DIY transmission mount
#1
 10-28-2009, 02:36 PM

DIY transmission mount
So, after reading countless threads on the common failures of the stock unit and alternatives by using stiff and harsh delrin bushings I stumbled through one thread that suggested on getting a new improved stocker and strenghtening it by filling it with window weld. Well since I couldn't see how it would bond well with the existing rubber/urethane and since my tranny mount was completely shot I decided to experiment a bit and decided that $10 for a tube of window weld is worth the effort. We'll see how it comes out. Here's the rough shots:
1. Here's the damaged unit showing how much play there was.

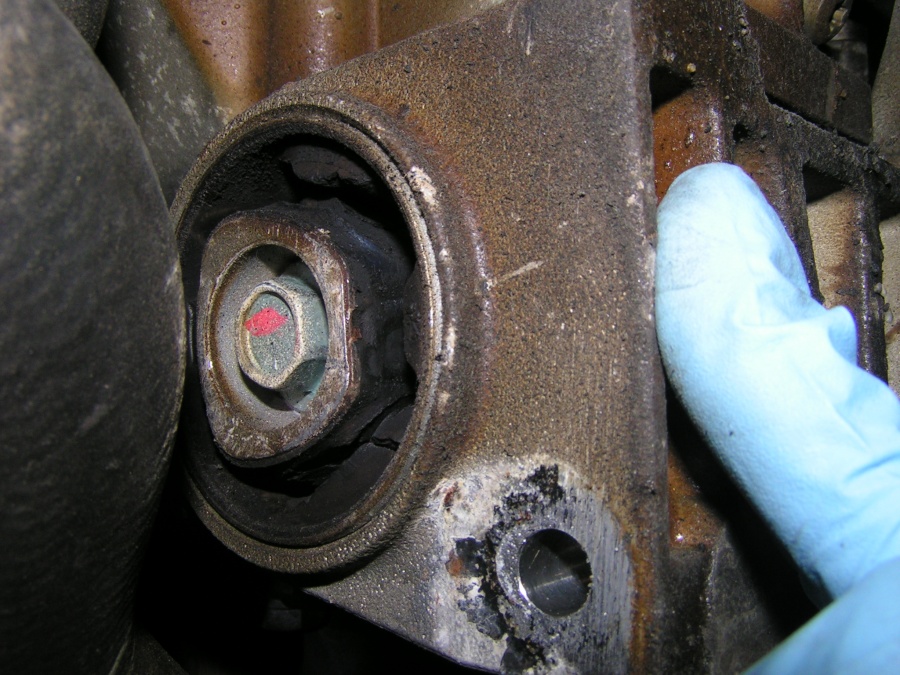
2. When taken out of the car the inner pieces fell out.


3. Next step was to clean the remaining rubber off everything.
I used a bench grinder with a spinning brush to clean the two inside pieces and a circular saw to clear the mount.

1. Here's the damaged unit showing how much play there was.
2. When taken out of the car the inner pieces fell out.
3. Next step was to clean the remaining rubber off everything.
I used a bench grinder with a spinning brush to clean the two inside pieces and a circular saw to clear the mount.
#2
10-28-2009, 02:46 PM
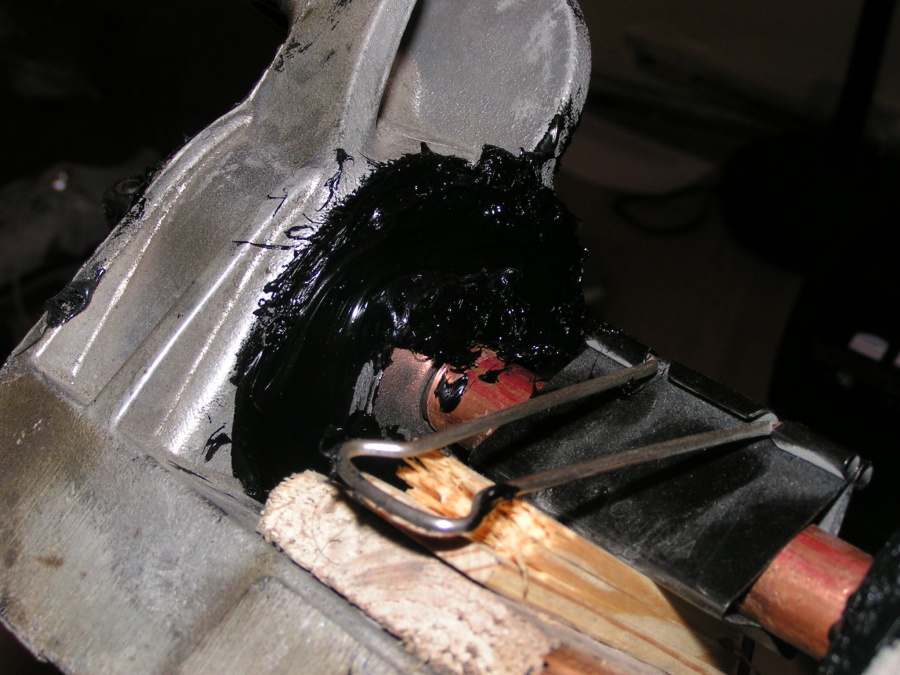
4. Next was the trickiest part. Setting up the centerpieces and getting it ready to be filled with window weld. After messing with it for an hour, I found that the best way was to mount the centerpieces on a shaft. I used a 12inch 1/2 socket extension and a piece of 1/2 copper pipe cut to the distance needed to seperate the 2 center pieces along with some electrical tape, zip ties, a clip and pieces of wood. Hard to explain so I took some pictures. The zipties are not there as I cut them off after the window weld set a bit. Looks like a mess as that is some really sticky stuff but I'll make sure the final product is nicely trimmed and cleaned

I first filled both openings on the outside, let it sit overnight and than filled the inside as the zip ties originally blocked the access from the inside. I thought that it will be hard to spread and set, but that stuff is really thick, dries quick and sticks to anything it touches.

That's it for now, once it dries for good I'll post an update.
I first filled both openings on the outside, let it sit overnight and than filled the inside as the zip ties originally blocked the access from the inside. I thought that it will be hard to spread and set, but that stuff is really thick, dries quick and sticks to anything it touches.
That's it for now, once it dries for good I'll post an update.
#3
10-28-2009, 02:47 PM
Registered User
Join Date: Nov 2005
Location: Under Your Car
Age: 46
Posts: 573
Rep Power: 78 

I am doing the same thing for a customer, only we are starting with a new mount and filling with window weld.

#5
10-28-2009, 02:59 PM
Yes it's the stuff for windshields. Vatozone should have it or any other parts store. 3m is the way to go.
#6
10-28-2009, 03:04 PM
Registered User
Word of caution here...
I installed the new, updated porsche 997TT mount, along with DOWNGRADING to the BLACK motor mounts... the 997 mount has much more material than the previous mount, and has no "holes" in the vibration material. I still get more "buzz" than previously, even with the WEVO Blue motor mounts I'd been using.
I think filling in the mount completely like that (assuming it's a denser material) may transmit even more drivetrain vibration into the cabin. For track cars, this isn't an issue, but for daily drivers, it may be a concern!
Mike
#7
10-28-2009, 03:11 PM
Word of caution here...
I installed the new, updated porsche 997TT mount, along with DOWNGRADING to the BLACK motor mounts... the 997 mount has much more material than the previous mount, and has no "holes" in the vibration material. I still get more "buzz" than previously, even with the WEVO Blue motor mounts I'd been using.
I think filling in the mount completely like that (assuming it's a denser material) may transmit even more drivetrain vibration into the cabin. For track cars, this isn't an issue, but for daily drivers, it may be a concern!
Mike
I installed the new, updated porsche 997TT mount, along with DOWNGRADING to the BLACK motor mounts... the 997 mount has much more material than the previous mount, and has no "holes" in the vibration material. I still get more "buzz" than previously, even with the WEVO Blue motor mounts I'd been using.
I think filling in the mount completely like that (assuming it's a denser material) may transmit even more drivetrain vibration into the cabin. For track cars, this isn't an issue, but for daily drivers, it may be a concern!
Mike
I did think about it and since it's an easy swap I fiigured I'll try it, give you guys feedback and worst comes to worst swap it out for a new one
Trending Topics
#9
10-29-2009, 01:47 AM
Registered User
Join Date: Aug 2009
Location: Houston Tx
Age: 38
Posts: 2,498
Rep Power: 185
well you could always make holes in it later to see if that dampens it a bit. but i am curious to the outcome as i did this many years ago on another car.
#10
11-01-2009, 07:10 PM
So, I trimmed it yesterday and put it on the car. Took about 3 days to dry. Came out real nice. No noticable vibration and the car feel nice and tight. I'm starting to think that my front differential tailshaft bearing took a dump because of the old worn mount.
Not the best pics, but I didn't notice they weren't sharp untill I uploaded them.


Not the best pics, but I didn't notice they weren't sharp untill I uploaded them.
#11
11-01-2009, 07:59 PM
Registered User
Join Date: Aug 2009
Location: Houston Tx
Age: 38
Posts: 2,498
Rep Power: 185
#12
11-01-2009, 10:39 PM
Just when you let off the gas, when the slack in the driveline changes I can hear a bit of noise from under the seat area.
#13
11-01-2009, 10:58 PM
You might be able to narrow the noise down by removing the shaft that goes to the front diff. This may unload the bearing enough to hear a change and also know for sure if that is the problem. If it is a bearing, then the noise will change based on loading similar to a bad wheel bearing.
#14
11-02-2009, 09:58 AM
You might be able to narrow the noise down by removing the shaft that goes to the front diff. This may unload the bearing enough to hear a change and also know for sure if that is the problem. If it is a bearing, then the noise will change based on loading similar to a bad wheel bearing.
I actually had the car on the lift and went over it with a mechanics stethoscope(sp?) and narrowed it down to the front diff bearing.
#15
05-06-2010, 09:18 AM

I can make you a solid mount made of delron, cost would be about $100.00 or so plus shipping, but it would certainly be a lot easier than the solutions that I have seen here.
Let me know if I can help,
Erik Johnson
GBox Performance Transaxle
(303) 440-8899 work
Let me know if I can help,
Erik Johnson
GBox Performance Transaxle
(303) 440-8899 work