How to repair seat heater cushion
#1
 10-09-2011, 09:59 PM

Join Date: Apr 2010
Location: Victoria, BC
Posts: 2,165
Rep Power: 215 

How to repair seat heater cushion
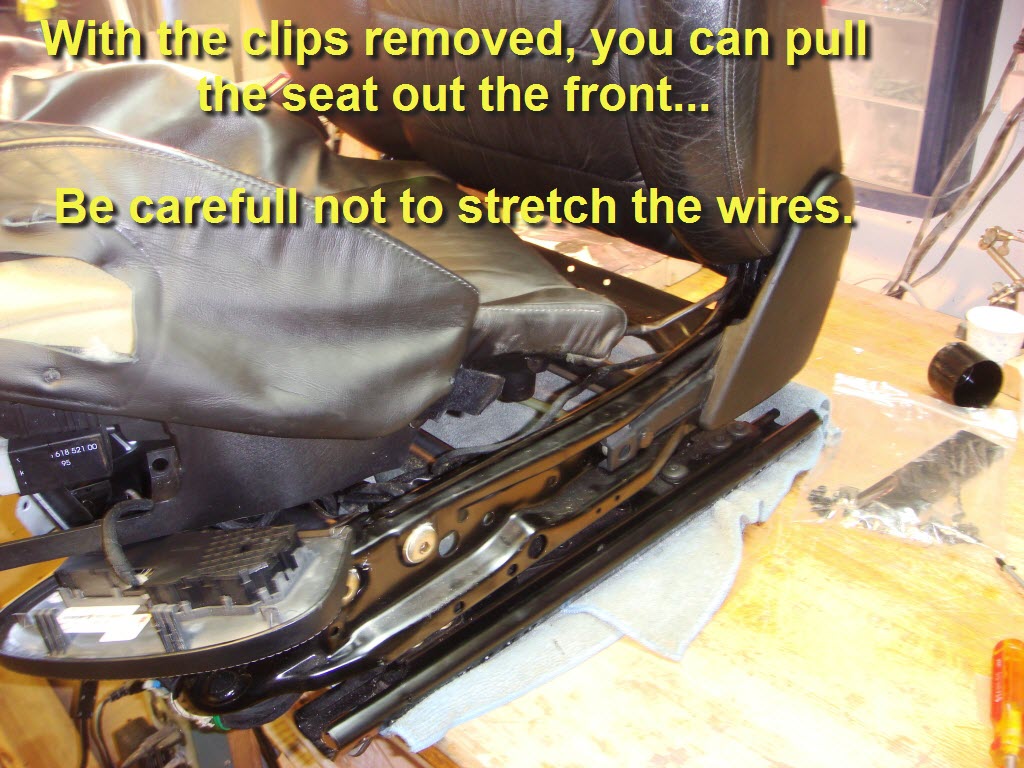
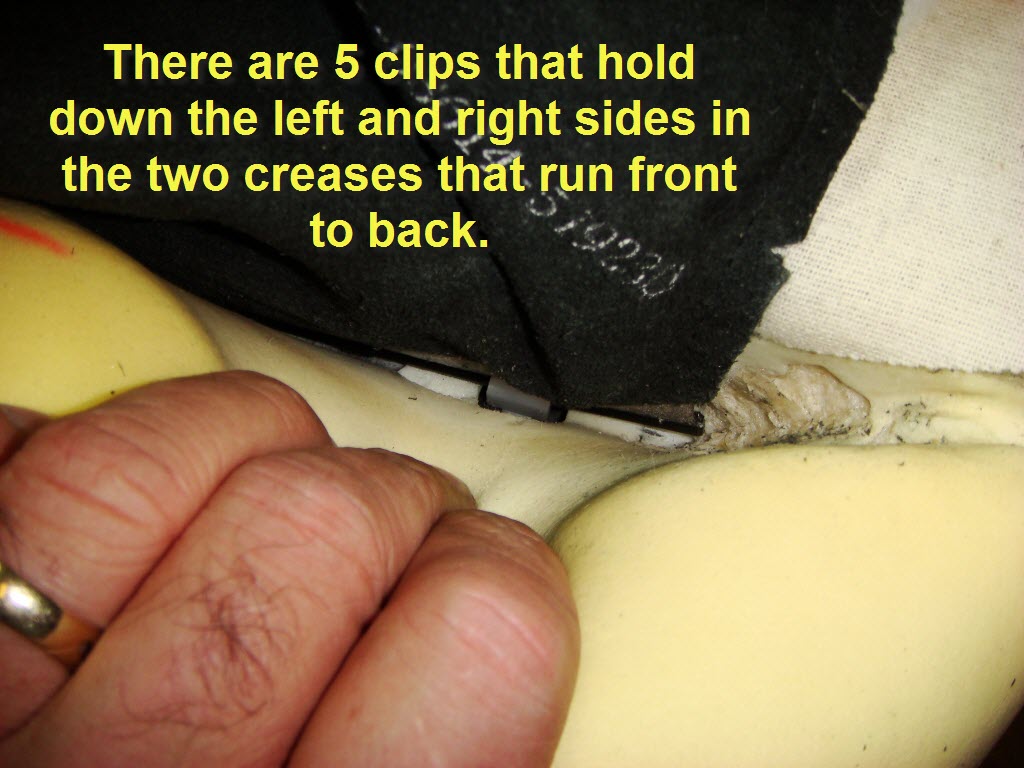
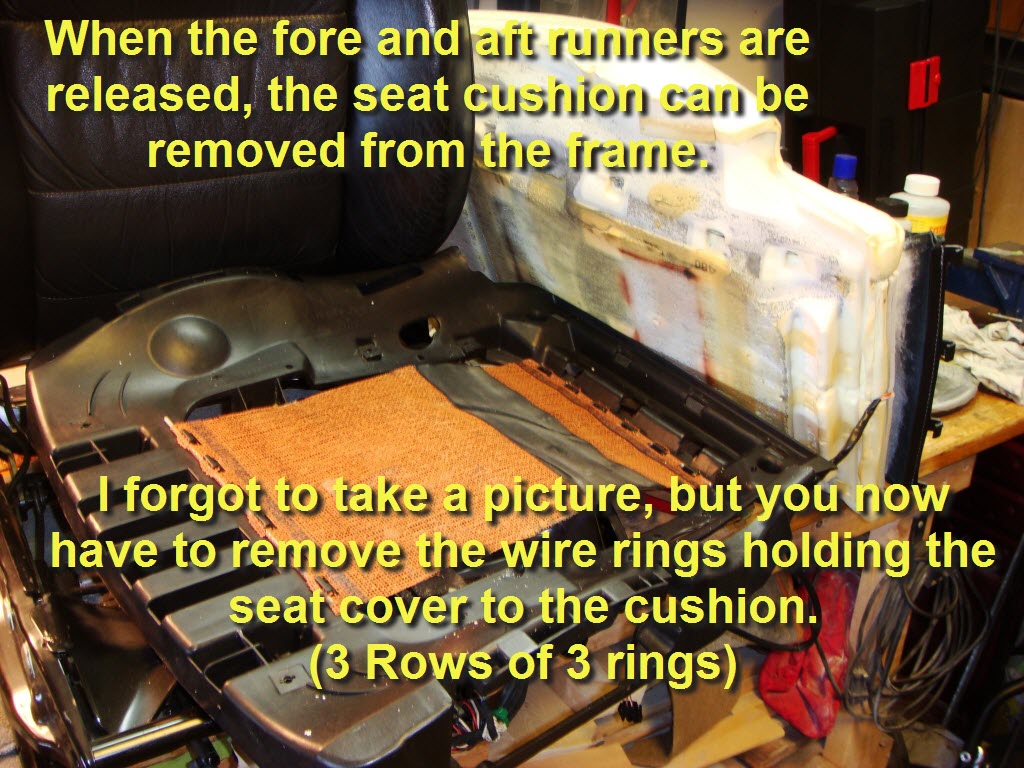
I had to replace my seat cushion because it got too hot and I didn't turn it off fast enough. It cooked. The new cushion cost about $175 from the dealer. I made a set of instructions that should help the next guy do it quickly and easily. This is a 4 out of 10 on the DIY difficulty scale. The hardest part is removing the metal clips that hold the seat cover to the cushion. I reused the clips so I didn't cut them out as suggested by the shop manual.
I didn't take pictures of the seat removal because it is covered in other DIYs.
Here we go...

I didn't take pictures of the seat removal because it is covered in other DIYs.
Here we go...
#3
10-10-2011, 01:57 AM

Brilliant. I am about to retrofit seat heating in to my seats as I have wired the car thus far. Do you have any photos of how the seat heating relay mounts and runs? PM me please.
Thanks
Thanks
#4
10-10-2011, 08:31 AM
Join Date: Apr 2010
Location: Victoria, BC
Posts: 2,165
Rep Power: 215
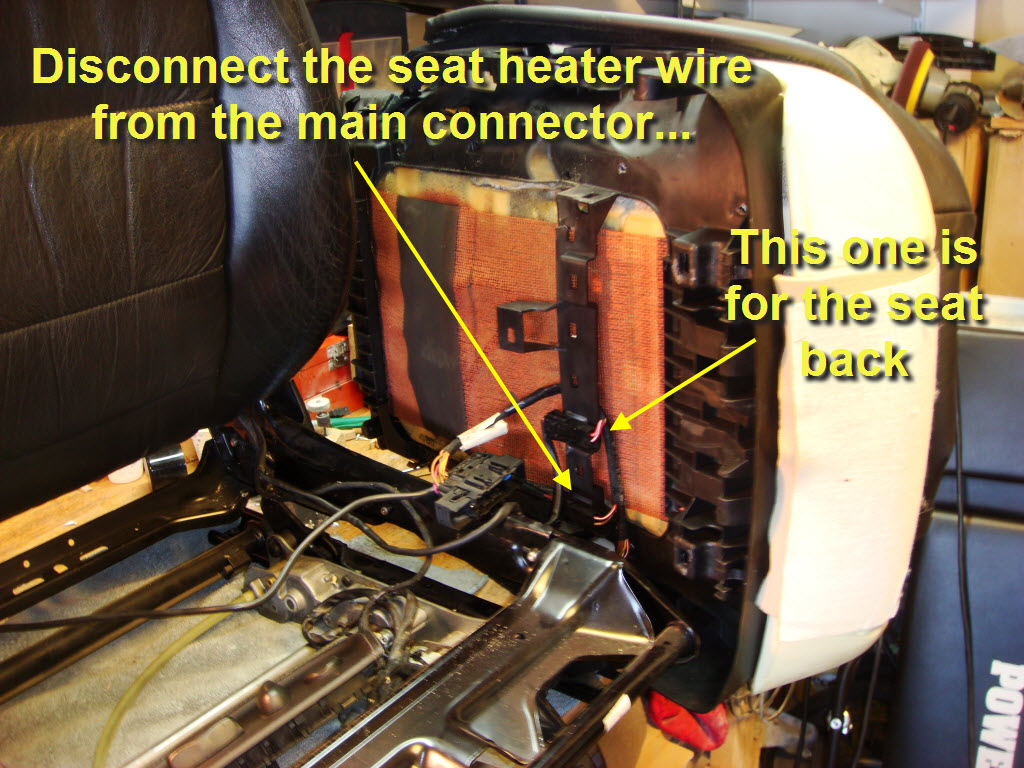
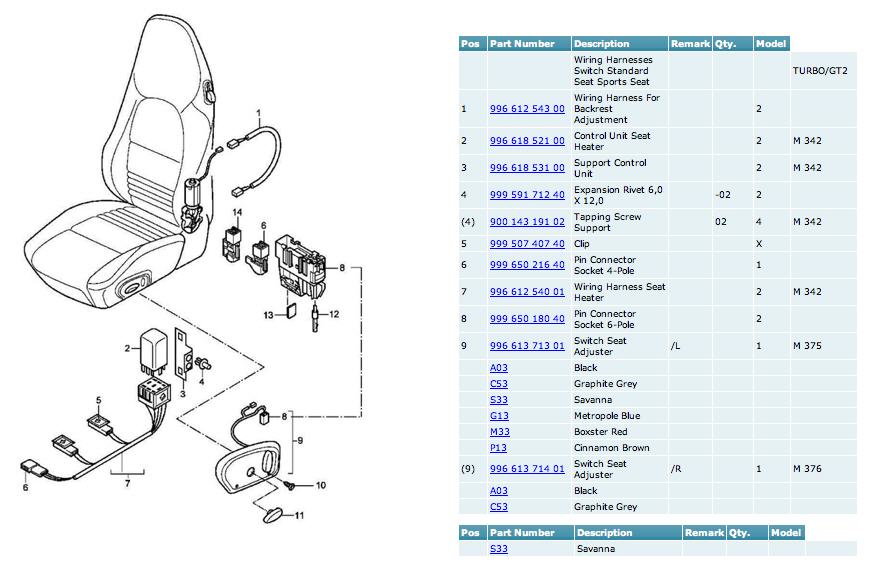
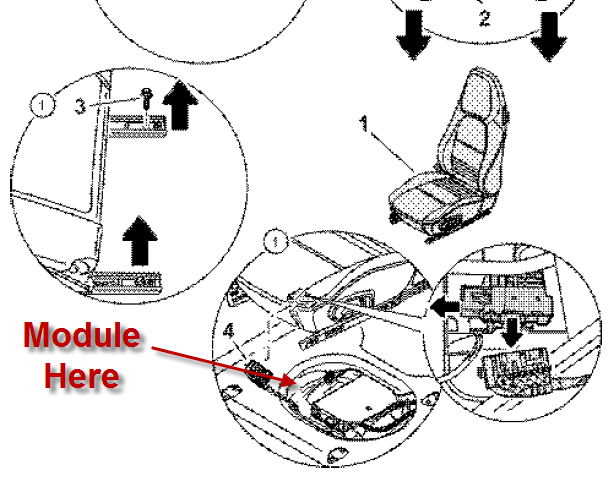
My control unit was actually mounted on the floor under the seat beside another control box (not sure what that one is for). Clips (#5) are on the bottom of the seat as above - where it says"This one is for the seat back". You can see the parts dedicated to heating are minimal (just the small wiring harness at #7).
#5
10-10-2011, 01:24 PM
I think the relay is normally mounted on the seat frame just where it says "This one is for the seat back". But in any case I'll work it out. Just need to work out how to take the cover off the seat back.
Trending Topics
#8
10-10-2011, 02:13 PM
Join Date: Apr 2010
Location: Victoria, BC
Posts: 2,165
Rep Power: 215
I put the seat back in... I'd have to remove it to show the location, but it's on the right side of the other control module under the seat. The other control module has quite a number of wires going into it and it is about 8L x 4W X 3/4H inches. If I can find a reason to lift the seat again, I'll take another picture...
#10
10-10-2011, 03:07 PM

Nice write up! I have a crushed spot in the back where the right butt cheek sits. A previous owner either had a huge *** or a huge wallet! I thought if I wanted to fix that it would mean a new seat. Awesomeness.
#11
10-11-2011, 01:49 AM
Thanks I think the relay is held in with a bracket which is self tappered in somehow. Does it ring any bells with you?
#12
10-11-2011, 11:24 AM
Join Date: Apr 2010
Location: Victoria, BC
Posts: 2,165
Rep Power: 215
Yes - that's the one. I pulled on mine a little to see if I could get it off to put Dynamat on all the exposed metal, but it didn't move. Had to Dynamat around it because I didn't want to break the mount.
#13
11-25-2011, 07:22 PM
I am in the process of retrofitting seat heating to my 996t, so to make this thread complete here are some notes on removing the centre backrest seat cover. I will be following the OPs DIY for my seat bases next weekend.
1) put you finger in the corner of the leather at the back of the seat and flick the flap out

2) With the flap unhooked, push it back in to the gap between the seat base and the backrest. The centre backrest is now just held in by three clips at the top and will flop around.
3) Put your fingers in the gap between the centre backrest at the top in between the headrest and pull the centre backrest up and towards you. There are three plastic clips which clip over a wire bar (in between the yellow bars) in the seat frame which you need to unhook. See below:


Once unhooked the centre backrest lifts out.
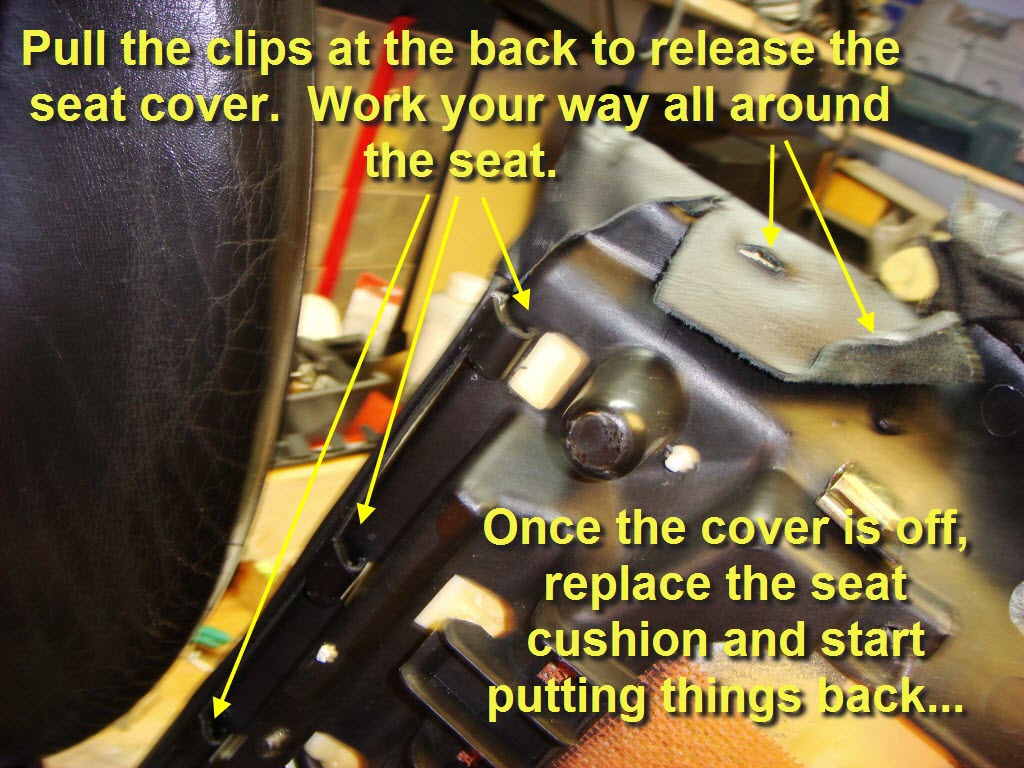
4) To remove the seat cover grab the material and unhook it from the plastic clips all around its edge

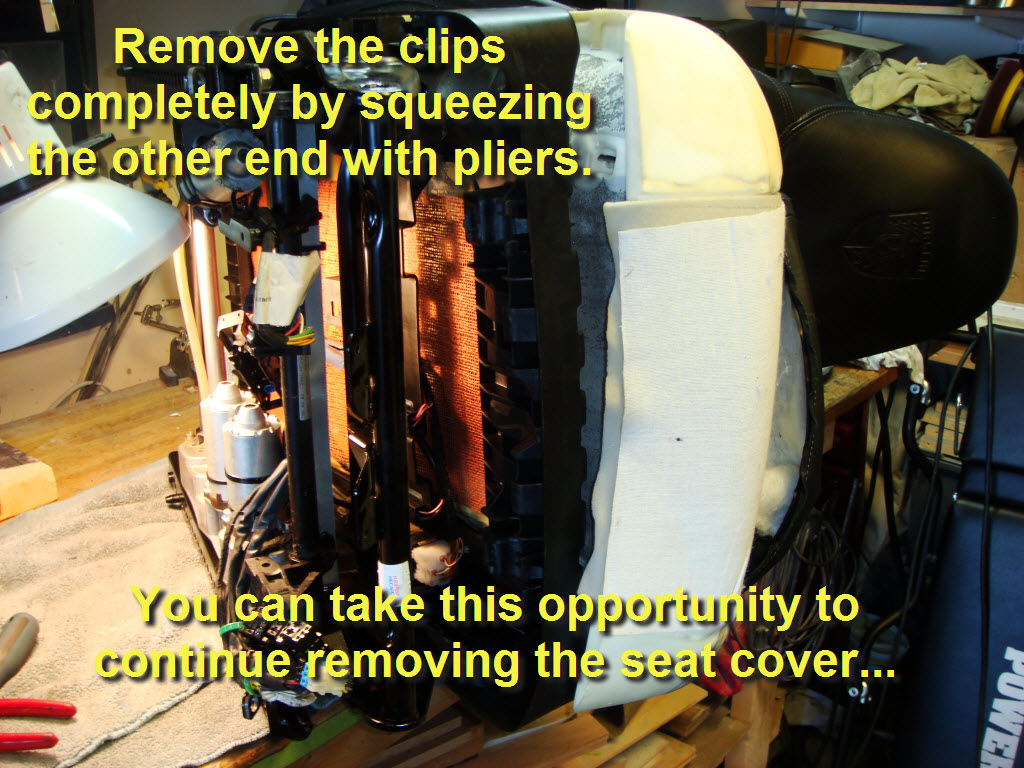
5) Now the only thing holding the seat cover on to the foam are 3 rows of 3 hog clips hooked on to the white plastic frame on the back of the seat foam (in the slits). You have two options, you can cut them with side cutters and replace them with the proper hog clip tool, or you can (as I did) grab the opposing ends and pull them apart with two pairs of pliers. If you do this you will need to straighten them back out in to a horse shoe shap for reuse. To get them out (or cut them) turn the backrest back over with the leather facing you and fold the leather back on itself. This will allow you to spread the foam and get access to the clips. Be careful not to fold the foam to far back on itself as you could damage the white plastic frame the hog clips grab aound i.e. the one with all the tabs on it that hold the leather in place.
That's all there is to it. It is a very simple job, the hardest part is dealing with the hog clips.
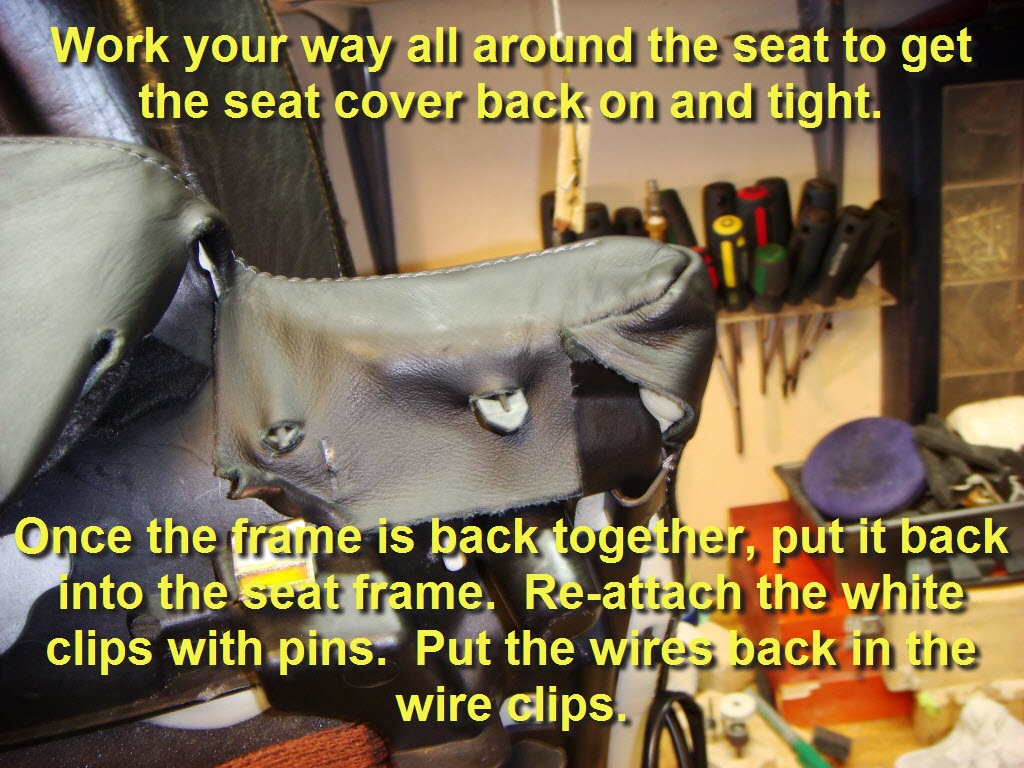
I must say after replacing my seat foam it is amazing how much better the seat feels, the old foam had really compressed and this was also shown in the leather being that bit tighter to refit over the plastic hooks.
1) put you finger in the corner of the leather at the back of the seat and flick the flap out
2) With the flap unhooked, push it back in to the gap between the seat base and the backrest. The centre backrest is now just held in by three clips at the top and will flop around.
3) Put your fingers in the gap between the centre backrest at the top in between the headrest and pull the centre backrest up and towards you. There are three plastic clips which clip over a wire bar (in between the yellow bars) in the seat frame which you need to unhook. See below:
Once unhooked the centre backrest lifts out.
4) To remove the seat cover grab the material and unhook it from the plastic clips all around its edge
5) Now the only thing holding the seat cover on to the foam are 3 rows of 3 hog clips hooked on to the white plastic frame on the back of the seat foam (in the slits). You have two options, you can cut them with side cutters and replace them with the proper hog clip tool, or you can (as I did) grab the opposing ends and pull them apart with two pairs of pliers. If you do this you will need to straighten them back out in to a horse shoe shap for reuse. To get them out (or cut them) turn the backrest back over with the leather facing you and fold the leather back on itself. This will allow you to spread the foam and get access to the clips. Be careful not to fold the foam to far back on itself as you could damage the white plastic frame the hog clips grab aound i.e. the one with all the tabs on it that hold the leather in place.
That's all there is to it. It is a very simple job, the hardest part is dealing with the hog clips.
I must say after replacing my seat foam it is amazing how much better the seat feels, the old foam had really compressed and this was also shown in the leather being that bit tighter to refit over the plastic hooks.
Last edited by NBTBRV8; 11-25-2011 at 07:26 PM.