DIY Easy LED DRL install
#1
 07-09-2012, 07:27 AM

Join Date: Jan 2009
Location: Northern NJ
Posts: 642
Rep Power: 65 

DIY Easy LED DRL install
So BOOSTD from another thread wanted to know about my LED DRL install, which I found all the parts and general info from another member here actually, so I have to give credit to z06081 for giving me the original LED item from ebay. The harness I ended up adding because I couldn't wire the LED's to my Dension and have them stay off. Apparently they were a constant 12v like the cigarette lighter and always stayed on. Anyway, the 2 items you need, if you want to do it are
Harness:
http://www.ebay.com/itm/LED-Daytime-Running-Light-DRL-Relay-Harness-Automatic-On-Off-Control-Porsche-/160835965223?pt=Motors_Car_Truck_Parts_Accessories &hash=item2572921127&vxp=mtr
and for the lights:
http://www.ebay.com/itm/UNIVERSAL-7-DRL-LED-DRIVING-FOG-HEAD-LAMP-LIGHTS-f-w13-/320747295874?pt=Motors_Car_Truck_Parts_Accessories &hash=item4aae075482&vxp=mtr
wiring the lights are easy. They only have a + and - terminal and you only need to get the blue wire connectors (16 guage I think) from Radioshack. Lights are mounted via 3M double sided tape to the 3rd open slat down (only one that fits the light)
You WILL have to take the front bumper off, and it's better that you do anyway because if you do you can run the lines underneath the front tray that is over the front trunk lock.
Here are some pics to show what I mean, I didn't take pics of the DIY because it's fairly simple and straightforward.
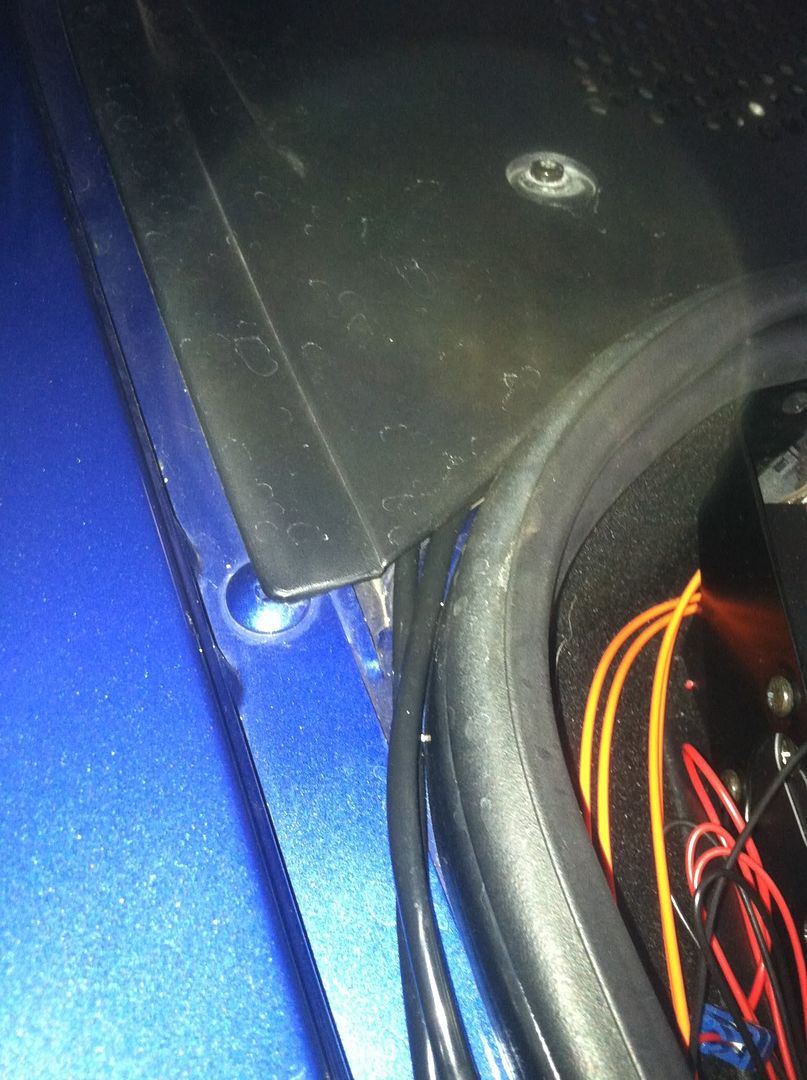
The lines running from the protective tray down front up the side of the trunk
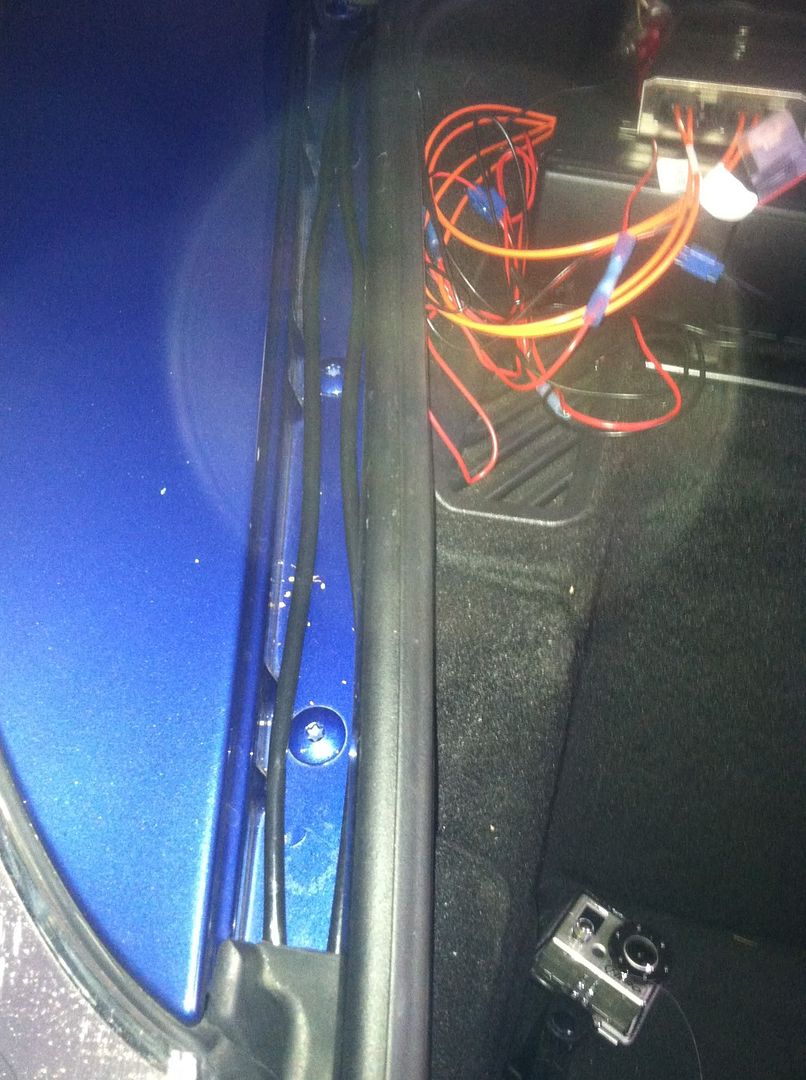
Here I have them going under the left tray that covers the A/C lines and such
I mounted the relay with 3m double sided tape against the wall right next to where the wire spool for the CD holder comes out of the front trunk area. Didn't take pics because I just got back from work and am too lazy to unscrew the trays lol sorry.
And here is where I passed the wires from the DRL through the driver side port. I think that's the radiator line next to it? Either way it's goes from there up right next to the headlight area and then you can run everything to the left side.

Because I ended up trying a bunch of different options, I forget if you have to get extra wire in order to lengthen everything enough to connect to the relay harness. I don't think you do for the passenger side but you might for the driver side. If you need some extra and are local to me and want to do it, give me a pm and I will bring over some. I bought a spool from Radioshack that I ended up only using like a foot of which is now just sitting here lol. Also, when mounting the lights to the car, the lights are slightly angled because to make it as flush as possible to the slat, you have to place the 3m tape across an uneven surface (the LED assembly has a small ridge where I guess the plastic gets heat merged together, and if you just use 1 strip of 3M tape, they will be pointing downwards and only illuminate about 2 feet in front of the car. To remedy this, after applying the 1st strip, cut another strip 3/4 lengthwise and then line it up flush with the back of the 1st strip. That way when you mount it to the slat, it will allow the drl to point upwards a bit more. Sounds confusing trying to explain it with words, but if ppl still don't get it I can take the setup apart and take pics this coming week.
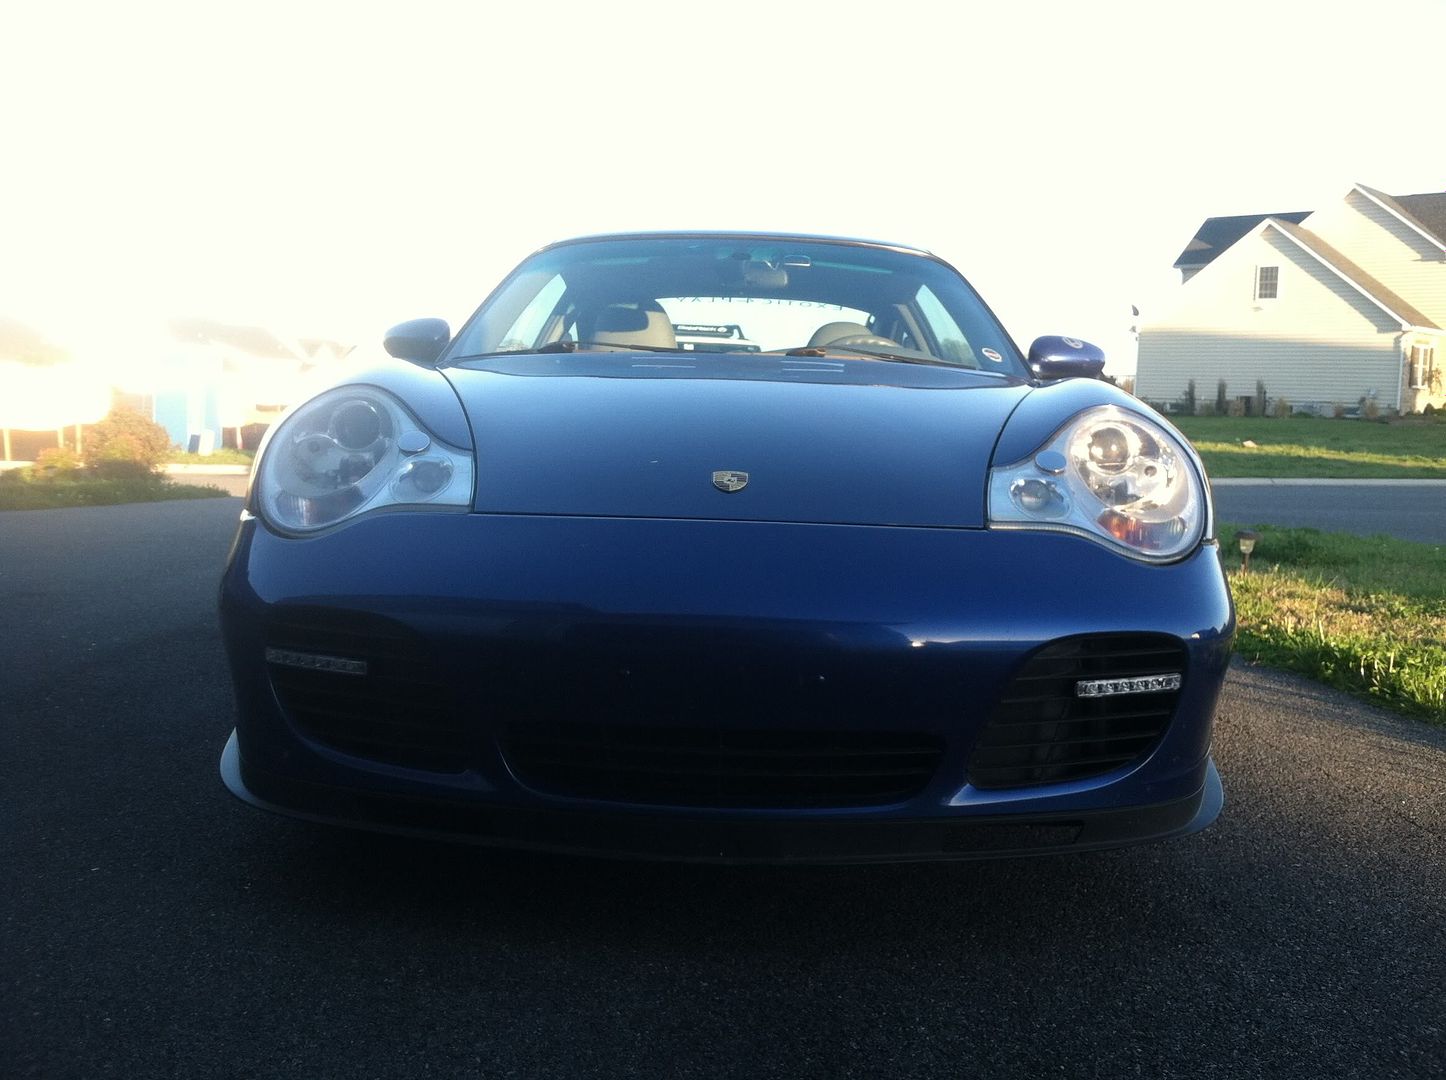
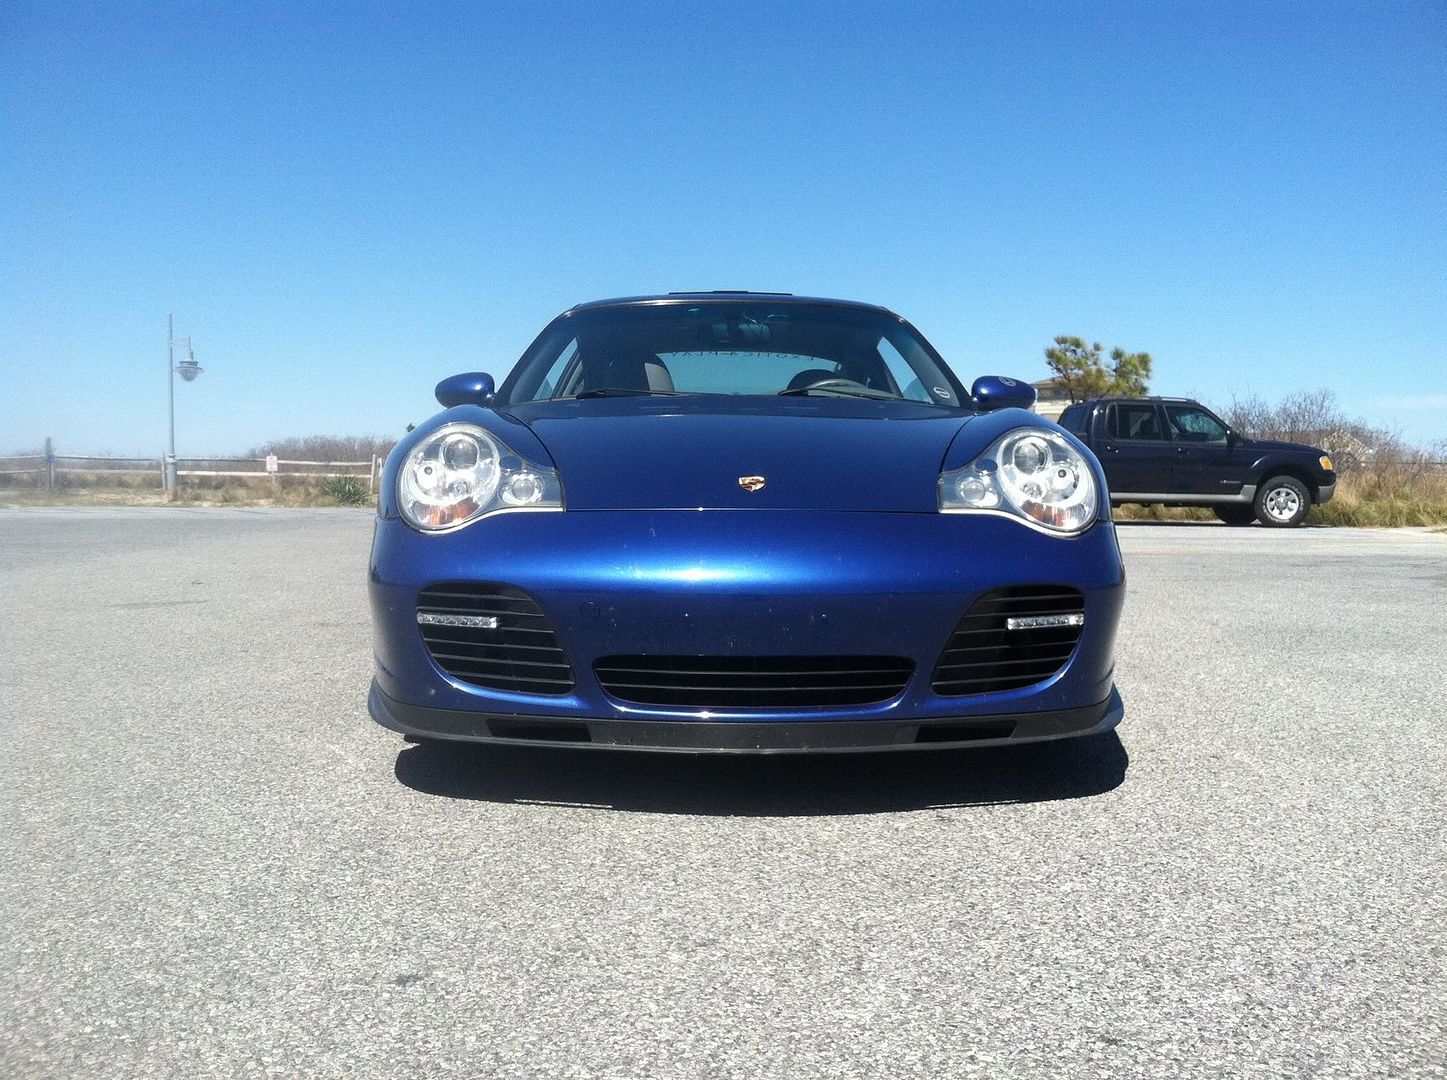
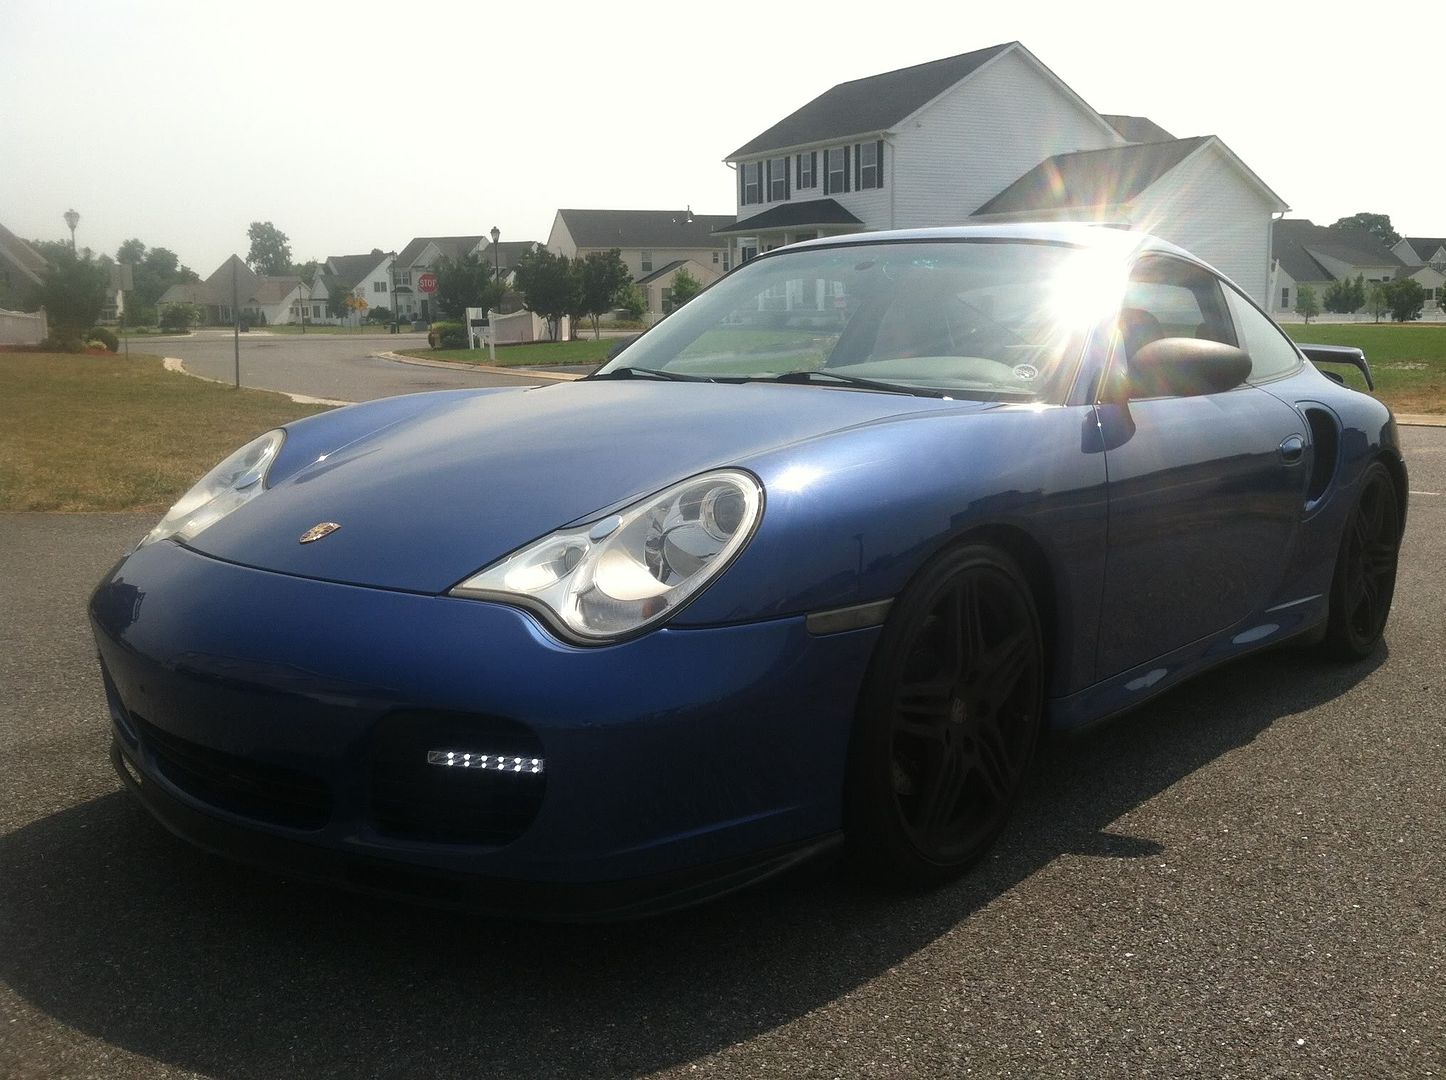
Finished product:


Harness:
http://www.ebay.com/itm/LED-Daytime-Running-Light-DRL-Relay-Harness-Automatic-On-Off-Control-Porsche-/160835965223?pt=Motors_Car_Truck_Parts_Accessories &hash=item2572921127&vxp=mtr
and for the lights:
http://www.ebay.com/itm/UNIVERSAL-7-DRL-LED-DRIVING-FOG-HEAD-LAMP-LIGHTS-f-w13-/320747295874?pt=Motors_Car_Truck_Parts_Accessories &hash=item4aae075482&vxp=mtr
wiring the lights are easy. They only have a + and - terminal and you only need to get the blue wire connectors (16 guage I think) from Radioshack. Lights are mounted via 3M double sided tape to the 3rd open slat down (only one that fits the light)
You WILL have to take the front bumper off, and it's better that you do anyway because if you do you can run the lines underneath the front tray that is over the front trunk lock.
Here are some pics to show what I mean, I didn't take pics of the DIY because it's fairly simple and straightforward.
The lines running from the protective tray down front up the side of the trunk
Here I have them going under the left tray that covers the A/C lines and such
I mounted the relay with 3m double sided tape against the wall right next to where the wire spool for the CD holder comes out of the front trunk area. Didn't take pics because I just got back from work and am too lazy to unscrew the trays lol sorry.
And here is where I passed the wires from the DRL through the driver side port. I think that's the radiator line next to it? Either way it's goes from there up right next to the headlight area and then you can run everything to the left side.
Because I ended up trying a bunch of different options, I forget if you have to get extra wire in order to lengthen everything enough to connect to the relay harness. I don't think you do for the passenger side but you might for the driver side. If you need some extra and are local to me and want to do it, give me a pm and I will bring over some. I bought a spool from Radioshack that I ended up only using like a foot of which is now just sitting here lol. Also, when mounting the lights to the car, the lights are slightly angled because to make it as flush as possible to the slat, you have to place the 3m tape across an uneven surface (the LED assembly has a small ridge where I guess the plastic gets heat merged together, and if you just use 1 strip of 3M tape, they will be pointing downwards and only illuminate about 2 feet in front of the car. To remedy this, after applying the 1st strip, cut another strip 3/4 lengthwise and then line it up flush with the back of the 1st strip. That way when you mount it to the slat, it will allow the drl to point upwards a bit more. Sounds confusing trying to explain it with words, but if ppl still don't get it I can take the setup apart and take pics this coming week.
Finished product:
Last edited by dragonman4; 07-09-2012 at 07:33 AM.
#3
07-09-2012, 08:41 AM
Join Date: Jan 2009
Location: Northern NJ
Posts: 642
Rep Power: 65
np. And I just noticed that the wire connectors you need are pictured in the 1st picture. It's the blue one connecting the power line in my Dension that I didn't heat shrink the ends of lol.

#5
07-09-2012, 09:11 AM
Join Date: Jan 2009
Location: Northern NJ
Posts: 642
Rep Power: 65
Nope, nothing related to the DRLs are connected to the Dension. That connector was from when I tried to wire it to the Dension before I bought the relay. It was always on, which is what ended up making me buy the relay.

#7
07-09-2012, 04:33 PM
Join Date: Jan 2009
Location: Northern NJ
Posts: 642
Rep Power: 65
Not sure. Probably because the LED units themselves come with a metal bracket that you could probably stick the 3M to, unless you want to drill holes in the GT2 bumper, which I personally wouldn't do. For 25 bucks though, I'd give it a shot if I had a GT2 =D
Trending Topics
#10
07-15-2012, 08:00 PM
Join Date: Jan 2009
Location: Northern NJ
Posts: 642
Rep Power: 65
Not at the time being,but I can take some next time I take the car out. I will pm you the pics since it seems not everyone enjoys this mod as I got neg repped for it being "rice" lol. Just can't please some people it seems.

Thread
Thread Starter
Forum
Replies
Last Post