When you click on links to various merchants on this site and make a purchase, this can result in this site earning a commission. Affiliate programs and affiliations include, but are not limited to, the eBay Partner Network.
On the '02 and later, I think you have to remove the mufflers, I know I did. There was really no way in hell without doing that and I have a lift. Since I've removed them before to do the PSE hack, and replaced the steel bolts with SS ones, I can remove my mufflers in seriously like less than 5 minutes a side. I reversed the 2 long bolts that hold the mufflers to the brackets, so they pull out from the bottom, so the bracket stays on the engine, just the mufflers come off. Also makes it a lot easier to get the rearward heatshield bolt off and on, too.
Can you post the diameter and length of the stainless steel bolts for the mufflers? I want to get some before I go back to work on my spark plugs this weekend.
Last weekend I spent 13 hours of hell lying on my back squeezing my hands into the tight spots to get the electrical connectors back on. One of them didn't click into place and has now come loose, causing misfires.
It didn't help that one of the bolts holding the heat shield sheared off. I had to use a right-angle Dremel to drill a hole in the remaining bolt. There wasn't enough space to back out the stuck bolt with an EZ-Out, so I tapped the hole and put a little screw in.
If anyone has more photos showing removing the mufflers and brackets that are in the way, that would be very much appreciated.
Hi P owners,
Thought I do a small write up to change out spark plugs.
Simple tools you may need and about 2-3 hours.
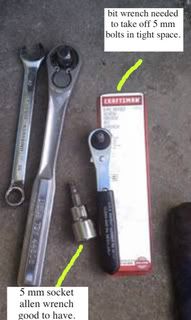
Here are some tools you may need, as you replace your spark plugs.
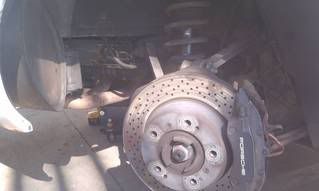
Take out the rear tires.
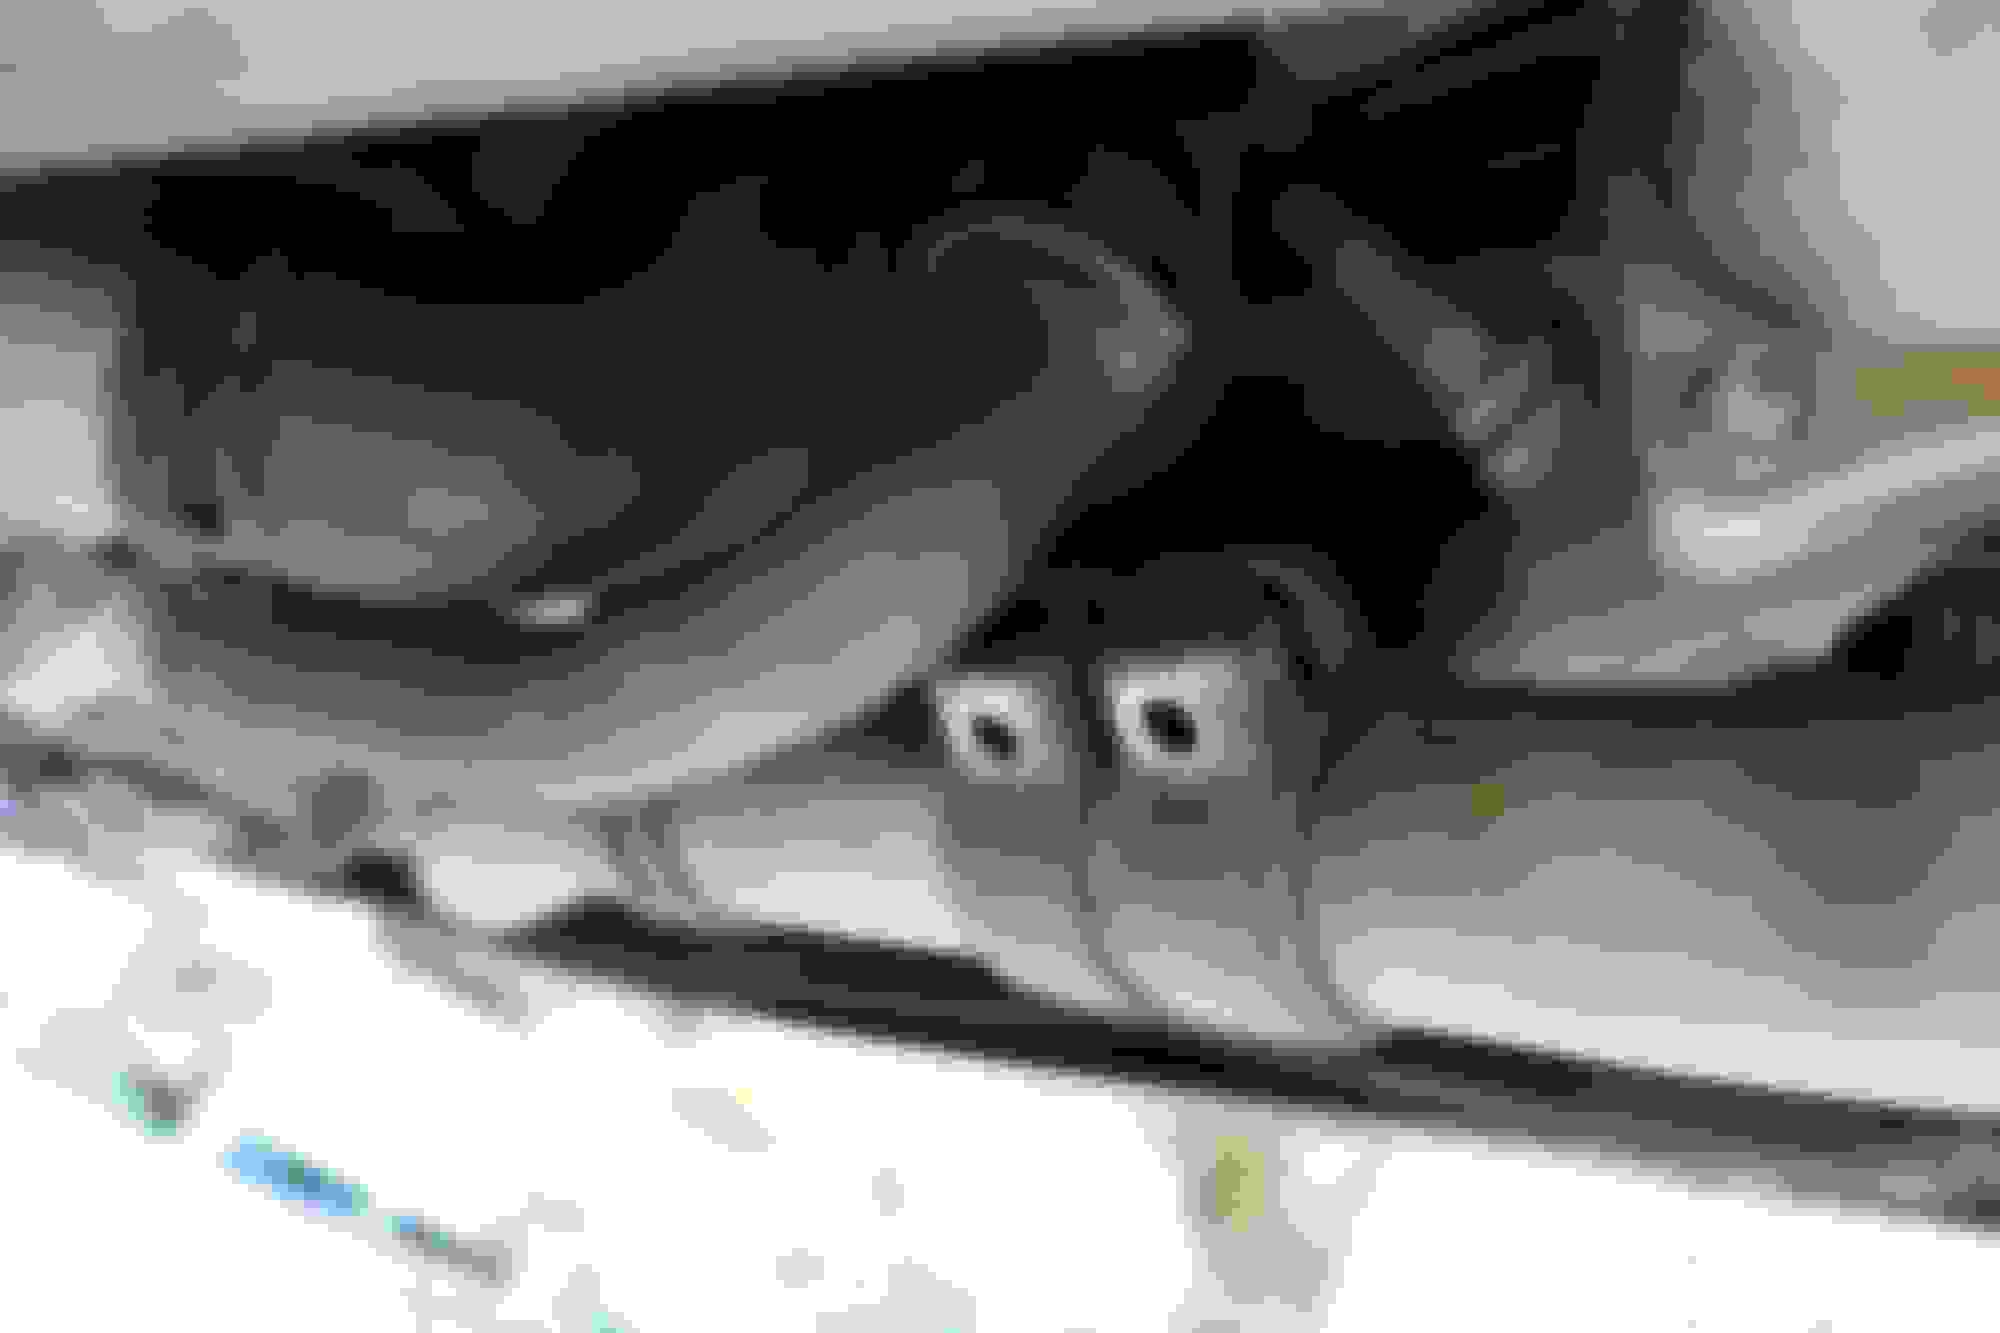
Once you do you will see a cover with 2 10 mm bolts, take that out and it will expose 3 spark plugs per side. There are 2 #5 hex bolts per coil packs. Remove those and pull out the spark plug and tubes. Use a standard spark plug too with 2 3" inch extensions or if you have a 4" extention with the 3/8 socket tool you should be fine. Its gonna get a little tight towards the exhaust. Make sure not to drop any extentions down the hole, pain to get out. To take off the coil pack from the tubes, squeeze the side of it and it should pop out. Use some anti freeze on the new plugs that you put in, once you put back the plugs torque the plugs to 25 lbs if you can. I also used a can of quick dry to clean the connectors of the coil packs. and re assemble. Good Luck Hope this write up helps. rear wheels take off. cover with 2 10 mm bolts.
coil packs and tube coming out.
Have fun, after everything is done go to fridge, get a cup of ice and poor beer.. sip and enjoy the day.
You make this job sound like it's a stroll in the park DIY job.... Why not tell the truth completely by saying. Unless you want to work by feel/touch rather than sight I would suggest you remove the exhaust either side. This DIY work is a PITA job all round. If you do it in 3 hours, then you are a wizard. You will need a boat plug which you push to one side so it grabs the sleeves if you are replacing those. Oh and be careful that the spark plug wrench is not left on the NEW spark plug or you will struggle like hell trying to put the individual coil back in place. (ASK ME WHY I KNOW lol).. You may have to torx burst the muffler holding bolts to remove them and buy new ones from any hardware shop when putting the mufflers back in place. So tell the whole truth and nothing but the truth. Strangely enough, you are not the first to skimp over a spark plug and sleeve replacement DIY job. I believe in calling a spade a spade and not a shovel.
Last edited by Hurdigurdiman; 01-29-2015 at 05:32 AM.
It took me about a day and half to do this job the first time, but I could probably do it again in about 3 or 4 hours. I really can't see how you can manage without removing the exhaust. That in itself will take you a few hours if you've never done it before, especially if the bolts are frozen.
A boat plug wrapped with sandpaper is needed to remove the tubes. I used a small flat pry bar to help remove and then to seat the tubes.
A mechanic's rolling board is nice to have too.
I had to go back in the next day when it started throwing codes. Be careful and thorough when connecting the coil wires. It can appear that they are properly seated even though they are not. Give the wires a slight tug to make sure each is secure.
More details on spark plug replacment with muffler removal
Yesterday I removed the mufflers to get access to the spark-plug coils. This was about three hours of extra work, but it was worth it because I had much better access to the coils. Next time it will be a lot faster because I know what to do. Here are more-detailed instructions to help first-timers.
* With the car on the ground, loosen the lug nuts on the wheels.
* With a floor jack, jack up the car at the middle of the structural cross member just in front of the engine. Put jack stands under the rear jack points on each side. Lower the car down onto the jack stands (never work under the car just a floor jack).
* Remove the wheels.
* Spray some Liquid Wrench penetrating oil (make sure you get the right Liquid Wrench product) onto all of the nuts and bolts that have been exposed to high temperature that you will be removing shortly. Wipe up drippage and overspray. On rubber hoses, the oil can soak in and cause a weak area that will bulge out later. On hot metal parts the oil will burn off later, so expect a little smoke.
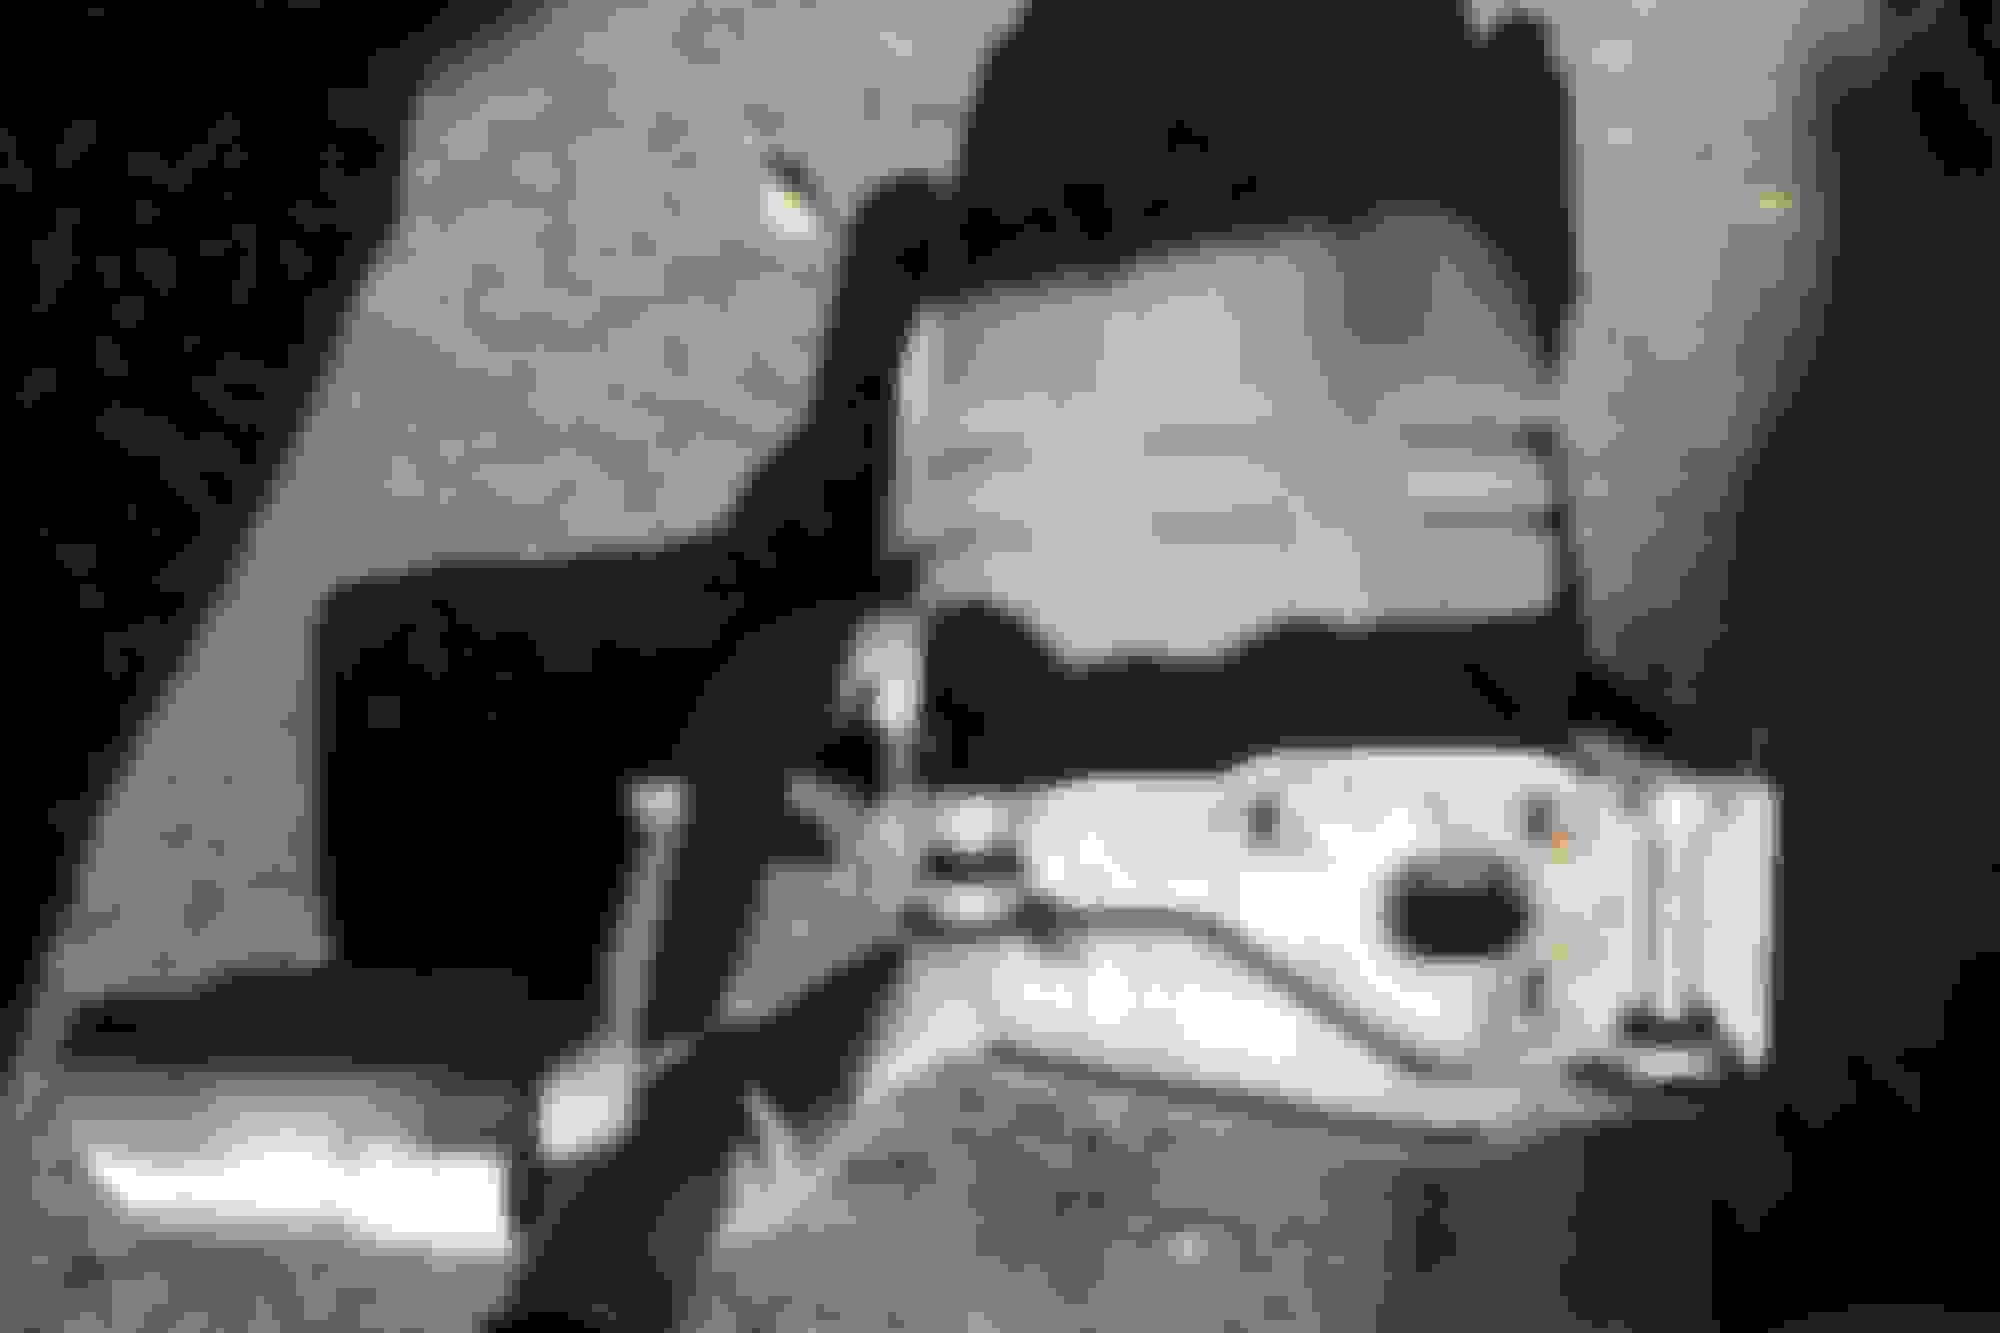
* On the two nuts connecting the exhaust to the each muffler, use a stainless-steel brush to scrub off as much rust as possible. Slide a 16-mm socket (an unusual size) onto a nut. It the socket doesn't slide on easily, tap it on with a hammer. Don't use a 17-mm socket as this will round off the corners of the nut. Use a breaker bar to unscrew the nut until it's loose enough to use a regular ratchet. These are carriage bolts, so there is not a head onto which a wrench can be put (this is good because my big Craftsman wrench set doesn't even have a 16-mm wrench). The photo below shows the exhaust after removing both bolts. Slide the sleeve toward the center of the car to allow removal of the muffler later. If it's stuck, pry the clamps open a bit and tap on the sleeve with a hammer. Crud will rain down on you when you hammer, so shield your eyes.
* Ideally, replace the carriage bolts with new stainless steel ones: d = 10 mm, pitch = 1.5, L = 54 mm. McMaster-Carr does not stock any metric stainless carriage bolts, so I might go with zinc-plate bolts. I used a tap to clean up the nuts' threads and a die to clean up the bolts' threads. See photo below.
* There are three stubs protruding from the muffler. See photo below.
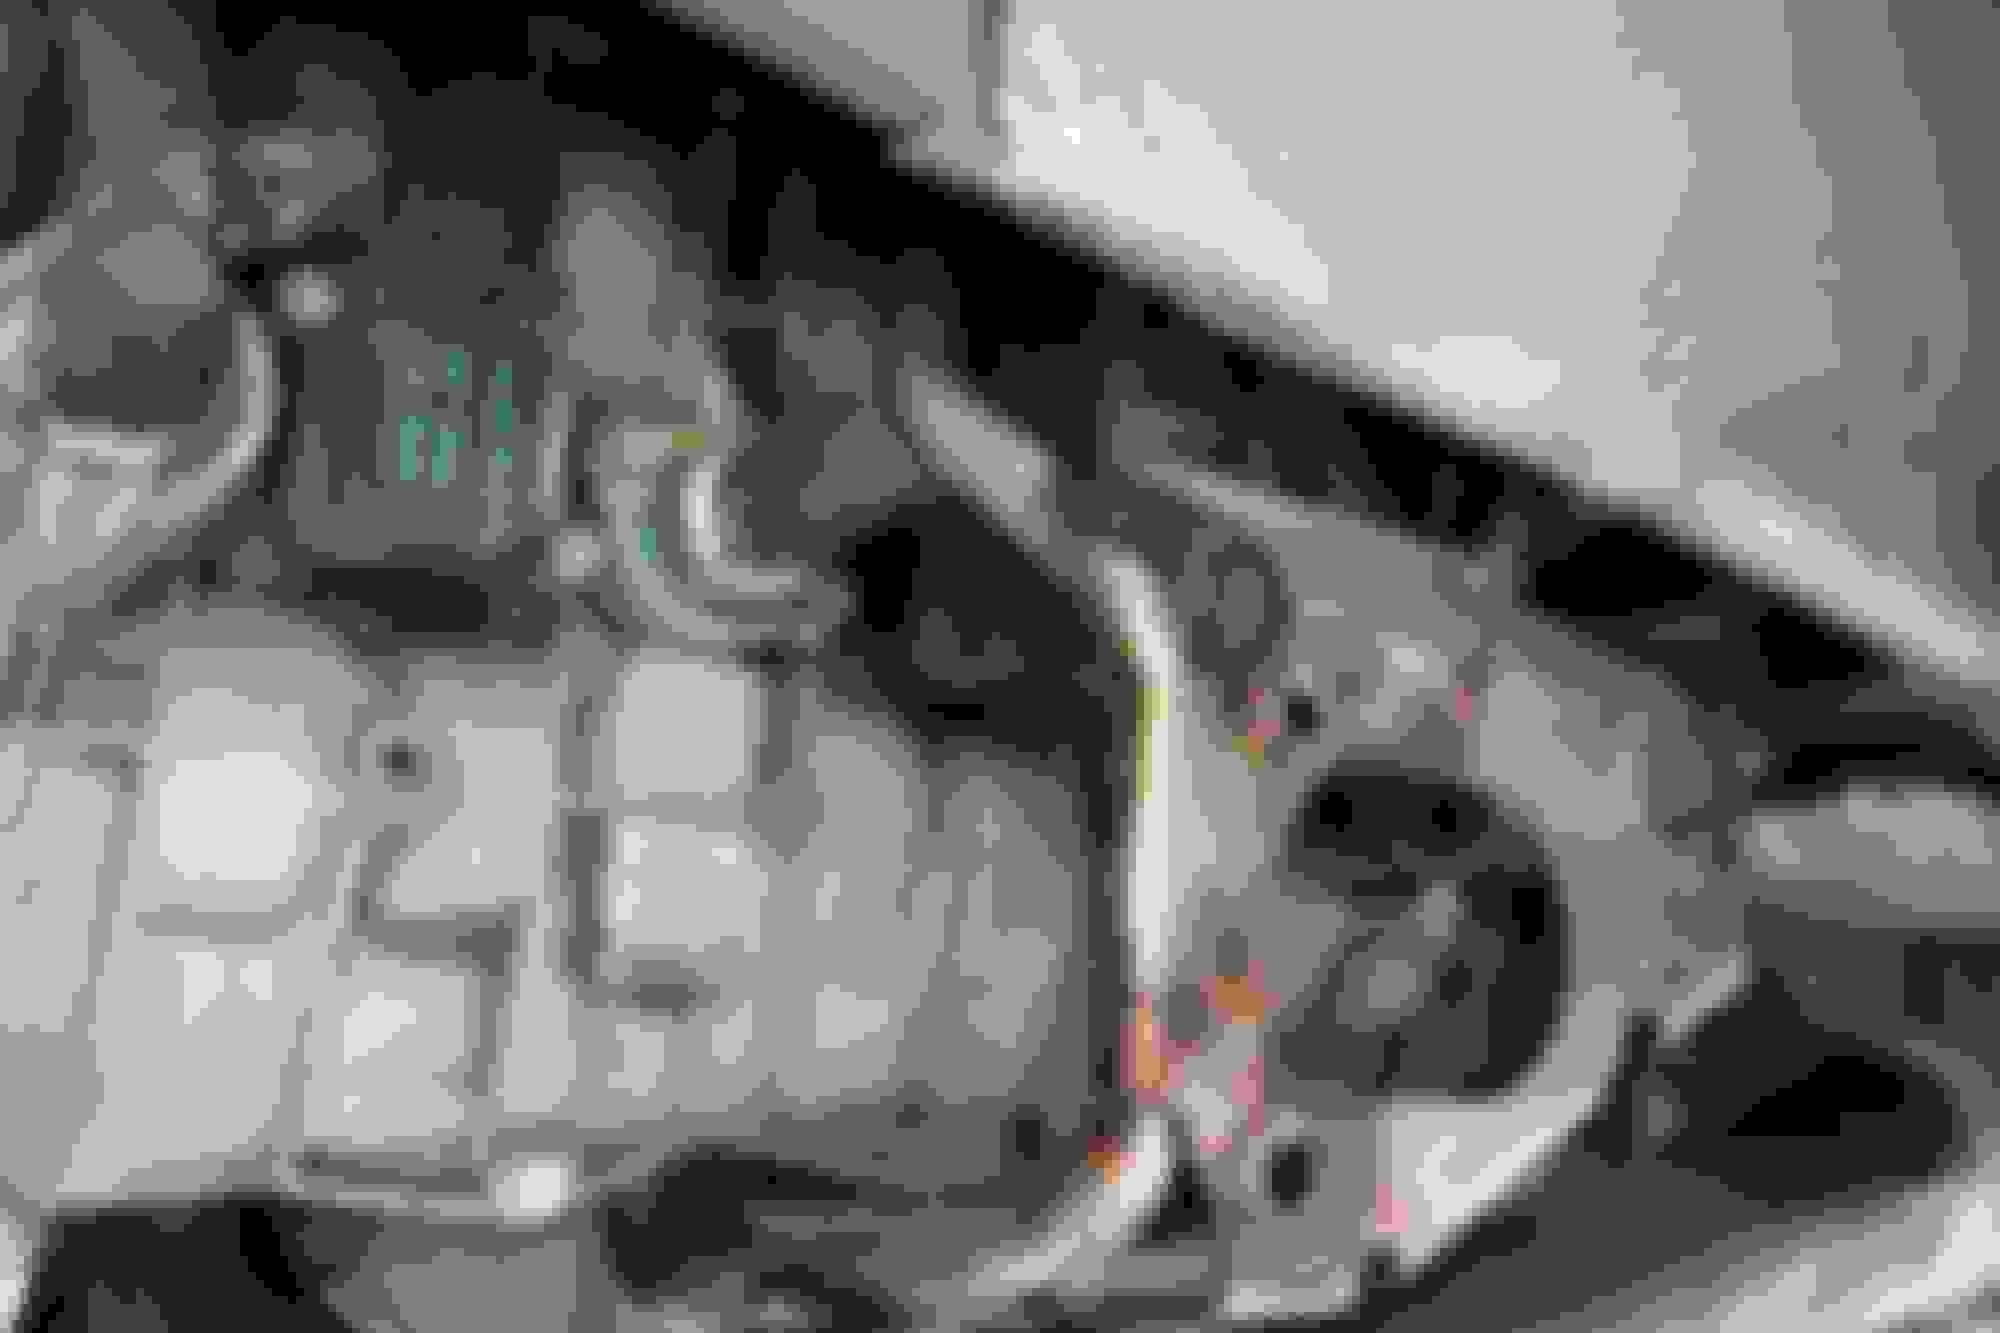
The studs go through a mounting bracket (see photo below) and are held on with nuts. Remove the nuts. Sorry, but there is no room to get a photo of these with muffler installed. After removing the nuts, pull the muffler back an inch away from the bracket, as well as pulling the exhaust connection loose. You are now holding heavy muffler. Keeping the muffler at the same elevation, move it forward to the brake rotor. The muffler can then be dropped down to the ground and removed. There is no need to remove the rear bumper.
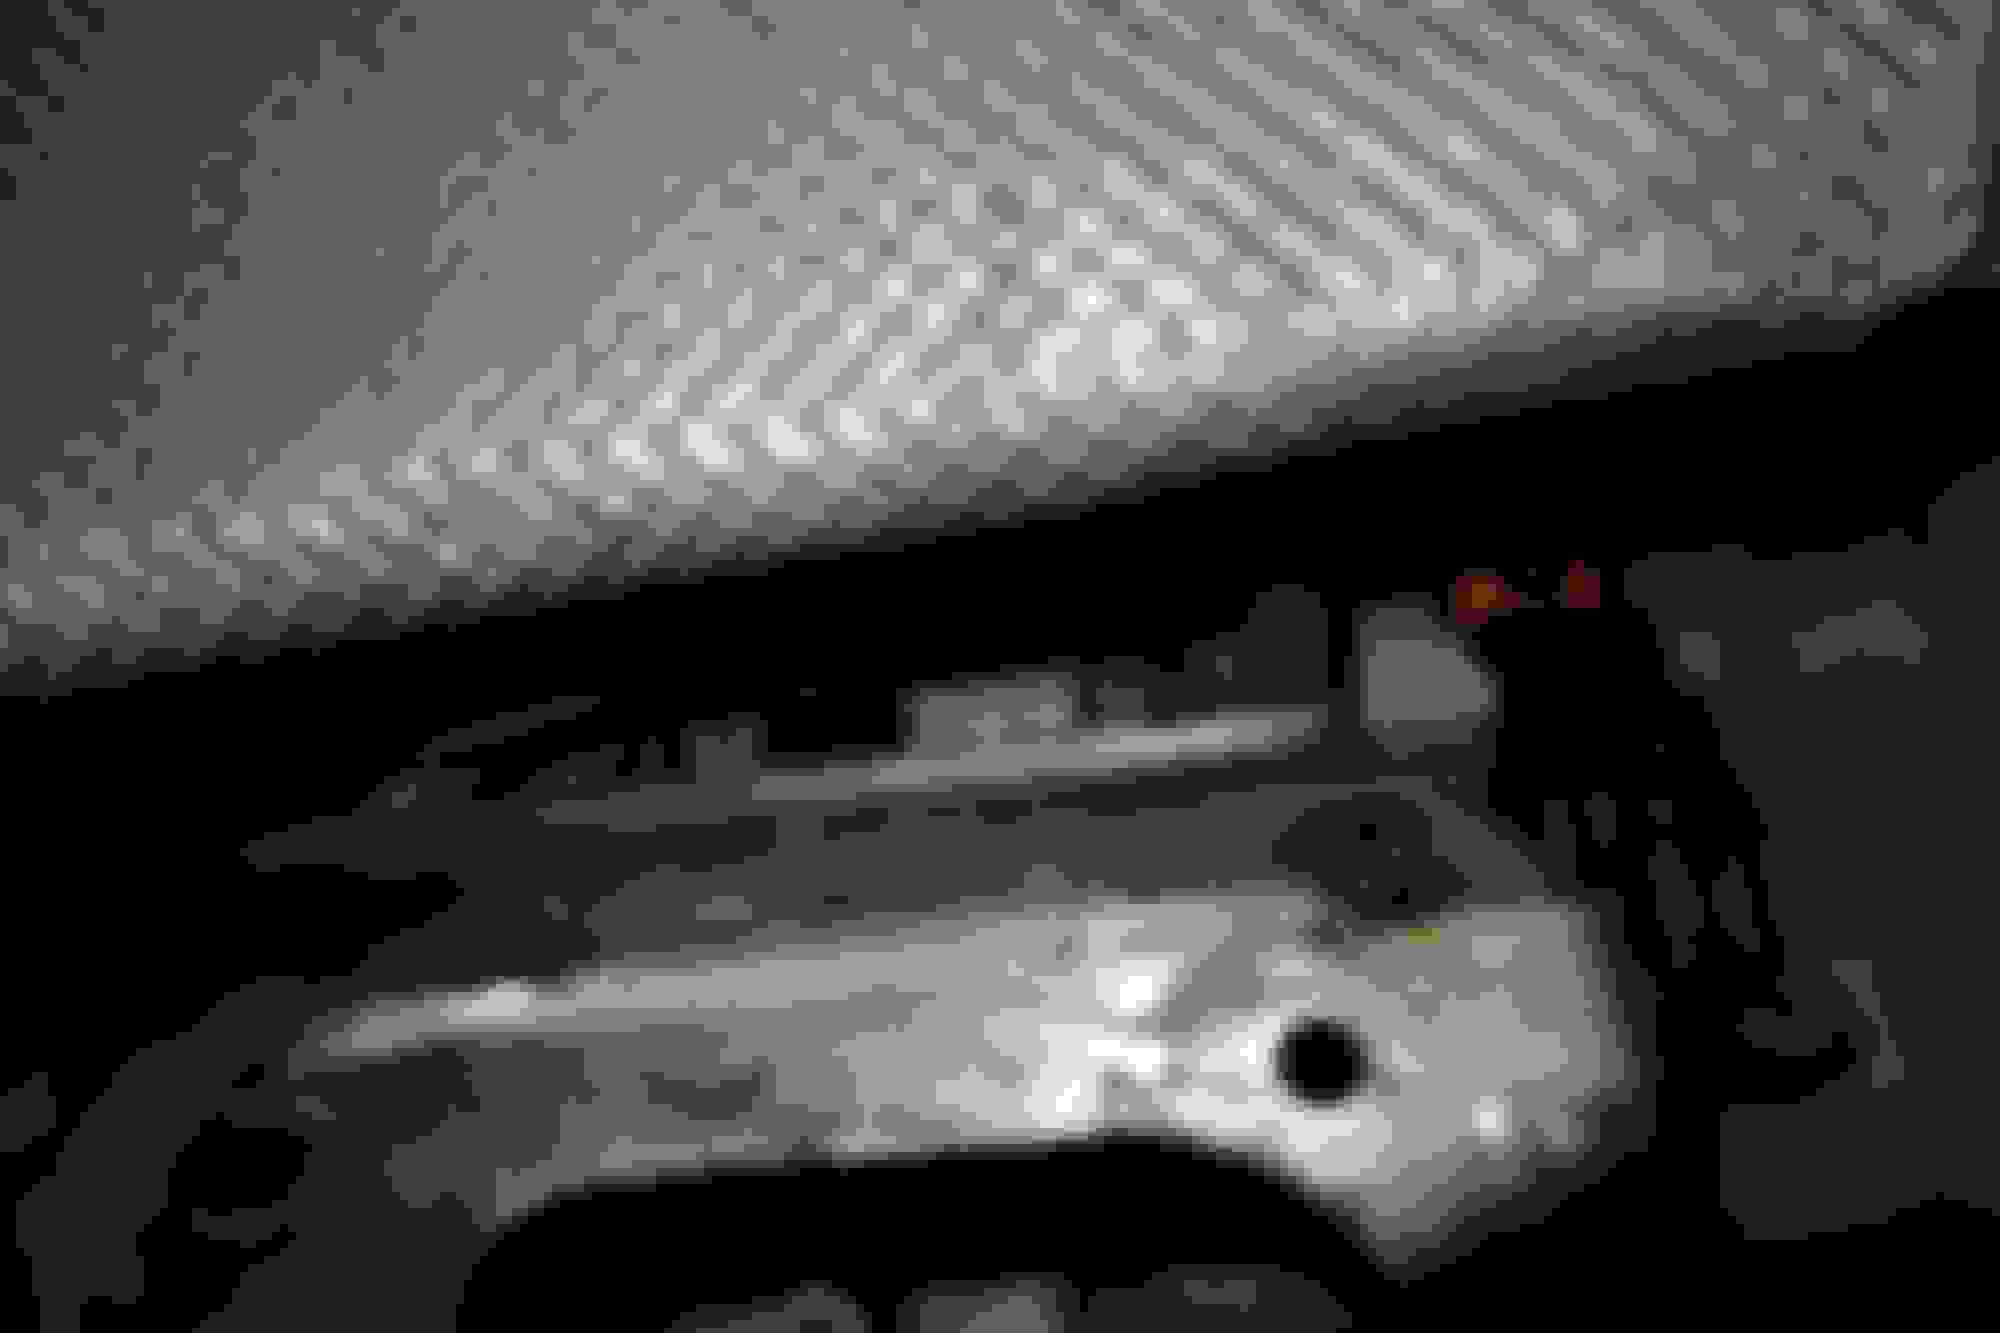
* Unbolt the heat shield.
* You now have much better access to the spark-plug coils and their electrical connections than with the muffler in place.
* Start removal of each coil connector by sliding its rubber cover up half an inch. Slide a small screwdriver upward along the connector to open the plastic clamp. On mine, the connectors popped upward as soon as they were loose. When loose, you can see an orange region on the connector.
* Remove and install the spark plugs as described by others above.
* Porsche recommends not using anti-seize lube on the spark plugs due to the concern of not making a good electrical connection to the engine head. Personally, after dealing with stuck spark plugs and damaged threads in the past, I always put a SMALL dab of anti-seize on the first few threads and have not had a problem.
* When bolting the coils back on, I suggest starting the bolts just a few turns, then making the electrical connecting before screwing in the bolts all the way. This is because the electrical connector really wants to be in position, and can slide behind the coil. When the coil gets tightened down, the plastic ring around the terminals on the connector can break off. This is doubly bad when the plastic falls in to the coil and prevents snapping on the connector later (guess how I know this).
Excellent tips. It is a good idea to replace the cat clamp bolts with stainless steel, but you don't have to go looking for OEM or metric bolts. Any ones that are approximately the same size will do. I got mine at Ace hardware for a couple of bucks.
Once you've removed the mufflers the first time it becomes a very quick procedure in the future. 1- because you'll be familiar with the process, and 2- because the nuts and bolts won't have 10+ years of rust and road crud on them.
* Porsche recommends not using anti-seize lube on the spark plugs due to the concern of not making a good electrical connection to the engine head. Personally, after dealing with stuck spark plugs and damaged threads in the past, I always put a SMALL dab of anti-seize on the first few threads and have not had a problem.
I saw this in the Bentley manual too and thought it was odd, I've always heard it's a good practice to use anti-seize...
This DIY is extremely misleading. It�s akin to saying �How to be able to afford a new Carrera� and saying �Draw enough money out of the bank and head to the dealership.�
Some people say remove the bumper, but I removed the muffler. This makes it much easier, but muffler removal is no cake walk. I used a mix of acetone and ATF to loosen rusty bolts. Works well. The passenger side is made tough by the #4 cylinder. It�s made easier by moving the wheel well heat shield out of the way, as it allows a socket extension to reach the bolts/plug. Also, rotate the coil clockwise almost 180* as you pull it out. This will allow you to pull it into the cutout in the muffler bracket. Pay attention to how it comes out and reverse it going back in.
The #2 cylinder on the driver�s side is almost as much of a beast. This is definitely th3 hardest to remove/replac3 the coil wire. I cut a notch in a wooden chopstick, much like a fishing hook, to get the boot on the clip. And getting sockets on the bolts/pkug is a pistol too. I didn�t unvolt the heat shield but simpky used the 3xtension to crush down the shield just a wee bit. That�s all it took.
They don�t use carriage bolts much in Japan. At least they aren�t available in home centers. Special order (4) 10mm 54mm and they will run about $30. I ordered 4 off eBay from China for about $11. Currently I just have some regular stainless bolts on one side.
Those mufflers....hated messing with those things. I actually considered ordering the straight bypass setup for about $270.
...as for removing the muffler, I found that completely useless since the mounting bracket is still in the way and the upper bolts for it are pretty much inaccessible.
This wasn�t the case for me at all. Maybe because it was my first time, but being able to see what I was doing helped greatly. I was also able to access some bolts through the bracket or around its edges. The driver�s side was much easier the the other side. Though the bracket made it very difficult to get to the boot/connector on #2.
It took me about a day and half to do this job the first time, but I could probably do it again in about 3 or 4 hours. I really can't see how you can manage without removing the exhaust. That in itself will take you a few hours if you've never done it before, especially if the bolts are frozen.
A boat plug wrapped with sandpaper is needed to remove the tubes. I used a small flat pry bar to help remove and then to seat the tubes.
A mechanic's rolling board is nice to have too.
I had to go back in the next day when it started throwing codes. Be careful and thorough when connecting the coil wires. It can appear that they are properly seated even though they are not. Give the wires a slight tug to make sure each is secure.
+++++++++++++++++++
Bill,
I finally bought a bunch of parts to do the plugs, tubes and coils, plus water pump, thermostat and oil change. Been studying these threads and am a little anxious about how tight the access might be to the plugs and coils. Mine is a 2001 cab, if you recall, so maybe they won't be too inaccessible. Seems the later 996s esp the turbos are a bear. I also can appreciate how fragile the wires and connectors might be, so I'll be extract careful.
I really like your suggestion to use an expanding rubber bung with sandpaper to pull the tubes. I figured, if I tried to lever them out, the ancient plastic would just chip away.
Hope I have good news by Saturday nite.
Jim
It helps to have a variety of socket extensions of different lengths. With the mufflers and rear wheels off it's really not a bad job at all. If you're replacing the coils with the latest version, the bolts for the small heat shield will now be too short after you replace the coils. You can use the old bolts from the coils as they are the same type and size but longer. The new coils will come with new bolts. When putting in the new tubes, I used the flat side of a pry bar to help seat them flush.
The water pump is a more challenging job but is doable with patience and the right tools.
I've done this job twice already. For god's sake, take the muffler off. It will save you a lot of time and aggravation. Takes 10 minutes to take the muffler off and no need to take off the rear bumper. These directions are for each side. Car is a 1999 C4 Cabriolet Manual transmission with 133,000 miles.
First jack up the rear and take the rear tire off.
The 3 nuts holding the muffler bracket are 13mm. The 2 nuts holding the muffler clamping sleeve are 15mm.
Once the nuts are removed, just pull the muffler towards the side of the car towards the side of the bumper (not towards the rear) and the mounting screws will come off the bracket. Then slide the muffler pipe tube out of the clamp and then slide the muffler down and out with a little finagling. If the car still has the original 15mm nuts on the clamping sleeve and they are rusty, use some penetrating oil and then use a big breaker bar. I've replaced my clamping sleeve with a new one so this thing now comes off quickly and easily.
You will now have plenty of room to work. I have tried this operation with the muffler on and I do not see the point of bending my big hands in all sorts of alien directions and contorting my bad back and knees into unfavorable positions and then cursing to high hell and then getting up feeling all dizzy and nauseas. What makes this worse is that you are lying on your back and/or sitting down. Now if you have a lift with a nice indoor garage with air conditioning, this may be a different story. Just take off the muffler. Your body and mind will thank you later.
Take off the heat shield and the 2 10mm bolts. Cylinder 3 (the easiest towards the front of the car) is self explanatory. The other two can be accessed easily from the front or rear of the car and lying down both with your head towards the front of the car and vice versa like the reclining buddha. First unplug the electrical connectors. Using a 5mm hex or star socket, undo the coil bolts. Use a combination of extensions and the spark plugs will come out. Keep in mind cylinder 2 (in the middle) is a little tricky due to the bracket but there is a hole that allows an extension a straight shot at the plug. Playing around with different combinations will help.
Install new Bosch 7314 or Denso spark plugs and torque to 22ft/lbs. Do not use anti seize! And do not leave the spark plugs loose! I did previously on my first job and they literally came loose and I could remove them with my hand! This caused a P0300, P0301, P0302, P0303 code (all on the drivers side) and check engine light as well as a rattling/tapping sound which I thought was a bad lifter valve. Symptoms of loose spark plugs will be poor idling, difficult start up, stalling at idle. But once running past idle, the car acts normal.
Keep in mind that the new 997 updated Beru coils have a taller bolt head so remember to reInstall the heat shield back on but not too tightly, otherwise you may strip the bolts. Also, when putting back on the 3 13mm nuts onto the muffler bracket, once you hear a scrunching sound, that is tight enough.
First timers will probably take a couple of hours. The second time around will literally take you no more than 30 minutes for each side if you are working fast and diligently.
@rhkwon - Well said and I agree completely. I had to cut off the bolts on the clamping sleeve even after applying penetrating oil. I just replaced them with a similar size stainless steel nut and bolt from the hardware store. No need to pay the Porsche tax. Subsequent removals are much easier.

 07-26-2013, 12:48 AM


 rear wheels take off.
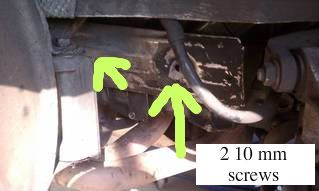 cover with 2 10 mm bolts.
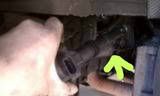
 You will need a boat plug which you push to one side so it grabs the sleeves if you are replacing those. Oh and be careful that the spark plug wrench is not left on the NEW spark plug or you will struggle like hell trying to put the individual coil back in place. (ASK ME WHY I KNOW lol).. You may have to torx burst the muffler holding bolts to remove them and buy new ones from any hardware shop when putting the mufflers back in place. So tell the whole truth and nothing but the truth. Strangely enough, you are not the first to skimp over a spark plug and sleeve replacement DIY job. I believe in calling a spade a spade and not a shovel.