DIY - Busted Climate Control Readout
#1
 08-01-2007, 07:00 PM

Join Date: Sep 2006
Location: michigan
Age: 41
Posts: 331
Rep Power: 31 
DIY - Busted Climate Control Readout
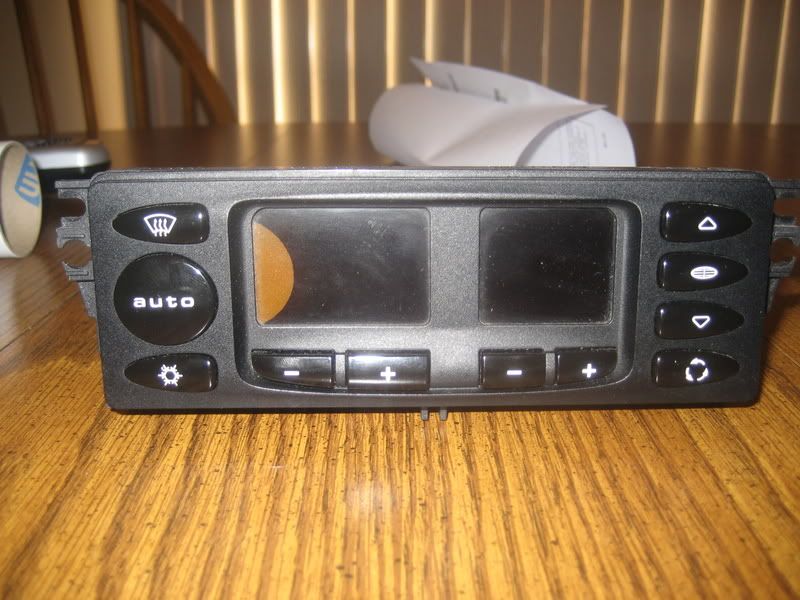
Well...Awhile back i was fiddleing with something in my car and droped something hard on the glass readout of the climate control. At first it just had a little bleeding on the glass, but eventually it got out of control and the display would flicker and was completely unreadable! Well, it finally bugged me enough to look into fixing. I called up suncoast and they wanted charge me about $400-500 for a new unit.....that wasnt going to work. So i went with option B.
http://cgi.ebay.com/ebaymotors/Audi-...QQcmdZViewItem
I took the plunge and tried to piece this thing together today. I wouldn't say that it was "easy" but it wasnt horribly hard either. The worst part by far was the modification of the stock internals to adopt this new piece. Anway here are some pics and a little description of what's going on.
Unfortunatly i didn not take a pic of what this thing looked like when it was installed prior to fixing...sorry!
Removal
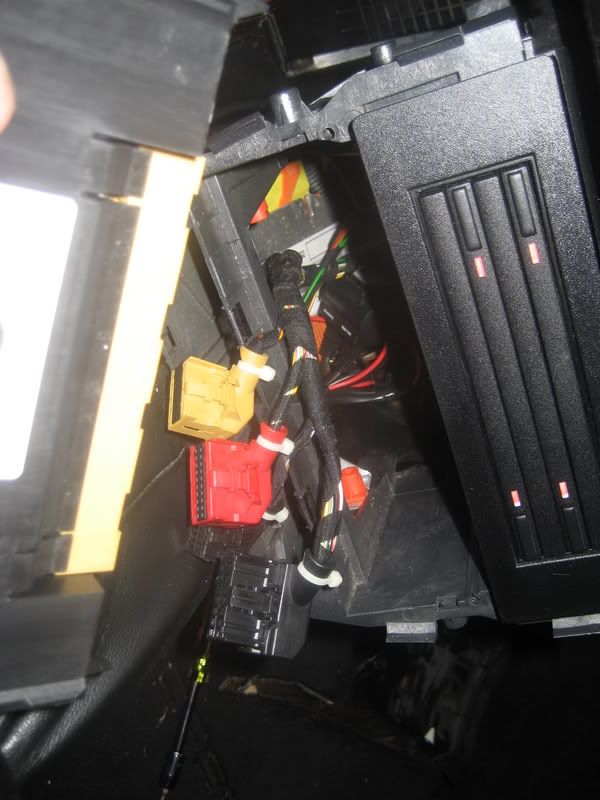
Removed - you can see the bleeding LCD juice
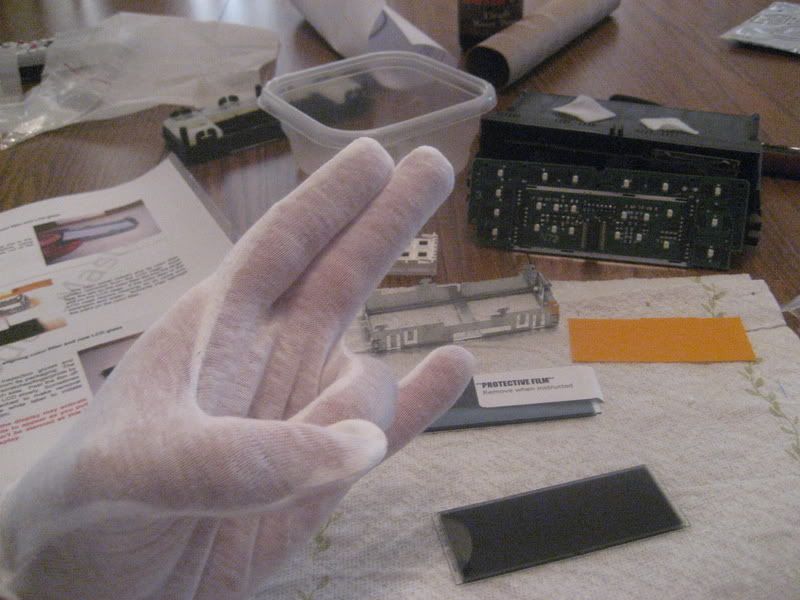
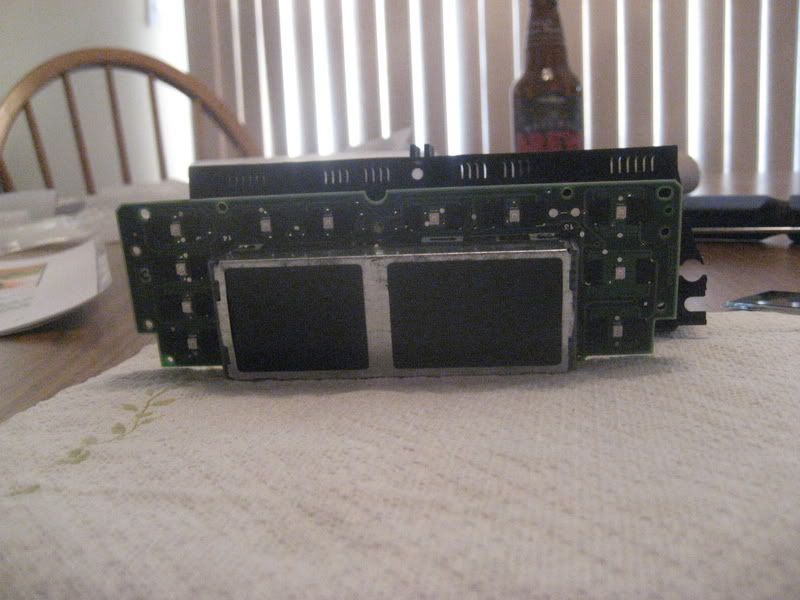
Deconstruction this wasnt too hard. Just a few screws and pins.
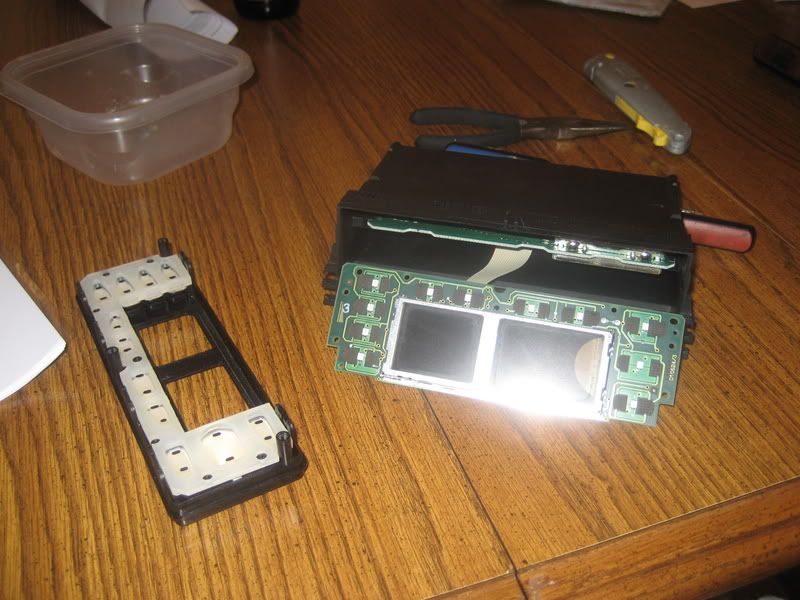
They give you sweet gloves with the kit...So while wearing sweet gloves its only right to make a sweet hand gesture. The shocker seemed appropriate.
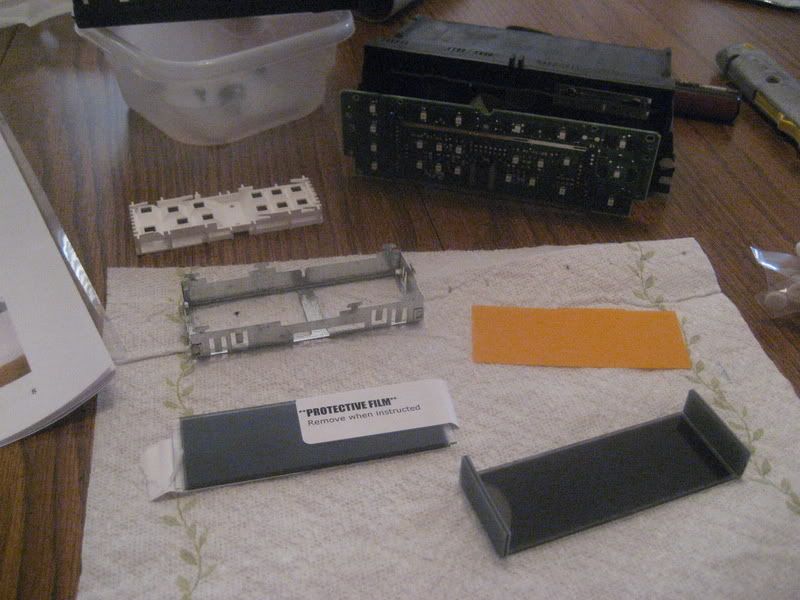
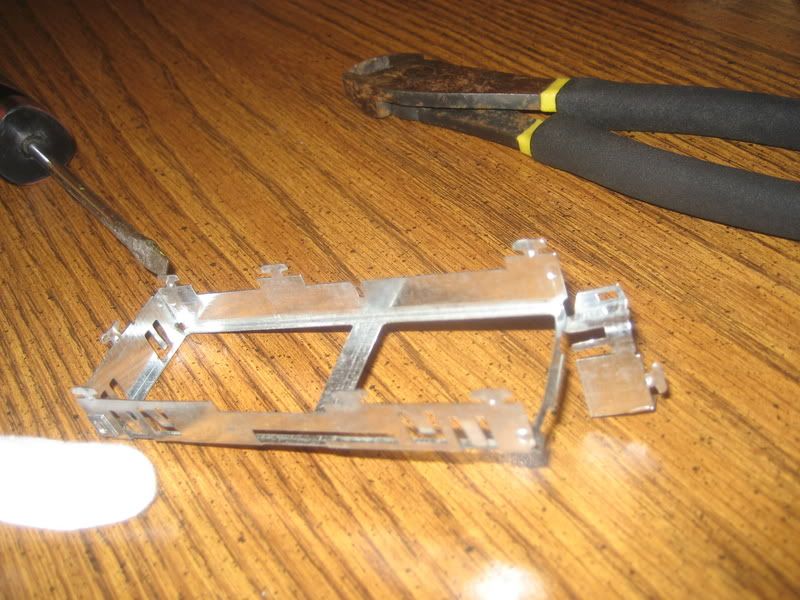
This is where it gets tricky. The LCD they send you in the kit is probably 1/8" - 1/4" too big for the stock metal "cage." So i basically trimmed the side pieces off the cage and smoothed them all over w/ some sandpaper. This is a pic halfway throught the process.
http://cgi.ebay.com/ebaymotors/Audi-...QQcmdZViewItem
I took the plunge and tried to piece this thing together today. I wouldn't say that it was "easy" but it wasnt horribly hard either. The worst part by far was the modification of the stock internals to adopt this new piece. Anway here are some pics and a little description of what's going on.
Unfortunatly i didn not take a pic of what this thing looked like when it was installed prior to fixing...sorry!
Removal
Removed - you can see the bleeding LCD juice
Deconstruction this wasnt too hard. Just a few screws and pins.
They give you sweet gloves with the kit...So while wearing sweet gloves its only right to make a sweet hand gesture. The shocker seemed appropriate.
This is where it gets tricky. The LCD they send you in the kit is probably 1/8" - 1/4" too big for the stock metal "cage." So i basically trimmed the side pieces off the cage and smoothed them all over w/ some sandpaper. This is a pic halfway throught the process.
#2
08-01-2007, 07:00 PM
Join Date: Sep 2006
Location: michigan
Age: 41
Posts: 331
Rep Power: 31
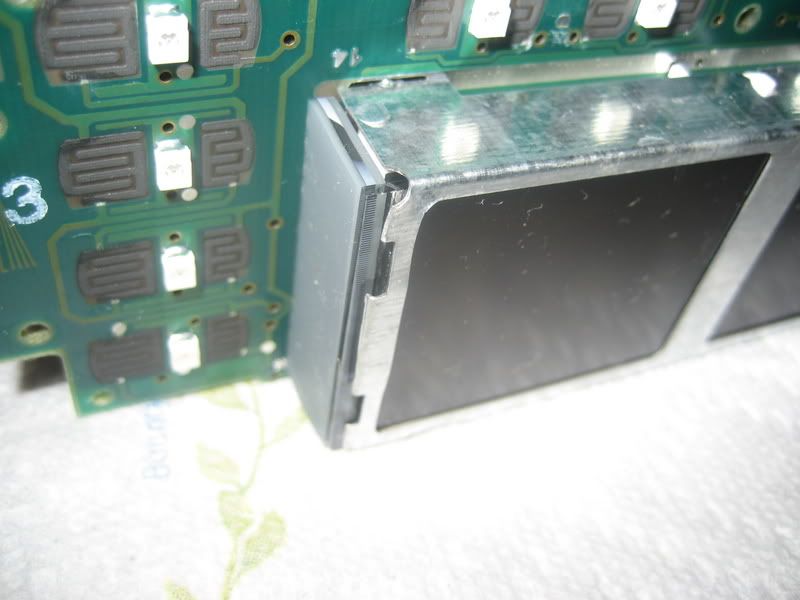
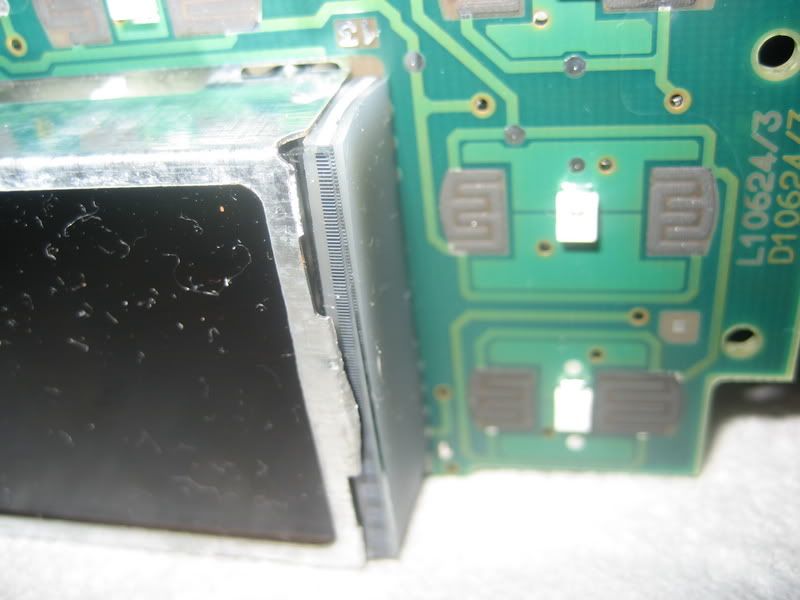
These two pics are after the unit was re assembled. There are these little rubber zebra connectors that transfer the electricity from the board to the LCD. In the factory version they fit neatly inside the metal cage, but because i destroyed that they didnt fit quite so nice/neat. Basically, to make it work, i just held everything together i re-assembled. Then you need to take a screwdriver and push the zebra connector back towards the terminals on the board. It makes a really odd angle, but it worked out ok?!? I was worried when i was doing it? -=edit=- afer review i just realized that these pics were taken before i put the big angle on the bottom of the zebra connectors. If you leave them like this the probably wont make a connection. the bottom needs to be pushed toward the middle to make it work....sorry!
Re-assembled and ready for the upcoming major dissapointment!
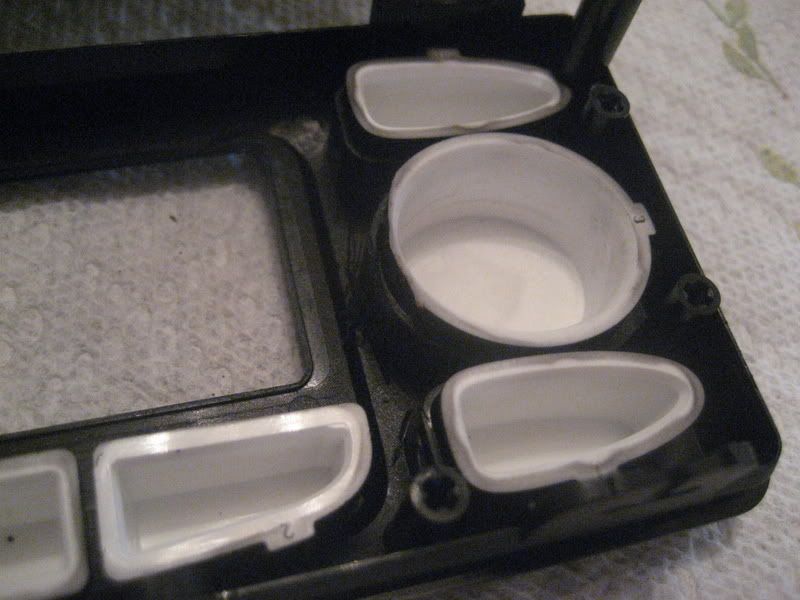
This last pic was another dicey area to overcome. Basically, because the new glass was bigger, it didnt exactly "fit" into the confines of the plastic internals. Therefore, i had to modify them slightly. What i ended up doing was shaving the side of the big circular "auto" button and a little bit of the plastic "tube" the the button fit into. I used a utility blade as my weapon of choice.
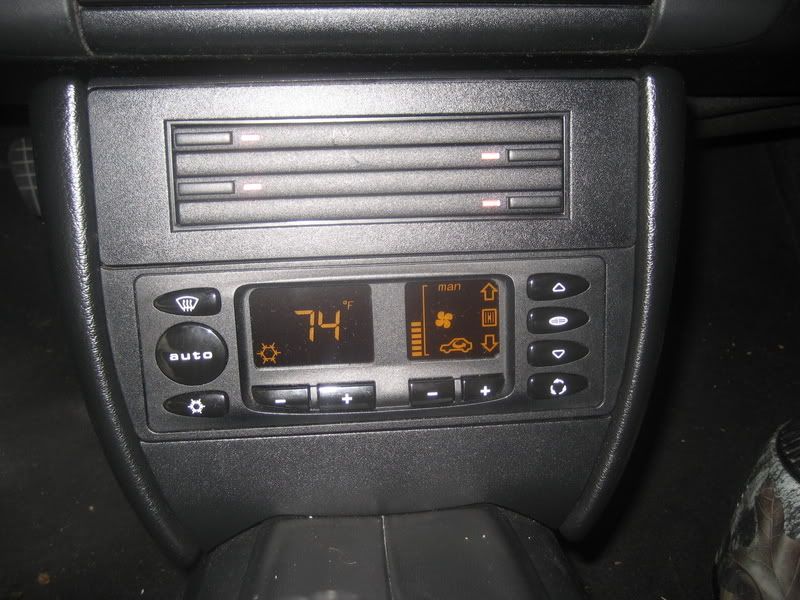
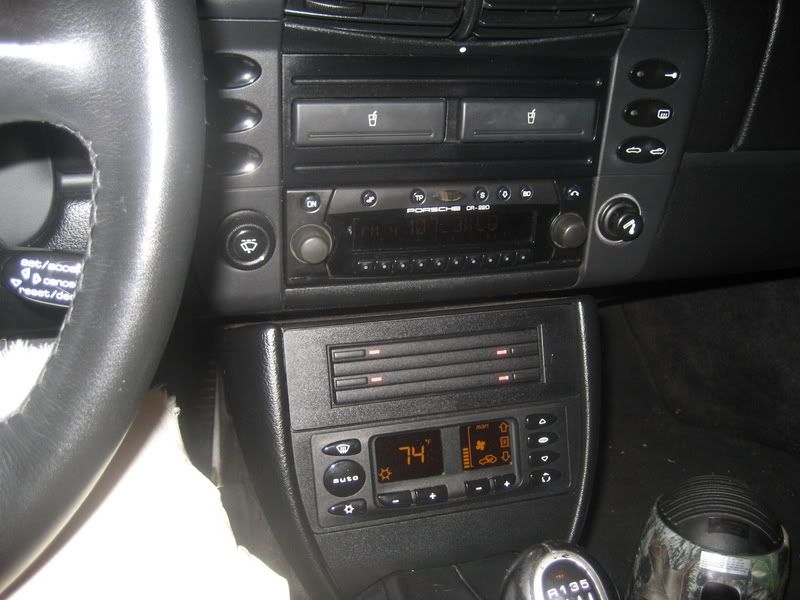
And here is the final product. I think it came out pretty good, I was expecting the readout to be the same as i had before, but it was slightly different as you can tell by the pics. I like it though, better than the ugly bleeding version i had before?!? Lol and this version has "manuell" spelled correctly!!!
Here is a pic of the old LCD before i pitched it....and my little PIA helper friend!
Re-assembled and ready for the upcoming major dissapointment!
This last pic was another dicey area to overcome. Basically, because the new glass was bigger, it didnt exactly "fit" into the confines of the plastic internals. Therefore, i had to modify them slightly. What i ended up doing was shaving the side of the big circular "auto" button and a little bit of the plastic "tube" the the button fit into. I used a utility blade as my weapon of choice.
And here is the final product. I think it came out pretty good, I was expecting the readout to be the same as i had before, but it was slightly different as you can tell by the pics. I like it though, better than the ugly bleeding version i had before?!? Lol and this version has "manuell" spelled correctly!!!
Here is a pic of the old LCD before i pitched it....and my little PIA helper friend!
Last edited by Jurichar; 08-01-2007 at 07:04 PM.
#3
08-01-2007, 07:05 PM
Registered User
Join Date: Apr 2007
Location: Chained to my Laptop....
Posts: 3,124
Rep Power: 170 
very nice- thanks for posting!
I WISH we had a dedicated DIY section on this forum. Eventually all the good threads get lost deep down in the old posts... Can anyone talk to the site admin? My emails have gone unanswered.
I WISH we had a dedicated DIY section on this forum. Eventually all the good threads get lost deep down in the old posts... Can anyone talk to the site admin? My emails have gone unanswered.

#5
08-01-2007, 07:07 PM
Join Date: Sep 2006
Location: michigan
Age: 41
Posts: 331
Rep Power: 31
Originally Posted by p0rsch3
very nice- thanks for posting!
I WISH we had a dedicated DIY section on this forum. Eventually all the good threads get lost deep down in the old posts... Can anyone talk to the site admin? My emails have gone unanswered.
I WISH we had a dedicated DIY section on this forum. Eventually all the good threads get lost deep down in the old posts... Can anyone talk to the site admin? My emails have gone unanswered.
#6
08-01-2007, 07:15 PM
Registered User
Join Date: Jun 2004
Location: Newport Beach, Ca.
Age: 55
Posts: 3,187
Rep Power: 148 Trending Topics
#9
08-02-2007, 05:54 PM
Nice job and thanks for your efforts in sharing. Wonder if this is available from the Audi stealers if the eBay source goes away??
+1 on the notion of creating a DYI section as this would be a classic to save !!
Salute!! demosan
+1 on the notion of creating a DYI section as this would be a classic to save !!
Salute!! demosan

 Feel free to pm if u have any questions or need help!
#15
01-07-2009, 07:04 PM

Registered User
Join Date: May 2008
Location: St. Louis Park, MN
Posts: 272
Rep Power: 36