DRLs for 997.1 TT any news?
#631
 05-27-2012, 12:01 AM


Had my Porsche dealer install them. They seem to work fine. Carousel Porsche only charged $375. I am not a tool or do it yourself guy, so it was well worth it! Thanks dan and vivid for a awesome product!
chaz
chaz
#632
05-27-2012, 07:30 AM

Registered User
Join Date: May 2008
Location: St. Louis Park, MN
Posts: 272
Rep Power: 36 

#633
05-28-2012, 08:04 AM
Registered User
Join Date: Feb 2007
Location: Fort Lauderdale, Florida
Posts: 374
Rep Power: 32 So I completed the "separate battery before install test" with both DRLs looking bright white. I did the test using only one controller unit. When I installed everything in my turbo with both controller units, this is what is displayed with the passenger side DRL showing two yellow lights and the drivers side perfectly white. Is it possible that the controller units may be bad and may not be powering the DRL correctly, or do I need to wait three days for it to "warm" up? I'm convinced its not a DRL LED issue, but rather a controller or installation issue. That being said, any recommendations would be appreciated.
I do want Vivid to give me 4 extra hours back at the end of my life since the install did not go as planned.

Last edited by hjacobs2000; 05-28-2012 at 08:14 AM.
#634
05-28-2012, 08:44 AM
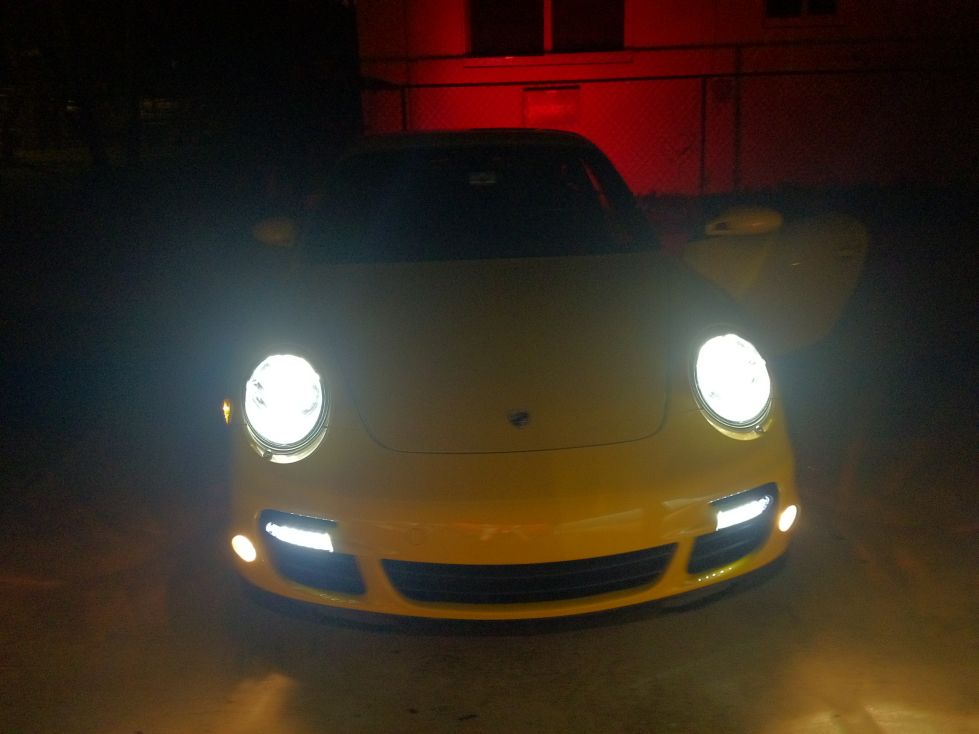
Install was completed on Friday, took a little longer to do it proper so it didn't look rushed. I didn't test prior to install. The lights are not super bright like an AUDI, however it's a Porsche and the lights are just as bright as the headlights(HID) and the same shade. I am very happy with the outcome hope others have the same success and I will post pic's tonight!

#636
05-28-2012, 04:50 PM
Registered User
Join Date: Feb 2007
Location: Fort Lauderdale, Florida
Posts: 374
Rep Power: 32
I replaced the other non working drivers side with a second set I had, I'm still not quite sure why these worked and the others did not.
Last edited by hjacobs2000; 05-28-2012 at 05:42 PM.
#637
05-28-2012, 05:13 PM

DRL's......
I would like to say this much about vivid. So far their customer service has been awesome, i really hope they figure this out.
I installed mine on friday and the passenger side looks great however, the drivers side is another story.
I recorded mine, so take a look.
John
I installed mine on friday and the passenger side looks great however, the drivers side is another story.
I recorded mine, so take a look.
John
#638
05-28-2012, 06:46 PM
Registered User
Join Date: May 2010
Location: South Beach, Miami
Age: 42
Posts: 338
Rep Power: 48
Sharing my My Agency Power LED DRL install experience. This is coming from someone who has never removed a body panel before -- hopefully it isn't too obvious!
The official instructions weren't specific enough for me so if you're attempting this one on your own some of the detail here should will help. Everything below is going to assume you've already read the official Agency Power install instructions.
Alright, here we go... the box:
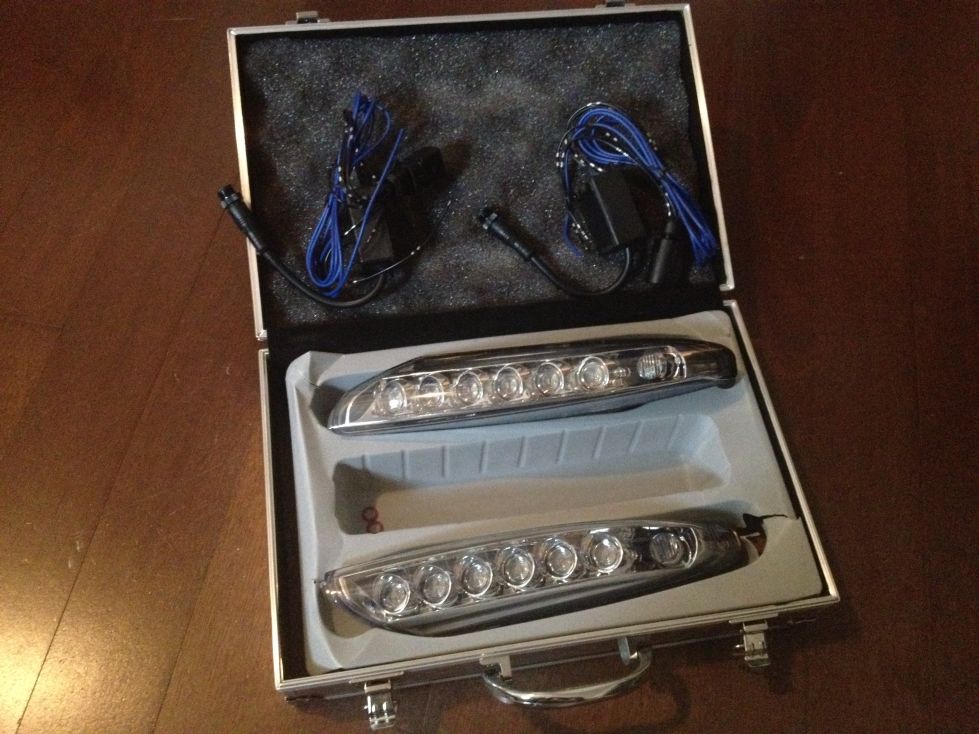
I soldered the wires from the box to to the red/green wire from the LED housing.
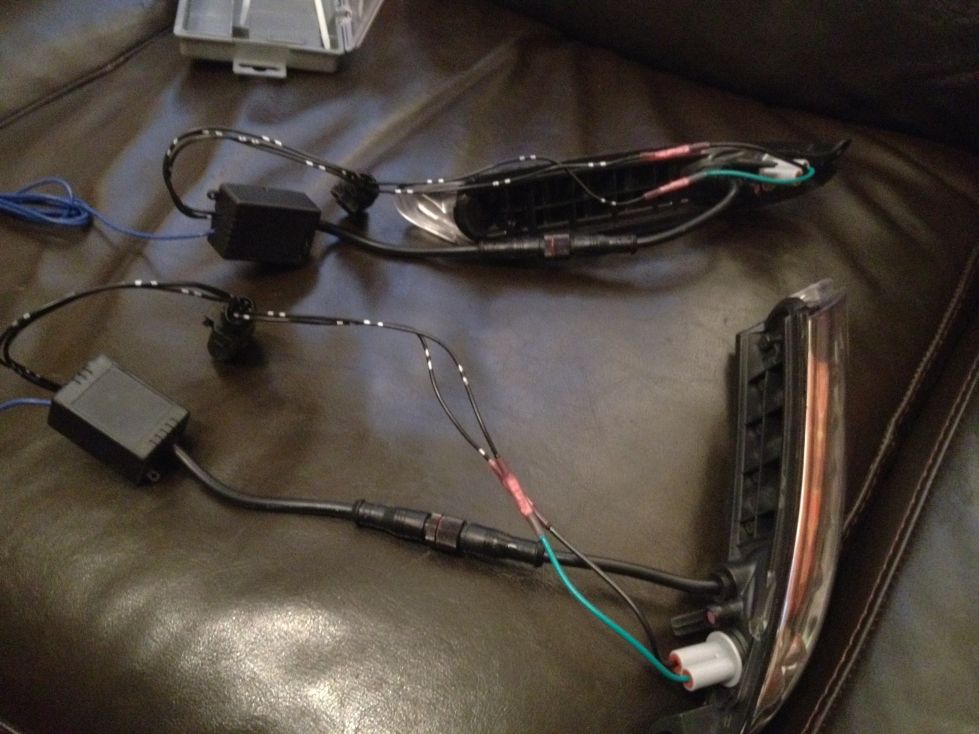
All my wire-wire connections were done with butt connectors, crimped, and then I used a mini butanetorch over the heat shrink to seal them up.
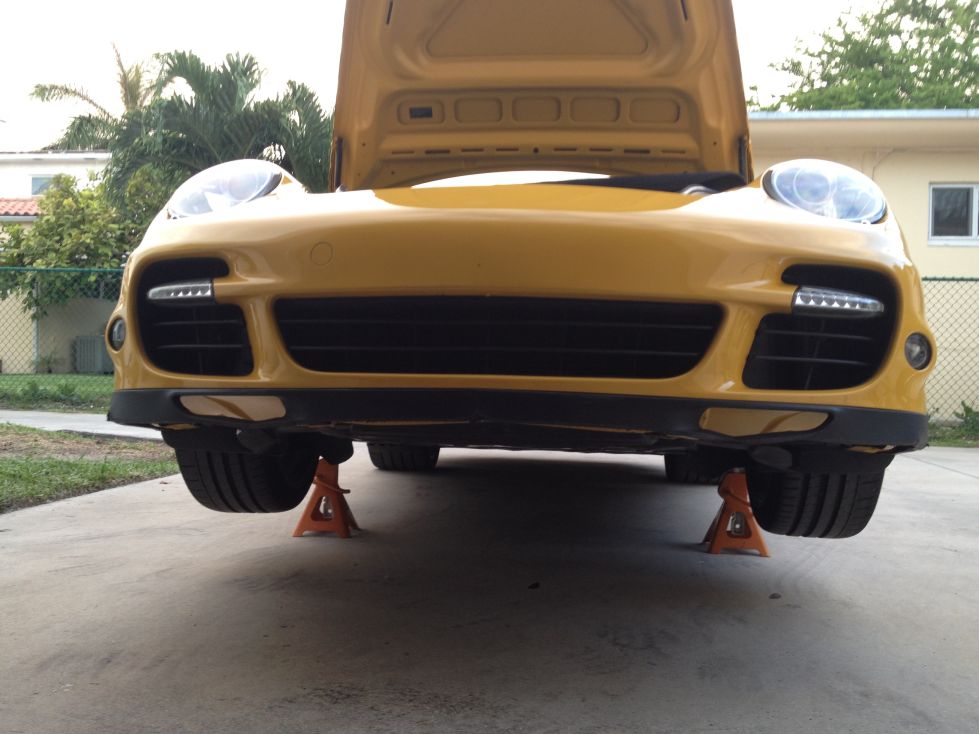
We are wheels up!
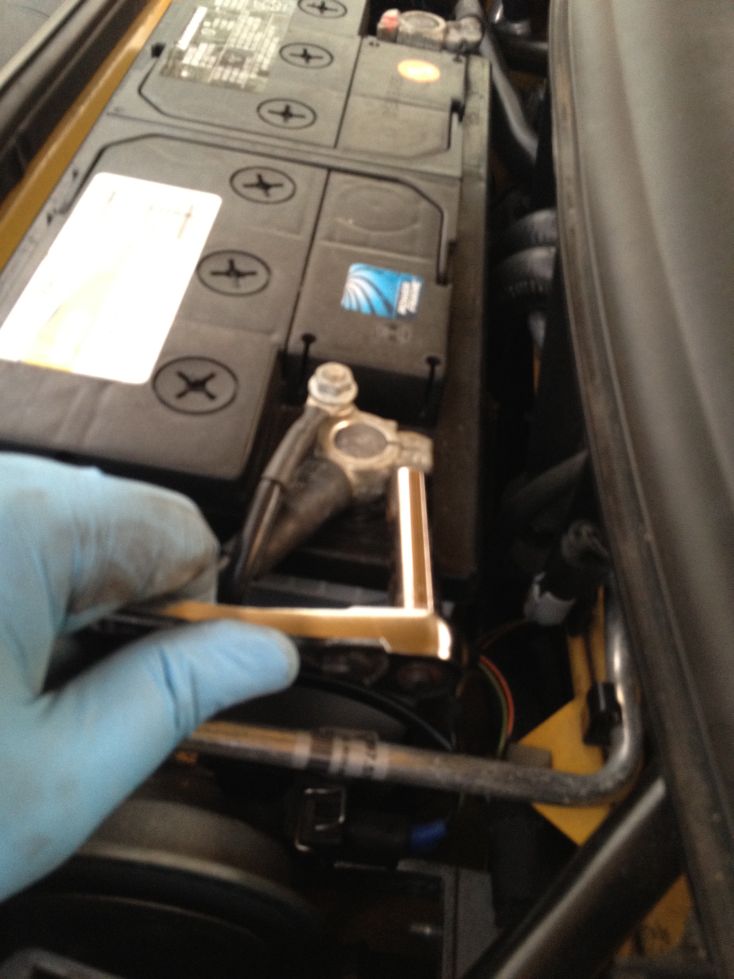
I didn�t test my lights before removing the bumper, so the next thing I did was disconnect the battery (usually a good idea if you�re doing any electronic work on the car).
Next you have to remove the fender liner for both wheels. This involves removing screws underneath the car and inside the wheel wells.
I think starting to remove the screws underneath the front of car first is best.

Move to the wheel wells and then you can take the entire piece out.
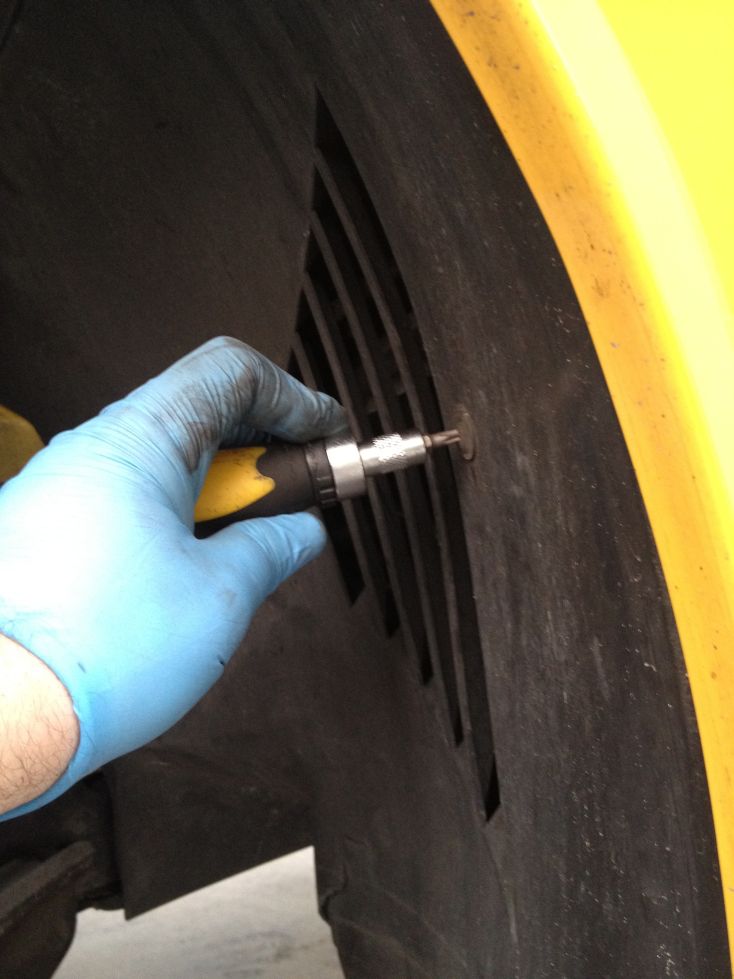
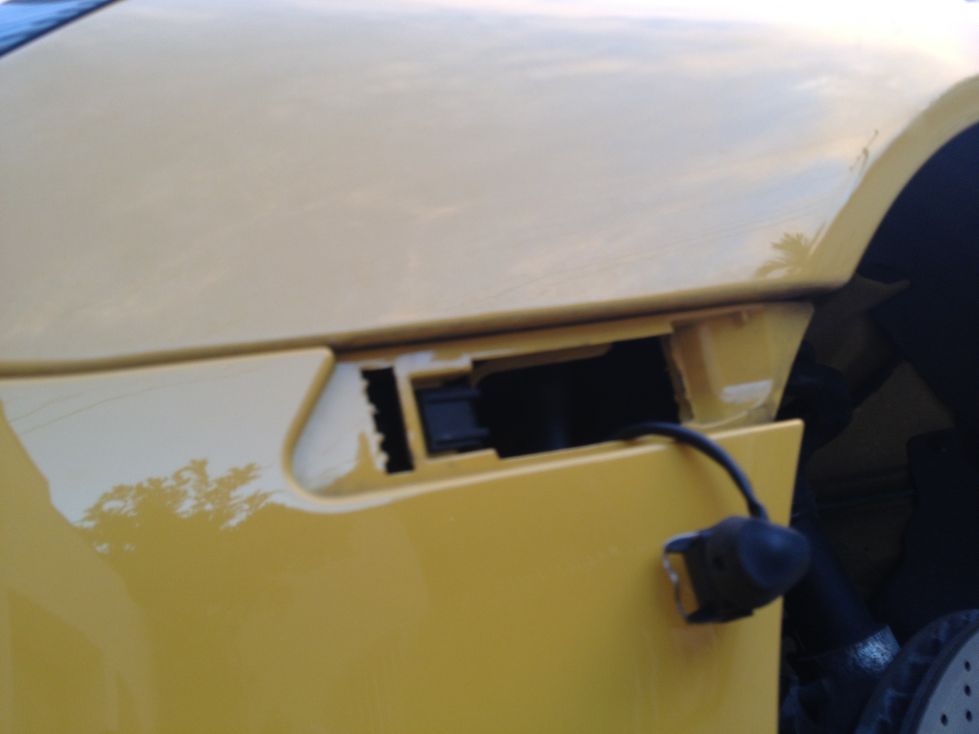
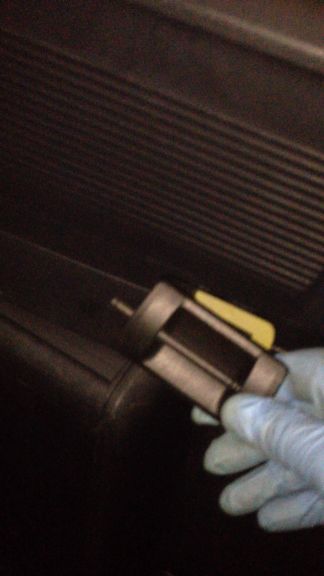
Now you remove the side marker light and disconnect it, fishing the connector back through the hole once it�s out. There is a clip in the back you can push to make it easy to pop out.
That little thin metal piece needs to be pushed down to remove the connector from the light, and to reattach it.
You then need to remove the screw that holds the bumper to the wheel well. On the right is a hose you need to disconnect as well for your headlight washers.
If you do not do this, it will likely pop out on it�s own and you�ll end up with washer fluid coming out. Don't ask how I know.
Push the blue clip off the hose and you can pull the bottom of the hose out.
You�ll only need to do this for driver�s side wheel well.
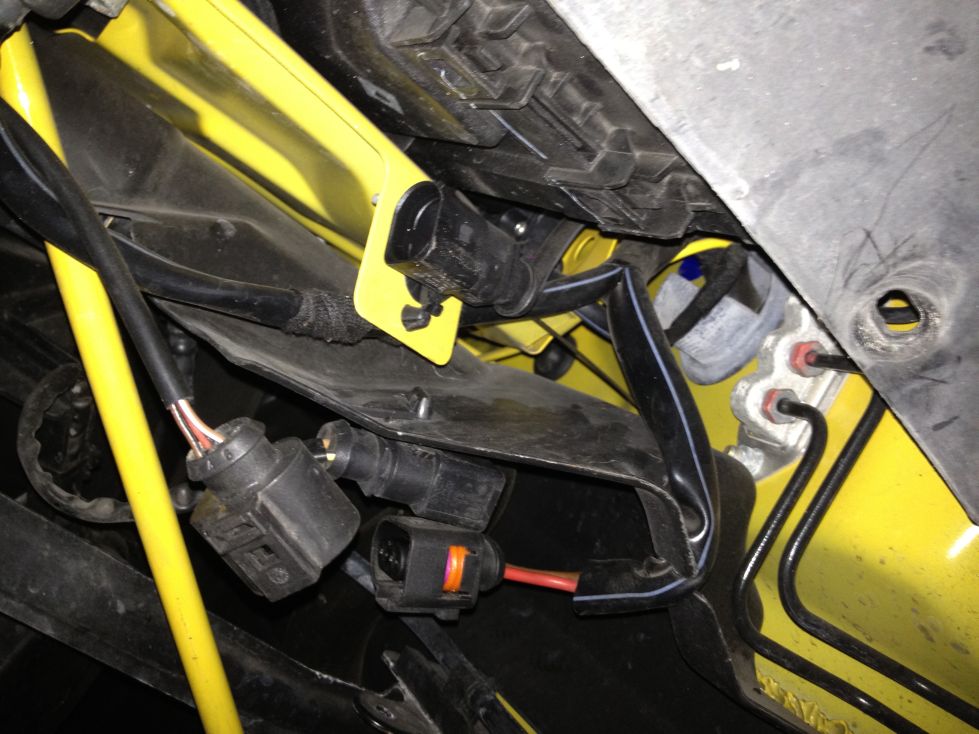
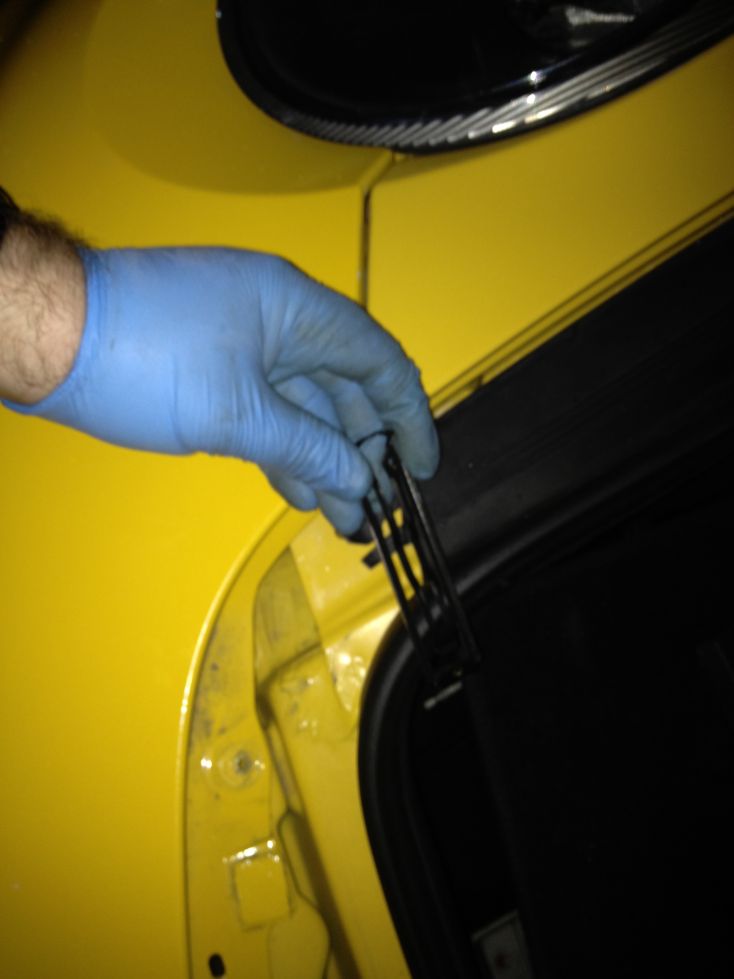
Next, disconnect the wires from your headlight assembly to the car. I don�t believe the one on the bottom was necessary, only the top one you see in the picture.
Now this part was a pain in the neck to figure out. You have to remove two clips from the top of the bumper. They pull inwards and are difficult to access. I�ve pictured where they are here.
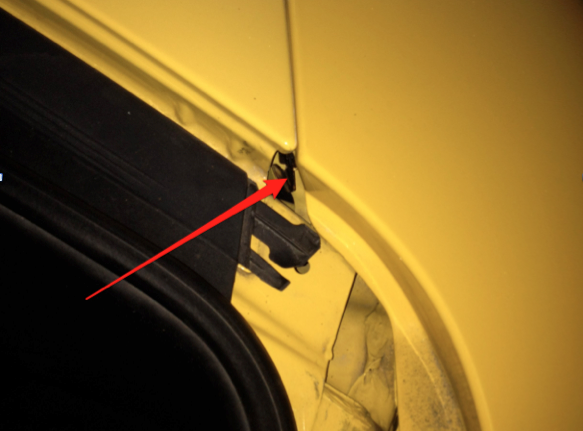
The way I removed them was slipping a zip tie over a part at the end where they are bent, then pulled them out.
I am sure there is a good tool for doing but I didn�t have one.
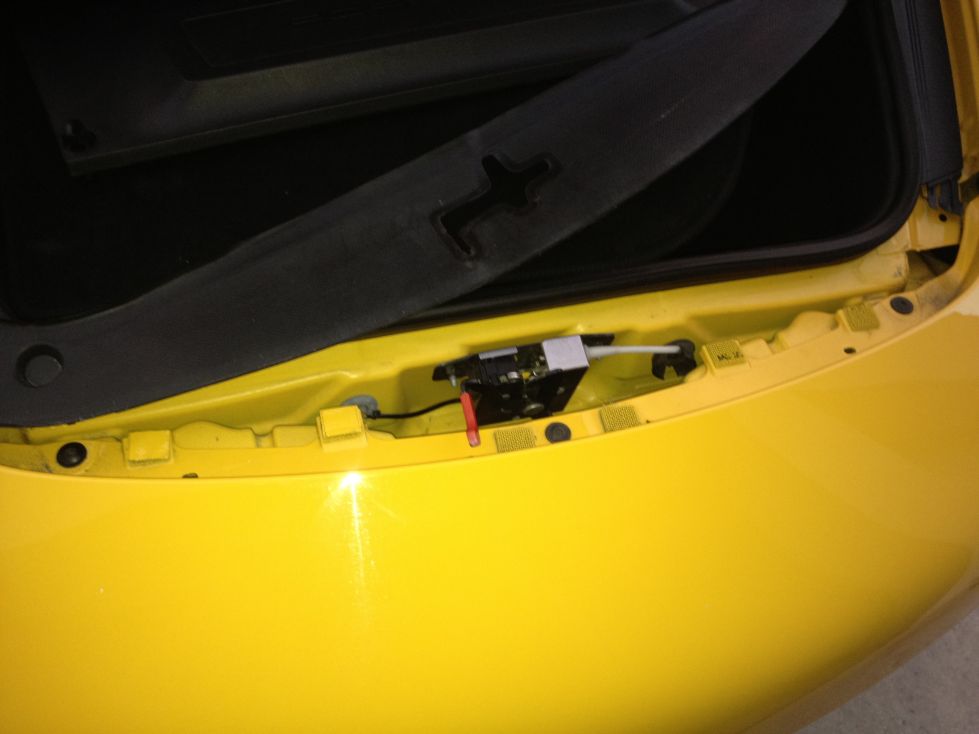
Next, peel back the rubber cover over the front of the bumper/trunk release lever and remove the 3 screws. I did this before removing the clips but I think it should be done afterwards as there will be less pressure on the clips with the screws securely holding the bumper on.
The bumper should now come off pretty easily. Yes, the sun went down while I was doing this
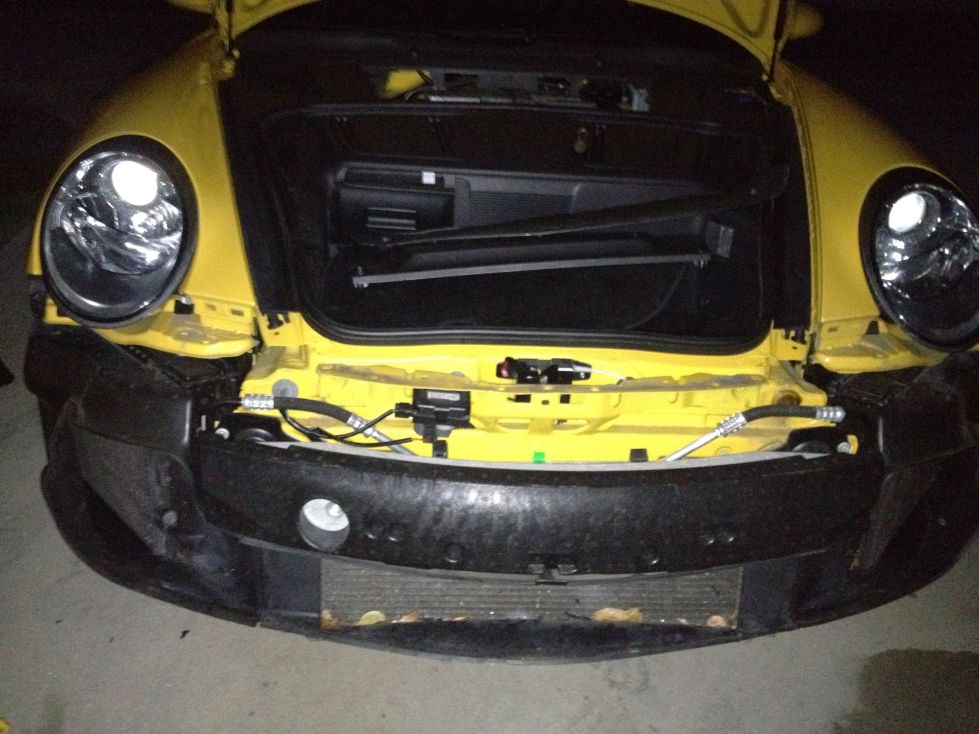
Good time to remove any debris from the radiator, too.
Now you need to remove the plastic piece you see pictured here. You�ll find a handful of Phillips screws you need to take out.
You�ll have a plastic piece to slide to one side in order to left it out once you�ve removed the screws. No idea what it is called.
Don�t forget to remove the connector running to the light that is part of this liner/trim piece, and then attach it back when you are done, lest you get a fault when you put everything back together.
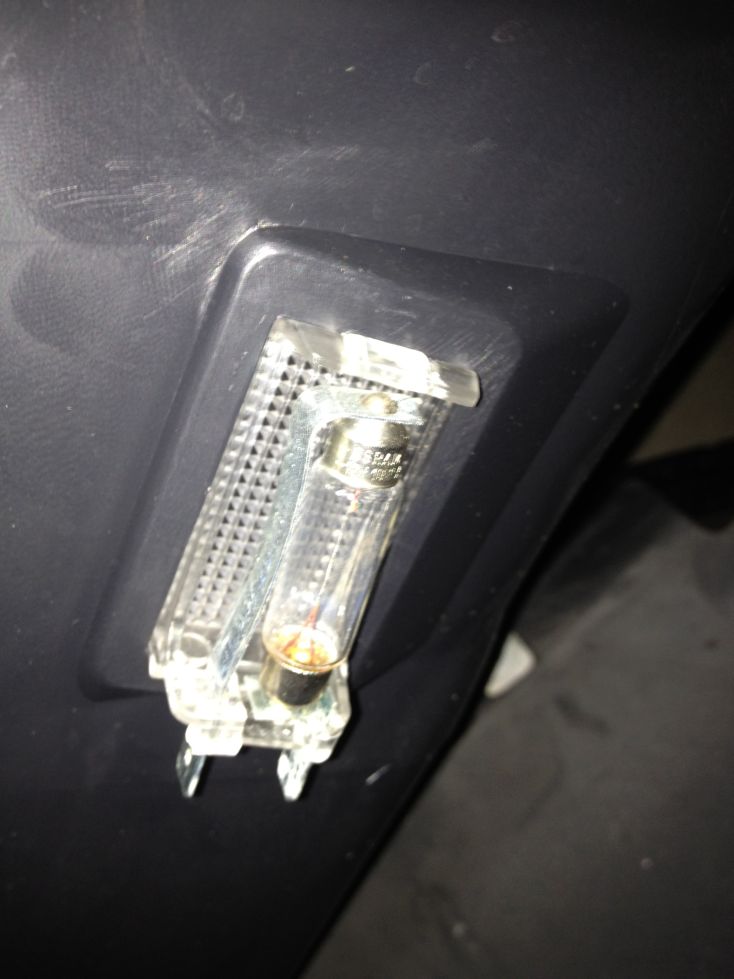
Now you remove the old light housings from the bumper. There is one screw holding them in, underneath the front corner of each light.
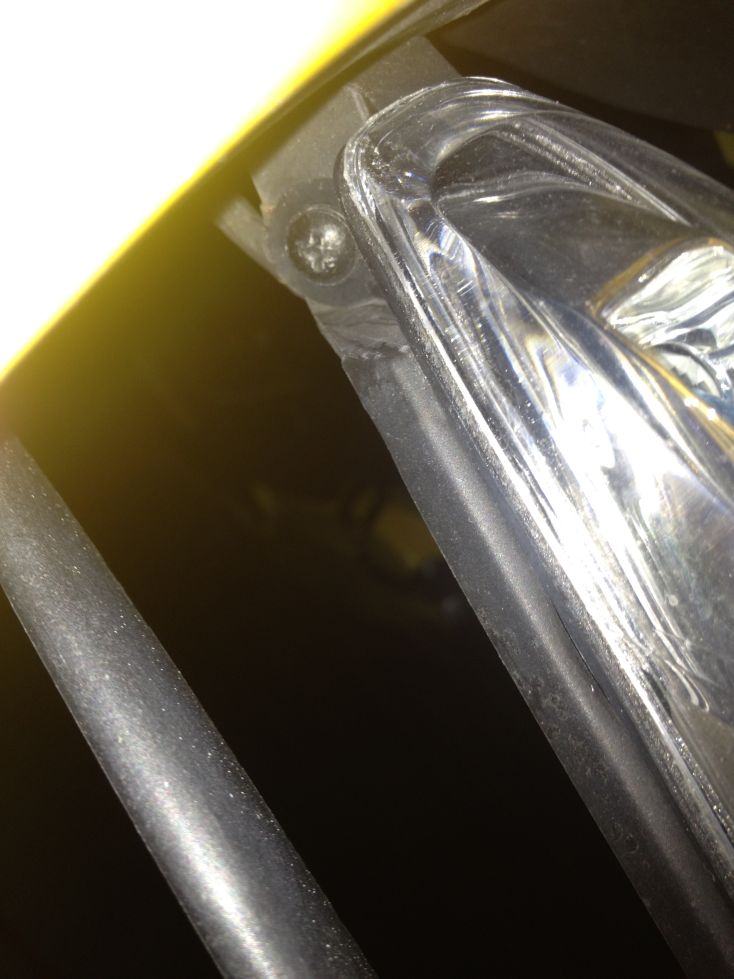
You�ll have a connector to remove that connects to the light. This comes off easily once you pull back on the tab to the rear of it.
Finally you will pop the old female end up off of it�s mount.
You can see this to the right of the picture below with the LED DRLs installed (I didn't get a 'before' picture).

Fitment was perfect.
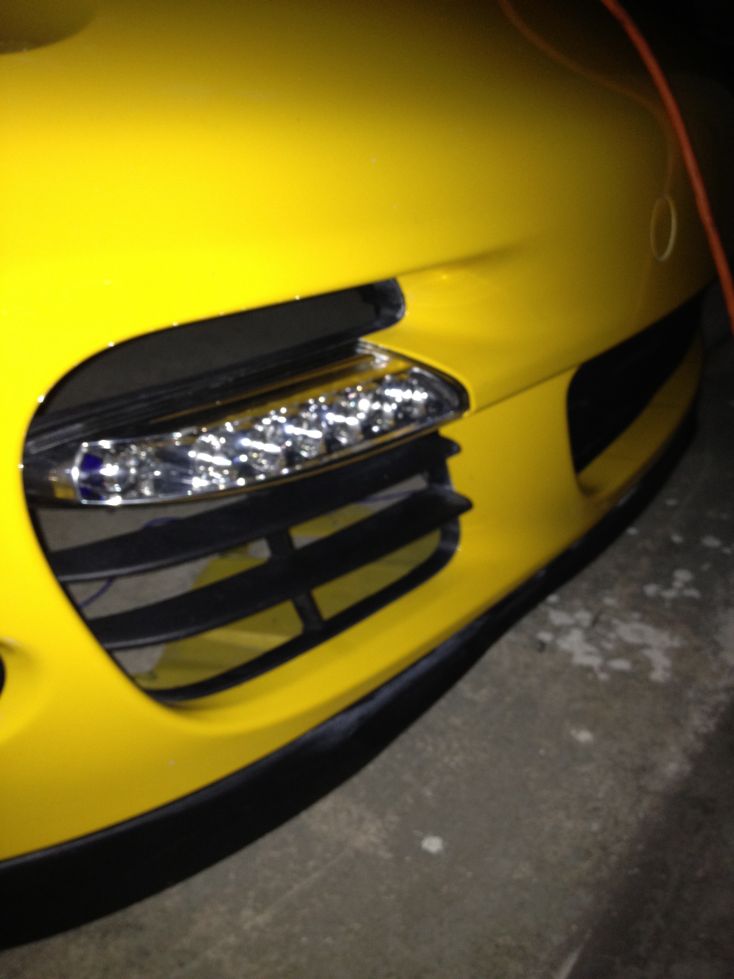
You can see I put the box from the new LED DRL behind the headlight washer part and then zip tied it on. It is pretty secure back there and won�t be coming out.
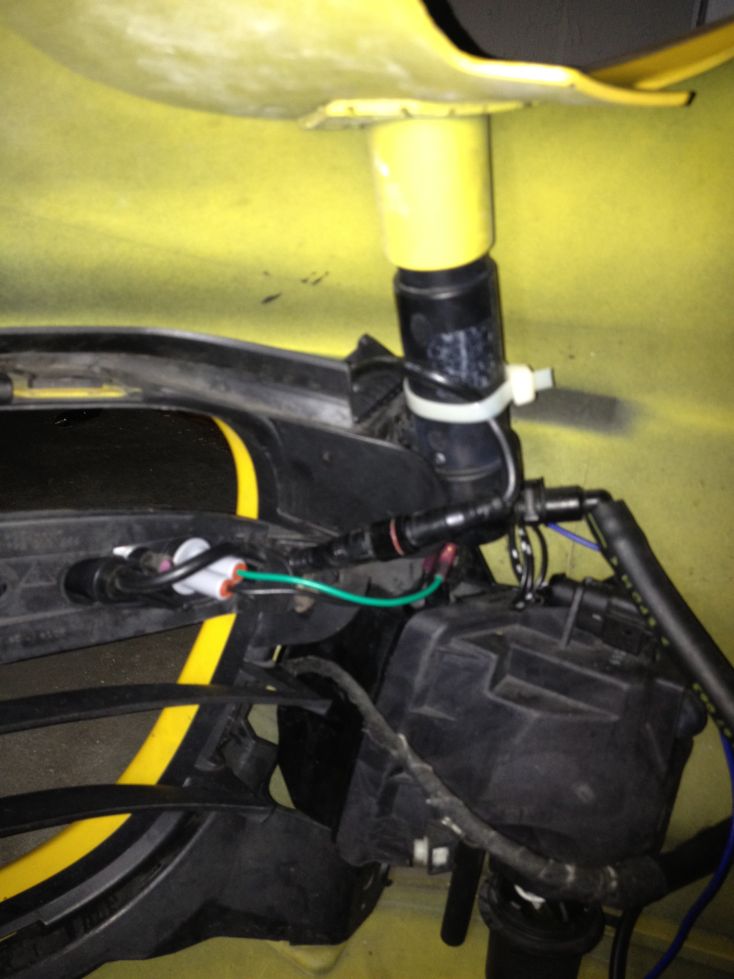
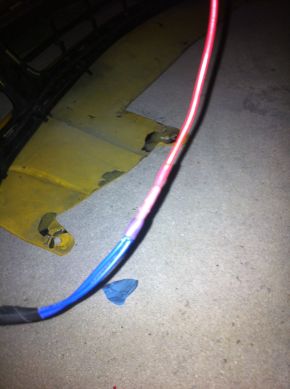
You�ll also see I ran the wire behind the fog light housing and to the bottom section of the bumper.
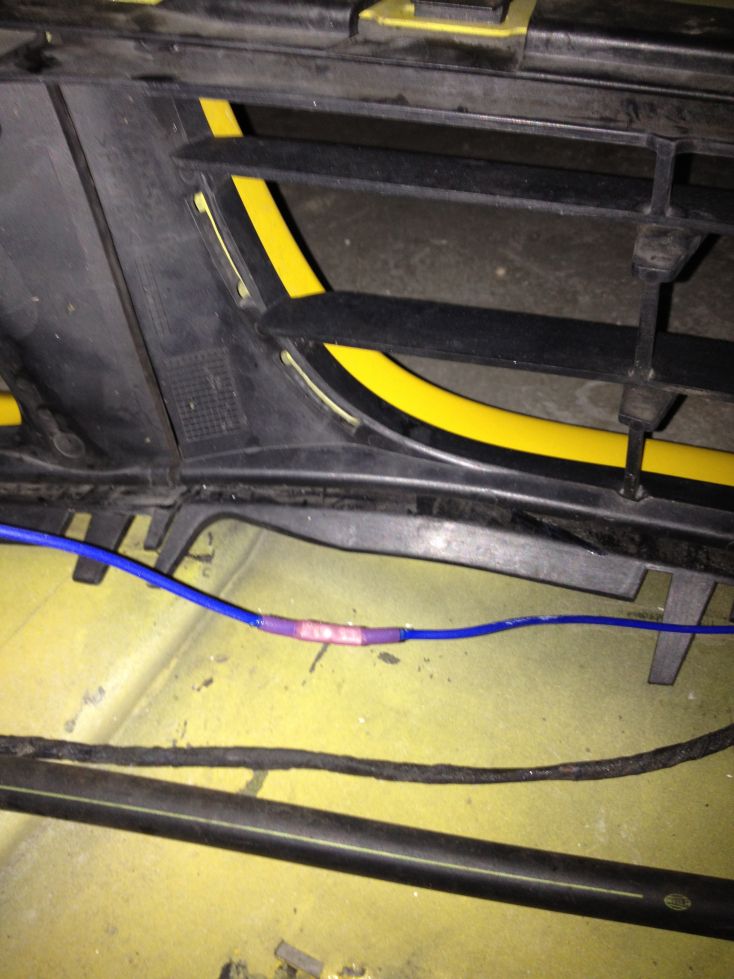
I thought I had better pictures of what I did next but I don't. I routed the blue wire from the passenger side of the bumper over towards the driver�s side, putting it behind an existing set of wires that run from one end to another.
That existing wire bundle will just pull out and I tucked the blue wire beneath it.
The blue wire from the passenger side will not run all the way to the driver�s side LED DRL unit. I just cut a length of the blue wire off from the driver�s side and ran it to the passenger wire, connecting it with another butt connector, crimping it, then using a mini torch on the heat shrink (it has an attachment that mutes the actual flame so I�m not actually shooting fire on it). You can also see the existing wire that I pulled out to tuck the blue wire behind it.
Now you will connect the two blue wires together into one end of a butt connector and connect the wire you�re running to your fuse box to the other end.
I also need to find somewhere to get better quality nitrile gloves one of these days
Now you�ll be running this wire through the wheel well. I left some extra length on it so the bumper could be removed again easily without having to cut the wire running to the LED DRLs. If you want to be fancy you can get some sort of attachment that allows for easy disconnect/reconnect should your bumper have to be removed again.
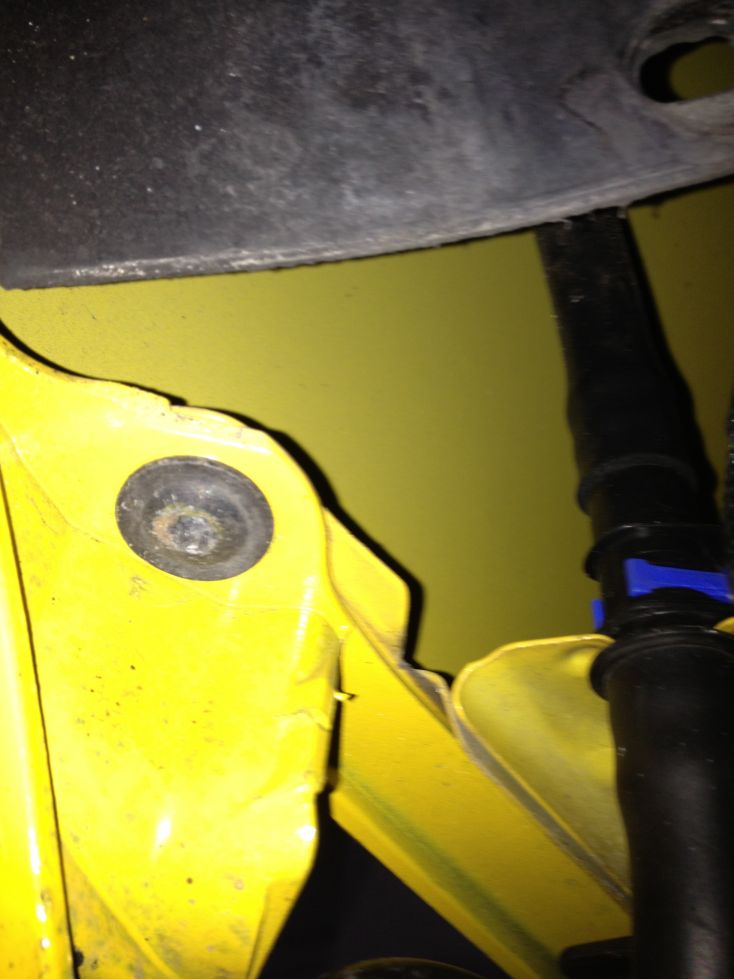
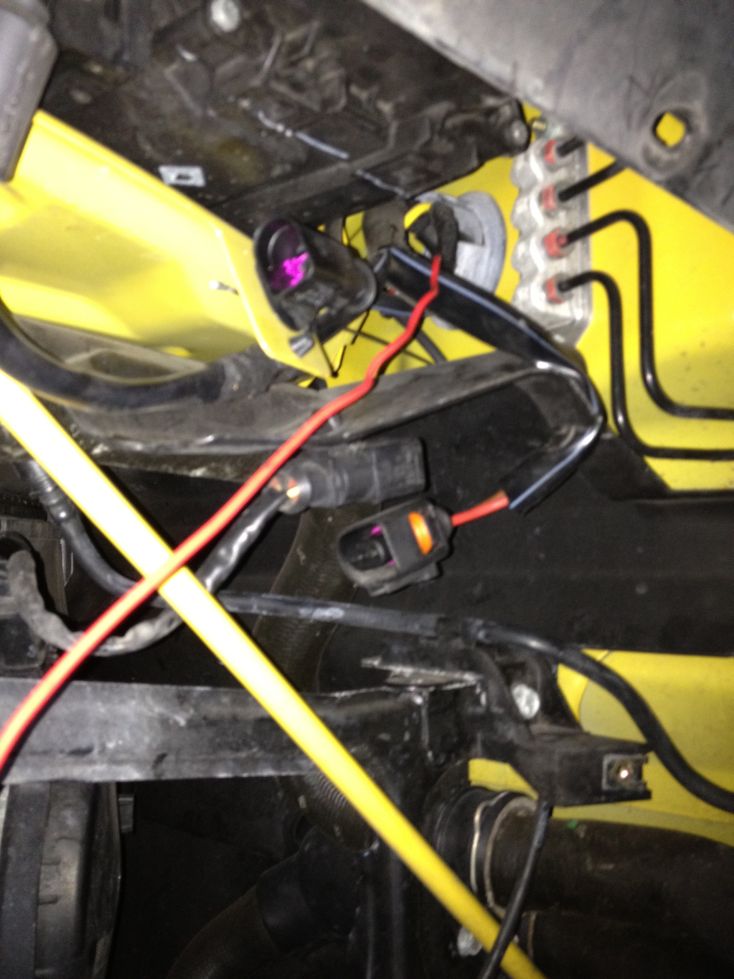
I decided to use a grommet on my car that was used to run a wire to an old radar detector that the previous owner installed.
This is the view from the to of the car with the detector wire also running through the grommet:
Here is a view from the wheel well � you cant see the grommet directly but you can see where the wire is coming from:
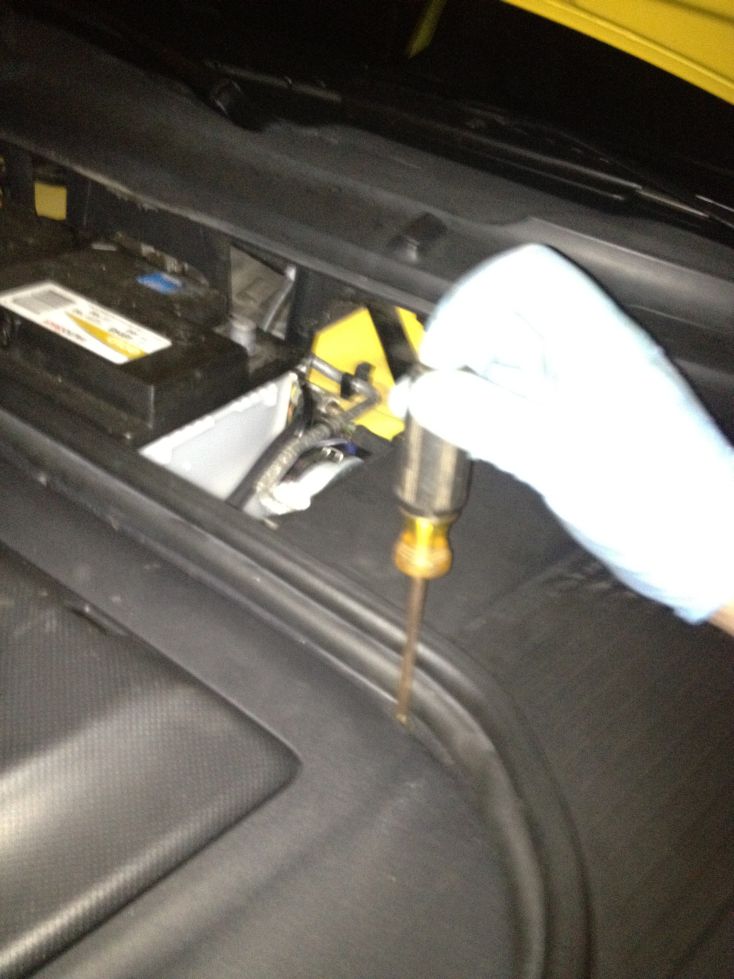
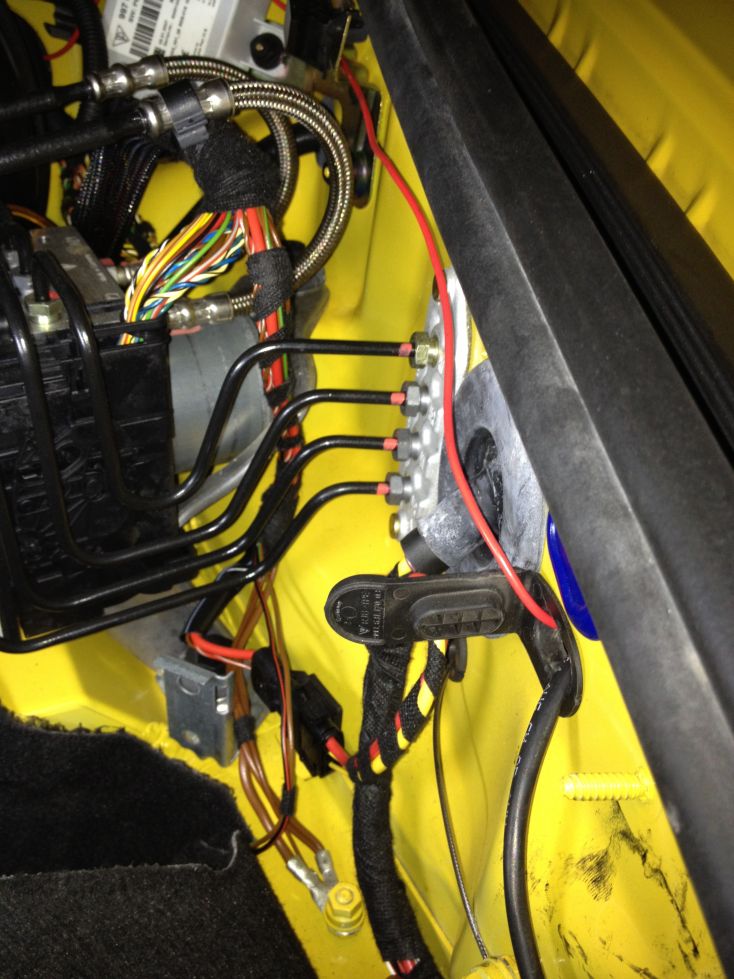
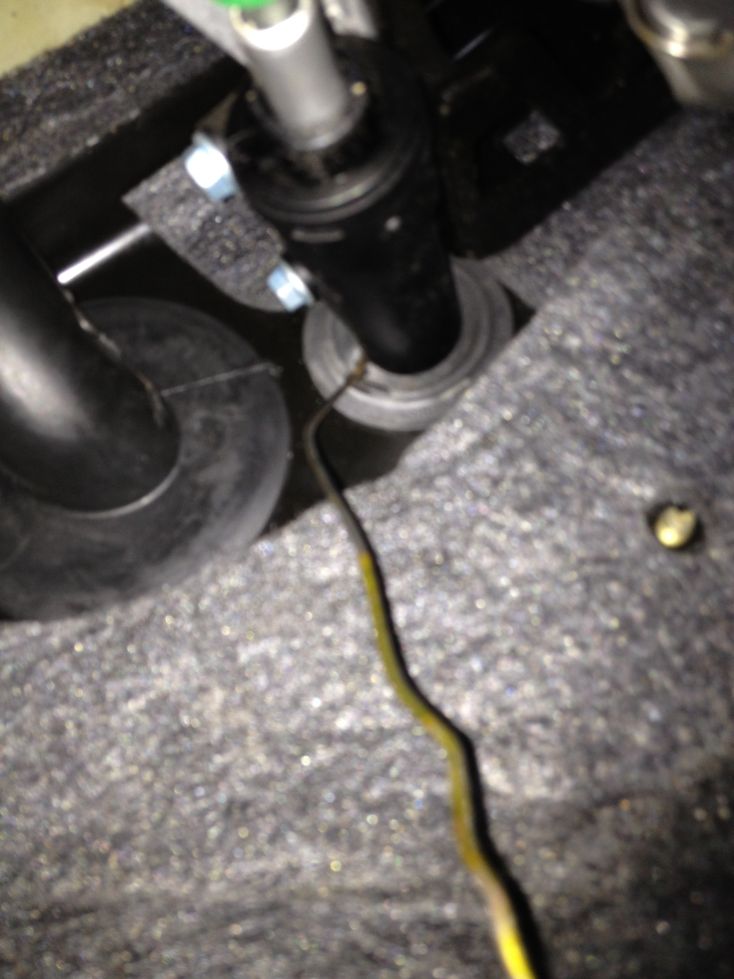
You�ll then run this through a large grommet on the driver�s side of the car, right next to the front control module. This is the first of two grommets you will run the wire through.
I used a screw driver to poke a hole through it. I'd guess a drill would usually be recommended. Make sure you hold the other side of the grommet so you don�t actually push it out.
Here is a picture with my red wire tied to the end of a coat hanger that was used to push the wire through.
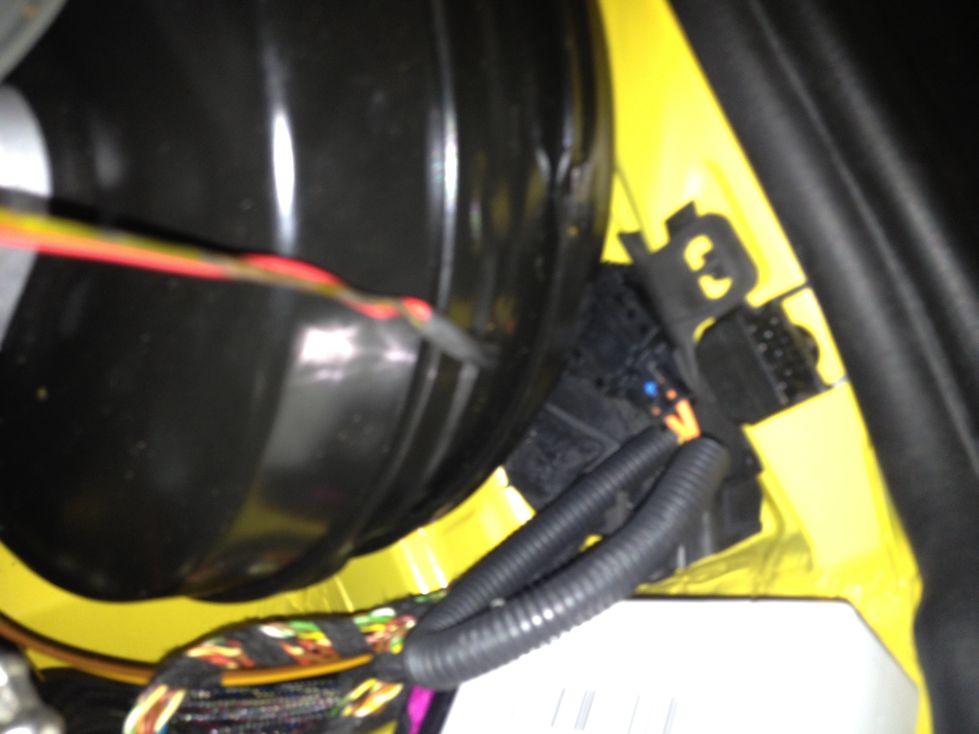
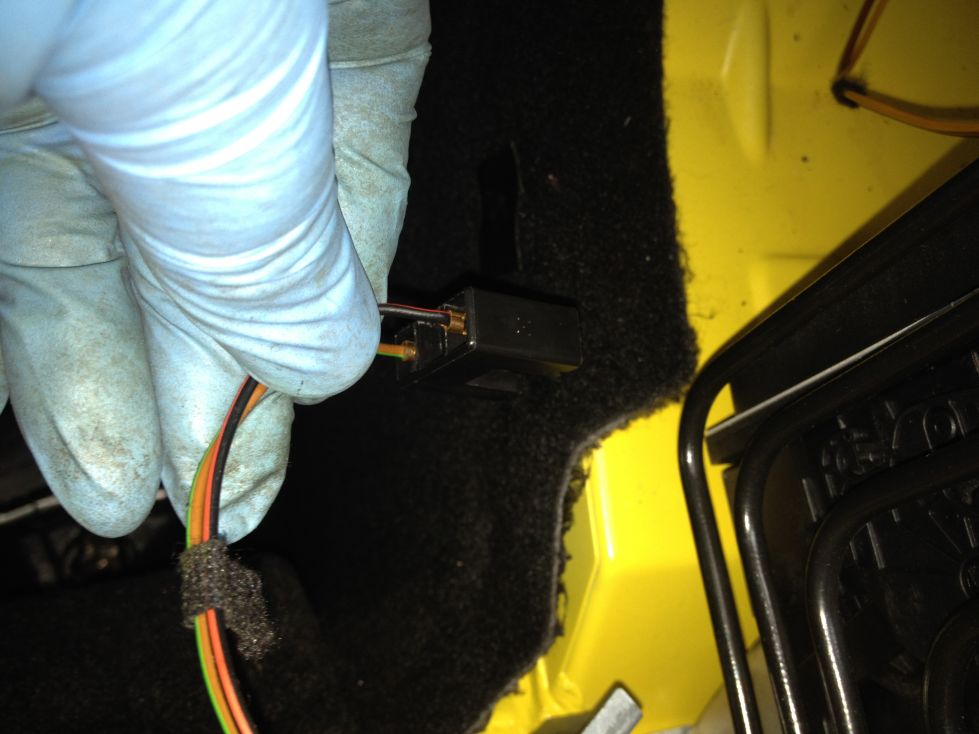
I didn�t get a picture from the top of the car, but here is a picture of the driver�s side footwell where I ran the wire through. It had some sort of black/green tubing going through it on both sides, which you can barely see in the picture. It is a fairly small grommet next to a very large one. I ran a coat hanger up through the footwell and then taped the wire to it and pulled it through.
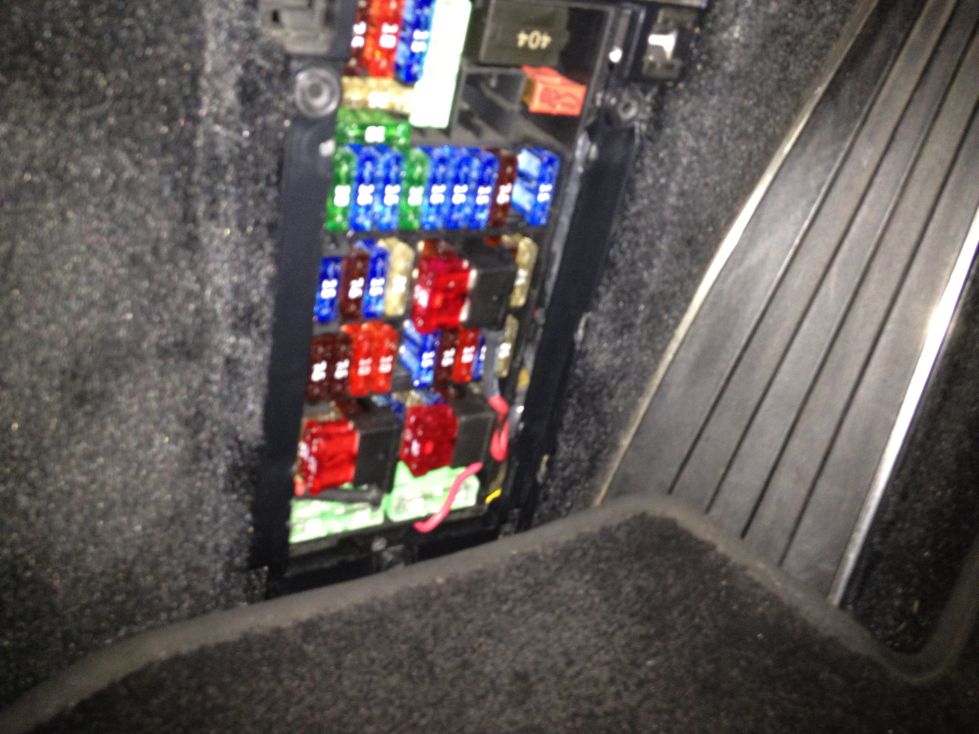
To get the wire to the fuse box nicely, unscrew it (Phillips screws for me) and remove the cover, then run your wire from behind it. I don�t have a picture with it removed.
I used a fuse tap for the LED DRLs. These are really easy to use, you just a wire that hangs off of it to your led drl wire via a butt connector, then plug in your fuses, then plug in the fuse tap. The instructions say to attach it to fuse B8 I believe which you can see in the picture. They were constantly on for me, even when the car was off so I changed them to use another fuse, C5, which is free on my car as it is only present on a tiptronic. As you can see I have two fuse taps already, one for my mobridge (not normal but I did it to troubleshoot interference which I still haven�t resolved) and the other I used to convert the center consoles cigarette lighter to ignition-on power as opposed to being on constantly. Make sure you get the fuse orientation correct. It is possible I didn�t have it right for the B8 fuse but I haven�t messed with it in a few days.
Put everything back together and that�s it!
The official instructions weren't specific enough for me so if you're attempting this one on your own some of the detail here should will help. Everything below is going to assume you've already read the official Agency Power install instructions.
Alright, here we go... the box:
I soldered the wires from the box to to the red/green wire from the LED housing.
All my wire-wire connections were done with butt connectors, crimped, and then I used a mini butanetorch over the heat shrink to seal them up.
We are wheels up!
I didn�t test my lights before removing the bumper, so the next thing I did was disconnect the battery (usually a good idea if you�re doing any electronic work on the car).
Next you have to remove the fender liner for both wheels. This involves removing screws underneath the car and inside the wheel wells.
I think starting to remove the screws underneath the front of car first is best.
Move to the wheel wells and then you can take the entire piece out.
Now you remove the side marker light and disconnect it, fishing the connector back through the hole once it�s out. There is a clip in the back you can push to make it easy to pop out.
That little thin metal piece needs to be pushed down to remove the connector from the light, and to reattach it.
You then need to remove the screw that holds the bumper to the wheel well. On the right is a hose you need to disconnect as well for your headlight washers.
If you do not do this, it will likely pop out on it�s own and you�ll end up with washer fluid coming out. Don't ask how I know.
Push the blue clip off the hose and you can pull the bottom of the hose out.
You�ll only need to do this for driver�s side wheel well.
Next, disconnect the wires from your headlight assembly to the car. I don�t believe the one on the bottom was necessary, only the top one you see in the picture.
Now this part was a pain in the neck to figure out. You have to remove two clips from the top of the bumper. They pull inwards and are difficult to access. I�ve pictured where they are here.
The way I removed them was slipping a zip tie over a part at the end where they are bent, then pulled them out.
I am sure there is a good tool for doing but I didn�t have one.
Next, peel back the rubber cover over the front of the bumper/trunk release lever and remove the 3 screws. I did this before removing the clips but I think it should be done afterwards as there will be less pressure on the clips with the screws securely holding the bumper on.
The bumper should now come off pretty easily. Yes, the sun went down while I was doing this
Good time to remove any debris from the radiator, too.
Now you need to remove the plastic piece you see pictured here. You�ll find a handful of Phillips screws you need to take out.
You�ll have a plastic piece to slide to one side in order to left it out once you�ve removed the screws. No idea what it is called.
Don�t forget to remove the connector running to the light that is part of this liner/trim piece, and then attach it back when you are done, lest you get a fault when you put everything back together.
Now you remove the old light housings from the bumper. There is one screw holding them in, underneath the front corner of each light.
You�ll have a connector to remove that connects to the light. This comes off easily once you pull back on the tab to the rear of it.
Finally you will pop the old female end up off of it�s mount.
You can see this to the right of the picture below with the LED DRLs installed (I didn't get a 'before' picture).
Fitment was perfect.
You can see I put the box from the new LED DRL behind the headlight washer part and then zip tied it on. It is pretty secure back there and won�t be coming out.
You�ll also see I ran the wire behind the fog light housing and to the bottom section of the bumper.
I thought I had better pictures of what I did next but I don't. I routed the blue wire from the passenger side of the bumper over towards the driver�s side, putting it behind an existing set of wires that run from one end to another.
That existing wire bundle will just pull out and I tucked the blue wire beneath it.
The blue wire from the passenger side will not run all the way to the driver�s side LED DRL unit. I just cut a length of the blue wire off from the driver�s side and ran it to the passenger wire, connecting it with another butt connector, crimping it, then using a mini torch on the heat shrink (it has an attachment that mutes the actual flame so I�m not actually shooting fire on it). You can also see the existing wire that I pulled out to tuck the blue wire behind it.
Now you will connect the two blue wires together into one end of a butt connector and connect the wire you�re running to your fuse box to the other end.
I also need to find somewhere to get better quality nitrile gloves one of these days
Now you�ll be running this wire through the wheel well. I left some extra length on it so the bumper could be removed again easily without having to cut the wire running to the LED DRLs. If you want to be fancy you can get some sort of attachment that allows for easy disconnect/reconnect should your bumper have to be removed again.
I decided to use a grommet on my car that was used to run a wire to an old radar detector that the previous owner installed.
This is the view from the to of the car with the detector wire also running through the grommet:
Here is a view from the wheel well � you cant see the grommet directly but you can see where the wire is coming from:
You�ll then run this through a large grommet on the driver�s side of the car, right next to the front control module. This is the first of two grommets you will run the wire through.
I used a screw driver to poke a hole through it. I'd guess a drill would usually be recommended. Make sure you hold the other side of the grommet so you don�t actually push it out.
Here is a picture with my red wire tied to the end of a coat hanger that was used to push the wire through.
I didn�t get a picture from the top of the car, but here is a picture of the driver�s side footwell where I ran the wire through. It had some sort of black/green tubing going through it on both sides, which you can barely see in the picture. It is a fairly small grommet next to a very large one. I ran a coat hanger up through the footwell and then taped the wire to it and pulled it through.
To get the wire to the fuse box nicely, unscrew it (Phillips screws for me) and remove the cover, then run your wire from behind it. I don�t have a picture with it removed.
I used a fuse tap for the LED DRLs. These are really easy to use, you just a wire that hangs off of it to your led drl wire via a butt connector, then plug in your fuses, then plug in the fuse tap. The instructions say to attach it to fuse B8 I believe which you can see in the picture. They were constantly on for me, even when the car was off so I changed them to use another fuse, C5, which is free on my car as it is only present on a tiptronic. As you can see I have two fuse taps already, one for my mobridge (not normal but I did it to troubleshoot interference which I still haven�t resolved) and the other I used to convert the center consoles cigarette lighter to ignition-on power as opposed to being on constantly. Make sure you get the fuse orientation correct. It is possible I didn�t have it right for the B8 fuse but I haven�t messed with it in a few days.
Put everything back together and that�s it!
Last edited by djben; 05-28-2012 at 06:48 PM.
#639
05-28-2012, 08:40 PM
Registered User
Join Date: May 2008
Location: St. Louis Park, MN
Posts: 272
Rep Power: 36
#640
05-28-2012, 10:40 PM
Registered User
Join Date: May 2010
Location: South Beach, Miami
Age: 42
Posts: 338
Rep Power: 48
Funny, you went through the same grommet that I did to get to the fuse box and actually posted more detailed pictures of it that I didn't happen to get.
I installed DDE rings (Angel Eyes) in my M3 about 6 years ago now. One of the cool things I recall doing with it was tapping into a wire for the interior lights which activated and deactivated them. The rings will turn on and off based on the car locking and unlocking - pretty cool. I think it was just a matter of adding a second activation wire with some sort of relay in the mix somewhere.
Wonder if we can find a way to get the AP DRLs working like that? It would be a nice touch
Last edited by djben; 05-28-2012 at 10:55 PM.

#642
05-29-2012, 07:29 AM
Registered User
Join Date: Feb 2007
Location: Fort Lauderdale, Florida
Posts: 374
Rep Power: 32
#643
05-29-2012, 09:29 AM
I just got back from a weeks vacation. Rob my partner I believe has spoken to some of you with issues. I will review everything today and respond to anything and everything today. Thank you for your patience.

#645
05-29-2012, 11:14 AM
Kudos to my partner Rob for helping you guys out while I was on vacation all last week. Still catching up here and will respond later. If you want to give Rob a shout out, email him rob@vividracing.com if you have not already done so.