New Product, Valentine One Mounting Bracket (G Bracket) for Porsche 997 by G Rides
#31
 01-08-2010, 03:46 PM


Join Date: Aug 2006
Location: San Luis Obispo, CA
Posts: 233
Rep Power: 0 

Thank you. We will have hardwire kits with the Add-A-Fuse and Ground Connector already installed available. Have a couple now with more in the works. The Add-A-Fuse are great, allows for no cutting or splicing as it just plugs right into the fuse panel like a standard fuse would.
#32
01-09-2010, 06:05 PM
Join Date: Aug 2006
Location: San Luis Obispo, CA
Posts: 233
Rep Power: 0
Removing and reinstalling the A-Pillar Cover on the Coupes is a little tricky, Cabriolet's are much easier. Here are some pictures and info to help with the Coupes to help when Hardwiring into your Fuse Panel.
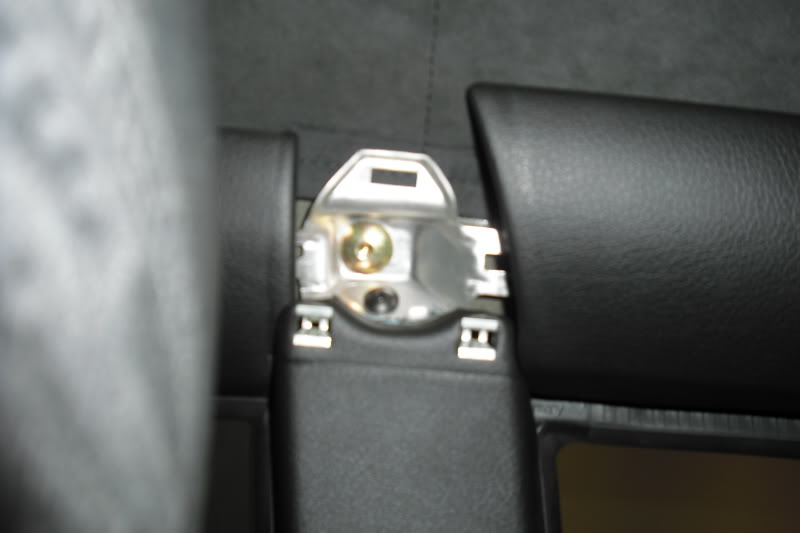
Start by removing the Hanger Holder Piece, pry from the base, then lift up to release the tab. I try to pry up with just my fingers, if that doesn't work, try to use some type of plastic wedge rather than a metal screwdirver.
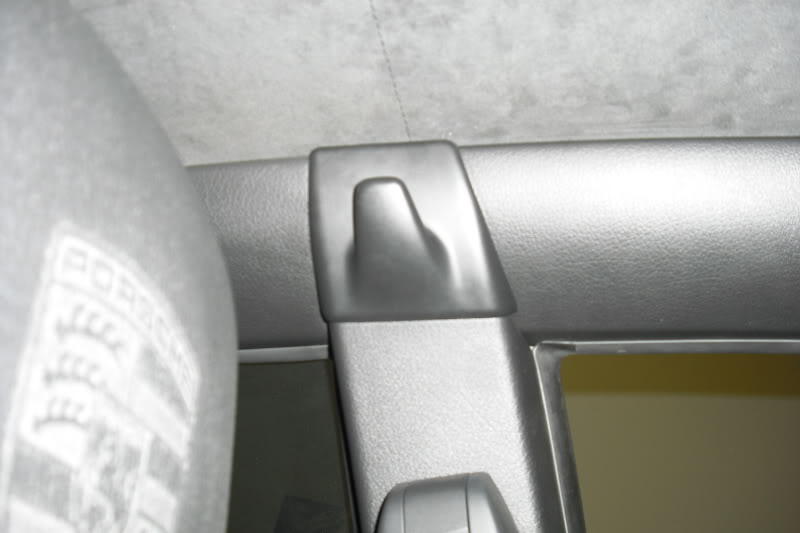
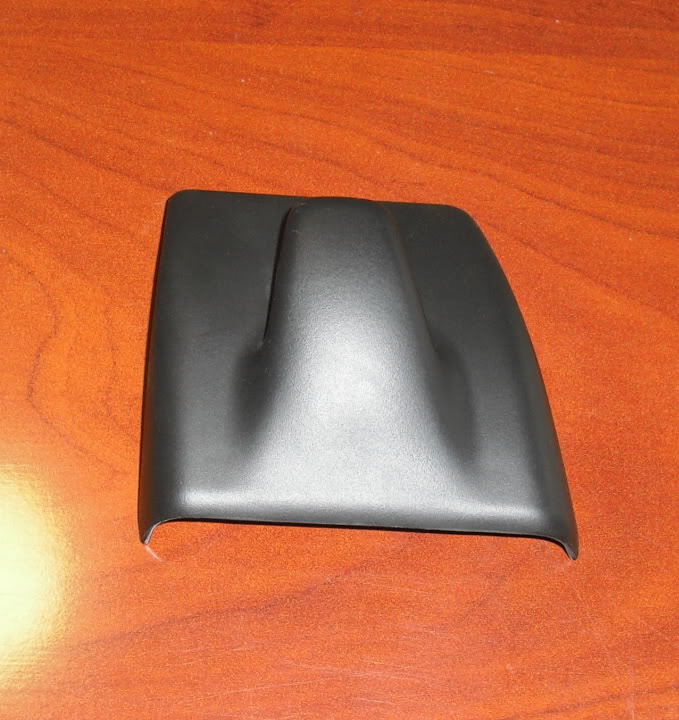
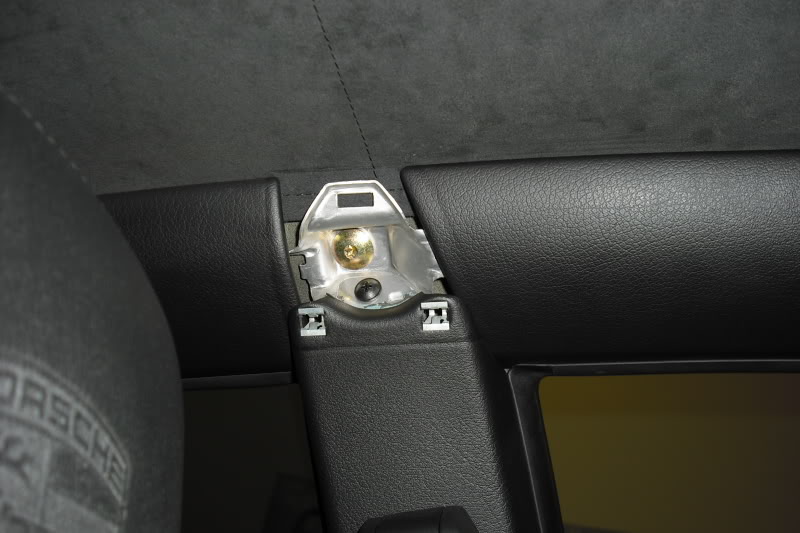
Please have a look at these to get an idea how the Hanger Cover is held in. The 2-bottom tabs pop in and out of place, the top is more hinged.
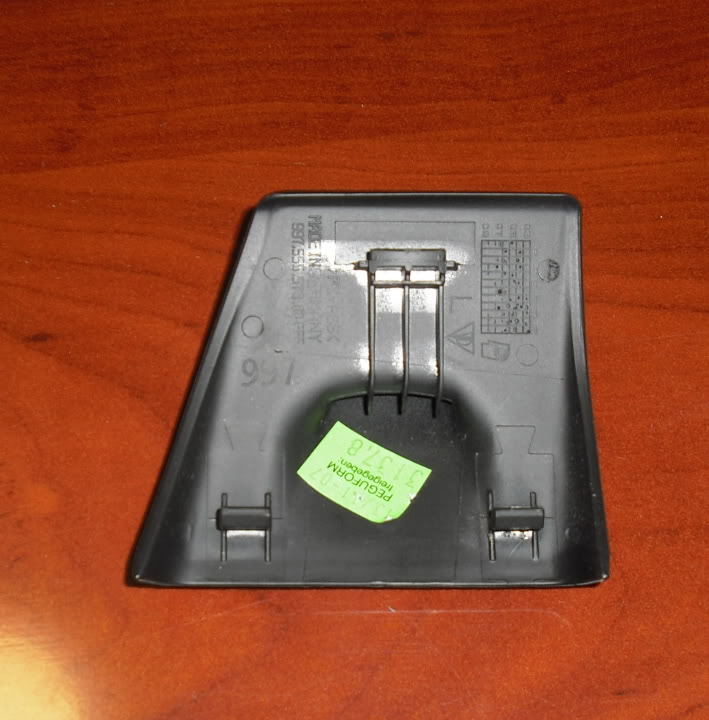
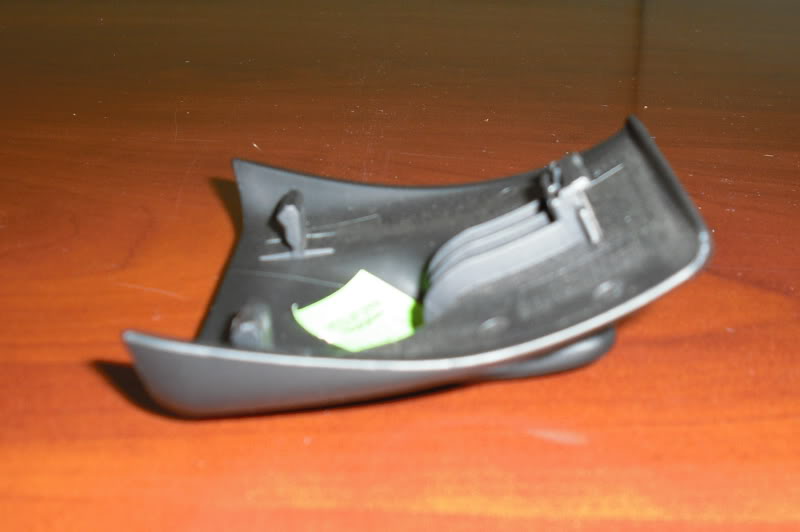
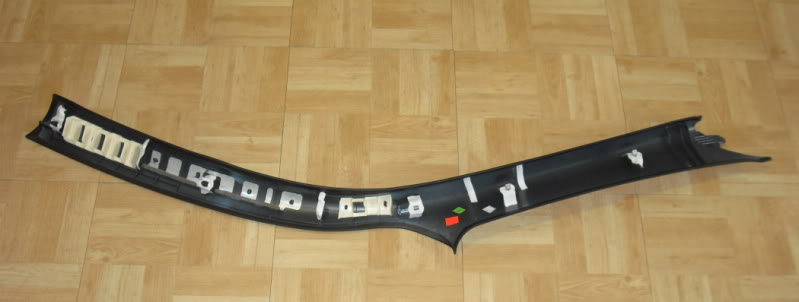
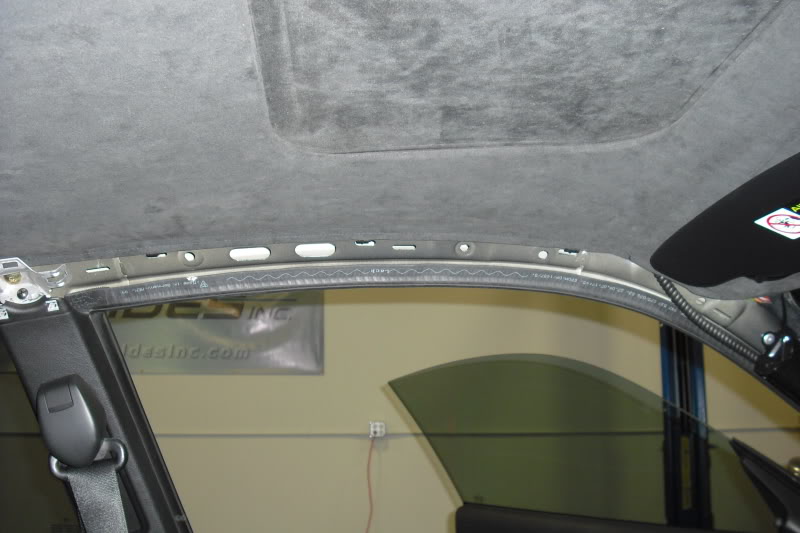
Here is the A-Pillar removed so you may see what holds it in place. No screws or bolts, just poped in and out of place with metal prongs (5 Prongs total) and a tab at the base that inserts by the dash board.
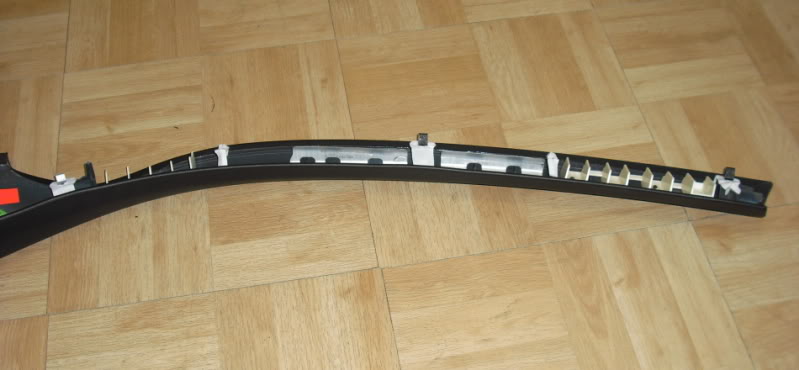
This portion runs along the windshield, note the 2-Prongs. Also note the tab that inserts into a slot by the dashboard.
This portion runs along the headliner, note the 3-Prongs.
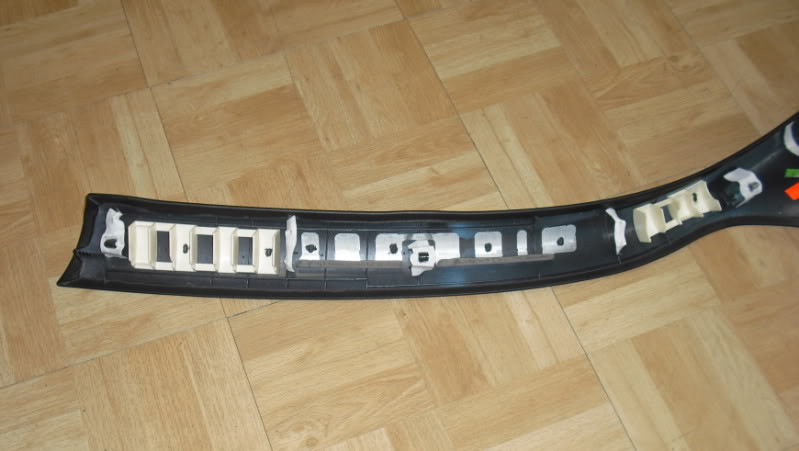
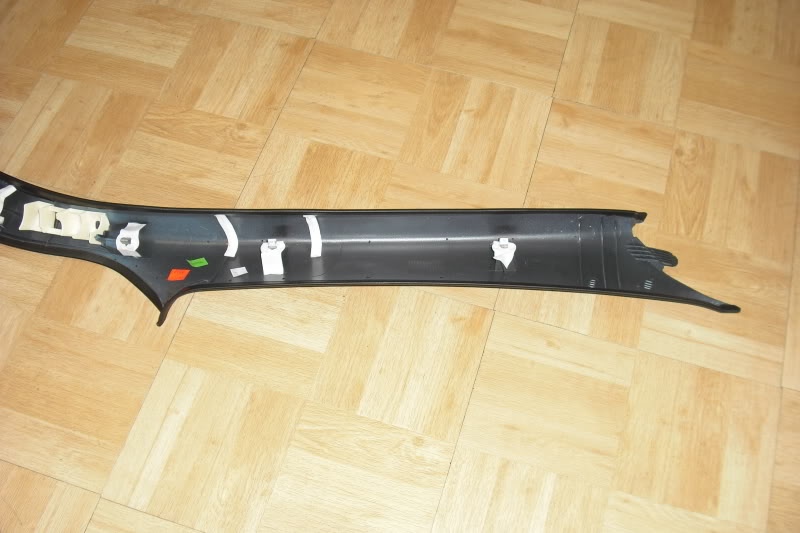
Please note this Plastic Post, which insert in hole towards the top of the windshield. It's tricky to see when installing, but look to make sure this is going into it's home so you don't break it off or have to wonder why your A-Pillar Cover doesn't seem to be fitting right.
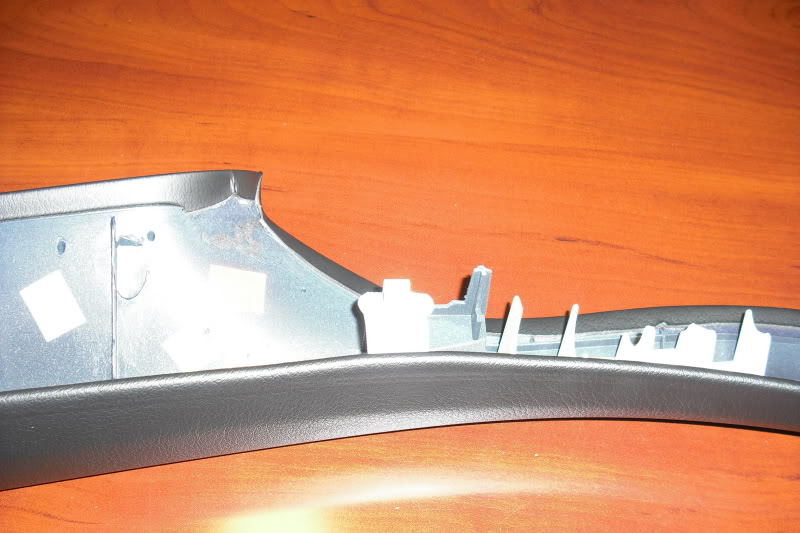
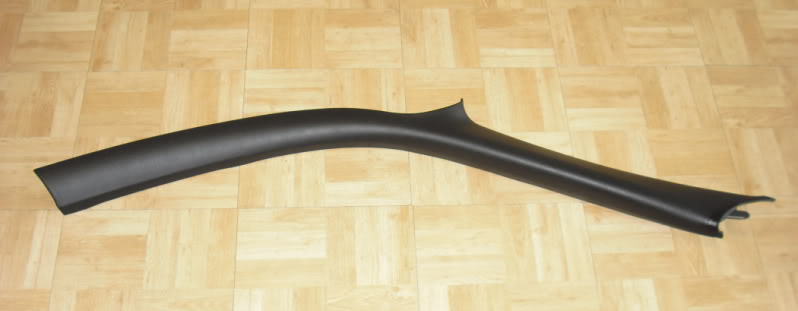
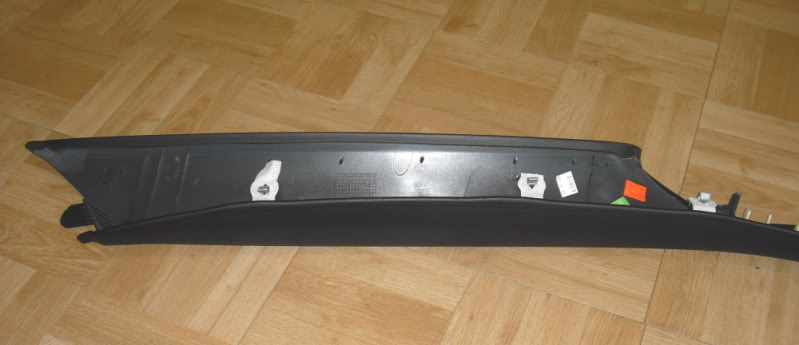
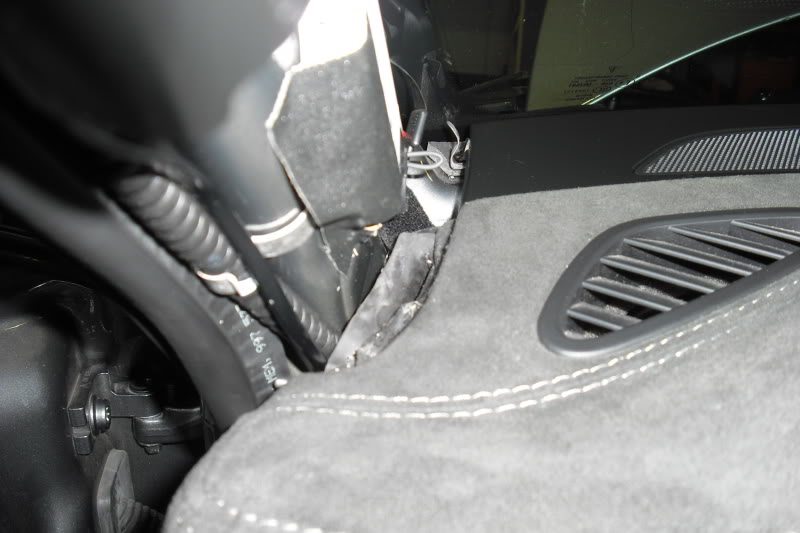
Ok so once the Hanger holder is off, work your fingers under the A-Pillar cover and start to pull those prongs free from their homes. I start around the top near where the headliner and windshield meet. Once the Prongs are pulled free, which will make a little noise, carefully slip the back of the A-Pillar Cover free from the B-Pillar Cover, it just sits behind it a little as seen in this picture.
This is with the A-Pillar Cover slipped by the B-Pillar Cover. You may have to bow the A-Pillar Cover a little to work it free here and reinstall, just be carefull and take your time. You don't need to be very forcefull here.
Once the Prongs are released and you have the back of the A-Pillar Cover past the B-Pillar Cover, carefully lower the A-Pillar cover down towards the floor (watch out for your headrest and seat belt). Lowering the A-Pillar Cover down now frees the tab at the front bottom portion of the A-Pillar Cover where it inserts into the slot and groove by the dash board.
Once the bottom portion of the A-Pillar Cover is free from the dash, just carefully take it out of the cabin as it should be totally free now.
Reinstalling is basically reverse order. Insert into dash, sneak by B-Pillar Cover, line your Prongs and that plastic post up. Once things are lined up, start to press back in place, will make a little noise again. The first time you do this it can be a little intimidating but it's not that bad. The biggest thing is being patient and somewhat gentle, the most force needed should be to release the Prongs. Other than that you should not be using a lot of force. If you are not real comfortable with doing this and you're not too far from San Luis Obispo, CA you're welcome to bring your Porsche over to G Rides .
.
Start by removing the Hanger Holder Piece, pry from the base, then lift up to release the tab. I try to pry up with just my fingers, if that doesn't work, try to use some type of plastic wedge rather than a metal screwdirver.
Please have a look at these to get an idea how the Hanger Cover is held in. The 2-bottom tabs pop in and out of place, the top is more hinged.
Here is the A-Pillar removed so you may see what holds it in place. No screws or bolts, just poped in and out of place with metal prongs (5 Prongs total) and a tab at the base that inserts by the dash board.
This portion runs along the windshield, note the 2-Prongs. Also note the tab that inserts into a slot by the dashboard.
This portion runs along the headliner, note the 3-Prongs.
Please note this Plastic Post, which insert in hole towards the top of the windshield. It's tricky to see when installing, but look to make sure this is going into it's home so you don't break it off or have to wonder why your A-Pillar Cover doesn't seem to be fitting right.
Ok so once the Hanger holder is off, work your fingers under the A-Pillar cover and start to pull those prongs free from their homes. I start around the top near where the headliner and windshield meet. Once the Prongs are pulled free, which will make a little noise, carefully slip the back of the A-Pillar Cover free from the B-Pillar Cover, it just sits behind it a little as seen in this picture.
This is with the A-Pillar Cover slipped by the B-Pillar Cover. You may have to bow the A-Pillar Cover a little to work it free here and reinstall, just be carefull and take your time. You don't need to be very forcefull here.
Once the Prongs are released and you have the back of the A-Pillar Cover past the B-Pillar Cover, carefully lower the A-Pillar cover down towards the floor (watch out for your headrest and seat belt). Lowering the A-Pillar Cover down now frees the tab at the front bottom portion of the A-Pillar Cover where it inserts into the slot and groove by the dash board.
Once the bottom portion of the A-Pillar Cover is free from the dash, just carefully take it out of the cabin as it should be totally free now.
Reinstalling is basically reverse order. Insert into dash, sneak by B-Pillar Cover, line your Prongs and that plastic post up. Once things are lined up, start to press back in place, will make a little noise again. The first time you do this it can be a little intimidating but it's not that bad. The biggest thing is being patient and somewhat gentle, the most force needed should be to release the Prongs. Other than that you should not be using a lot of force. If you are not real comfortable with doing this and you're not too far from San Luis Obispo, CA you're welcome to bring your Porsche over to G Rides
.
#33
02-09-2010, 06:34 PM
Join Date: Aug 2006
Location: San Luis Obispo, CA
Posts: 233
Rep Power: 0
I'd like to thank 6Speed Member BartN (TX) for helping us out. BartN (TX) was kind enough to test fit our 997 G Bracket for Auto Dimming Mirror in his Manual Mirror equipped 997 GT3. From that we've learned the 997 Manual Dimming Mirror equipped cars will require a different G Bracket. So please note that our current G Bracket will not fit the 997 Manual Dimming Mirror. Thanks again BartN (TX).
997 Auto Dimming Mirror G Brackets are in-stock, please let me know if you have any questions or how we may be of service.
997 Auto Dimming Mirror G Brackets are in-stock, please let me know if you have any questions or how we may be of service.
#34
02-09-2010, 07:15 PM
Registered User
Join Date: Jul 2003
Location: Highland Village, TX (near Dallas)
Posts: 750
Rep Power: 52 I'd like to thank 6Speed Member BartN (TX) for helping us out. BartN (TX) was kind enough to test fit our 997 G Bracket for Auto Dimming Mirror in his Manual Mirror equipped 997 GT3. From that we've learned the 997 Manual Dimming Mirror equipped cars will require a different G Bracket. So please note that our current G Bracket will not fit the 997 Manual Dimming Mirror. Thanks again BartN (TX).
997 Auto Dimming Mirror G Brackets are in-stock, please let me know if you have any questions or how we may be of service.
997 Auto Dimming Mirror G Brackets are in-stock, please let me know if you have any questions or how we may be of service.
For a manual mirrored car it does need to come up significantly to avoid obstructing the driver's view. I'm sure the manual version Gary's going to produce will fix that issue.
Finally, I'd like to add that working with Gary was a pleasure and and he couldn't have been any more easy to work with or more accomodating. Thanks Gary.
#36
02-11-2010, 04:33 PM
Join Date: Aug 2006
Location: San Luis Obispo, CA
Posts: 233
Rep Power: 0 I like to add my impression of the bracket. The quality was first rate. It fit in nicely with the interior. Installation was a complete non-event. I had the trim piece unclipped and the unit mounted in 3-5 minutes and that's without knowing what I was doing.
For a manual mirrored car it does need to come up significantly to avoid obstructing the driver's view. I'm sure the manual version Gary's going to produce will fix that issue.
Finally, I'd like to add that working with Gary was a pleasure and and he couldn't have been any more easy to work with or more accomodating. Thanks Gary.
#37
02-12-2010, 09:59 AM
[QUOTE=Gary@G Rides;2649181]
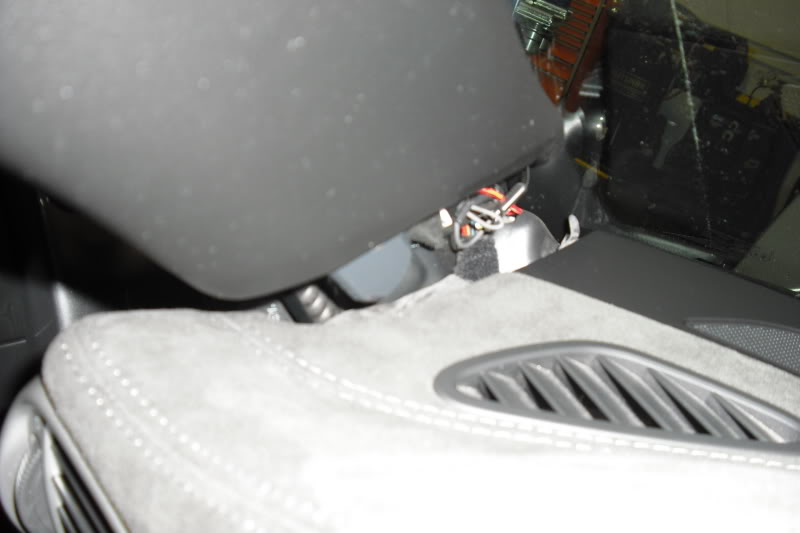
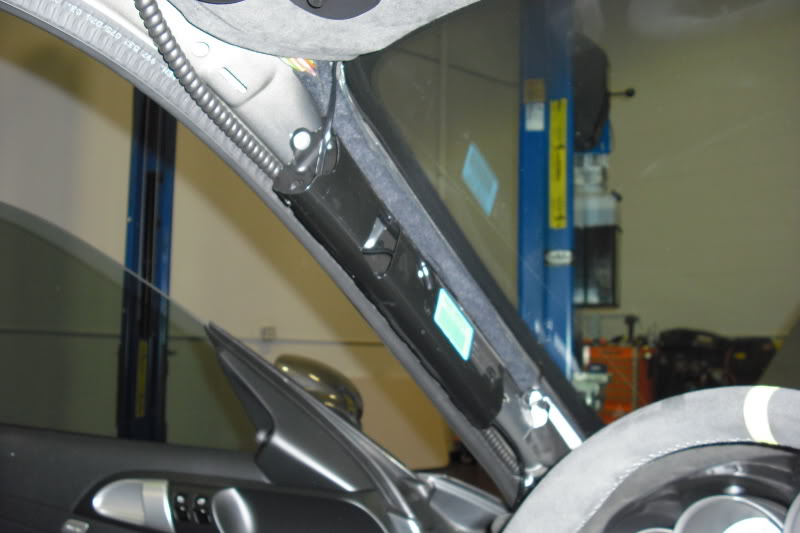
Route the hardwire as seen and 2-small black zip ties tiddy the hardwire cord well as seen and are fairly descreet.
Gary - how do you actually hardwire the unit? I have the auto-dimming mirrors in my car, but would like to know how my V1 would connect to it before ordering this great unit.
Thanks!
Route the hardwire as seen and 2-small black zip ties tiddy the hardwire cord well as seen and are fairly descreet.
Gary - how do you actually hardwire the unit? I have the auto-dimming mirrors in my car, but would like to know how my V1 would connect to it before ordering this great unit.
Thanks!
#38
02-12-2010, 10:16 AM
Here is a link to info regarding how to hardwire a V-1:
New Product, Valentine One Mounting Bracket (G Bracket) Made for 997 by G Rides
Scroll down through the thread and there is a good write-up and pictures. I have this bracket and the hardwire installed on my 997TT and it works very well.
Ken
New Product, Valentine One Mounting Bracket (G Bracket) Made for 997 by G Rides
Scroll down through the thread and there is a good write-up and pictures. I have this bracket and the hardwire installed on my 997TT and it works very well.
Ken
#39
02-12-2010, 10:31 AM
Thank you. We will have hardwire kits with the Add-A-Fuse and Ground Connector already installed available. Have a couple now with more in the works. The Add-A-Fuse are great, allows for no cutting or splicing as it just plugs right into the fuse panel like a standard fuse would.
#40
02-15-2010, 12:59 PM
Join Date: Aug 2006
Location: San Luis Obispo, CA
Posts: 233
Rep Power: 0
I have one available right now.
#42
02-15-2010, 01:22 PM
Join Date: Aug 2006
Location: San Luis Obispo, CA
Posts: 233
Rep Power: 0
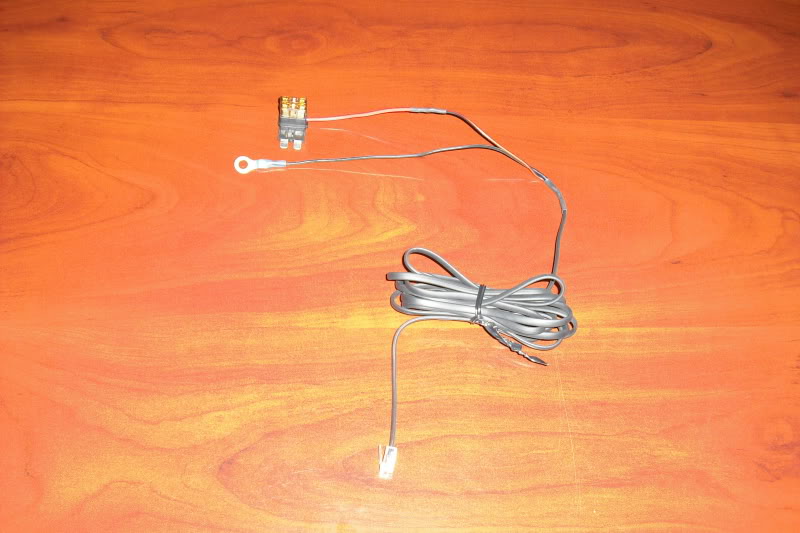
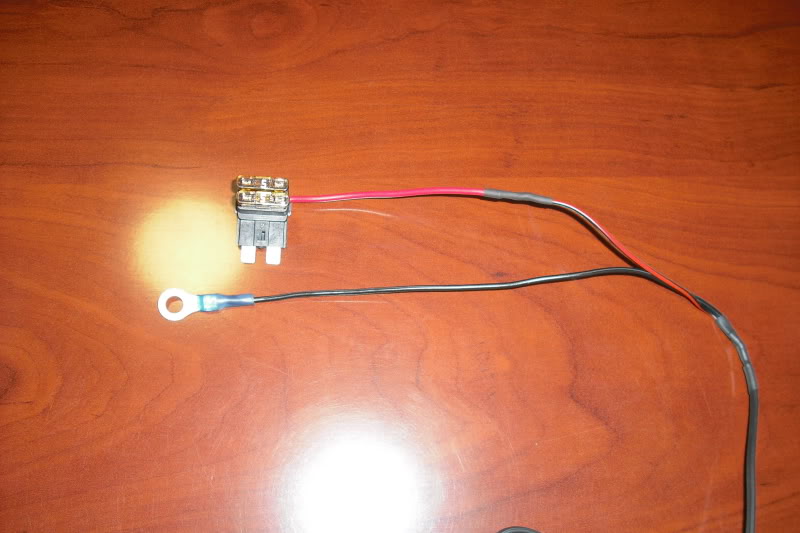
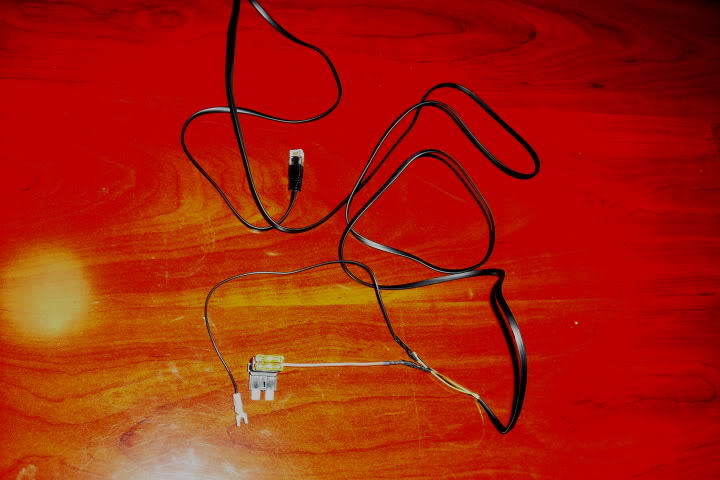
Would be the cord with an Add-A-Fuse, soldered and shrink wrapped (with 2-5 Amp Fuses), a Ground Terminal, much like what you see in this picture. The most difficult part of the install would be to run the cord, once in place it's pretty much plug-n-play.
#43
02-16-2010, 02:08 PM
Join Date: Aug 2006
Location: San Luis Obispo, CA
Posts: 233
Rep Power: 0
Here's a couple pictures of our latest Hardwire Kit. This one is going out today but we'll have more available soon. Add-A-Fuse is soldered and shrink wrapped, ground post is a WeatherProof piece and the fuses are included. Makes for a clean install of your Radar Detector without cutting or splicing on your car.