When you click on links to various merchants on this site and make a purchase, this can result in this site earning a commission. Affiliate programs and affiliations include, but are not limited to, the eBay Partner Network.
Replacing 09 plastic backed fascia with metal backed piano black fascia
Hi all,
So I'm onto a new project, I recently got a piano black fascia from Ebay and, knowing that it was all metal, I had to get the fitting kit from am bits:
Says you need this kit if switching from plastic to metal, so I thought it was a bit of a no brainer.
I started by prying off the fascia, a 5 minute process:
Just a trim tool, be careful with the leather and pull in and up.
Remember to push these metal brackets aside first!
This allows the nav cover to detach from the unit and free float. Makes it super easy to pull everything out.
Just pull from here, there's 4 attachment points. They're a bit tough but means to be pulled from.
Disconnect all cables... piece of cake.
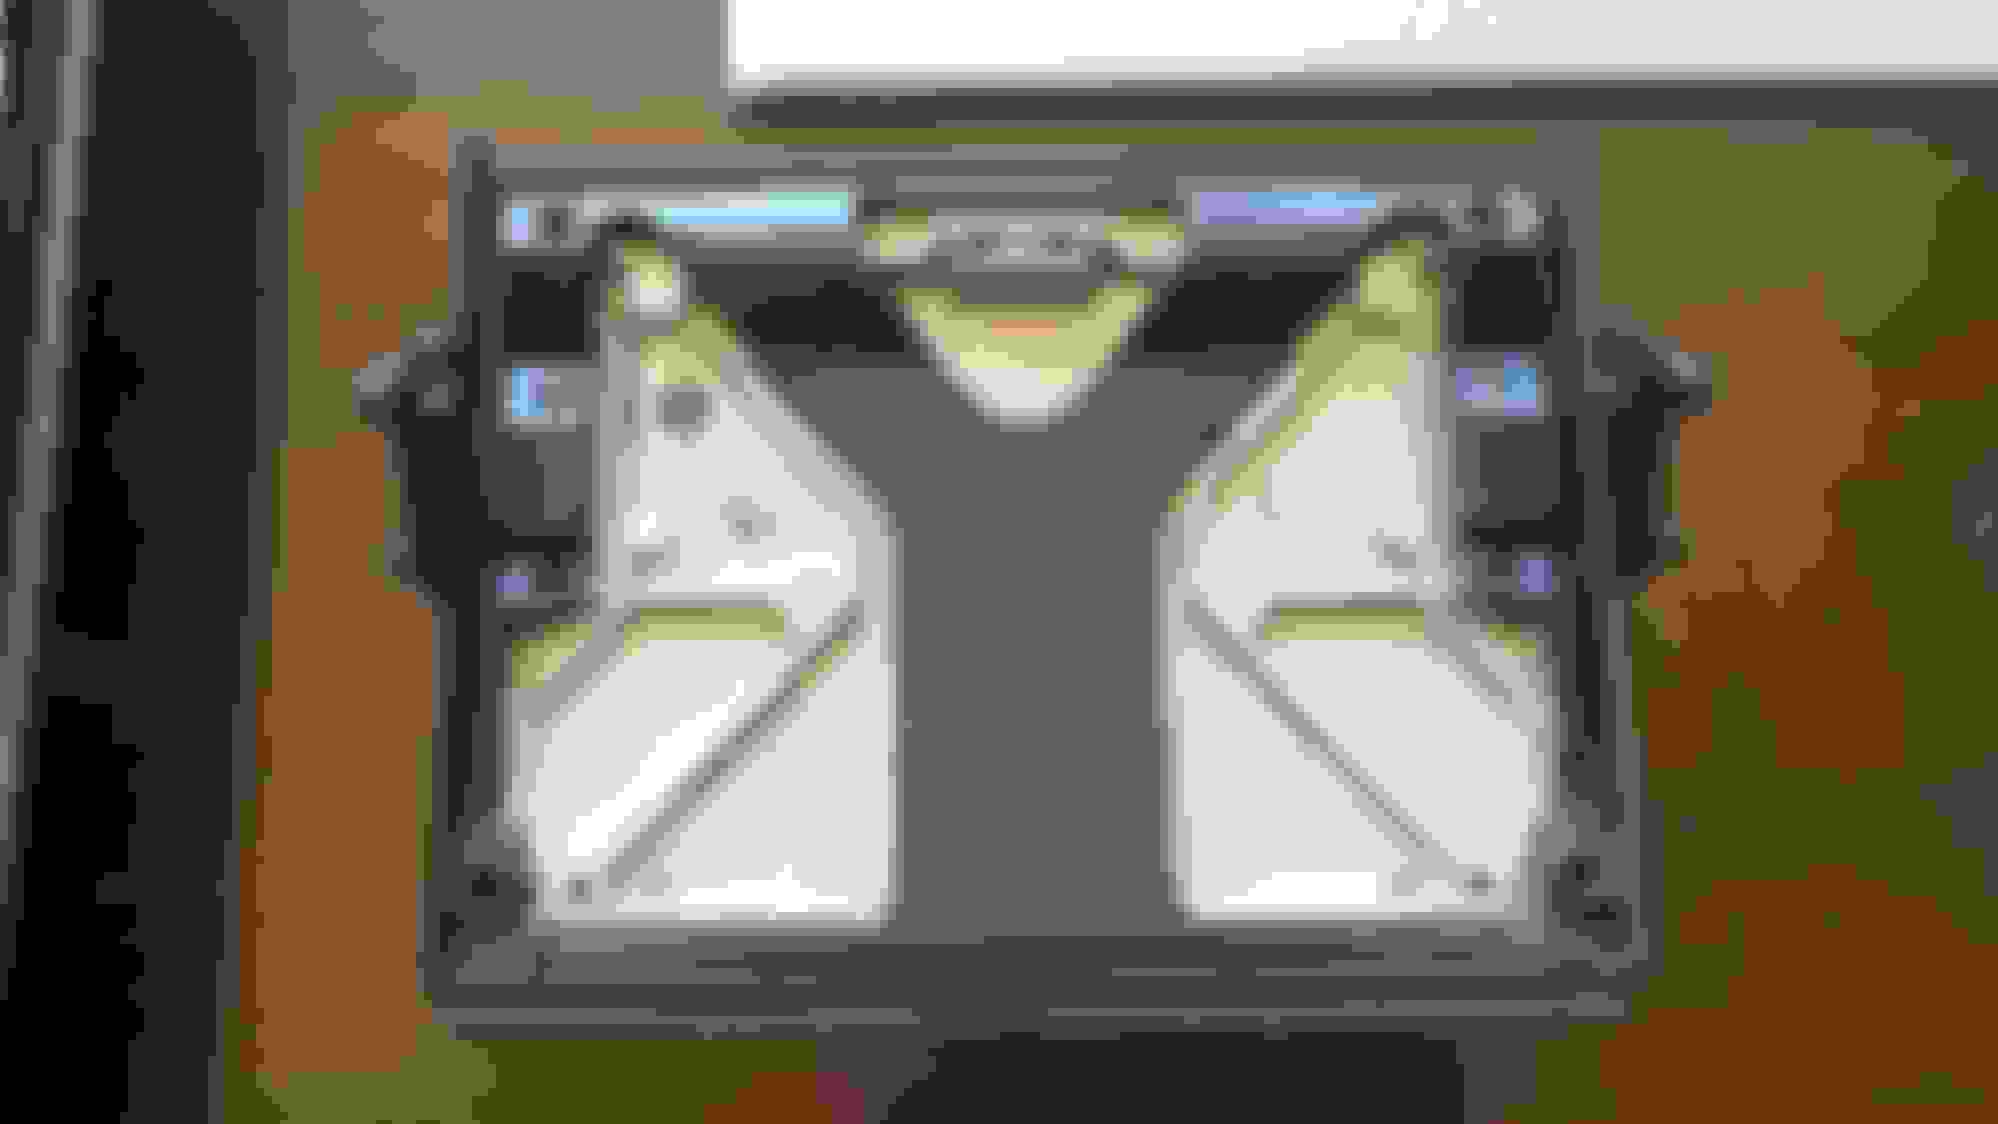
old fascia is out. New one which is metal backed is on the right. You can see there's no way to mount the navigation, vents or the buttons to it as it comes!
Align the new parts from the kit... easy
These go on the side...
And this one goes on the bottom.
Some more parts. Honestly, for these you could get them transferred from the old fascia, or so it seems.
This part is curious. The old one is wrapped in felt, the new one is plastic. I'm using the old one of course.
Wait a minute... these are the screws that came with the kit!
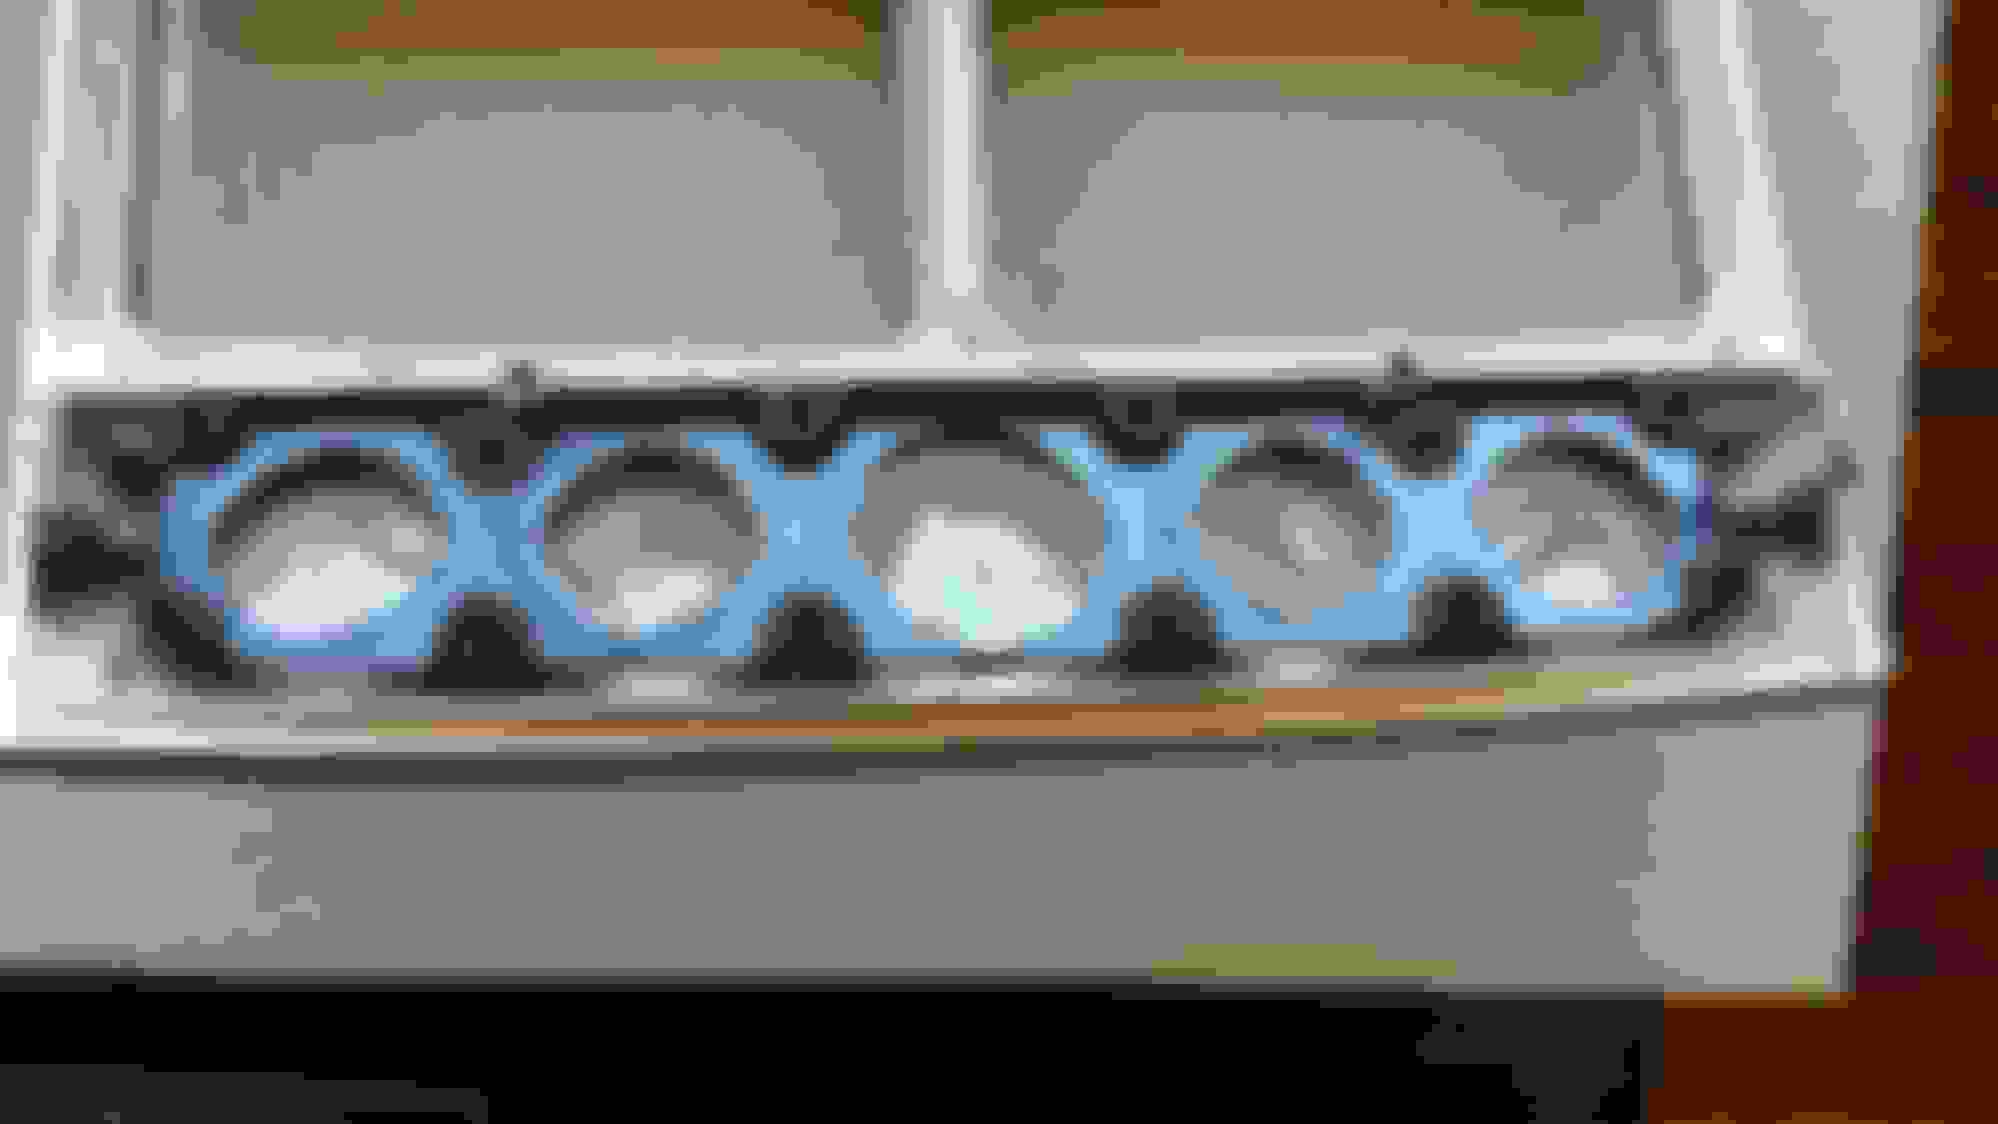
And this is the fascia... I don't see any threads?!
Contrast to the plastic fascia, which has not only threads, but...
These are the screws from the old fascia! These won't work with a metal one.
So at this point I'm stuck. I can't seem to mount anything! I can't figure out the attachment strategy. The screws that came with the kit are too short, the new fascia has no threads, and the old screws won't work.
1 - The tiny screws eat into the metal, so they will work as an attachment strategy
2 - Unfortunately there's only 22 screws on the kit, I'd need 29
3 - The screws are still too short for most attachment points
4 - The old screws will also make threads into the metal but this will happen:
Sooo....
Fortunately, one less crew on the old fascia is doable since it has an overabundance of screws. It'll have to do for now. I re-mounted all the old hardware, since I also notice that the start button won't fit either.
Obviously I'm missing something here. Whatever it is, it's not plug-and-play and I already screwed up enough (pun intended). I can't get the broken screw out but even if it stays stuck in there, I was trying with the hole for the stopper so it's not exactly a structural part, meaning I can change the attachment strategy or something if needed.
I might just take this to my mechanic for him to do. Very frustrated with this one.
Thanks for the write-up, I hope you figure it out. If you decide to go back to the plastic one there is one upside -- I have the piano lacquer version and it shows a ton of dust. One more thing to keep clean on my black car.
Been trying to pry off that screw to no avail... :/
I might ask my mechanic to do this, it's probably a 30' job if you know what you're doing.
I wish there was some kind of documentation about doing this upgrade.
To remove the broken screw, try grabbing very tightly onto the little bit that is still exposed with a small pair of vise grip locking pliers. I have a pair of needle-nose vise grips that work really well for scenarios such as this.
Also, you say the start button does not fit. Did you accidentally get the one for pre-09 cars that have an actual start button instead of an ECU?
Yeah, tried with a pair of pliers but they didn't work, not enough to grab onto. Not a huge deal right now, since I still couldn't install the darn thing since some stuff doesn't fit and the screws don't fully make sense.
I got a fascia for a new ECU car, the start button/dock fits through the fascia but not through the plastic attachment/bracket.
My guess is that an Aston mechanic will know exactly how to fit this...
That's why I suggested needle-nose vise grips, not standard pliers. They have to ability to lock onto a small nub and turn it. You can't do it with a regular pair of pliers because they can't get enough grip.
Also, as I said before, you probably got the mounting kit for the older style fascia that isn't meant for the ECU docking station. That would explain why you also got the wrong screws and the non-felt covered bracket.
Ahhhhh I get you now... like these?
I don't have those, might have to go buy them.
Darn... The kit was like 60 pounds or so. I hope it's correct and not me buying the wrong one. Even if that was the case, think I can at least use some of it, like the hinge mounts for the navi backing, but honestly don't know where/how to get the rest of the parts, assembly instructions, etc.
I think it's probably just one piece of plastic to mount the ECU and buttons that I'm missing, and some screws maybe.
Wow thanks for showing the disassembly process! My piano black fascia has a thin crack running from the upper left corner of the nav opening. Haven't yet decided how to fix.
Why can't you use the docking station bracket from the original fascia?
The screws wouldn't be long enough, if they're wide enough for one they wouldn't for the other, and I'm not even sure both fascias are the same depth, meaning the holes for everything seem deeper on the metal one.
Yes, but like I said, I think you got the wrong screws (along with the wrong bracket). If the only problem preventing you from using the older bracket is the length of the screws then a trip to your local Ace Hardware store might be in your future. Either that or you can go to Lowe's and buy a screw stretcher. It should be in the same aisle as the cable and wire stretchers.
Yes, but like I said, I think you got the wrong screws (along with the wrong bracket). If the only problem preventing you from using the older bracket is the length of the screws then a trip to your local Ace Hardware store might be in your future. Either that or you can go to Lowe's and buy a screw stretcher. It should be in the same aisle as the cable and wire stretchers.
Not really, the new bracket's center hole isn't big enough for the dock, and the old bracket is too tall to fit anything. Or so it seems. I might try to layer everything next weekend to double check if the only thing I'd need would be new screws, but it looks unlikely.
Being terrified of breaking the part beyond repair, I gave it to my mechanic since I was due a service anyways.
He mounted the brackets and fixed my mistake with the screw. He threaded all the other screws and replaced the ones that were too short. He couln't finish the job ad the navi door wouldn't clear the hole! Filing it meant potentially breaking a very expensive part, so he left it like this for me to figure out the filing.
 03-28-2015, 05:47 PM