DIY: Porsche 997 Turbo: OEM Koito Bi-xenon Clear Lens Swap
#1
 05-01-2012, 08:10 AM

Join Date: Apr 2010
Location: Atlanta, GA
Posts: 133
Rep Power: 30 

DIY: Porsche 997 Turbo: OEM Koito Bi-xenon Clear Lens Swap
Car's been down for a few weeks getting some other things done to it (Turbos, diverter valves, interior, etc) so I figured what better time than to improve the light output from the factory Koito bi-xenon projectors in my 997.1TT. The factory headlight projectors are also found in the Nissan Murano, 370Z, and Bentley Continental GT. Unmodified, they have a 3" fresnel lens and actually perform really well (naturally, being a Japanese- made, Koito product)
The OEM ballasts are Denso's 35w D2 units, and it came from the factory with standard Philips 85122 4300K D2S bulbs.
A headlight junky for a living, stock lighting isn't really my thing
This mod will work for all 997.1 Carrera's, Turbos, Boxsters, and Caymans. It will not work for the 997.2 or Cayenne headlights since they're not made by Koito (I believe they're AL or Valeo units)
The parts used for the upgrade:
- Osram D2S CBI 5000K bulbs: http://www.theretrofitsource.com/pro...ducts_id=10591
- STi-R clear lenses: http://www.theretrofitsource.com/pro...products_id=85
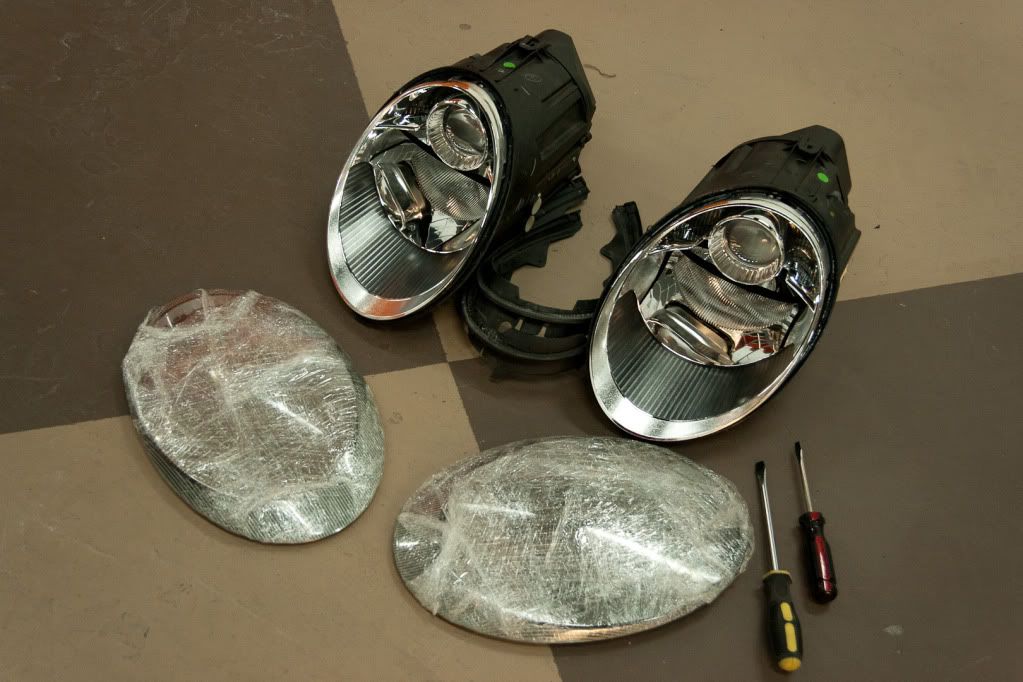
Lets get started by carefully removing the OEM rubber weather stripping from the outside of the housing. Just un-clips from a few points around the outside edge.
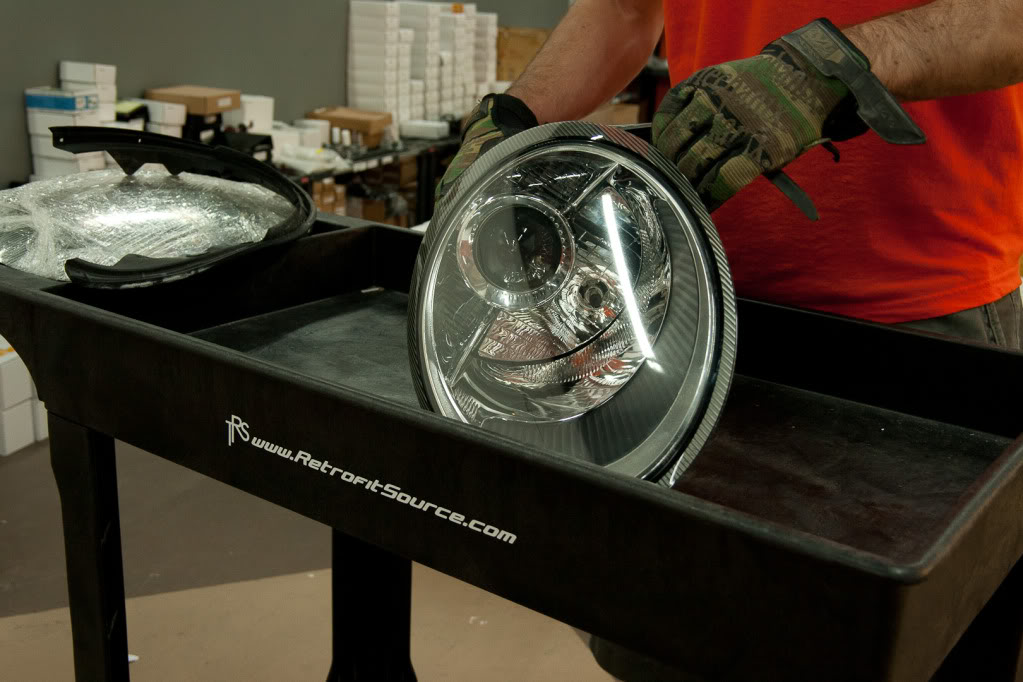
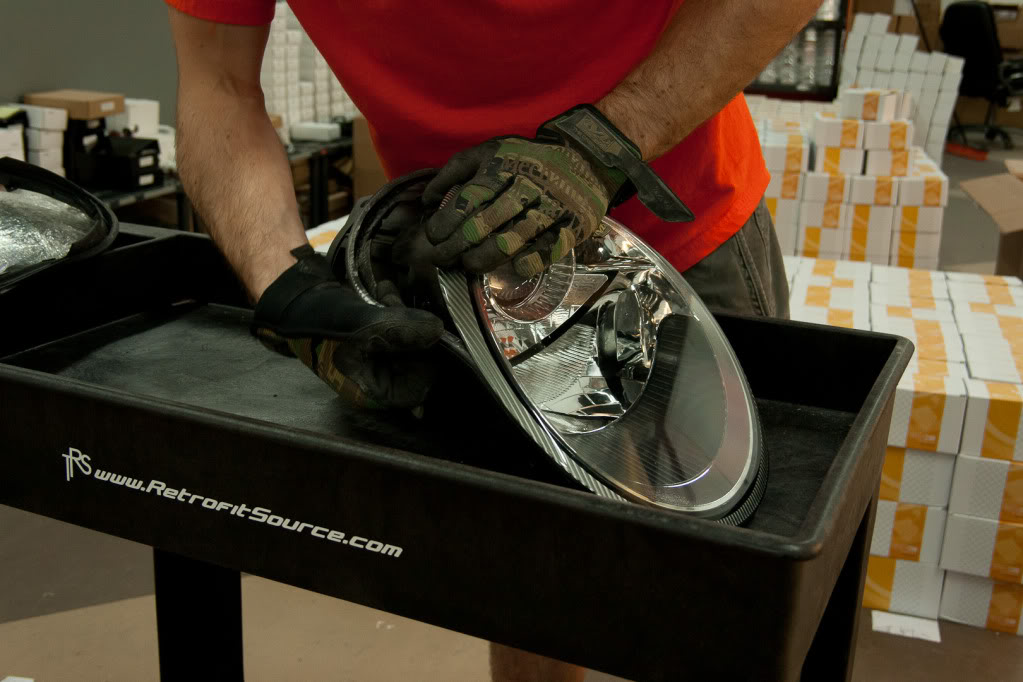
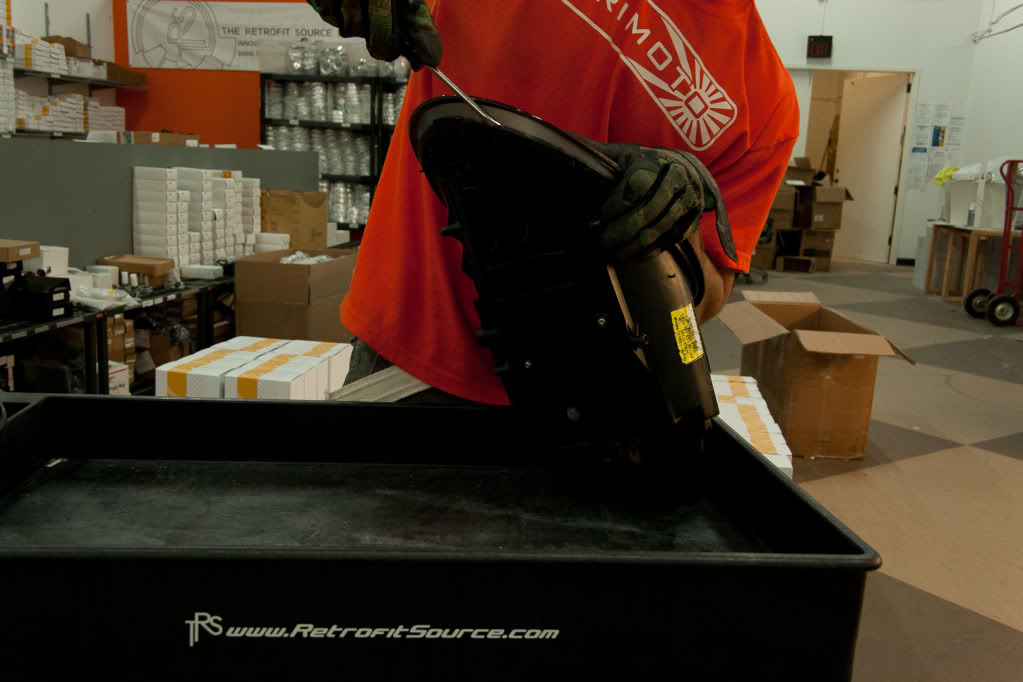
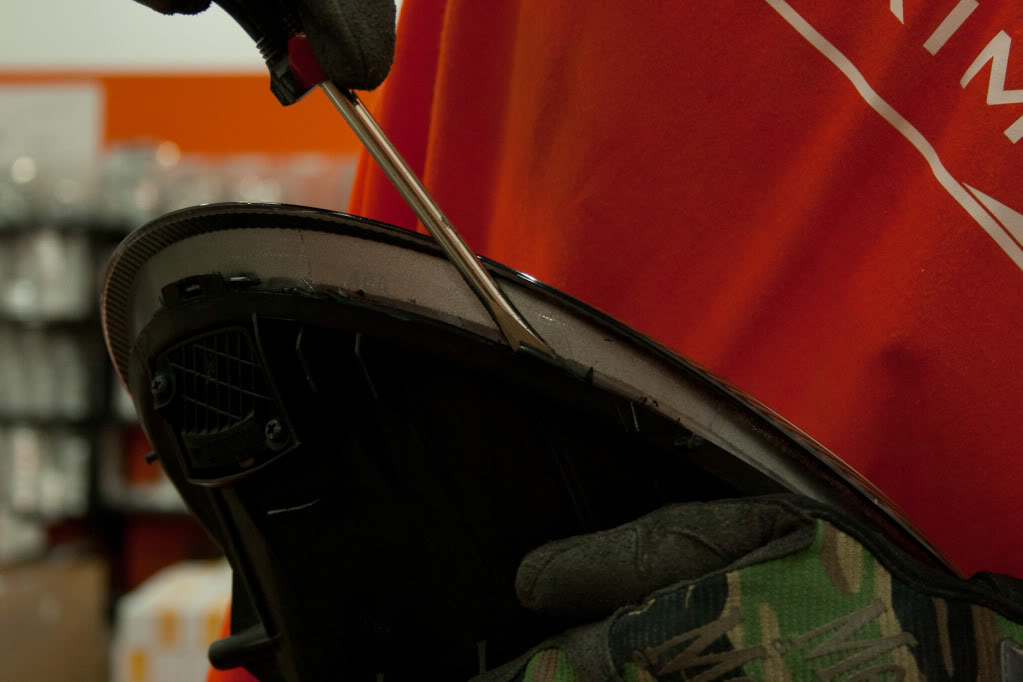
Next, we'll start to remove the front lens cover on the housing. Unlike a typical Koito headlight, its not sealed with Butyl rubber. Heat does nothing to the glue, so I didnt bother. A screw driver and some prying/scraping around the perimeter of the housing will do the trick. Dont use too much force, just enough to pop the seal between the lip on the rear-side of the front lens cover and the glue holding it in. Eventually, you can just lift it right off. Ta Da!

Next, wrap up the lenses with serran wrap or something to keep the under-side from getting dusty. Nothing (NOTHING!) worse than dusty or scratched up insides of headlight lenses, ya dig?
Now we've gotta remove the chrome trim bezel inside the housing. Pretty easy. Just need to remove these two T20 Torx security screws on the bottom.
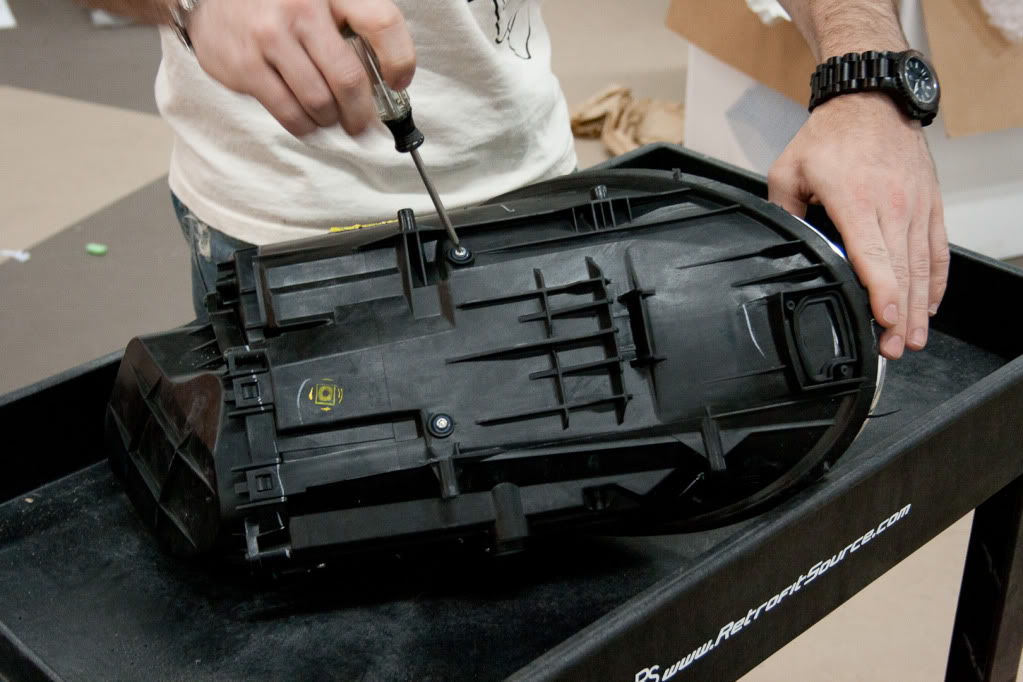
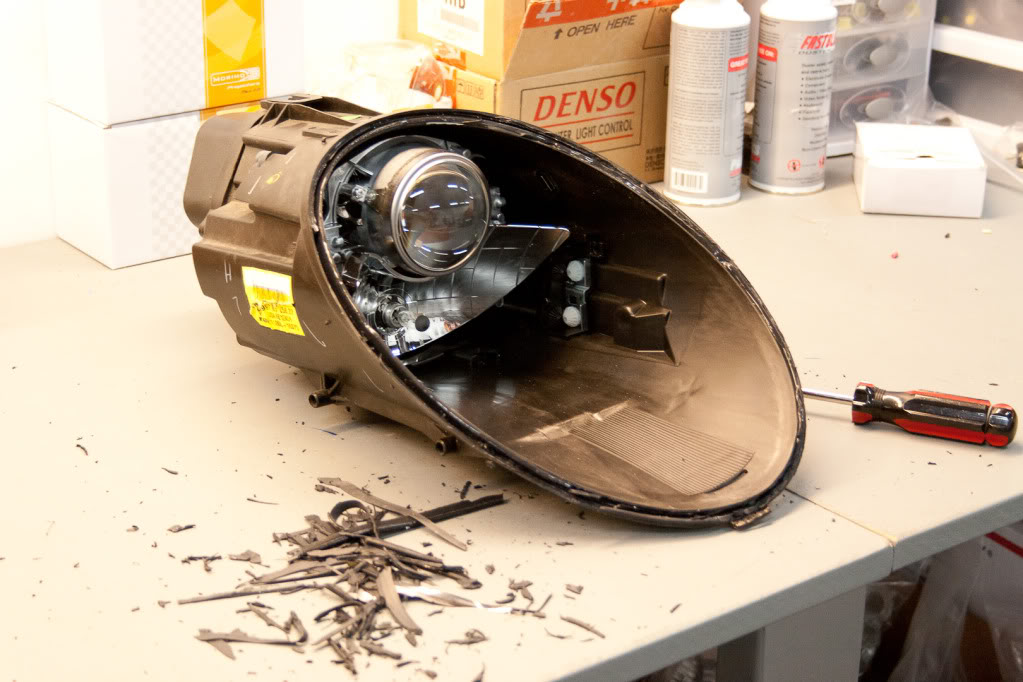
After the torx screws are removed, you can just use some light pressure and a big flat blade screw driver to push the trim out the front of the housing. There's nothing holding it in except for a bit of friction.
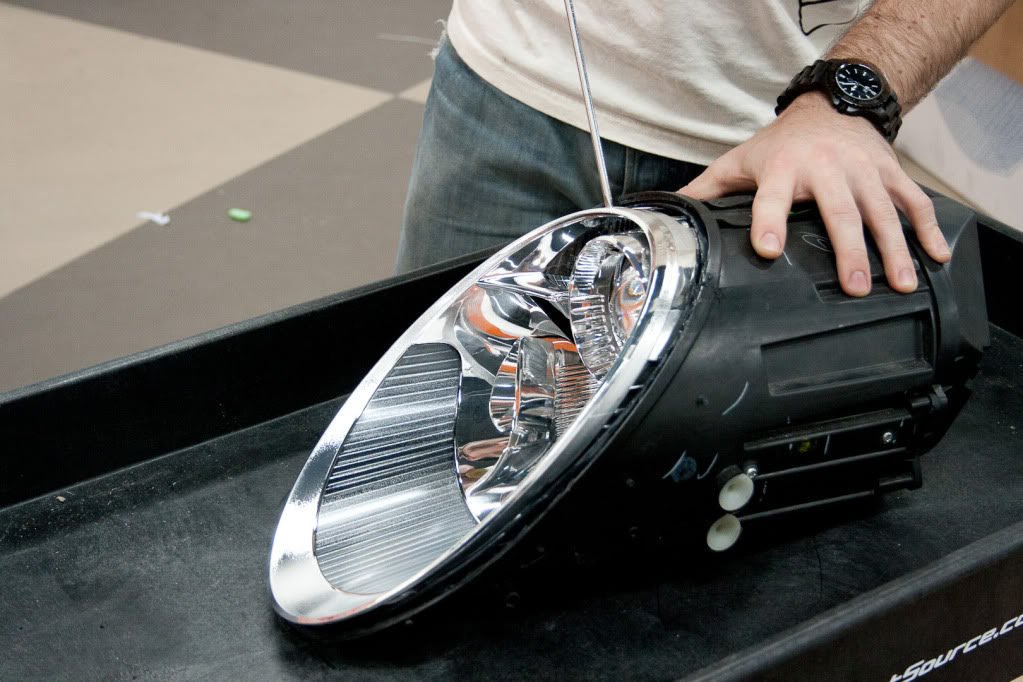
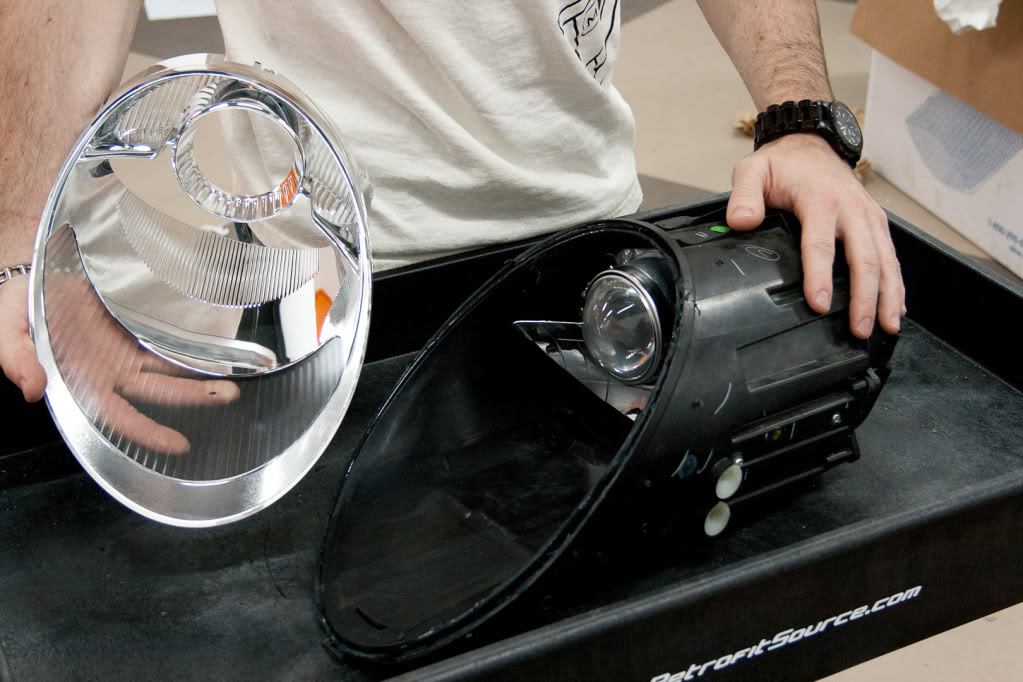
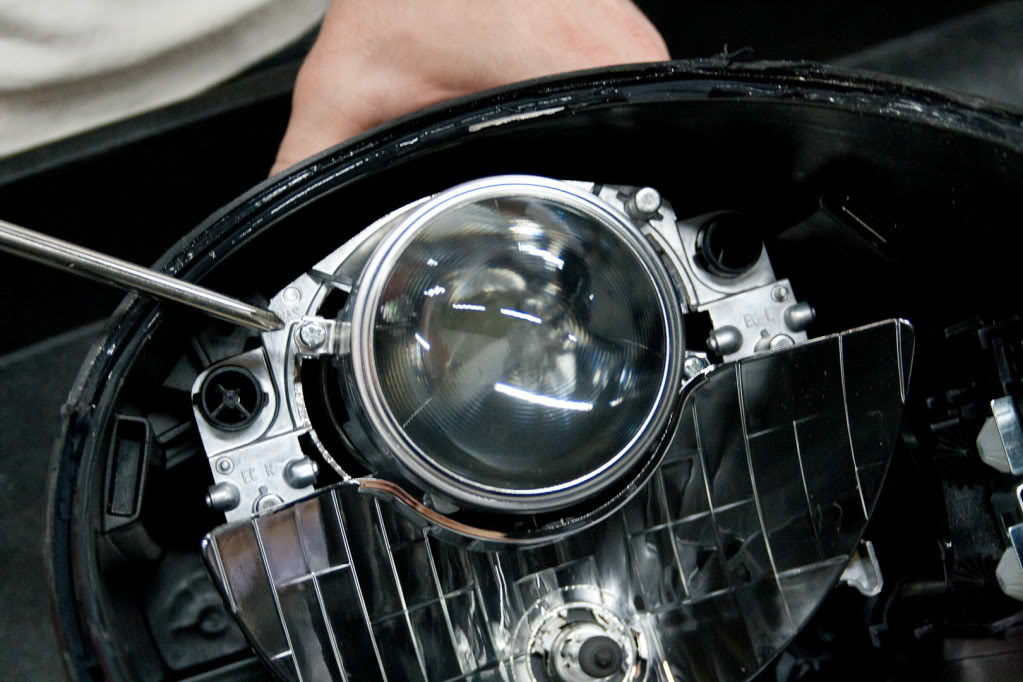
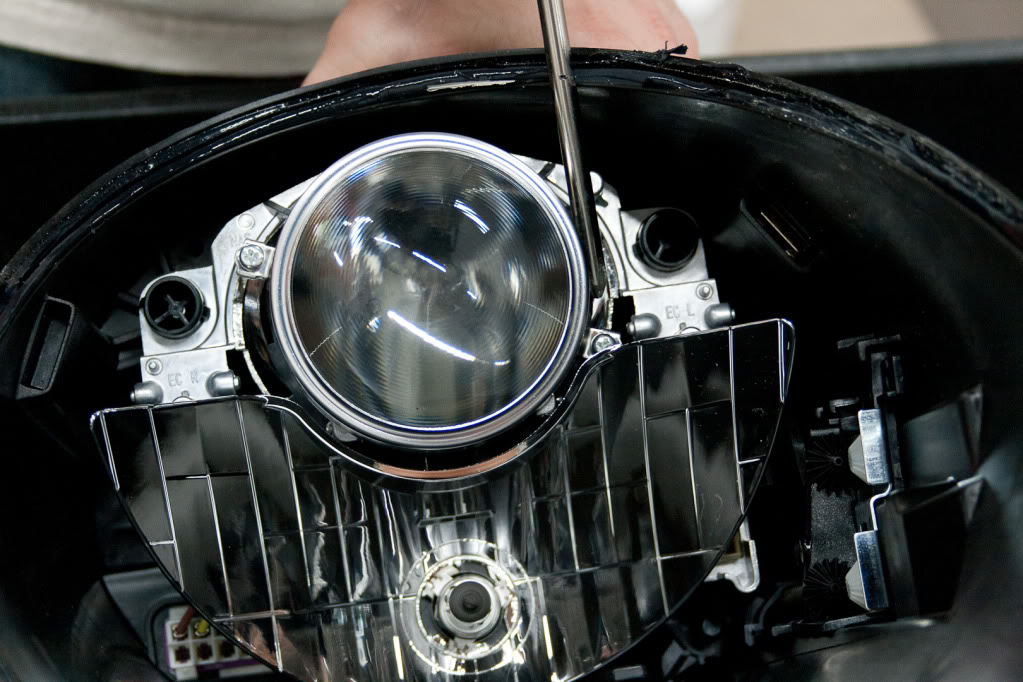
From here, we've got access to the projector. There are 2 screws that hold the lens retainer ring onto the front. Using a Philips screwdriver, the lens retainer and original fresnel projector lens can easily be removed.
One screw: Two screw:
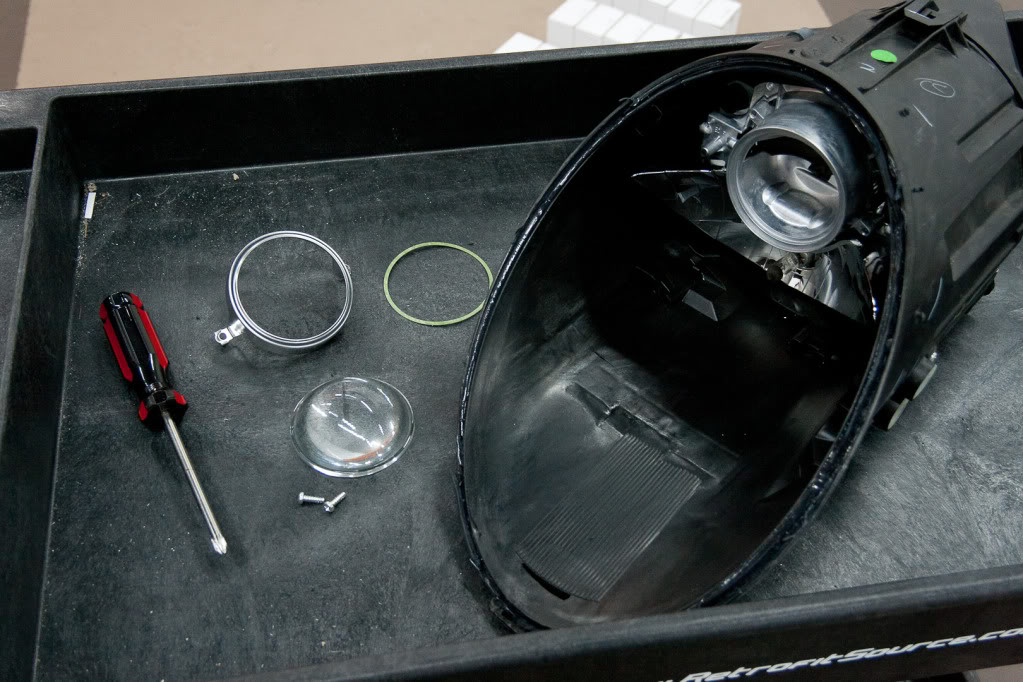
All apart:
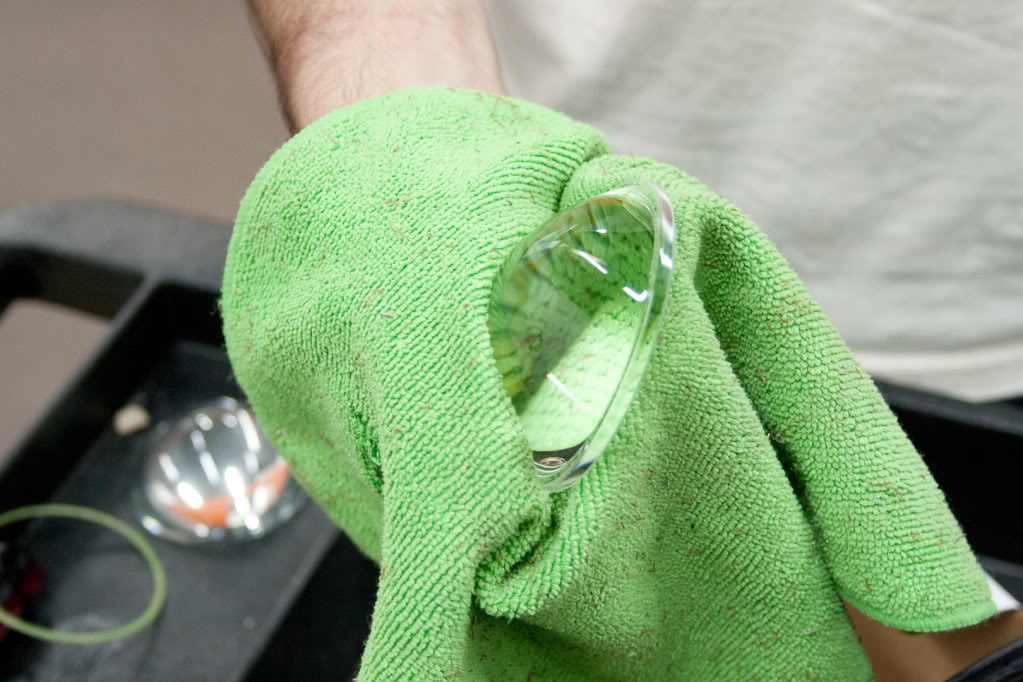
Now, its time to install the STi-R clear lens. But before that, make sure it's clean too. dust and fingerprints on the back-side of a projector lens are not cool.
Before you put the lens in, put in the metal spacer ring that normally comes with the STi-R clear lenses. (don't use the original green paper spacer along with it though)
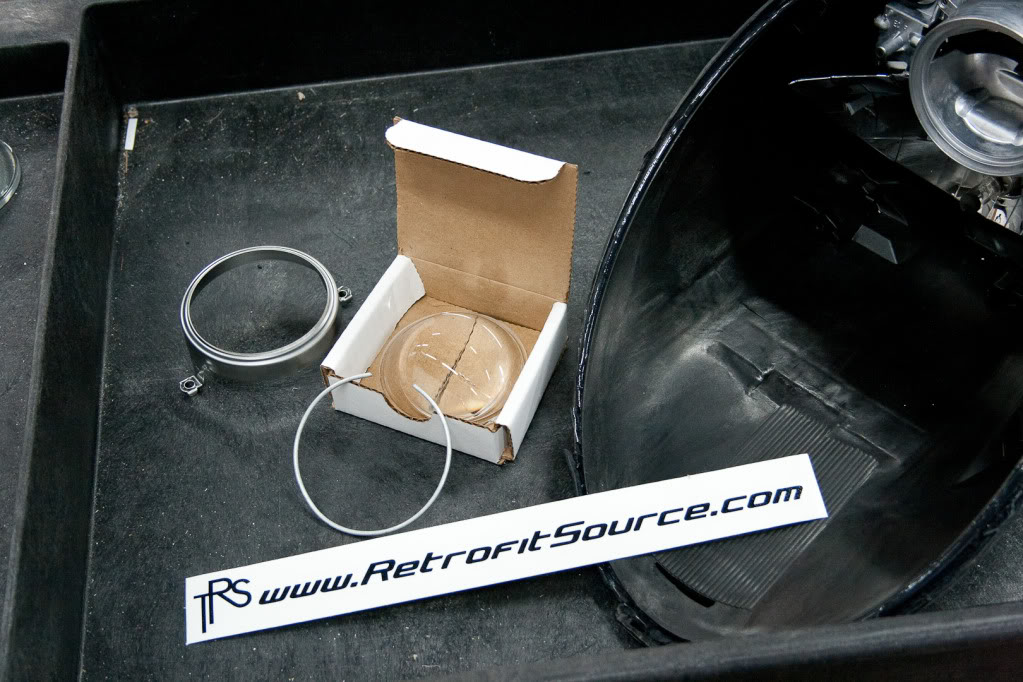
Lens Spacer Installed:

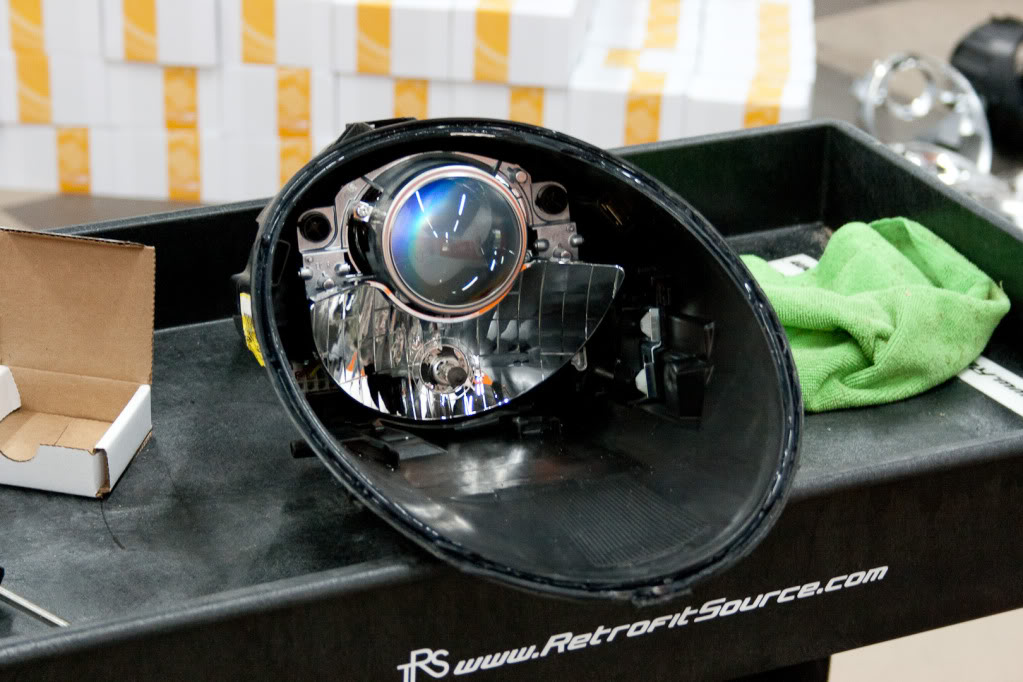
Now re-install the STi-R clear lens in reverse order. Should be pretty easy. Tighten one side, then the other, then go back - to make sure the lens is seated perfectly centered/flat on the face of the projector.
Mmmmmm clear lens goodness
Now, it's time to re-seal the headlight. Before then, you will want to clear as much of the the original glue from the channel on the black rear housing. This step sucks because it's not very exciting, but realistically spending a half an hour scraping glue isn't as bad as a headlight full of moisture after it's rained, or you washed the car, so dont skip this step!
Glue scrapage:
From there, you can re-fill the channel with a fresh bead of silicone caulk. I used black RTV since it has about the same consistency as the original glue once dry.
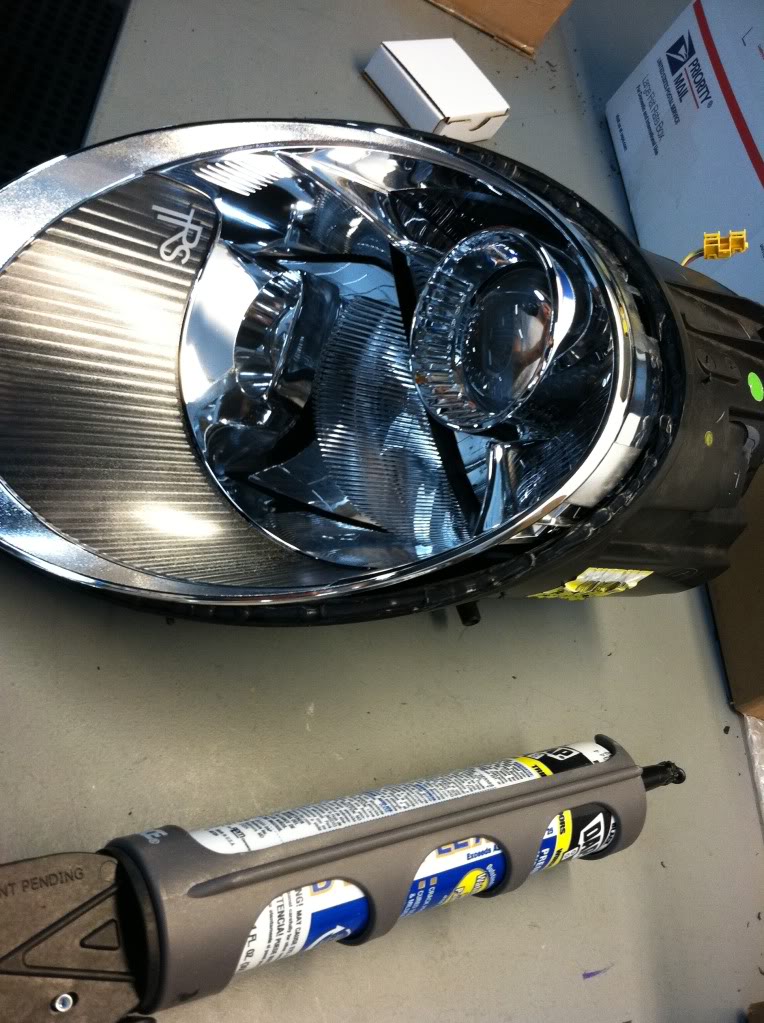
Check out my super cool TRS logo on the bezel. The mark of goodness
Press the front lens back onto the housing, making sure that all of the clips etc are aligned and it's fully seated back into the channel. Let dry, and enjoy!
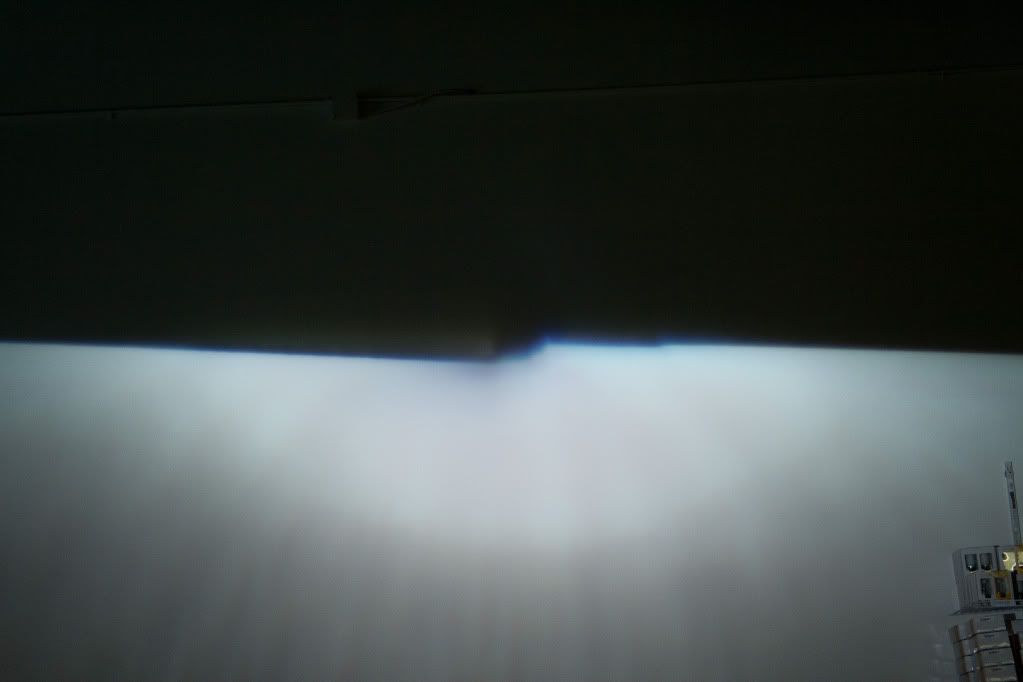
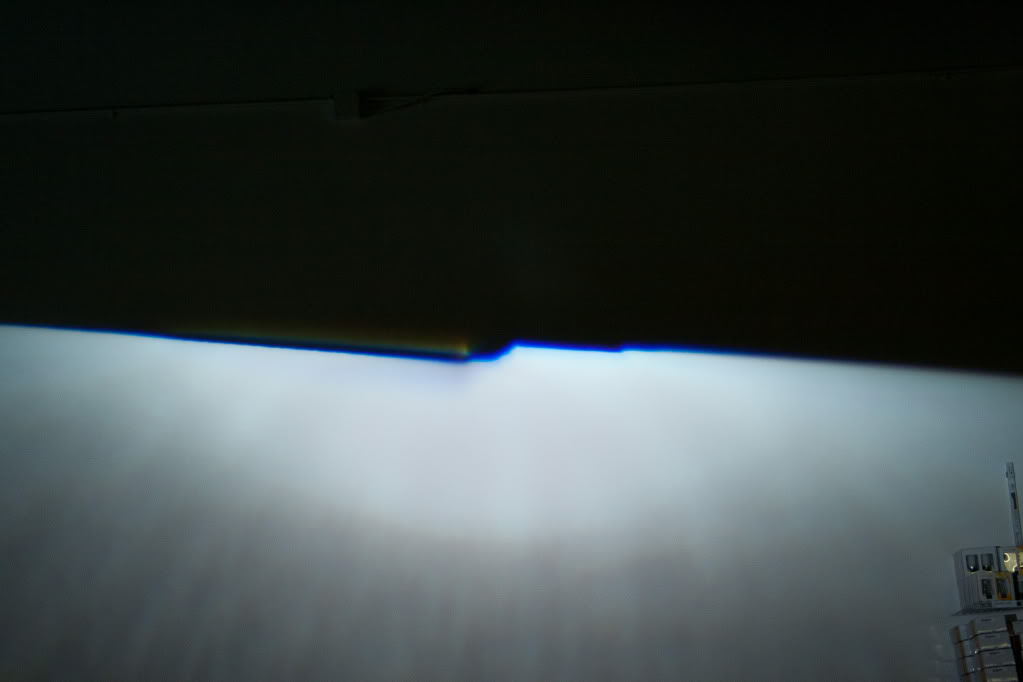
Now, a quick before and after shot. (both of which are using the upgraded Osram CBI bulb)
Three things to notice:
1) Much better definition/sharpness to the cutoff line at the top of the beam pattern
2) More vivid color across the span of the cutoff line - as this band of colorful light passes in and out of the field of vision of on-lookers, it greatly enhances that "color flicker" effect they see from your headlights. So you get the exotic looks of high Kelvin bulbs (8000K etc) without the downside of reduced luminosity. (its important to note that as you move up the kelvin scale for HID bulbs, the intensity/luminosity goes down)
3) More intense light throughout the beam pattern for better down the road visibility, extra width, etc. Of course the more light that can pass through the glass on the front of the projector, the brighter it will be.
Cheers!
The OEM ballasts are Denso's 35w D2 units, and it came from the factory with standard Philips 85122 4300K D2S bulbs.
A headlight junky for a living, stock lighting isn't really my thing
This mod will work for all 997.1 Carrera's, Turbos, Boxsters, and Caymans. It will not work for the 997.2 or Cayenne headlights since they're not made by Koito (I believe they're AL or Valeo units)
The parts used for the upgrade:
- Osram D2S CBI 5000K bulbs: http://www.theretrofitsource.com/pro...ducts_id=10591
- STi-R clear lenses: http://www.theretrofitsource.com/pro...products_id=85
Lets get started by carefully removing the OEM rubber weather stripping from the outside of the housing. Just un-clips from a few points around the outside edge.
Next, we'll start to remove the front lens cover on the housing. Unlike a typical Koito headlight, its not sealed with Butyl rubber. Heat does nothing to the glue, so I didnt bother. A screw driver and some prying/scraping around the perimeter of the housing will do the trick. Dont use too much force, just enough to pop the seal between the lip on the rear-side of the front lens cover and the glue holding it in. Eventually, you can just lift it right off. Ta Da!
Next, wrap up the lenses with serran wrap or something to keep the under-side from getting dusty. Nothing (NOTHING!) worse than dusty or scratched up insides of headlight lenses, ya dig?
Now we've gotta remove the chrome trim bezel inside the housing. Pretty easy. Just need to remove these two T20 Torx security screws on the bottom.
After the torx screws are removed, you can just use some light pressure and a big flat blade screw driver to push the trim out the front of the housing. There's nothing holding it in except for a bit of friction.
From here, we've got access to the projector. There are 2 screws that hold the lens retainer ring onto the front. Using a Philips screwdriver, the lens retainer and original fresnel projector lens can easily be removed.
One screw: Two screw:
All apart:
Now, its time to install the STi-R clear lens. But before that, make sure it's clean too. dust and fingerprints on the back-side of a projector lens are not cool.
Before you put the lens in, put in the metal spacer ring that normally comes with the STi-R clear lenses. (don't use the original green paper spacer along with it though)
Lens Spacer Installed:
Now re-install the STi-R clear lens in reverse order. Should be pretty easy. Tighten one side, then the other, then go back - to make sure the lens is seated perfectly centered/flat on the face of the projector.
Mmmmmm clear lens goodness
Now, it's time to re-seal the headlight. Before then, you will want to clear as much of the the original glue from the channel on the black rear housing. This step sucks because it's not very exciting, but realistically spending a half an hour scraping glue isn't as bad as a headlight full of moisture after it's rained, or you washed the car, so dont skip this step!
Glue scrapage:
From there, you can re-fill the channel with a fresh bead of silicone caulk. I used black RTV since it has about the same consistency as the original glue once dry.
Check out my super cool TRS logo on the bezel. The mark of goodness
Press the front lens back onto the housing, making sure that all of the clips etc are aligned and it's fully seated back into the channel. Let dry, and enjoy!
Now, a quick before and after shot. (both of which are using the upgraded Osram CBI bulb)
Three things to notice:
1) Much better definition/sharpness to the cutoff line at the top of the beam pattern
2) More vivid color across the span of the cutoff line - as this band of colorful light passes in and out of the field of vision of on-lookers, it greatly enhances that "color flicker" effect they see from your headlights. So you get the exotic looks of high Kelvin bulbs (8000K etc) without the downside of reduced luminosity. (its important to note that as you move up the kelvin scale for HID bulbs, the intensity/luminosity goes down)
3) More intense light throughout the beam pattern for better down the road visibility, extra width, etc. Of course the more light that can pass through the glass on the front of the projector, the brighter it will be.
Cheers!
Last edited by TRSMatt; 05-02-2012 at 10:12 AM.
#7
05-03-2012, 07:57 AM
Join Date: Apr 2010
Location: Atlanta, GA
Posts: 133
Rep Power: 30
Thanks Joel! fairly easy way to improve the light output and "bling" from the already good factory xenon headlights
Trending Topics

#9
05-31-2012, 08:32 AM
Registered User
Join Date: Jun 2006
Location: Toronto, Dubai, Kuwait & Bombay
Age: 38
Posts: 2,941
Rep Power: 212
Good Job Matt!!! Will this work for 996 Litronics? I have been in Contact with Andrew @ TRS in regards to purchasing CBI Bulbs for my 996. Gonna Pull the Trigger soon :P

#13
10-15-2012, 06:56 AM
Join Date: Apr 2010
Location: Atlanta, GA
Posts: 133
Rep Power: 30
Thanks guy glad you like the mod! really helps improve the performance from the stock 997 bi-xenon lights, also gives you an opportunity to clean up inside too as some said.

#15
06-08-2019, 03:25 AM

Registered User
Join Date: May 2015
Location: Stockholm, Sweden
Posts: 41
Rep Power: 10
Reviving this old thread. What did you guys use to get rid of the haze of the inside of the front lenses?

Thread
Thread Starter
Forum
Replies
Last Post
roxboxxx
Cayenne 955/957
62
06-09-2018 08:12 PM
porschefan22
996
33
04-01-2016 08:38 AM