Project BMW E46: Chassis and Subframe Reinforcement Time
Measure thrice, weld once…hopefully
With the subframe out of the car, it’s easy to see how Turner Motorsport’s chassis reinforcement kit works. In essence, there are four steel plates, one for each subframe-to-chassis mounting point, that are welded to the chassis. These thick steel plates better distribute the load of the subframe against the chassis, reducing fatigue.
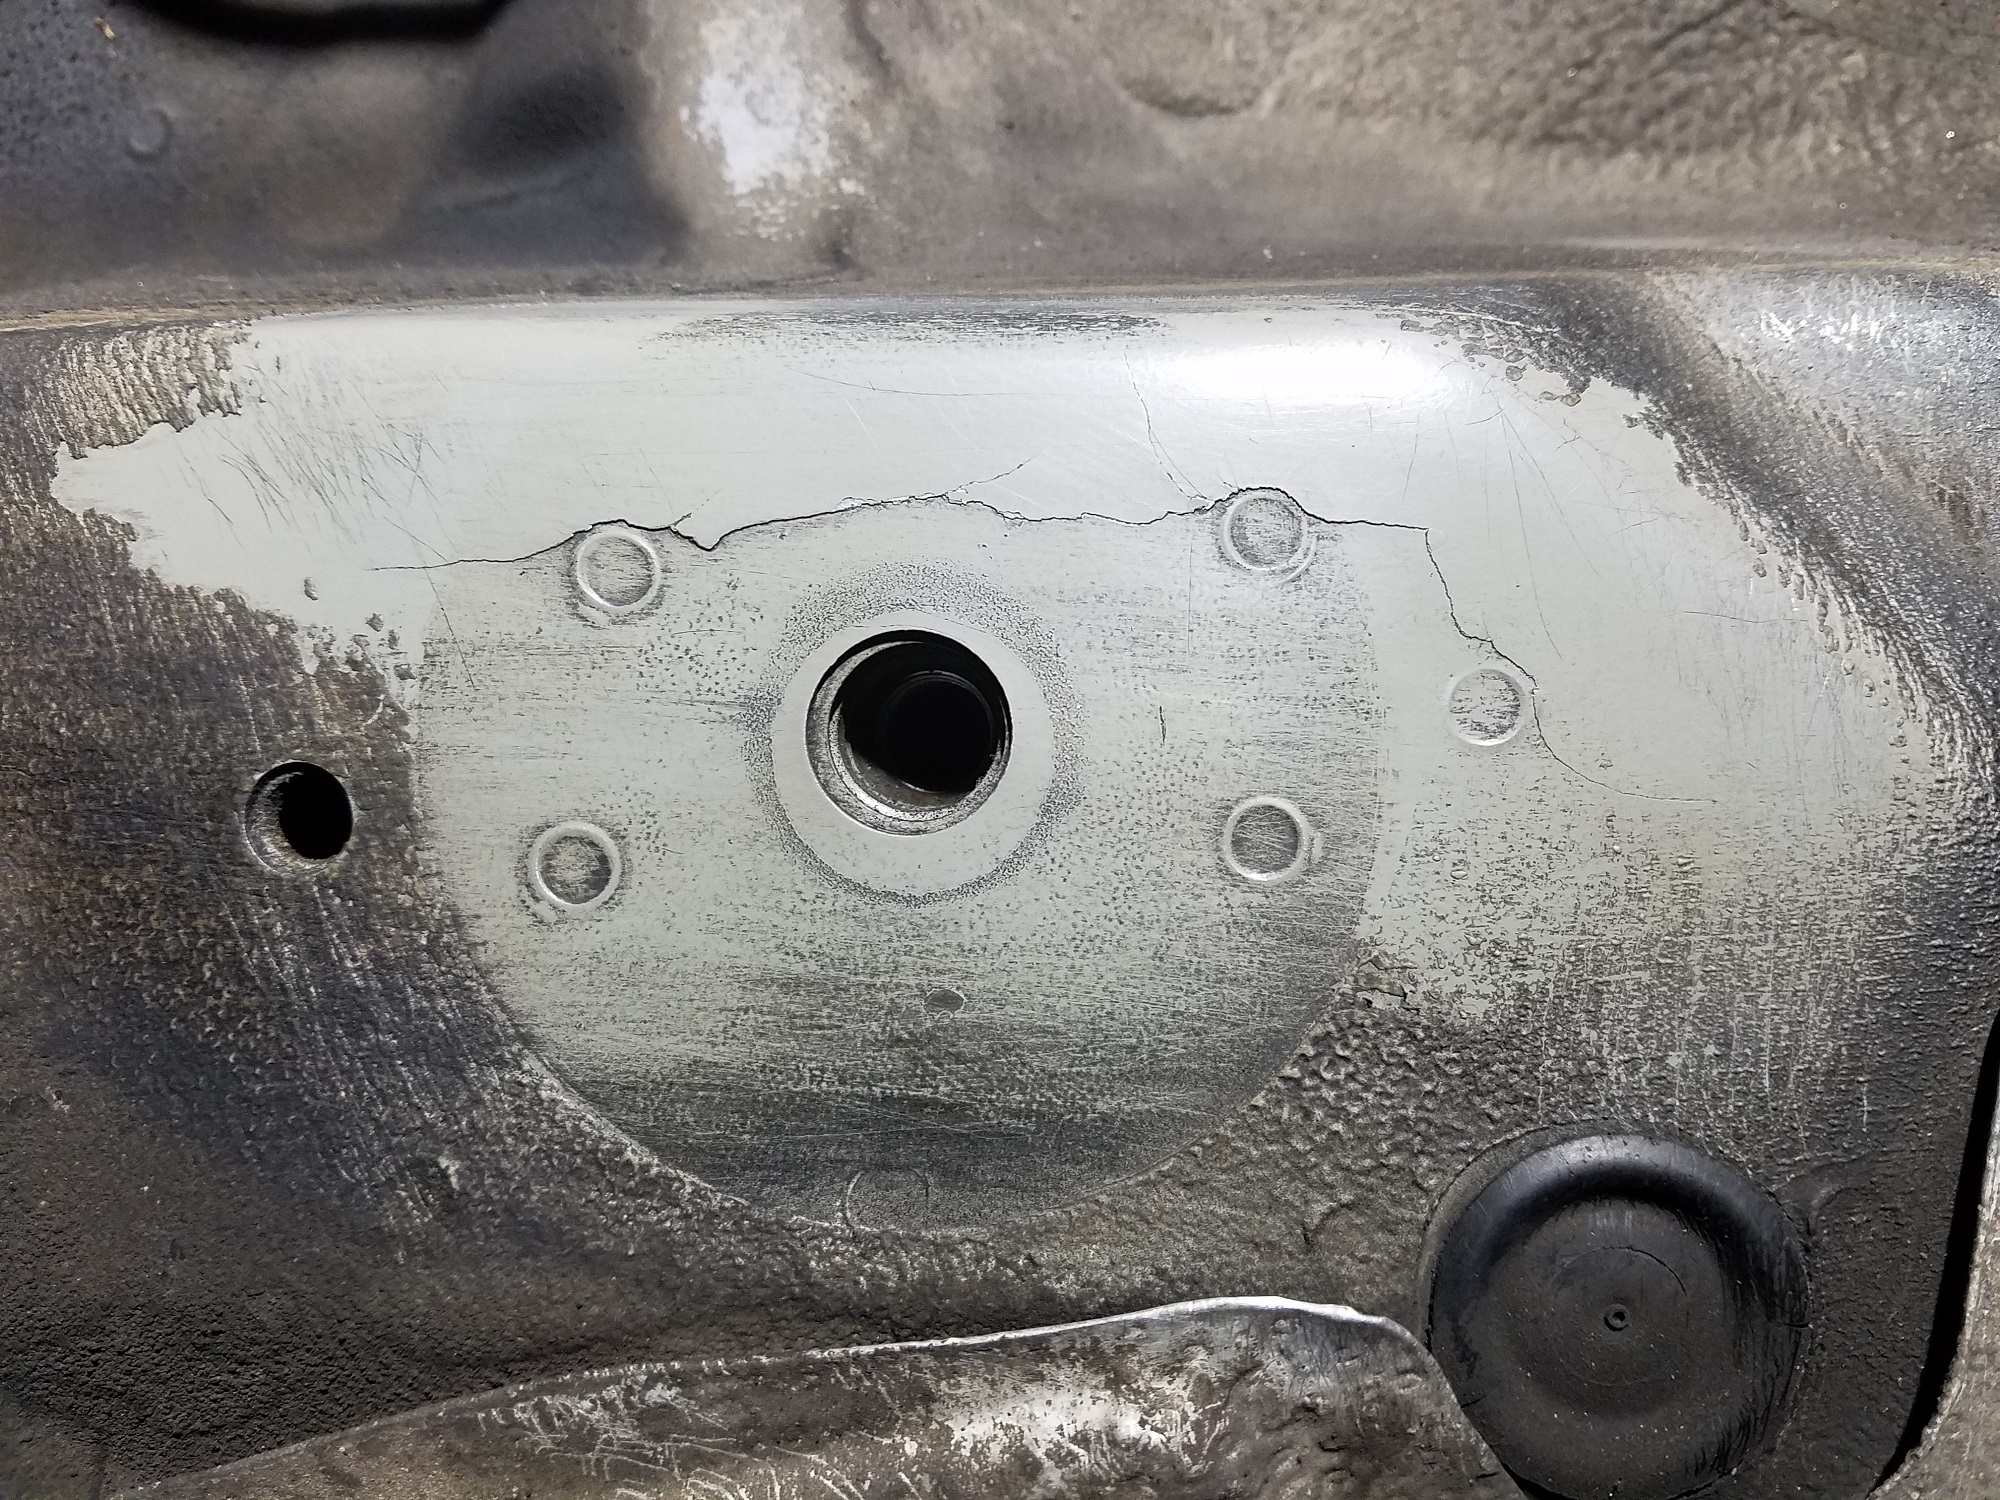
Of course, since these plates are being welded to the chassis any pre-existing chassis damage has to be repaired first. Since I lucked out and my car only has one crack in the chassis, that’s the only thing to fix. To that end, it’s a matter of grinding out the crack in the chassis sheet metal until it’s gone. So, I spent a few hours with my handy dandy grinder and went at it. With the crack ground out it was time to do some more cutting and grinding.
Here is one of the Turner Motorsport reinforcement plates bolted up to the chassis before welding:

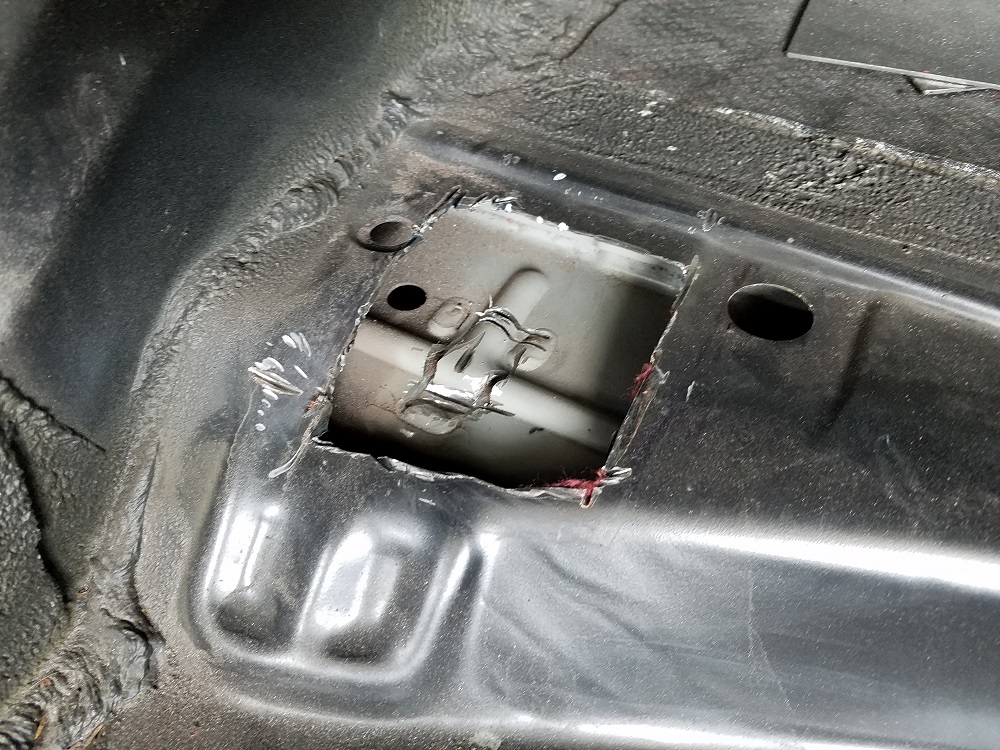
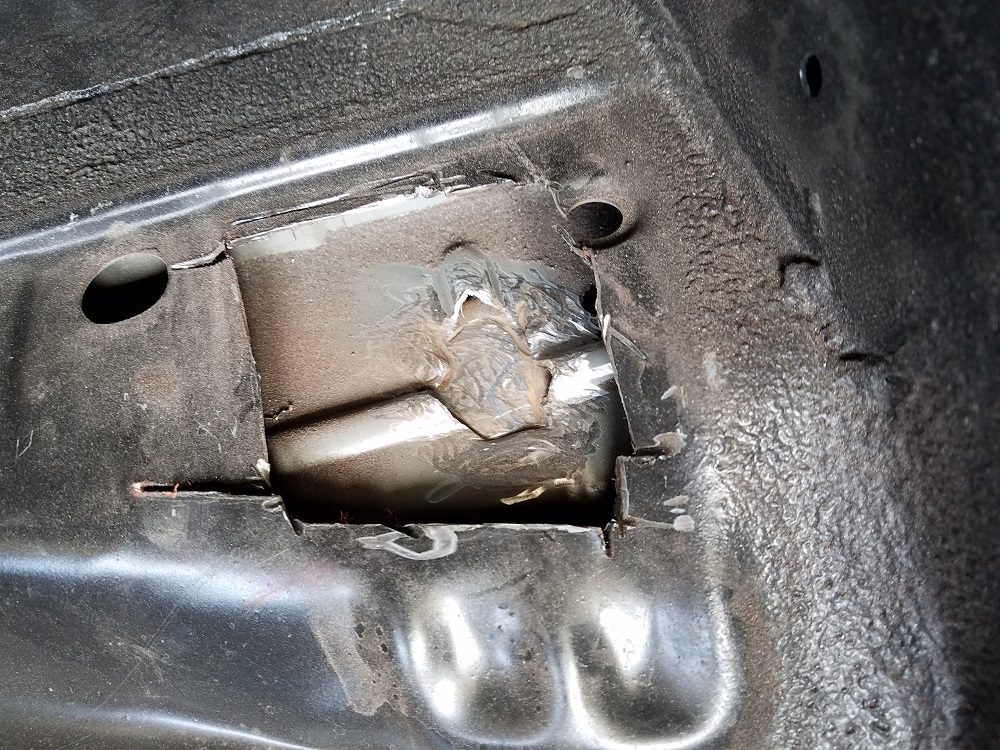
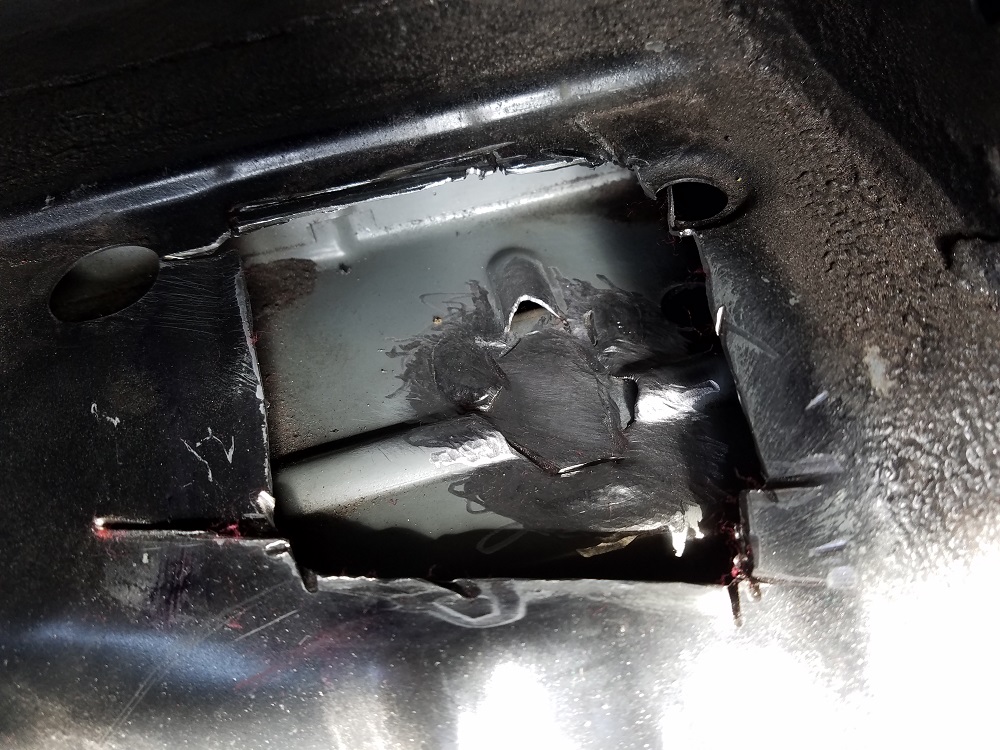
In addition to the four plates welded to the bottom of the chassis, the upper part of the rear floor pan has to be reinforced to really tie things together. So, after removing all of the trunk liners and getting down to bare metal, I promptly cut two holes in the floor of the trunk. These strategically-cut holes were to access the two weak spots in the upper part of the rear floor pan. These two spots have to also be welded for the sake of reinforcement. Once these two areas are ground down to bare metal and welded up, simply grab those two semi-squares cut out of the trunk floor and weld them back in. Voila, it’s almost as if it kinda didn’t happen, sorta.
One small problem
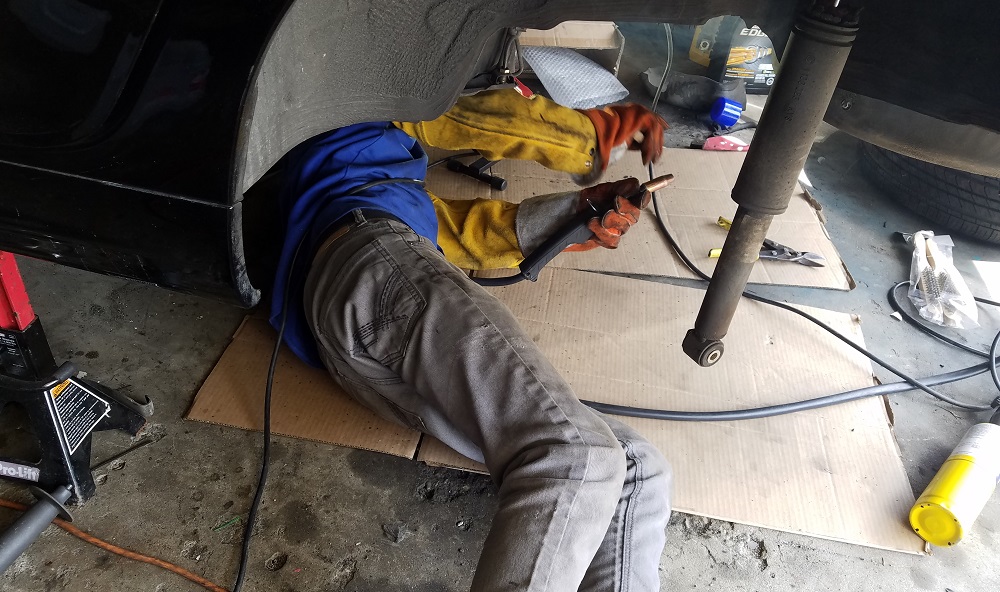
With the top side of the reinforcements done it’s time to finally weld in the reinforcement plates and get the show on the road. I called my friend Tim, who is a much better welder than I, and asked him to do this job. After getting under the car, Tim spotted an issue right away that I didn’t think about. ‘I’m not using a welder next to a fuel tank full of gasoline.’ Fair enough, I guess the $50 I was paying him to do the job wasn’t worth dying over.
After a 45 minute detour, the fuel tank was out and the welding got going. It went off without a hitch, which is surprising for our crummy little Harbor Freight welder. Eventually all four plates were welded to the E46 chassis. Huzzah!
With that and everything else done, all that remains is reassembling everything. And, really, how hard can that be? So, stay tuned for the next episode of Project BMW E46 where I finally put this heap of scrap back together and get it off jack stands!