When you click on links to various merchants on this site and make a purchase, this can result in this site earning a commission. Affiliate programs and affiliations include, but are not limited to, the eBay Partner Network.
I've seen a lot of attempts and discussion of this and thought I'd post how I did it, and how not to do it, since it took me a few attempts to do it correctly.
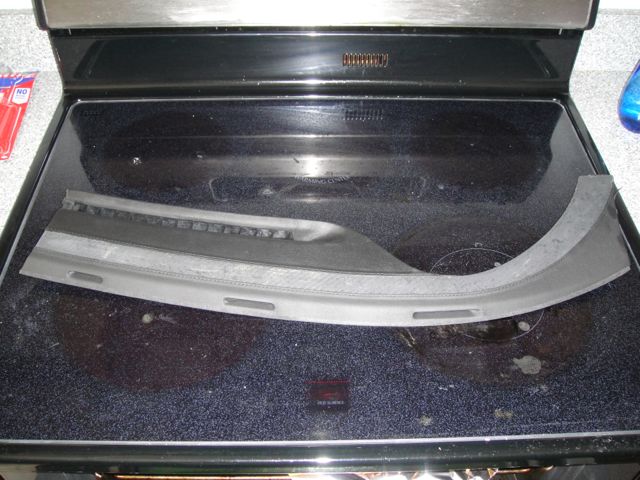
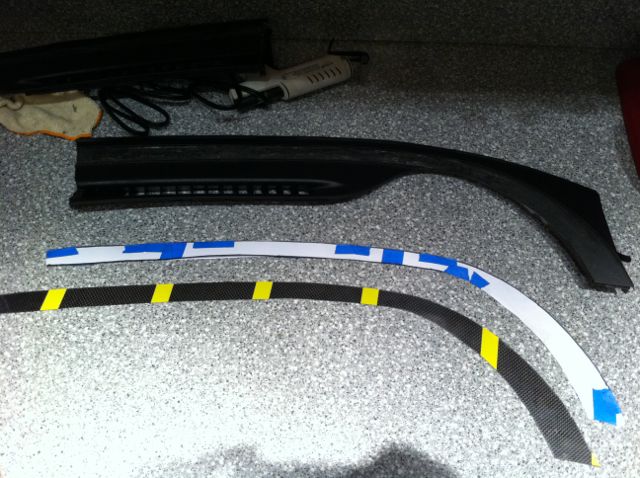
First, you'll need to pull everything out of the interior because you need time and space to work. I did most of this in my kitchen because the first time I attempted it, I used the oven to cook the original CF trim pieces prior to gluing them in place.
Once you have the two pieces from the top of the dash off, you can remove the original carbon fiber strips by just pulling. The epoxy is brittle and easy to remove. I used drywall sandpaper mesh to clean the remaining epoxy off and create a good adhesion surface as shown:
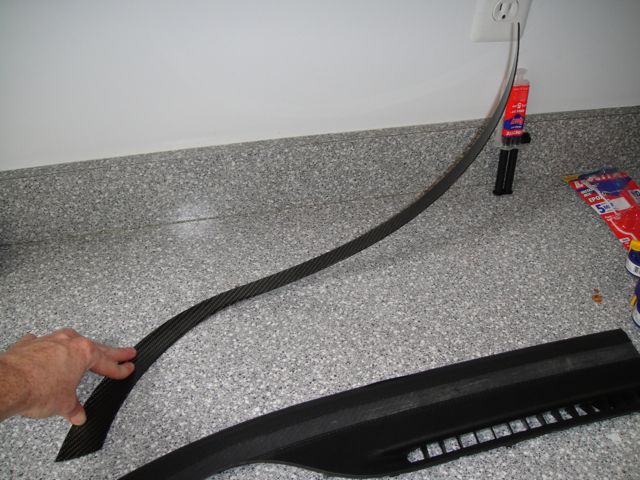
Baking the carbon fiber pieces in the oven will soften them and return them to flat, but they were not cured properly from the factory and will always pull back off. Here is a shot of one after I heat cycled it a few times - it still is nowhere near flat.
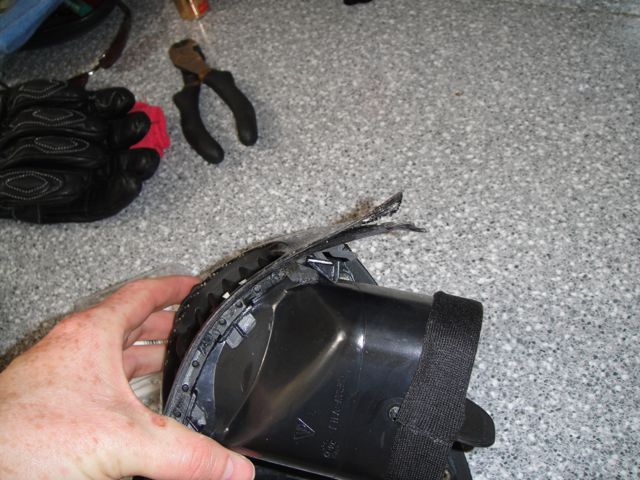
Using a hot air gun or an oven (I set 375F and baked it until I saw it relax completely) is the only good way to deal with the two end vent pieces. You need to clean up the old adhesive beneath it with a razor and sandpaper prior to doing this.
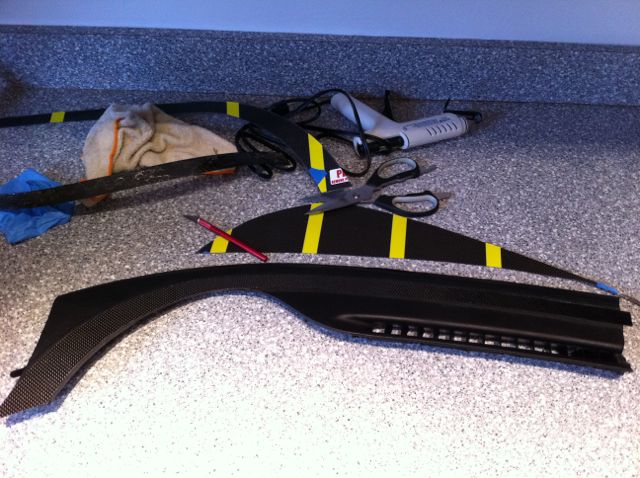
Cook it until it is soft, then apply hot glue around the edges of the carbon fiber. You need to get it right up to the edge or it will slowly peel itself apart. Clamp it tight, and clamp it immediately or you won't get a good fit. Hot glue works better than the epoxies I tried because it has a bit of flex in it and does not get brittle.
Mostly cleaned up:
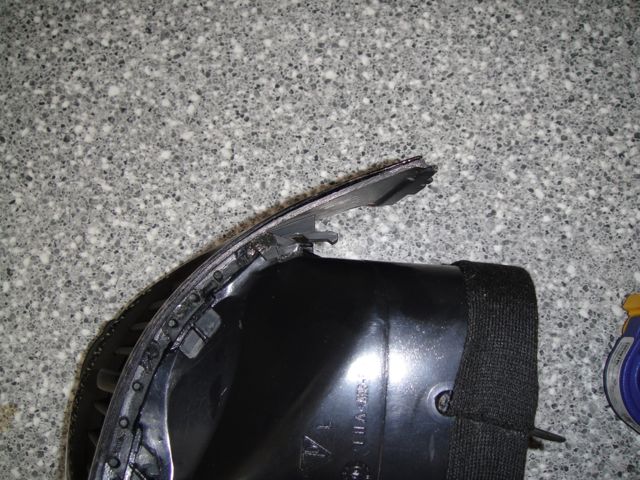
Here it is baked and hot glued:
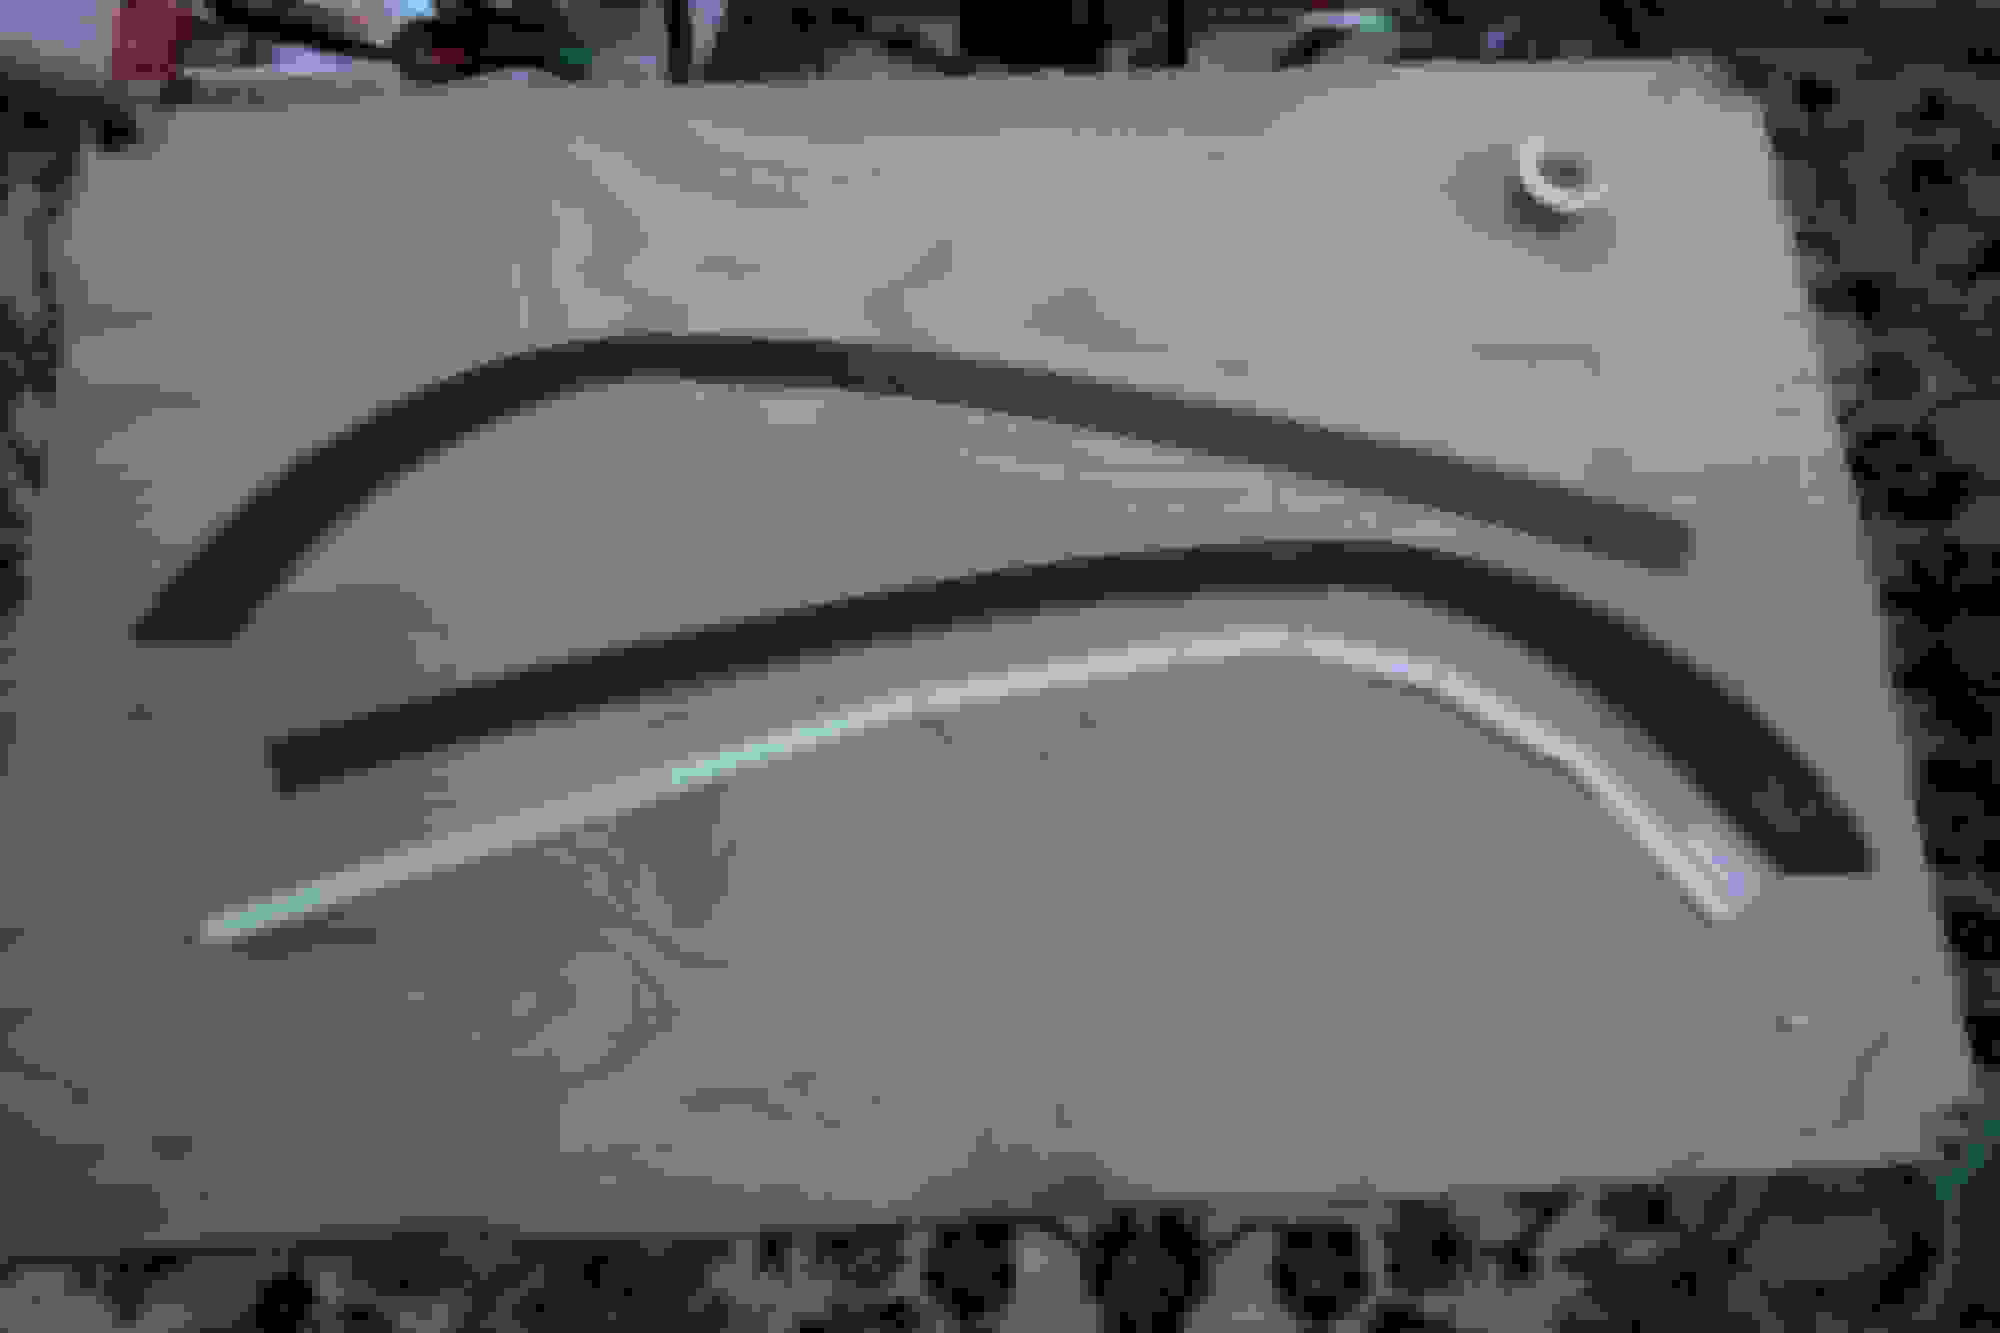
As I noted earlier, cooking and gluing or epoxying the original strips in place is hopeless because of their poor manufacturing quality. Porsche's epoxy resin for the CF also is not UV stable so it turns yellow with time. The best option is to use new carbon fiber. I bought a 12"x30" glossy sheet of UV-resistant adhesive-backed real CF veneer from http://www.dragonplate.com
This is a close match to the un-yellowed original carbon fiber and is a real CF sheet instead of a decal. I then created a template for the original space using paper, and cut it out of the CF sheet using very heavy shears. You have a bit of room for error around the edges. Be aware that both sides are not identical due to the leather having been cut and glued by hand - you must make two templates.
Here's a picture of the template and the cut out:
Last edited by Solid_911TT; 10-21-2011 at 02:49 PM.
Finally, here is a picture of it installed. Obviously I still need to trim the edges a bit, but overall this turned out very well. The adhesive backing seems to be quite temperature stable and has stayed in place correctly through the summer heat and now the colder weather (low 40's).
Mine just started curling this summer after 9 years of remaining flat. I would like to remove the front dash pieces and try to re-cement the OEM pieces back in place or replace it. How did you get the dash pieces off?
Mine just started curling this summer after 9 years of remaining flat. I would like to remove the front dash pieces and try to re-cement the OEM pieces back in place or replace it. How did you get the dash pieces off?
Removal:
1. First pull down on the hangar hooks at the top of the B pillars. Then undo the phillips screw on each side.
2. Pull the B pillar trim down slightly, then pull the weatherstripping loose from the corner at the top of the B-pillar. Peel it back until it is clear of the side vent on the front of the dash and clear of the trim along the window line.
3. Pop the A pillar trim piece loose by pulling or prying it, starting at the top of the B pillar.
4. When it is completely popped loose, you have to pull it upwards from the vent area, as there is a tab that it sockets over.
5. Remove the two T20 screws on the side of each side vent. One requires either a very short driver or a T20 bit in a small hex bit ratchet.
6. Pull the circular vent out from the center of the passenger side vent. There is a third T20 hidden to one edge behind it.
7. On the driver's side, take a small screwdriver in one hand and while looking up at the bottom of the light switch ****, pull it out and hold it. Use the screwdriver to push up on the small metal piece you see in the bottom center, that will release it and allow you to remove the ****.
8. Remove the T20 hidden behind the ****. Pull the vent out, then remove the two harness plugs from the light switch. They are very tight friction fit - just pull very hard.
9. You can now pull the end vents off.
10. Remove the center trim piece on the top of the dash board where the vents are. I consistently break tabs on this thing so YMMV, but I believe you pry up at the end closest to you, then pull it towards you. If you try to pop the front end up you are guaranteed to break tabs.
11. Now use some plastic wedges or other non-scratching tools to pry the vent trim panels loose. They are held in with snaps, and it takes quite a bit of force.
Tricks for reassembly:
Reinserting the end vents often causes the plastic arm that connects the vent open close wheel to pop loose. If you insert it halfway, then use a finger to bend the plastic arm inward while the ball and socket joint on the arm clears, this will not happen.
The dash vents must be installed first.
The weatherstripping you peeled loose must be installed prior to snapping down the A pillar trim where it meets the B pillar or it will be impossible to reinsert the weatherstripping properly at the corner.
When applying the CF veneer, try to do it with a rolling motion to ensure good contact and no waves in the surface.
Also worth doing:
Now is a great time to do the remote entry range extension mod, since you are removing the A pillar trim anyway.
Last edited by Solid_911TT; 10-23-2011 at 08:02 AM.
Sorry to bring this back from the dead, but can anyone that's done this chime in on how well this fix has held up? Also, any other recommended vendor's other than Dragon Plate? It doesn't look like they offer the 30"x12" sheet anymore and they do not offer custom sizes... not a big deal, but I'll just end up with a lot of excess.
I ended up using my own method and it worked great. It has now held up a few years with no issues.
I peeled the OEM carbon strips off the dash with the dash in place and then removed the clear coat in just a few minutes by running it over the edge of a counter top causing the clear coat to crack and break off. It flaked off really easily. This left me with pure carbon fiber strips which laid perfectly flat. I sprayed them with about 20 coats of clear coat, sanding every few coats and again just before the two finish coats. Let it dry for a day and glued it down. It worked perfectly, has not lifted or discolored. Everything is fine and it was an extremely easy project. Below are a few pictures - you can see how simple this was...
I need to replace my dash trim. Mine was missing when I bought my car and I never noticed until a bit later. Buying a sheet and cutting it out appears to be my best option.
I need to replace my dash trim. Mine was missing when I bought my car and I never noticed until a bit later. Buying a sheet and cutting it out appears to be my best option.
Dash pieces are easy. Do a search under my name as I made a similar thread and make parts in CF. If you need a hand reach out.
 10-21-2011, 02:46 PM