steel wide body, lots of pics
#16
so the pics show the rear bumper flares I glassed on last night.
pic1 is grinding away the bumper surface so the glass sticks better also to make the part and bumper seem have a lower profile for me to blend and sand.
pic2 is the back side of the part ground away to do the same thing as the bumper.
pic3 showing how it blends together.
pic4... success
pic5 success x2 lol
very happy with it, came out great. everything lined up and I don't think blending it will be to complicated. one side skirt part is made and the other side skirt mold is just about done. also the roof bump I'm making is taking shape and i'll have some pics of that soon as well.
last night was a huge motivation for me. I finally have some parts mounted!!! super excited :rockon:
#17
so just a quick update.
1-Rear bumper is pretty much done as far as smoothing out the blended surfaces. I just have to sand a little bit on the drivers side and cut our the under lying bumper where I overlaid the new which you can see in the pic of the inner view of the bumper.
2-my molds are still nice and sturdy after pulling my parts out of them
3-driver side mold is just about to come off, probably tomorrow.
4-working on the passenger side skirt while its off before I attach it so I can do the smoothing out and pretty work on the underside before it goes on.... sanding while laying on my back.. not fun.
5-few new parts came :thumbup: some mufflers I'm going to try, some steel braided brake lines and some lift pads for the car. I still haven't received my cats yet. but when they come in i'll start my exhaust build and post pics of it.
6-roof gelcoat has been applied. will be putting on a second coat tonight and then glass Thursday.
Thanks for looking

#20
list of pics
2 pics of rear fin in primer
1 pic of rear fin with paint but not sanded and clear coated yet
2 pics of rear fin after wet sand and clear
2 pics of rear fin on car ... just to see it
1 pic of drivers side skirt in mold
1 pic of drivers side skirt after being pulled from mold
2 pics of rear fin in primer
1 pic of rear fin with paint but not sanded and clear coated yet
2 pics of rear fin after wet sand and clear
2 pics of rear fin on car ... just to see it

1 pic of drivers side skirt in mold
1 pic of drivers side skirt after being pulled from mold
#21
so this post shows the start of the exhaust I'm building. I cut off the triangles thingies where the fab speed headers go into the rest of the exhaust... it was quite choked down. so I opened it up to be a smoother flow. you can see in the pics how much I had to take out to match it to the headers. the complete exhaust will be smoothly matched up 2.5 inch exhaust with quad mini sport mufflers. hoping to achieve a higher pitched sounding system over the previous fab speed system I had. fab speed has a great system, but I'm trying to get a different sound.
thanks
oh also threw in a pic of the control arm area as I'm taking it all apart to put in all new bushings and suspension.
thanks
oh also threw in a pic of the control arm area as I'm taking it all apart to put in all new bushings and suspension.
#22
long post/update, lots of pics.. I hope I'm not killing you guys with redundant and boring pics. just trying to be thorough  So this post will go through the exhaust mods.
1 ok so first pic was just my second set of mufflers that finally came. you can see the yellow lines on them for where I cut them to shorten them up. as you guys know its tight in the rear and I needed them to be as short as possible.
2 two halfs of the x-brace
3 how I fitted each side of the x-pipe and spacing of the mufflers. spacer between the mufflers than rubber bands to keep them squeezed while I tacked them.
4 on floor ready to weld on the stainless side of the v-bands
5 stainless welded on.
6 bracing I welded on the mufflers to keep them together whenever I need to take them off so they keep there fitment
7 how the x-pipe came out after welding. had a horrible time welding this x-pipe together.. not sure why but I kept getting popping and inconsistent welds on it
8 stainless welds. this was my first time welding stainless... I thought it went .. ok.
9 length of the finished system
10 finished look
11 weight of the system.
another post coming after this one with the new parts that came this previous week and progress on the car it self.
 So this post will go through the exhaust mods.
1 ok so first pic was just my second set of mufflers that finally came. you can see the yellow lines on them for where I cut them to shorten them up. as you guys know its tight in the rear and I needed them to be as short as possible.
2 two halfs of the x-brace
3 how I fitted each side of the x-pipe and spacing of the mufflers. spacer between the mufflers than rubber bands to keep them squeezed while I tacked them.
4 on floor ready to weld on the stainless side of the v-bands
5 stainless welded on.
6 bracing I welded on the mufflers to keep them together whenever I need to take them off so they keep there fitment
7 how the x-pipe came out after welding. had a horrible time welding this x-pipe together.. not sure why but I kept getting popping and inconsistent welds on it
8 stainless welds. this was my first time welding stainless... I thought it went .. ok.
9 length of the finished system
10 finished look
11 weight of the system.
another post coming after this one with the new parts that came this previous week and progress on the car it self.
#23
so this previous week I was able to get the driver side skirt mounted, bonded in and ready for paint. pics 1, 2 and 3
4 sanding on the door openings.. that's some knuckle busting stuff right there.
5 primed
6 painted but not wet sanded or clear coated. should have done/on by end of the week.
7, 8 and 9 wheel well paint. I have used por-15 in the past and JUST MY OPINION, that stuff is highly over rated. for the last few cars I've done, I have used the stuff pictured. it is oil based and seeps into every crack and coats extremely well. looks great, very durable and is intended for tractor equipment that sits in the elements year round.. great stuff!!! you can get it at TSC (tractor supply company)
the remaining pics are of the new parts that came.
hope you guys are enjoying this thread as much as I'm enjoying this project. having a blast and cant wait to get it back on the road.
Last edited by ttt123; 04-17-2018 at 05:41 AM.
#26
so I wet sanded and put on some clear coat. also fitted the exhaust in there. if I was going to do it again.. I'd go just an inch or two skinnier on the width. it was tight making these bends. I still need to make the exit to the tips for it but you can pretty much see how its going to be. the pic from the rear with the bumper on where you can see the exhaust hanging down was before I raised it a little. Its about an inch higher so theirs a little less sticking down.
#28
hello, new member here. Thanks for sharing the write up. I am very interested in doing this to my 996. does the car need to be modified to fit the front bumper? I was advised by my local shop that the water coolers need to be moved to a different location? any input is appreciated. Thanks in advance
#29
hello, new member here. Thanks for sharing the write up. I am very interested in doing this to my 996. does the car need to be modified to fit the front bumper? I was advised by my local shop that the water coolers need to be moved to a different location? any input is appreciated. Thanks in advance
I haven't kept this thread updated because I received very few comments on what I was doing but over on this thread there is a ton more detail. https://rennlist.com/forums/996-forum/1041683-like-it-or-not-steel-wide-body.html
mod your Porsche, you will love it lol I have people come up to me all the time asking about the car and taking selfies with it. it amazes me how many people drop there jaw over this Porsche now.
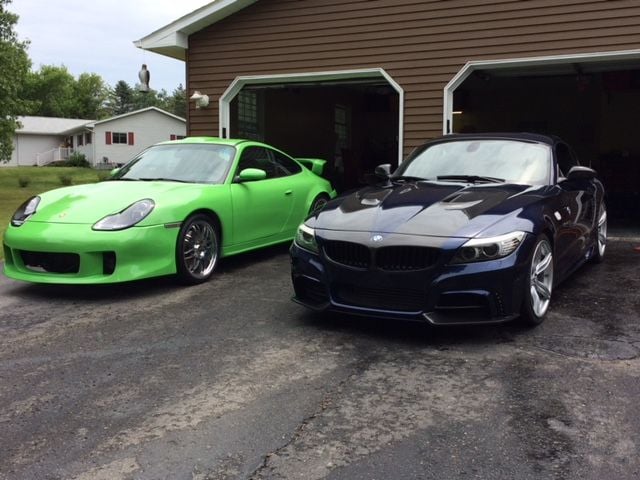
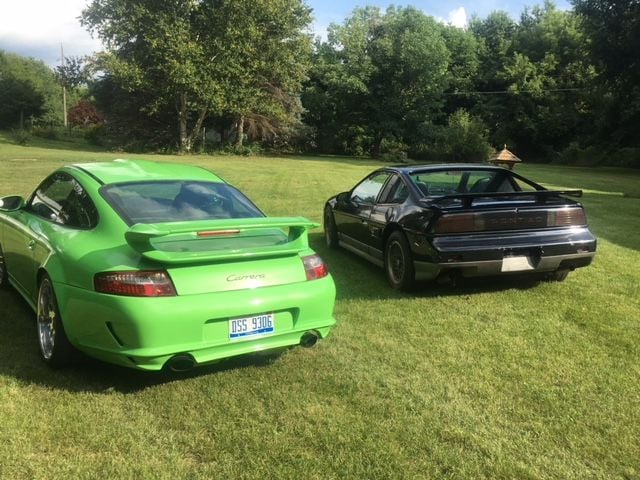
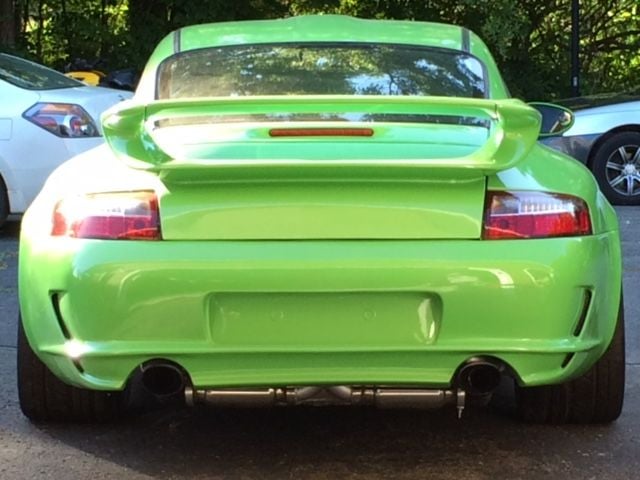
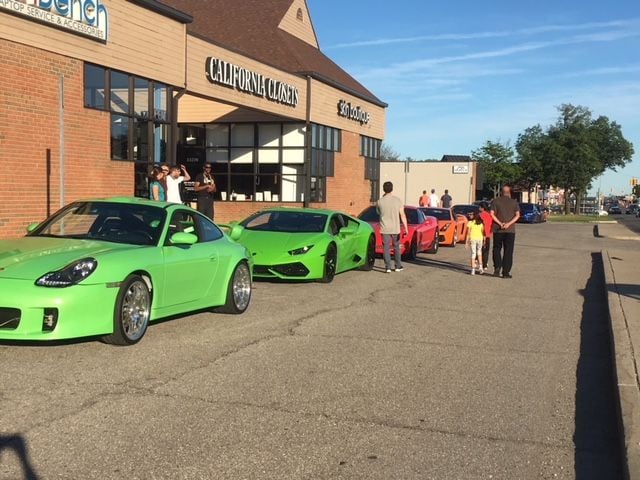
Here are some pics of the finished car.


[
Last edited by ttt123; 08-20-2018 at 05:58 AM. Reason: pictures


