When you click on links to various merchants on this site and make a purchase, this can result in this site earning a commission. Affiliate programs and affiliations include, but are not limited to, the eBay Partner Network.
Early DB9 replacement Euro rear license plate mount
(Was asked to repost this with images, as previous crosspost in another thread did not show the images.)
I replaced the original US spec plastic rear license plate carbuncle with the European style license plate lights and trunk release mounted in the correct space under the trunk lid edge on my 2005 DB9. I got the European style license plate lights + trunk release mechanism from the UK bits web site.
Dismantled the US spec structure by loosening trunk lid inner lining, and unbolting all the parts, disconnecting the wiring plug. The European unit uses the exact same plug. Leaves several large holes, six of which are not covered by a US license plate. I had these filled and painted by a local body shop (perfect color match btw).
Up inside the trunk lid is a plate held by three cross-head screws that serves not much purpose in US spec, but is a mounting plate for the European style unit. However the original openings in that plate do not match up to the new unit and I had to drill out four holes for the mounting bolts, and two larger holes for the license plate light bayonet bulb fitments. Mounting the new unit was then simple, though I needed to caulk it in as no gasket provided.
See attached pics.
Before
Original US plate holder part disassembled
Original US under trunk lid, part disassembled
Original US plate holder removed
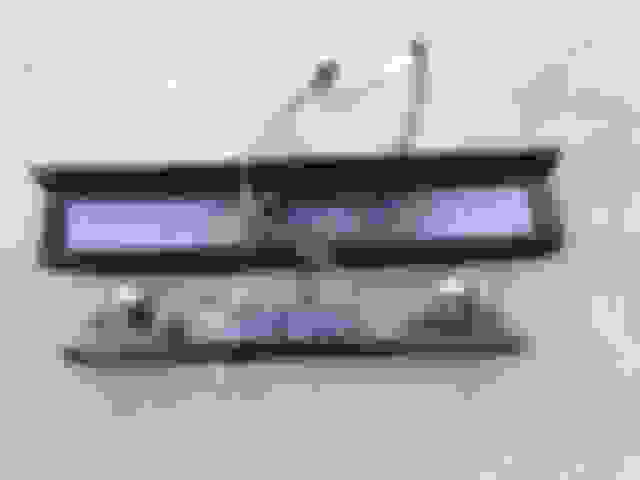
Original US back plate and new trunk release/plate lights - holes to not align
Looks great! I'm having a hard time understanding how the mounting holes for the original light "brackets" are covered.. Am I missing something?? Thanks for the post.
I'm sure it's a US Road Act regulation to have these license plate lights originally fitted on the side but what's the main reason for it?
I am sure there is someone better qualified than me to answer this, but it will be something like the plate vertical angle was 0.75deg too sloped from the vertical to satisfy the Feds, and their carefully thought out regulations
Looks great! I'm having a hard time understanding how the mounting holes for the original light "brackets" are covered.. Am I missing something?? Thanks for the post.
So on the fourth pic you can see the holes left behind when the original US plate holder removed ... I had those outer eight holes (not six, my bad) filled and painted by a local body shop - that whole inset back panel is a natural edge for the spray so its well contained. Even though car is 2005 the paint match was perfect. This was a very simple low cost, job. I did not fill the inner four holes. Mounted plate direct to the panel.
Nice transformation... and wonderful color. I'm from Jersey too (exit 148 GSP).... where are you from? Bring your DB9 up to Lime Rock in June for the annual AMOC Time Trial.
Just as an FYI, there is always the option of having the bumperettes painted to match the car. I have a real good guy for this if anyone is interested. He did mine on my Porsche and has done various other cars and even interior panels.
Another old thread, and another happy 'customer'! Thanks for the idea. My 2005 had a few oddities when I purchased it (from a used car dealer). The front plate holder was the euro spec. The rear had the US bumperettes, but strangely they didn't have any illumination. When I pulled them (and the rear license plate holder off) to rectify that so I could pass Texas inspection, I discovered someone had already put in the Euro style license plate lights and trunk release so it was a no-brainer to do as the OP did. I covered the holes with some spare Xpel until I could get them filled and painted.
I've since had the holes filled and paint done at Katy Coach Works. I couldn't bring myself to just drill holes into the decklid since it's two layers with a gap, so I instead have a thin 'adapter plate' to match the US plate and 4 of the existing holes.
The trunk release alone makes this modification worthwhile.
I have the unicorn 2005 DB9 with the manual transmission which they didn't offer that year. I dont want to fill things in due to trying to keep it OEM for value down the road. BUT....... I am doing this project later this week.
1. I plan to use S-TEK Black Gloss PPF in the plate surround area to cover all the holes. I think that should make things nice.
2. Can you show a pic, or explain what you used to NOT have to drill 4 holes. I might drill them anyway. They can be re-filled later if ever needed.
Advice? Don't tell the person at the hardware store what you're trying to accomplish! It takes too much time explaining why you're buying vent pipe roof flashing to fab a defrost for your racecar.
I'm known to over complicate things just to get something my way. I didn't want to drill holes because I don't think the license plate area is one layer of composite. The thickness suggests it's two layers with an air gap between. If you drill holes, you'll be opening up that air gap, and never get all the shavings out. **** retentive? Yeah, probably. Like you tho, I want to be able to go back to the US spec if needed by just drilling out the expoxy or whatever the body shop used to fill the holes.
I pulled off the bumperettes and put some pieces of clear PPF I had over the holes on the outside and inside of the boot before I got mine filled properly, more to test the concept and make sure I liked the look. On hot days, the PPF would have a slight bulge with it heating the air between. You really don't need to cover the hole from the inside; I was just paranoid about water or dirt getting into the trunk. The first 'adapter plate' used just nuts and bolts, but was a bit thick due to the bolt heads and made pushing the trunk release not comfortable (knuckles brushing against the plate).
Here's what I have now. It's a bit better. It looks bad up close, but 5' away it appears to be one plate and still gives plenty of room to activate the trunk release. Please forgive the McGyver-ish method. If it's stupid but works...
I started with a blank aluminum vanity plate. Then simply laid a piece of 11x17 paper over the boot area and 'shaded' where the holes were with a pencil. Then transferred that to the plate and drilled 4 new holes to line up with the boot holes.
Then I got a few different sizes of these from Ace Hardware, apparently called Joint Connector bolts. I needed something with a thin head, and these are nice in that they are hex drive and not slotted. https://www.baltimorehardware.com/pr...d-brass-finish
4 long ones and 4 short ones (~2" and ~1", sorry I don't remember the lengths). I ended up trimming them all down anyways to get a better fit. *edit* Now that I think about it, I did end up having to run a die over the shorter ones as they still weren't short enough. You'll see what I mean when you look at the picture. *edit*
I sandwiched the DMV plate to the vanity plate with the bolt, vanity plate, washer, DMV plate, washer, then nut. https://www.ebay.com/itm/5-CHROME-FL...-/182621582575
I got these since they don't look like your standard acorn nut.
Then I attached that whole assembly the boot lid with the assembly, washer, beveled rubber washer, boot lid, washer, jam nut (since it's thinner). https://www.acehardware.com/departme...-washers/40130
I *think* that's what I got for the rubber washers. The rubber washer takes up any misalignment and 'seals' the boot.
*edit* If you come across a better mouse trap (or even more appropriate bolts) let me know. I initially thought about having someone stud weld studs to a plate, but I was concerned about the thickness needed of the plate to be able to do that, and that it'd have to be steel rather than aluminum. *edit*
 03-09-2015, 07:32 PM