
Replacing V8 Vantage Gas Struts on Doors


Thread Starter
|
Registered User

Joined: Dec 2010
Posts: 58
From: Rockwell, NC
Rep Power: 21

Replacing V8 Vantage Gas Struts on Doors
I recently purchased my 2007 V8 Vantage from an independent dealer. The dealer agreed to furnish the hatch and hood gas struts that needed to be replaced. I also mentioned that I wondered why the doors would not stay open. Upon doing some research, I discovered that gas struts also were required on the doors. After discussing it with the dealer, he agreed to split the cost on the door struts which was perfectly acceptable to me. He also offered to do the labor but I prefer to work on my own cars.
One of the previous owners had evidently used something abrasive to remove brake dust from the wheels. The chemical had attacked the clear coat. Also, the tires turned out to be the original ones and were dated 2006. The rear tires were down to the wear bars but the front tires still had lots of tread left. However, they were weather checked and needed to be replaced. We have a place near here that does a good job of refinishing wheels and will also mount the new tires that i received from the Tire Rack. The PO had installed special lug nuts that required a special socket. It was not in the car but I was able to order two sockets at a local Discount Tire. One went into the tool box while the other one is in the car.


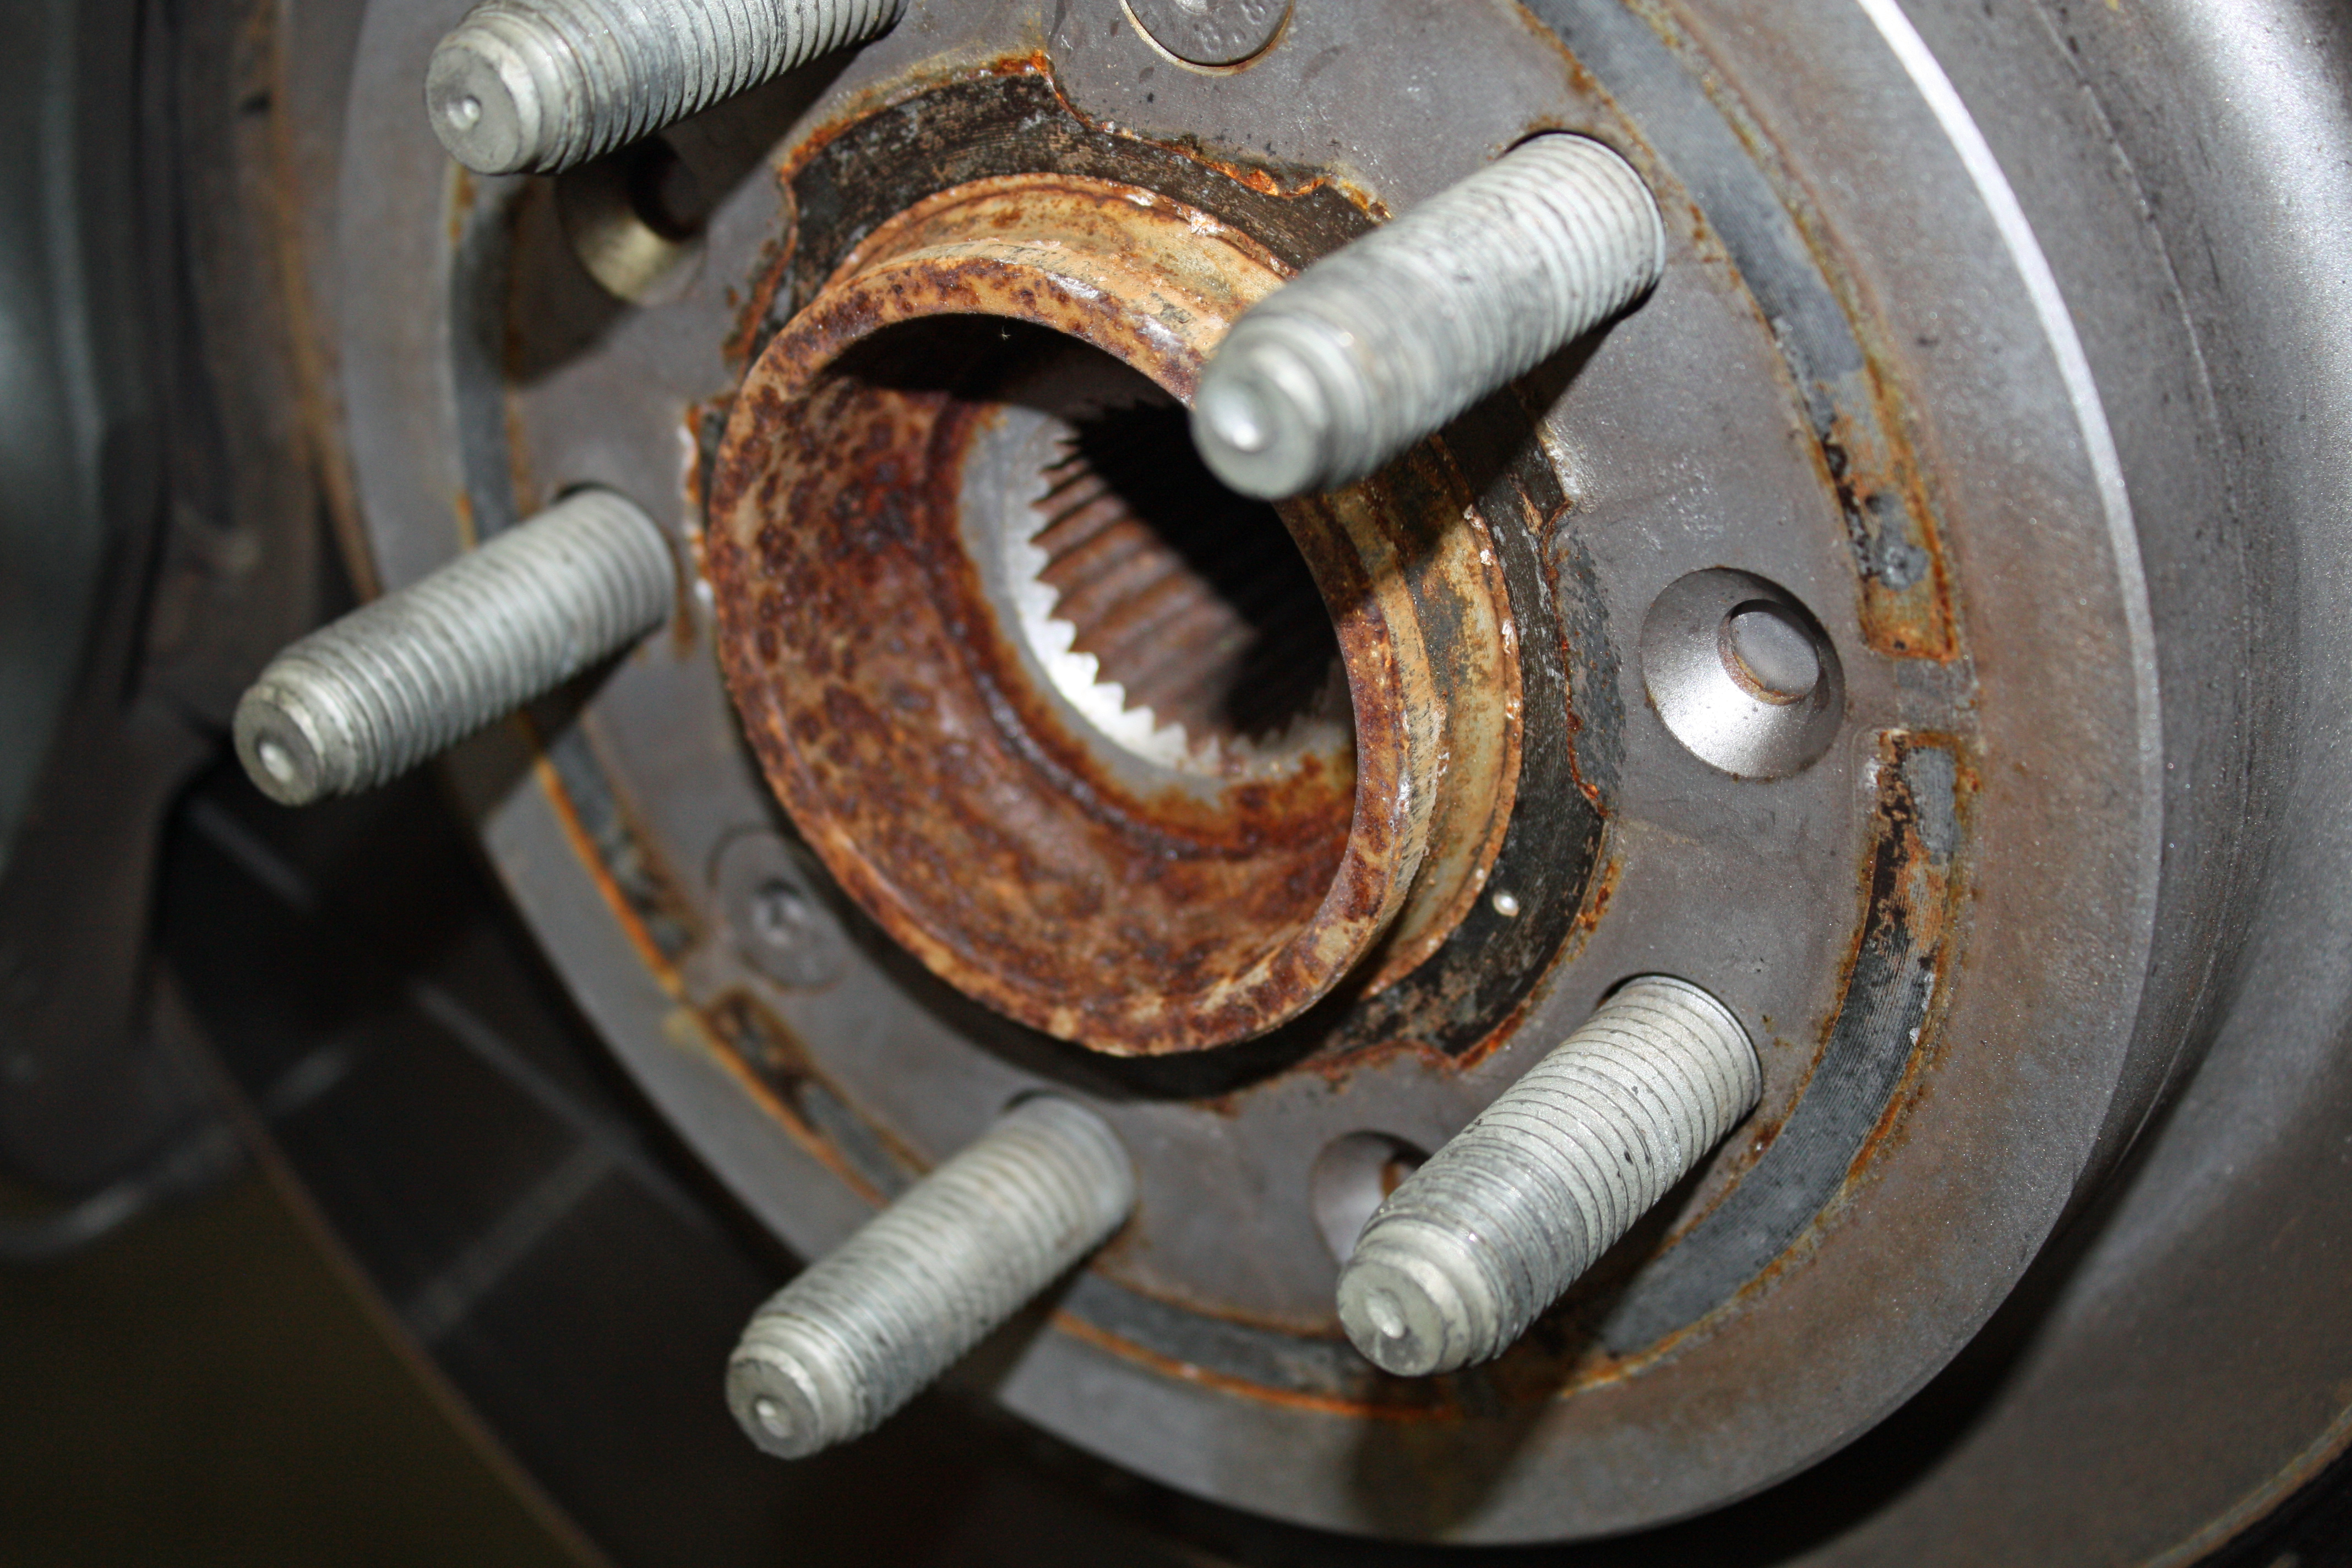
After removing the lug nuts, I had to use a heavy rubber mallet to break the front wheels away from the hub. The culprit was rust. I wire brushed and sanded all of the hubs. A liberal dose of anti-seize will be applied before the wheels are re-attached.
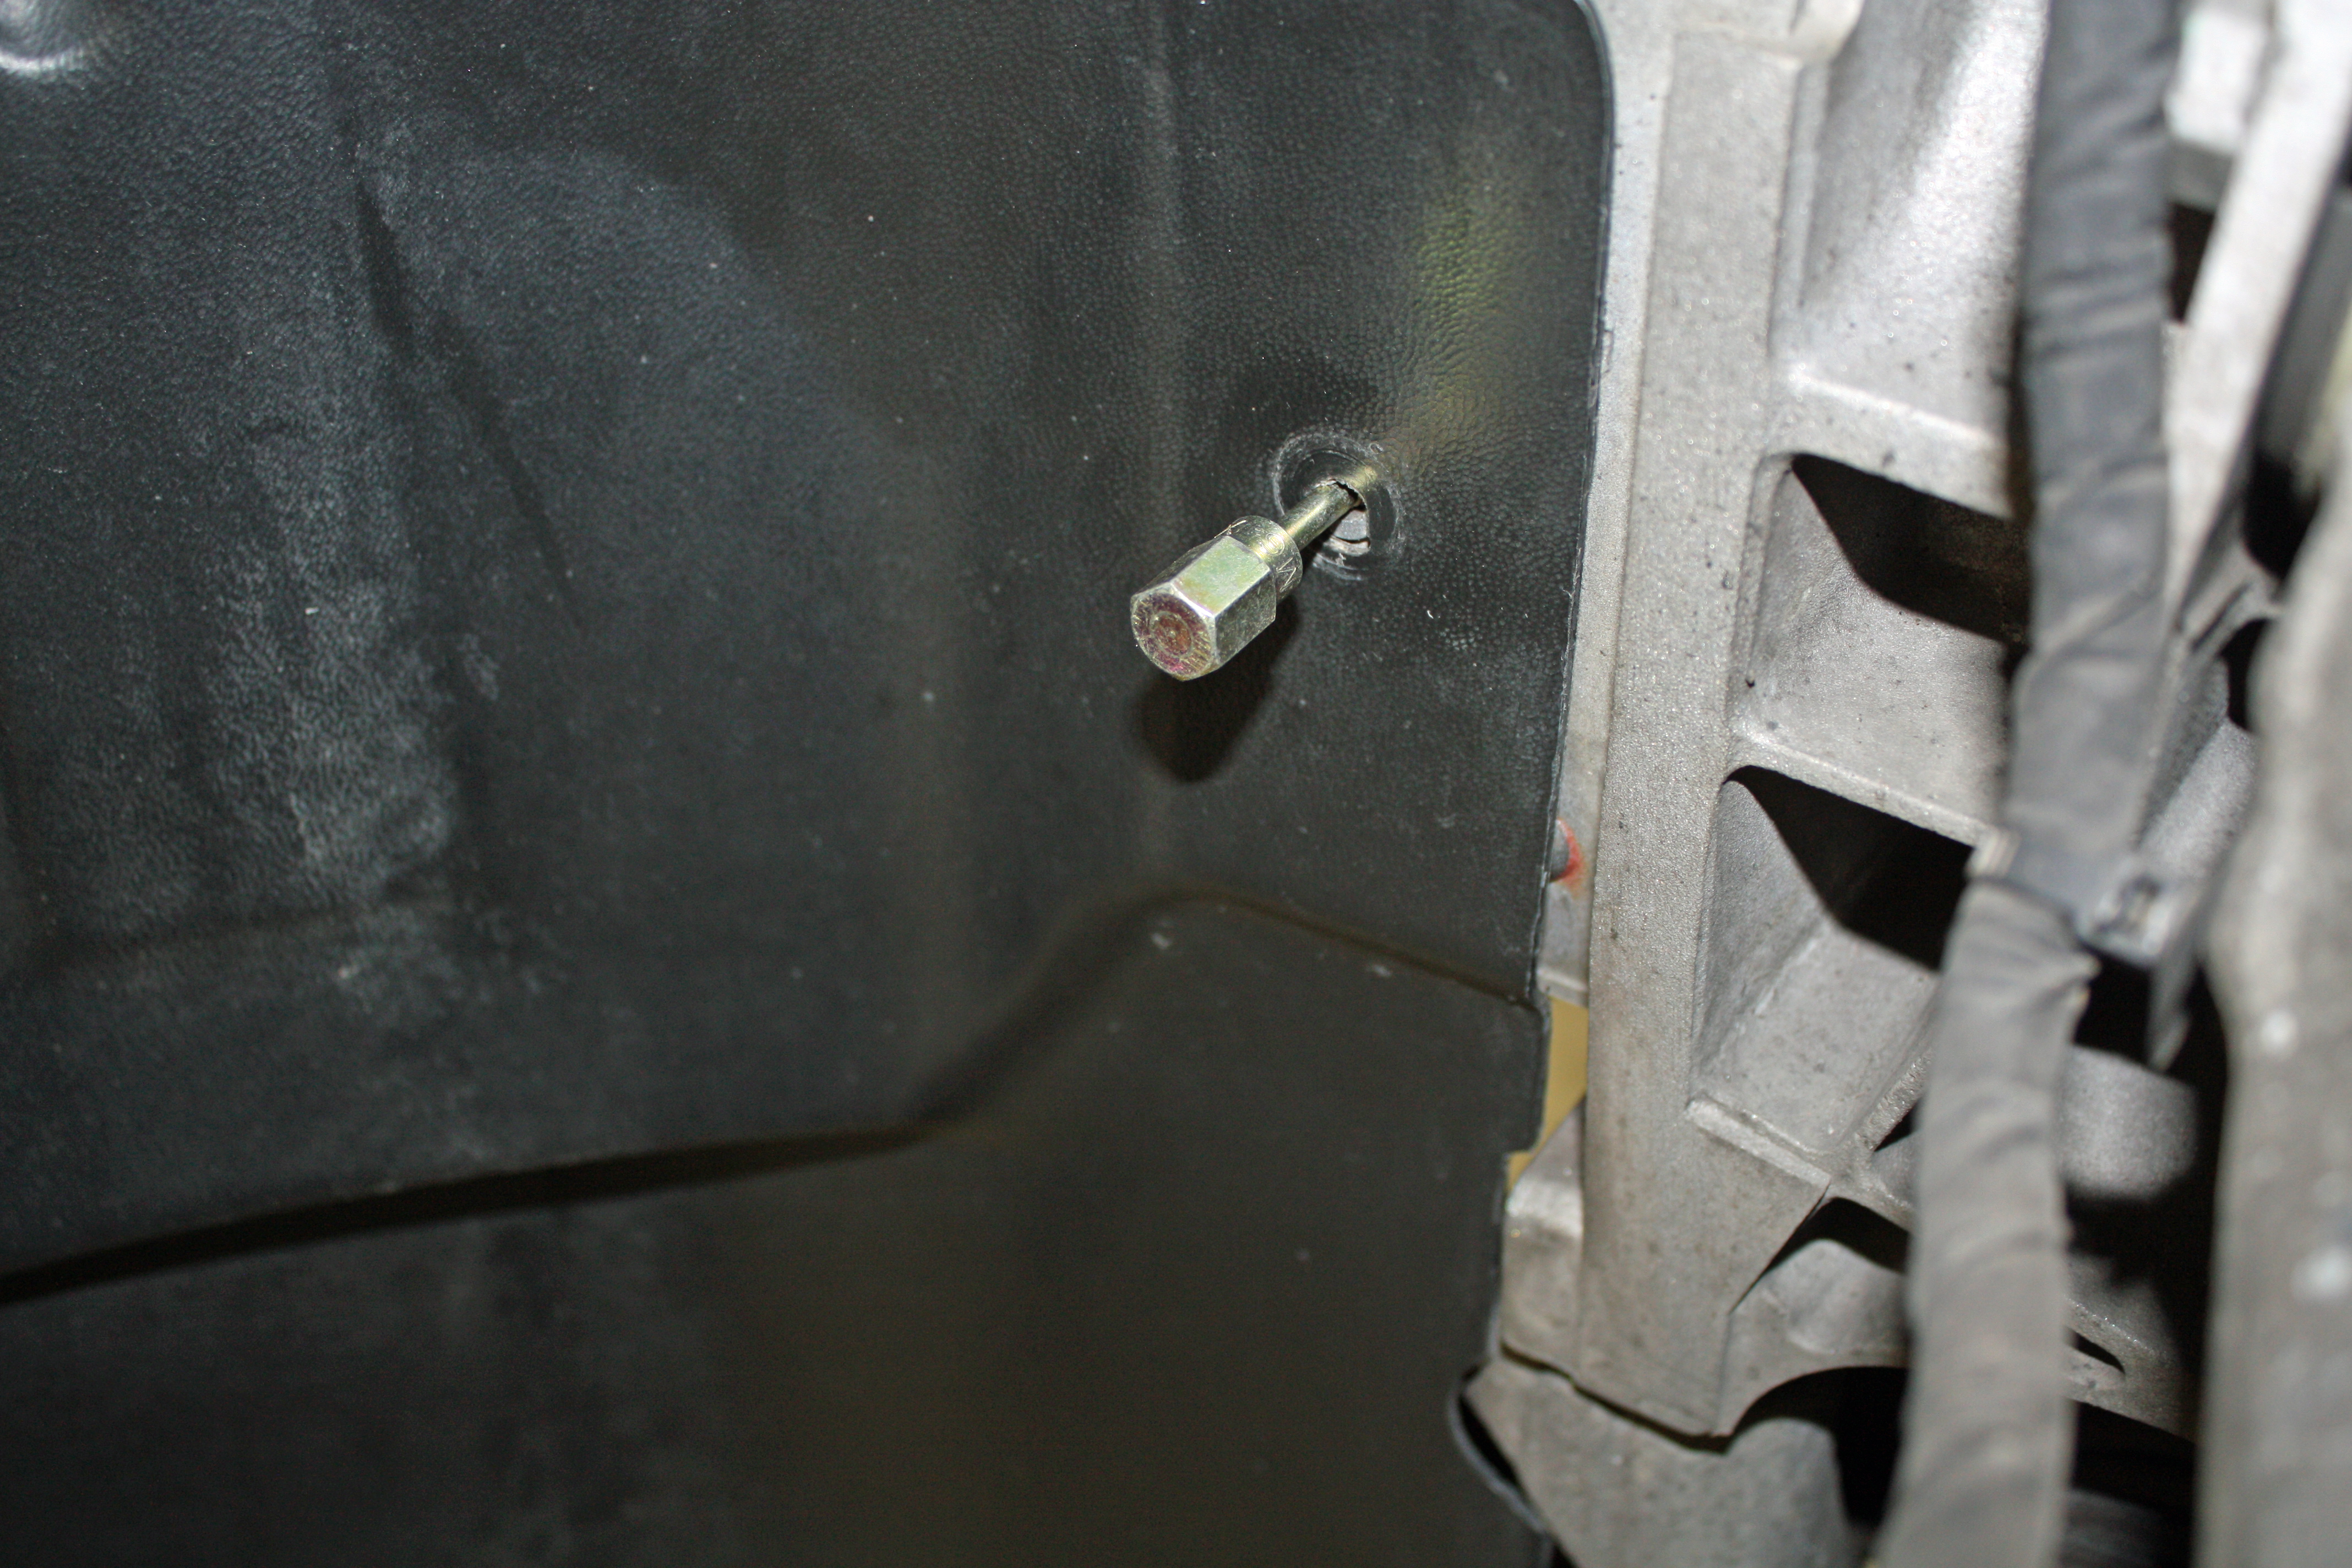
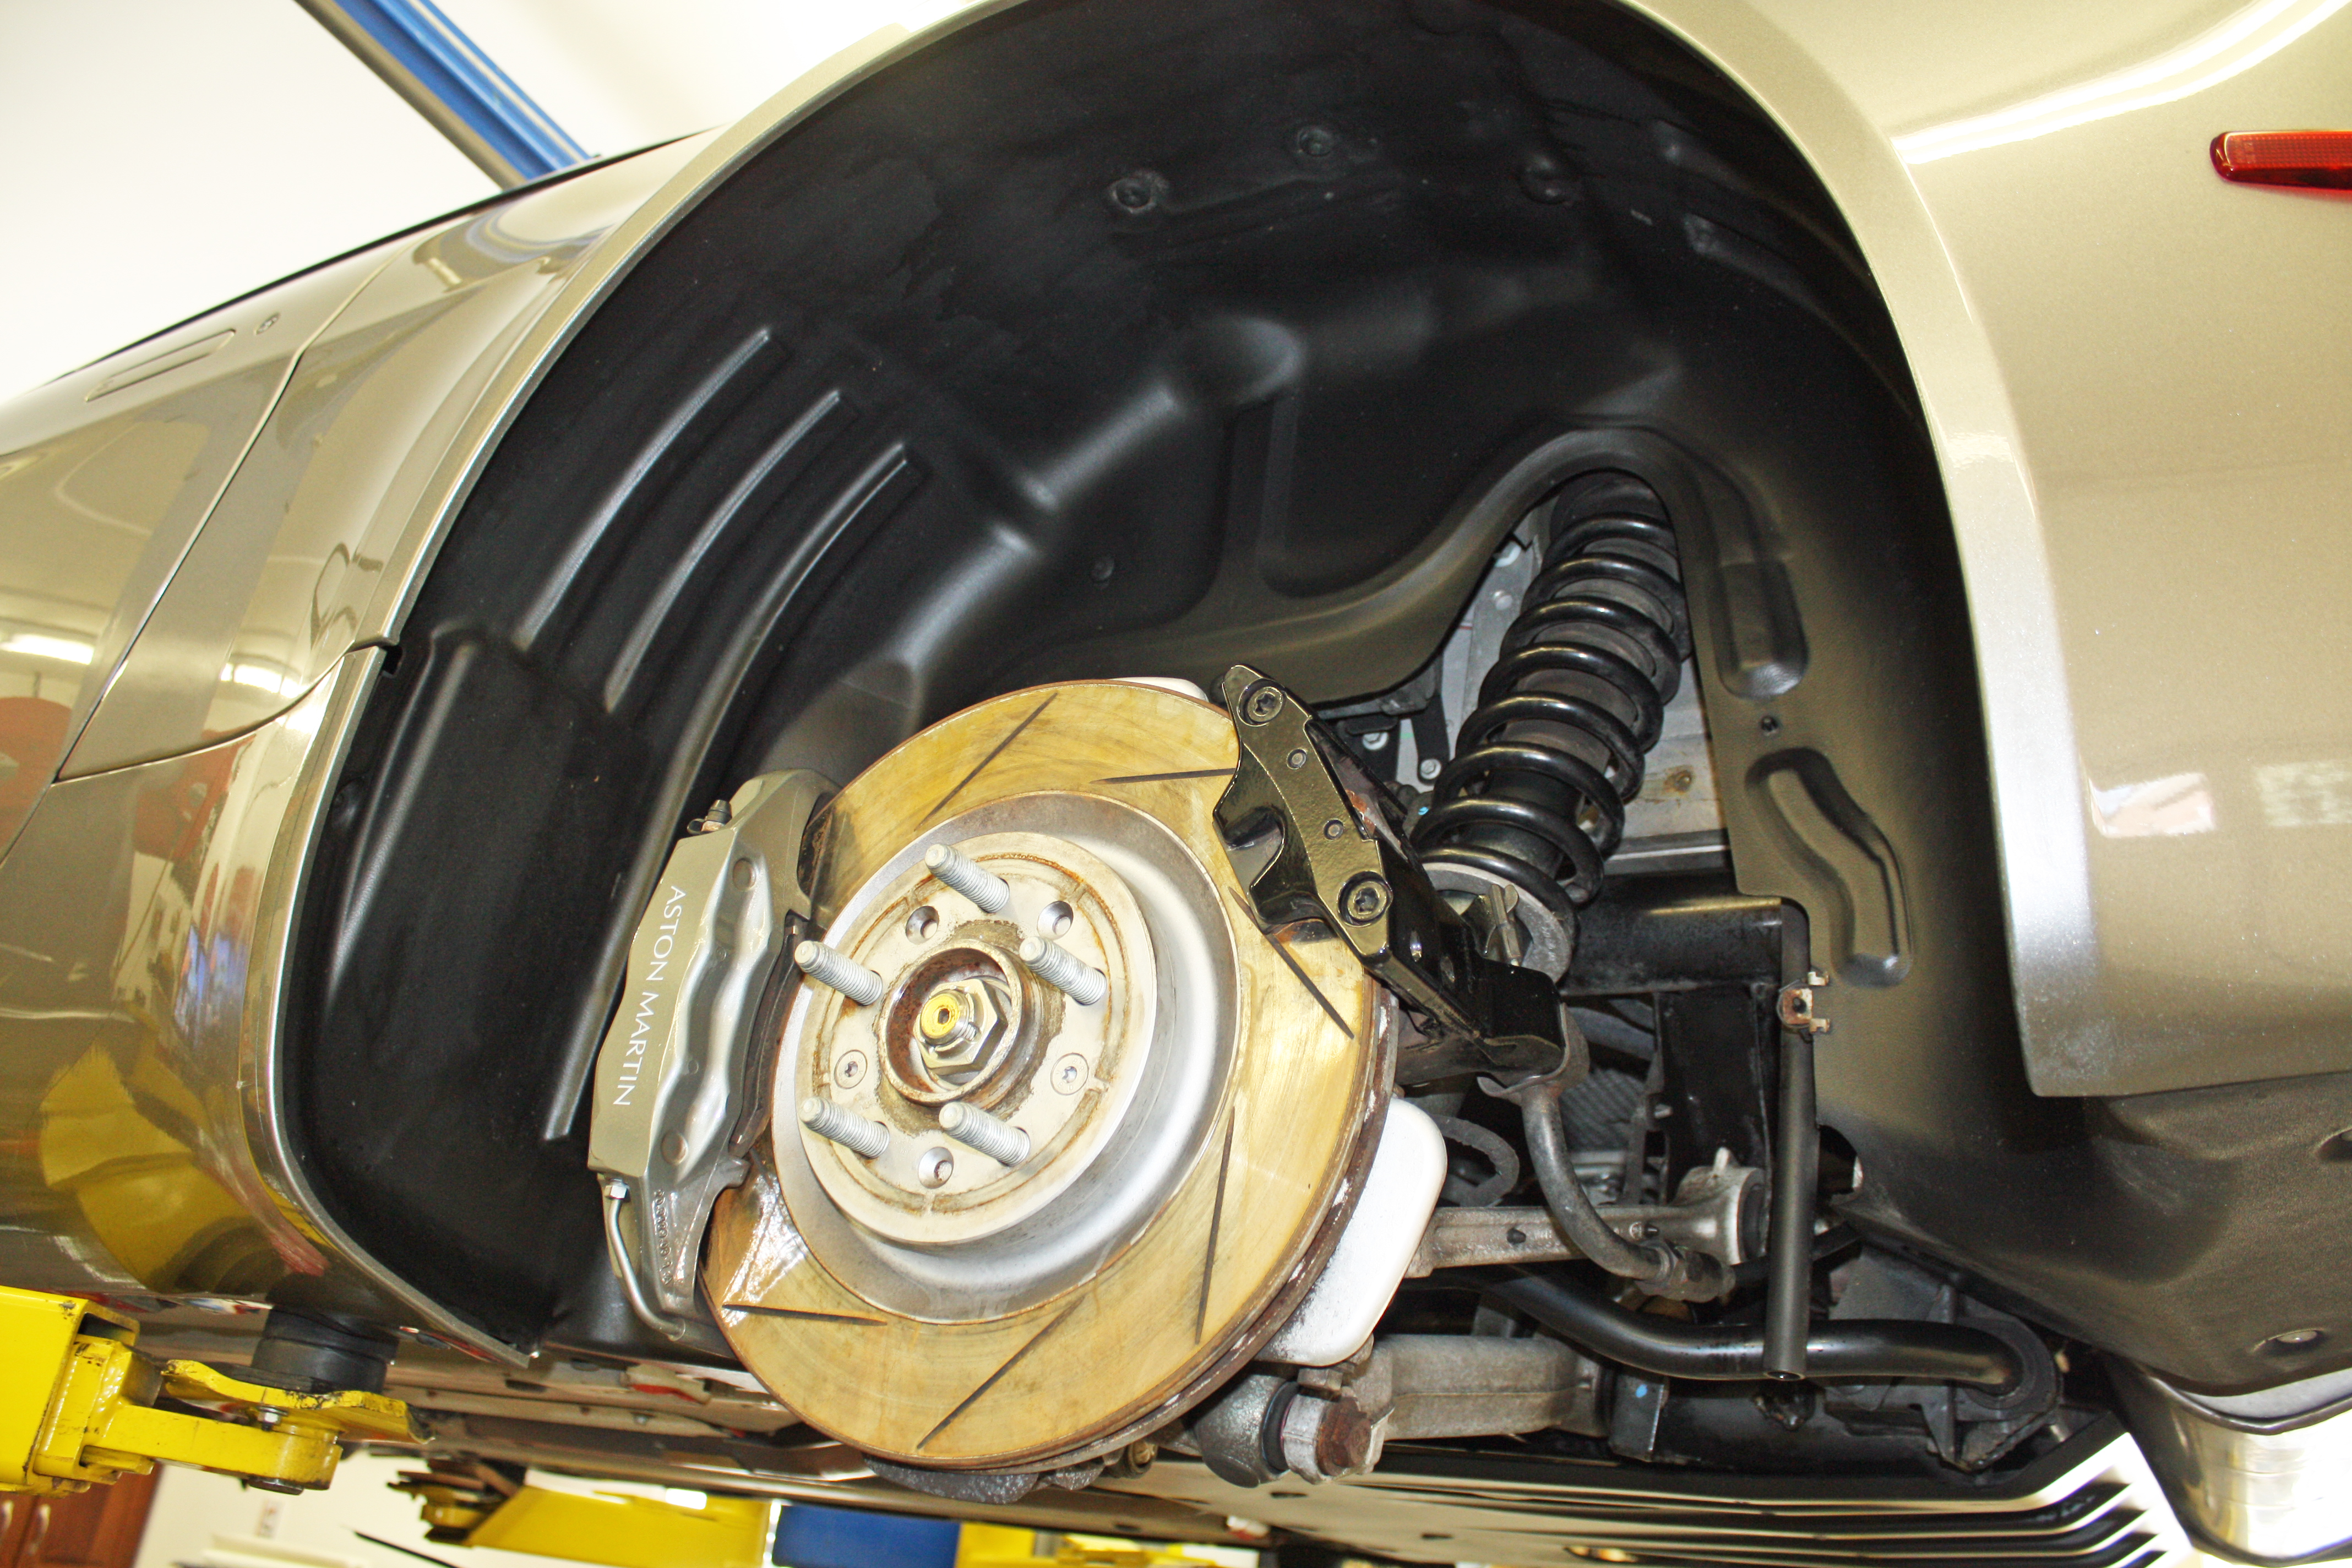
To install the door struts requires removing the inner fender liners to gain access to the struts inside the front fenders. After removing many, many fasteners, the liners were on the floor where I later cleaned them. I also removed the metal pan under the engine.


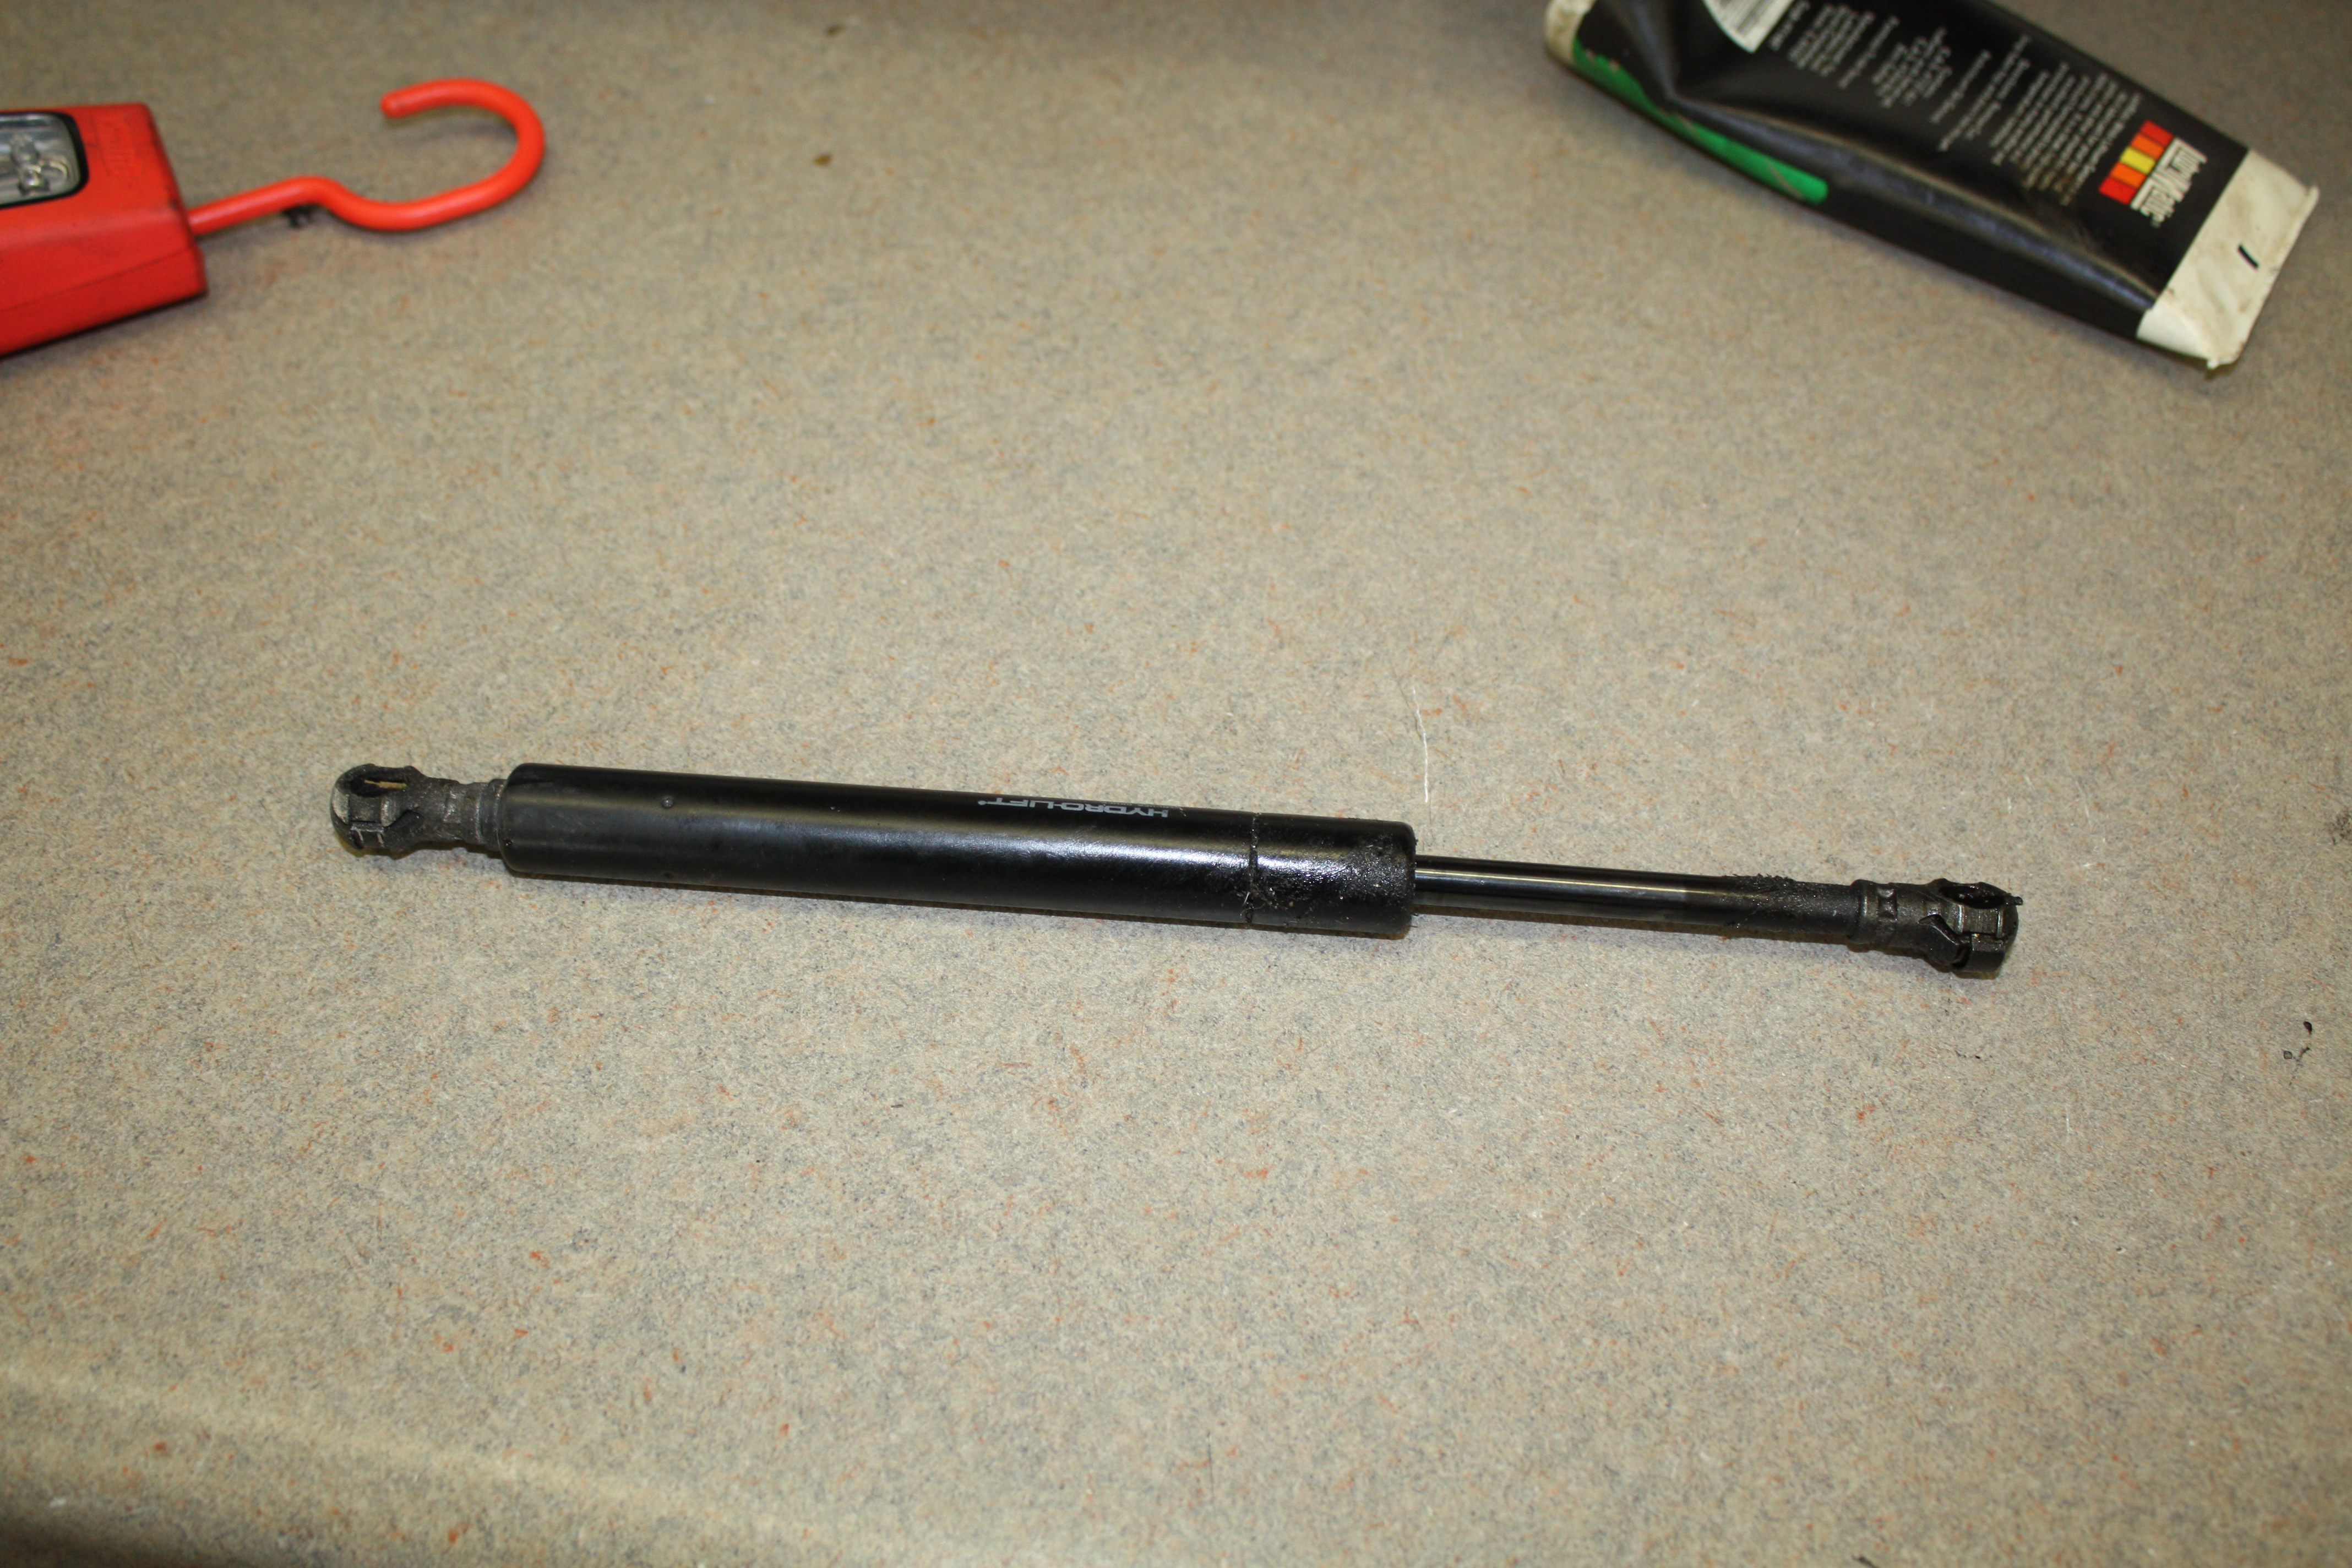
Now I could finally see the strut. I used a pick type tool to release the clip on the old strut. Once it was off, I attached the door end and then had my wife open the door to the point where I could attach the front part of the strut. It was readily apparent that the old struts were leaking.


One of the previous owners had evidently used something abrasive to remove brake dust from the wheels. The chemical had attacked the clear coat. Also, the tires turned out to be the original ones and were dated 2006. The rear tires were down to the wear bars but the front tires still had lots of tread left. However, they were weather checked and needed to be replaced. We have a place near here that does a good job of refinishing wheels and will also mount the new tires that i received from the Tire Rack. The PO had installed special lug nuts that required a special socket. It was not in the car but I was able to order two sockets at a local Discount Tire. One went into the tool box while the other one is in the car.


After removing the lug nuts, I had to use a heavy rubber mallet to break the front wheels away from the hub. The culprit was rust. I wire brushed and sanded all of the hubs. A liberal dose of anti-seize will be applied before the wheels are re-attached.


To install the door struts requires removing the inner fender liners to gain access to the struts inside the front fenders. After removing many, many fasteners, the liners were on the floor where I later cleaned them. I also removed the metal pan under the engine.


Now I could finally see the strut. I used a pick type tool to release the clip on the old strut. Once it was off, I attached the door end and then had my wife open the door to the point where I could attach the front part of the strut. It was readily apparent that the old struts were leaking.


Thread Starter
|
Registered User
Joined: Dec 2010
Posts: 58
From: Rockwell, NC
Rep Power: 21
As I was re-installing the fender well liners, I had one fastener that did not want to screw in freely. After trying another fastener with the same results, I broke out my thread chasers to make the threads whole again. It worked well and avoided having a stripped screw.
In addition to cleaning the front fender well liners, I scrubbed the rear ones as well and did some other cleaning as well. Not concours by a long shot but cleaner that it was.
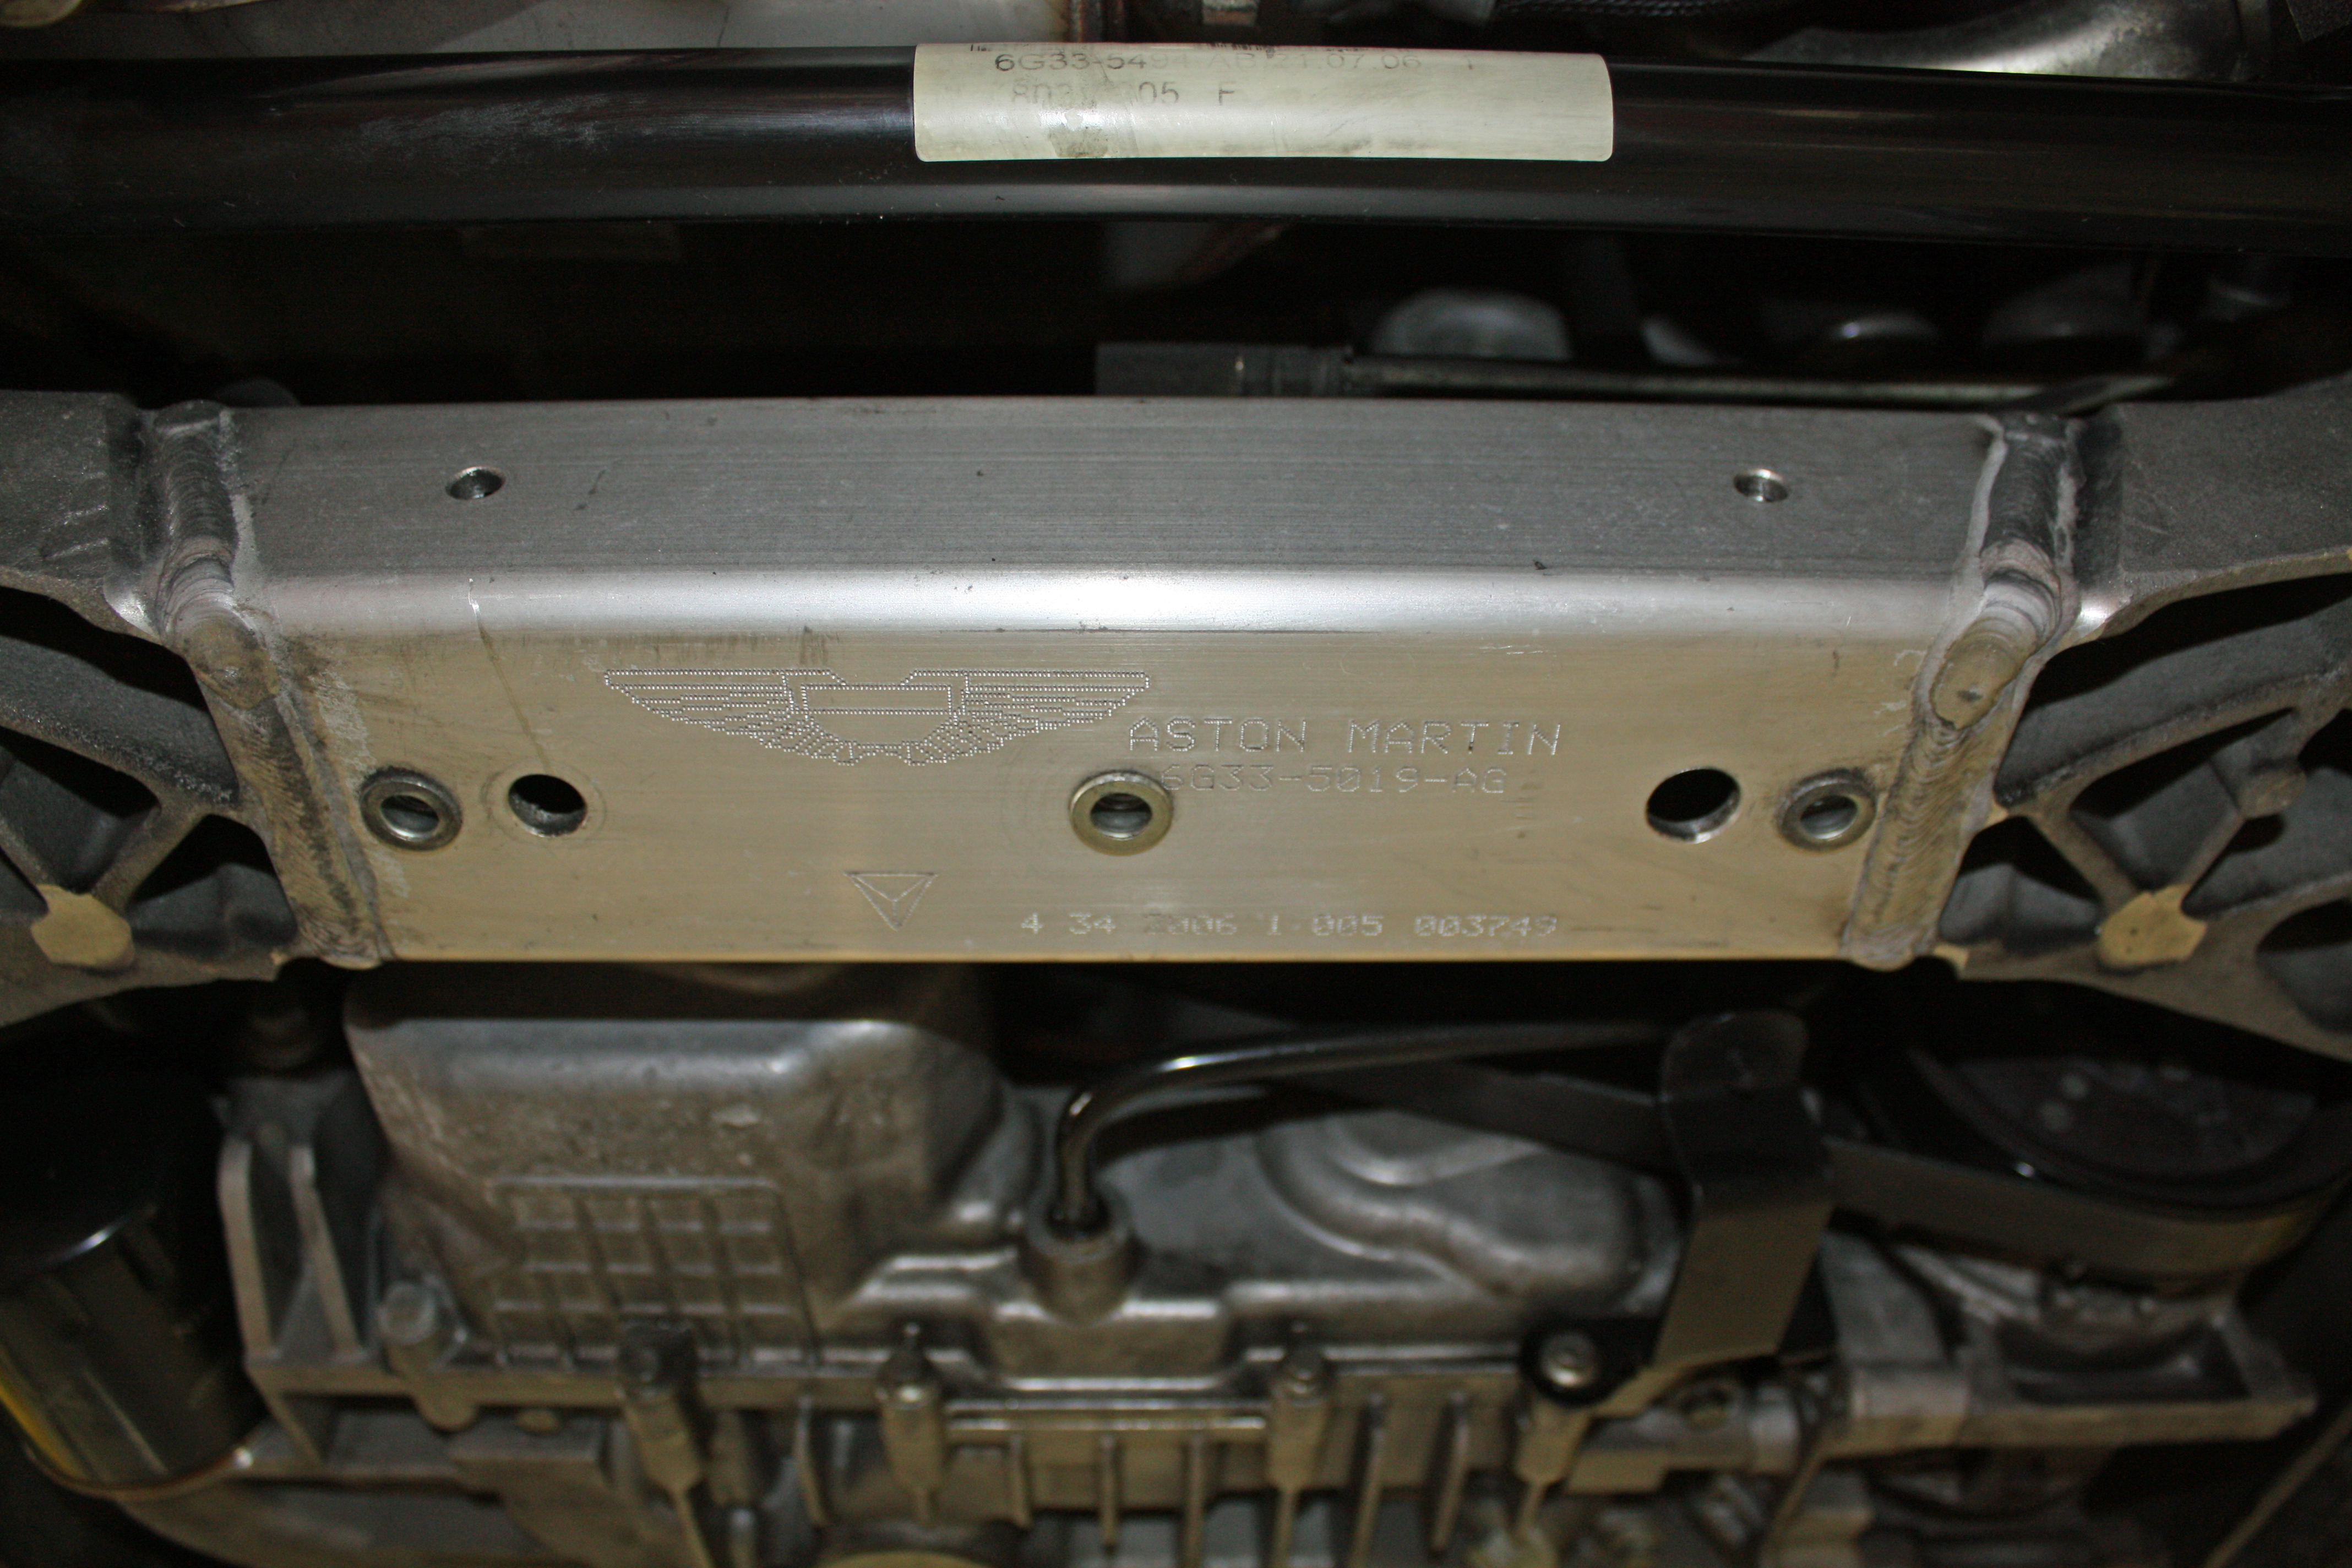
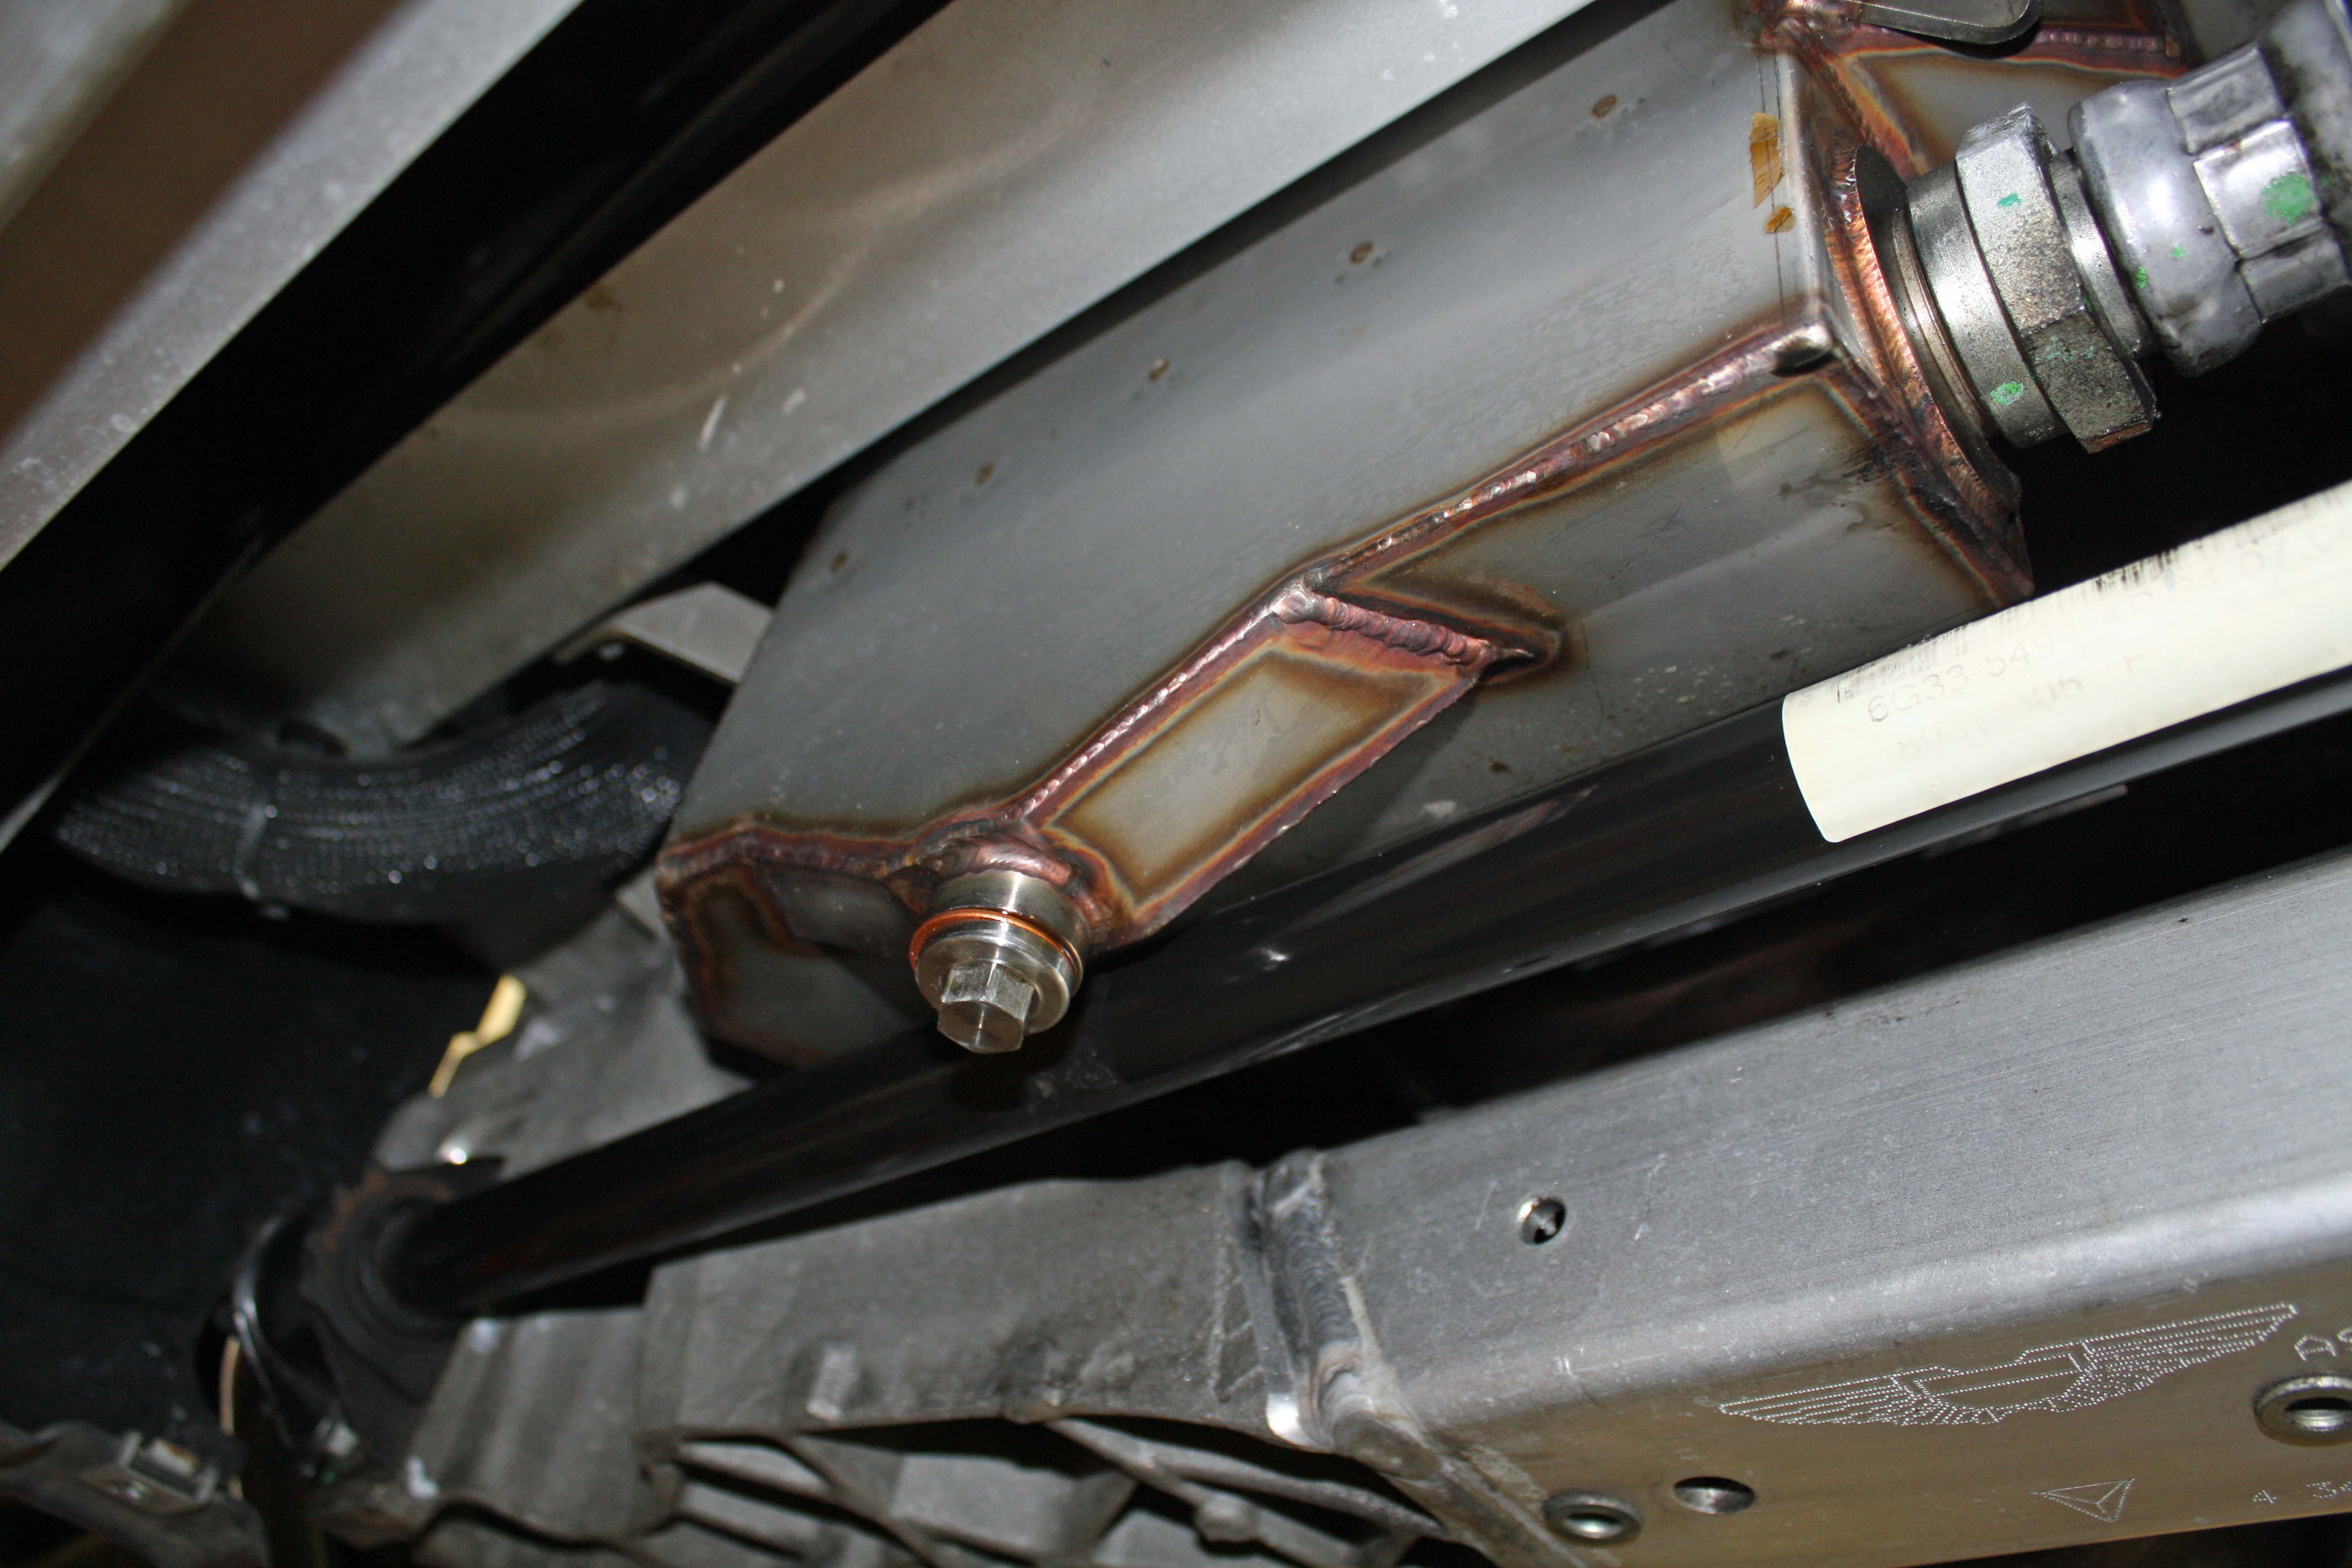
As I was cleaning and checking out the bottom of the car, I was constantly impressed by the parts number tags on various items such as the exhaust pipe, the muffler, and the engine cradle.


Registered User
Joined: Dec 2014
Posts: 203
From: NC
Rep Power: 25

I agree that the inner bits are as lovely as the outside. When ever I work on mine, I find myself just staring at the craftsmanship that went in to make these cars. the extrusions, and welding are super.

Registered User
Joined: Oct 2006
Posts: 984
From: Issaquah, WA
Rep Power: 61
Taking the car apart makes it clear why these things are so heavy. There are about 4x more screws than necessary to hold panels in place and they use very high quality hardware. I can't figure out why they decided it was necessary to hold the radiator upper cover plate (the one with the inspection badge) down with so many screws. But it does add to the specialness of the car.
Trending Topics
Registered User
Joined: Aug 2014
Posts: 1,038
From: Oxnard, Ca
Rep Power: 62
Oh boy, I thought I was ****. Now I need to pull the wheels on my car and clean the inner fender liners. I clean the underside of my car when it is up on my rack. I would need to purchase a trestle so I can remove my wheels on the 4 post lift. The Aston is the car on the top right.
Ron
Ron
Thread Starter
|
Registered User
Joined: Dec 2010
Posts: 58
From: Rockwell, NC
Rep Power: 21
Initially I used the same car soap I use on the car and scrubbed them with a wheel brush. I then used Simple Green and a paper towel. Pretty exotic stuff!!
Thread Starter
|
Registered User
Joined: Dec 2010
Posts: 58
From: Rockwell, NC
Rep Power: 21
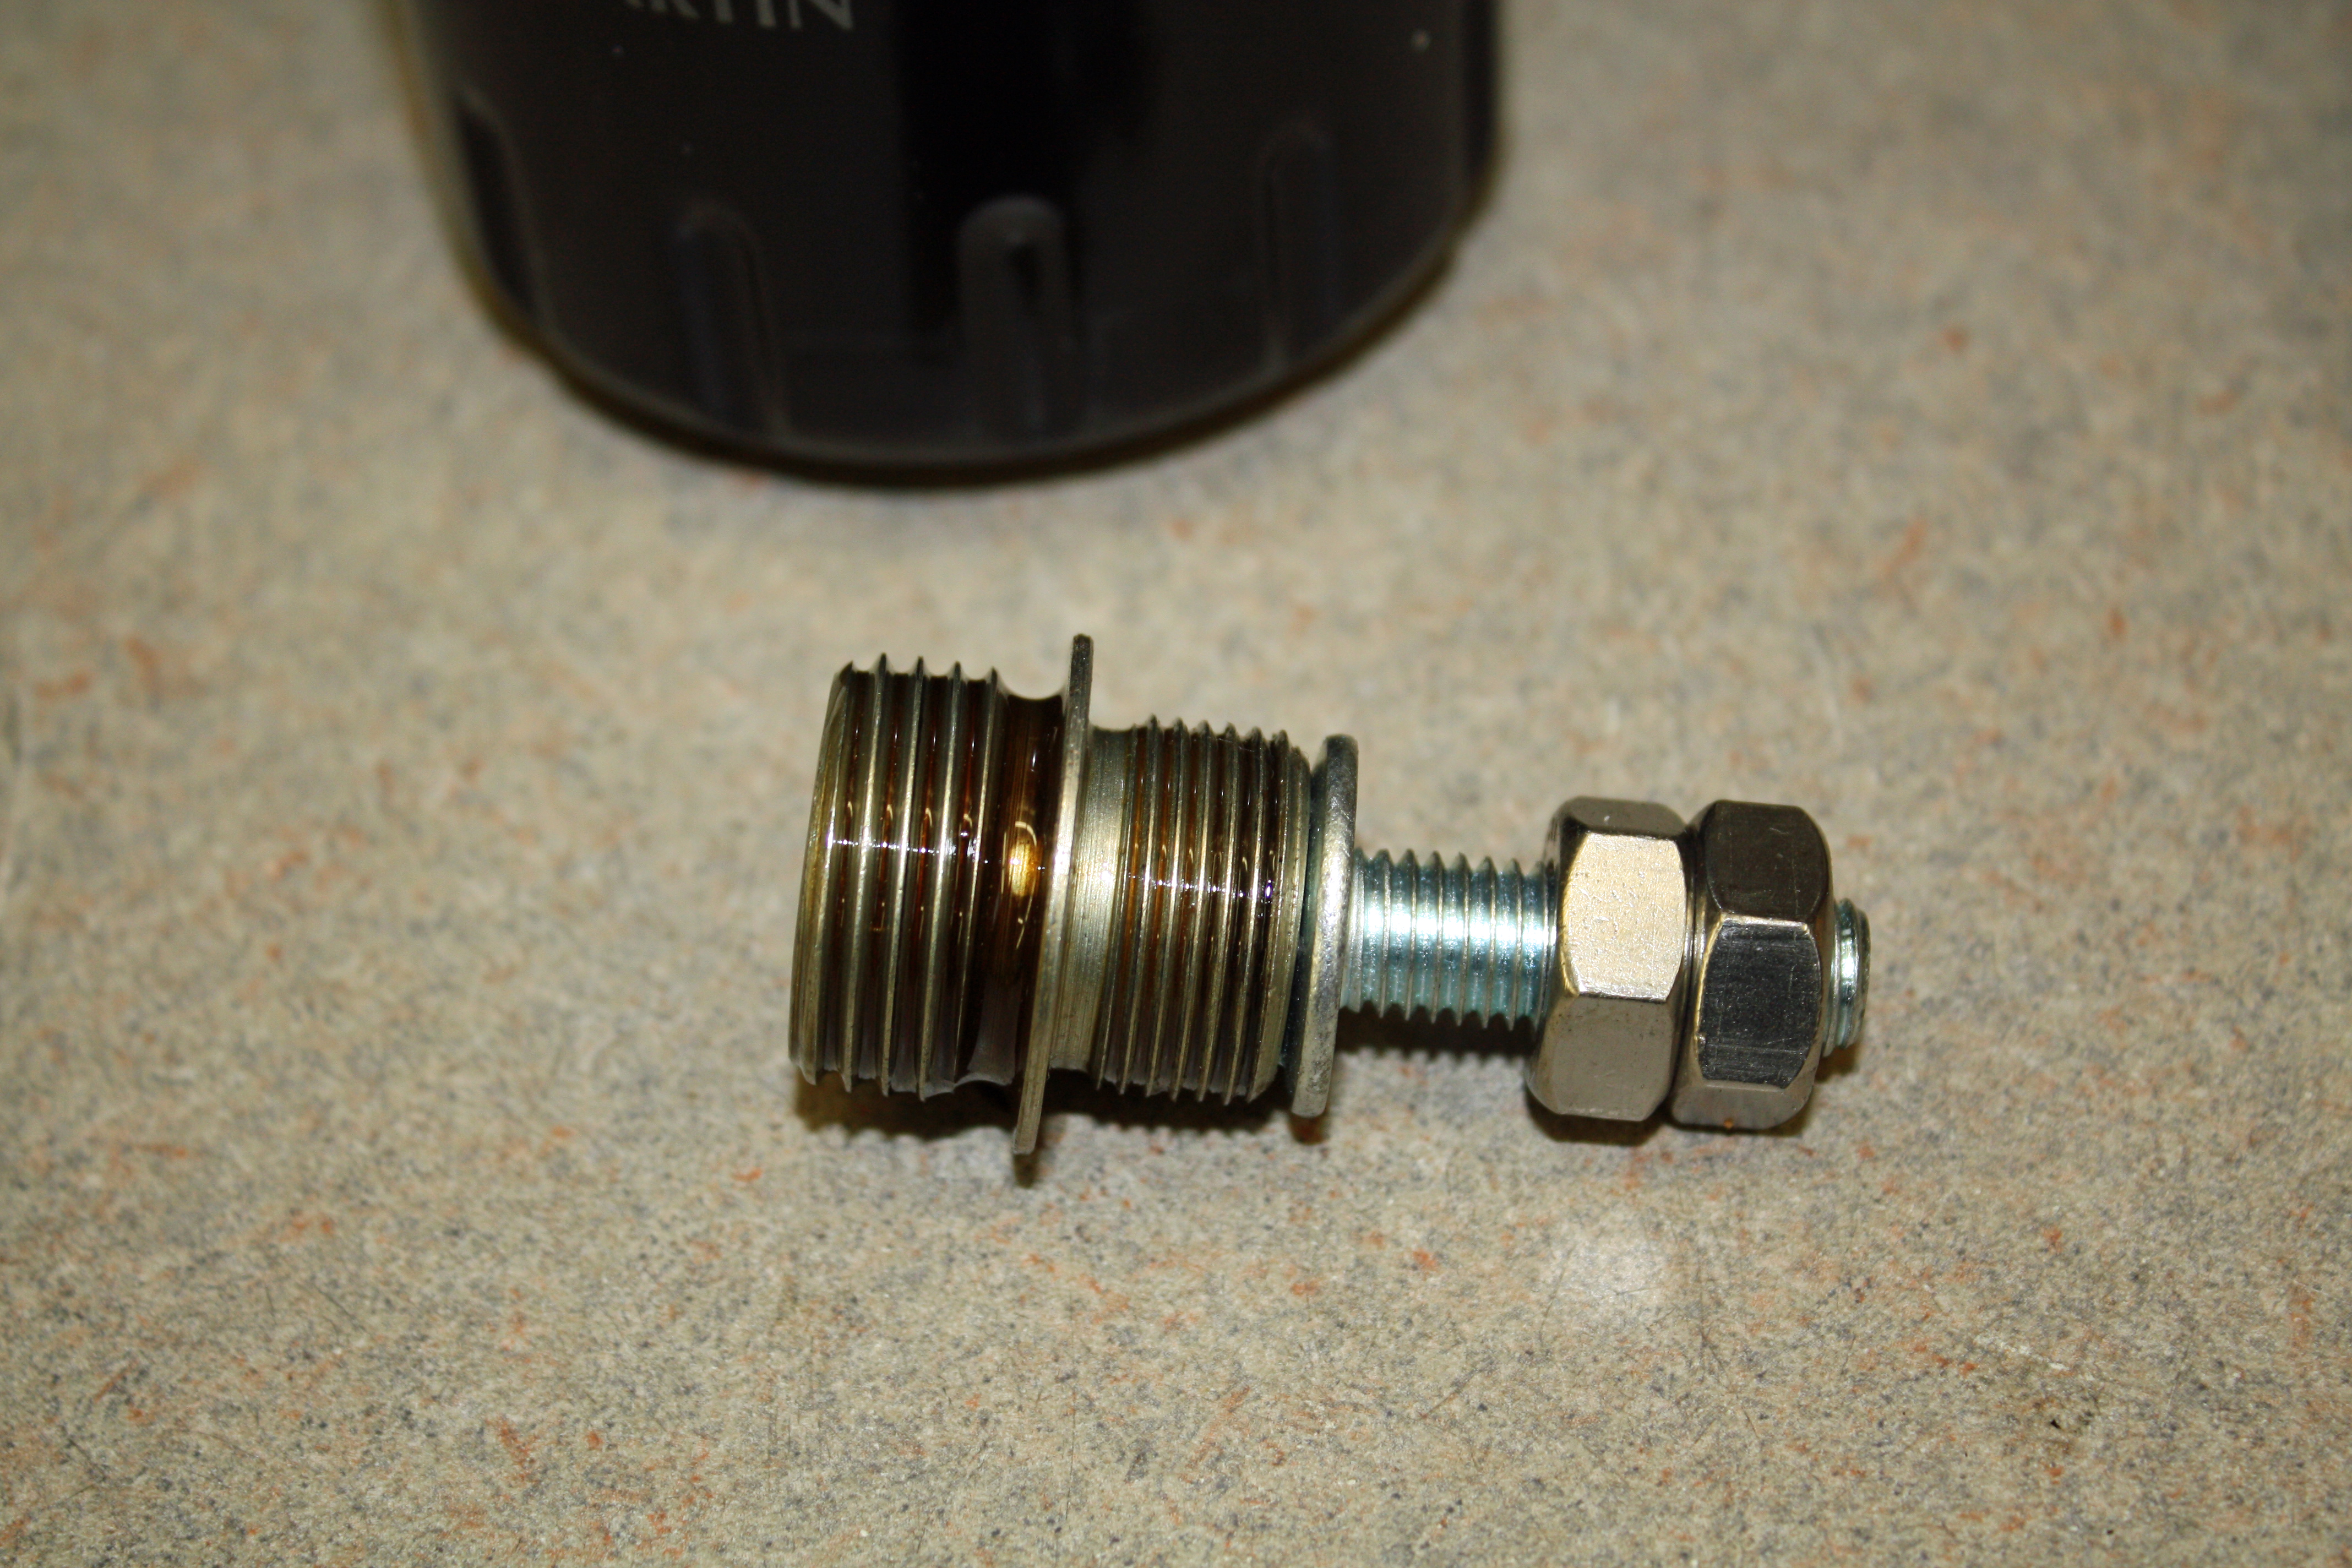
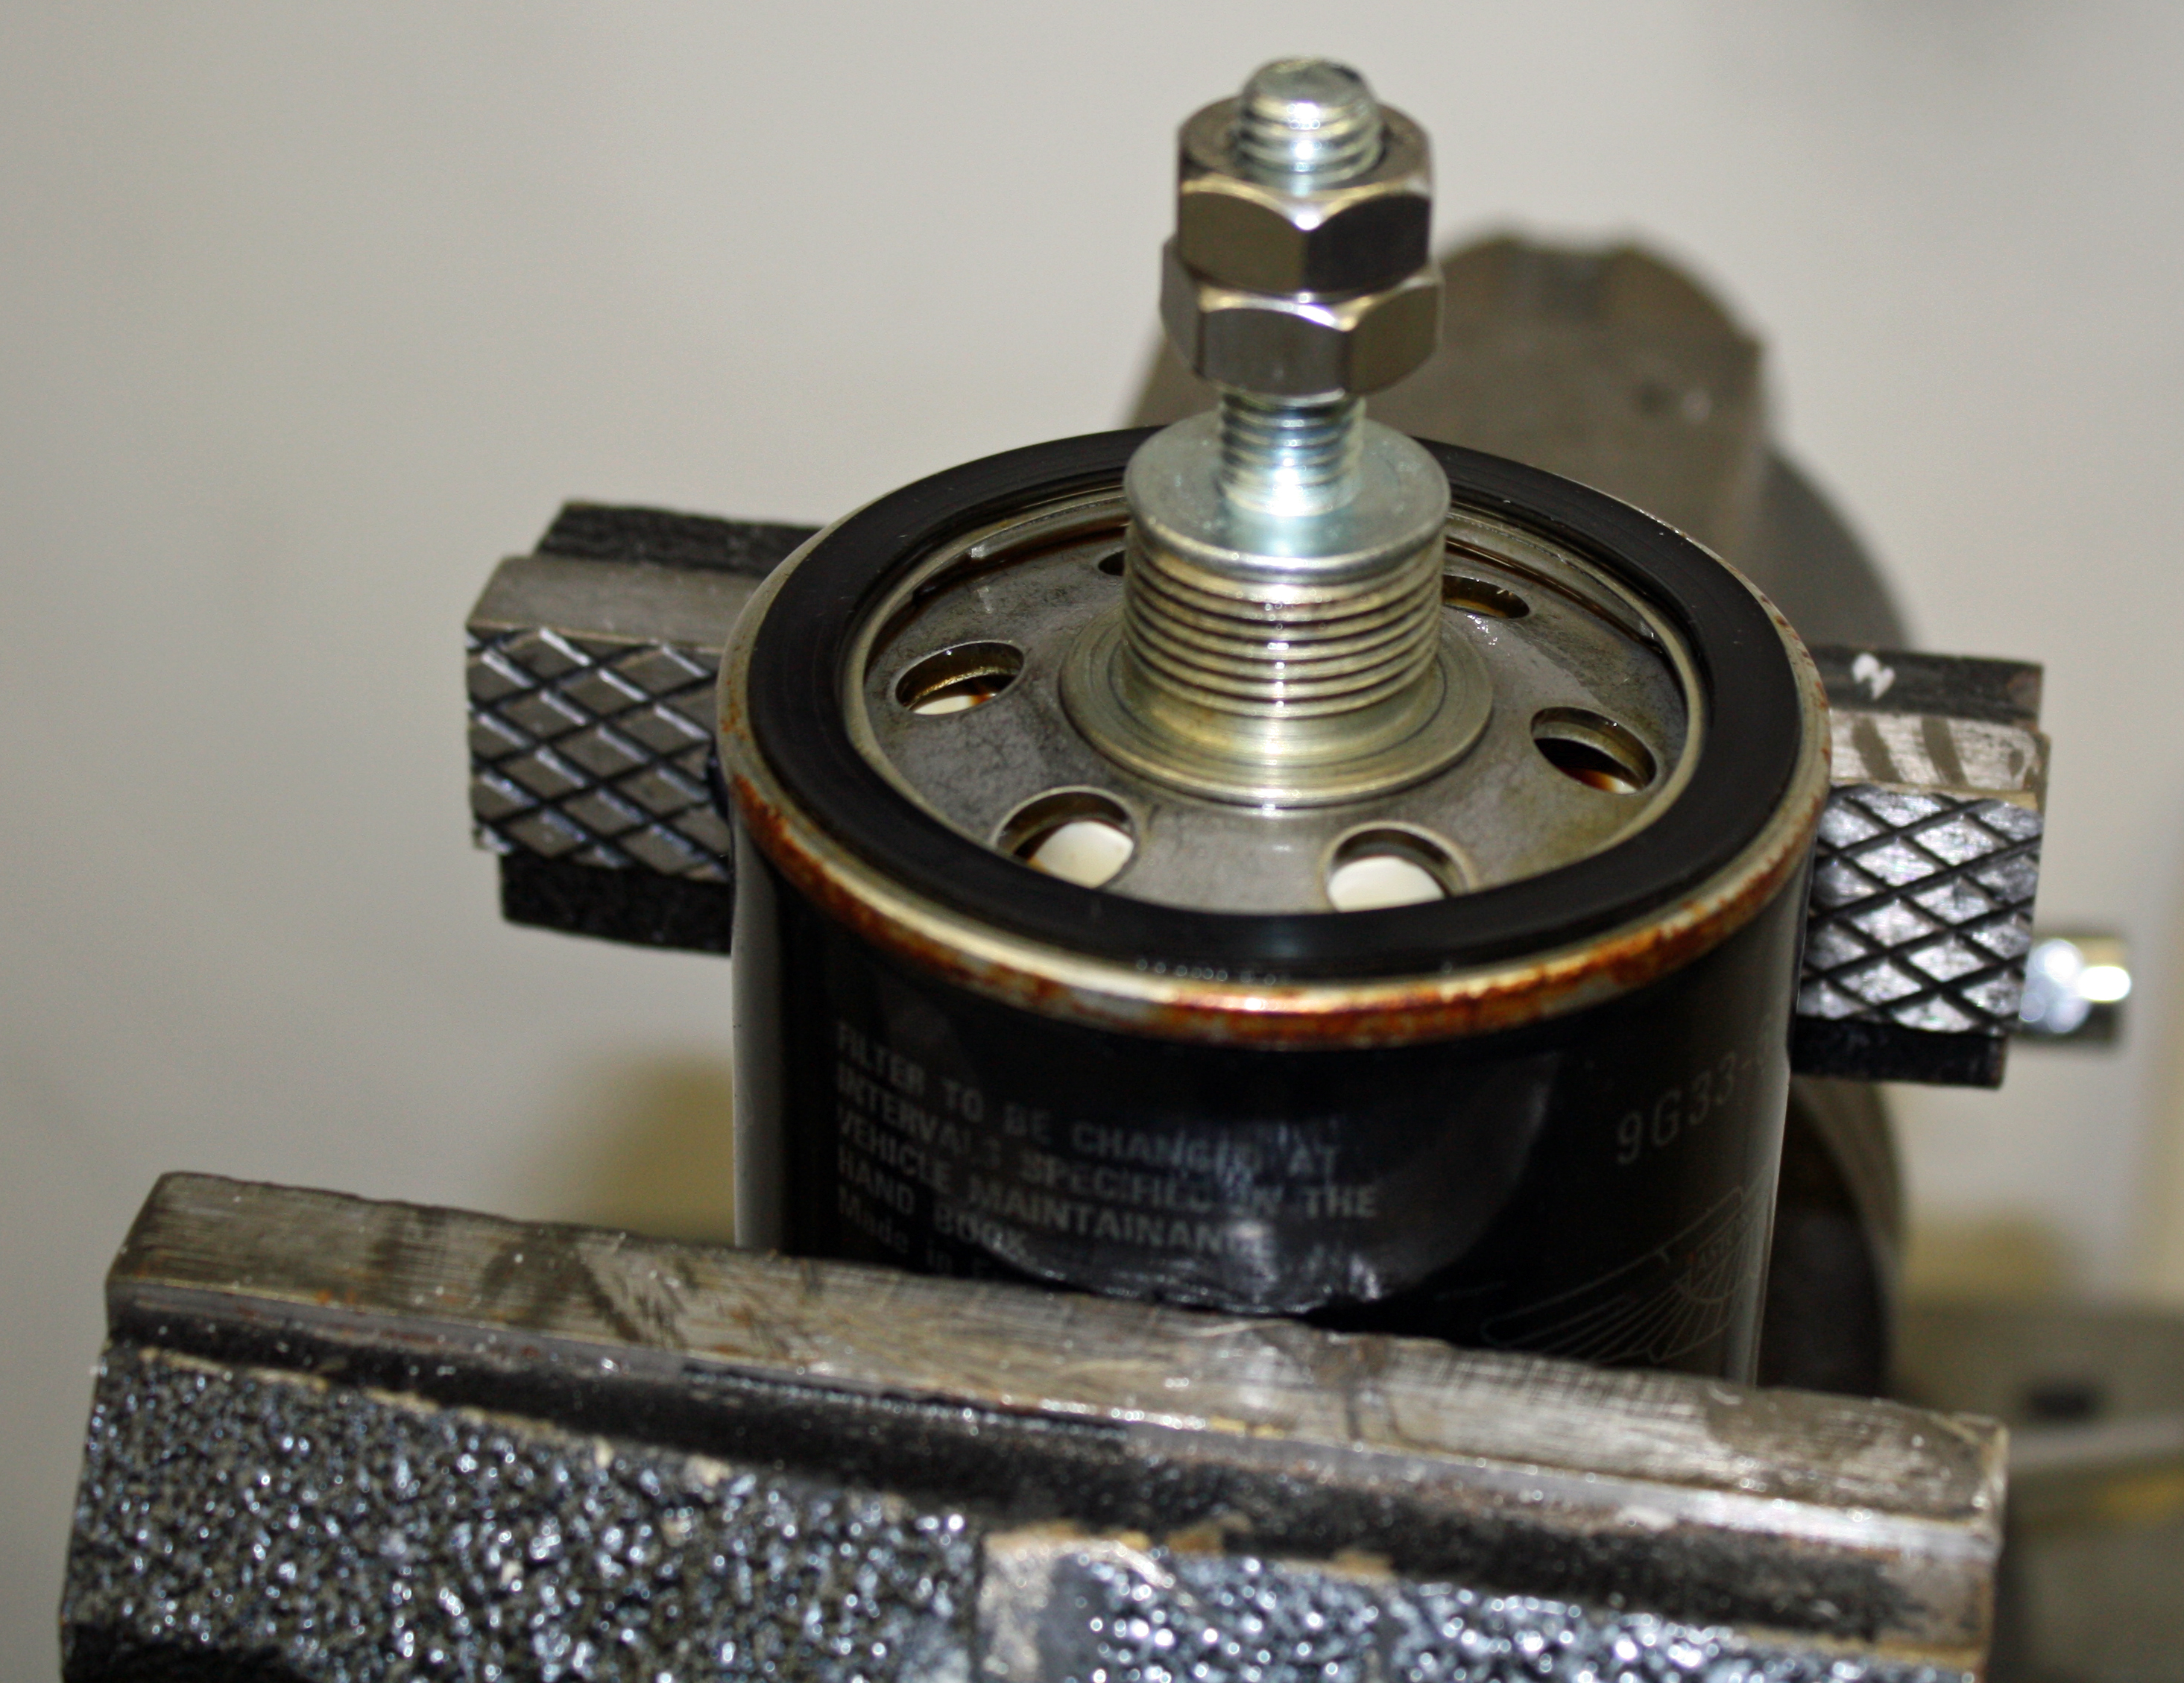
While the car was on the lift, I changed the oil. After draining the oil, I removed the oil filter only to discover I had to change over the threaded receptacle as it came off with the old filter. I didn't have a hex key quite that large but a 17mm bolt head and a little vise time did the trick.


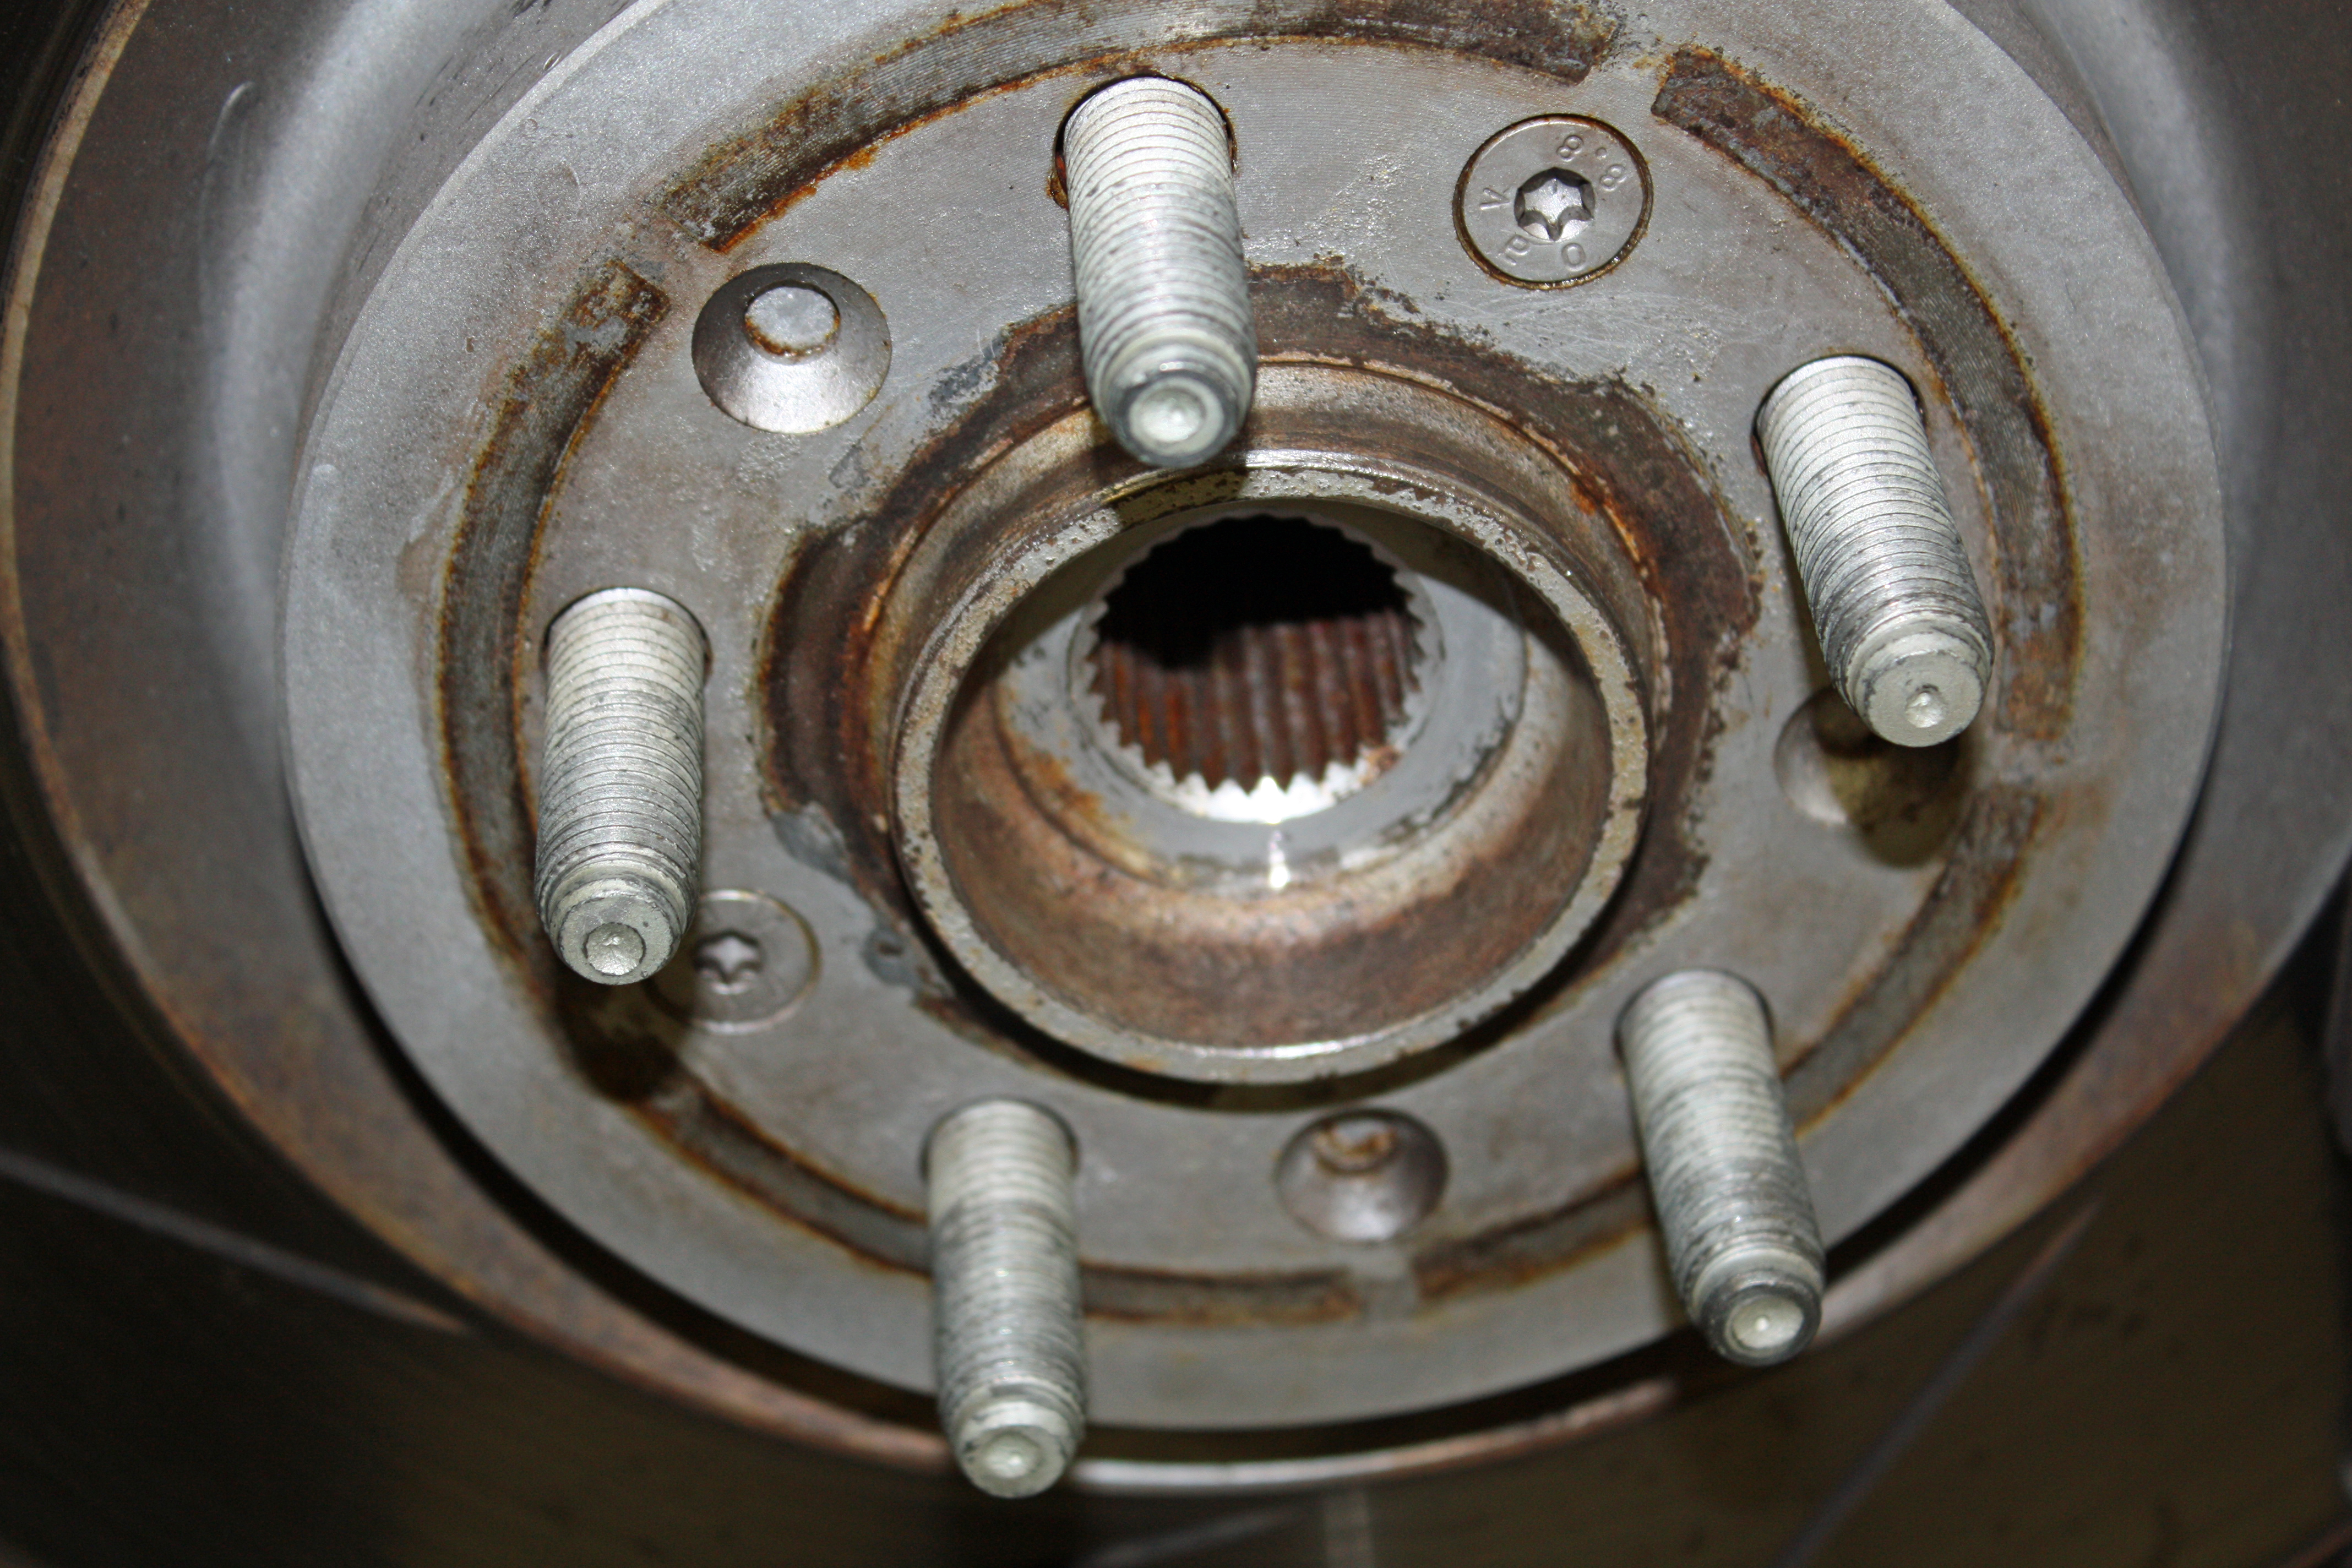
My newly refinished wheels were ready to go last week. They looked fantastic. Before mounting them, I applied a liberal dose on anti-seize to the hubs to prevent them from the wheels from sticking to the hubs. I waited until the last minute to apply the anti-seize because, as anyone knows who uses it, this stuff has a tendency spread throughout your garage like a virus.


My newly refinished wheels were ready to go last week. They looked fantastic. Before mounting them, I applied a liberal dose on anti-seize to the hubs to prevent them from the wheels from sticking to the hubs. I waited until the last minute to apply the anti-seize because, as anyone knows who uses it, this stuff has a tendency spread throughout your garage like a virus.


Registered User
Joined: Apr 2012
Posts: 244
From: Ontario, Canada
Rep Power: 24
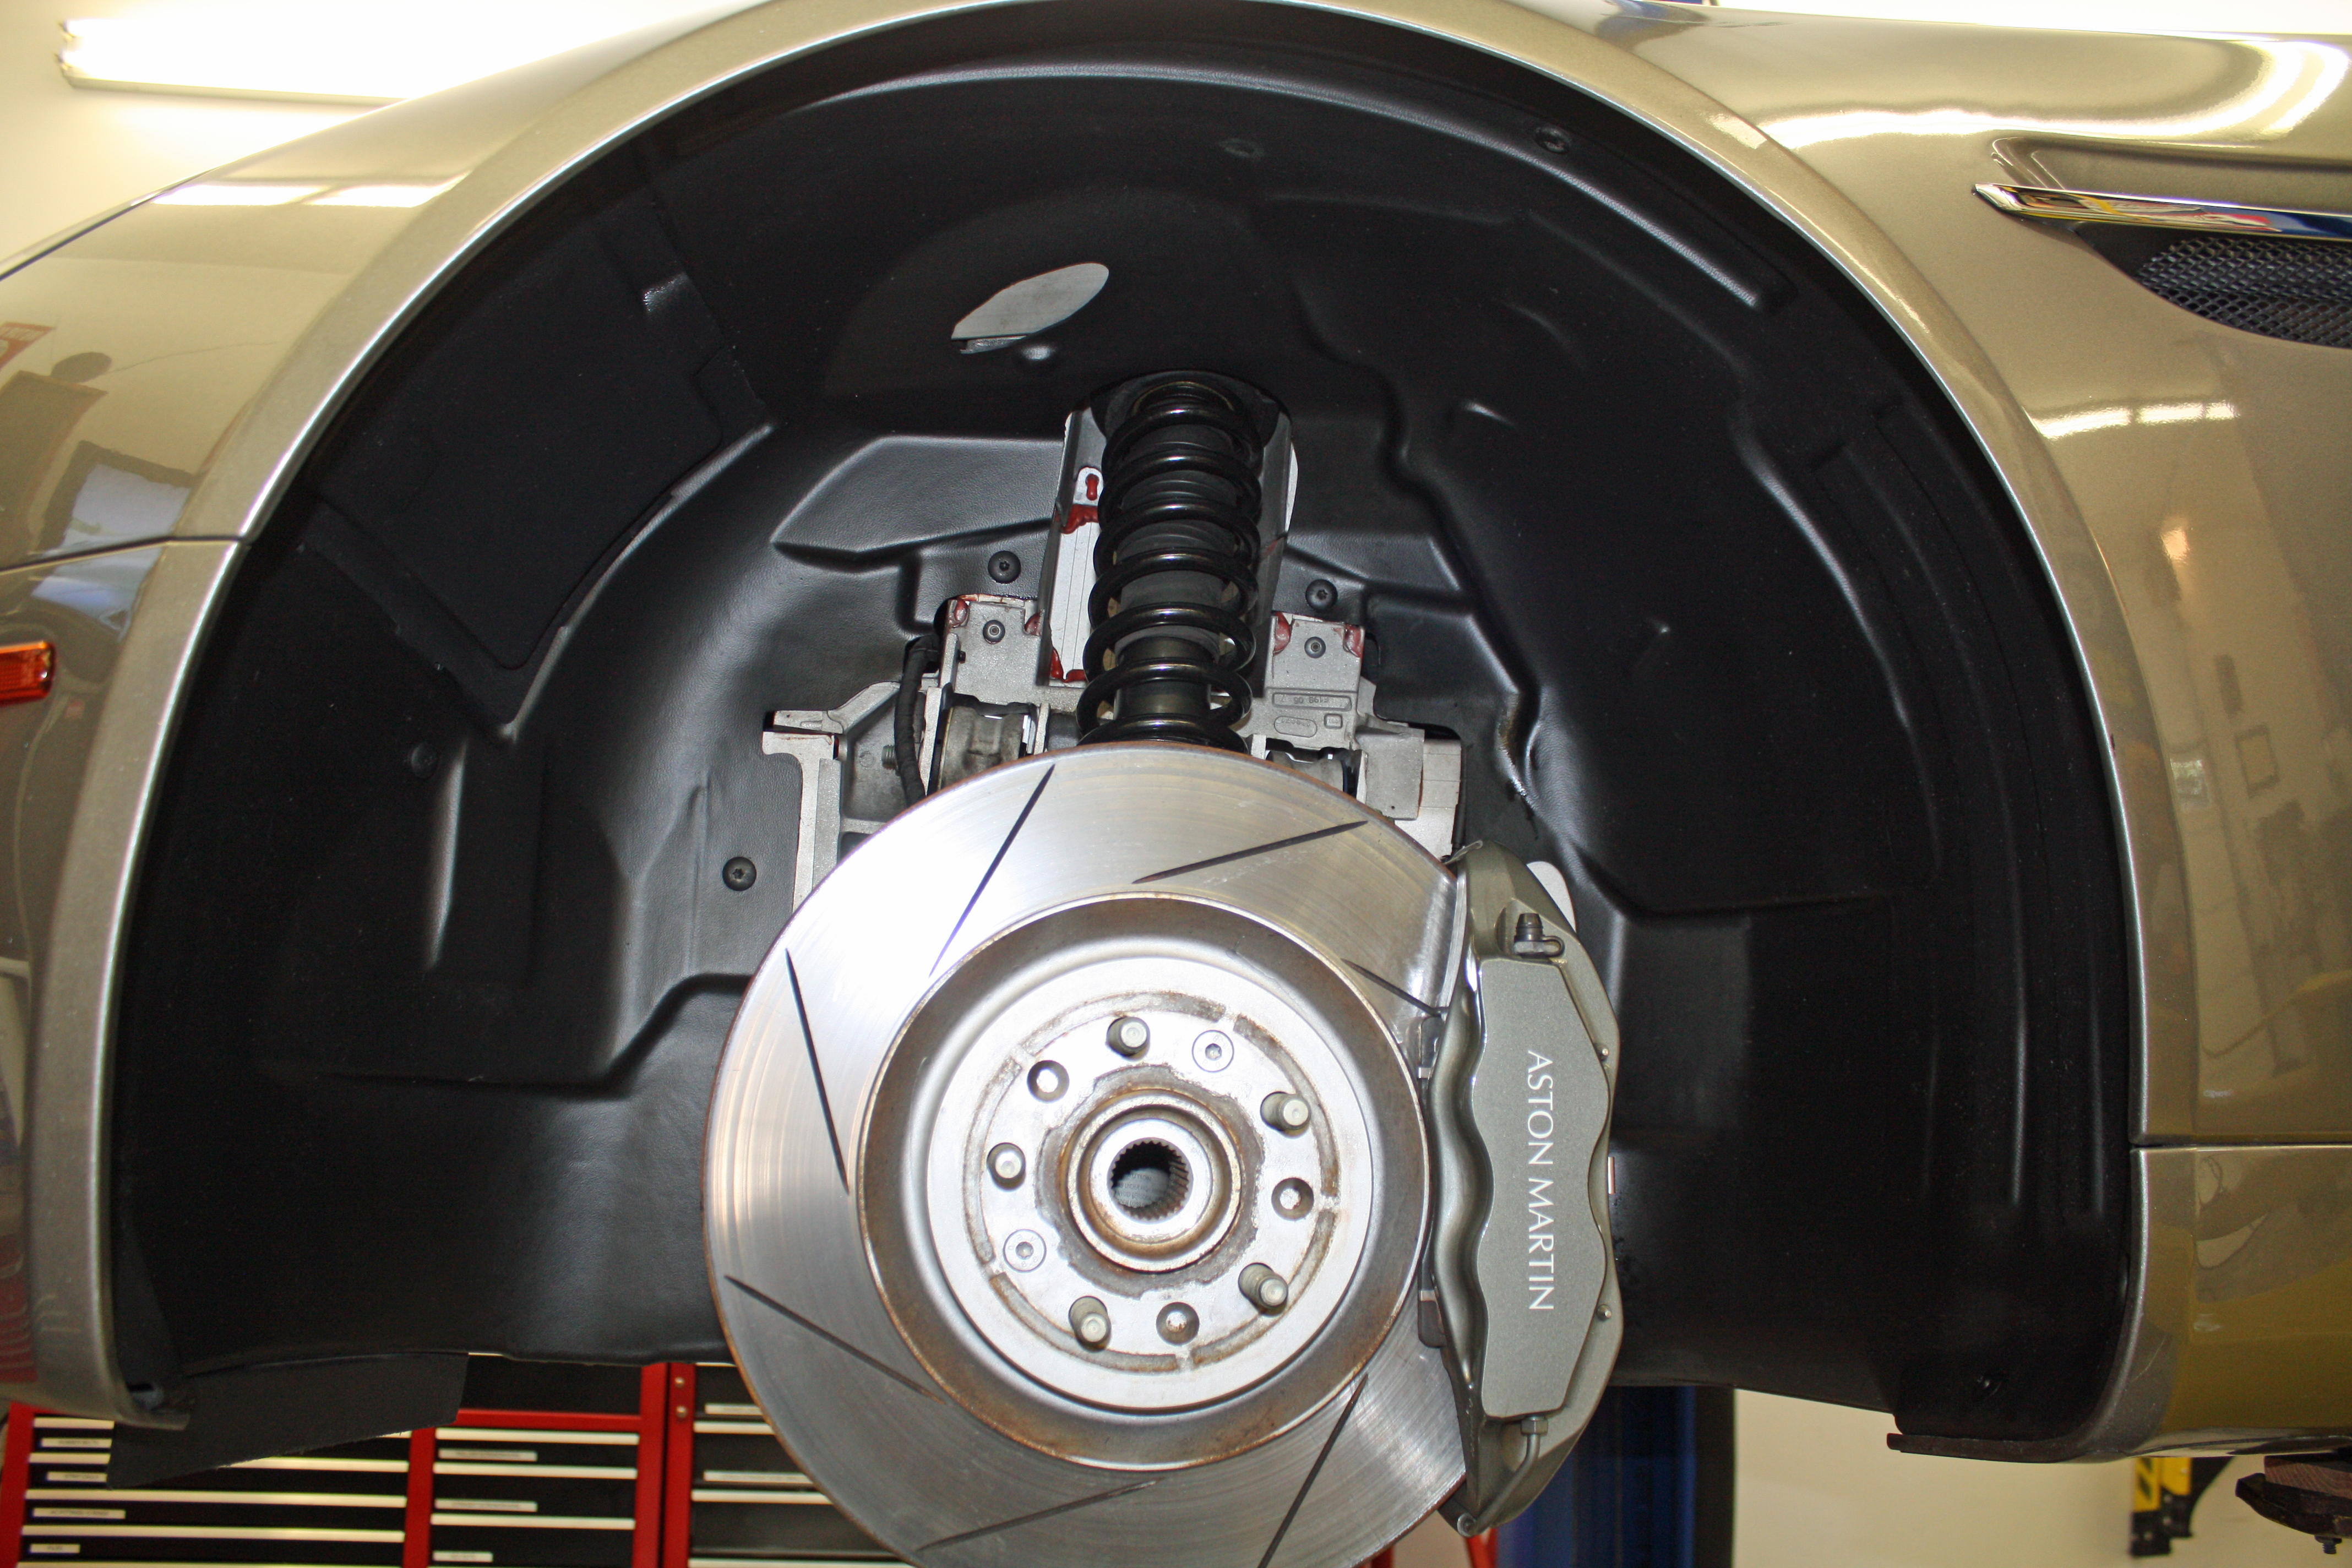
When you changed the oil did you clean the two oil filter screen things located under the two little covers held on with the two small hex bolts? The one cover is visible at the very top of your first picture.