Installing a thermostat in a 2007 Vantage V8
#1
 11-18-2017, 07:45 PM


Join Date: Dec 2010
Location: Rockwell, NC
Posts: 56
Rep Power: 19 
Installing a thermostat in a 2007 Vantage V8
Earlier this week I drove my 2007 Vantage V8 with the ambient temperature at around 40 degrees. Because I have been aware that the thermostat can fail causing the car to be unable to reach operating temperature, I was watching the gauge. It only came up to about halfway to the middle reading on the temp gauge. I knew I had a problem. During warm temperatures, the car reached a normal reading so I had not suspected anything.
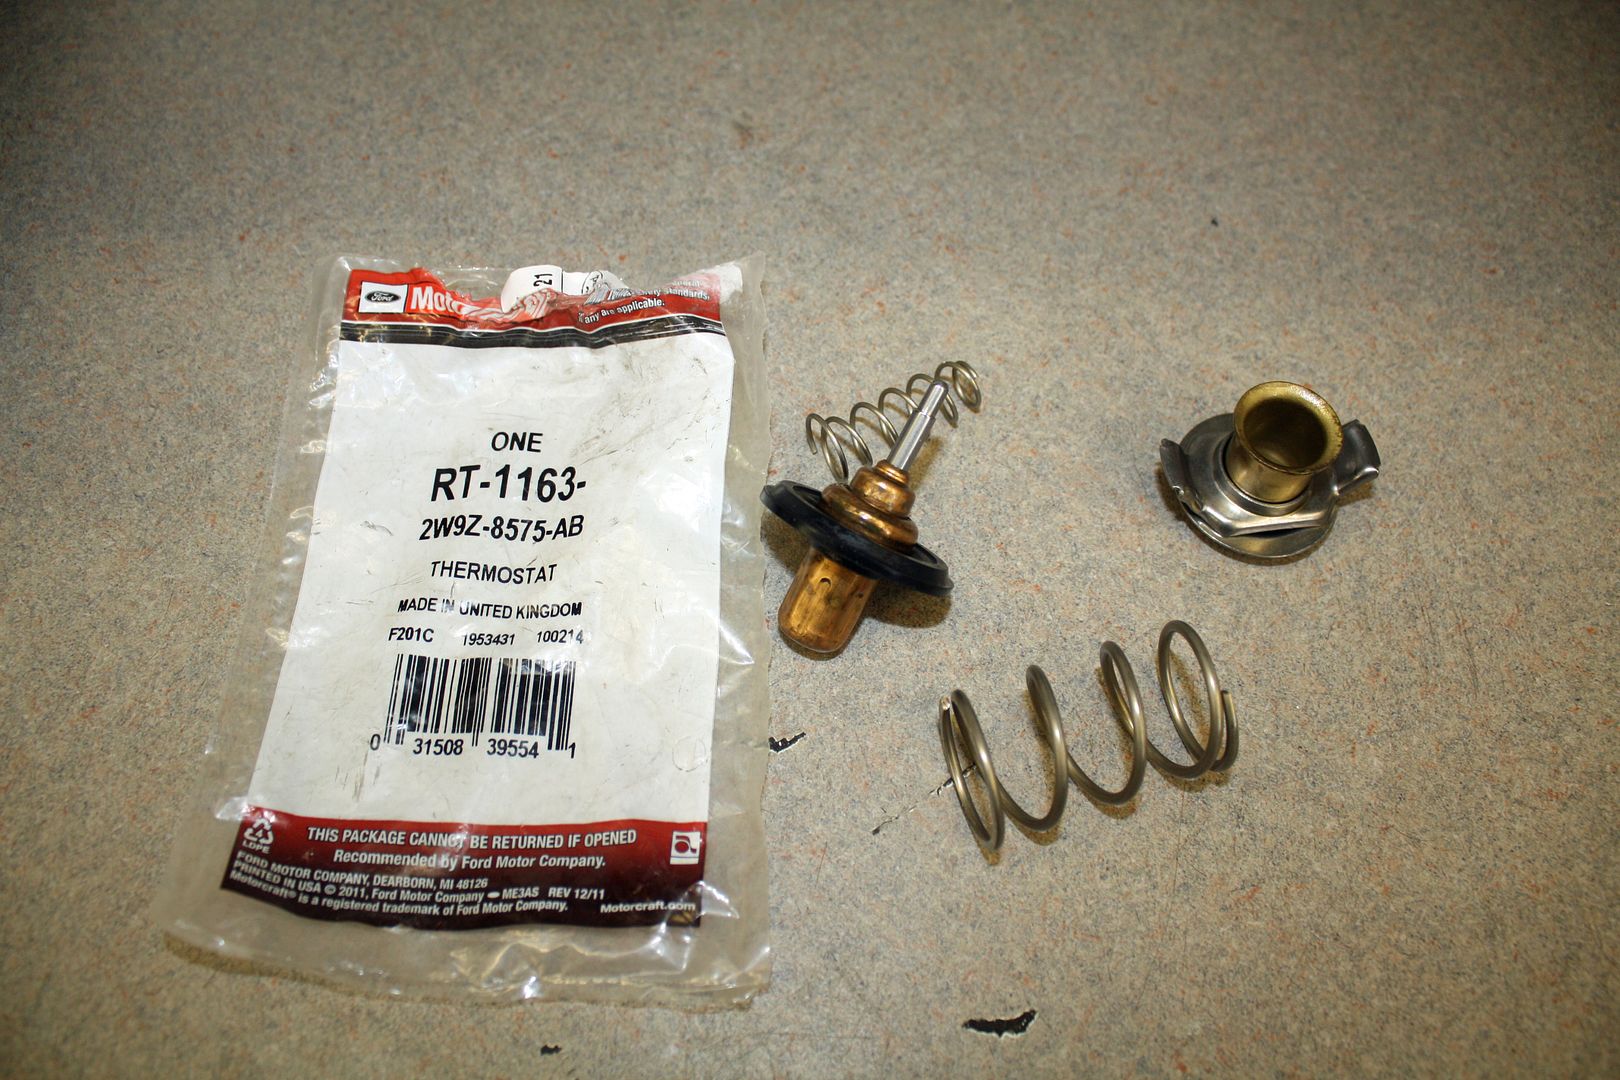
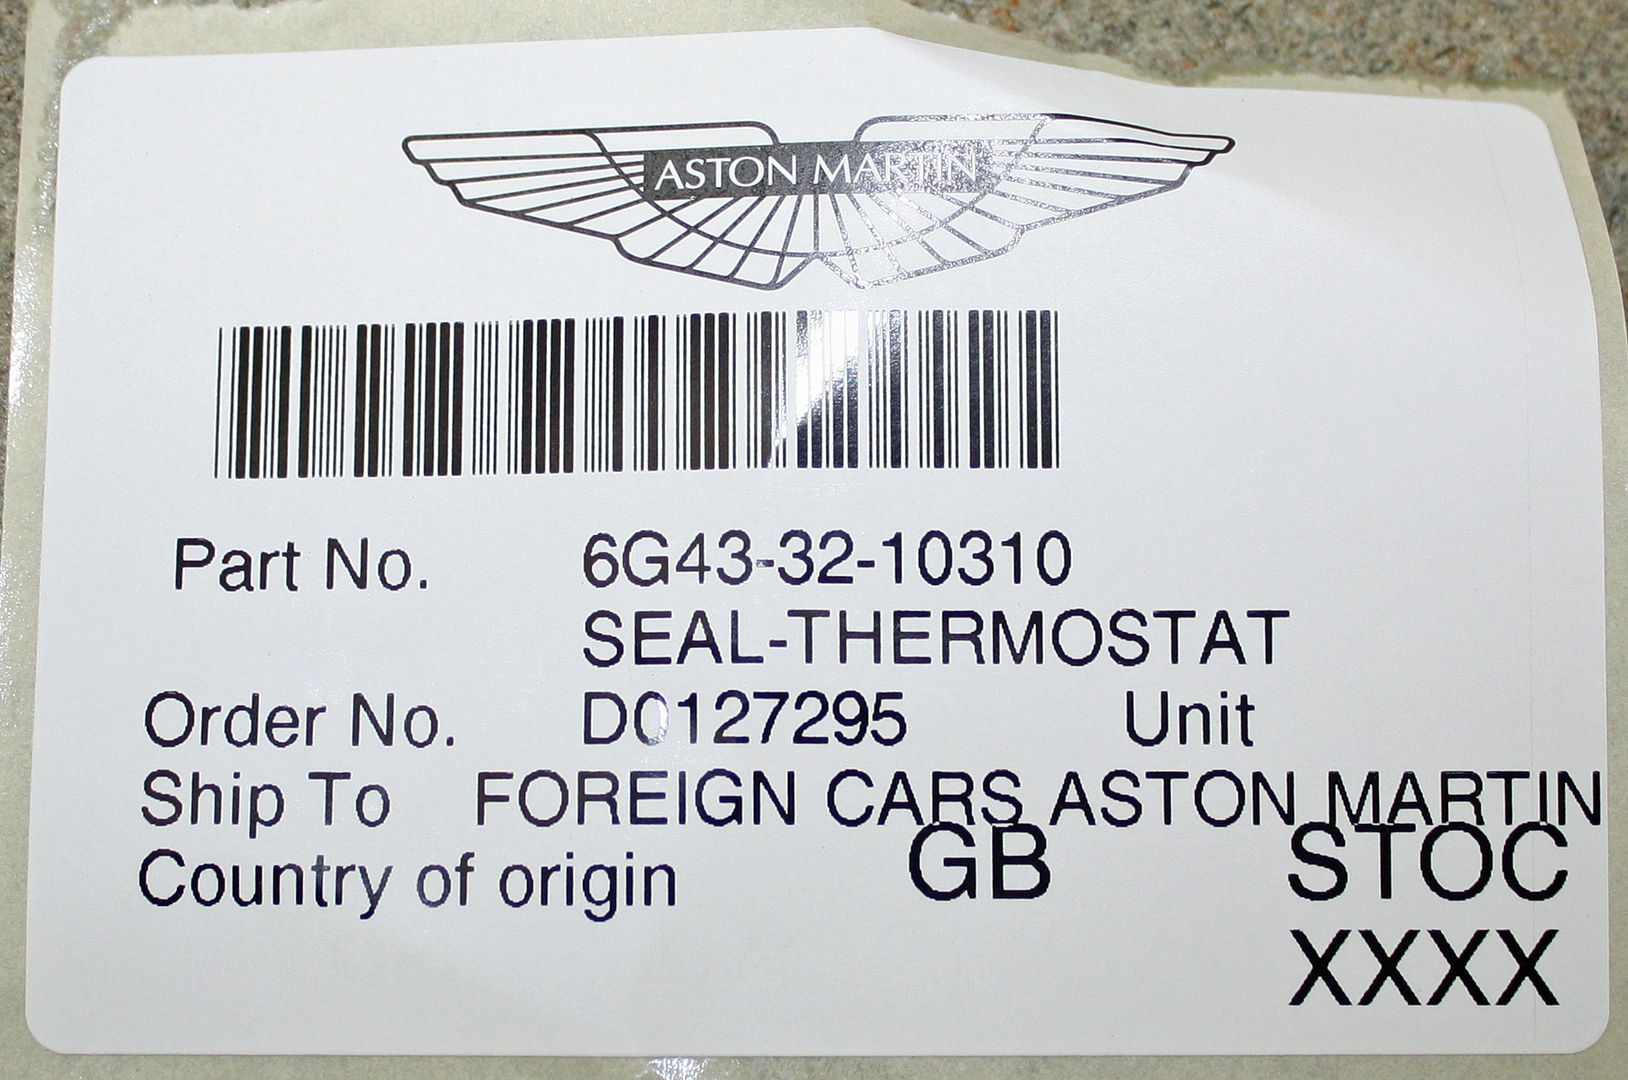
Time to replace the thermostat. After doing some research, I found that the trick thermostat was for a Ford truck. Not too surprising since Ford owned Aston when my car was built. I found one on eBay for $24.99, part number RT1163. The seal was procured from our local Aston dealer for $16.99.
I found Red Pants instructions online which were spot on. The only reason I am writing this up is that I have documented the procedure with a number of photos and there might be interest in how I compressed the springs to install the new thermostat.
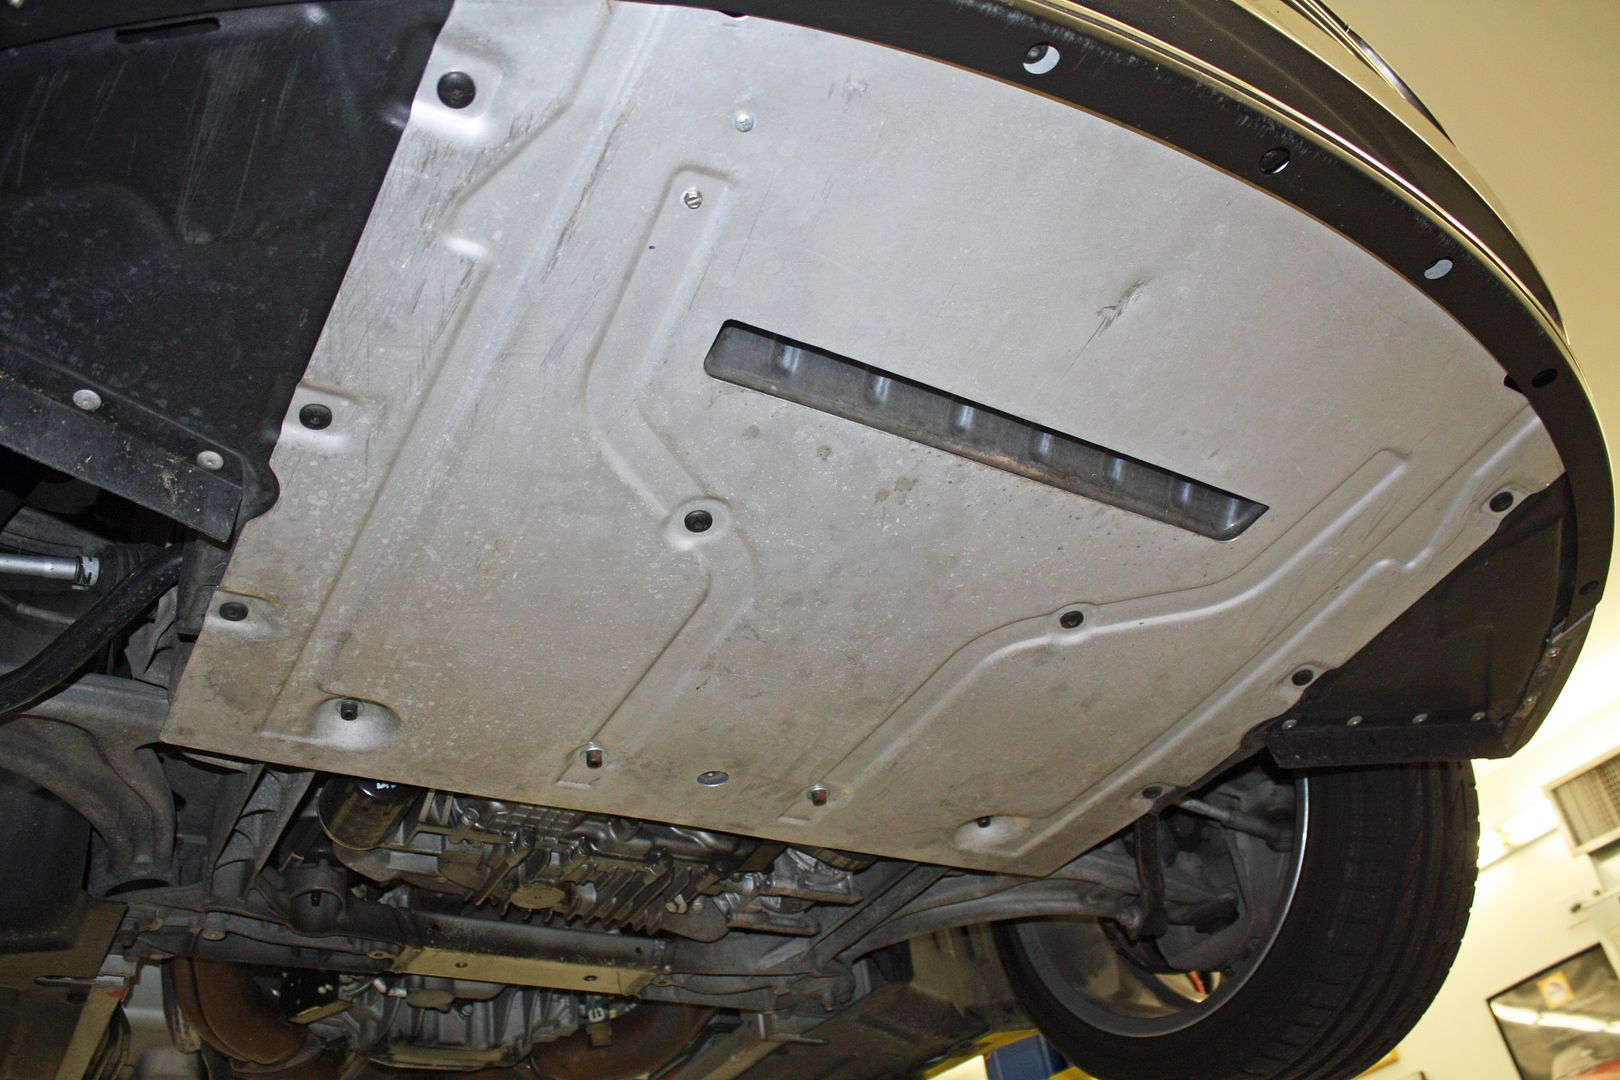
First up I put the car on my lift and then removed the front pan. With that done, I placed a wash tub under the car to catch the anti-freeze. This was only partly successful as I did not have it placed far enough to the rear.

As per Red Pants instructions I put a large trash bag underneath the thermostat housing with a towel stuffed in above that to hopefully catch the some of the anti-freeze and to keep it off of the serpentine belt.
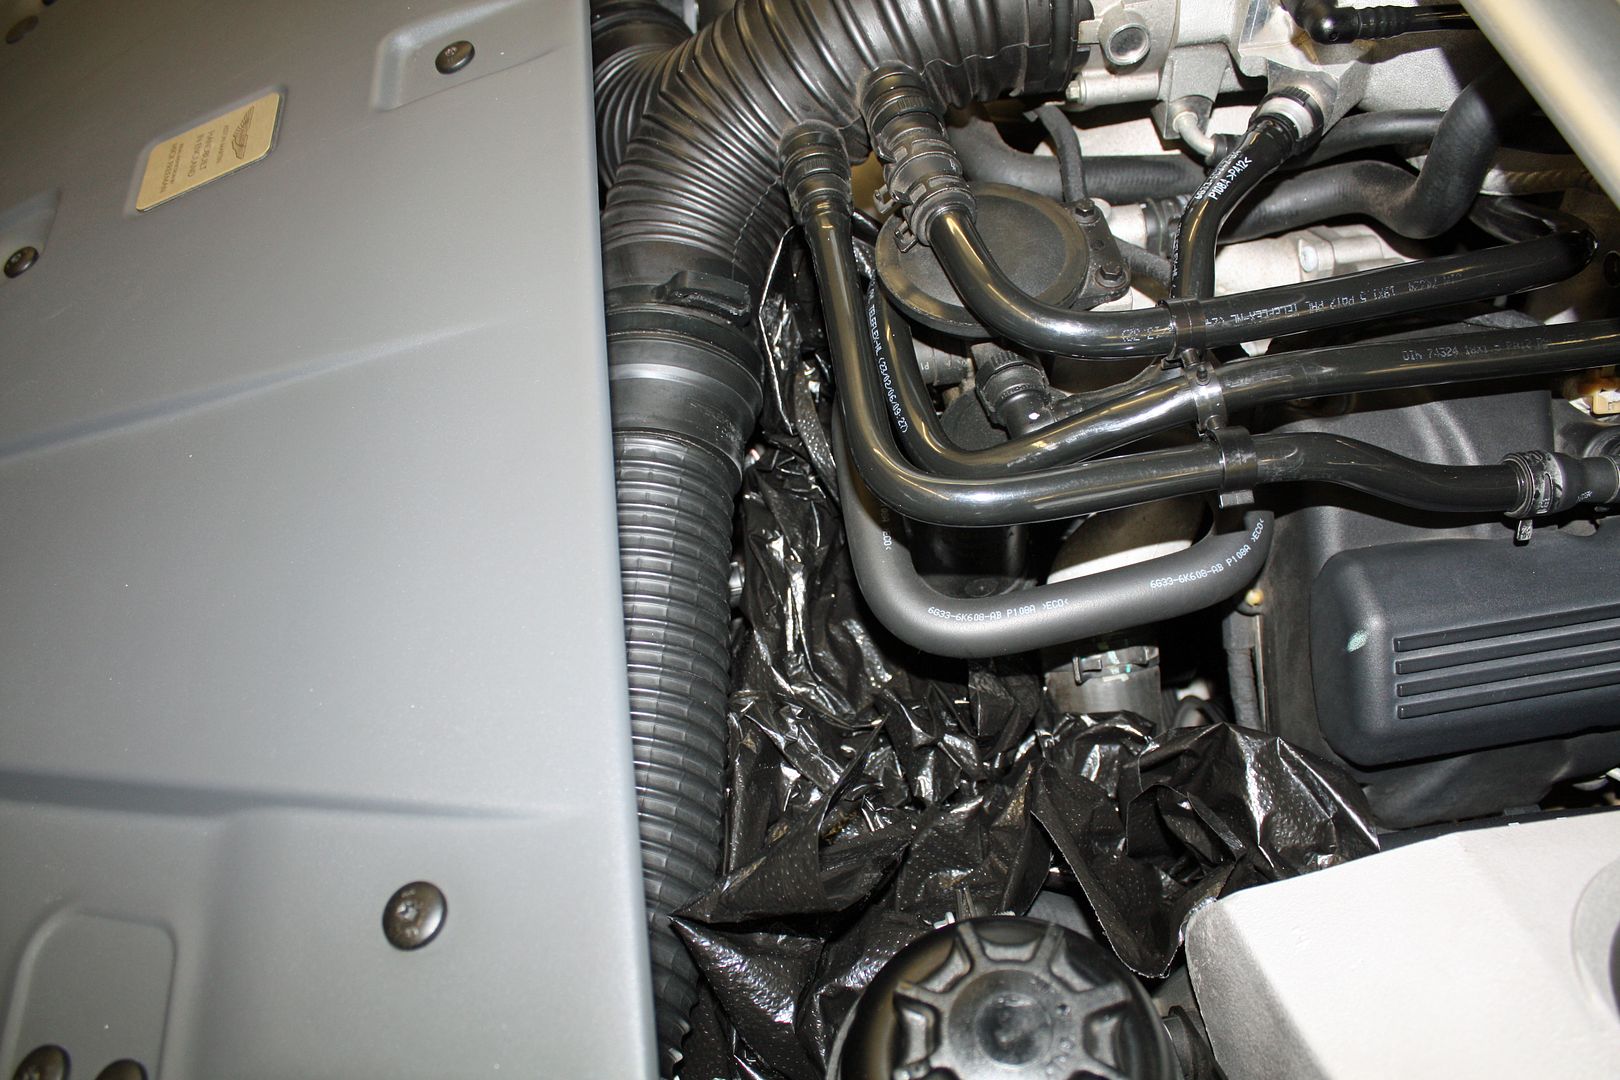
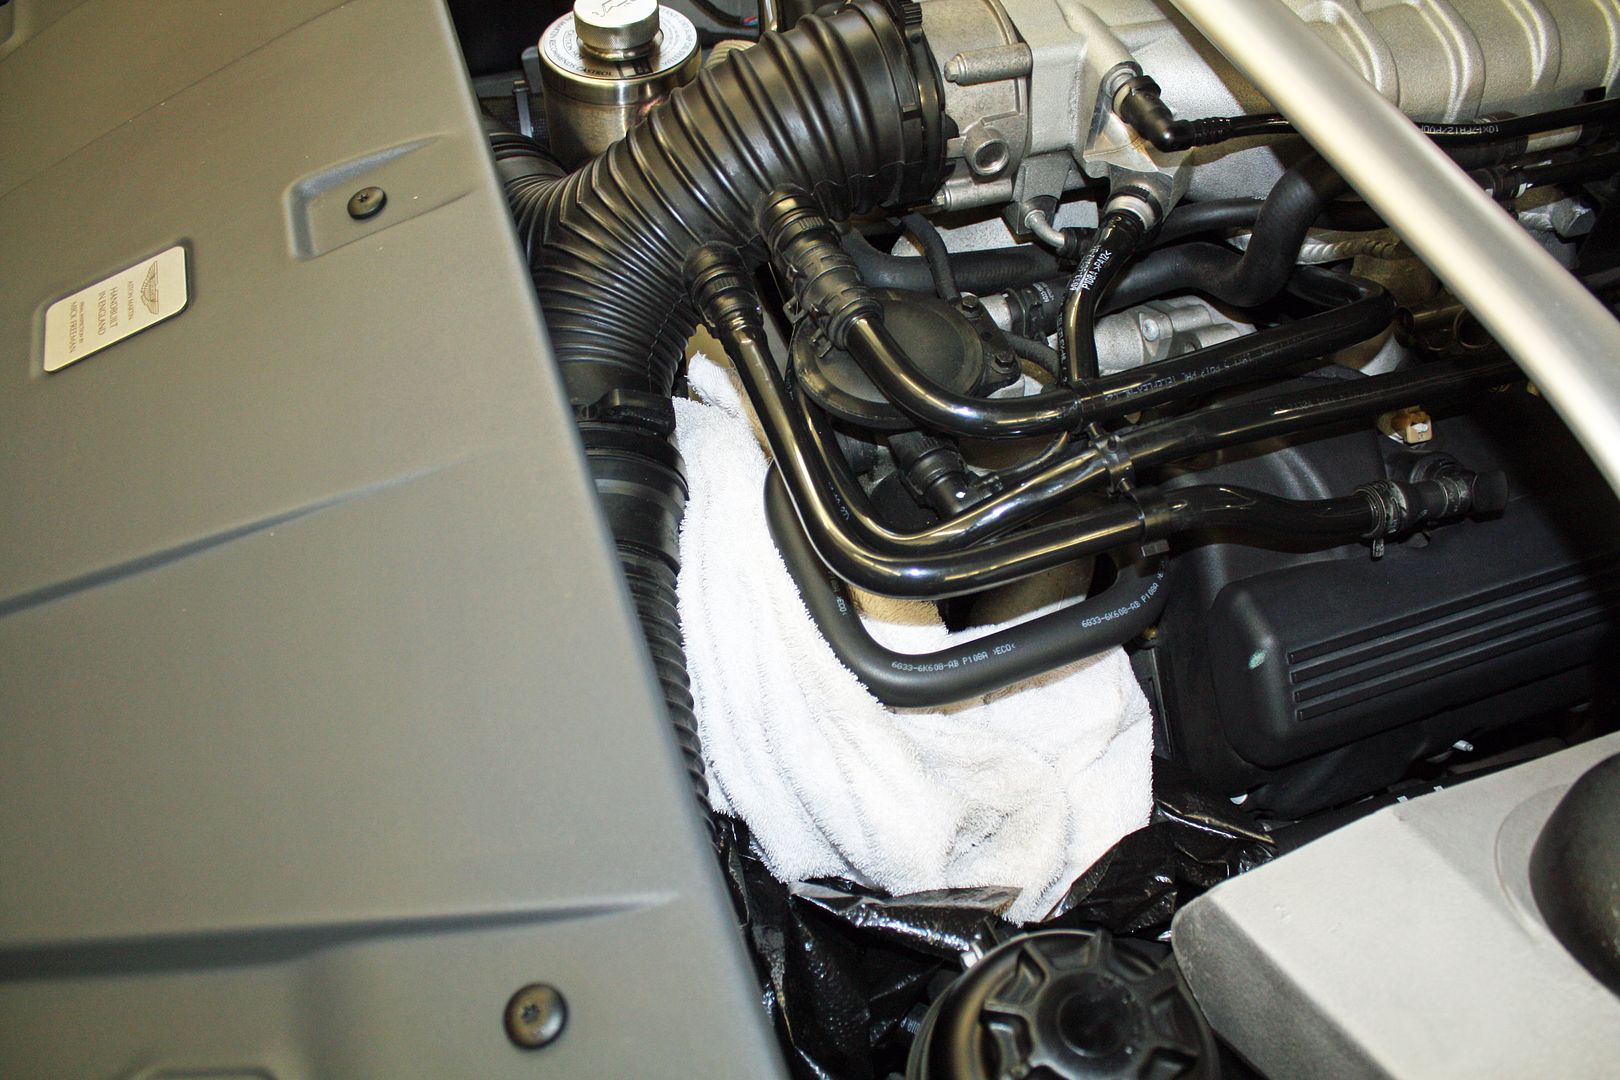
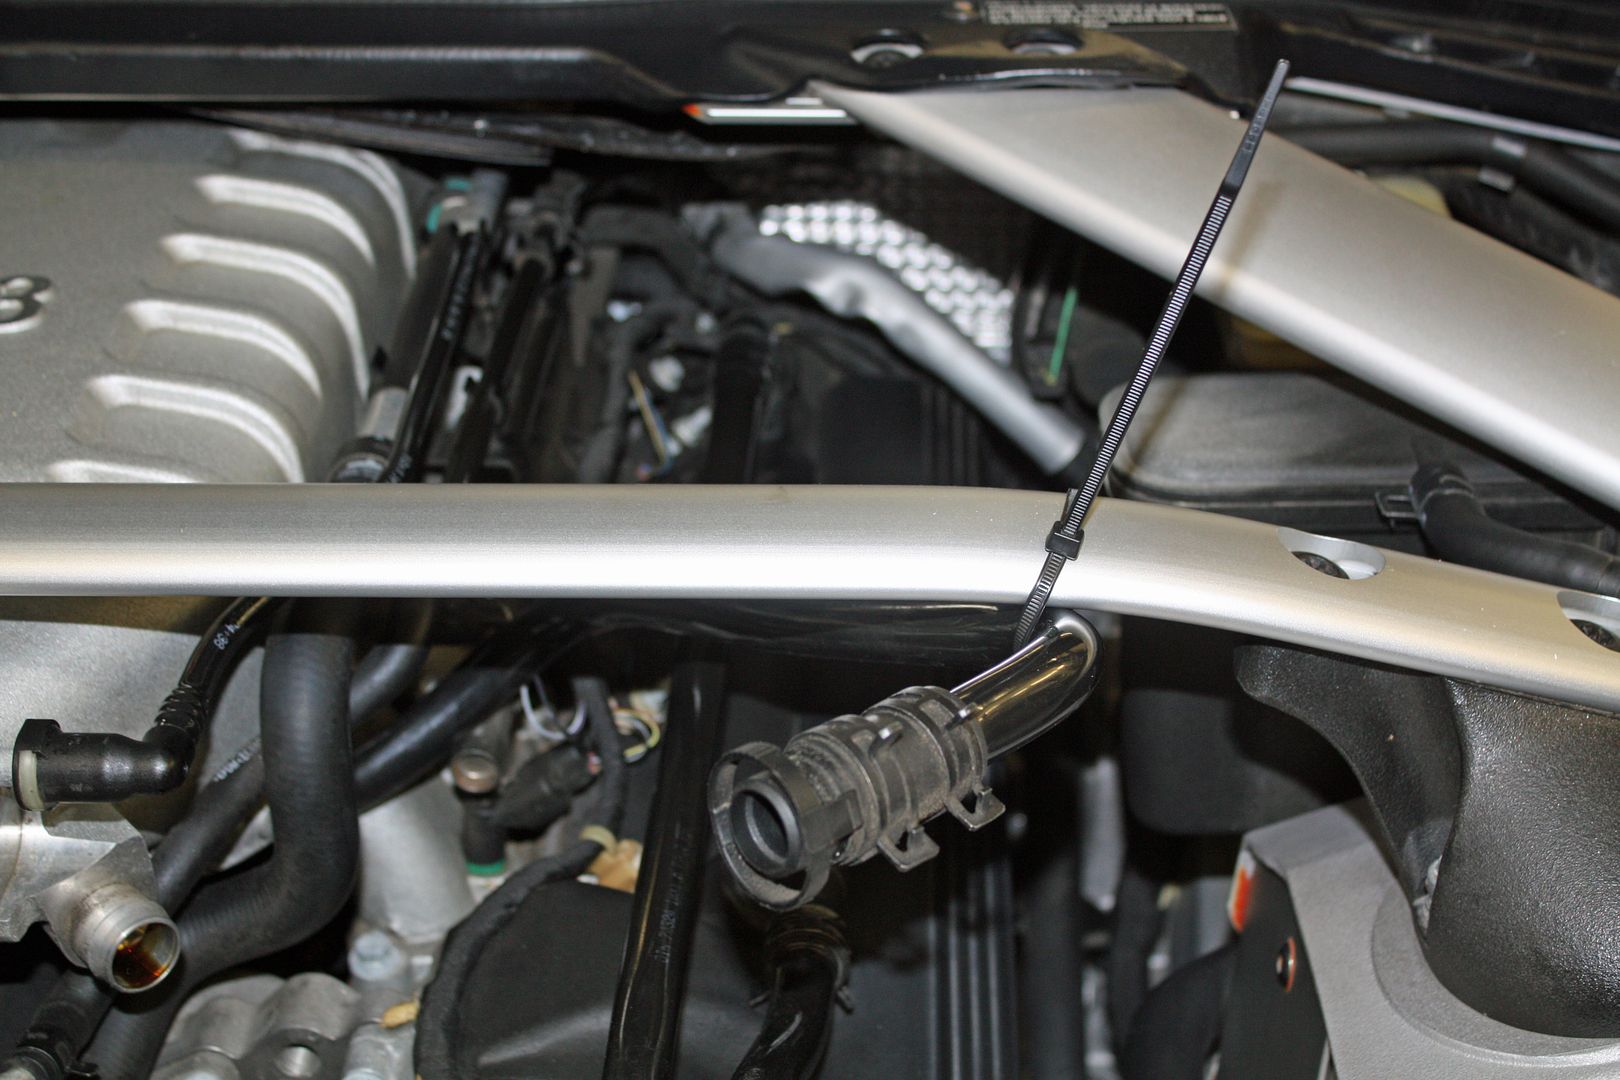
I disconnected the long L-shaped quick-release plastic tube where it goes into the intake tube. You only need to disconnect that one end, allowing it to move around as you work. To keep it out of the way, I used a zip tie to attach it to the cross bar.
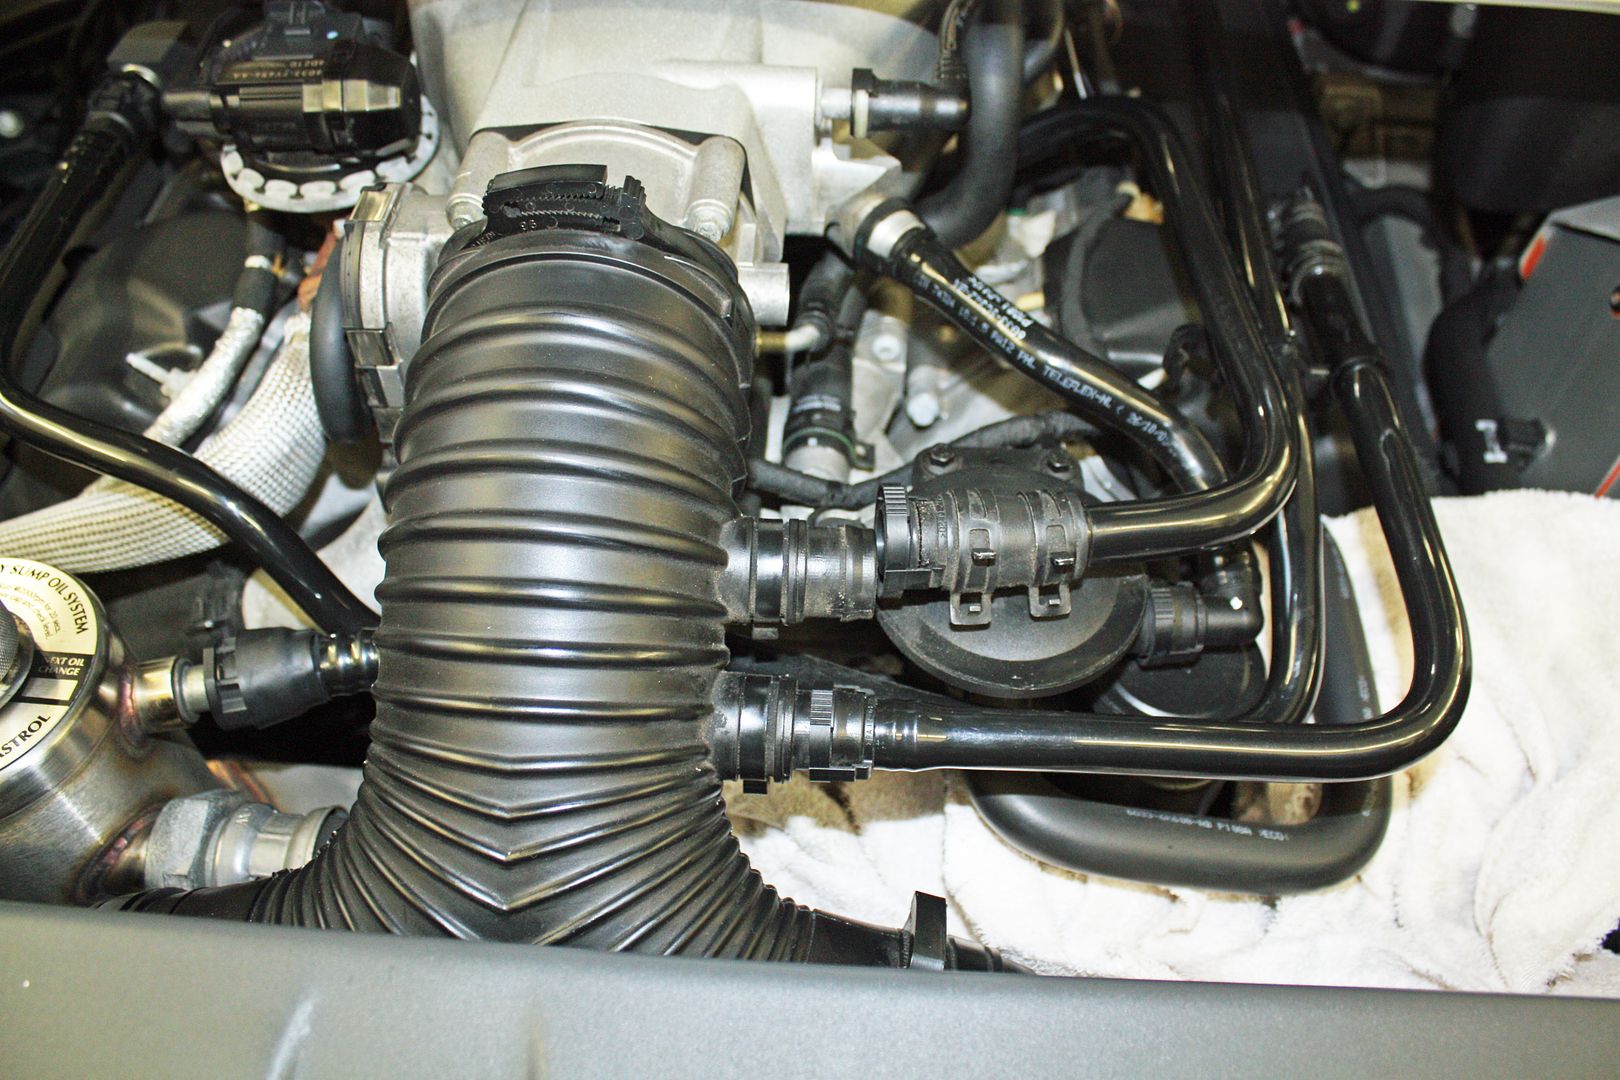
Next I disconnected the quick-release plastic tube that goes from the PCV to the intake manifold that is shaped like a 7.
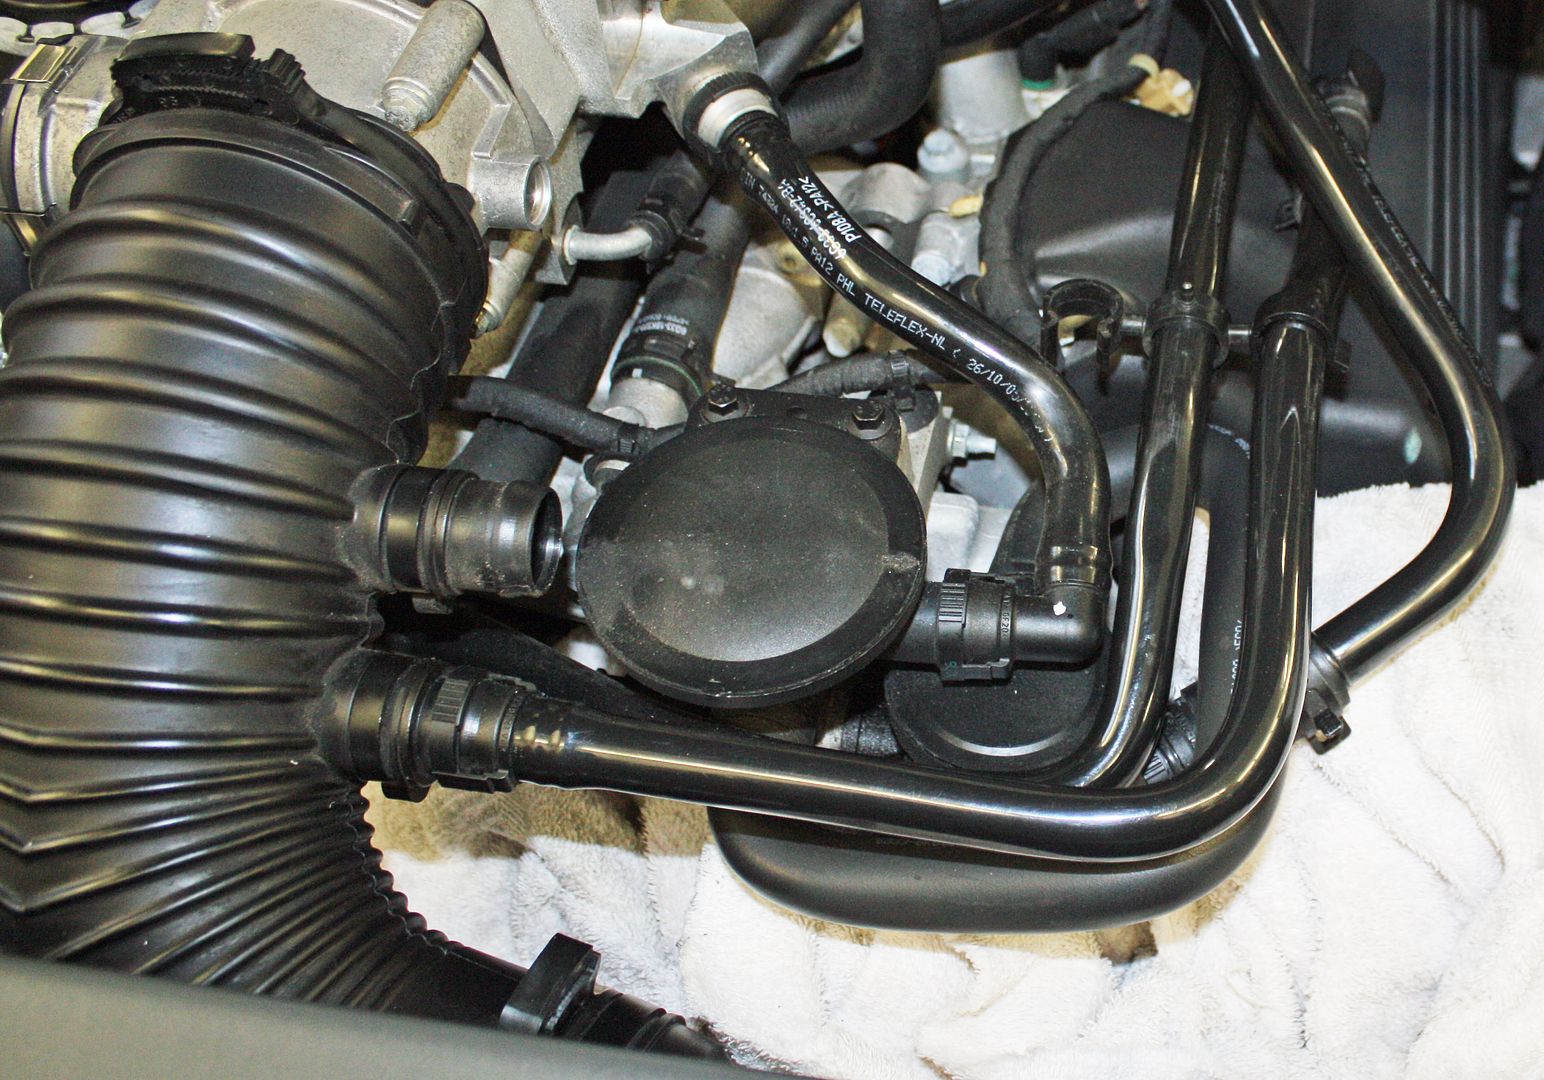
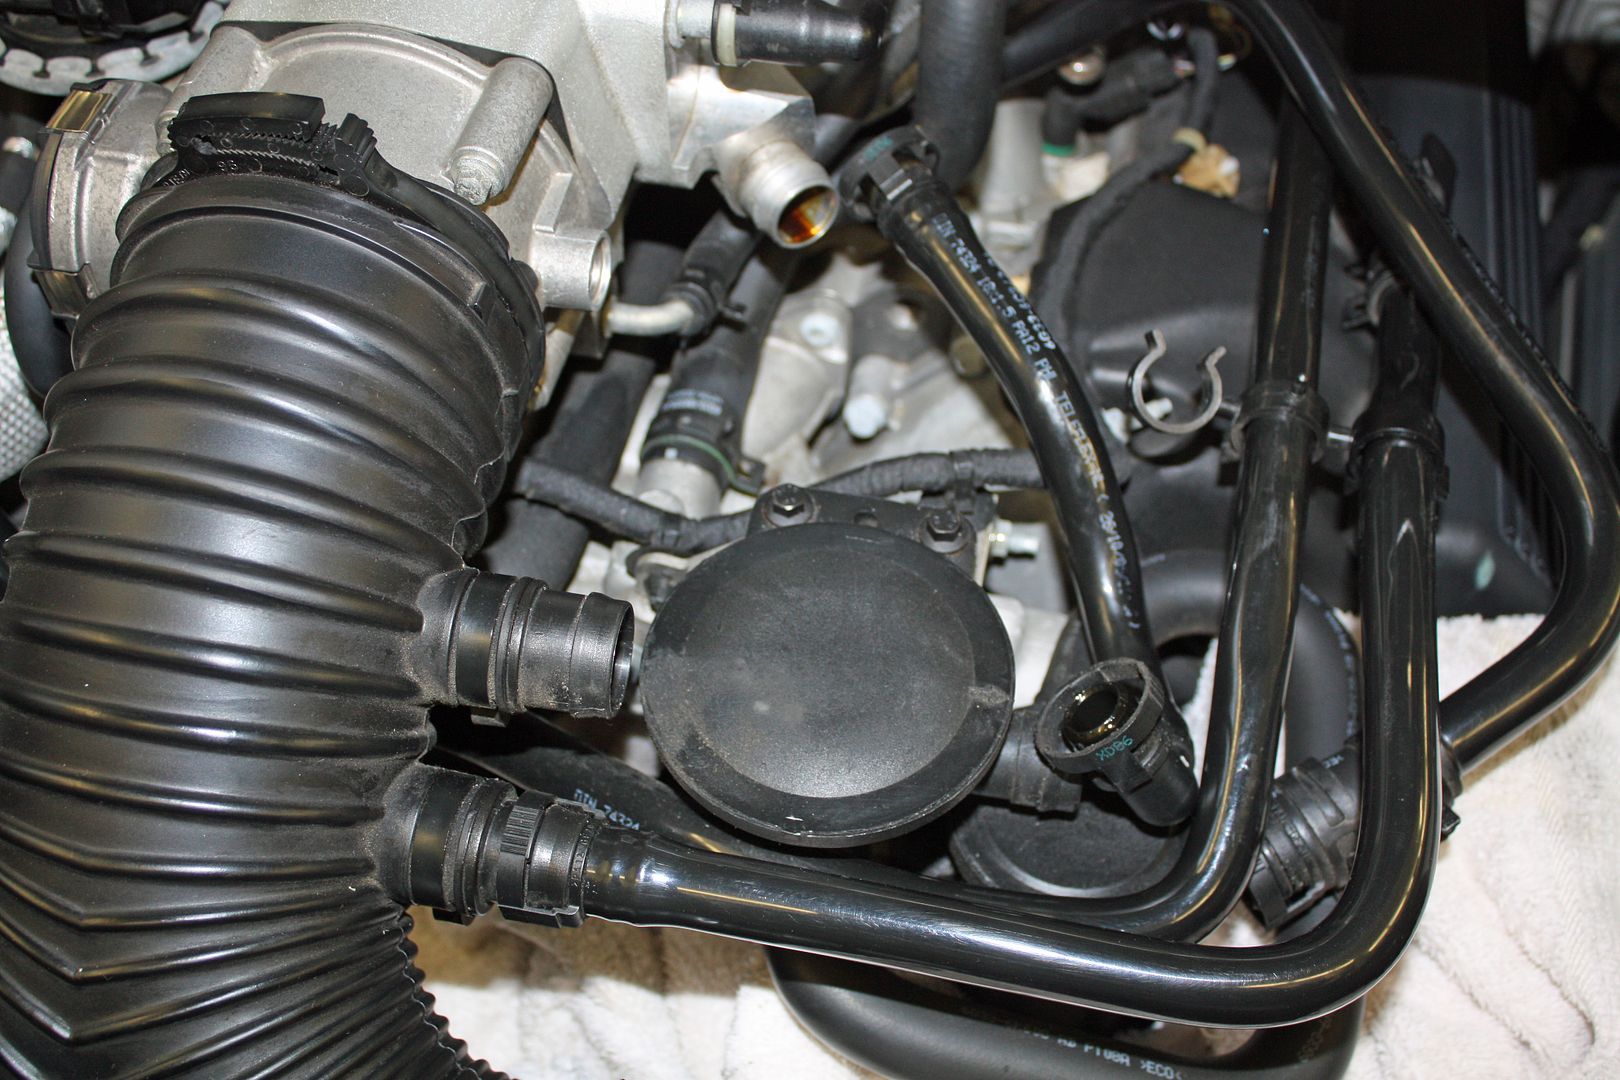
I used a pliers to get the hose clamp loose from the air-oil separator, and then I pulled the U-shaped hose aside.
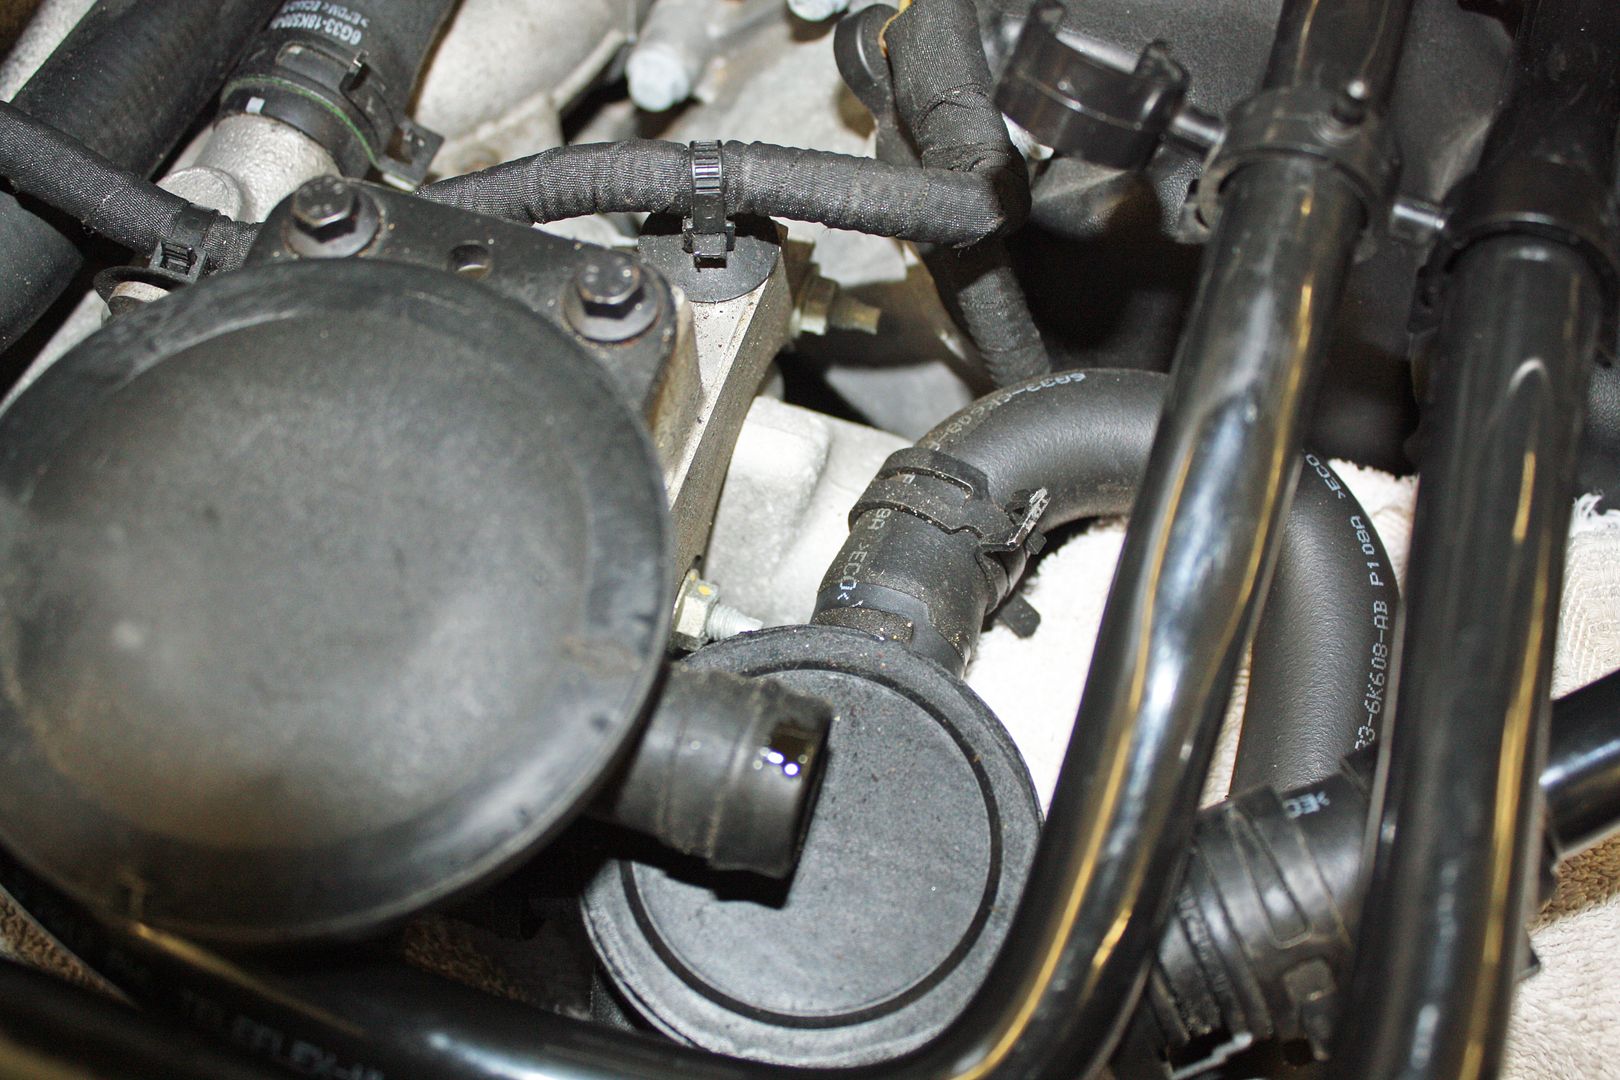
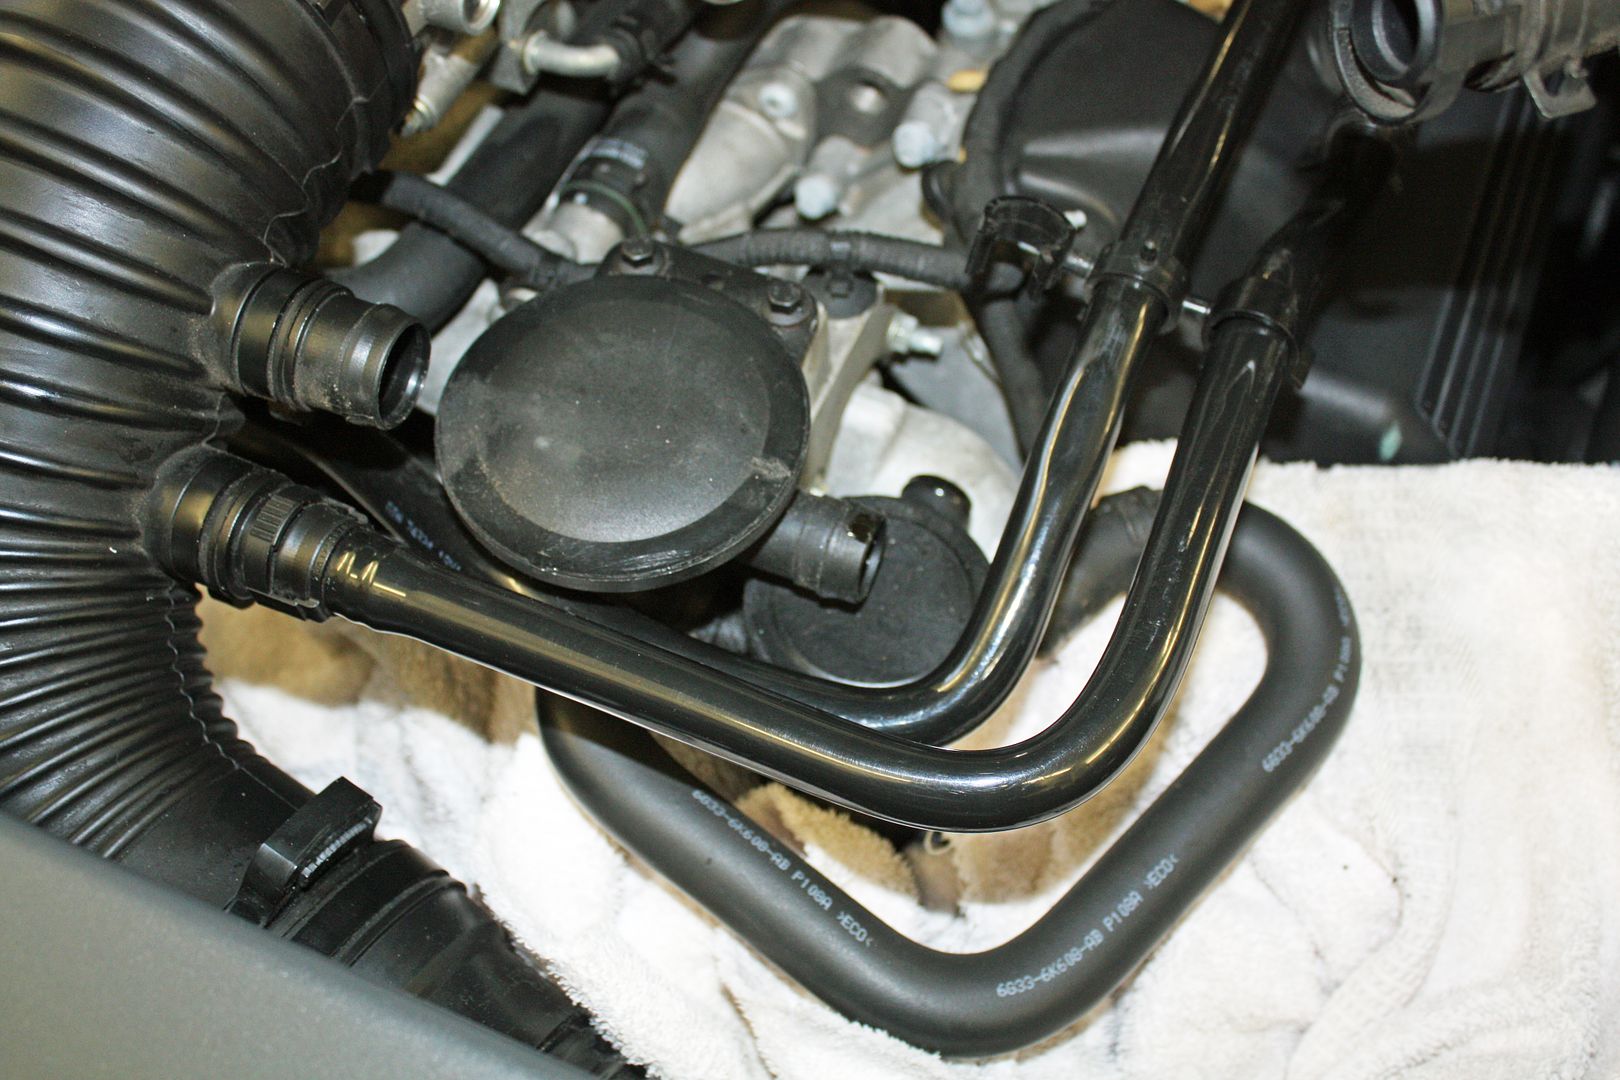
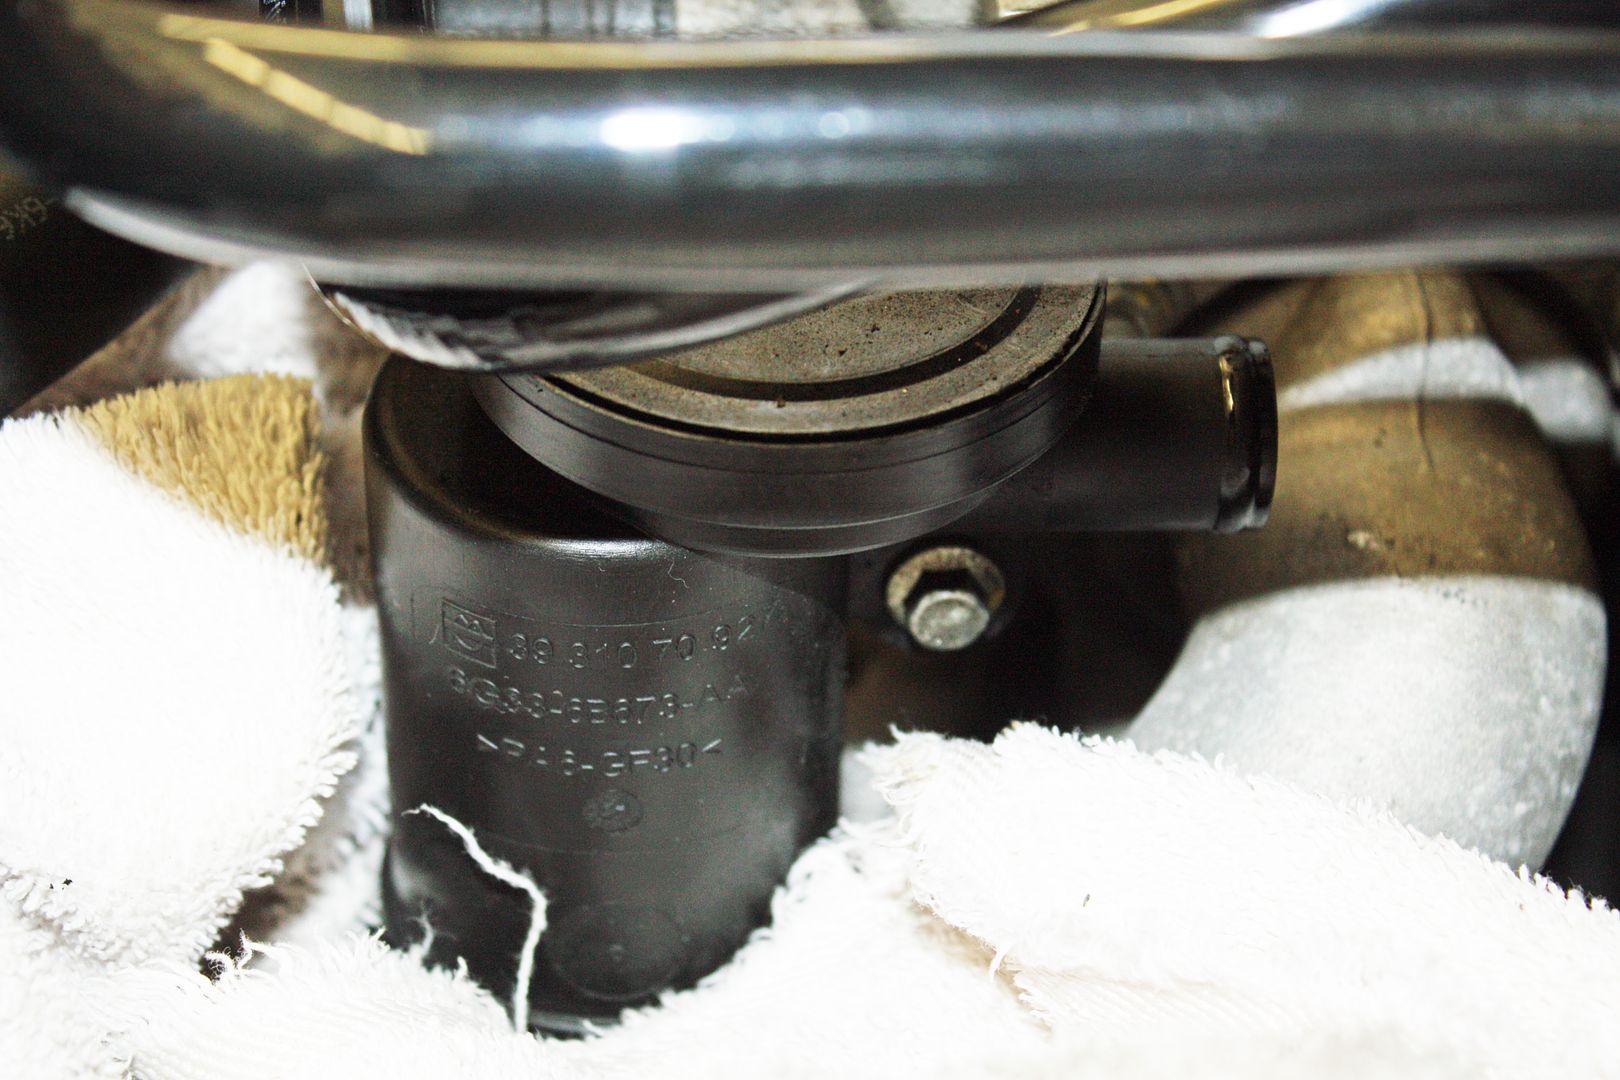
The next step is removing the PCV by removing the two black bolts with an 8mm socket. With the bolts out, pull straight up to remove the PCV. There are two O-rings on the bottom outlet.
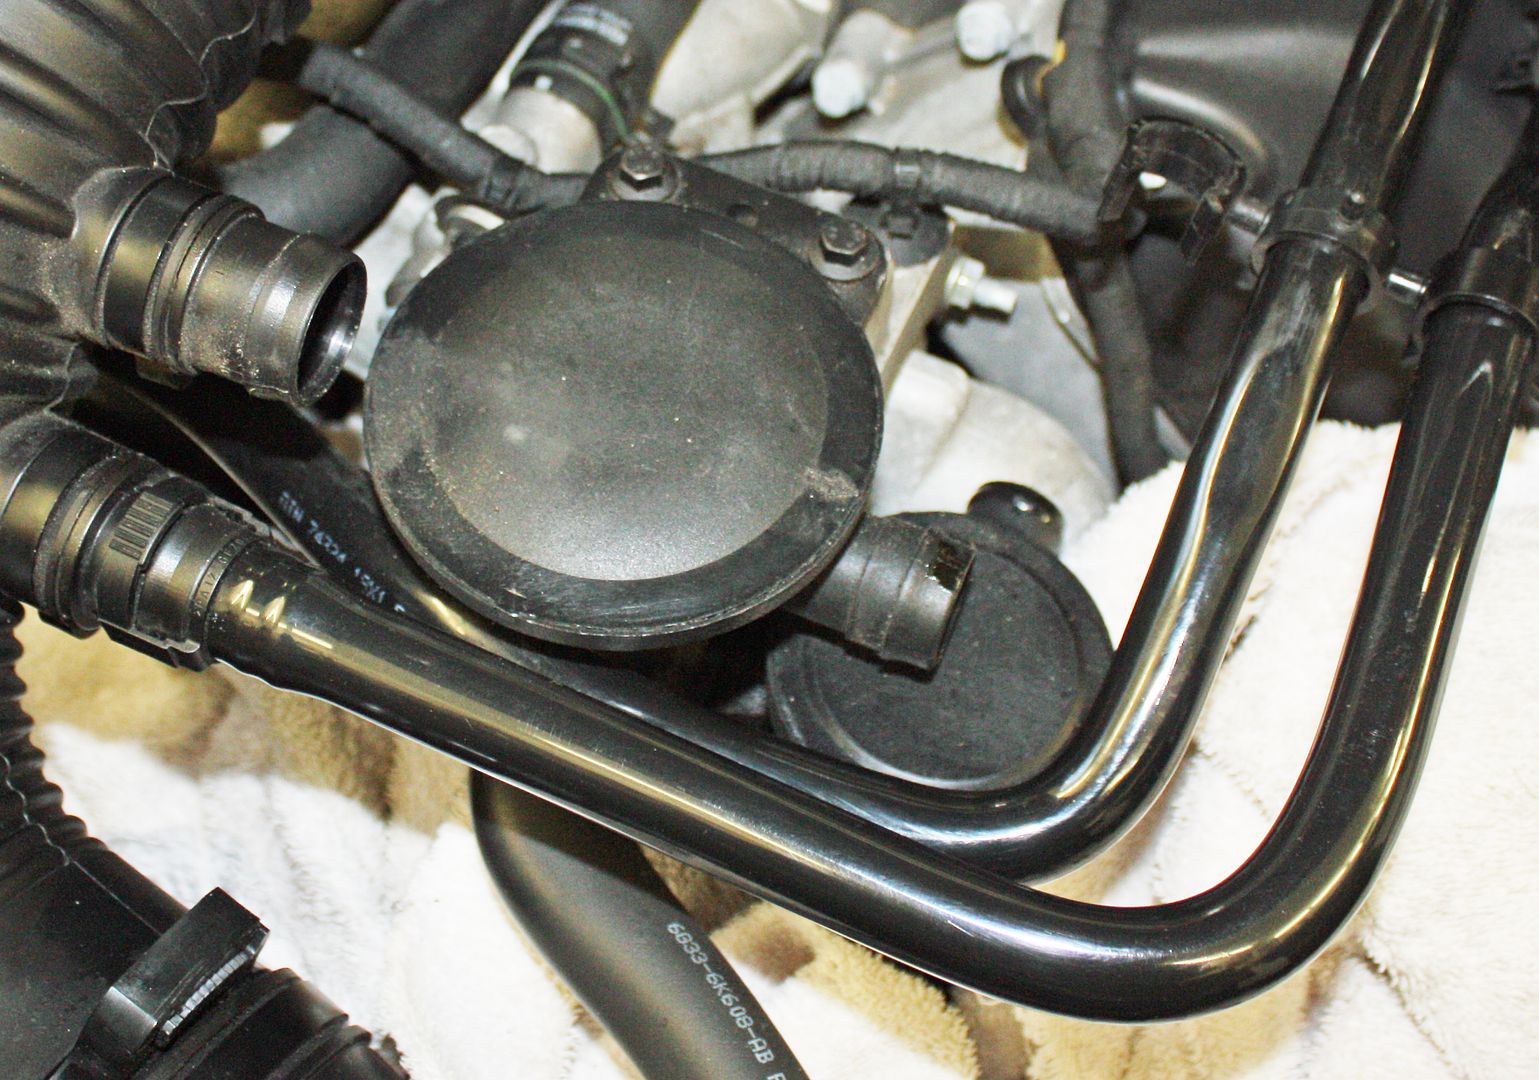
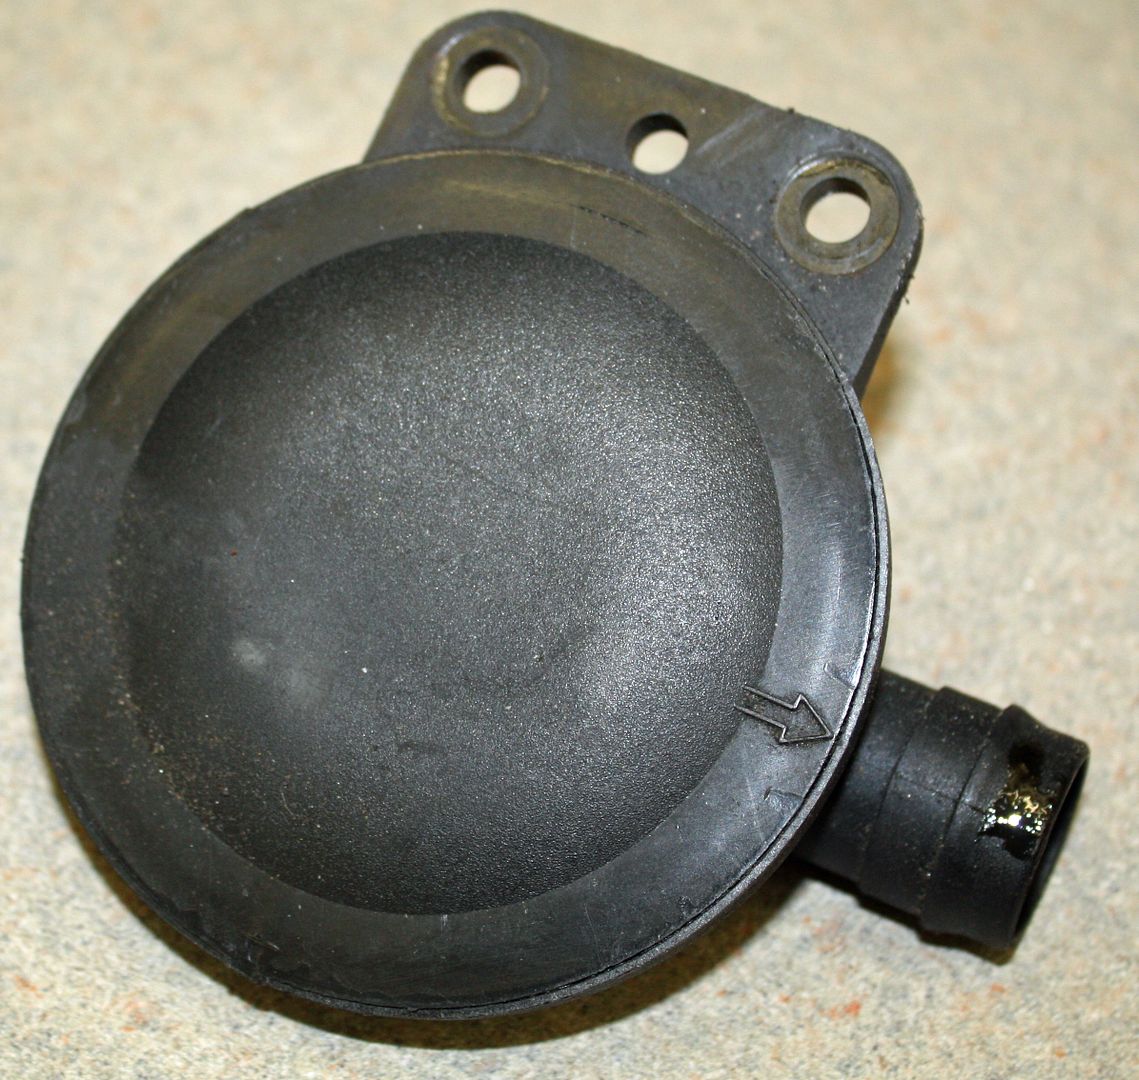
Now we can remove the air-oil separator (AOS). It is a slightly smaller version of the PCV and sits below the PCV. It is held in place by one 8mm bolt. With the bolt removed, pull it out and move it to the side with the hose still attached.
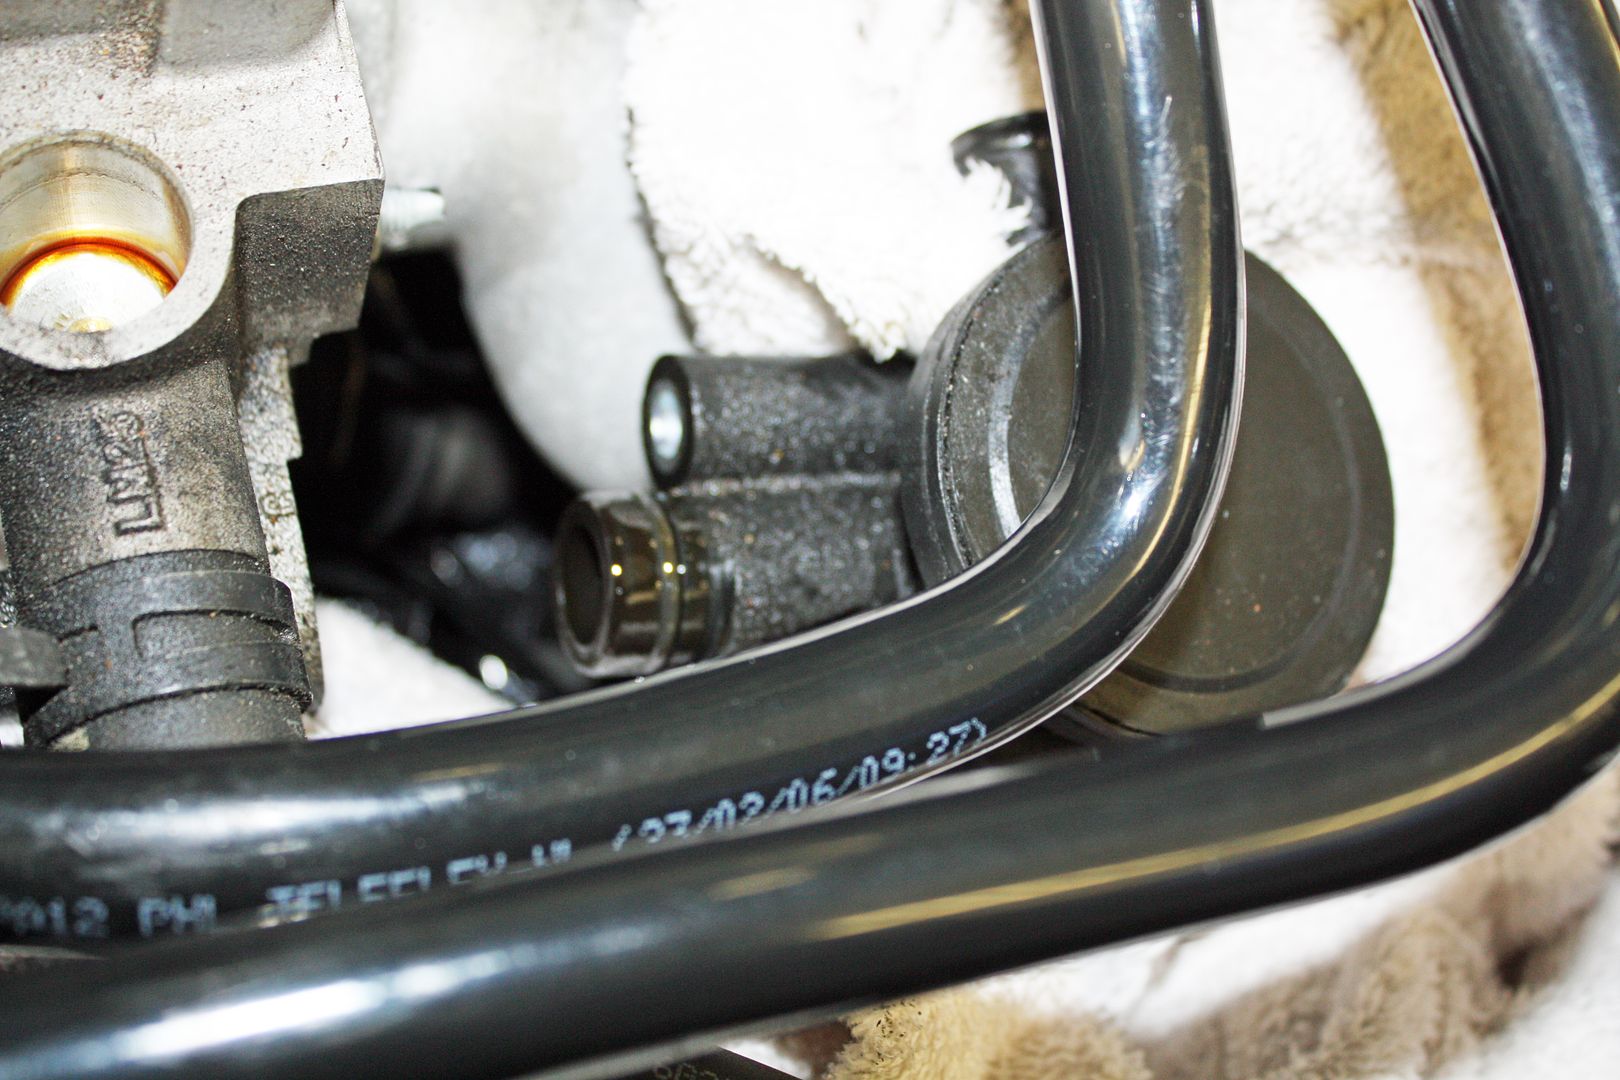
Next the bracket that sits above the thermostat housing needs to be removed. There are two 10mm nuts on the side and one 10mm bolt to the left as you look at it from the front of the car. The stud next to the head makes for a tight fit but I was able to remove the bracket. I had a hard time getting the nut off on the stud next to the head as someone had rounded off one of the corners. That means the thermostat had been replaced at least once. A new nut replaced it.
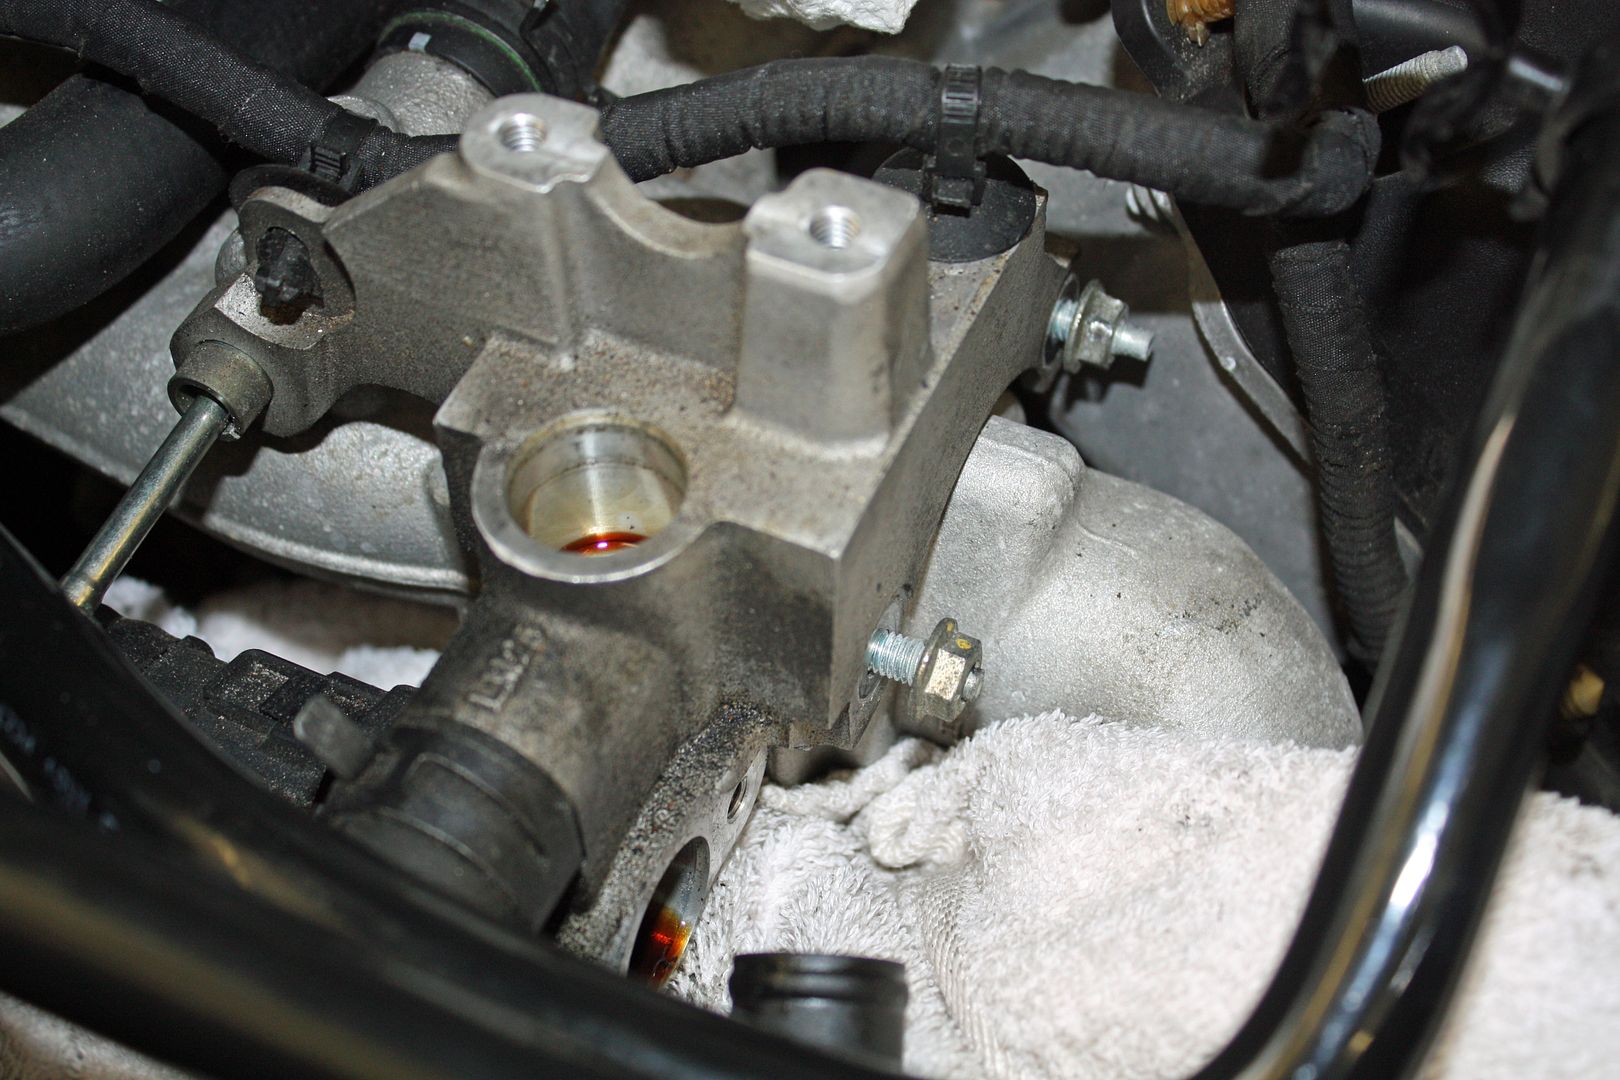

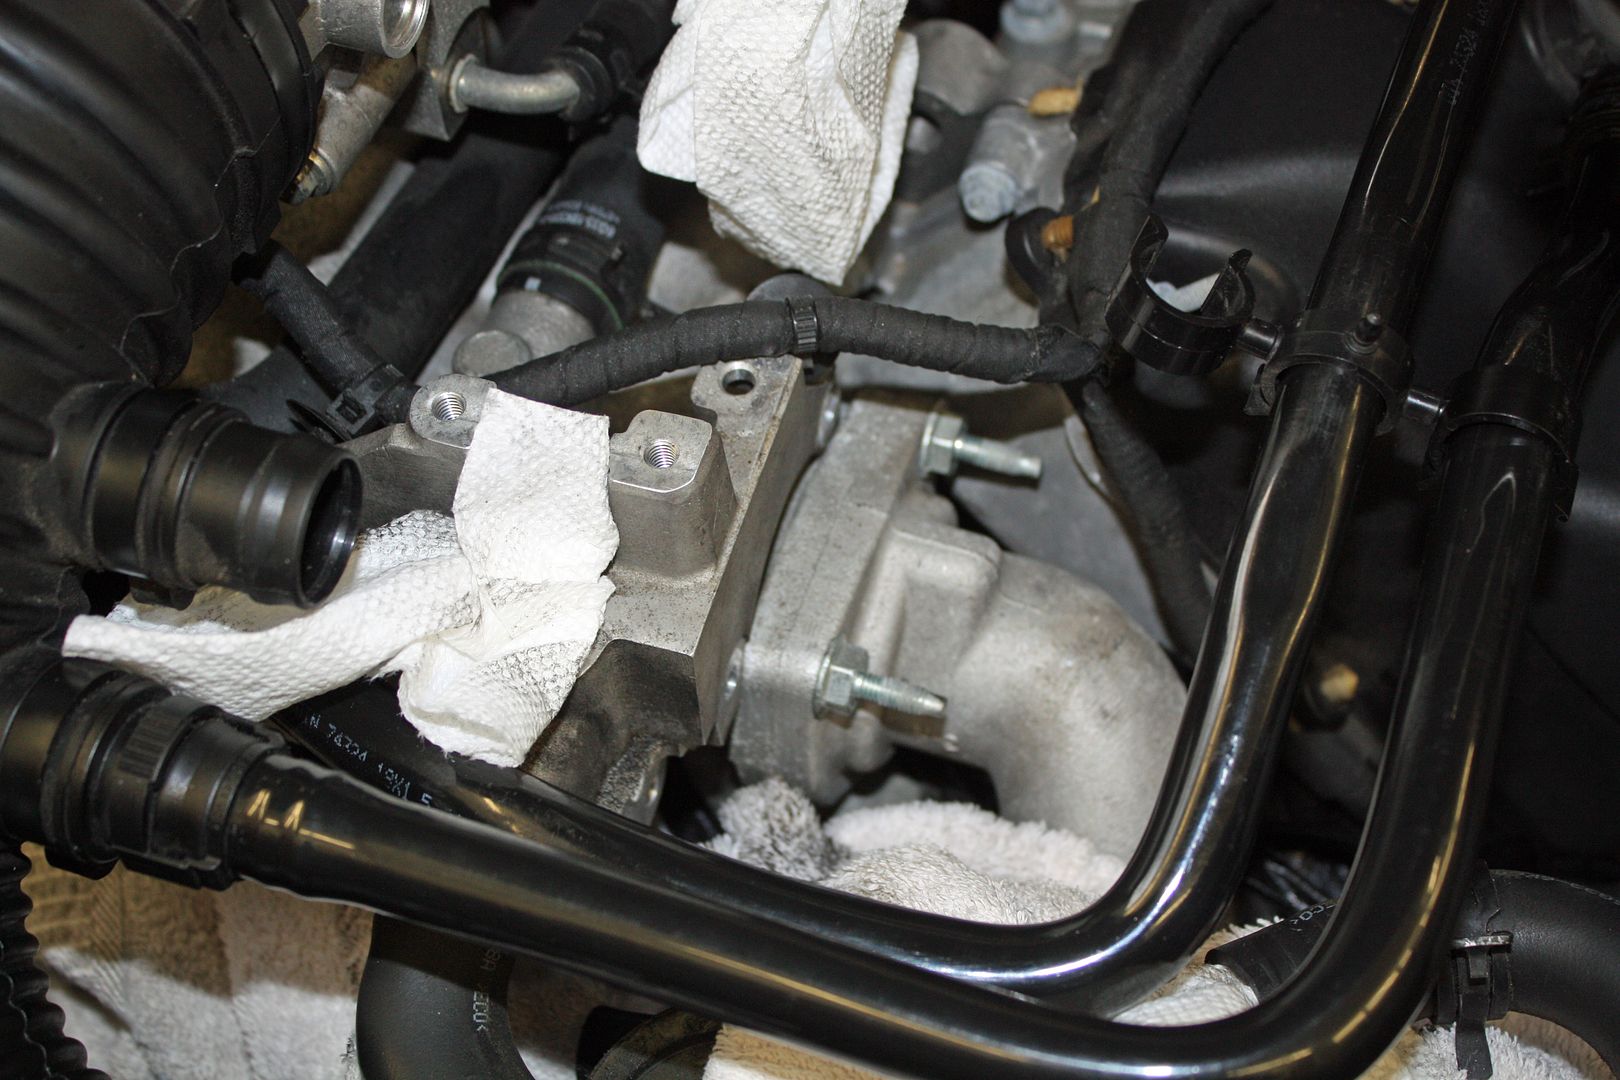
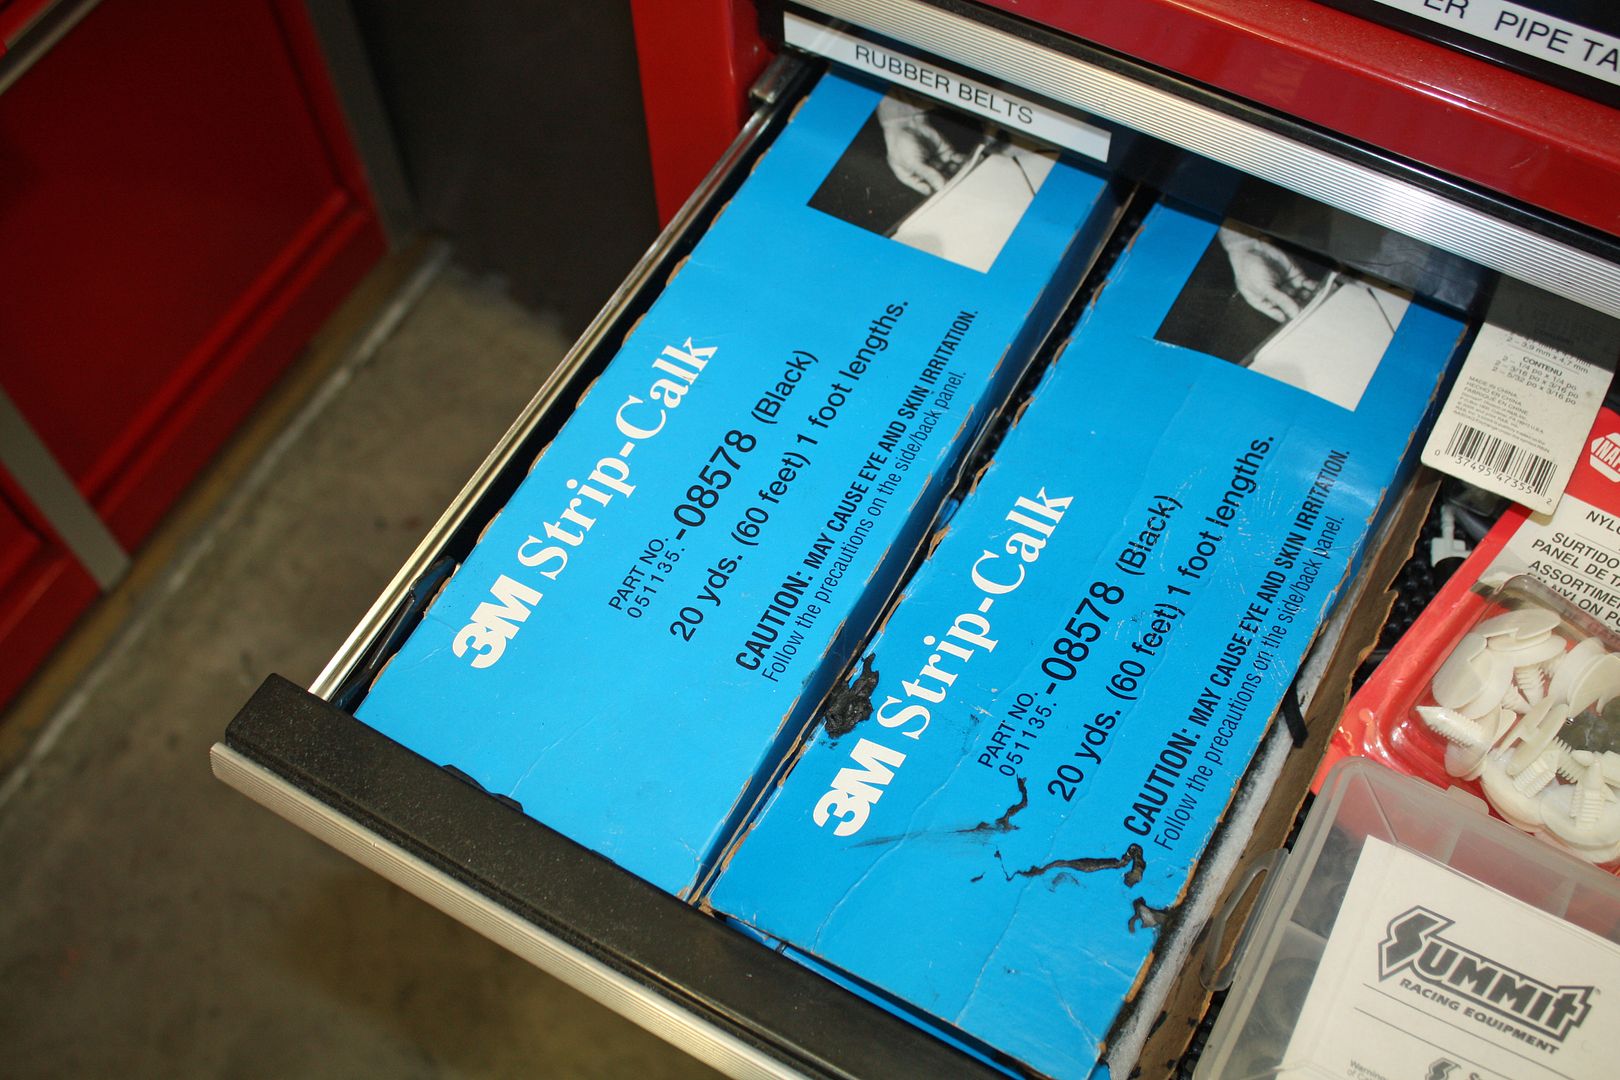
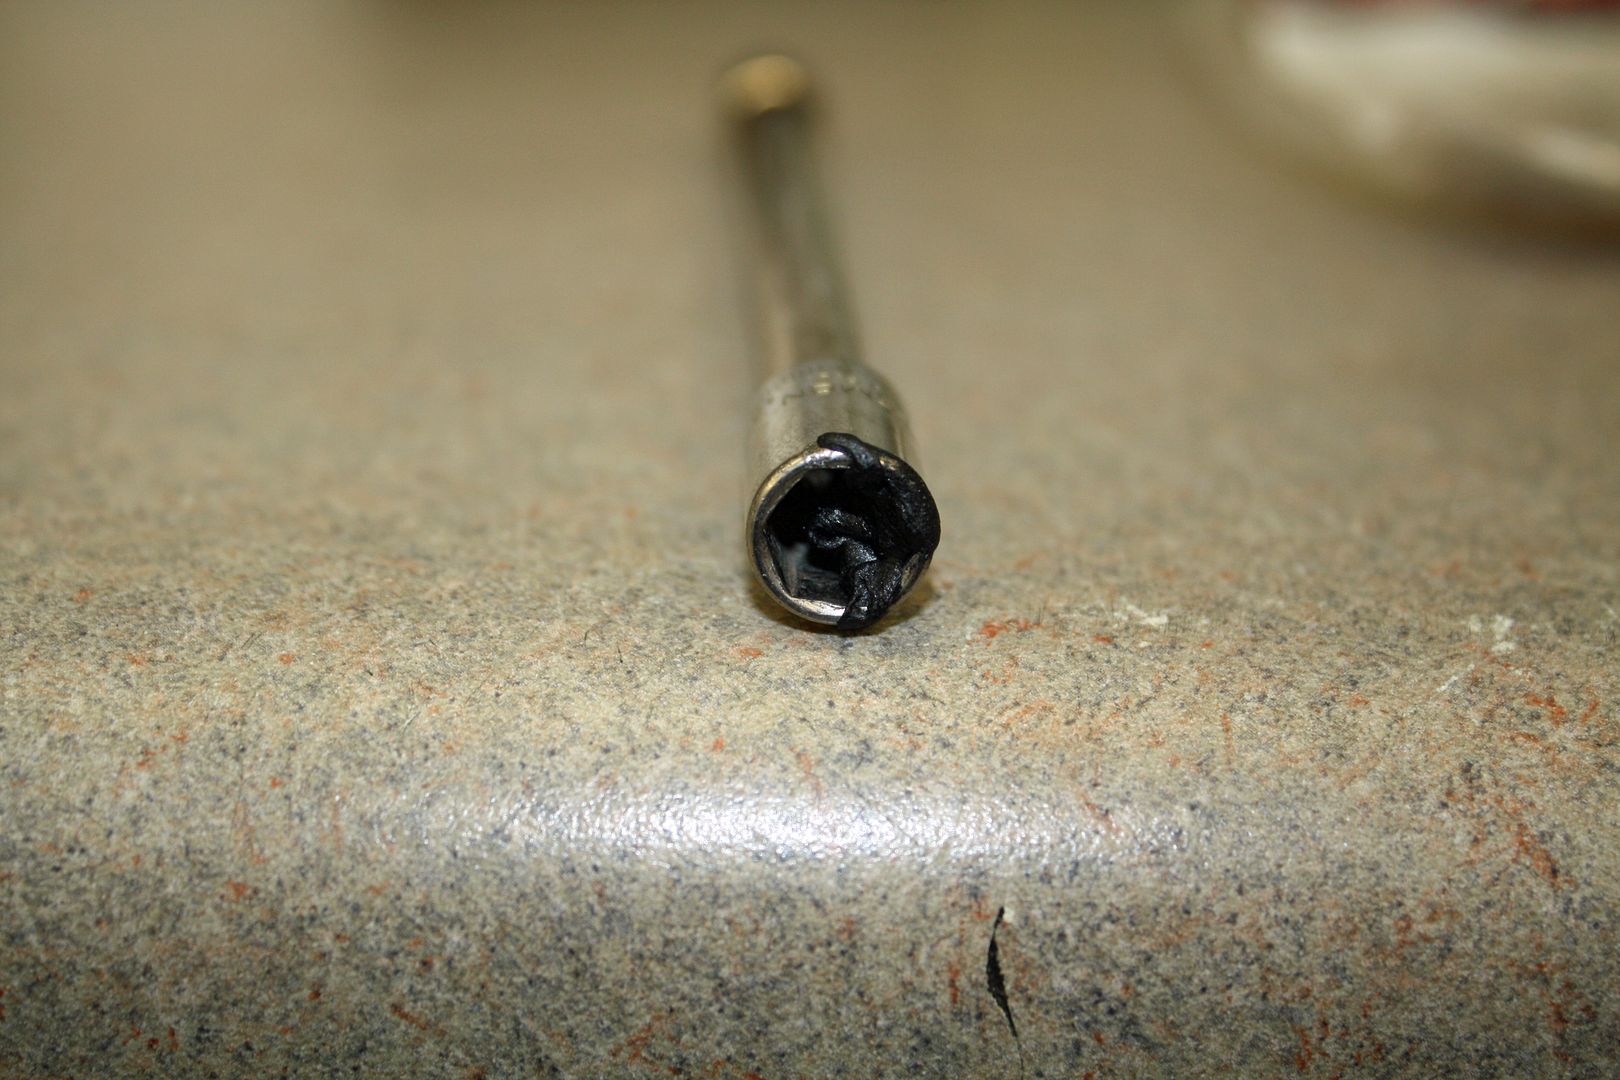
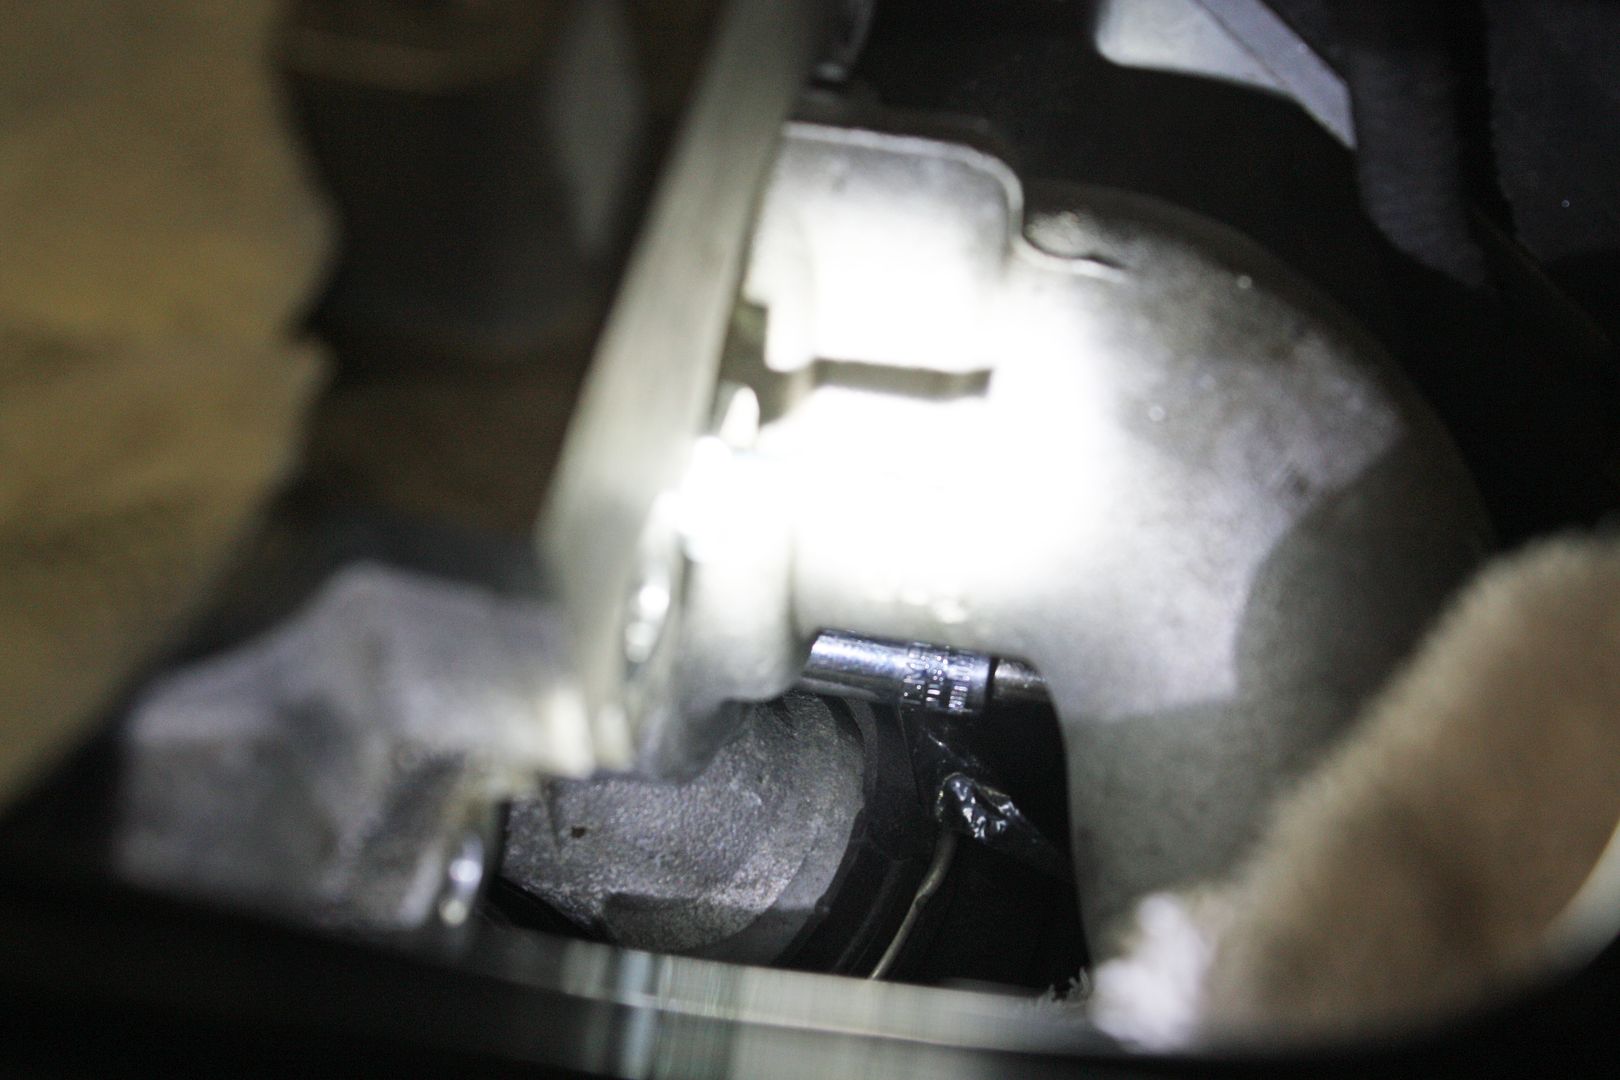
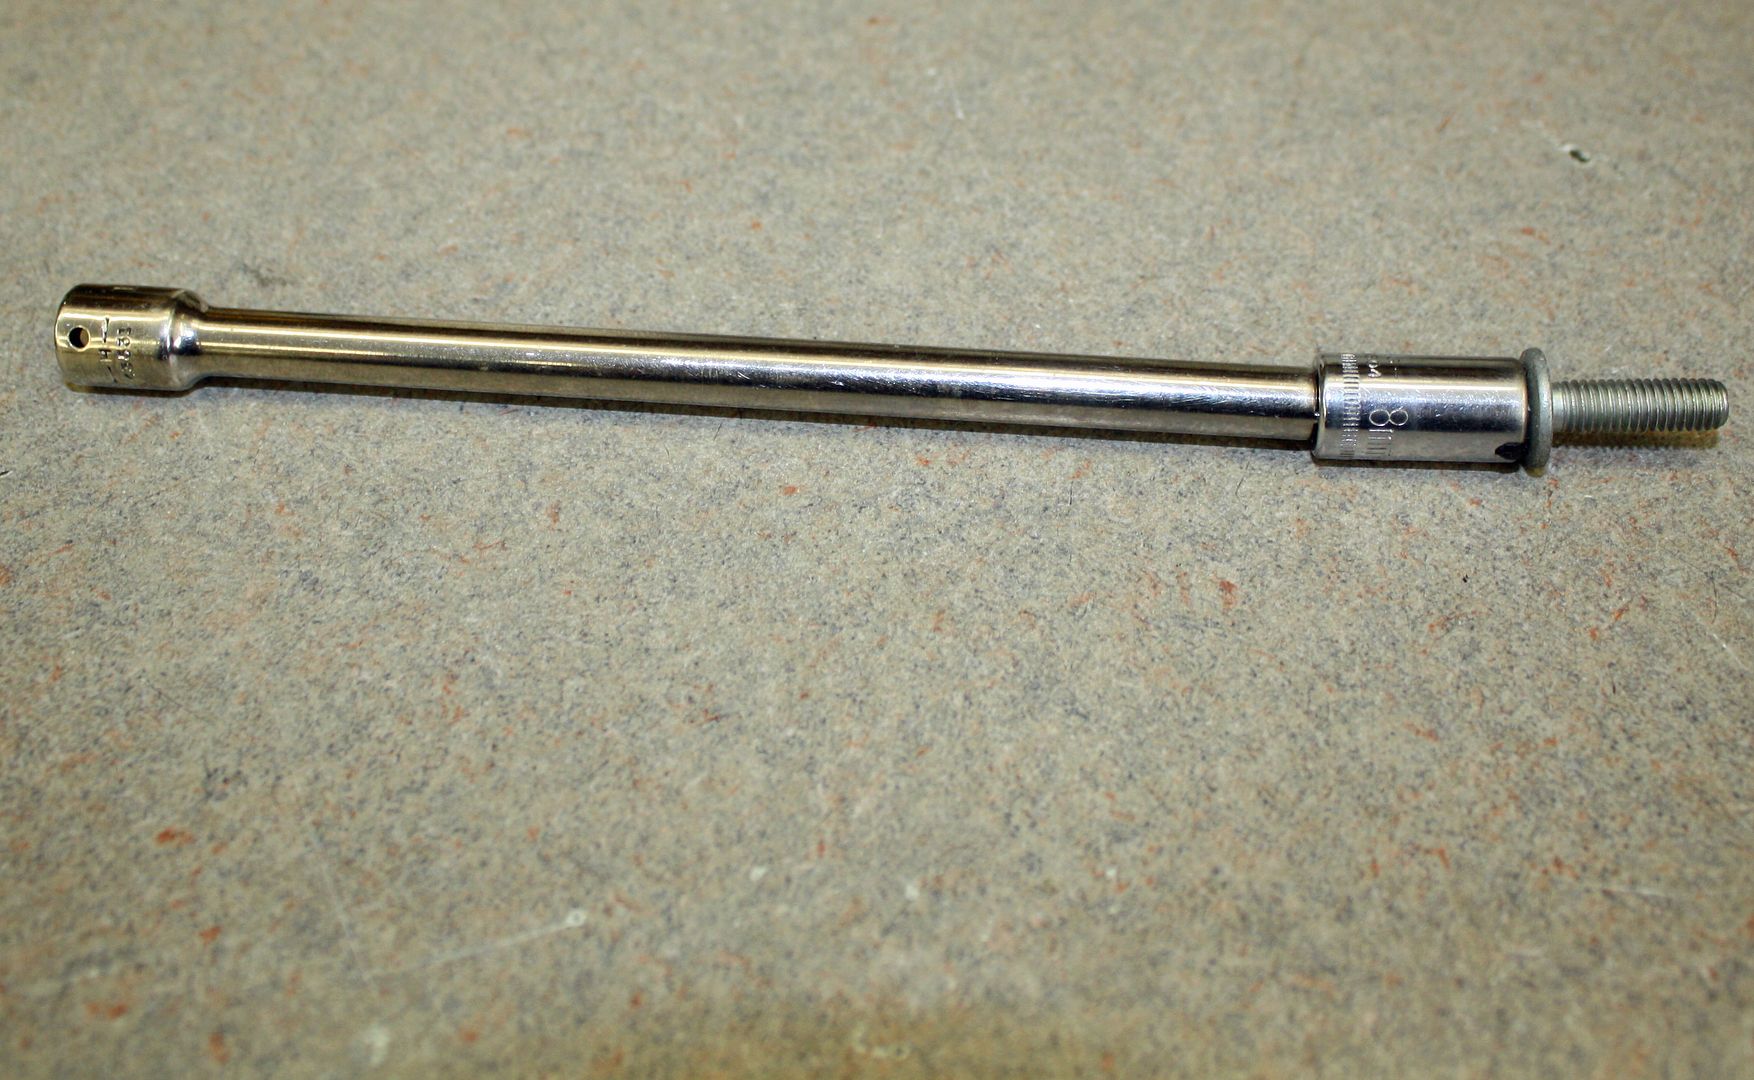
Now the thermostat housing can be removed. The two 13mm studs at the top have to be removed as well as an 8mm bolt that is on the bottom directly in the middle of the housing. I couldn't get my hand on that bolt so I used an extension and 8mm socket. To make sure the bolt stuck to my socket, I placed a small bit of strip caulk on the socket. This also held the bolt in place when I re-installed it.
As I was loosening the stud next to the head, it rubbed against the head when loosened all the way. It was actually in a little bit of a bind. To make it easier to re-install, I used my grinder to grind off some of the end.
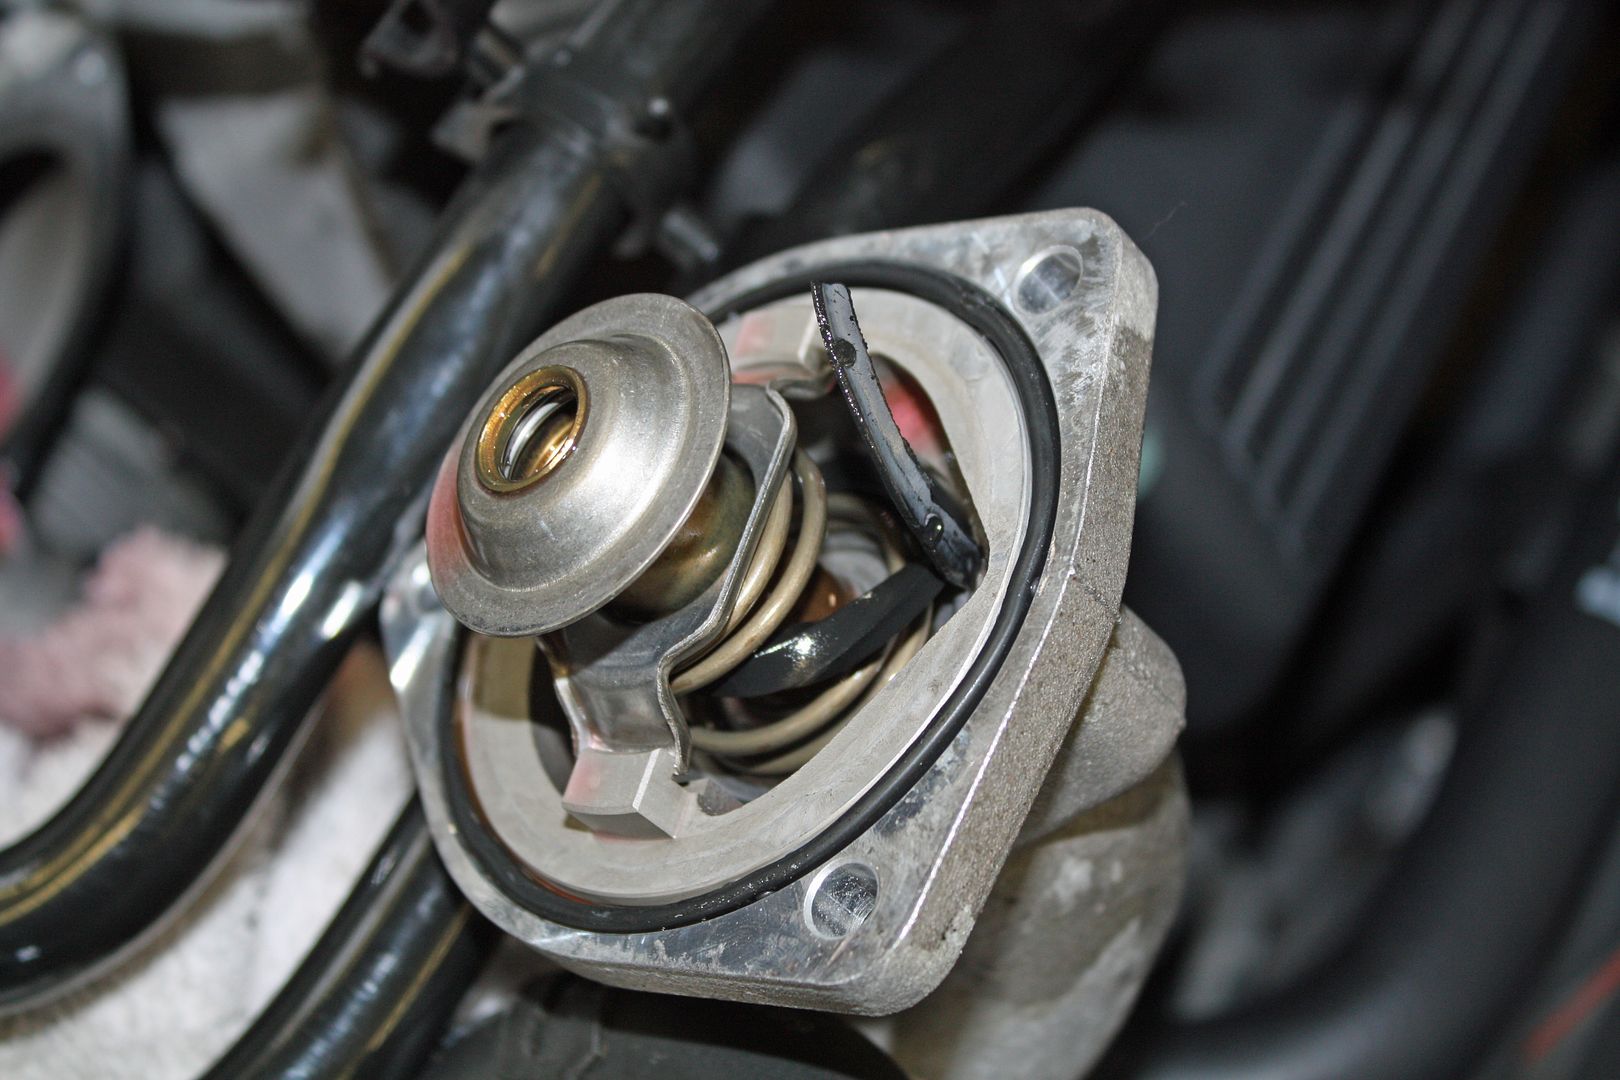
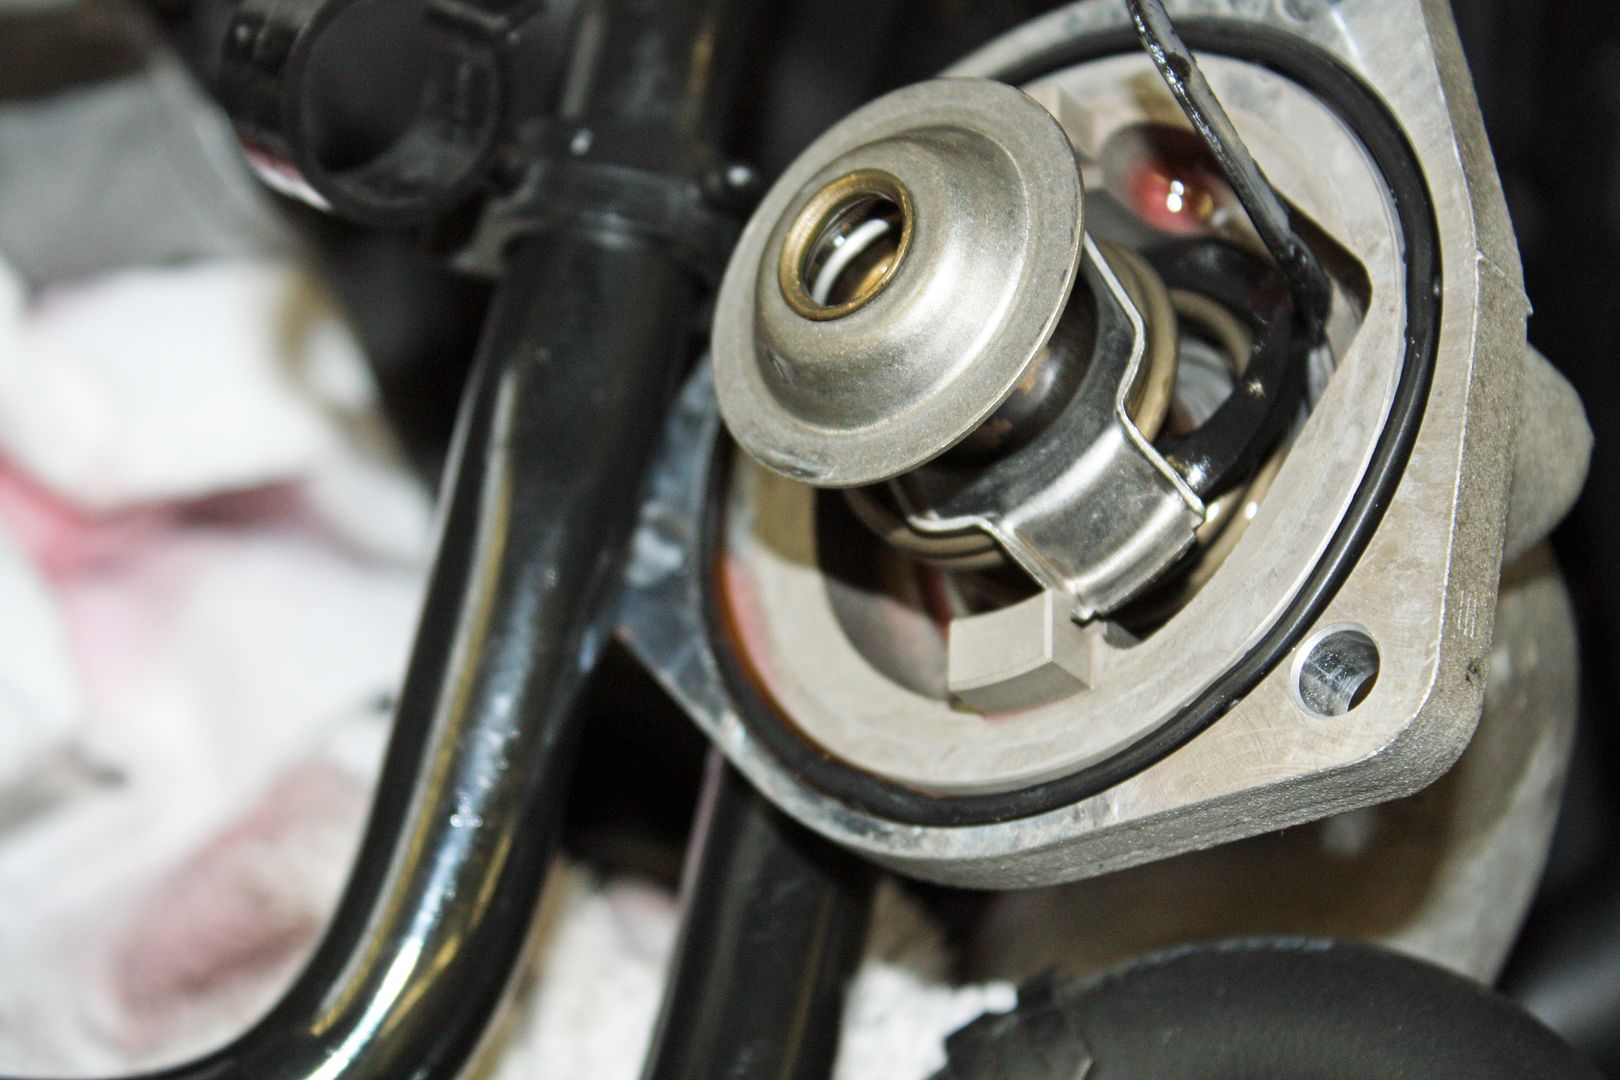
With all of the bolts removed, I could remove the thermostat housing. What I found confirmed what I suspected. The rubber seal had torn away from the thermostat and was wrapped around the spring. It looked exactly like the one on Red Pants video. To remove the thermostat from the housing, you must push down on the spring while turning the locking pins to release them. It wasn't easy but it was doable.
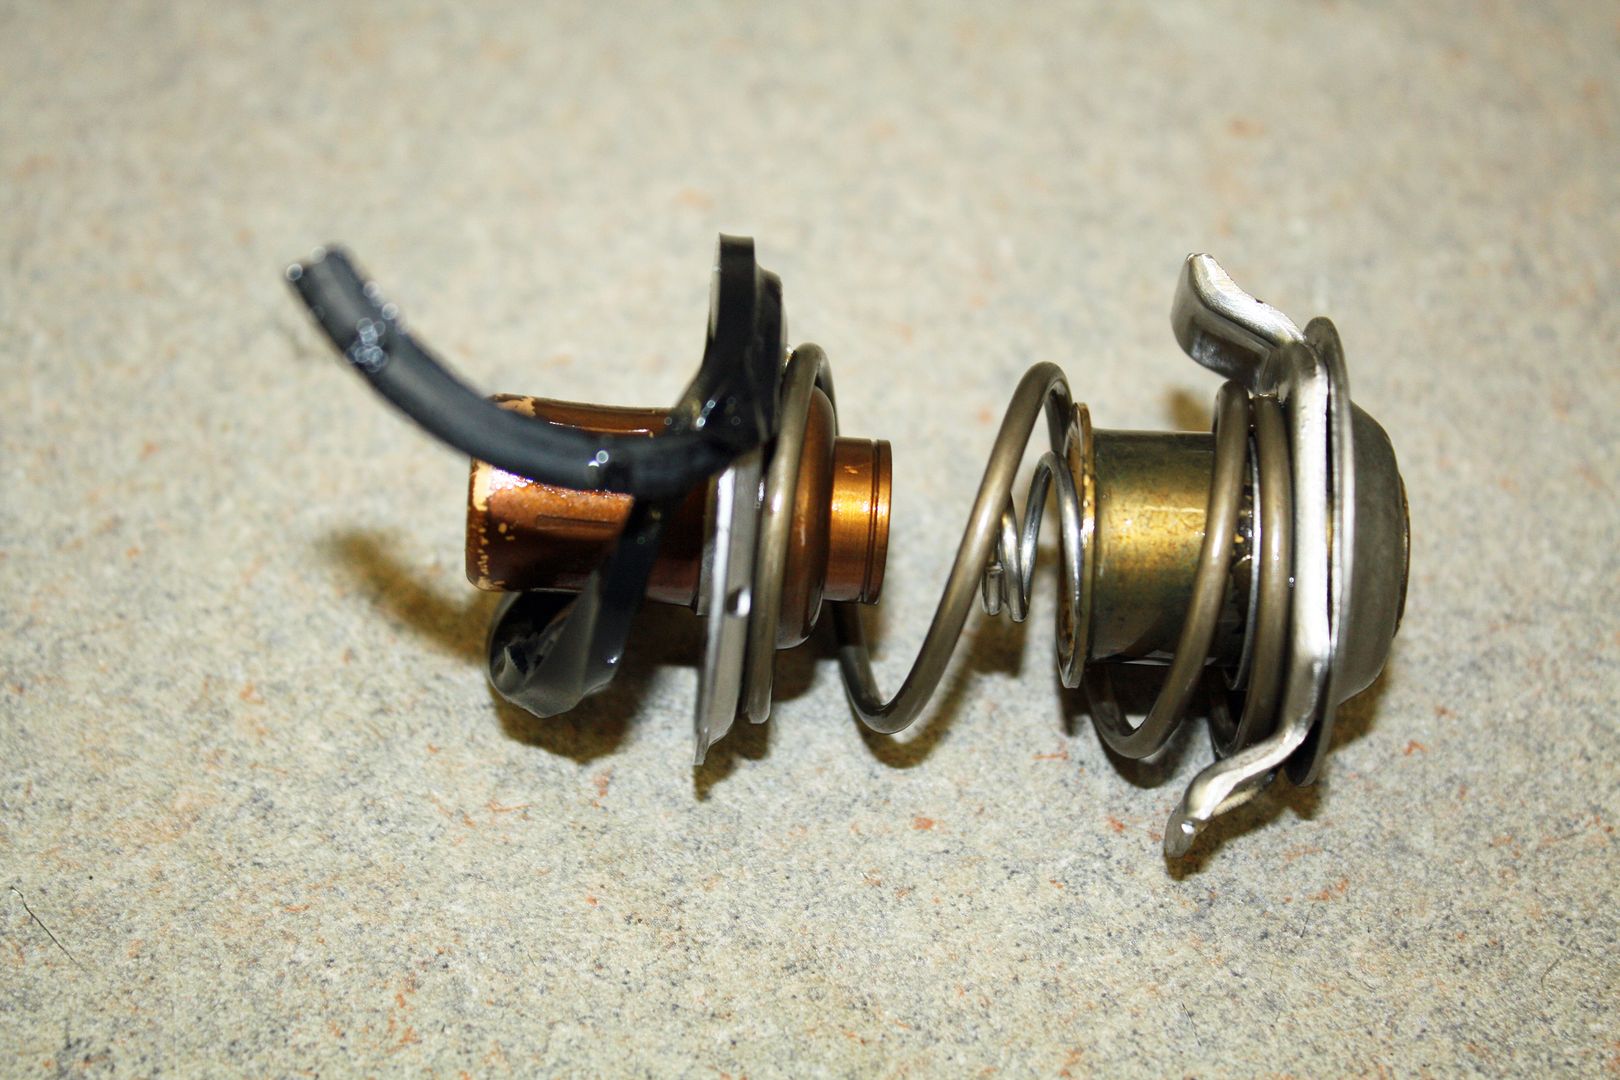
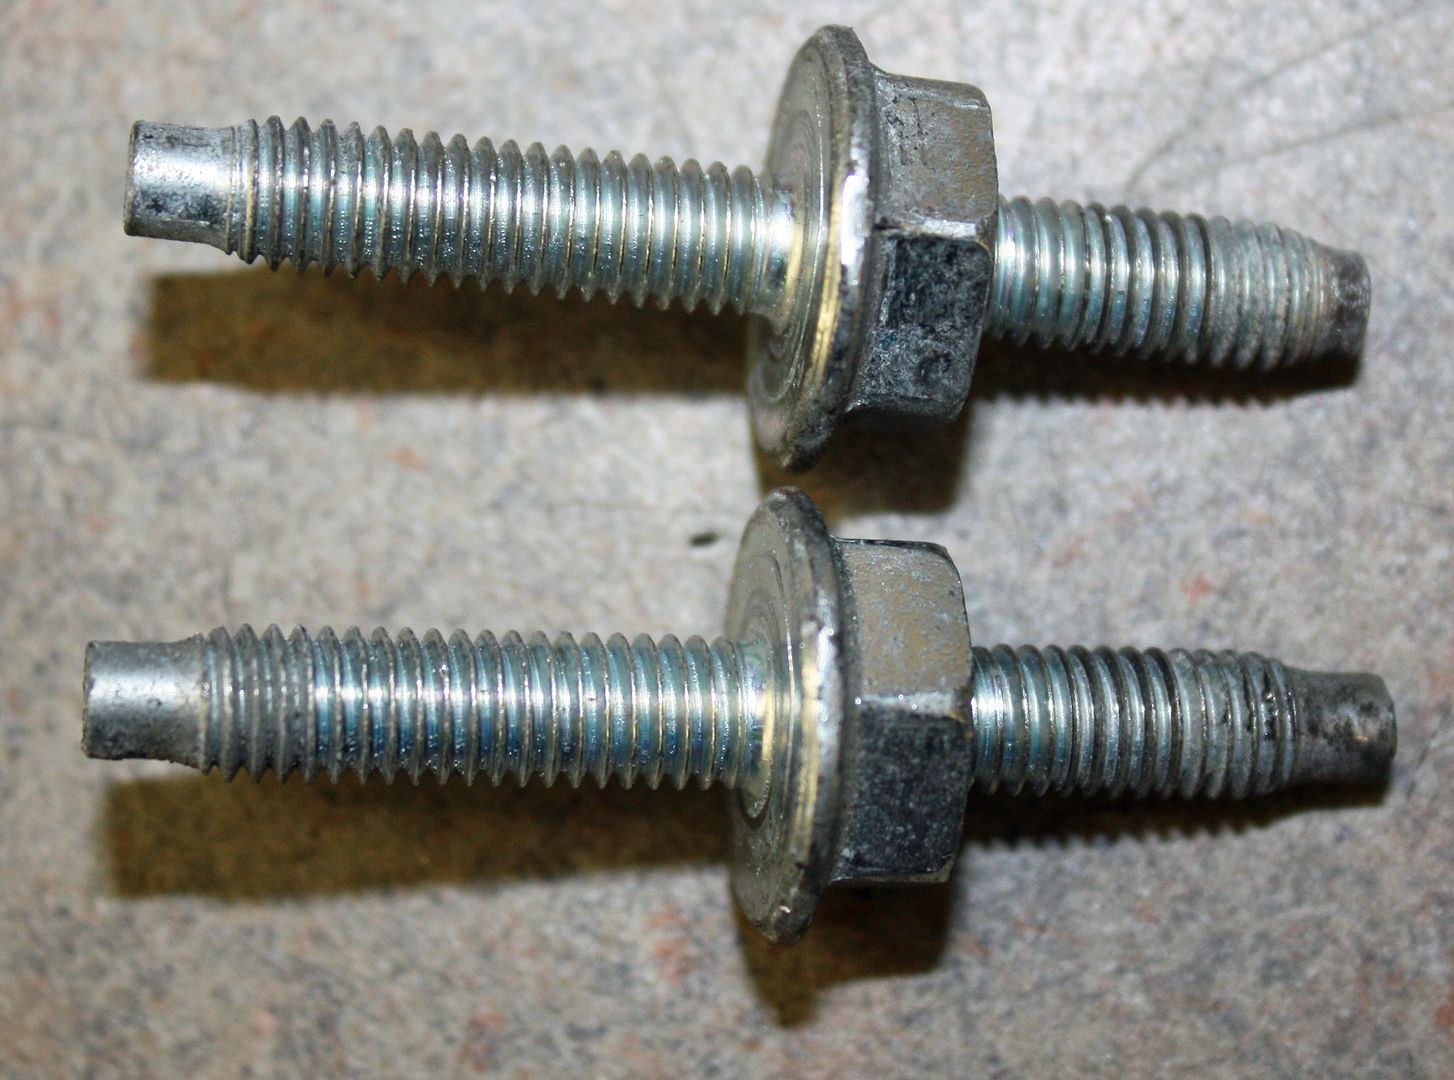
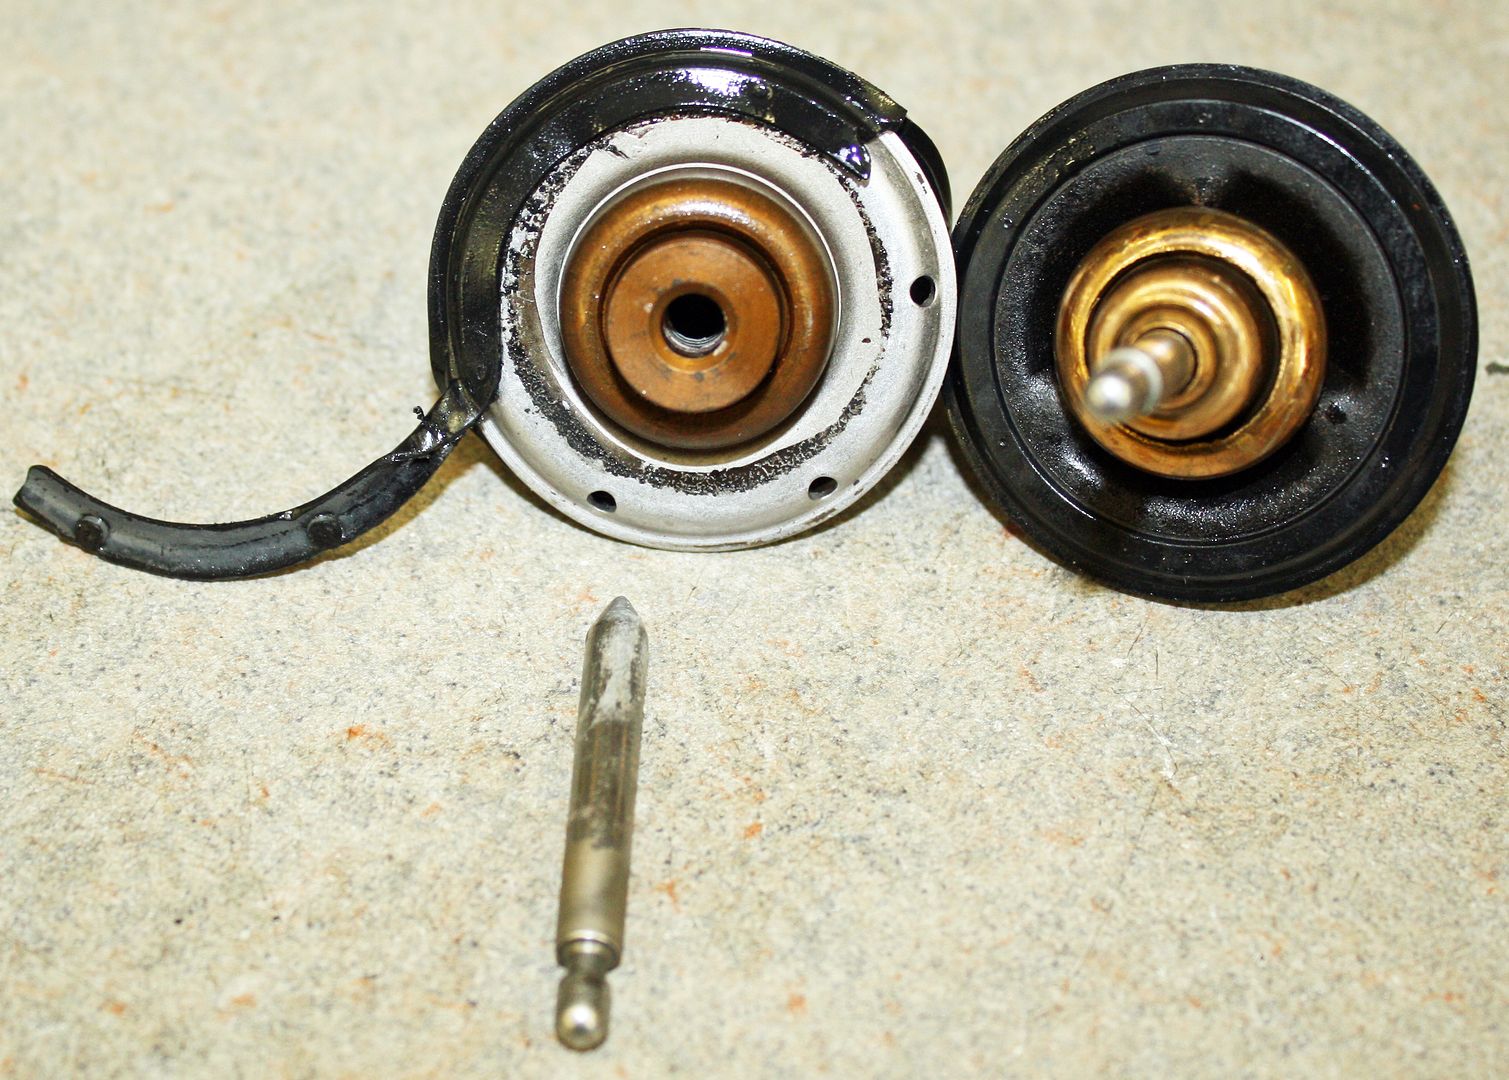
The Ford thermostat is supposed to be an improvement over the original one. In the photo below you can see the difference in how the rubber is attached to the thermostat. Also, the pin is integrated into the new thermostat while the old one used a separate pin.
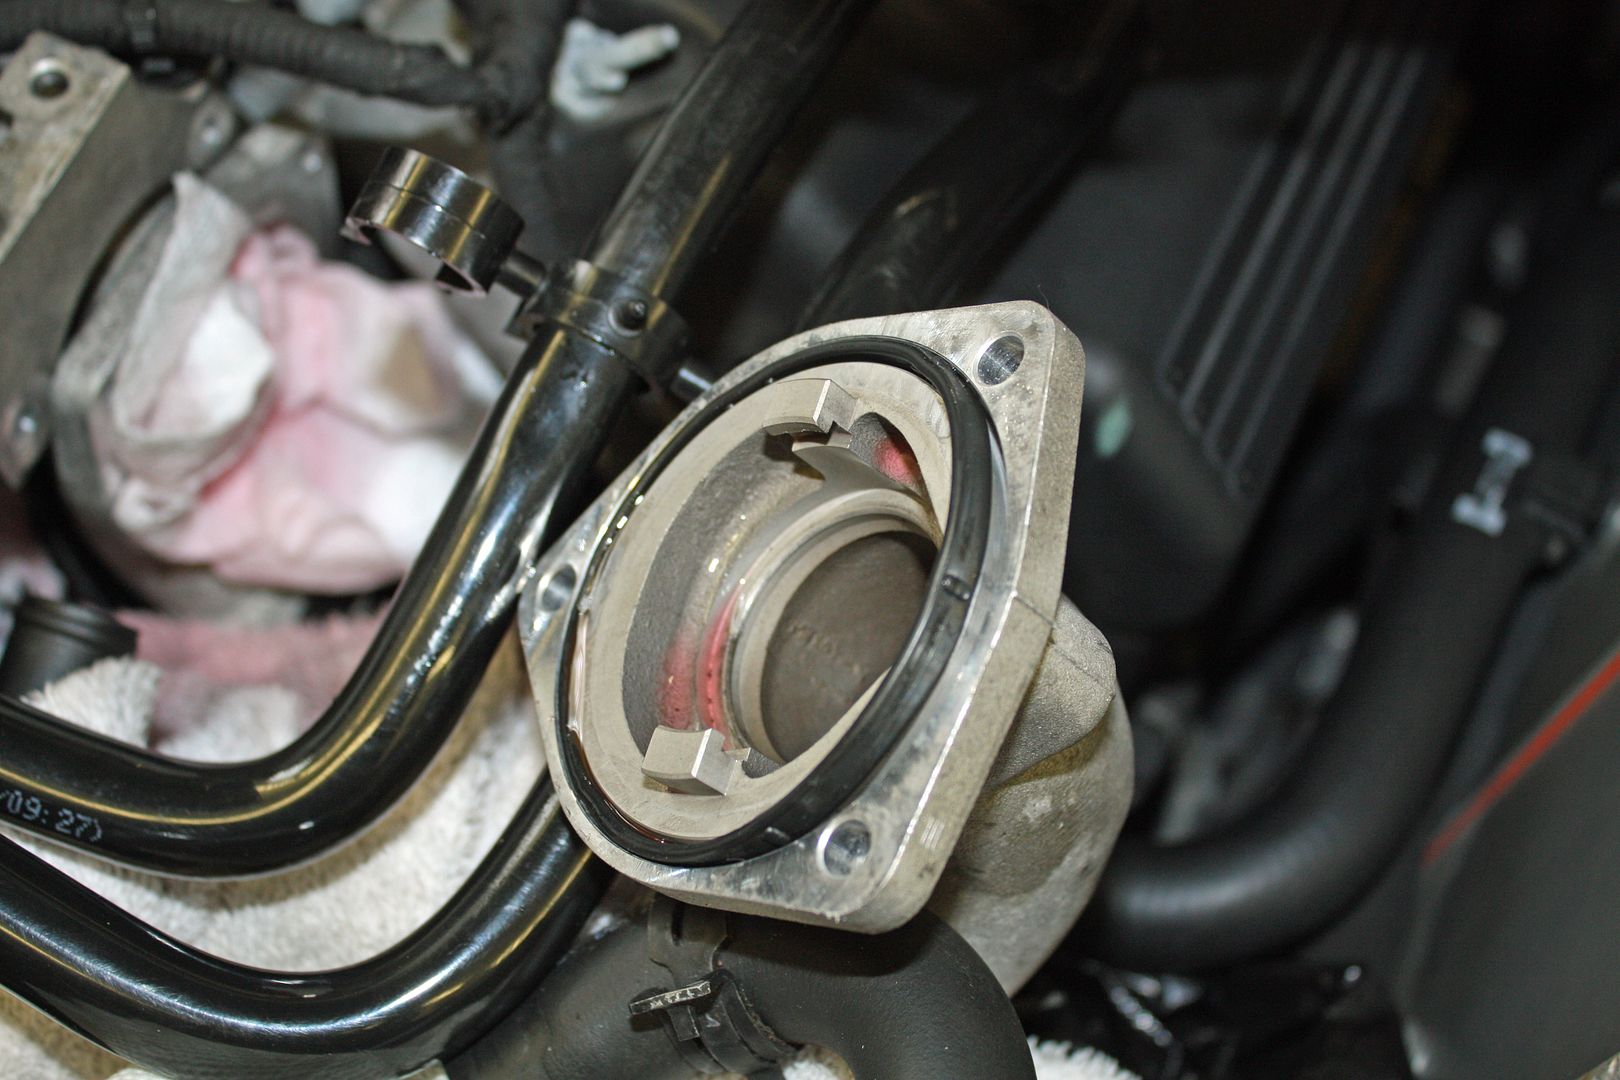
Before re-assembling the thermostat I replaced the housing seal.
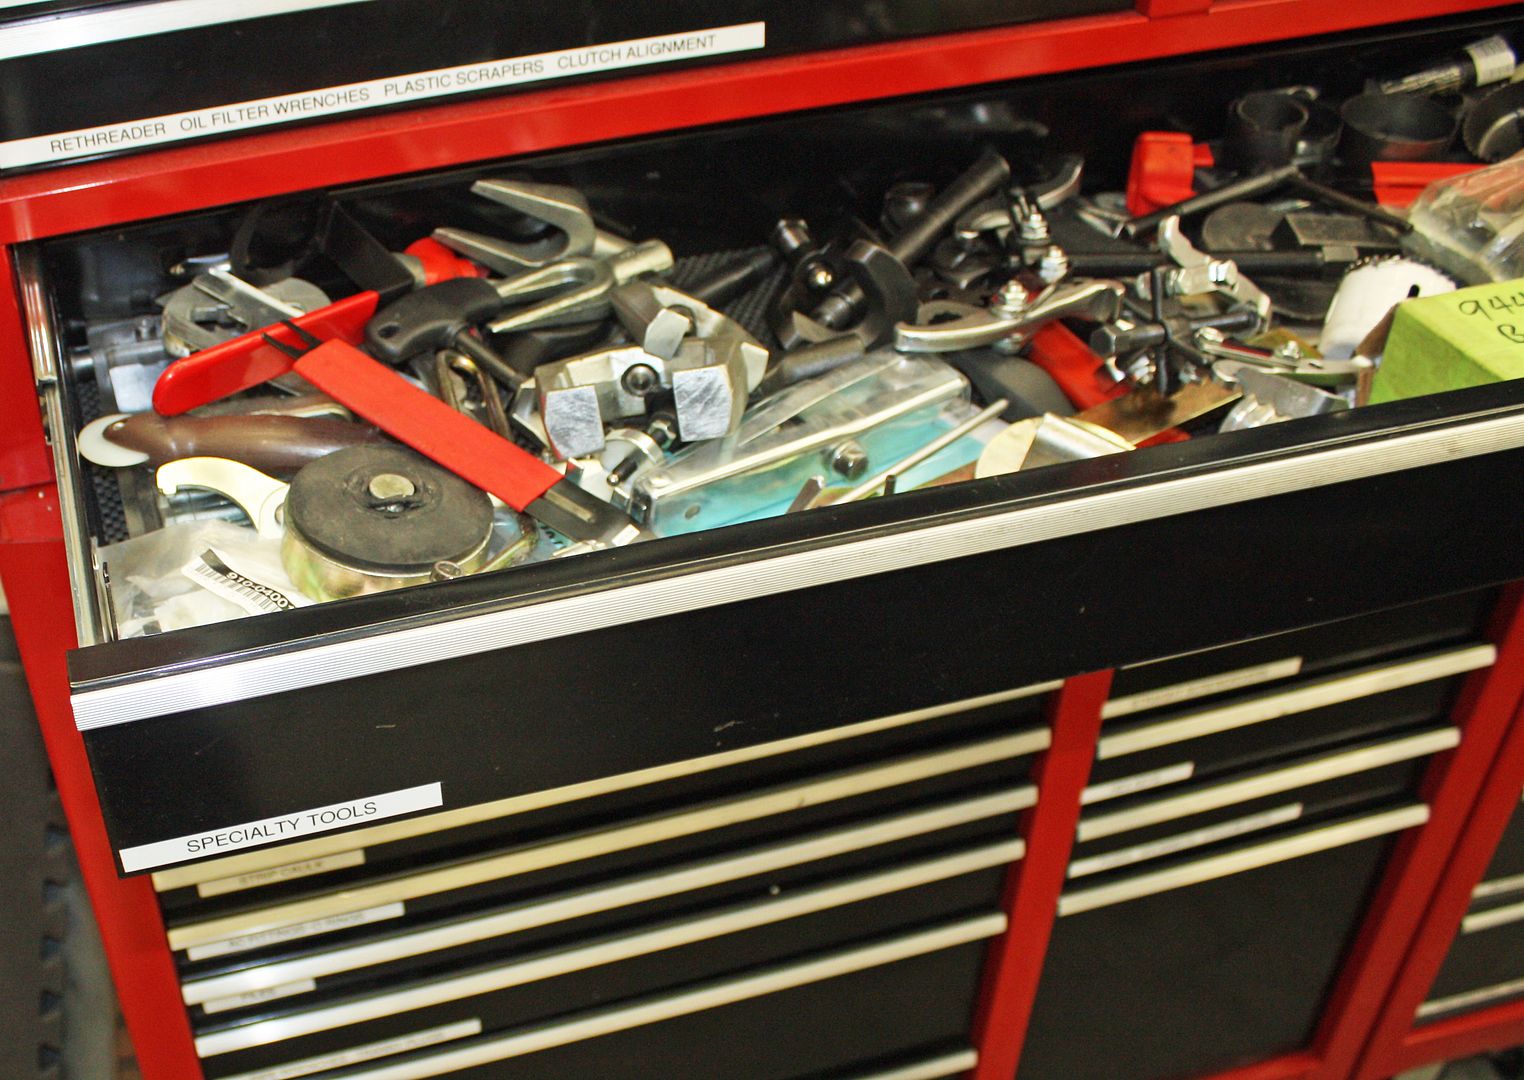
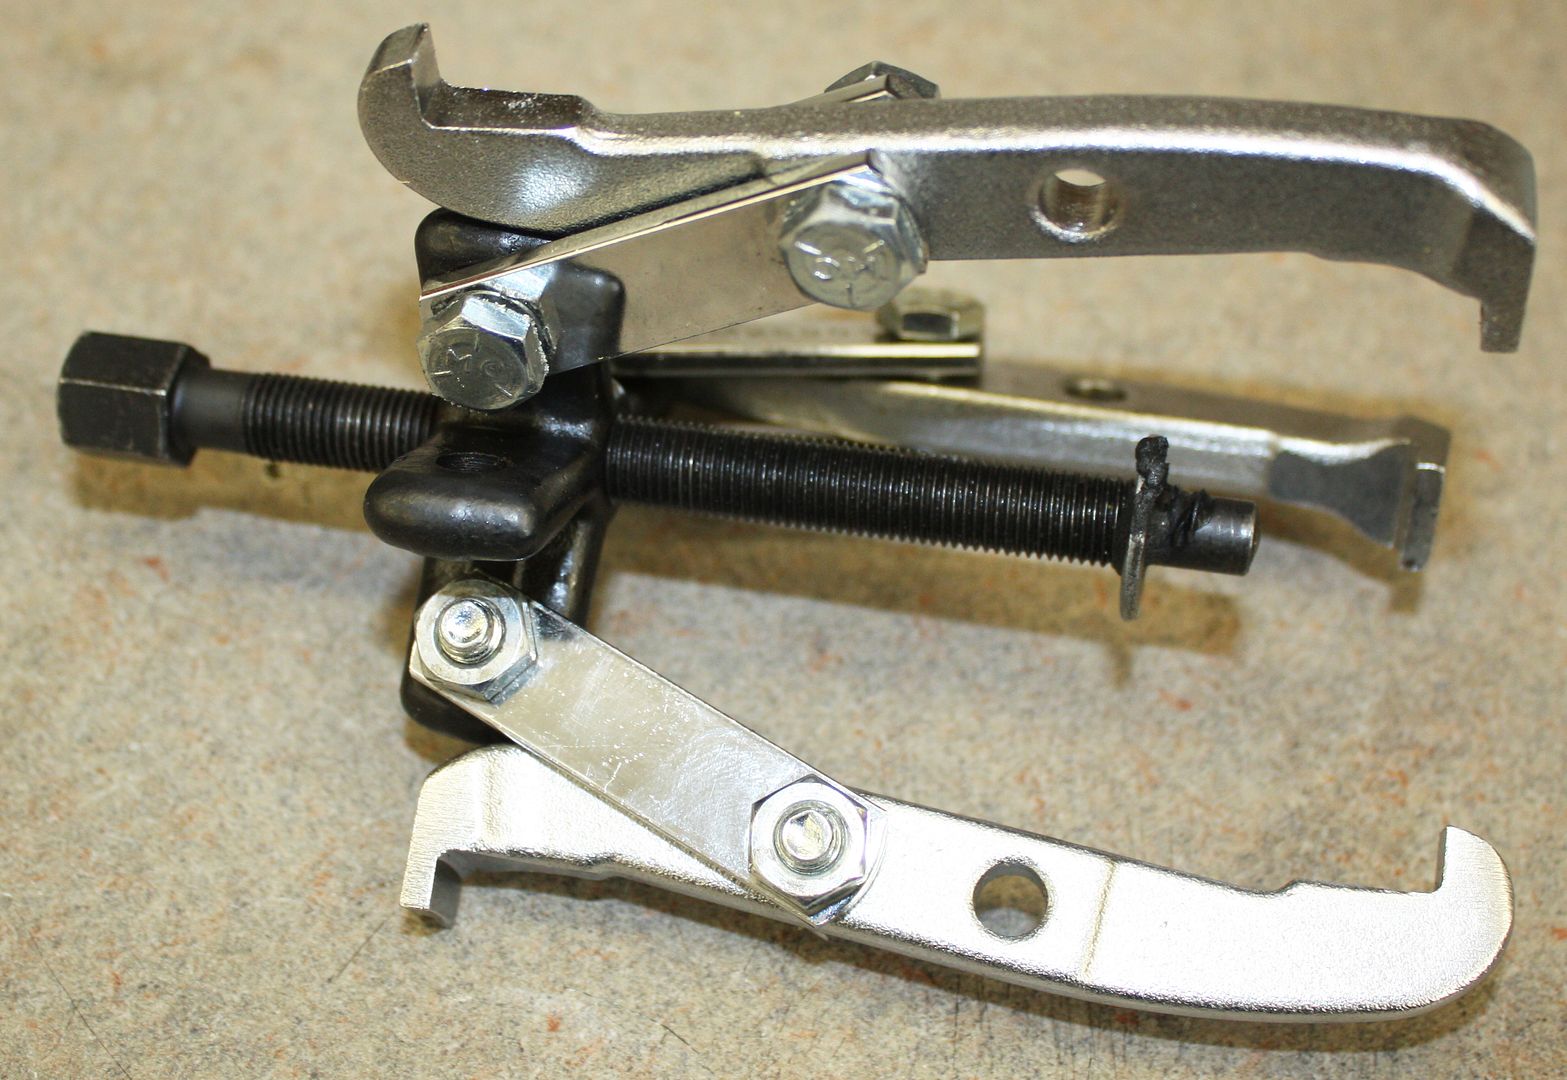
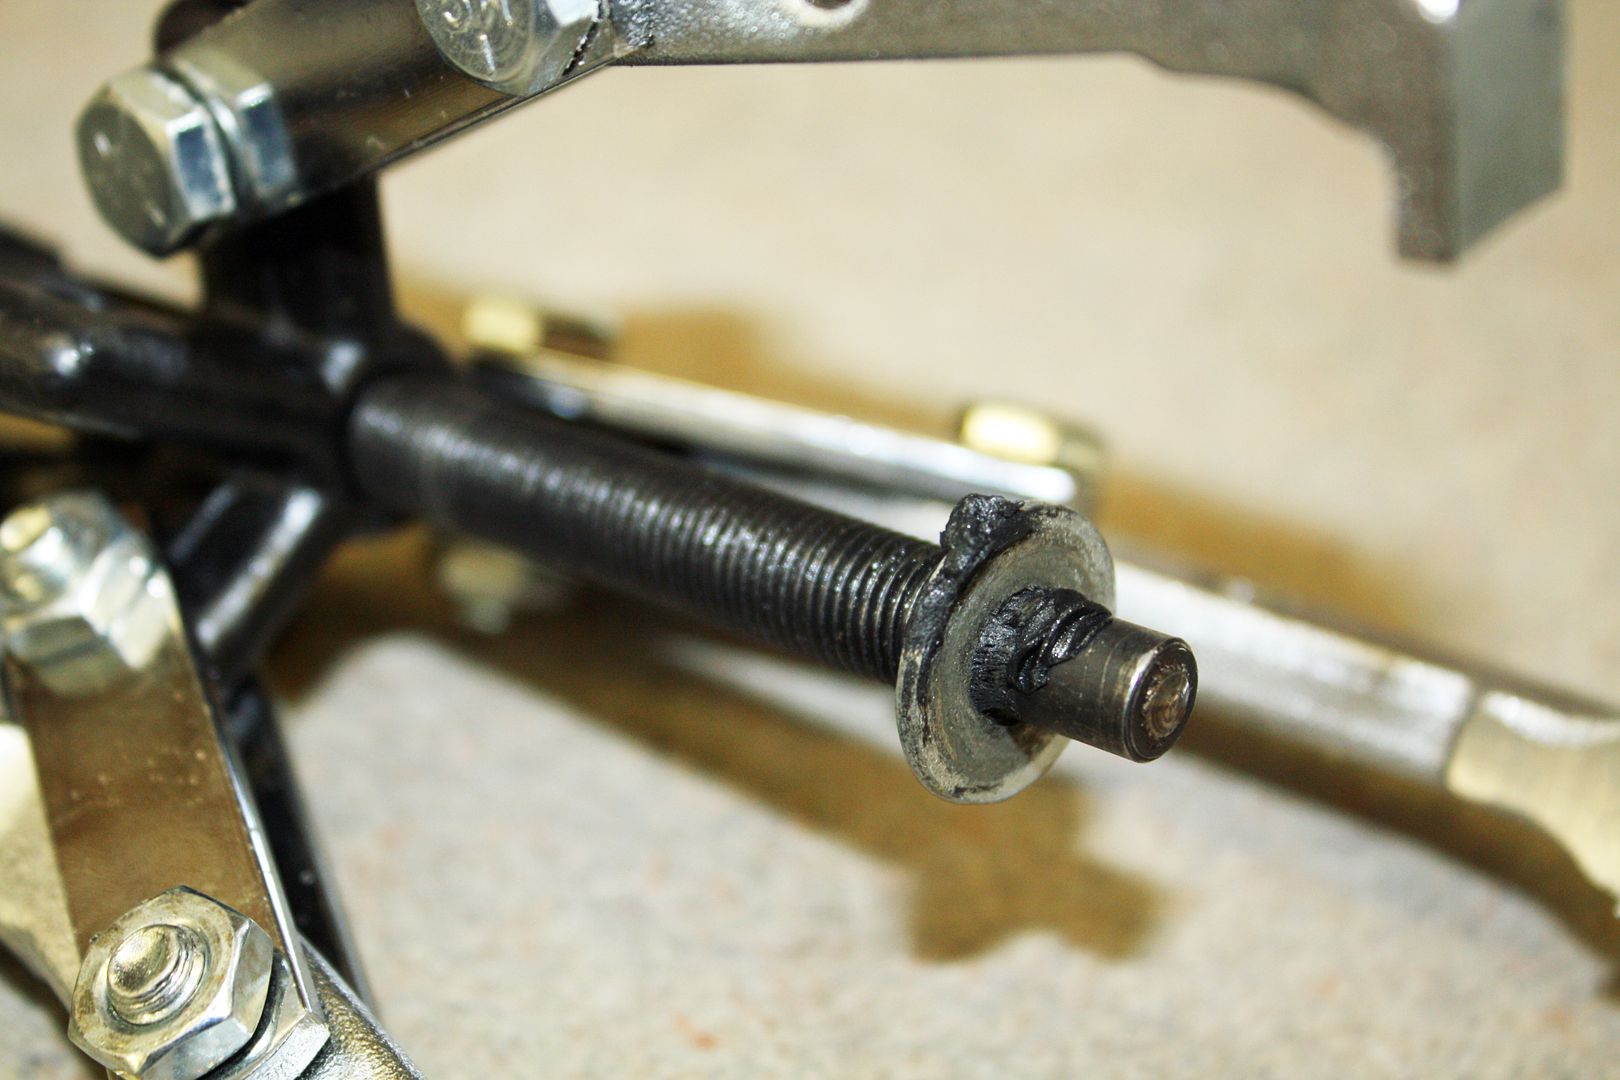
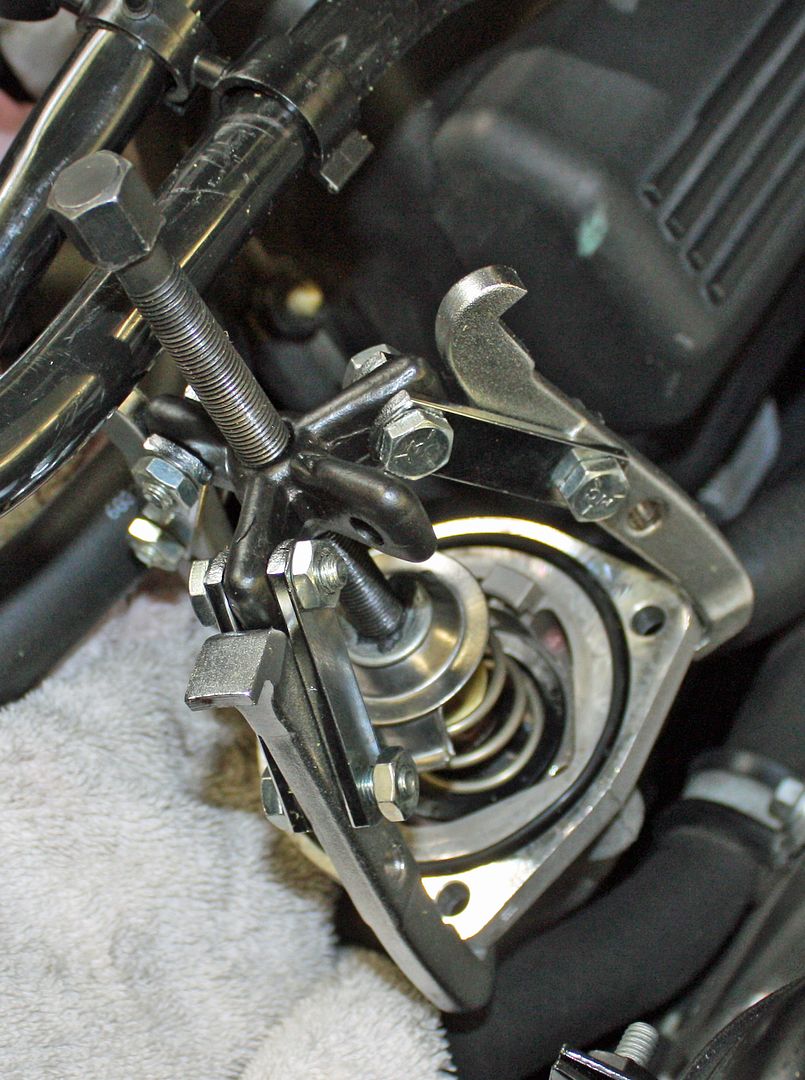
Installing the new thermostat in the housing uses the same basic procedure as removing it. Except that now you have fresh springs with more resistance. I struggled for a bit trying to push down with my palm far enough to engage the clips while also trying to turn it. I wasn't having much luck. There must be a better way. I scrounged around in my specialty tool drawer to see what I had that might work. I came up with this three pronged puller. To keep the center stud from entering the thermostat, I found a washer and used some more of the strip caulk to keep it in place. I placed the three prongs under the housing and used a ratchet wrench to tighten down the center stud. Eventually, I had the spring compressed enough where I used a screw driver to rotate the clips into place.
It worked great. From this point, you reverse the above steps to put everything back together. Don't forget to top off the coolant. Once I had it all buttoned up, I started the car and let it run in the garage to check for leaks. I then took a little ride and the temp came up to the normal range. It was 71 degrees here today so I couldn't test for cold weather driving. With winter around the corner, I am sure there will be ample opportunities for that test.
Time to replace the thermostat. After doing some research, I found that the trick thermostat was for a Ford truck. Not too surprising since Ford owned Aston when my car was built. I found one on eBay for $24.99, part number RT1163. The seal was procured from our local Aston dealer for $16.99.


I found Red Pants instructions online which were spot on. The only reason I am writing this up is that I have documented the procedure with a number of photos and there might be interest in how I compressed the springs to install the new thermostat.
First up I put the car on my lift and then removed the front pan. With that done, I placed a wash tub under the car to catch the anti-freeze. This was only partly successful as I did not have it placed far enough to the rear.


As per Red Pants instructions I put a large trash bag underneath the thermostat housing with a towel stuffed in above that to hopefully catch the some of the anti-freeze and to keep it off of the serpentine belt.


I disconnected the long L-shaped quick-release plastic tube where it goes into the intake tube. You only need to disconnect that one end, allowing it to move around as you work. To keep it out of the way, I used a zip tie to attach it to the cross bar.


Next I disconnected the quick-release plastic tube that goes from the PCV to the intake manifold that is shaped like a 7.


I used a pliers to get the hose clamp loose from the air-oil separator, and then I pulled the U-shaped hose aside.


The next step is removing the PCV by removing the two black bolts with an 8mm socket. With the bolts out, pull straight up to remove the PCV. There are two O-rings on the bottom outlet.


Now we can remove the air-oil separator (AOS). It is a slightly smaller version of the PCV and sits below the PCV. It is held in place by one 8mm bolt. With the bolt removed, pull it out and move it to the side with the hose still attached.


Next the bracket that sits above the thermostat housing needs to be removed. There are two 10mm nuts on the side and one 10mm bolt to the left as you look at it from the front of the car. The stud next to the head makes for a tight fit but I was able to remove the bracket. I had a hard time getting the nut off on the stud next to the head as someone had rounded off one of the corners. That means the thermostat had been replaced at least once. A new nut replaced it.


Now the thermostat housing can be removed. The two 13mm studs at the top have to be removed as well as an 8mm bolt that is on the bottom directly in the middle of the housing. I couldn't get my hand on that bolt so I used an extension and 8mm socket. To make sure the bolt stuck to my socket, I placed a small bit of strip caulk on the socket. This also held the bolt in place when I re-installed it.


As I was loosening the stud next to the head, it rubbed against the head when loosened all the way. It was actually in a little bit of a bind. To make it easier to re-install, I used my grinder to grind off some of the end.

With all of the bolts removed, I could remove the thermostat housing. What I found confirmed what I suspected. The rubber seal had torn away from the thermostat and was wrapped around the spring. It looked exactly like the one on Red Pants video. To remove the thermostat from the housing, you must push down on the spring while turning the locking pins to release them. It wasn't easy but it was doable.


The Ford thermostat is supposed to be an improvement over the original one. In the photo below you can see the difference in how the rubber is attached to the thermostat. Also, the pin is integrated into the new thermostat while the old one used a separate pin.

Before re-assembling the thermostat I replaced the housing seal.

Installing the new thermostat in the housing uses the same basic procedure as removing it. Except that now you have fresh springs with more resistance. I struggled for a bit trying to push down with my palm far enough to engage the clips while also trying to turn it. I wasn't having much luck. There must be a better way. I scrounged around in my specialty tool drawer to see what I had that might work. I came up with this three pronged puller. To keep the center stud from entering the thermostat, I found a washer and used some more of the strip caulk to keep it in place. I placed the three prongs under the housing and used a ratchet wrench to tighten down the center stud. Eventually, I had the spring compressed enough where I used a screw driver to rotate the clips into place.


It worked great. From this point, you reverse the above steps to put everything back together. Don't forget to top off the coolant. Once I had it all buttoned up, I started the car and let it run in the garage to check for leaks. I then took a little ride and the temp came up to the normal range. It was 71 degrees here today so I couldn't test for cold weather driving. With winter around the corner, I am sure there will be ample opportunities for that test.

#3
11-18-2017, 09:07 PM
Registered User
Join Date: Apr 2017
Location: Niagara Region
Age: 52
Posts: 400
Rep Power: 28 
#4
11-19-2017, 08:07 PM
Join Date: Dec 2010
Location: Rockwell, NC
Posts: 56
Rep Power: 19 It was cooler today and the temp came up to normal as it should.
#5
11-21-2017, 07:38 PM

Registered User
Join Date: Nov 2015
Location: Northern Virginia
Age: 61
Posts: 53
Rep Power: 11
#6
01-21-2018, 07:36 AM
Just replaced the thermostat. Followed the step-by-step directions and had not problems. I did not have to grind the stud to take off the bracket. While it didn't off straight away, I found that if I turned it a bit it would slide right past the head. Thanks again for the directions.
#7
01-21-2018, 05:21 PM

Thanks for the great write up. This is on my winter list, I would like to do a complete coolant change at the same time but it seems like a pita to get all the coolant out. If anyone has a good write up please let me know.
On another subject I would consider redpants oil separator it keeps the intake nice and clean
On another subject I would consider redpants oil separator it keeps the intake nice and clean