BUSY WEEKEND:DYI Oil Change / De-Rusted & G2'd my rotors / Lowered / Full Pics of all
#1
 09-19-2010, 07:42 PM

BUSY WEEKEND:DYI Oil Change / De-Rusted & G2'd my rotors / Lowered / Full Pics of all
BUSY weekend - spent 2 days under my C doing various projects.
1.) OIL CHANGE: I typically pay the stealer $250+ and I figured after all the crap I have done to my C, why not a simple oil change.
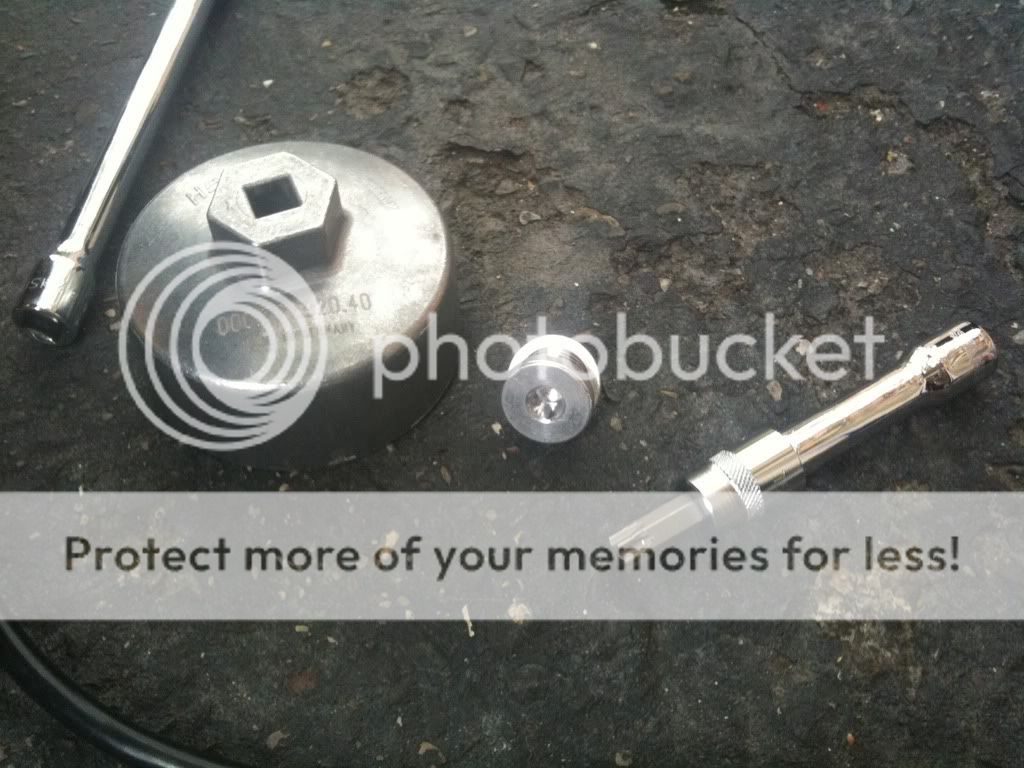
Filter, new drain plugs and oil filter wrench all came from suncoast. Mobil1 came from pepboys. For those who have never done it before, total cost is less then $90 wing ***** if you have the tools. See notes above each pic.
2.) BRAKE FIX: De-Rust my once really nice rotors (my fault - I used caliper paint instead of G2 epoxy). Problem solved - see pics.
3.) DROPPED FURTHER: Decided my C was not low enough so I spun the rear KWs all the way down (can't go any further) and dropped the fronts to match. Ride quality is identical to how it was before - handling, def a performance increase.
ENJOY THE PICS:
1. ) OIL CHANGE
> My 5000 lb + C on plastic ramps - YES PLASTIC

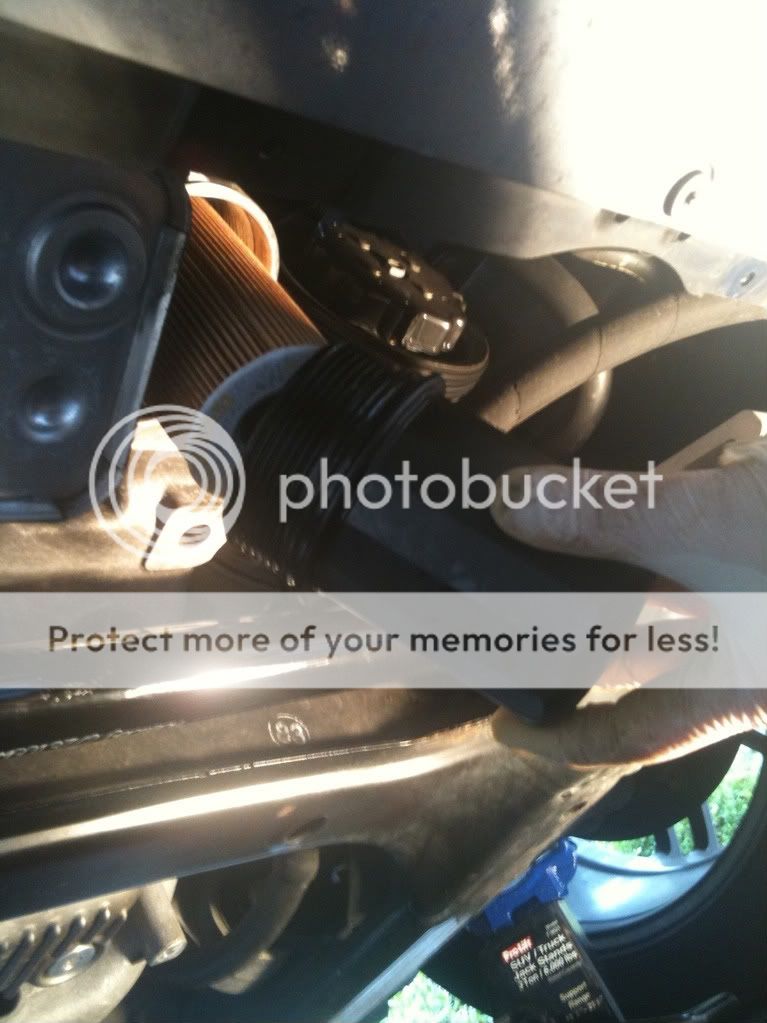
T50 Torx is needed for the drain plug(s) and 10mm socket to pull down the front plastic shield (NOTE: you only have to remove the front shield - not both.)
After the shields are removed, you can see the oil filter housing (removed in this pic) and oil drain plug easily. There is actually a second drain plug at the back of the engine about 12 inches from the first drain plug. When I removed the second one after the first stopped dripping, nothing came out. To me, its a waste to remove the second plug. NOTE - YOU SHOULD REPLACE THE DRAIN PLUGS WITH EVERY OIL CHANGE!! They are made of aluminum and strip very easily.

New filter and oil filter housing

So here is what my oil looked like after 7K (I Drive my C like a 911)

New filter install - You just push it up over the male end, grease the seal around the housing, screw the oil filter housing over the filter and tighten with the wrench.
Once everything is tight I filled with 2 Quarts of 0w 40 mobil1 and then checked for leaks (engine off of course). With no leaks noted, I put in the remaining 6 quarts (8 quarts total), start, let run for 15 min, check for leaks. With no leaks noted, I screwed the plastic shields up and called it done.
Overall - piece of cake and a good way to bond with your car.
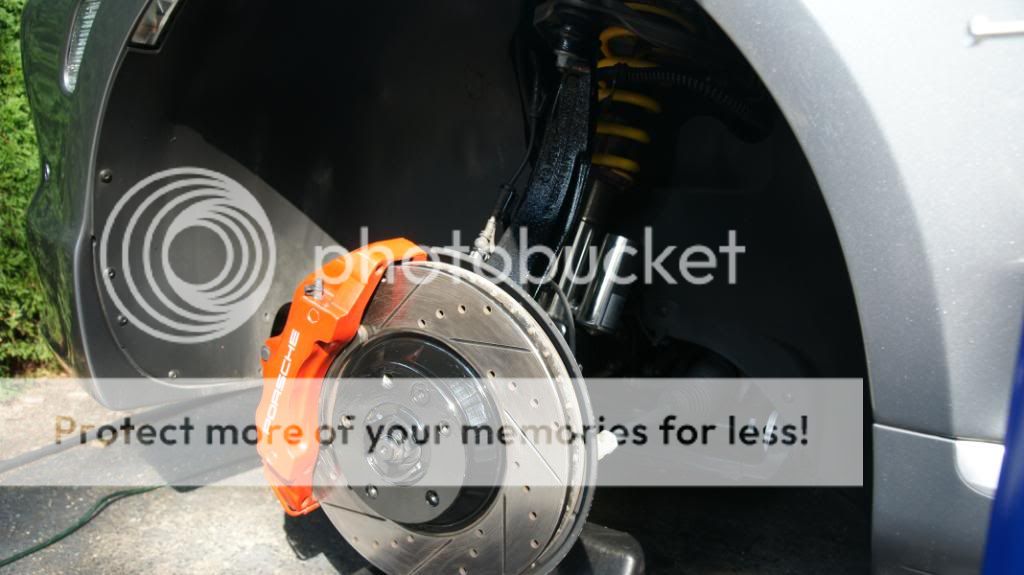
2.) Rotor rust repair.
A year ago I replaced my rotors, pads & painted my calipers. The full DYI is here: https://www.6speedonline.com/forums/...s-painted.html
Well, I screwed up and painted the rotor hubs with caliper paint instead of G2 epoxy. The rust came 6 months later and I addressed it all this weekend. This time I used G2
BEFORE:

AFTER:
3.) Dropped
So while I was under my truck all weekend, I decided to go lower. Here is the results. Can't go any lower than this as the backs are spun all the way down. As I said up top - ride quality is identical, it just handles better now.

So that was my weekend - My hands and back are shouting at me now (is it normal to physically see your hands pulse??). Both my truck and me are happy.
Will re-torque all my lug bolts in 100 miles for safety sake.
More projects coming soon.
1.) OIL CHANGE: I typically pay the stealer $250+ and I figured after all the crap I have done to my C, why not a simple oil change.
Filter, new drain plugs and oil filter wrench all came from suncoast. Mobil1 came from pepboys. For those who have never done it before, total cost is less then $90 wing ***** if you have the tools. See notes above each pic.
2.) BRAKE FIX: De-Rust my once really nice rotors (my fault - I used caliper paint instead of G2 epoxy). Problem solved - see pics.
3.) DROPPED FURTHER: Decided my C was not low enough so I spun the rear KWs all the way down (can't go any further) and dropped the fronts to match. Ride quality is identical to how it was before - handling, def a performance increase.
ENJOY THE PICS:
1. ) OIL CHANGE
> My 5000 lb + C on plastic ramps - YES PLASTIC
T50 Torx is needed for the drain plug(s) and 10mm socket to pull down the front plastic shield (NOTE: you only have to remove the front shield - not both.)
After the shields are removed, you can see the oil filter housing (removed in this pic) and oil drain plug easily. There is actually a second drain plug at the back of the engine about 12 inches from the first drain plug. When I removed the second one after the first stopped dripping, nothing came out. To me, its a waste to remove the second plug. NOTE - YOU SHOULD REPLACE THE DRAIN PLUGS WITH EVERY OIL CHANGE!! They are made of aluminum and strip very easily.
New filter and oil filter housing
So here is what my oil looked like after 7K (I Drive my C like a 911)
New filter install - You just push it up over the male end, grease the seal around the housing, screw the oil filter housing over the filter and tighten with the wrench.
Once everything is tight I filled with 2 Quarts of 0w 40 mobil1 and then checked for leaks (engine off of course). With no leaks noted, I put in the remaining 6 quarts (8 quarts total), start, let run for 15 min, check for leaks. With no leaks noted, I screwed the plastic shields up and called it done.
Overall - piece of cake and a good way to bond with your car.
2.) Rotor rust repair.
A year ago I replaced my rotors, pads & painted my calipers. The full DYI is here: https://www.6speedonline.com/forums/...s-painted.html
Well, I screwed up and painted the rotor hubs with caliper paint instead of G2 epoxy. The rust came 6 months later and I addressed it all this weekend. This time I used G2
BEFORE:
AFTER:
3.) Dropped
So while I was under my truck all weekend, I decided to go lower. Here is the results. Can't go any lower than this as the backs are spun all the way down. As I said up top - ride quality is identical, it just handles better now.
So that was my weekend - My hands and back are shouting at me now (is it normal to physically see your hands pulse??). Both my truck and me are happy.
Will re-torque all my lug bolts in 100 miles for safety sake.
More projects coming soon.
Last edited by roxboxxx; 09-19-2010 at 07:49 PM.
#4
09-20-2010, 08:45 AM
Basic Sponsor

Great write-up!
__________________
SuncoastParts.com
Your #1 Source for Genuine Porsche Parts and Accessories on the Web!
Visit us at http://www.SuncoastParts.com
Call us at: 877-923-1700
Email us at: Parts@SuncoastParts.com
Follow us to stay connected:
Join Our Newsletter | Facebook
SuncoastParts.com
Your #1 Source for Genuine Porsche Parts and Accessories on the Web!
Visit us at http://www.SuncoastParts.com
Call us at: 877-923-1700
Email us at: Parts@SuncoastParts.com
Follow us to stay connected:
Join Our Newsletter | Facebook
#5
09-20-2010, 09:01 AM
BTW - You guys really delivered for me. I saw the weather was going to be nice so I called late on Thursday to see if you can overnight the stuff. You did and even threw in a few extra washers. My only regret is that I don't live closer to you guys.
Big ups to Suncoast !
(Now if I could only get you guys to sell me side-skirts for half price
)
#7
09-20-2010, 05:34 PM
Great write up.
I would suugest using a hex bit rather than a Torx bit to remove the soft aluminum drain plug.
The drain plug is a metric hex bit. Using a proper bit (instead of an Allen key or Torx bit) will prevent stripping the plug.
I would suugest using a hex bit rather than a Torx bit to remove the soft aluminum drain plug.
The drain plug is a metric hex bit. Using a proper bit (instead of an Allen key or Torx bit) will prevent stripping the plug.
Last edited by bbywu; 09-20-2010 at 05:37 PM.
Trending Topics
#8
09-20-2010, 06:44 PM
Registered User
Join Date: May 2005
Location: Colorado
Age: 39
Posts: 1,468
Rep Power: 121 

Correct, 8mm Allen bit.
#11
09-20-2010, 09:48 PM
Def torx in my case
#12
04-23-2011, 10:54 AM

oil change
Thanks alot for the detailed post. Im planning on changeing my oil next week for my 2004 cayenne. I have a few questions on your pics, what is the big round metal piece on the pic and do i need that tool? I also tried looking to buy new oil plugs and not sure if im buying the correct ones. I would appreciate any help. Thanks again.

#14
04-23-2011, 10:29 PM

You can buy the plug from pelican. You can buy just the washers and/or plugs. I buy usually buy 4 washers and 2 plugs at a time. You should always change the washers every oil change. I change the plug every other oil change.
#15
04-25-2011, 08:06 PM
Thanks alot for the detailed post. Im planning on changeing my oil next week for my 2004 cayenne. I have a few questions on your pics, what is the big round metal piece on the pic and do i need that tool? I also tried looking to buy new oil plugs and not sure if im buying the correct ones. I would appreciate any help. Thanks again.
Do not try to change ur oil without this tool and without new drain plugs! The plugs strip and you will be stuck if you do not have an extra handy.

Thread
Thread Starter
Forum
Replies
Last Post