C2K MKIV Supra Build Thread
#1
 11-22-2018, 07:01 PM


Join Date: Oct 2013
Location: Sin City
Posts: 32
Rep Power: 12 
C2K MKIV Supra Build Thread
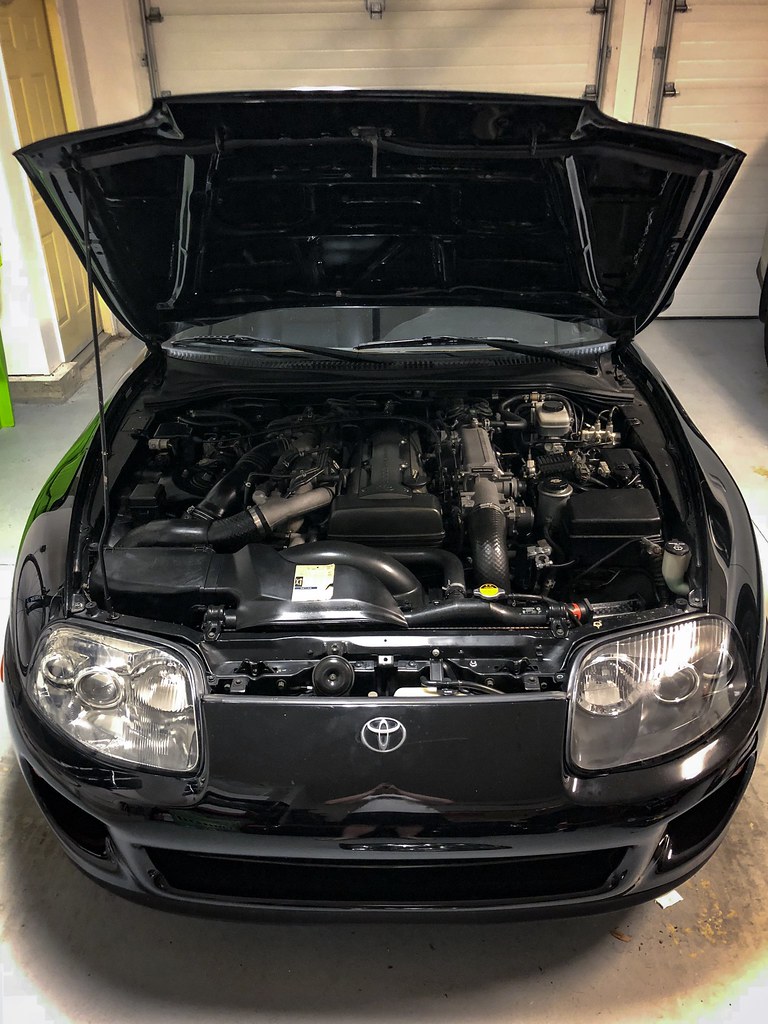
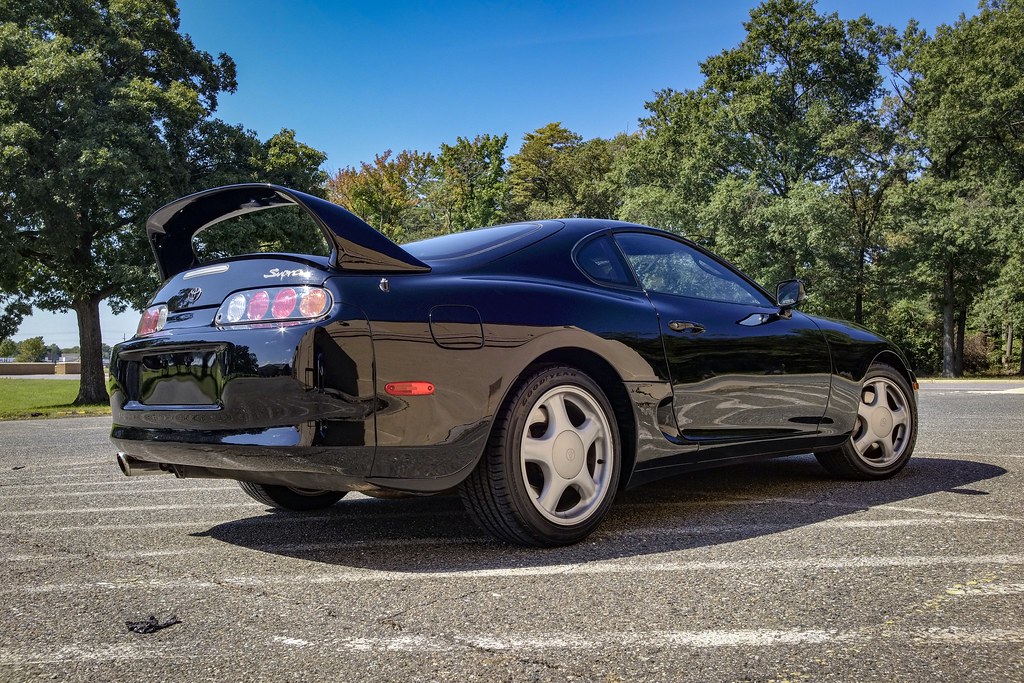
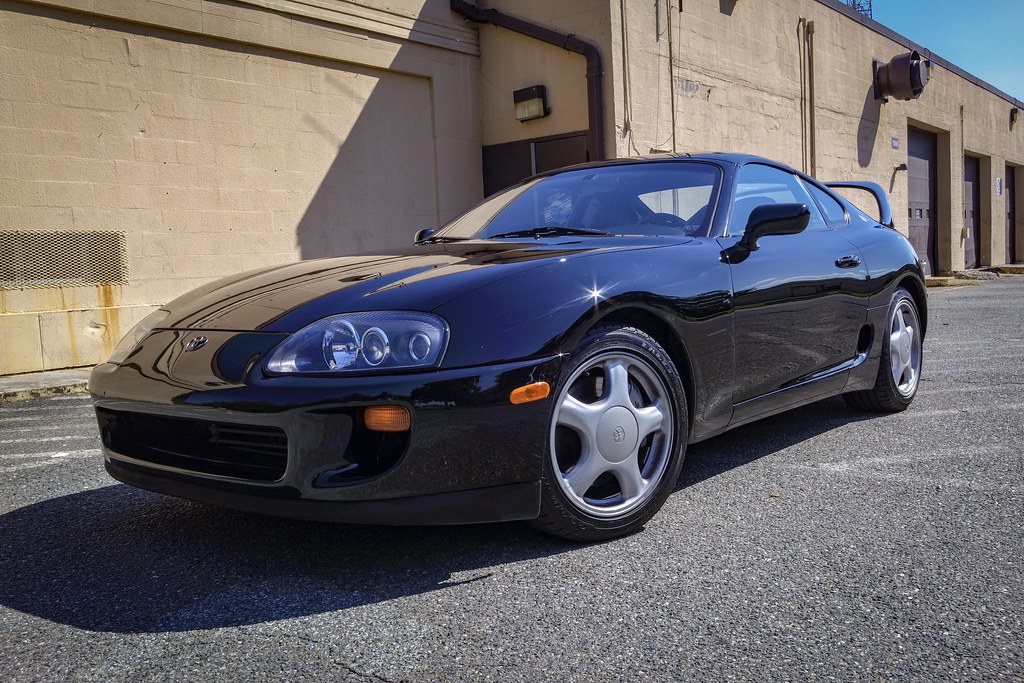
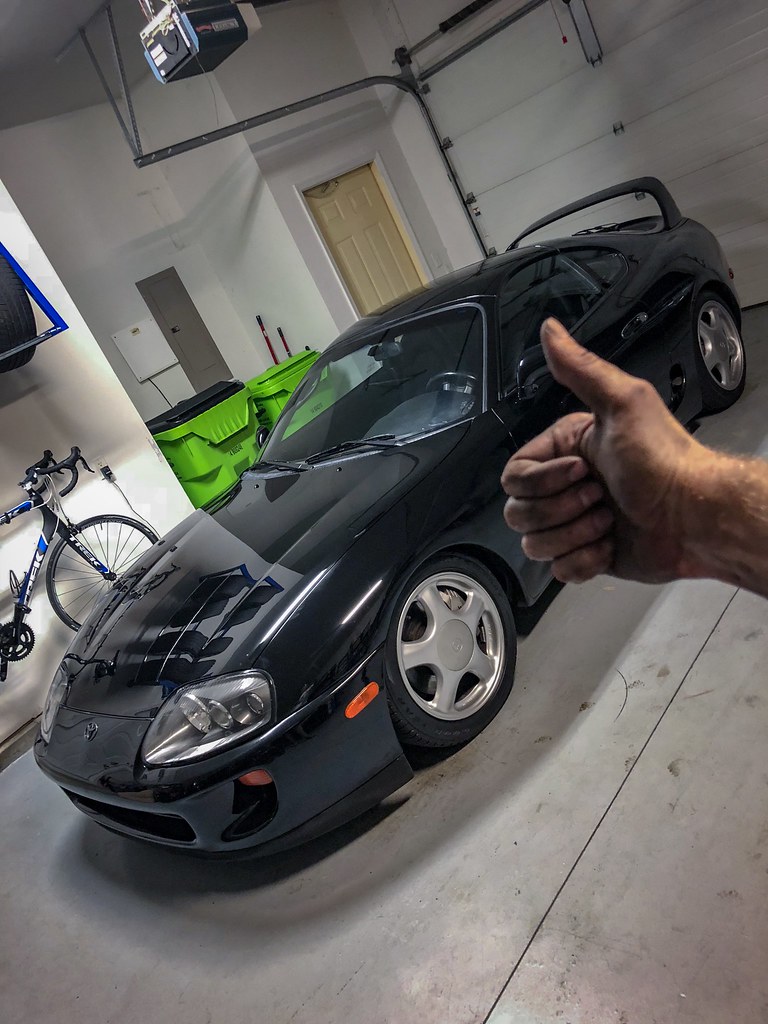
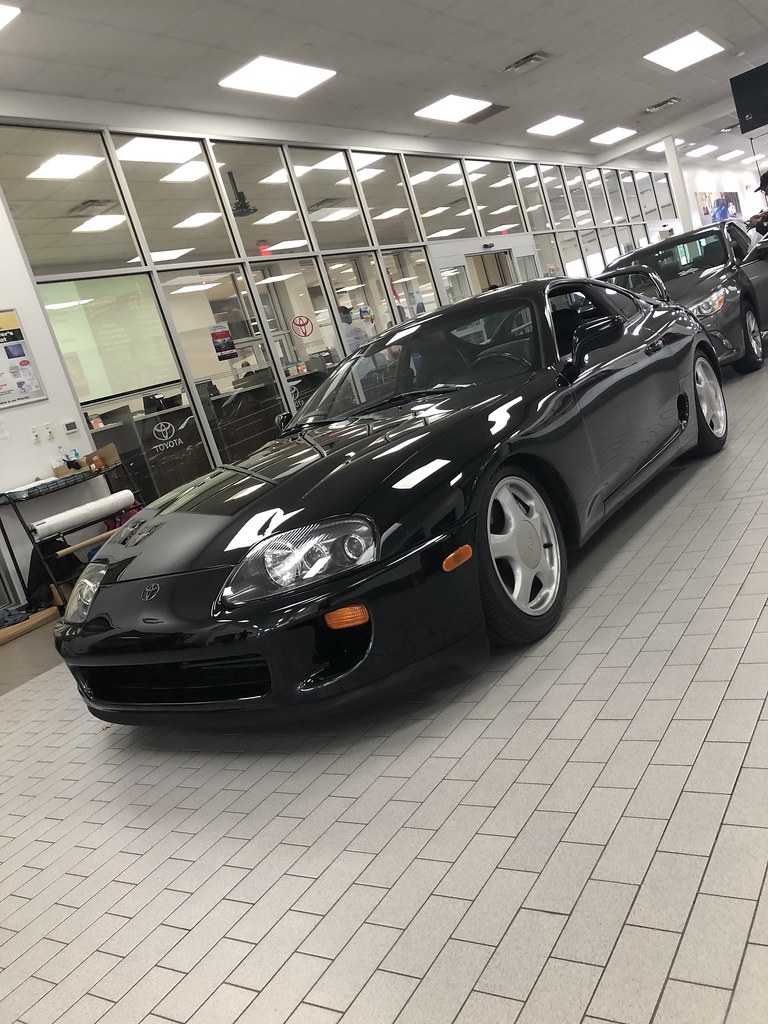
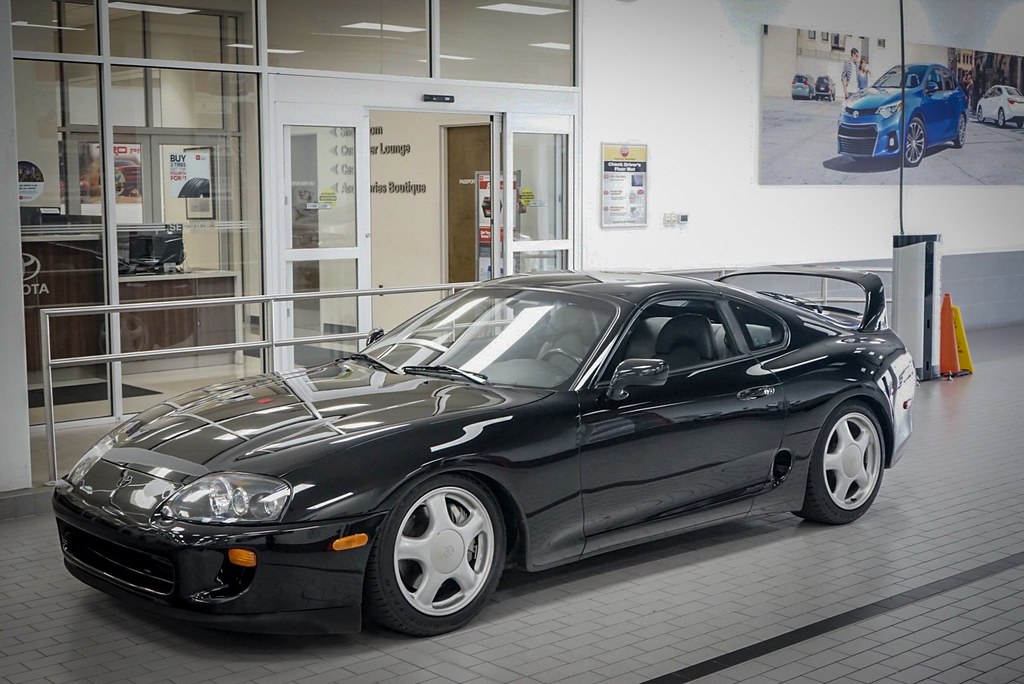
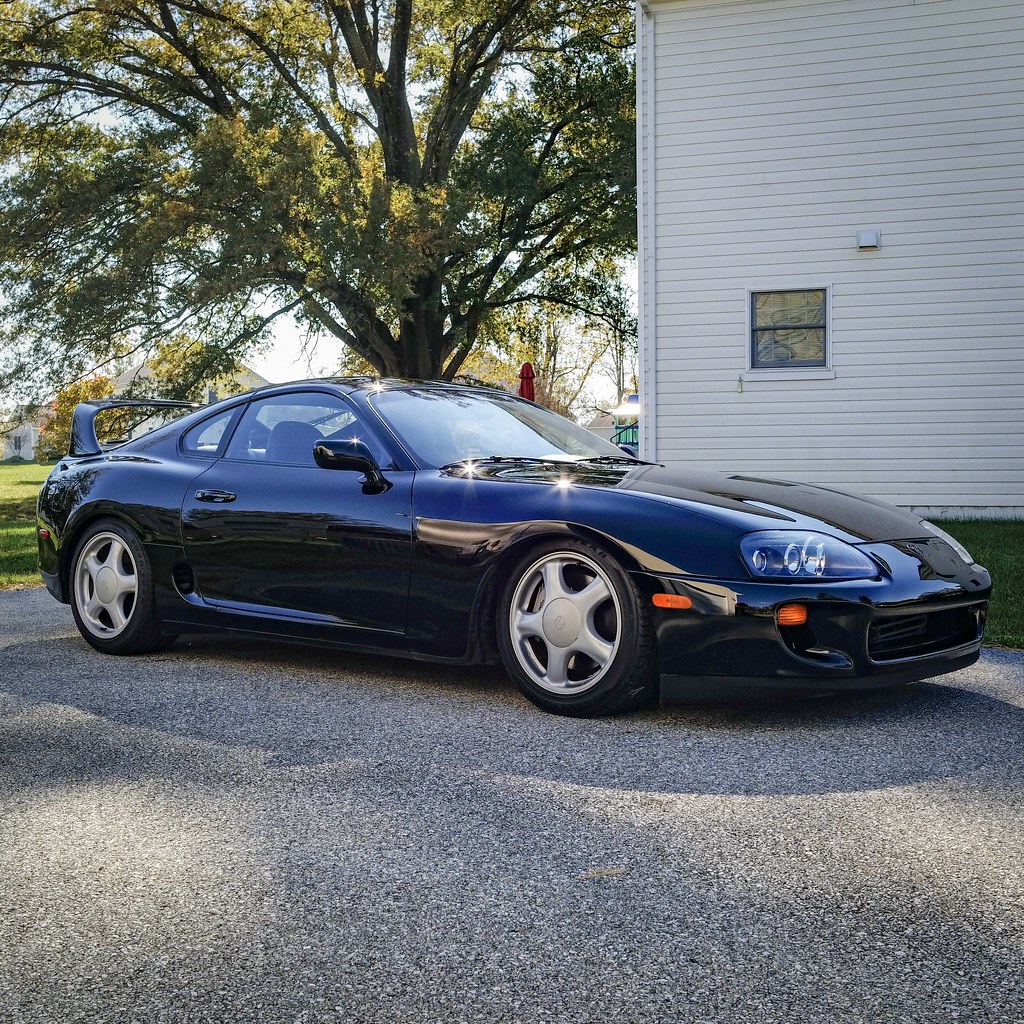
Latest Shot 17 Nov 2018
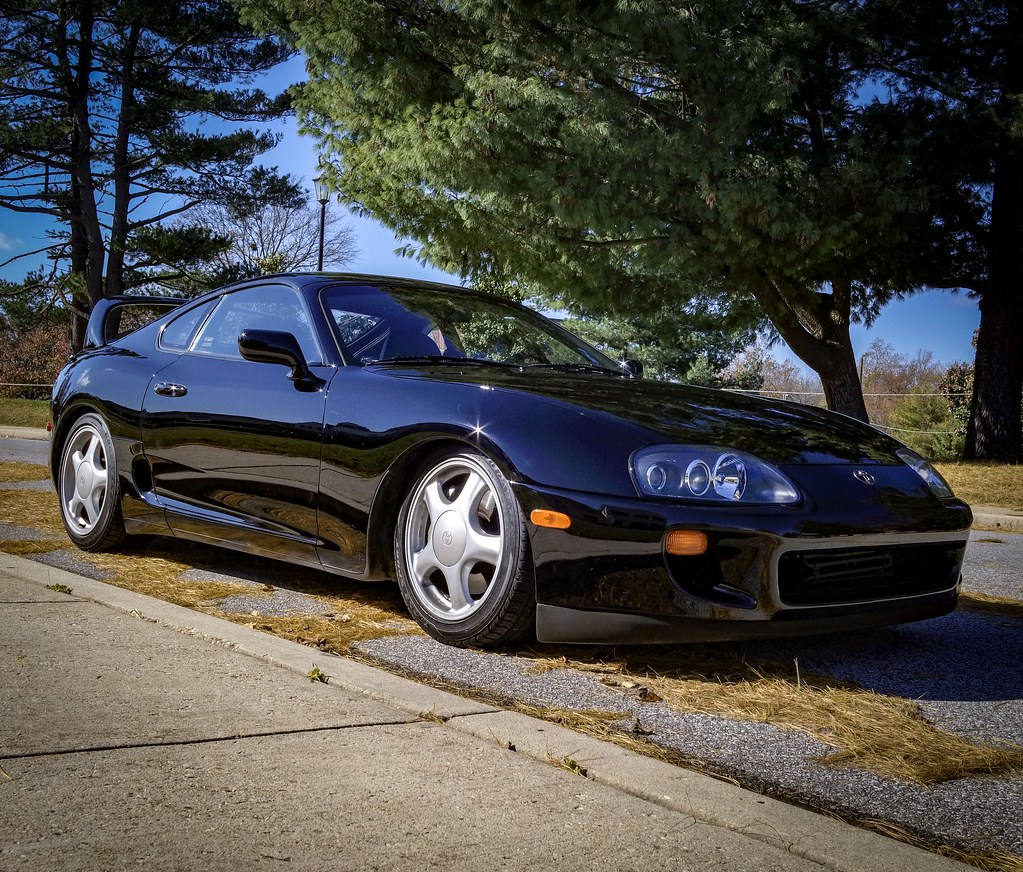
Let me begin by saying I have been lurking around Supra forums for over a decade dreaming about the day I would own a Supra...well the day has finally come! This thread will chronicle the C2KMotorsports Supra build.
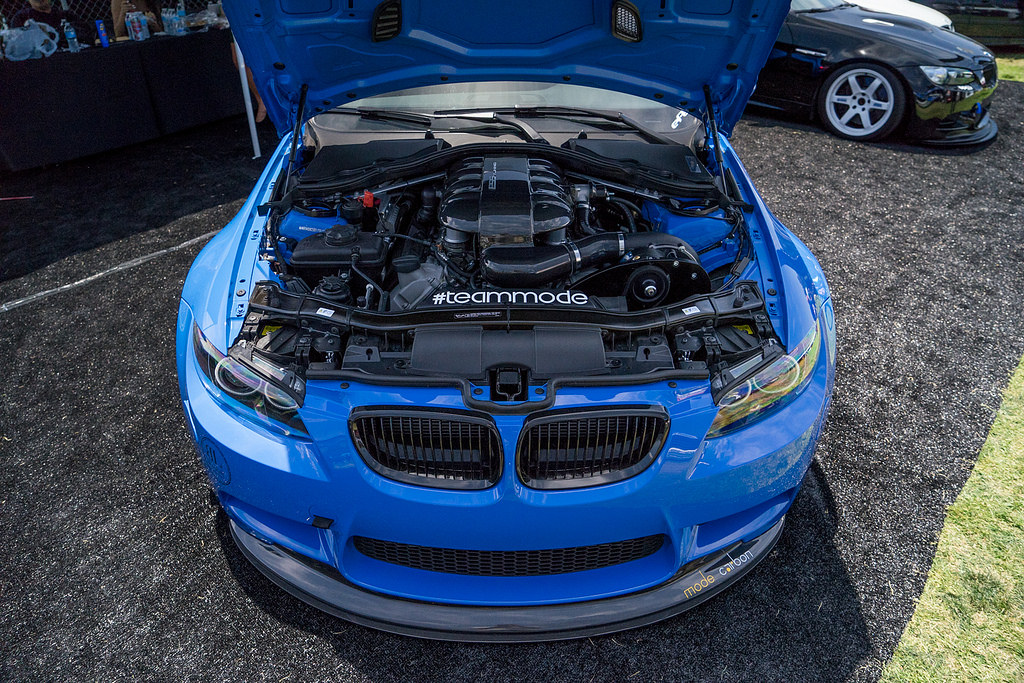
Before we begin this journey let me start by showing you where I've been the past decade! I was heavy into the BMW scene, starting out with the Super charged BMW individual Santorini Blue E92 M3.
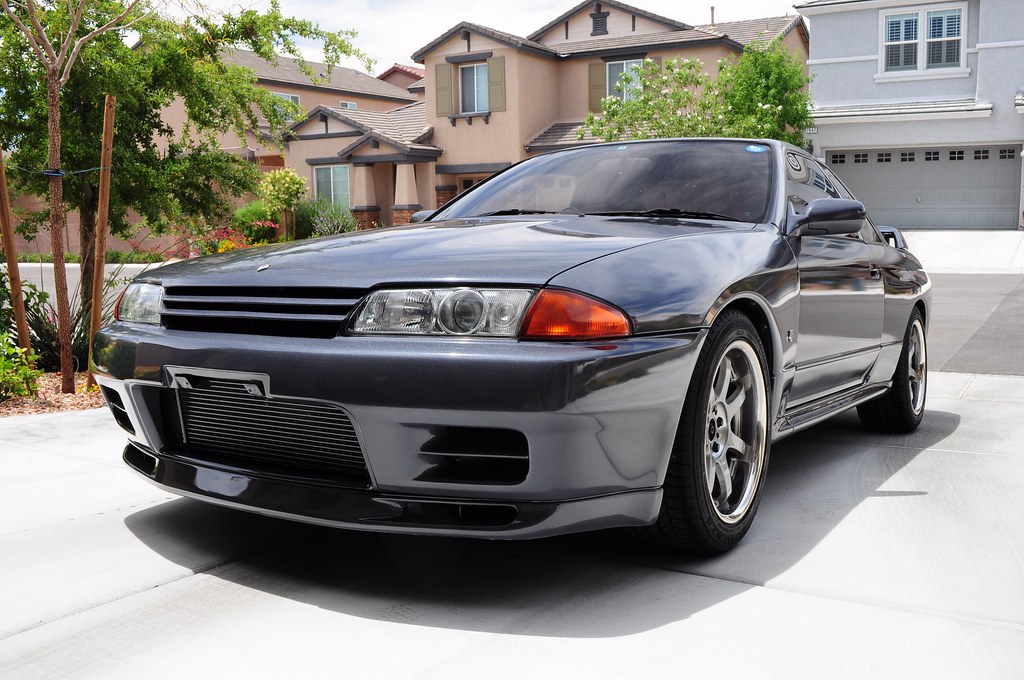
After the Santorini project had run its course I was one of the first to import a R32 GTR back in 2015...
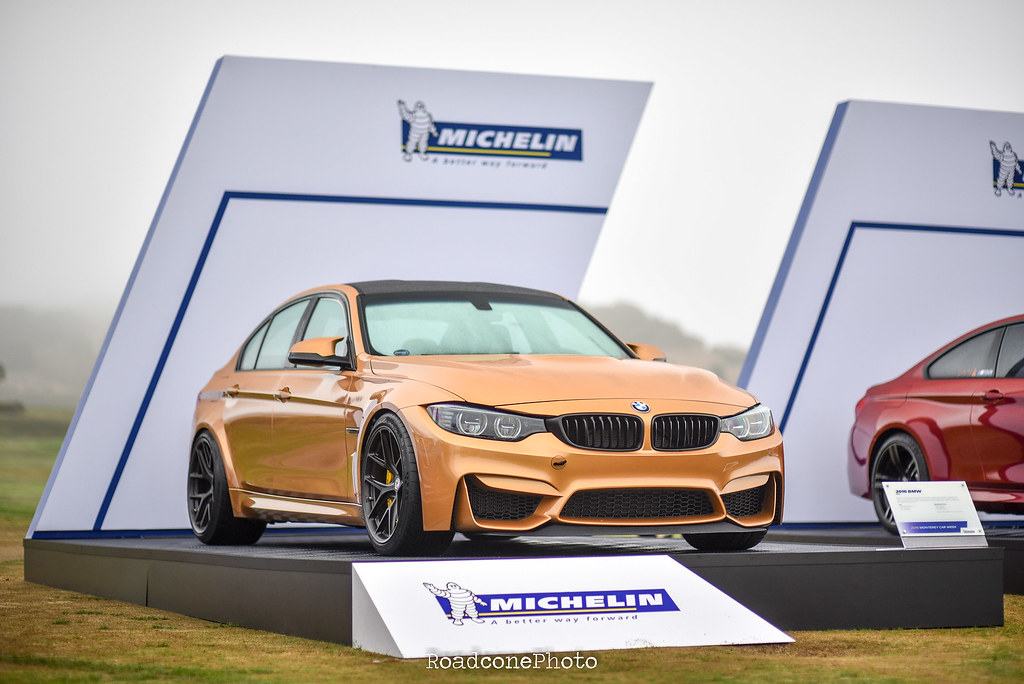
I only owned her for a short time before I picked up the Sunburst Gold F80 M3!
Then I tried my hand at the F31 330xi 'Smash Wagon'
Which brings us the the Supra Project!
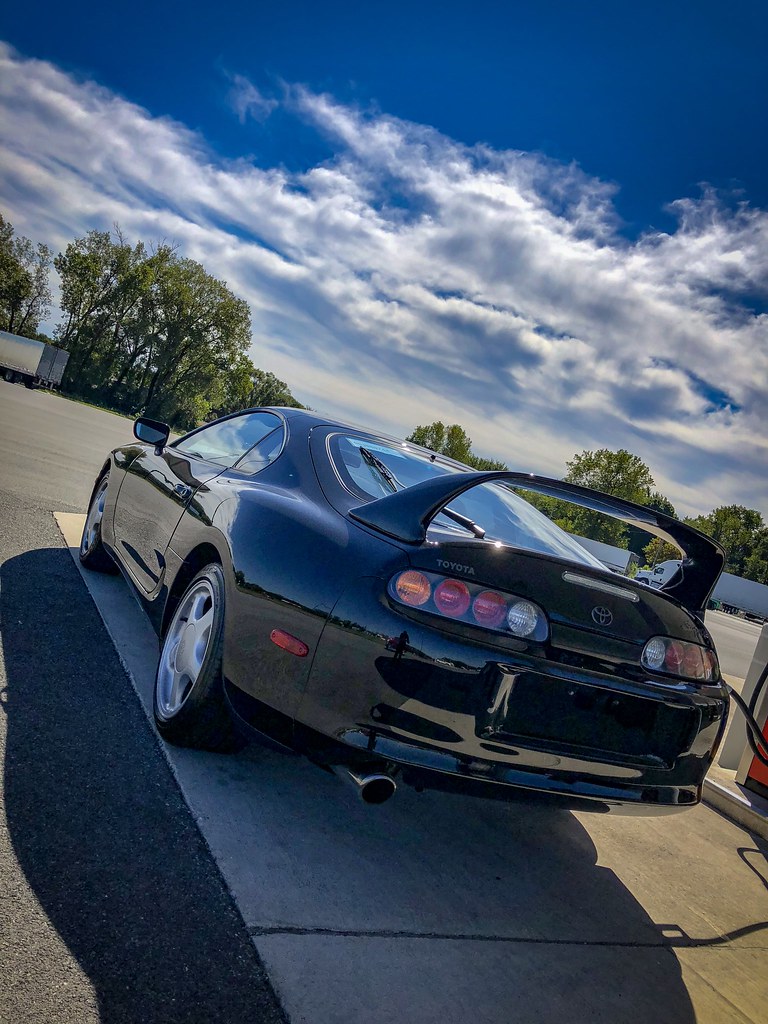
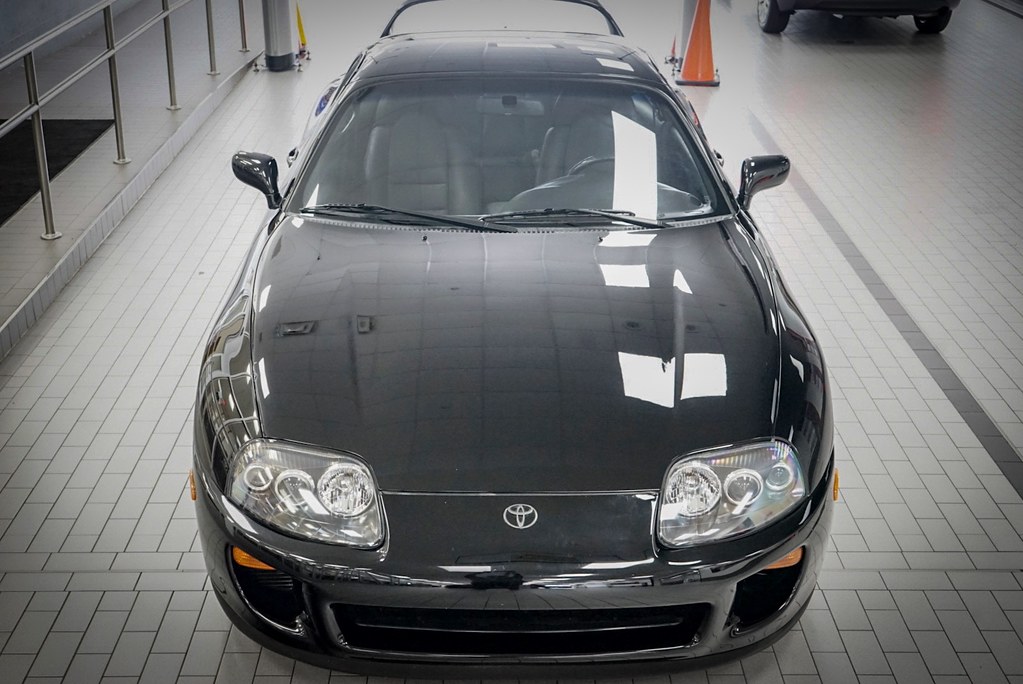
The car:
1993 Supra Sport Roof Turbo AT
88K miles
Black on Black
BONE STOCK

Exterior Plans:
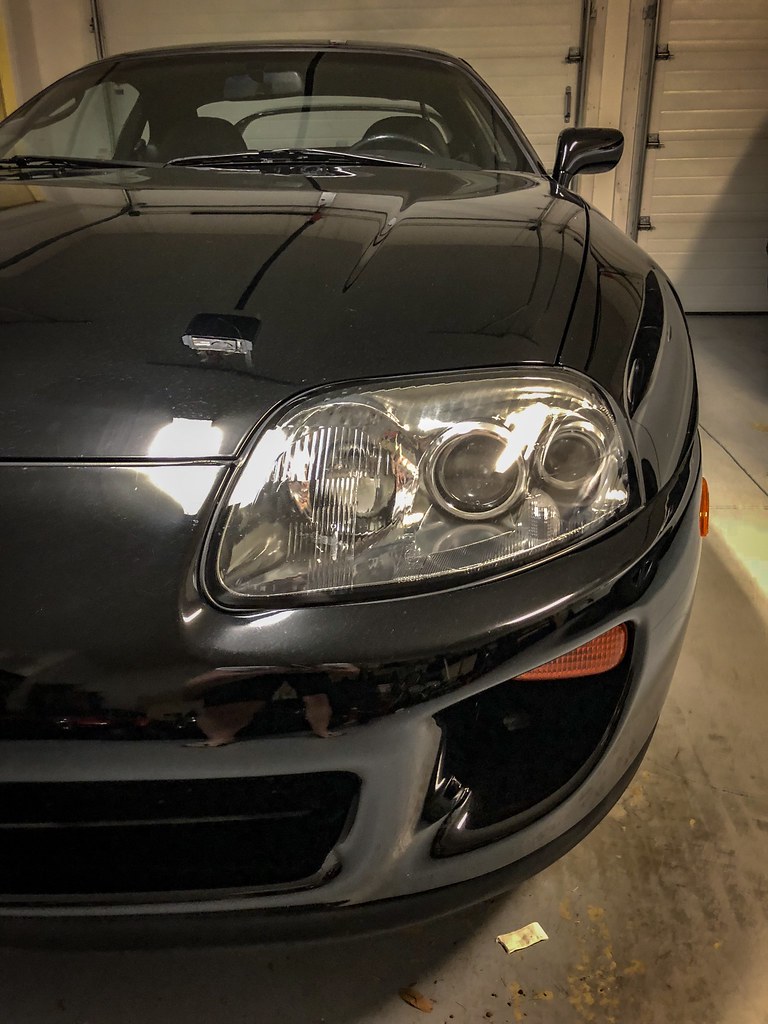
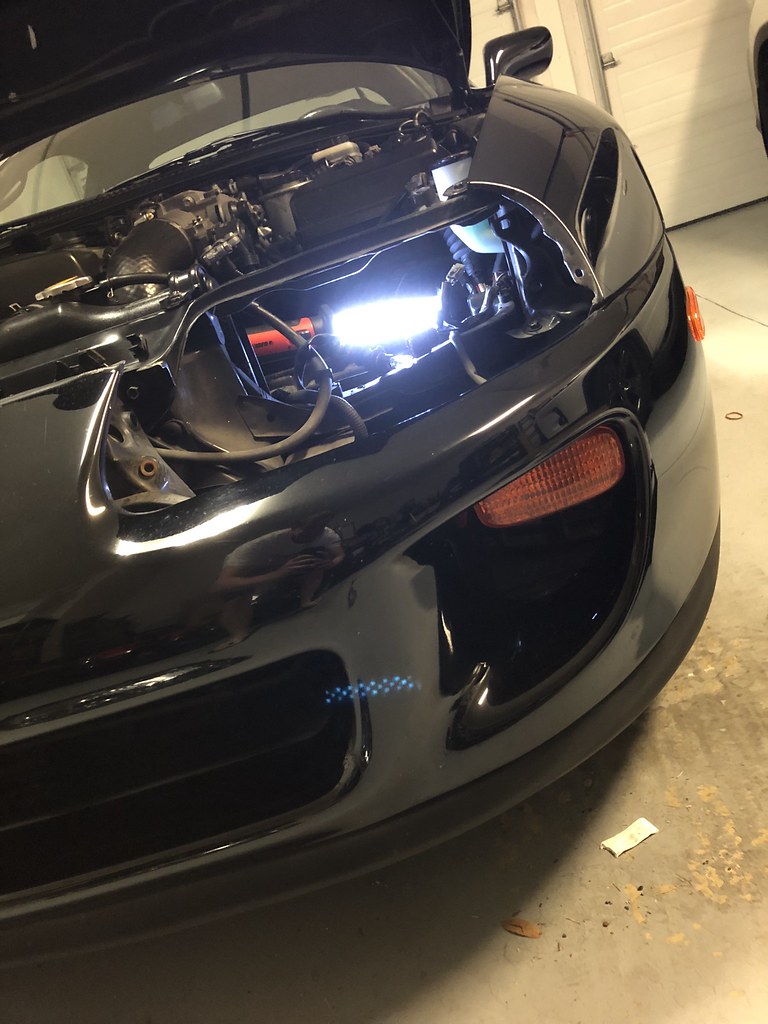
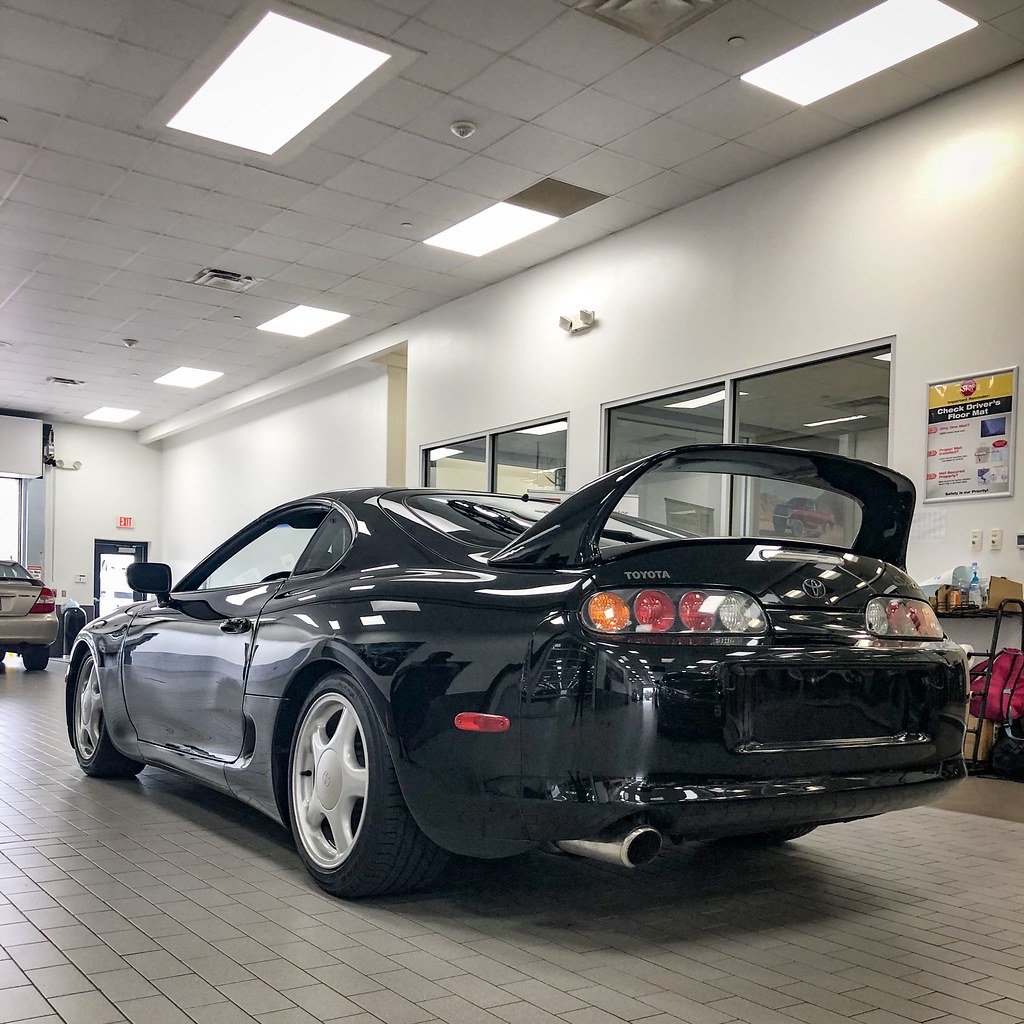
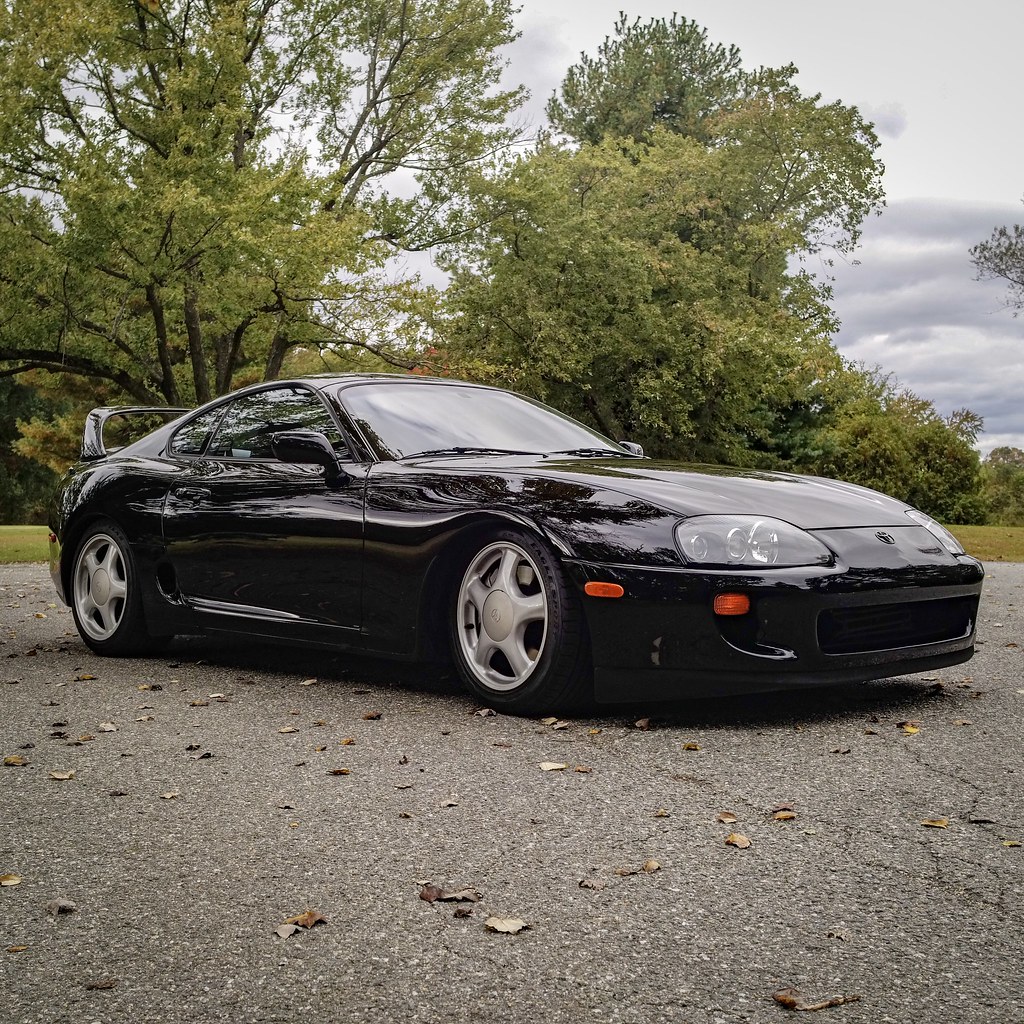
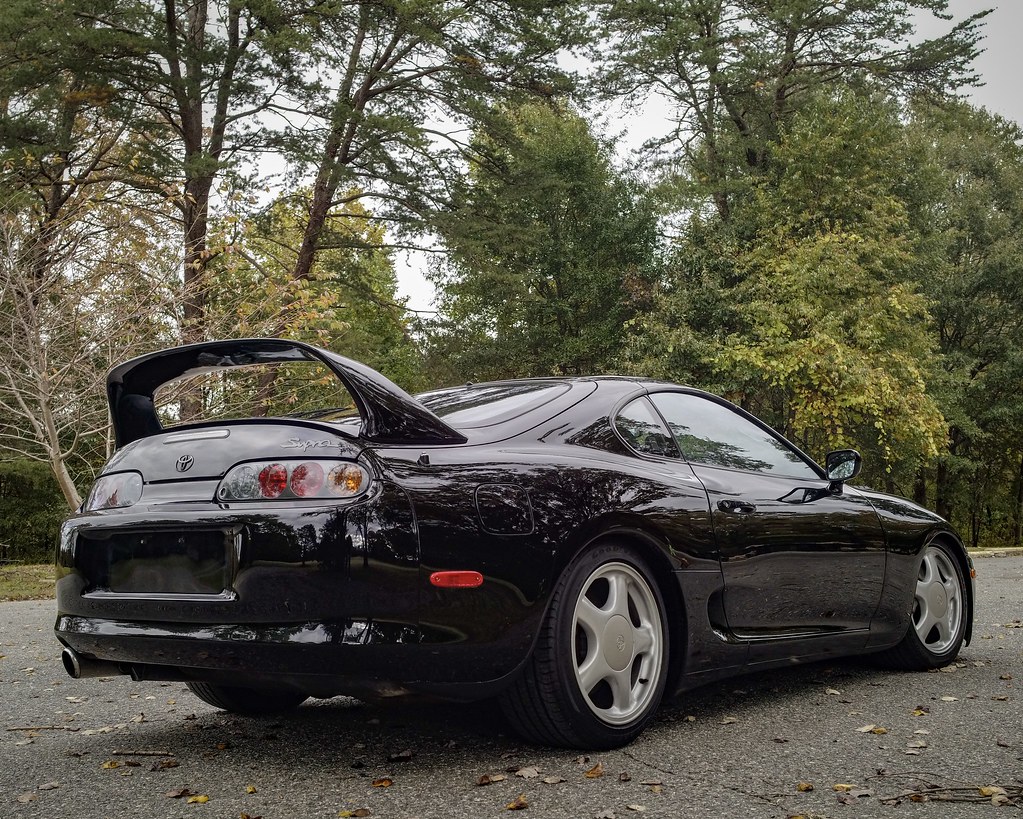
'98 Headlights/Taillights/Signals -- DONE!
Lip kit...considering Twin Z Design or Shine (interested in suggestions)
HRE 3 Piece Wheels Classic 305 -- Just Ordered!!
Michelin PS4S -- Just Ordered!!
Possible color change wrap
Xpel Tint
Interior Plans:
Touch Screen head unit with back up camera...open to suggestions
Trim paint match to '98 color -- Paint Ordered from supra paint!
'98 Steering wheel -- Done!
Suspension/Brake Plans:
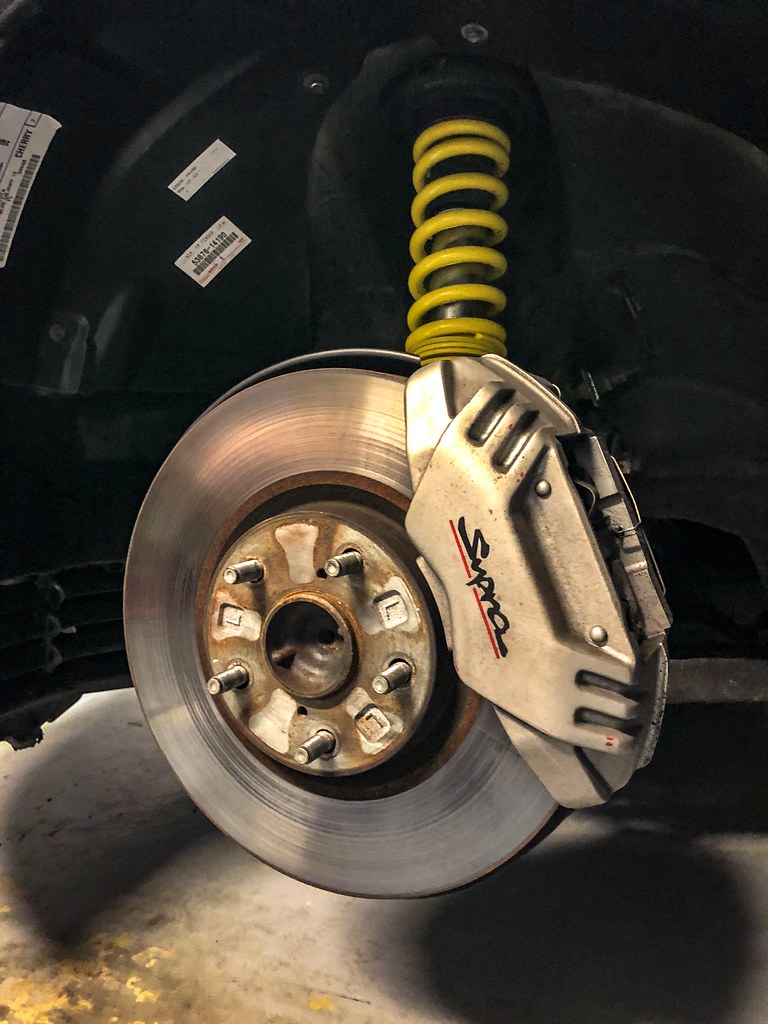
KW V3 -- Done
TRD Sways
TRD Strut Tower Brace -- Done
Brembo GT 380 Front
Brembo drilled rotors & pads Rear
Refreshed Bushings
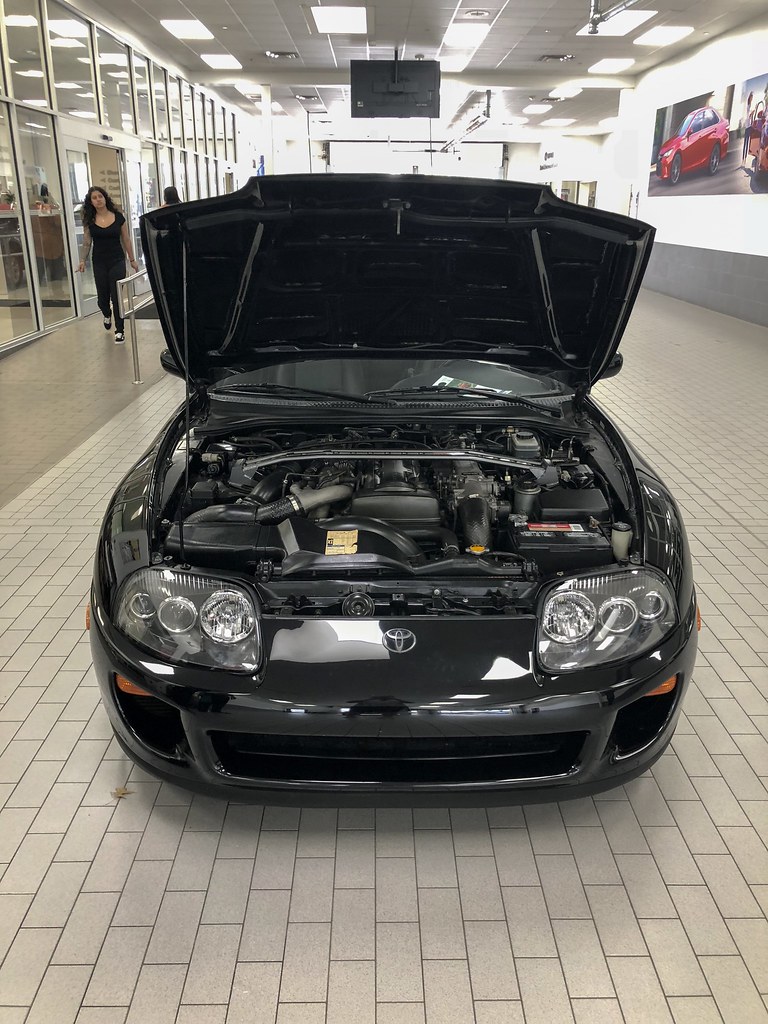
Motor Plans:
Exhaust
FMIC
Big Turbo Kit
Planned Restoration:
OEM Fender Liners -- DONE
OEM Keys -- Done
OEM Cowl Shroud -- Ordered
OEM Dash -- Ordered
OEM Airbag Cover -- Ordered
New floor mats -- Looking
OEM Hatch stoppers (end the squeaking please God!) -- Done
Potential Future Mods:
6MT Conversion
Recaro Seats
Stay tuned! I'll be posting mini photo journals of installs when I accomplish them, I hope you enjoy them and I'll definitely be looking for advice and support! Also follow the day to day ownership of the car on instagram at @c2kmotorsports
-Curt
HEADLIGHTS~~~~~~~~~~~~~~~~~~~~~~~~~~~~~~~~~~~~~~~~ ~~~~~~~
The first thing to go were the chrome 93 headlights that were showing signs of ware...the install was straightforward, pull out the air box cover and battery, remove the three bolts on either side holding the headlights in, swap out the bulbs, remove the running light bulb and stow the running light 'wand' with some zip ties and the process was complete! Totally changed the look of the car and really freshened things up!
BEFORE:
DURRING:

SIDE BY SIDE
AFTER
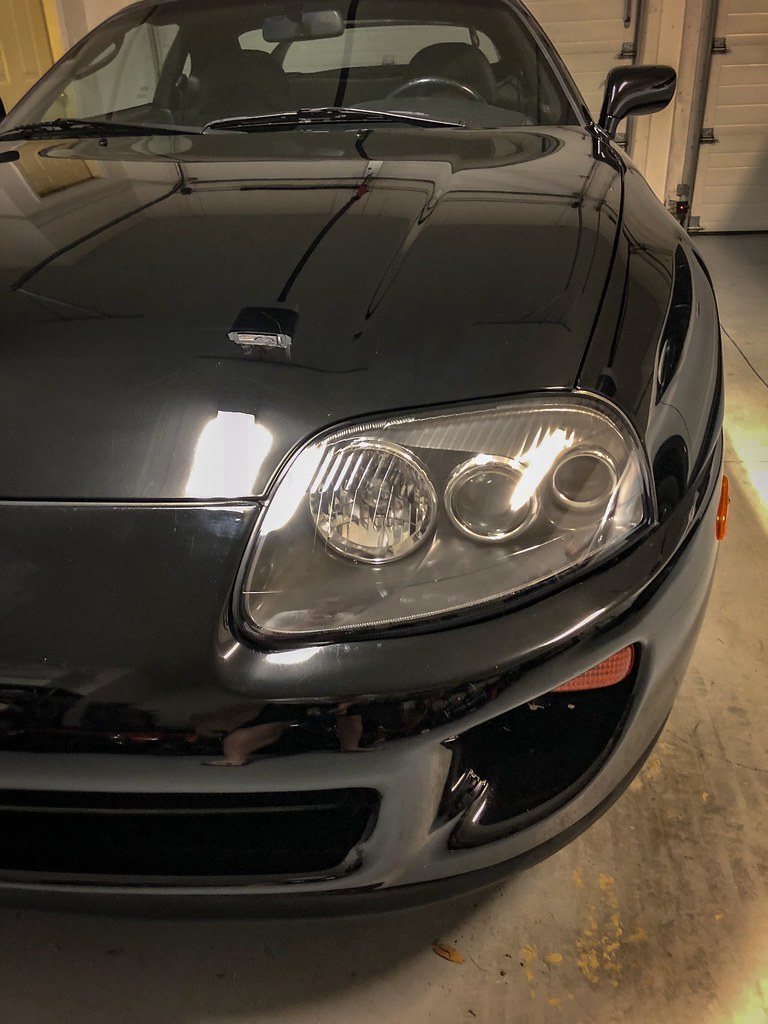
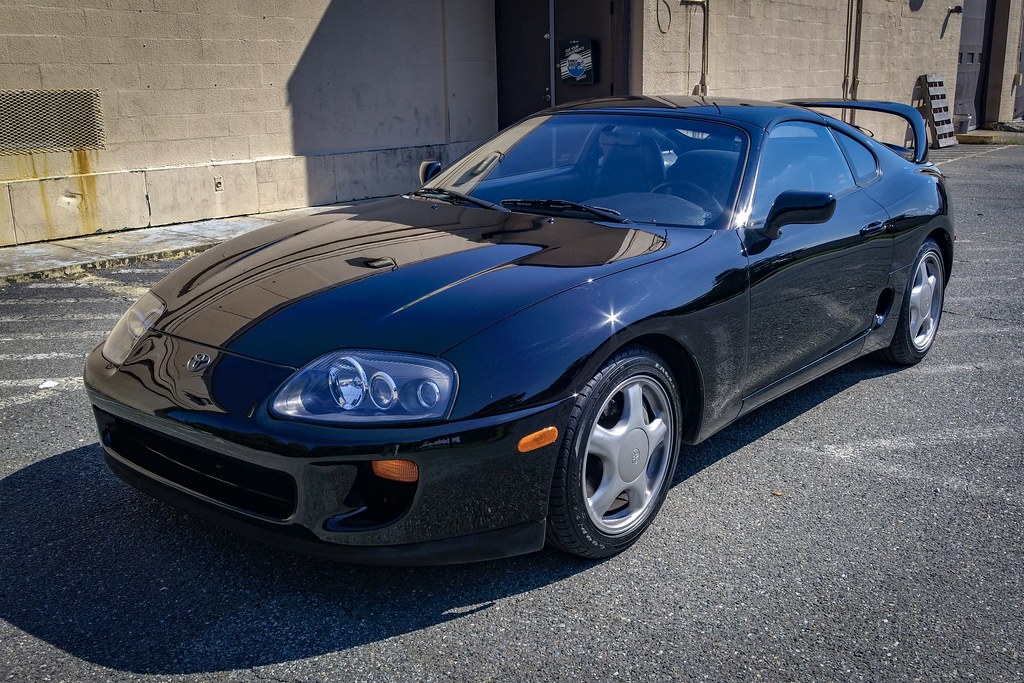
Photo Shoot!
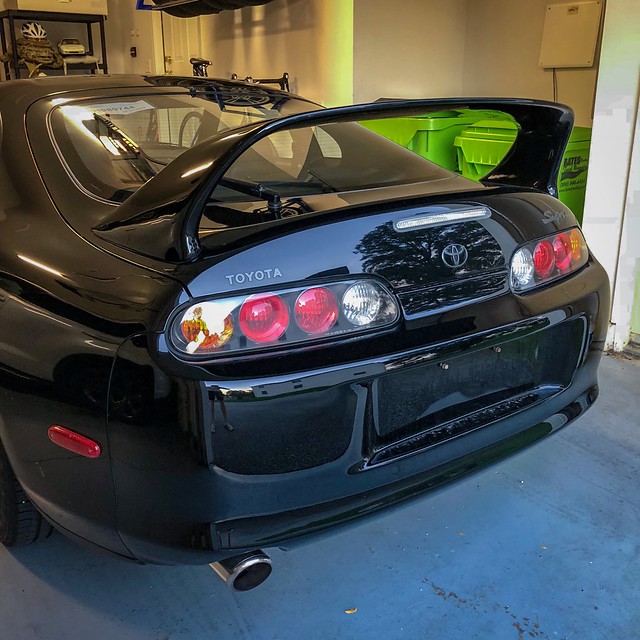
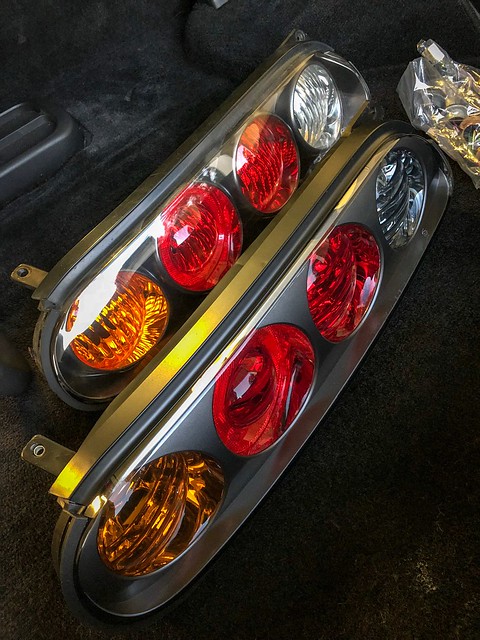
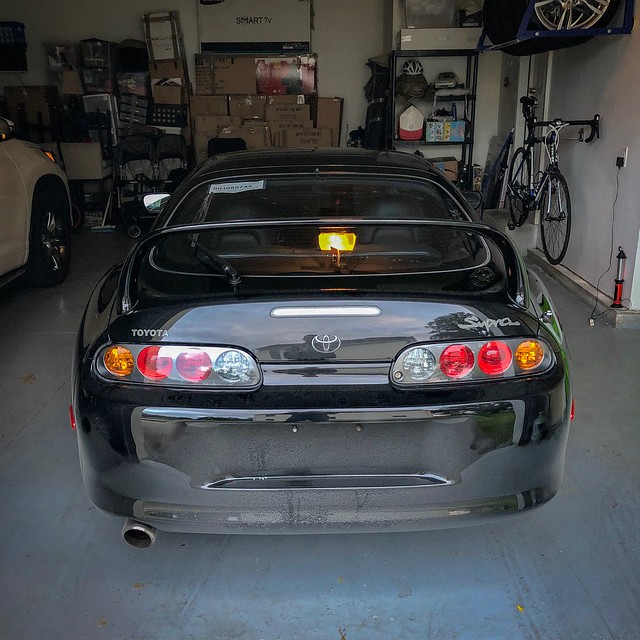
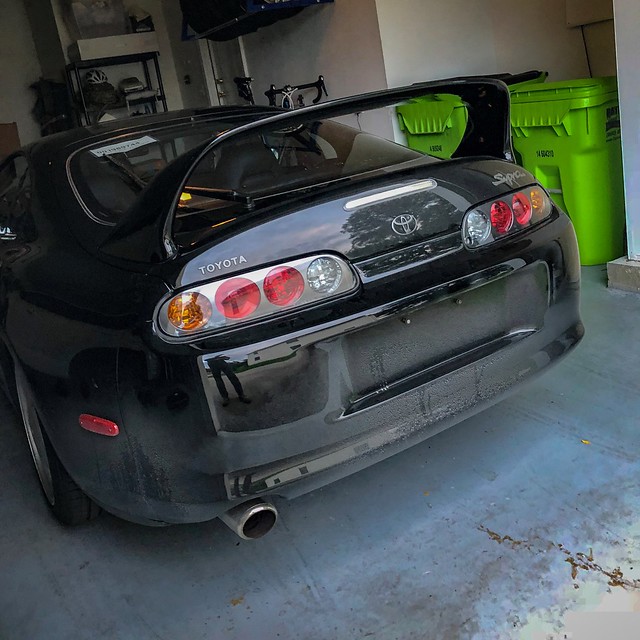
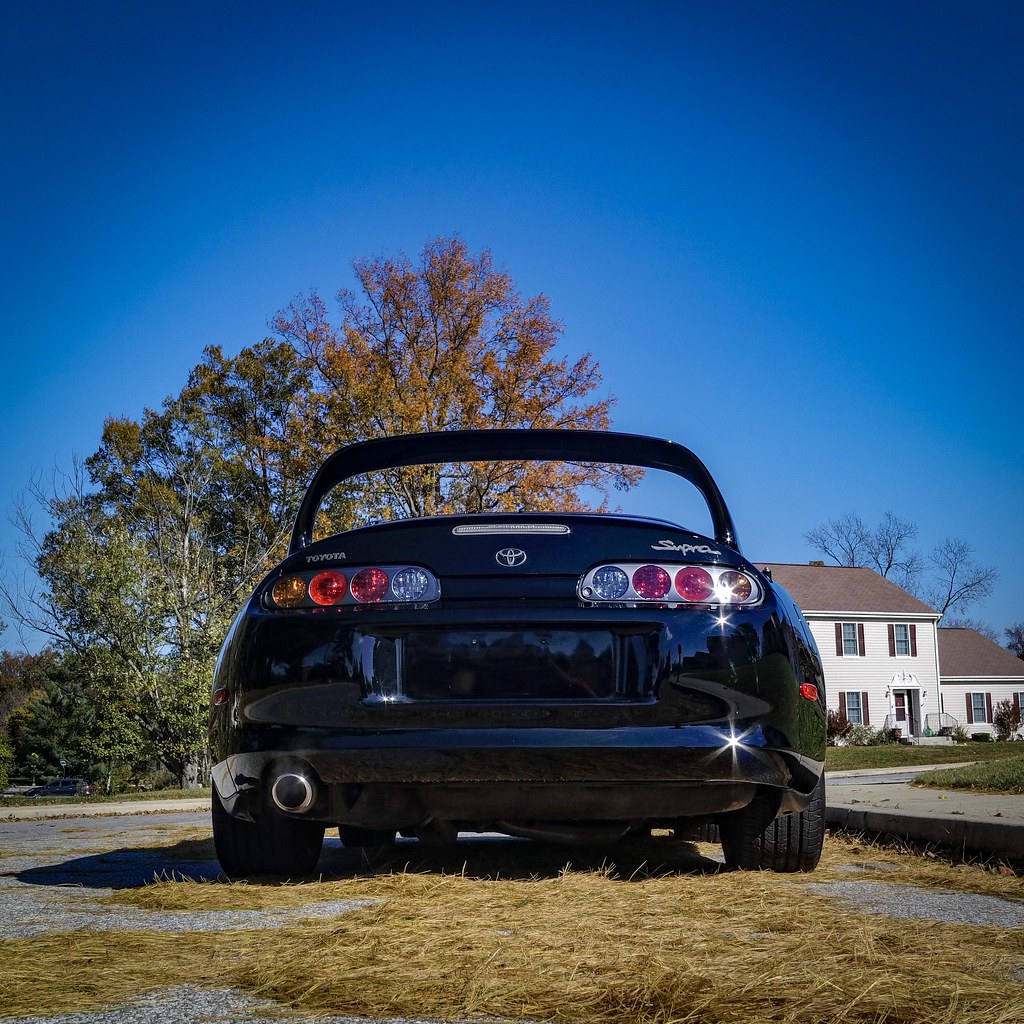
98 TAILIGHTS~~~~~~~~~~~~~~~~~~~~~~~~~~~~~~~~~~~~~~~~~ ~~~~~
Taillights are a subtle and relatively cheap mod that makes a big difference in my opinion. At a little over $300 with harness and bulbs included for all-OEM upgrade parts these are a pretty easy decision IMO. They are incredibly easy to install as well.
1. pop off the partial shroud of the targa holders and remove the two screws holding the holders to the body.
2. remove the screws holding the rear trunk trim piece in place and remove the trim all together
3. two screws hold each taillight in place, once removed be careful not to scratch the paint when removing them, takes a bit of wiggling, painters tape on the bumper may be a good precaution
4. unplug the harness and pull it out of the body pass-through by compressing the grommet seal on the back side until it comes through.
5. assemble the new bulbs/harness/tail lights and re-install in reverse order!
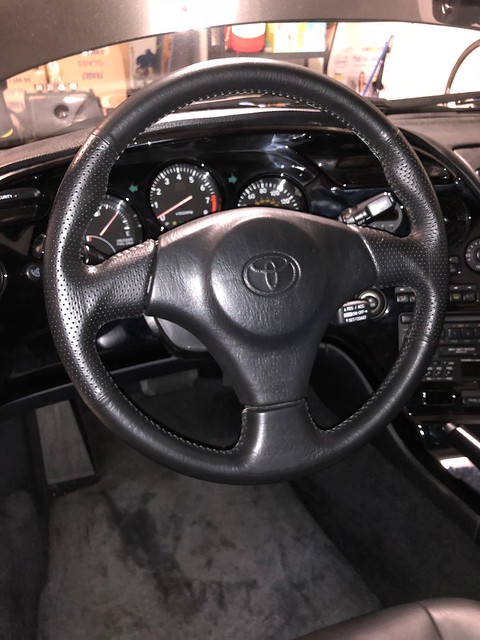
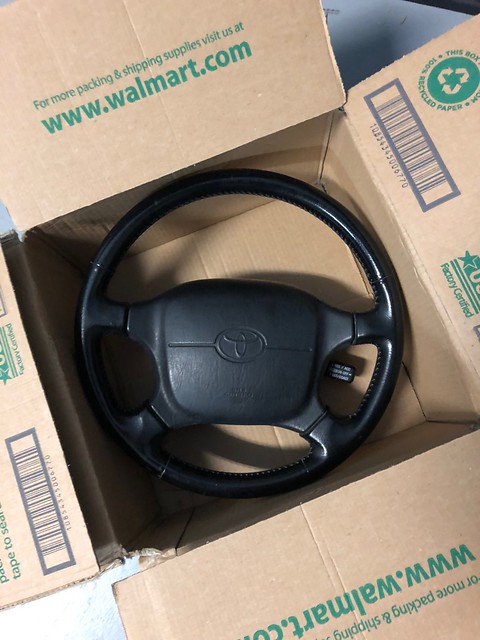
98 STEERING WHEEL~~~~~~~~~~~~~~~~~~~~~~~~~~~~~~~~~~~~~~~~~
Put on the steering wheel today, I pieced it together from an instagram seller who brings over JDM parts, he provided the wheel, airbag and airbag adaptor wiring between 93 and 98+. I was lucky to find a member on here selling the 98 wheel bezel with cruise control stock so I picked it up.
The install was fairly straight forward,
1. pop off the plastic covers on either side of the original bezel
2. loosen the two hex screws under them
3. pop out the airbag
4. unplug the airbag and cruise control
5. break/remove the nut holding the wheel to the hub
6. I had to spray the slpine with some WD-40 and let it soak for a bit before being able to yank the wheel off the hub.
7. I re-used the 93 wheels bolts for the cruise control stock, the holes were drilled but not tapped on the 98+ wheel so I had to drill the holes a little larger and essentially self tap with the old screws being careful not to strip them.
8. everything re-assembled just as it came off, fun little 1 hour mod!

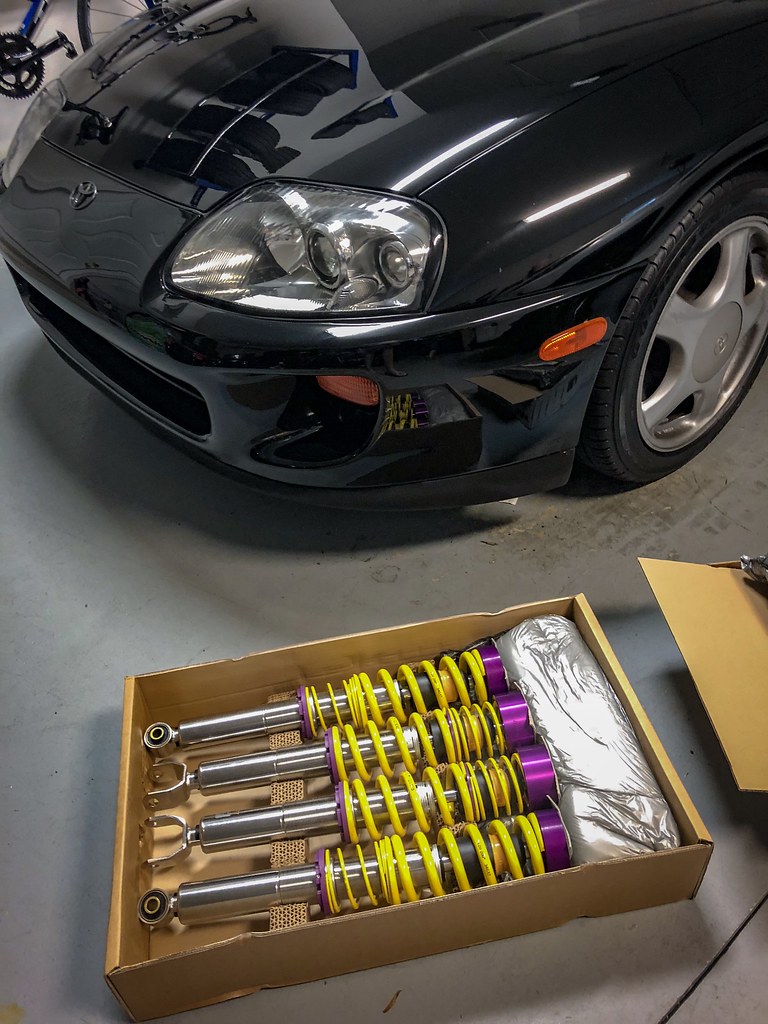
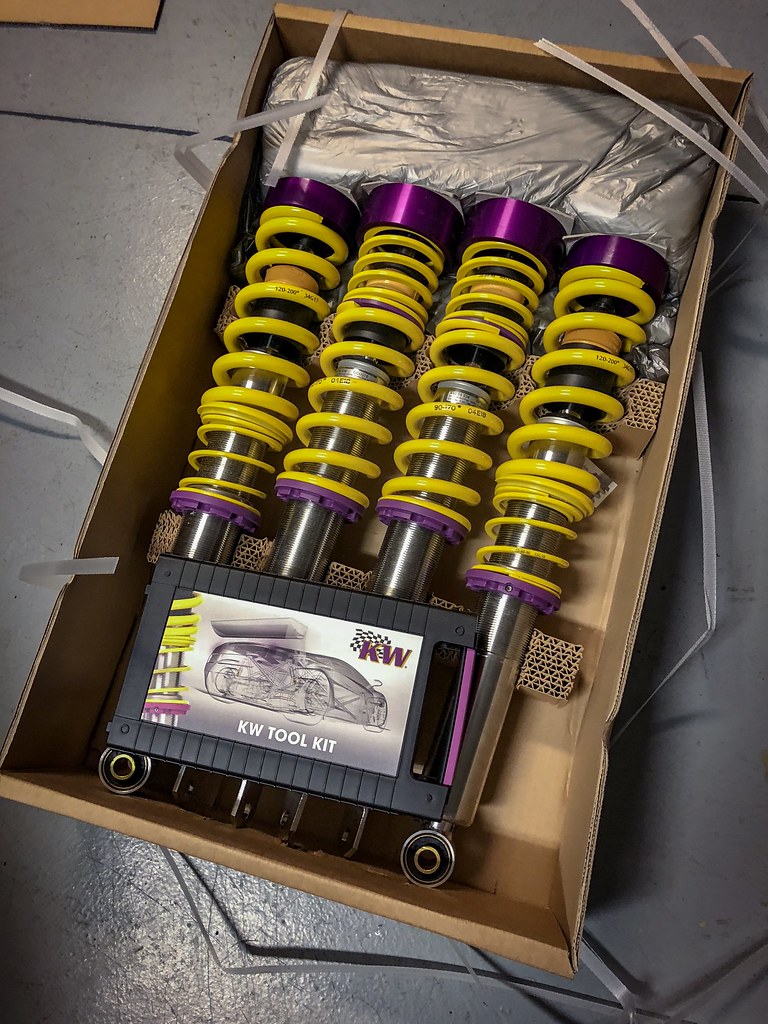
KW SUSPENSION~~~~~~~~~~~~~~~~~~~~~~~~~~~~~~~~~~~~~~~~ ~~~~~~
I have been through several different types of suspension set-ups over the years. I used to be of the mindset, why spend money on coilovers when you can buy springs for a fraction of the cost and achieve a modest drop and stiffening of the ride. As I started going to car shows and perusing the forums I saw more and more cars that achieved a 'perfect' stance with paper thin wheel gaps and camber/stiffness/rideheight control. I thought that stuff was all cool but much to expensive for my goals.
From coil springs I moved on to an adjustable spring set-up, I was able to achieve the stance I was looking for and for a modest cost but soon came to realize that it was at the expense of ride comfort and my struts. The car had an unnatural bouncy feeling and I would actually say handling was degraded and my struts eventually gave out.
So I decided to finally splurge for a set of true coilovers. I went with KW's entry level Variant 3 system for my E92 M3. What a difference these made, the car was still very comfortable to drive but had a much more 'sporty' feel. Plus I was able to adjust the ride height at my whim which I really liked. The system re-uses the stock pillow mounts so you don't get the metal to metal vibration and noise like other set-ups.
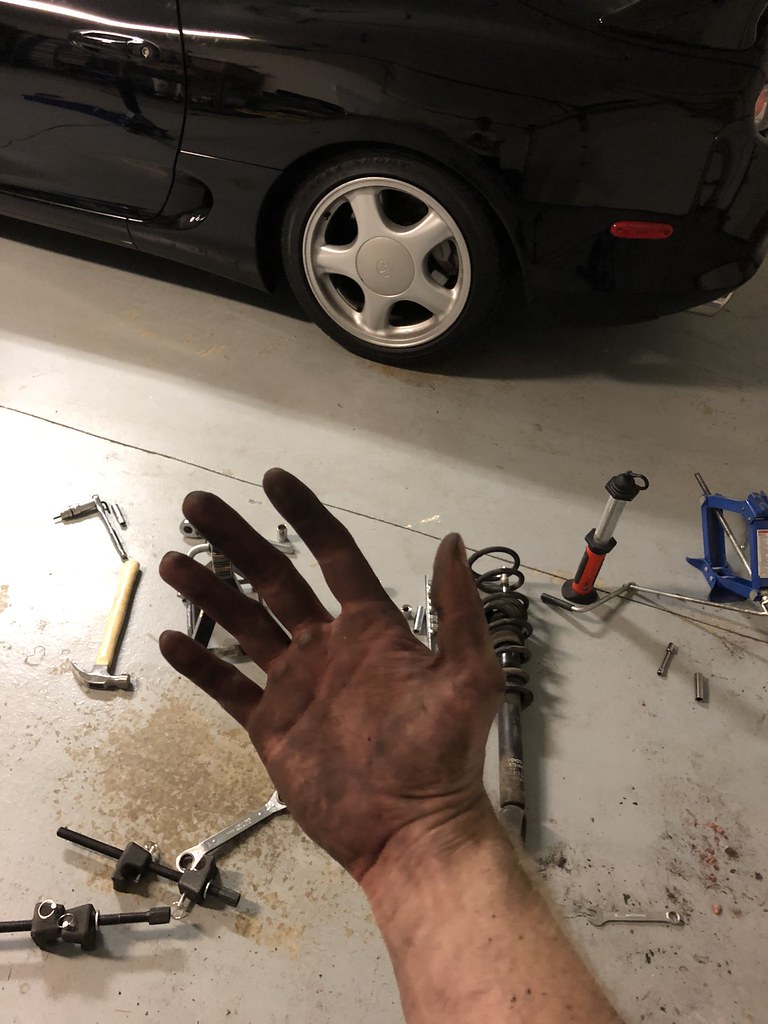
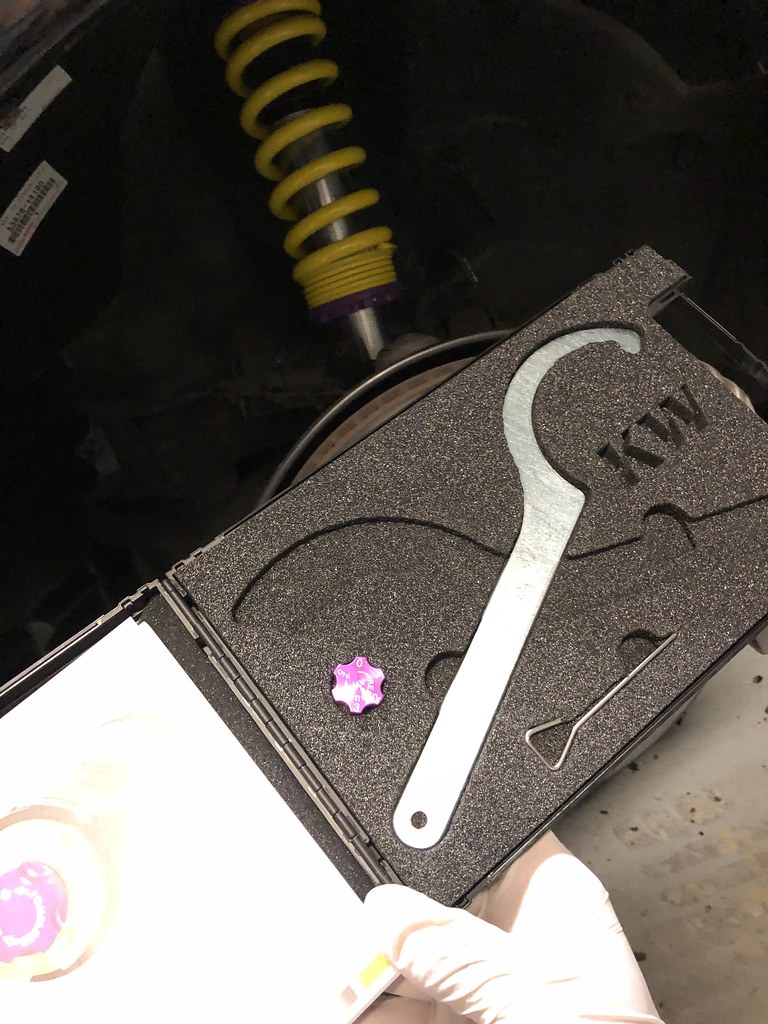
I'm a long time customer of KW due to their long standing pedigree in the euro racing circuits and OEM relationships. Their kits are always a huge improvement over stock and provide ride height and dampening stiffness controllability. The install was time consuming to do by myself without a lift or air tools but I was able to pull it off in about half a day this weekend. I also threw the TRD Strut brace on during this install too!
The install process is pretty straight forward...
- Jack car up, take the wheel off
- Undo to three top hat nuts, hidden under other top hat nuts for various things (I may have been fooled in the rear) :loser:
- Break/remove the strut mount bolt
- Un-do the sway bar end link, use a second jack to compress the strut assembly and get a low profile pass through socket wrench and allen key to remove the bolt
- Loosen the top hat nut before dropping the assembly out ***without removing it***
- Drop the assembly out and use mcpherson strut compressors to unload the spring
- remove the top hat, trim the rubber boot off, re-assemble on the KW Kit using the same pass through socket wrench set
- You will have to drill/file down the pass-through on the stock top hat to make it round, it will have two flat areas that were very helpful in getting the top hat screw off because they prevent the strut rod from rotating but the KW strut rods are round and won't fit. I didn't have the perfect size bit for the job so I ended up using a smaller one and just grinding down the flat areas until I had removed enough material for it to slide onto the KWs.
- Re-assemble
Pretty much exactly the same on all four corners. I needed a nice install like this to get my hands dirty, its like therapy!
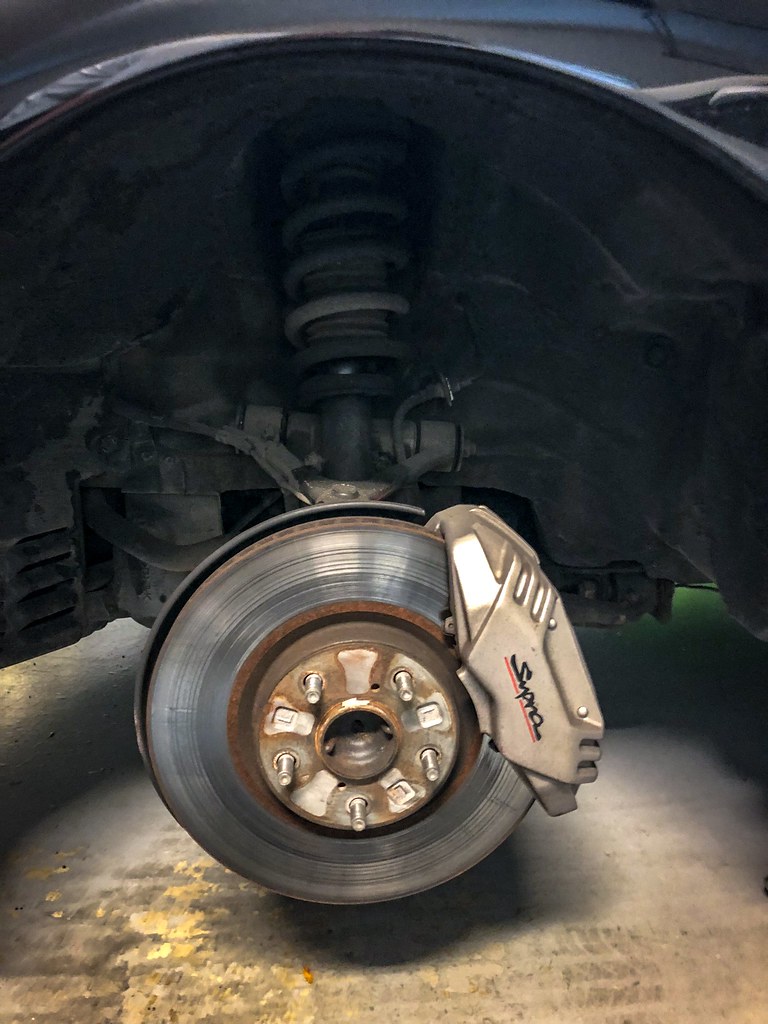
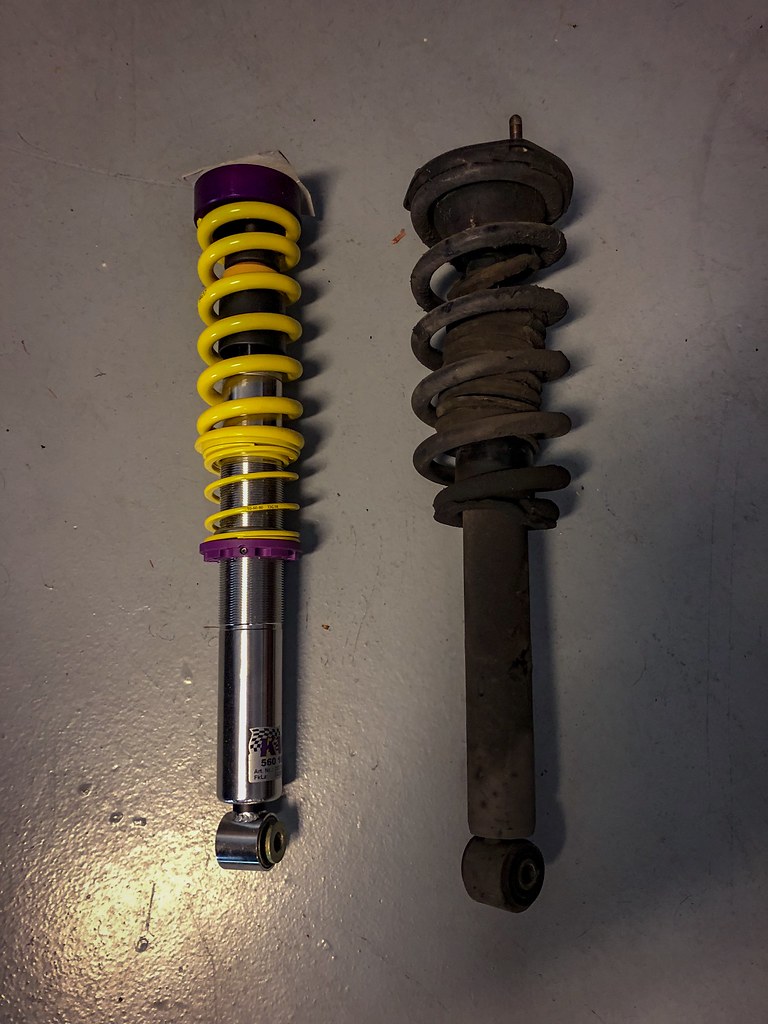
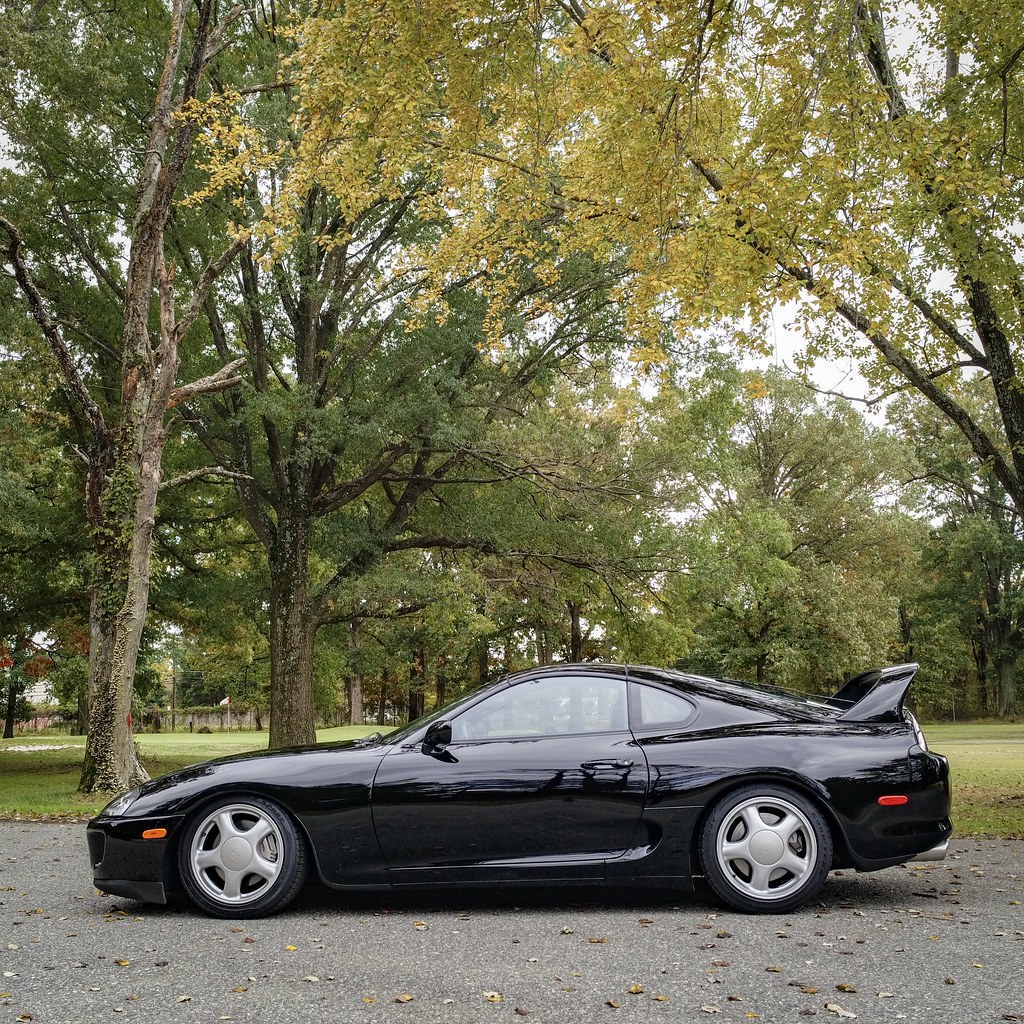
The stock 25 year old suspension was TIRED and noisy, pretty sure a couple, if not all, of the struts were blown, the KW V3 was a much needed refresh, now she feels extremely tight and less noisy, plus I can now fine-tune the ride height and stance for those new aggressive fitment HREs when they arrive!

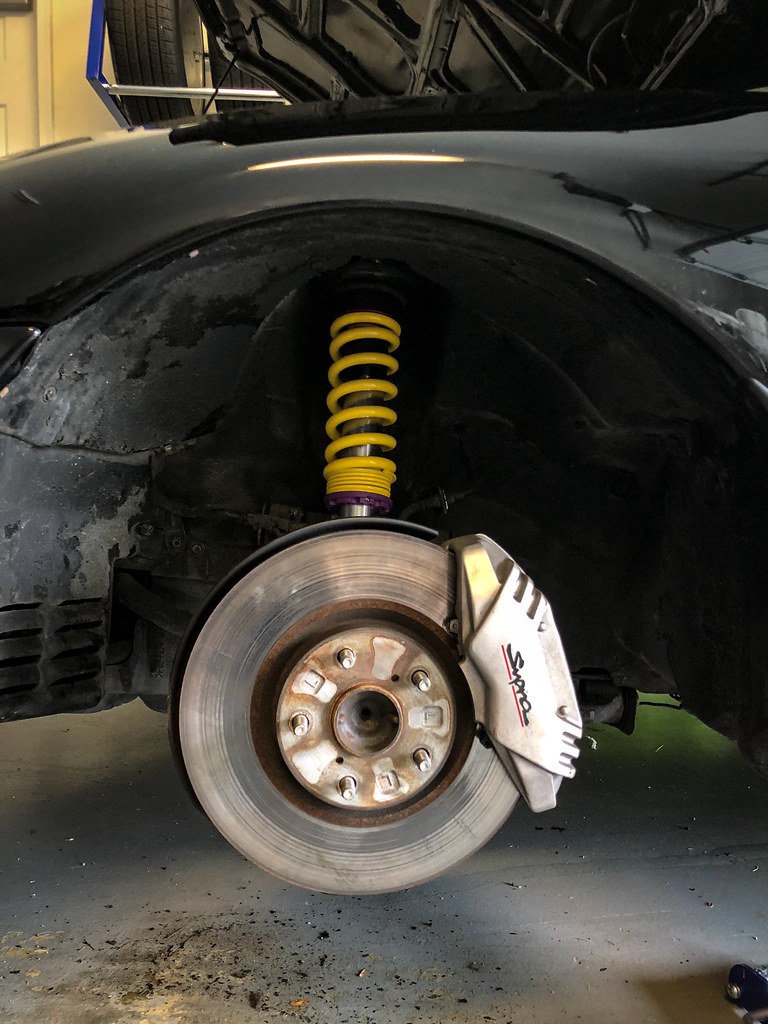
**This mod also drove my decision for replacing the OEM fender liners with new OEM plastic, it will make a big difference, for me atleast!
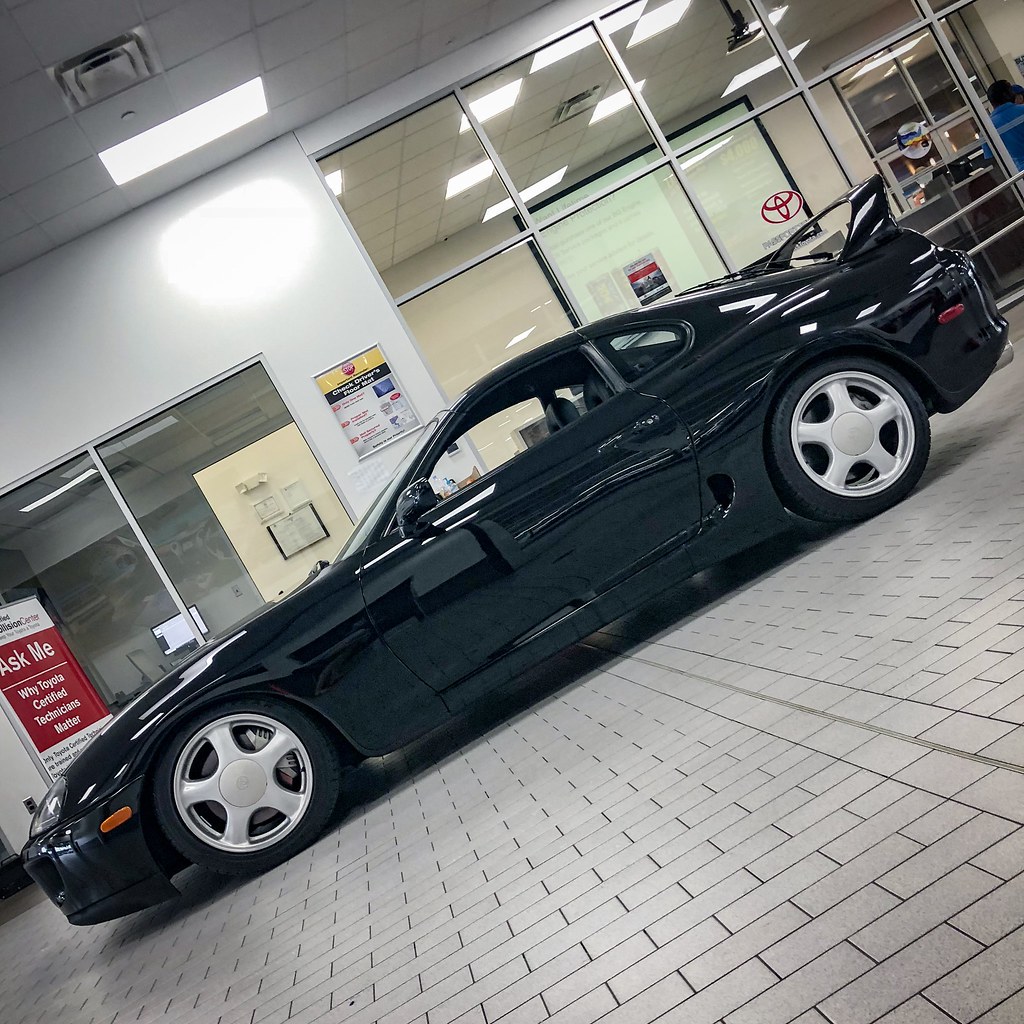
PHOTO SHOOT!
Miscellaneous Restorations ~~~~~~~~~~~~~~~~~~~~~~~~~~~~~~~~~~~~~~
10-14-18
A few small detail restorations:
1. Rear hatch rubber bump stop replacement, hopefully this will keep the rear hatch from squeaking like an old school bus! I was only able to replace the stoppers on the hatch as the ones on the body are held in by Phillips head screws with a ridiculous amount of thread lock on them and strip easily...will have to drill them out later. Hopefully replacing the hatch stoppers is enough to end the squeaking...we'll see.

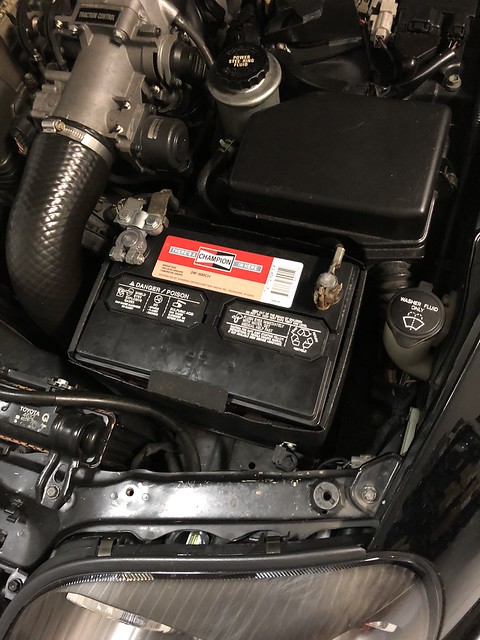
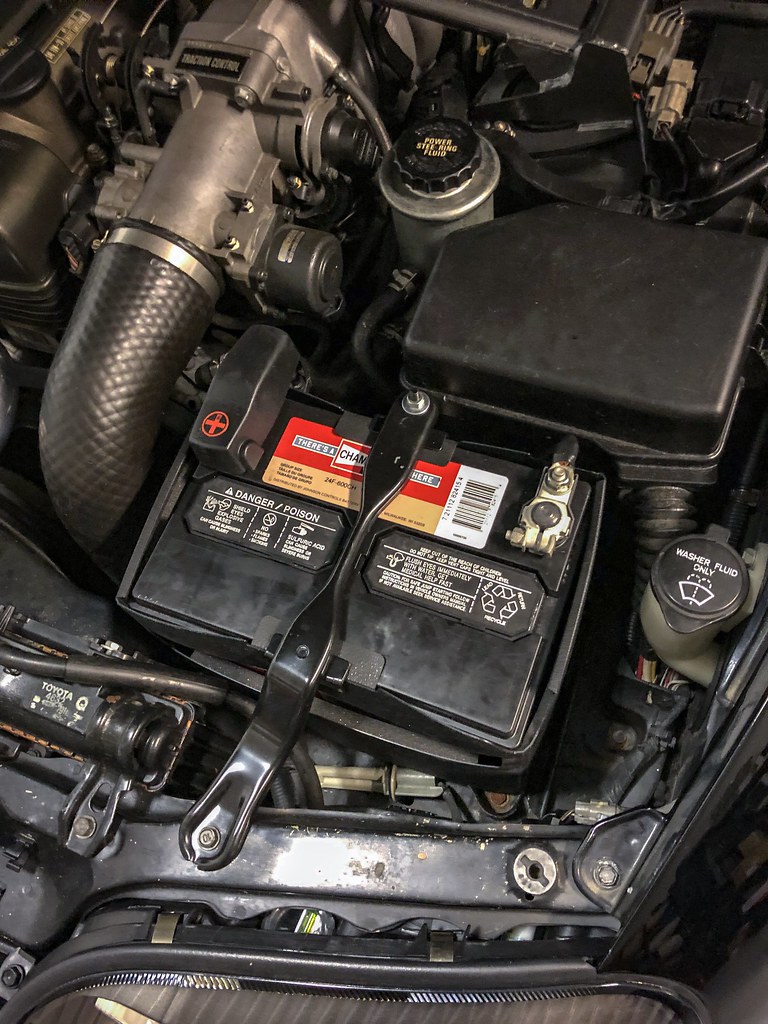
2. I was missing the battery tie down and the plastic surround was all cracked so I replaced them all!

3. The drivers carpet hook was broken, the replacement part was from the '98 catalogue, not exactly the same but a form/fit replacement and you get two in the package!

11-20-18
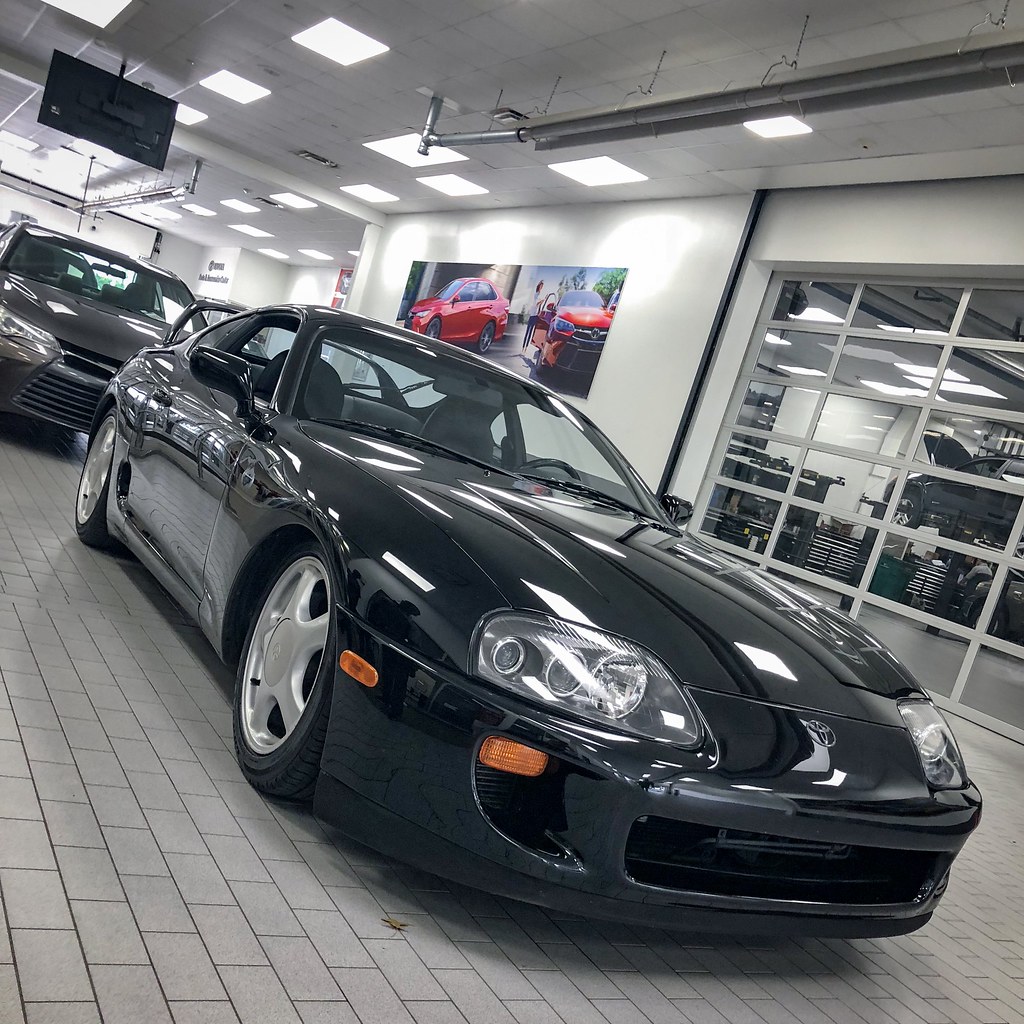
Just got the Supra back from Freed Engineering. The car had several 'ninja issues', the turn signal system stopped working, the car was blowing smoke on cold start and the turbos seemed really noisy at lower RPMs. Plus I wanted a professional leak down and compression check done so I decided to take her in!
Well...I had three different leaks in the coolant system, a bad water pump seal, a completely compromised hose to the stock surge valve, a missing vacuum hose to one of the waste gates and a bunch of bad connections in my fuse box. On top of that I had them address the old corroded battery terminals, upgrade the radiator hose to a Titan Motorsports elbow and extract the stripped screws on the rear lower hatch stops so I could throw in the new ones I had ordered.
WOW! All these issues were present when I bought the car so I just assumed that's how the car ran! The motor runs like a top now, the car doesn't feel like a dog in lower RPMs and has a much smoother transition to boost, the stock auto seemed to be much more lively and appropriate with gear selection based on throttle position, no more smoke, turn signals work and best of all...about an 80% reduction in interior squeaking/rattling noises :sadance:
Needless to say I'm very pleased!
11-22-18
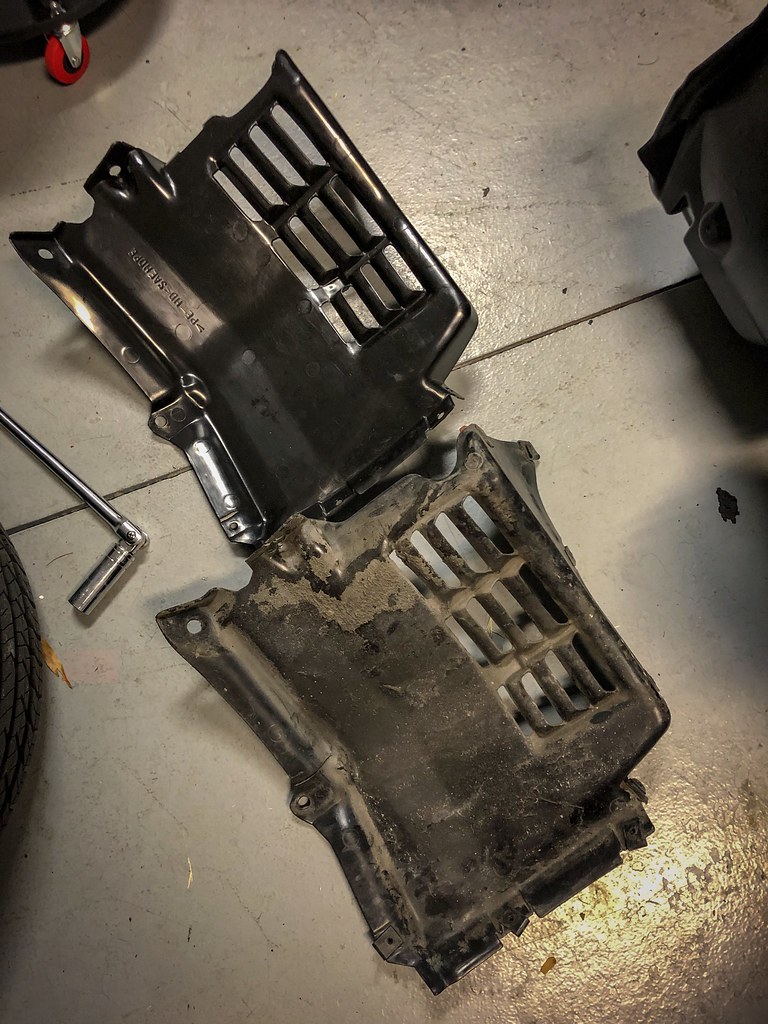
When I was finished with the KW V3 Suspension install I was looking for satisfying before and after pictures but the condition of the fender liners ruined the ‘newness’ feeling for the wheel wells because they were covered in rubber and grime so I decided to replace them! Very simple install, the hardest part is finagling the upper liner back into place and lipping it into the fender. I also took the opportunity to adjust the KW V3s up about 1.5 inches because she was doing a good bit of rubbing at the original level.
Now my wheel wells are so fresh the factory stickers are still on them!


Now its time for some Brembo Brakes and the wheel wells will be on-point!
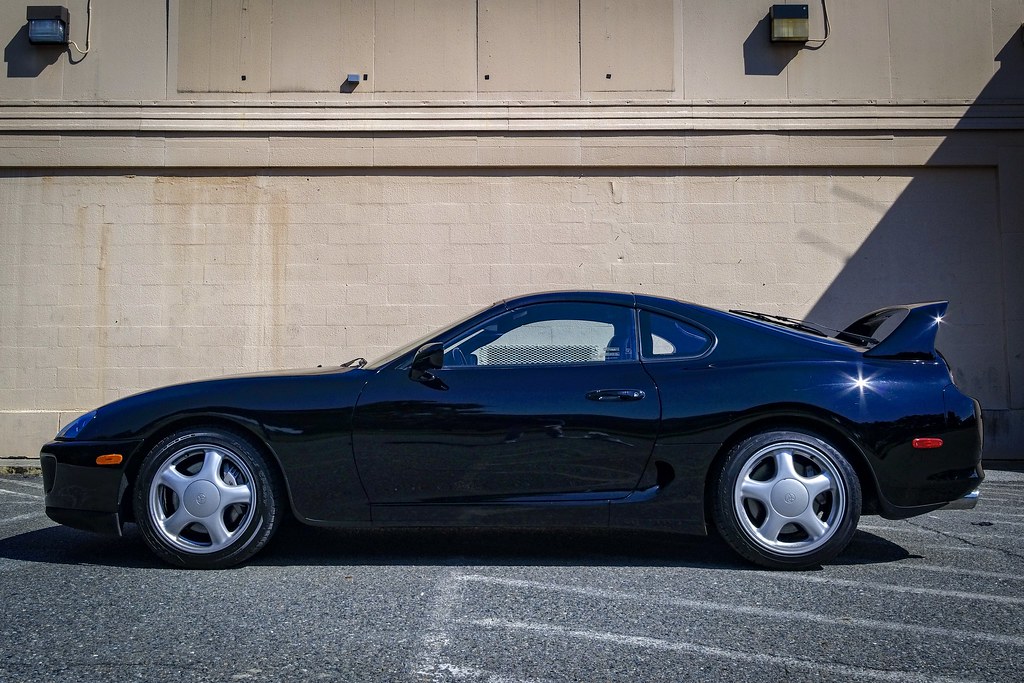
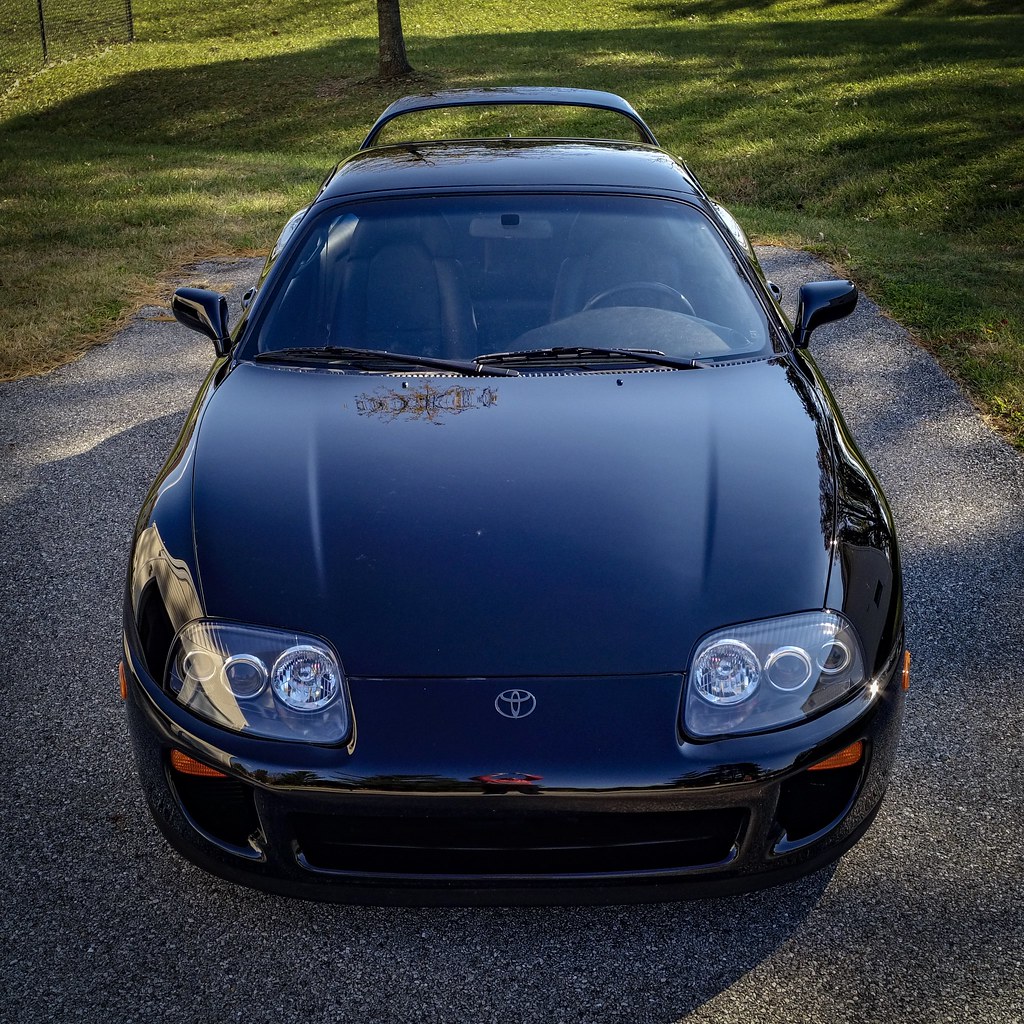
PHOTOSHOOT CHECKPOINT 10-15-18~~~~~~~~~~~~~~~~~~~~~~~~~~~~~~
A few more shots from after the KW V3 Coilover Suspension Install from my friend Shaun @stillnahrich


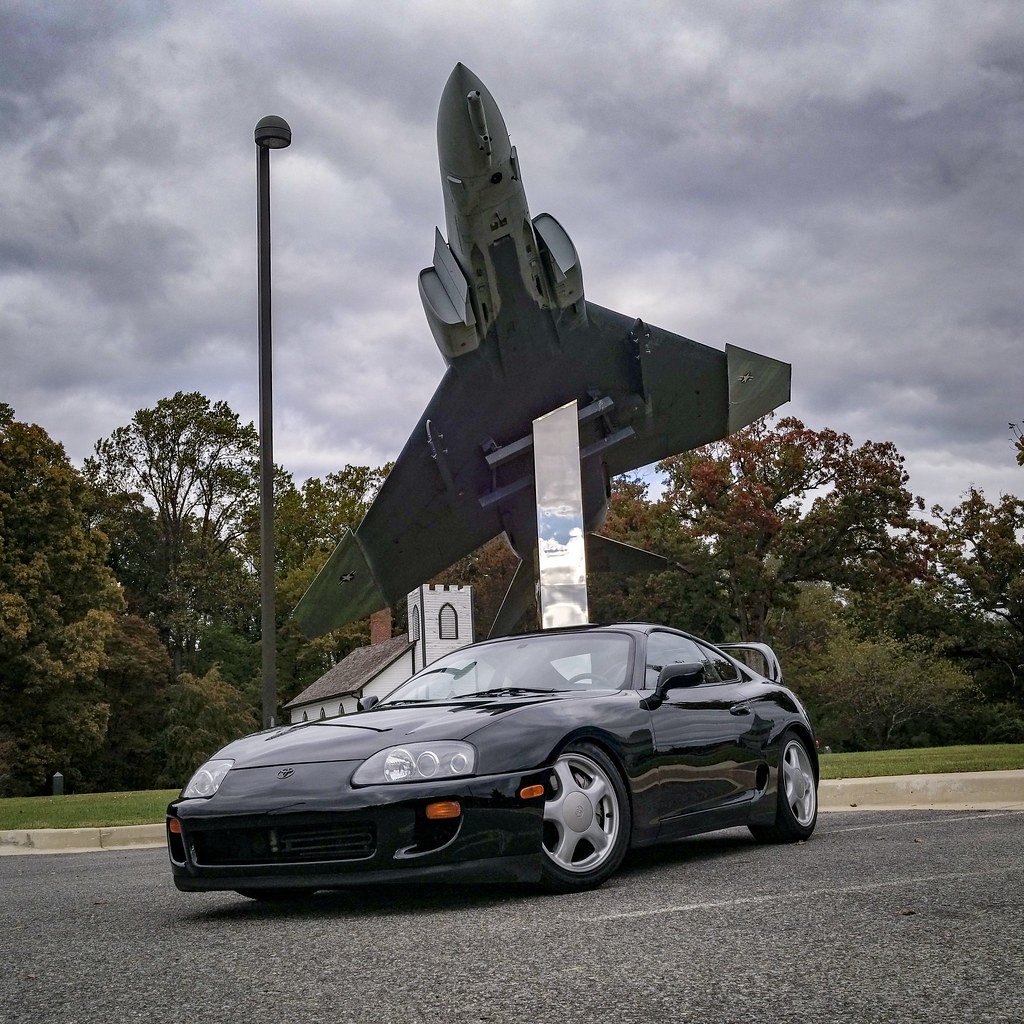
PHOTOSHOOT CHECKPOINT 11-1-18~~~~~~~~~~~~~~~~~~~~~~~~~~~~~~~
A few quick shots from this weekend, starting to get cold out!

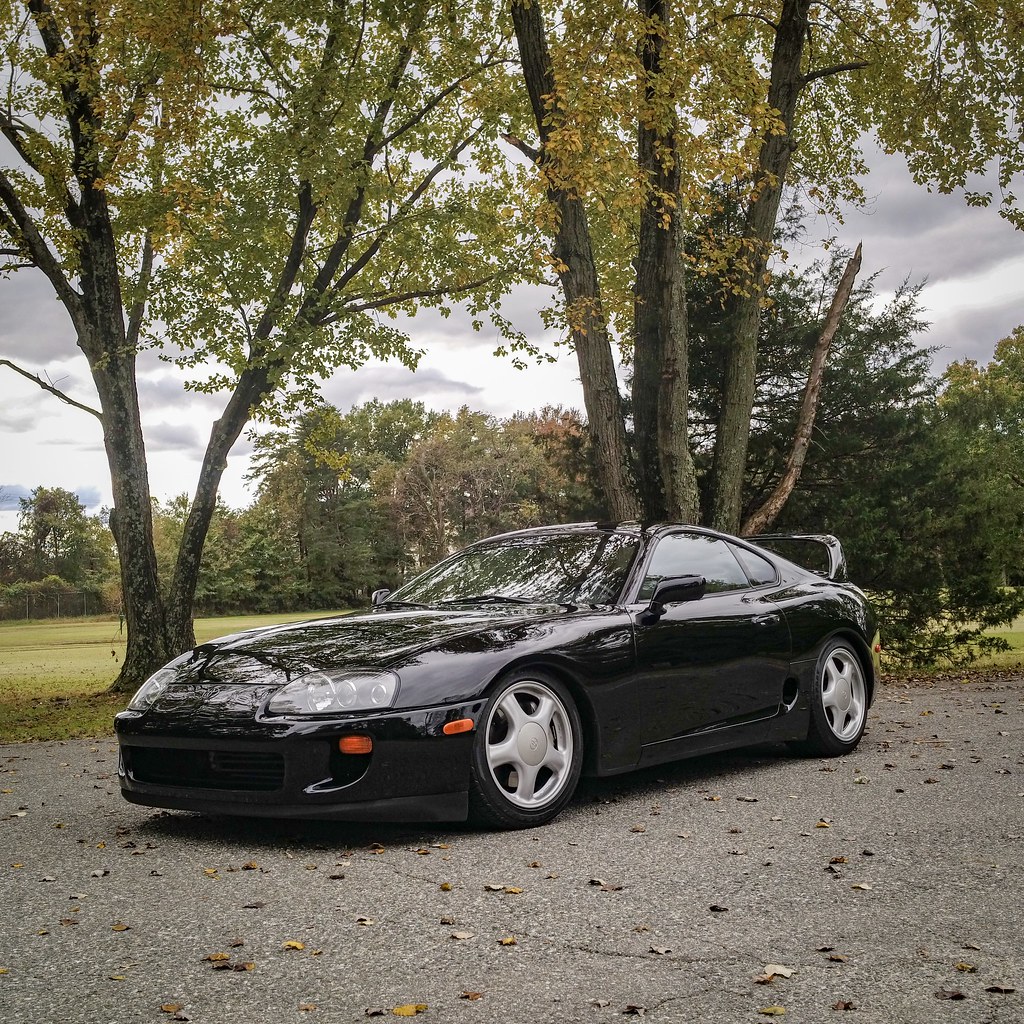
PHOTOSHOOT CHECKPOINT 11-17-18~~~~~~~~~~~~~~~~~~~~~~~~~~~~~~
Took some shots around the house, one thing has become clear...I am not nearly skilled enough to take care of the original black paint...its obviously been polished before but I've managed to add some swirls to the paint in my ham fisted care...I'm seriously considering having it professionally polished then doing a full body PPF like XPEL so I can protect the paint and also ease cleaning/care.


Let me begin by saying I have been lurking around Supra forums for over a decade dreaming about the day I would own a Supra...well the day has finally come! This thread will chronicle the C2KMotorsports Supra build.
Before we begin this journey let me start by showing you where I've been the past decade! I was heavy into the BMW scene, starting out with the Super charged BMW individual Santorini Blue E92 M3.
After the Santorini project had run its course I was one of the first to import a R32 GTR back in 2015...
I only owned her for a short time before I picked up the Sunburst Gold F80 M3!
Then I tried my hand at the F31 330xi 'Smash Wagon'
Which brings us the the Supra Project!
The car:
1993 Supra Sport Roof Turbo AT
88K miles
Black on Black
BONE STOCK
Exterior Plans:
'98 Headlights/Taillights/Signals -- DONE!
Lip kit...considering Twin Z Design or Shine (interested in suggestions)
HRE 3 Piece Wheels Classic 305 -- Just Ordered!!
Michelin PS4S -- Just Ordered!!
Possible color change wrap
Xpel Tint
Interior Plans:
Touch Screen head unit with back up camera...open to suggestions
Trim paint match to '98 color -- Paint Ordered from supra paint!
'98 Steering wheel -- Done!
Suspension/Brake Plans:
KW V3 -- Done
TRD Sways
TRD Strut Tower Brace -- Done
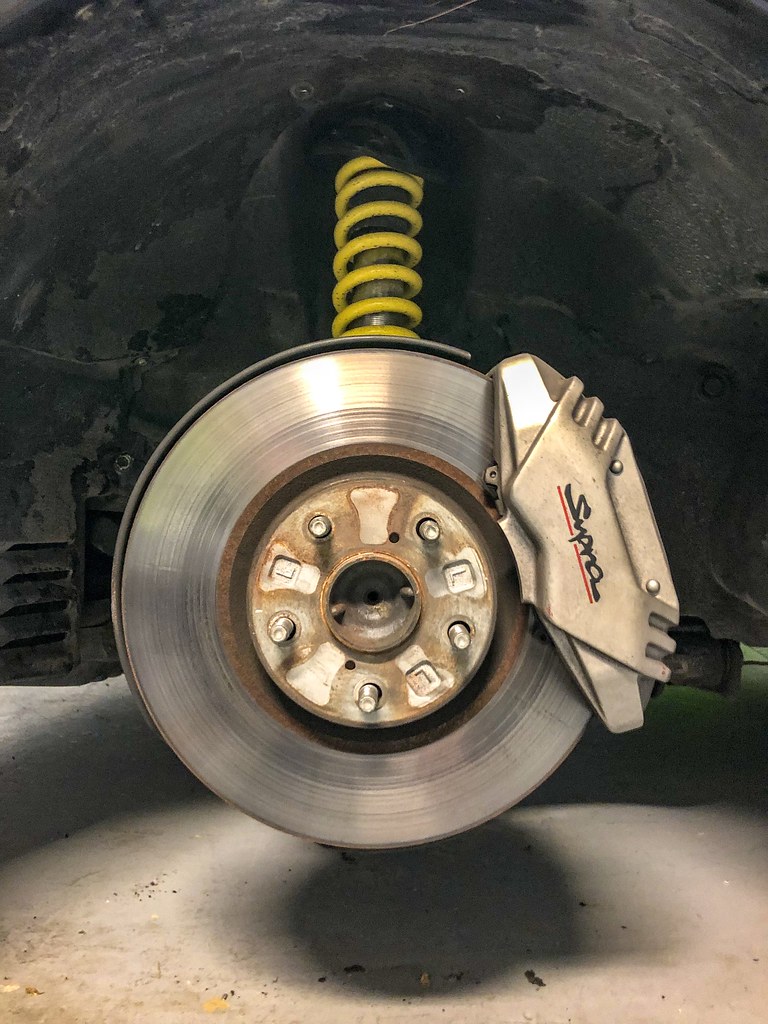
Brembo GT 380 Front
Brembo drilled rotors & pads Rear
Refreshed Bushings
Motor Plans:
Exhaust
FMIC
Big Turbo Kit
Planned Restoration:
OEM Fender Liners -- DONE
OEM Keys -- Done
OEM Cowl Shroud -- Ordered
OEM Dash -- Ordered
OEM Airbag Cover -- Ordered
New floor mats -- Looking
OEM Hatch stoppers (end the squeaking please God!) -- Done
Potential Future Mods:
6MT Conversion
Recaro Seats
Stay tuned! I'll be posting mini photo journals of installs when I accomplish them, I hope you enjoy them and I'll definitely be looking for advice and support! Also follow the day to day ownership of the car on instagram at @c2kmotorsports
-Curt
HEADLIGHTS~~~~~~~~~~~~~~~~~~~~~~~~~~~~~~~~~~~~~~~~ ~~~~~~~
The first thing to go were the chrome 93 headlights that were showing signs of ware...the install was straightforward, pull out the air box cover and battery, remove the three bolts on either side holding the headlights in, swap out the bulbs, remove the running light bulb and stow the running light 'wand' with some zip ties and the process was complete! Totally changed the look of the car and really freshened things up!
BEFORE:
DURRING:
SIDE BY SIDE
AFTER
Photo Shoot!
98 TAILIGHTS~~~~~~~~~~~~~~~~~~~~~~~~~~~~~~~~~~~~~~~~~ ~~~~~
Taillights are a subtle and relatively cheap mod that makes a big difference in my opinion. At a little over $300 with harness and bulbs included for all-OEM upgrade parts these are a pretty easy decision IMO. They are incredibly easy to install as well.
1. pop off the partial shroud of the targa holders and remove the two screws holding the holders to the body.
2. remove the screws holding the rear trunk trim piece in place and remove the trim all together
3. two screws hold each taillight in place, once removed be careful not to scratch the paint when removing them, takes a bit of wiggling, painters tape on the bumper may be a good precaution
4. unplug the harness and pull it out of the body pass-through by compressing the grommet seal on the back side until it comes through.
5. assemble the new bulbs/harness/tail lights and re-install in reverse order!
98 STEERING WHEEL~~~~~~~~~~~~~~~~~~~~~~~~~~~~~~~~~~~~~~~~~
Put on the steering wheel today, I pieced it together from an instagram seller who brings over JDM parts, he provided the wheel, airbag and airbag adaptor wiring between 93 and 98+. I was lucky to find a member on here selling the 98 wheel bezel with cruise control stock so I picked it up.
The install was fairly straight forward,
1. pop off the plastic covers on either side of the original bezel
2. loosen the two hex screws under them
3. pop out the airbag
4. unplug the airbag and cruise control
5. break/remove the nut holding the wheel to the hub
6. I had to spray the slpine with some WD-40 and let it soak for a bit before being able to yank the wheel off the hub.
7. I re-used the 93 wheels bolts for the cruise control stock, the holes were drilled but not tapped on the 98+ wheel so I had to drill the holes a little larger and essentially self tap with the old screws being careful not to strip them.
8. everything re-assembled just as it came off, fun little 1 hour mod!
KW SUSPENSION~~~~~~~~~~~~~~~~~~~~~~~~~~~~~~~~~~~~~~~~ ~~~~~~
I have been through several different types of suspension set-ups over the years. I used to be of the mindset, why spend money on coilovers when you can buy springs for a fraction of the cost and achieve a modest drop and stiffening of the ride. As I started going to car shows and perusing the forums I saw more and more cars that achieved a 'perfect' stance with paper thin wheel gaps and camber/stiffness/rideheight control. I thought that stuff was all cool but much to expensive for my goals.
From coil springs I moved on to an adjustable spring set-up, I was able to achieve the stance I was looking for and for a modest cost but soon came to realize that it was at the expense of ride comfort and my struts. The car had an unnatural bouncy feeling and I would actually say handling was degraded and my struts eventually gave out.
So I decided to finally splurge for a set of true coilovers. I went with KW's entry level Variant 3 system for my E92 M3. What a difference these made, the car was still very comfortable to drive but had a much more 'sporty' feel. Plus I was able to adjust the ride height at my whim which I really liked. The system re-uses the stock pillow mounts so you don't get the metal to metal vibration and noise like other set-ups.
I'm a long time customer of KW due to their long standing pedigree in the euro racing circuits and OEM relationships. Their kits are always a huge improvement over stock and provide ride height and dampening stiffness controllability. The install was time consuming to do by myself without a lift or air tools but I was able to pull it off in about half a day this weekend. I also threw the TRD Strut brace on during this install too!
The install process is pretty straight forward...
- Jack car up, take the wheel off
- Undo to three top hat nuts, hidden under other top hat nuts for various things (I may have been fooled in the rear) :loser:
- Break/remove the strut mount bolt
- Un-do the sway bar end link, use a second jack to compress the strut assembly and get a low profile pass through socket wrench and allen key to remove the bolt
- Loosen the top hat nut before dropping the assembly out ***without removing it***
- Drop the assembly out and use mcpherson strut compressors to unload the spring
- remove the top hat, trim the rubber boot off, re-assemble on the KW Kit using the same pass through socket wrench set
- You will have to drill/file down the pass-through on the stock top hat to make it round, it will have two flat areas that were very helpful in getting the top hat screw off because they prevent the strut rod from rotating but the KW strut rods are round and won't fit. I didn't have the perfect size bit for the job so I ended up using a smaller one and just grinding down the flat areas until I had removed enough material for it to slide onto the KWs.
- Re-assemble
Pretty much exactly the same on all four corners. I needed a nice install like this to get my hands dirty, its like therapy!
The stock 25 year old suspension was TIRED and noisy, pretty sure a couple, if not all, of the struts were blown, the KW V3 was a much needed refresh, now she feels extremely tight and less noisy, plus I can now fine-tune the ride height and stance for those new aggressive fitment HREs when they arrive!
**This mod also drove my decision for replacing the OEM fender liners with new OEM plastic, it will make a big difference, for me atleast!
PHOTO SHOOT!
Miscellaneous Restorations ~~~~~~~~~~~~~~~~~~~~~~~~~~~~~~~~~~~~~~
10-14-18
A few small detail restorations:
1. Rear hatch rubber bump stop replacement, hopefully this will keep the rear hatch from squeaking like an old school bus! I was only able to replace the stoppers on the hatch as the ones on the body are held in by Phillips head screws with a ridiculous amount of thread lock on them and strip easily...will have to drill them out later. Hopefully replacing the hatch stoppers is enough to end the squeaking...we'll see.
2. I was missing the battery tie down and the plastic surround was all cracked so I replaced them all!
3. The drivers carpet hook was broken, the replacement part was from the '98 catalogue, not exactly the same but a form/fit replacement and you get two in the package!
11-20-18
Just got the Supra back from Freed Engineering. The car had several 'ninja issues', the turn signal system stopped working, the car was blowing smoke on cold start and the turbos seemed really noisy at lower RPMs. Plus I wanted a professional leak down and compression check done so I decided to take her in!
Well...I had three different leaks in the coolant system, a bad water pump seal, a completely compromised hose to the stock surge valve, a missing vacuum hose to one of the waste gates and a bunch of bad connections in my fuse box. On top of that I had them address the old corroded battery terminals, upgrade the radiator hose to a Titan Motorsports elbow and extract the stripped screws on the rear lower hatch stops so I could throw in the new ones I had ordered.
WOW! All these issues were present when I bought the car so I just assumed that's how the car ran! The motor runs like a top now, the car doesn't feel like a dog in lower RPMs and has a much smoother transition to boost, the stock auto seemed to be much more lively and appropriate with gear selection based on throttle position, no more smoke, turn signals work and best of all...about an 80% reduction in interior squeaking/rattling noises :sadance:
Needless to say I'm very pleased!
11-22-18
When I was finished with the KW V3 Suspension install I was looking for satisfying before and after pictures but the condition of the fender liners ruined the ‘newness’ feeling for the wheel wells because they were covered in rubber and grime so I decided to replace them! Very simple install, the hardest part is finagling the upper liner back into place and lipping it into the fender. I also took the opportunity to adjust the KW V3s up about 1.5 inches because she was doing a good bit of rubbing at the original level.
Now my wheel wells are so fresh the factory stickers are still on them!
Now its time for some Brembo Brakes and the wheel wells will be on-point!
PHOTOSHOOT CHECKPOINT 10-15-18~~~~~~~~~~~~~~~~~~~~~~~~~~~~~~
A few more shots from after the KW V3 Coilover Suspension Install from my friend Shaun @stillnahrich
PHOTOSHOOT CHECKPOINT 11-1-18~~~~~~~~~~~~~~~~~~~~~~~~~~~~~~~
A few quick shots from this weekend, starting to get cold out!
PHOTOSHOOT CHECKPOINT 11-17-18~~~~~~~~~~~~~~~~~~~~~~~~~~~~~~
Took some shots around the house, one thing has become clear...I am not nearly skilled enough to take care of the original black paint...its obviously been polished before but I've managed to add some swirls to the paint in my ham fisted care...I'm seriously considering having it professionally polished then doing a full body PPF like XPEL so I can protect the paint and also ease cleaning/care.
Last edited by Curt2000; 11-22-2018 at 07:10 PM.


Thread
Thread Starter
Forum
Replies
Last Post
seangts
Automobiles For Sale
13
02-13-2017 11:17 AM