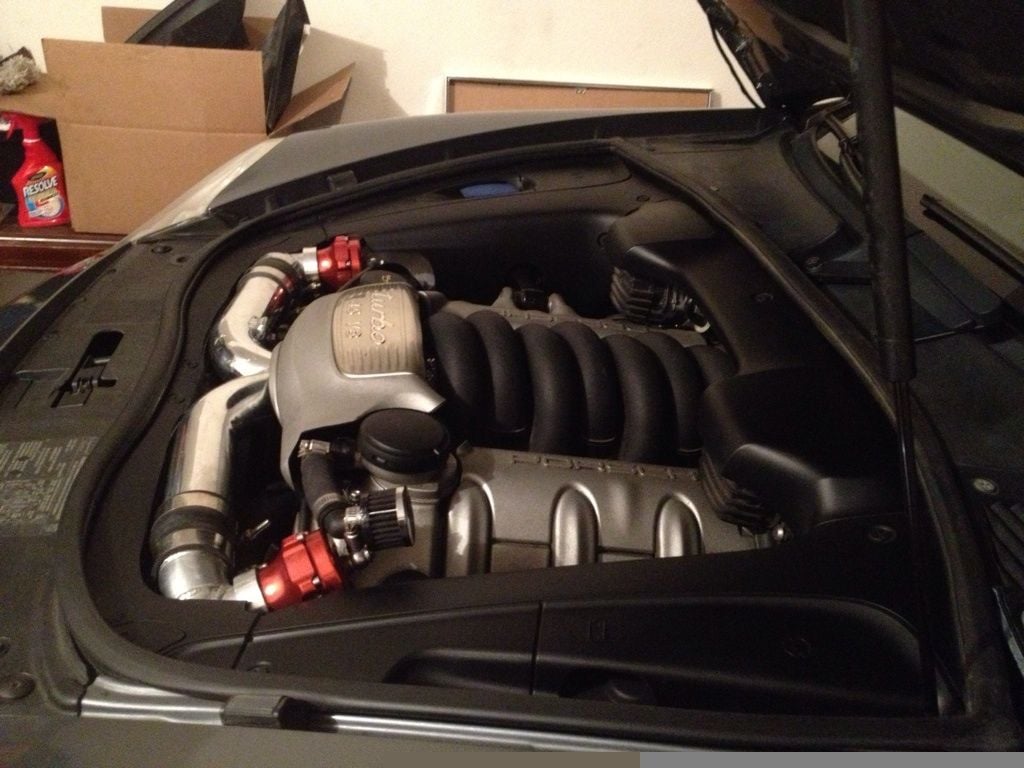
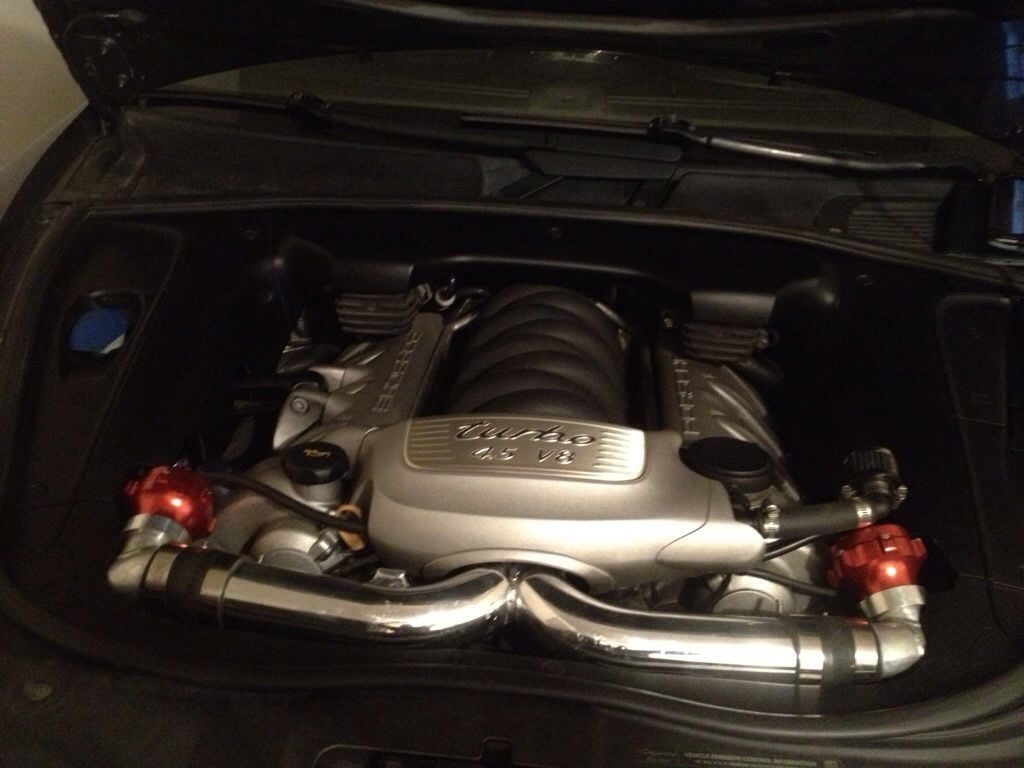
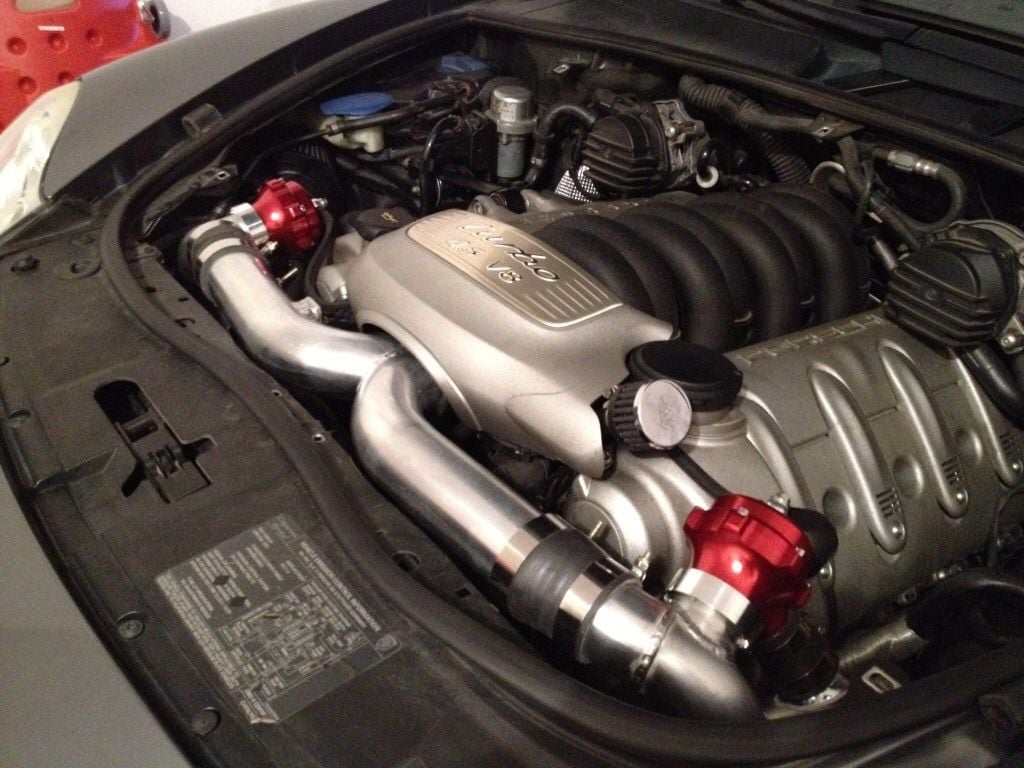
Hyperboost HX Diverter Valves installed
#33
Hey, great write up and pics, I just noticed you have replaced diaphragm type bovs (diverter valves) with piston type valves, diaphragm types can be mounted either way, but piston type must be mounted with the pressure side (from the turbo) opposite the vacuum fitting, otherwise they won't open completely, the pictures show them mounted back to front.
#35
I picked up a pair of Hyperboost HD Diverter Valves from Pete at Stratmosphere.

Installed them last weekend. Getting off the throttle is very smooth now after hard acceleration. Getting on the throttle it seems like boost is built faster or more is available now. Overall the Turbo seems to drive smoother. This mod was done in order to replace the OEM diverter valves from Bosch that are known to leak or wear down over time and to make sure I have the best performing parts in the car prior to upgrading the boost with an aftermarket chip if I decide to.
The install isn't overly hard, but doing it for the first time without know where all the bits are etc was time consuming. Hopefully this info and these pictures can help others with the install.(this is a great time to install clear corners as well)
First take off both front wheels and wheel liners.
Then take off the front lower black air pan.
On the passenger side looking to the left of the intercooler you will see this:

You will notice there is a kink the hose from the factory. We will fix this later:

You can slide out the plastic cover around the back of the intercooler by pulling it to the right. This will give you more room to work.
Pull the vaccum line off the top the valve and then use locking vise grips or pliers to open the hose clamps. Slide each nozzel out it's hose.
(optional step here)
Take the vaccum line and follow it up to the front of the engine where it connects to a T. Remove it from the T and install the part with the memory kink it in here. In other words flip the vaccum line around so that the part with the kink is on T. OR you could go and buy an entire replacement vaccum line.
Then cut off about an inch of the hose and pick up a plastic 90* 3/16 fitting from your local auto parts store.
When it's done it will look like this:

Reverse the instructions to put this side back together.
The drivers side is hidden. You won't be looking for it in the same location as the passenger side, and you might even be able to leave on the wheel liner but I'm not sure.
After removing the lower tray you can look up and find the boost hose. Hiding behind it will be the other valve:

This is what you are looking for:

Remove that black boost hose and this is what you will see:

This will give you room, but not much. It is very tight in there, but it IS possible to get it out AND reuse the OEM hose clamps.
You will reuse the stock vaccum hose with no modifications.
Here is the new valve installed:


Again reverse install everything. Let the car warm up and take it for a test drive. Listen for any boost leaks and watch your boost gauge as you go up through the rpms. Just like stock it should peak at 0.6bar and then start to fall above 5500-6000rpms. Boost should come on at 2000rpms.
Here is the website for the Hyperboost HX valve:
http://www.stratmosphere.com/hyperboost.htm
Anyone thinking about a chip should consider this, and anyone who has a chip should DO IT!

Installed them last weekend. Getting off the throttle is very smooth now after hard acceleration. Getting on the throttle it seems like boost is built faster or more is available now. Overall the Turbo seems to drive smoother. This mod was done in order to replace the OEM diverter valves from Bosch that are known to leak or wear down over time and to make sure I have the best performing parts in the car prior to upgrading the boost with an aftermarket chip if I decide to.
The install isn't overly hard, but doing it for the first time without know where all the bits are etc was time consuming. Hopefully this info and these pictures can help others with the install.(this is a great time to install clear corners as well)
First take off both front wheels and wheel liners.
Then take off the front lower black air pan.
On the passenger side looking to the left of the intercooler you will see this:

You will notice there is a kink the hose from the factory. We will fix this later:

You can slide out the plastic cover around the back of the intercooler by pulling it to the right. This will give you more room to work.
Pull the vaccum line off the top the valve and then use locking vise grips or pliers to open the hose clamps. Slide each nozzel out it's hose.
(optional step here)
Take the vaccum line and follow it up to the front of the engine where it connects to a T. Remove it from the T and install the part with the memory kink it in here. In other words flip the vaccum line around so that the part with the kink is on T. OR you could go and buy an entire replacement vaccum line.
Then cut off about an inch of the hose and pick up a plastic 90* 3/16 fitting from your local auto parts store.
When it's done it will look like this:

Reverse the instructions to put this side back together.
The drivers side is hidden. You won't be looking for it in the same location as the passenger side, and you might even be able to leave on the wheel liner but I'm not sure.
After removing the lower tray you can look up and find the boost hose. Hiding behind it will be the other valve:

This is what you are looking for:

Remove that black boost hose and this is what you will see:

This will give you room, but not much. It is very tight in there, but it IS possible to get it out AND reuse the OEM hose clamps.
You will reuse the stock vaccum hose with no modifications.
Here is the new valve installed:


Again reverse install everything. Let the car warm up and take it for a test drive. Listen for any boost leaks and watch your boost gauge as you go up through the rpms. Just like stock it should peak at 0.6bar and then start to fall above 5500-6000rpms. Boost should come on at 2000rpms.
Here is the website for the Hyperboost HX valve:
http://www.stratmosphere.com/hyperboost.htm
Anyone thinking about a chip should consider this, and anyone who has a chip should DO IT!
#36
That looks great. Any plans or a a thread with pics on how you did it all? Sure would make changing them out a whole lot easier!!
#37
Hey jdub... I had posted these pics along time ago so they might still be hanging around! It was a geat setup!  The setup itself isn't that difficult, just requires some custom fabrication.
 The setup itself isn't that difficult, just requires some custom fabrication.
Last edited by 03EvoIII; 08-30-2014 at 08:18 PM.
#38
So you made it yourself? Looks very clean and nice!!
#39
OK, I don't see why everyone said this was so hard. It was a little tight on the driver's side but not that bad. With the remote clamp pliers it was just a matter of getting them at the correct angle.
I didn't take either wheel off and only took the passenger side wheel well liner loose. You can get to all the fasteners for it with the tire still on. Actually I almost had just as hard a time getting the passenger side top clamp off as the driver's. The shroud for the intercooler kept getting in the way.
But they are done and the whole project only took me a couple hours. Well, so far. I left the bottom trays off when I did the bypass pipes last week so that saved me a little time. And I still left them off until after I go for a test drive to make sure it all holds.
#40
Hey, great write up and pics, I just noticed you have replaced diaphragm type bovs (diverter valves) with piston type valves, diaphragm types can be mounted either way, but piston type must be mounted with the pressure side (from the turbo) opposite the vacuum fitting, otherwise they won't open completely, the pictures show them mounted back to front.
So in this picture the boost side is on the left which means, on mine at least, I should have the top of the valve with the vacuum fitting opposite it.
#41
https://www.6speedonline.com/forums/...ml#post3744975
#42
There are install pics in this thread that may help you out:
https://www.6speedonline.com/forums/...ml#post3744975
https://www.6speedonline.com/forums/...ml#post3744975
In the AP valves I bought the piston moves vertically from the bottom inlet to the top (top being defined as the end with the vacuum fitting). Which would mean the 90 deg side is the outlet.
In the picture I posted from the original post in this thread that means the bottom needs to go into the hose on the left which is not how he installed his and not how I installed mine.
I swapped the driver's side last night but didn't have time to do the passenger and only a short drive to work this morning. I'll swap the other and take it for a drive tonight to see if it fixed my issues.
And searching for info today I found these which look very nice. Half again the money but also adjustable. Interesting....
http://synapseengineering.pinnacleca...product&id=626 And these guys say theirs can be installed in either push or pull configuration.
#44
I moved the passenger side valve and went for a drive. Still losing boost at the top end. It runs right up to .8bar+ then starts quickly falling back. I pushed on the valve in the AP and it didn't seem to be nearly as stiff as the original valve.
I guess I'll put the old ones back in tomorrow and see what happens. If that fixes it a call to Agency Power will be in order. If it doesn't then I need to find where I'm losing boost.
I guess I'll put the old ones back in tomorrow and see what happens. If that fixes it a call to Agency Power will be in order. If it doesn't then I need to find where I'm losing boost.
#45
If you are losing boost, then I suggest putting a small zip tie around the 6mm vacuum line that activates the boost valve.


