When you click on links to various merchants on this site and make a purchase, this can result in this site earning a commission. Affiliate programs and affiliations include, but are not limited to, the eBay Partner Network.
OK, looks like I am going to remove the steering rack. That seems to be the only way to access these lines that I should have dealt with last year.
I know there are threads here dealing with the rack removal, but for those who have done it, any words of advice or tips?
Thanks.
@2007Conti ,
Before you go that far into it, see if by removing just the passenger side heat shielding, you can gain access to the factory tee, the heat shield is held on with two fasteners, either nuts or screws, I can't recall at the moment, but either fastener is located at 9 & 3 o'clock positions, the inner portion of the shield is help in place by z style clips, that you most likely can't see, once the outer nuts or screws are removed, the shield just slides out off of the inner clips.
Also, turning the steering wheel all the way to the left will likely give you more access, and ease as the tie rod end will be further away from the access area.
Thanks Johnny but no such luck. I can barely touch the tee with the rack in the way. Working to remove it now. The infamous "Third Bolt" is living up to it's reputation. It's taking every bit of ingenuity that I have to not only get to it but to remove it. Almost out now and getting ready to disconnect the steering shaft. Then it should be out.
OK, that was a bunch of no fun. The rack is OUT. Now a few questions on where to tie in vacuum:
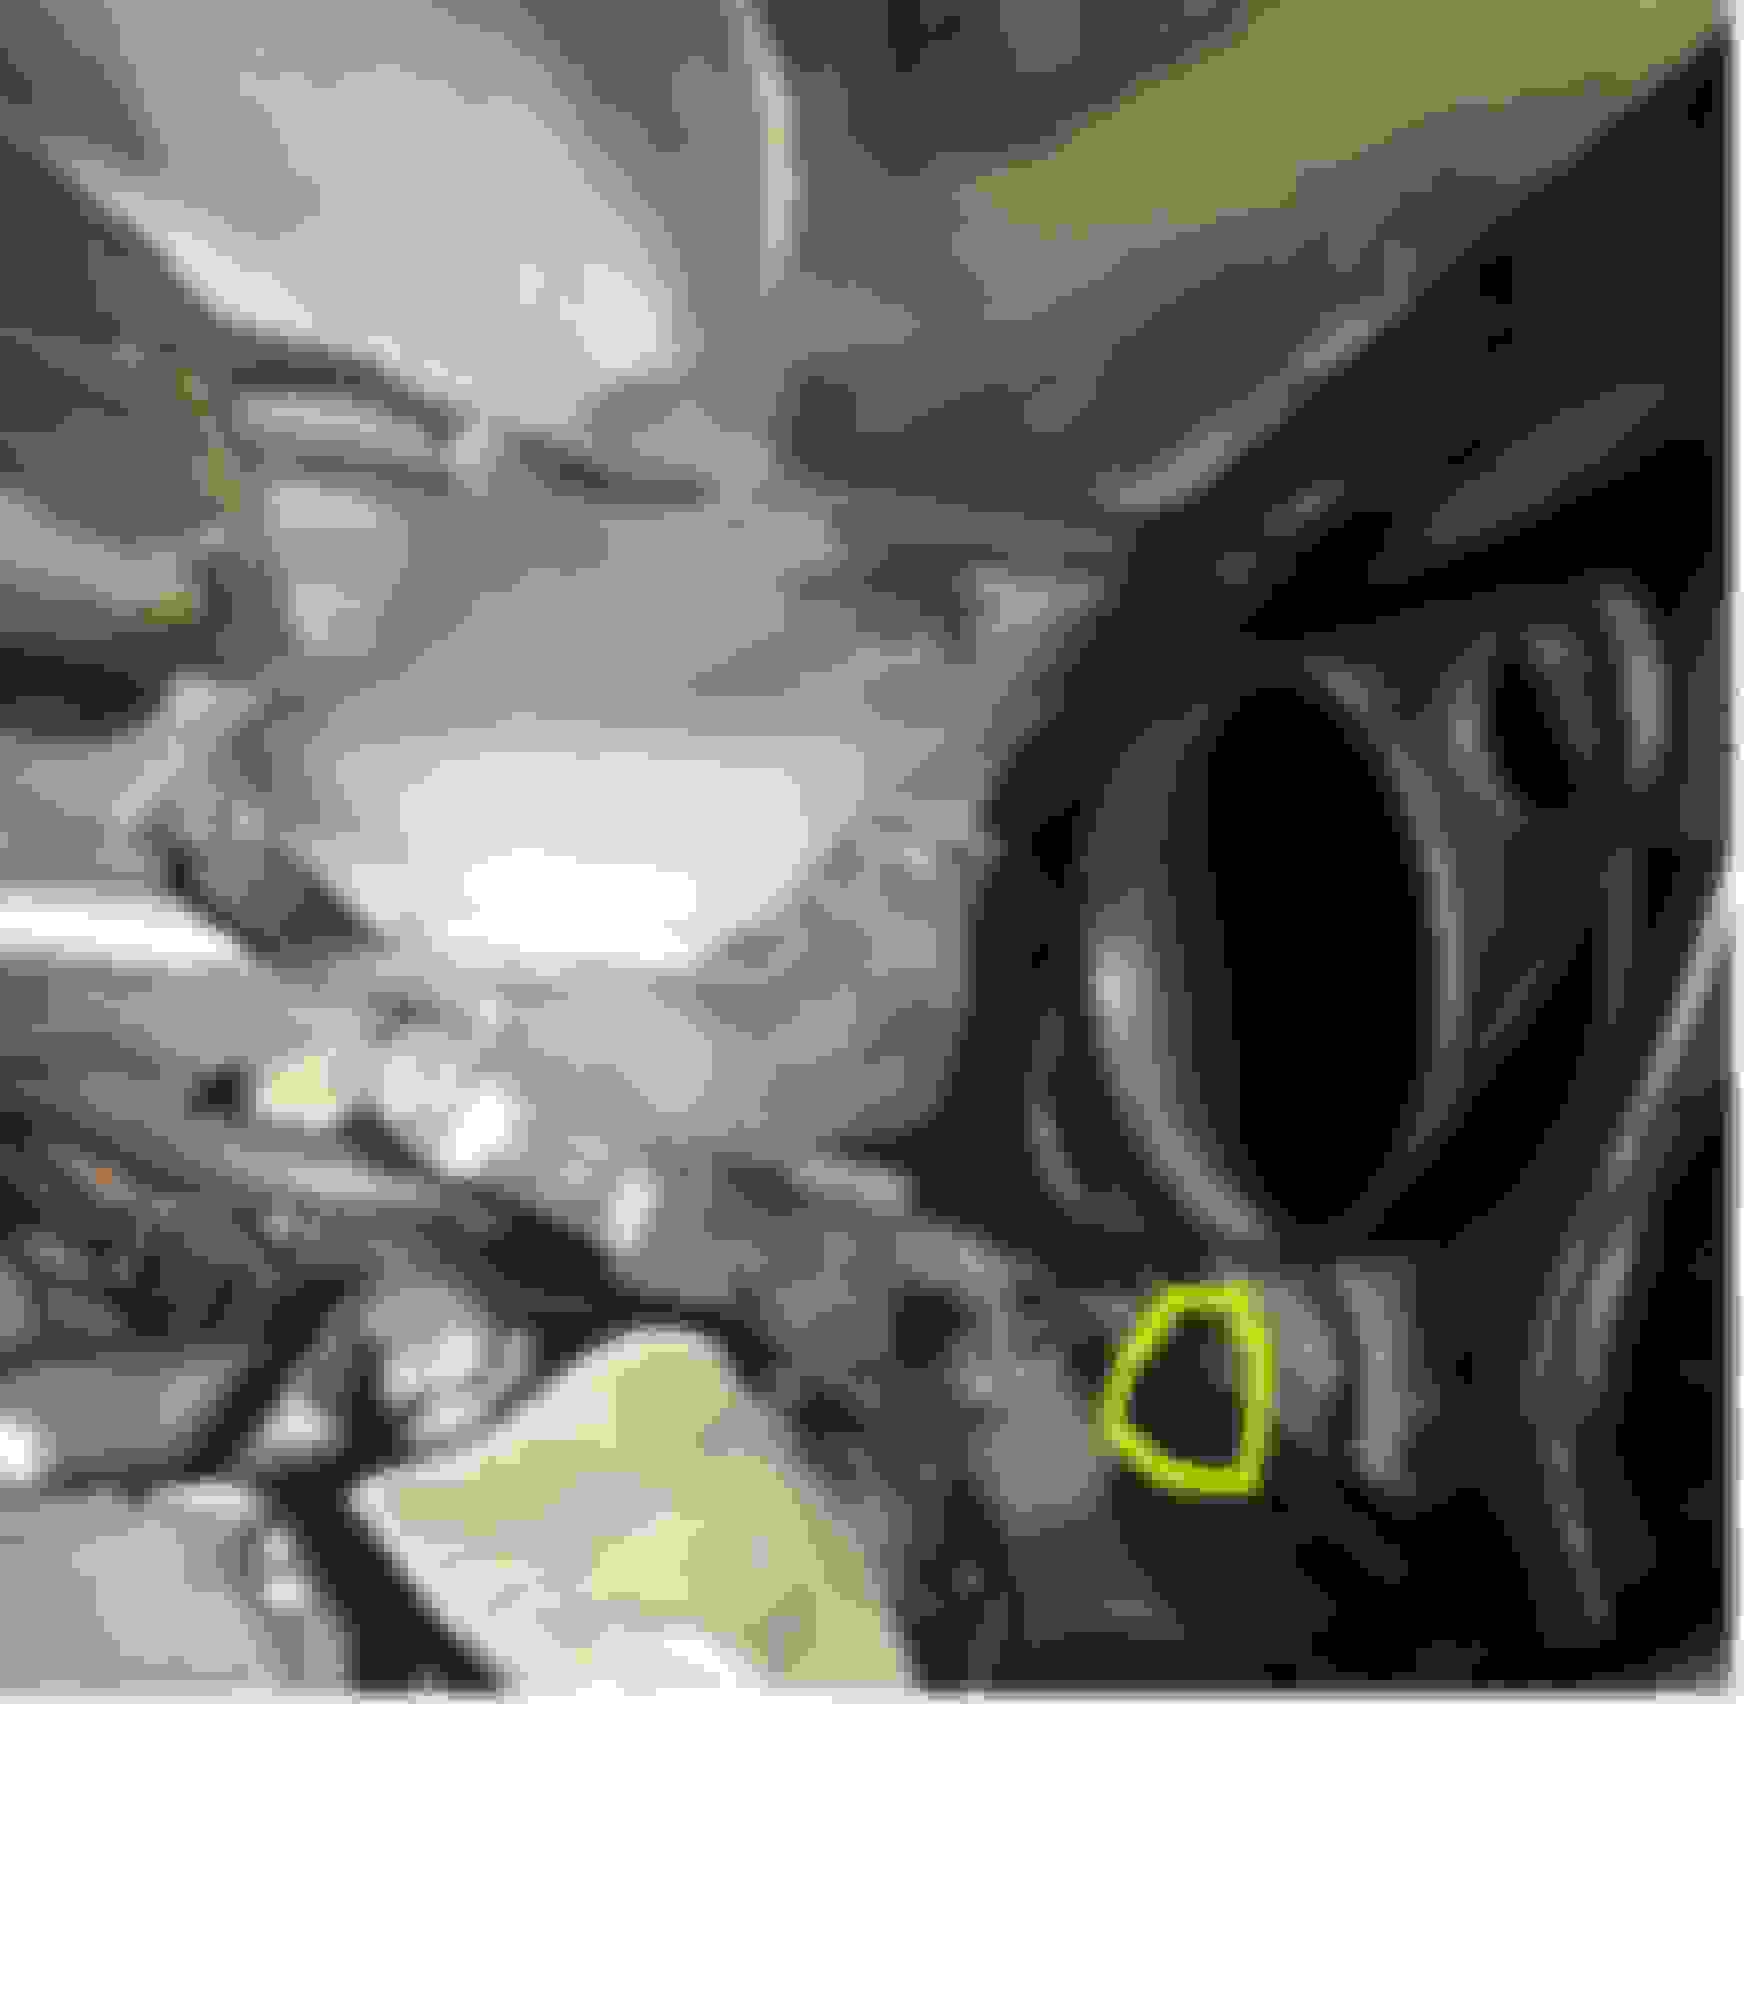
the tee on the passenger side.
So is the area marked #2 the line that goes up to the back of the engine? I'm thinking of hooking my vacuum line to the area marked #1 and capping #2. Would this be correct? This would provide vacuum to the large line that goes to the brake booster, right?
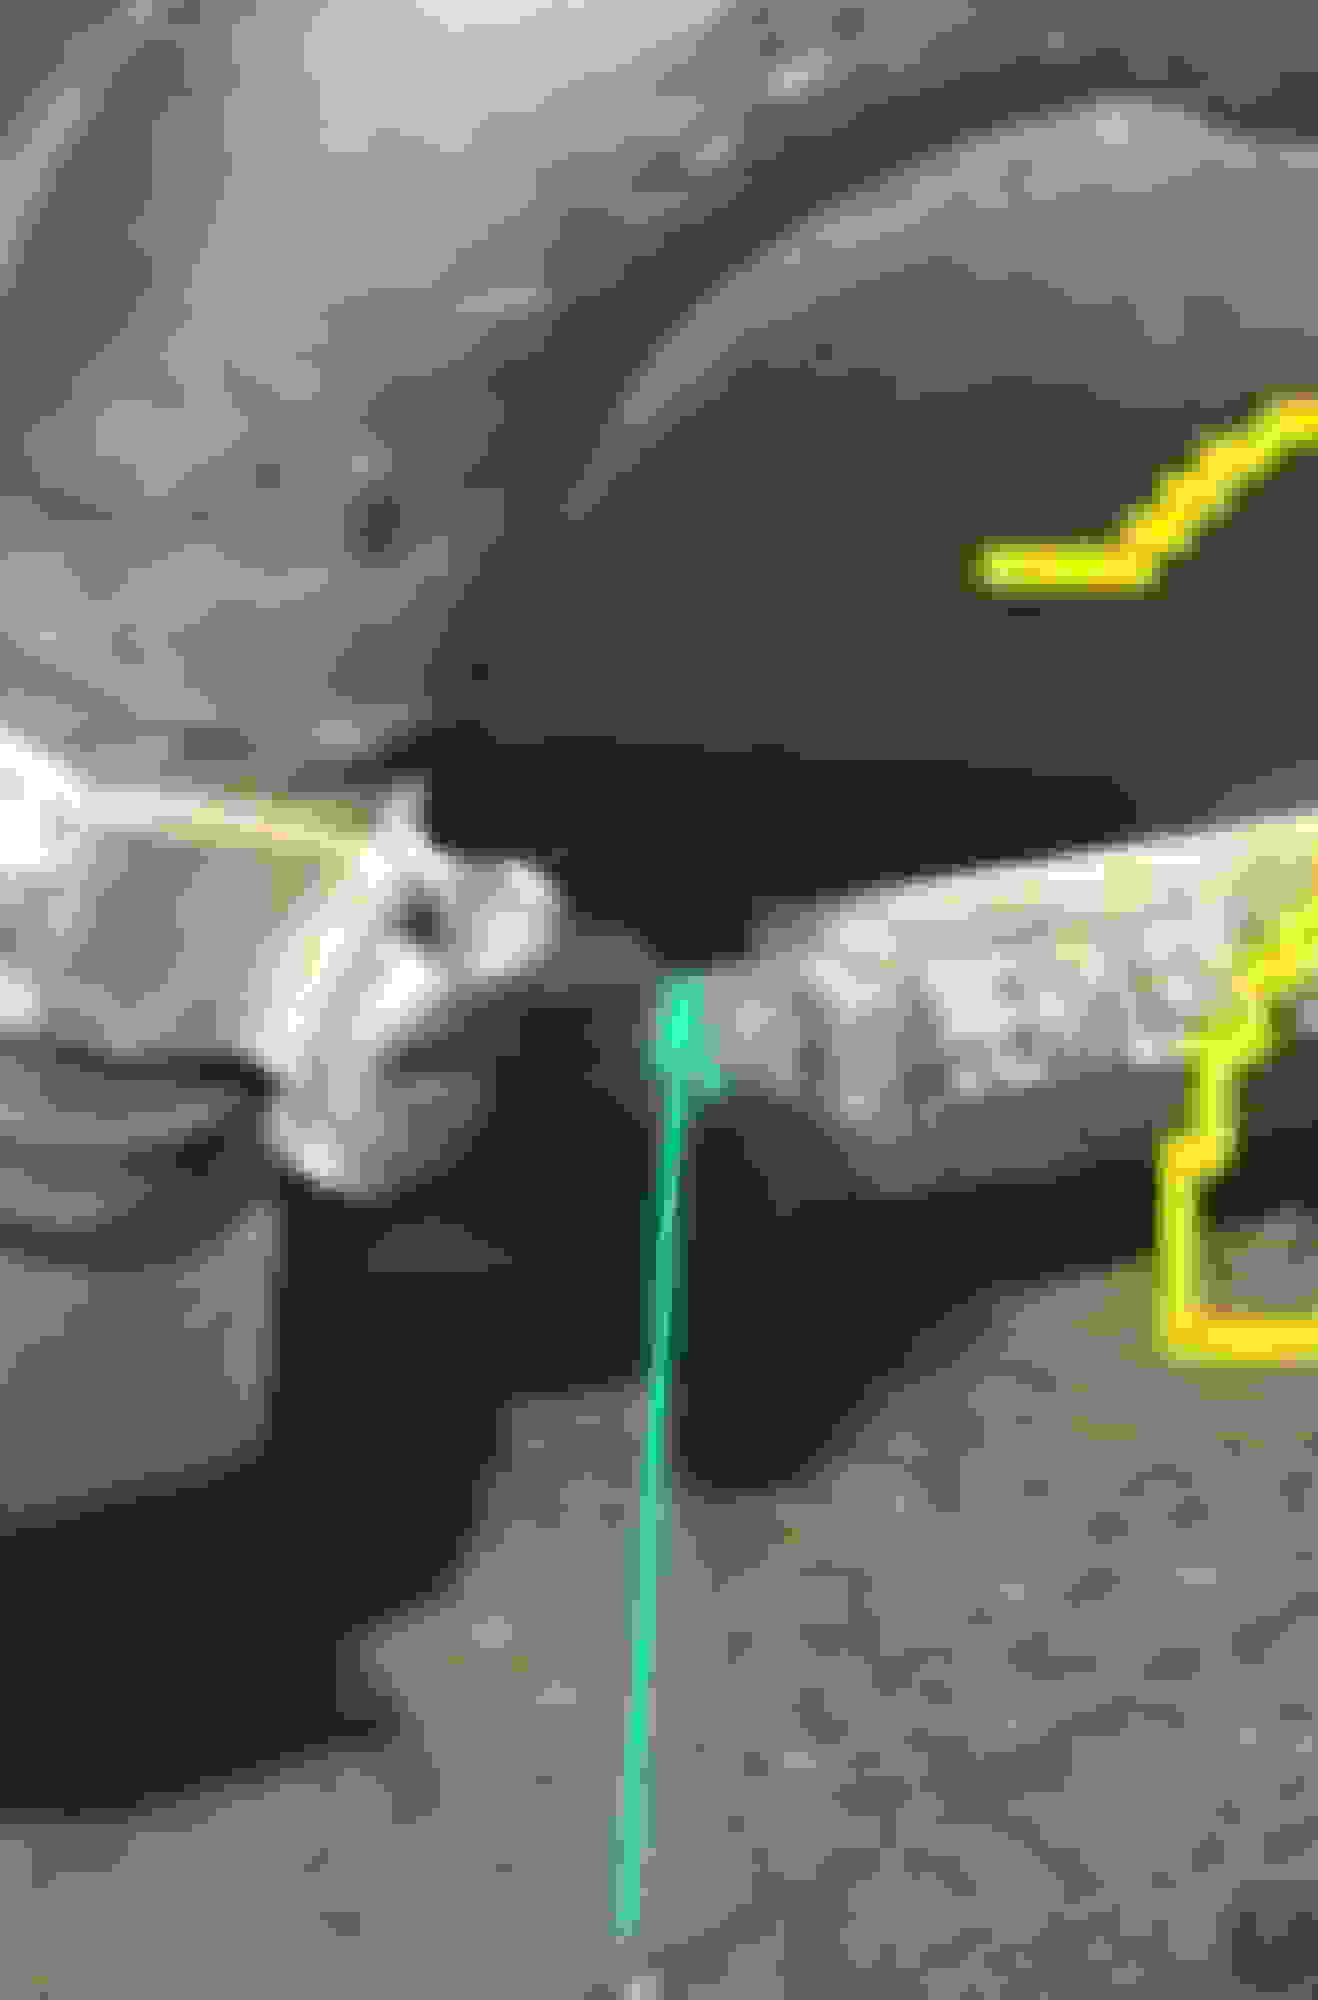
driver side
Is this line connected to the large line on the other side? If so, can I cap this circled area and still have vacuum to the large line on this side provided by the other side?
Just want this to be the LAST time I deal with this and get it right this time.
@2007Conti ,
That driver's side line does NOT get touched, it goes to the driver side turbo.
The line that you numbered "2", Yes, you would cut/remove that line number 2 from the tee, and cap the tee port it came off of, now, as you have already ran a vacuum source up to the rear center of the engine, the center tee is out of the equation as far as feeding the center line up the firewall, and as you already cut the line that used to come from the pump/ball *****, and ran you copper line, now that whole center line is dead.
BUT, OF MOST IMPORTANCE !!
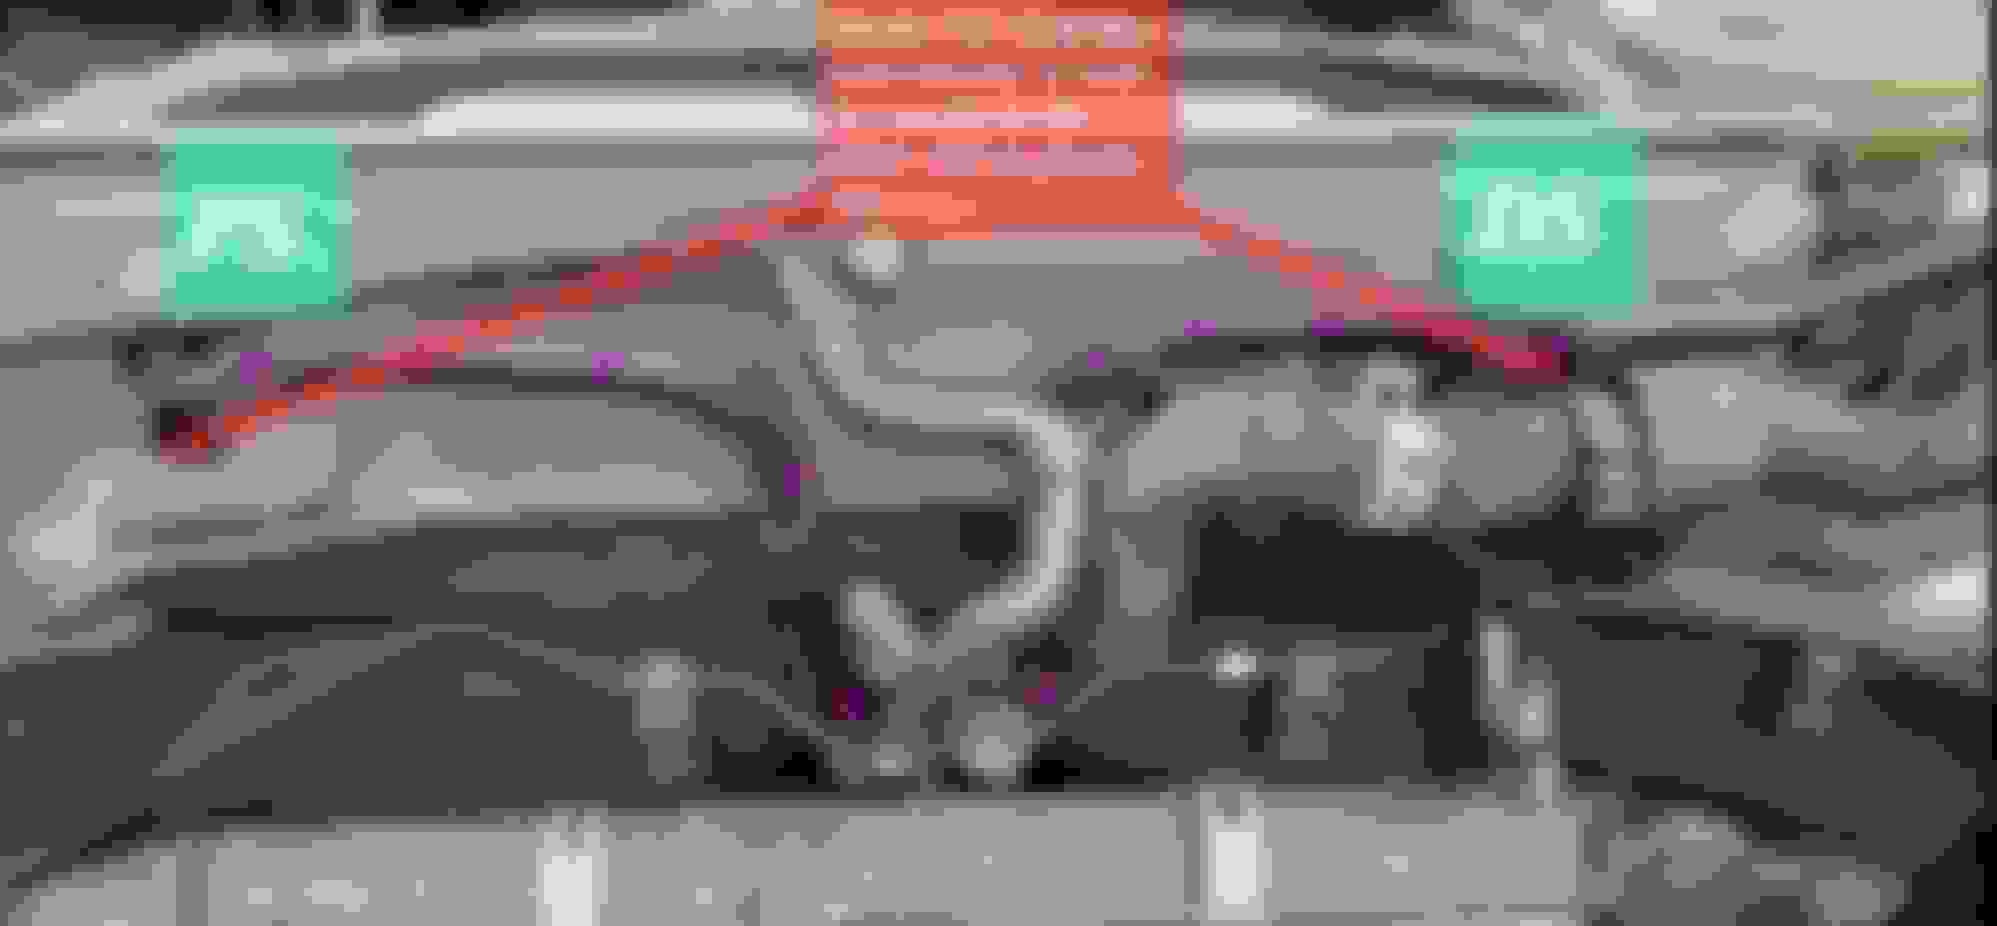
Smoke test the two large lines from the rear of the intake manifold down to the rack area as pictured, these are a major issue and loss of vacuum.
Do not do all this work without being sure these lines are good, as you can see in my video, mine were cracked !
Edit: I just realized that my video didn't show the cracks at the bottom of the large lines, only their tops with cracks, I can tell you that the cracks at the bottom of the large lines was way worse than the cracks at the top.
.
I see a gapping hole on your number 2 line...
Johnny
.
Last edited by Johnny Hotspur GT; Mar 10, 2023 at 11:22 AM.
OH, boy. Put the rack back in before I saw this message. Took all day yesterday only to find out that I didn't fix the problem.
If I have to remove this rack again I may burn this car to the ground. Those intake hoses are probably the only ones that I haven't smoke tested. That gaping hole that you spotted was taken out of the equation when I got access to the tee. I capped off that part of the tee.
Just smoke tested the large lines from the back of the intake. No smoke from those lines down near the steering rack.
Just for kicks and giggles I plugged the intake openings where those hoses normally go in. . Car runs perfect at idle. Vacuum pump comes on when I push throttle not when I push brakes.
Really scratching my head now. Happy that there doesn't appear to be a leak at the lower hoses. Sad that I haven't found the problem yet.
Hello @2007Conti ,
Just so we can be sure that the smoke test is being done as needed, please confirm that you removed the plastic lines from the check valves, and that you didn't remove the rubber hoses from the intake manifold and insert the smoke machine into each rubber hose, as the one way check valves will not let the smoke in.
Johnny
.
Last edited by Johnny Hotspur GT; Mar 11, 2023 at 01:28 PM.
Just on the off chance check the post I made on the solenoid near the oil filler. Very easy to miss as the two legs are not easy to see. But from experience it cleared up several issues on my car related to the vacuum pump running on braking, rough idle, crappy performance and turrbo sensor implausible codes.
Just on the off chance check the post I made on the solenoid near the oil filler. Very easy to miss as the two legs are not easy to see. But from experience it cleared up several issues on my car related to the vacuum pump running on braking, rough idle, crappy performance and turrbo sensor implausible codes.
Thanks. You had leaky hoses there if I remember correctly, right?
Both of the legs had broken off and essentially I had two open hoses. It was very hard to see and this valve is under the front cover plate wo not apparent unless you really look for it. Car ran like crap, struggled on hills and threw all kind of crazy codes. A bit hard to replace only because the factory single use crimps are very difficult to cut and release. Need little hands to work it that area but it can be done. Cursing a blue streak is recommended but not required.
Both of the legs had broken off and essentially I had two open hoses. It was very hard to see and this valve is under the front cover plate wo not apparent unless you really look for it. Car ran like crap, struggled on hills and threw all kind of crazy codes. A bit hard to replace only because the factory single use crimps are very difficult to cut and release. Need little hands to work it that area but it can be done. Cursing a blue streak is recommended but not required.
Hopefully if I had a leak in that area, one of my 253 recent smoke tests would have revealed it.
As far as cursing goes, if you want to step up to a whole different level, remove the power steering rack. The bolt, affectionately known as "The third bolt" will not only test your sanity, but might cause you to question life in general.
what they created, whatever one want touch smth in this car, the job is almost impossible - steering rack, bulb in front lights replacement, lambda sensors, well known vacuum lines, third stop light ...
all requires disasembling of half of the car to replace anything or better... we should replace whole car
It sucks but I get it. That is a massive engine crammed into a not so massive space. Also, all of the things that make the car incredible take up room too. Wish I could just pay someone to fix mine, lol!


 Need little hands to work it that area but it can be done. Cursing a blue streak is recommended but not required.

 what they created, whatever one want touch smth in this car, the job is almost impossible - steering rack, bulb in front lights replacement, lambda sensors, well known vacuum lines, third stop light ...