
INSTALL: Custom Full 2.75" Y-Pipe Upgrade [PICS]

Thread Starter
|
Moderator

Joined: Jan 2011
Posts: 1,504
From: (in my garage welding something vicious)
Rep Power: 105


I should probably announce from the outset that this will be my last performance mod for a long time (possibly ever on this platform). The reality is that, besides from a major turbo upgrade, I have pretty much maxed out this platform, performance-wise 
So consider this my "pi�ce de r�sistance" as well as my farewell mod
Moving on to business, the vast majority of my performance mods were directed at opening up the intake and the exhaust backpressure, besides the methanol injection (race gas). To this end, I have an EVOMS air intake, larger 82mm throttle body and intake manifold, a cat bypass option and full 3" exhaust w/ x-pipe. The only thing missing here is an upgraded plenum and possibly upgrading the small plastic chargepipes that connect to both intercoolers.
After surveying what was available aftermarket, I was convinced there was not an option for increasing the size of the plenum and chargepipes (complete YPipe upgrade) to take full advantage of the larger 82mm throttle body. So off I went to fabricate the necessary pieces myself
DISCLAIMER
This thread is not intended for anyone to copy or imitate. I am not endorsing any products or companies. I am merely showing the steps I went through to get this working for me. If you think you want to do something similar, contact your local Porsche dealer and ask for recommendations and proceed at your own risk. I assume no responsibility for any work performed on your vehicle.
SPECIAL NOTE
Given the lengths of some of my most recent threads, I have opted instead for a photo montage punctuated with brief notes.
Skip to Conclusion with final pics here....
PHOTO MONTAGE
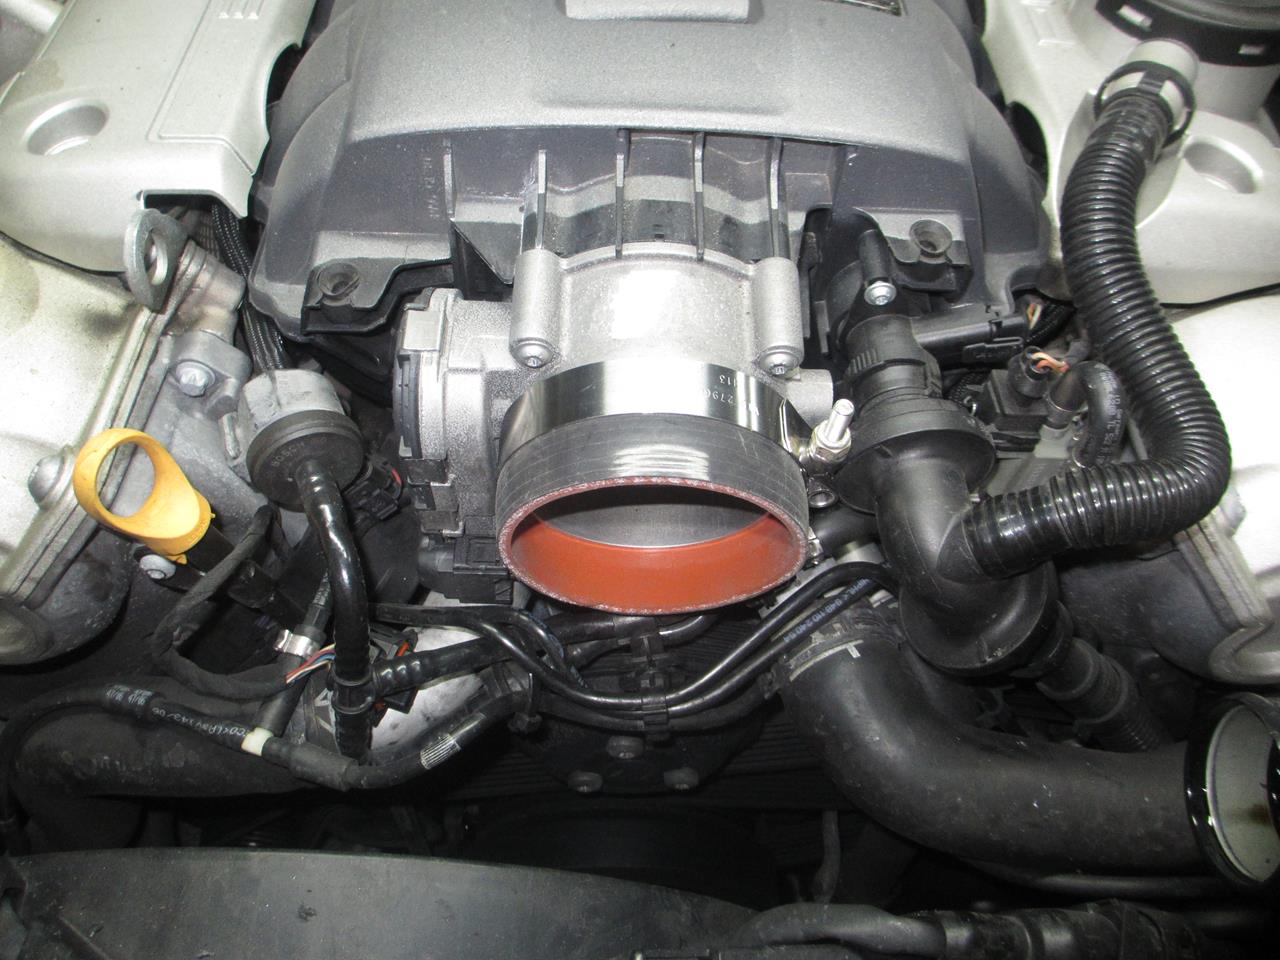
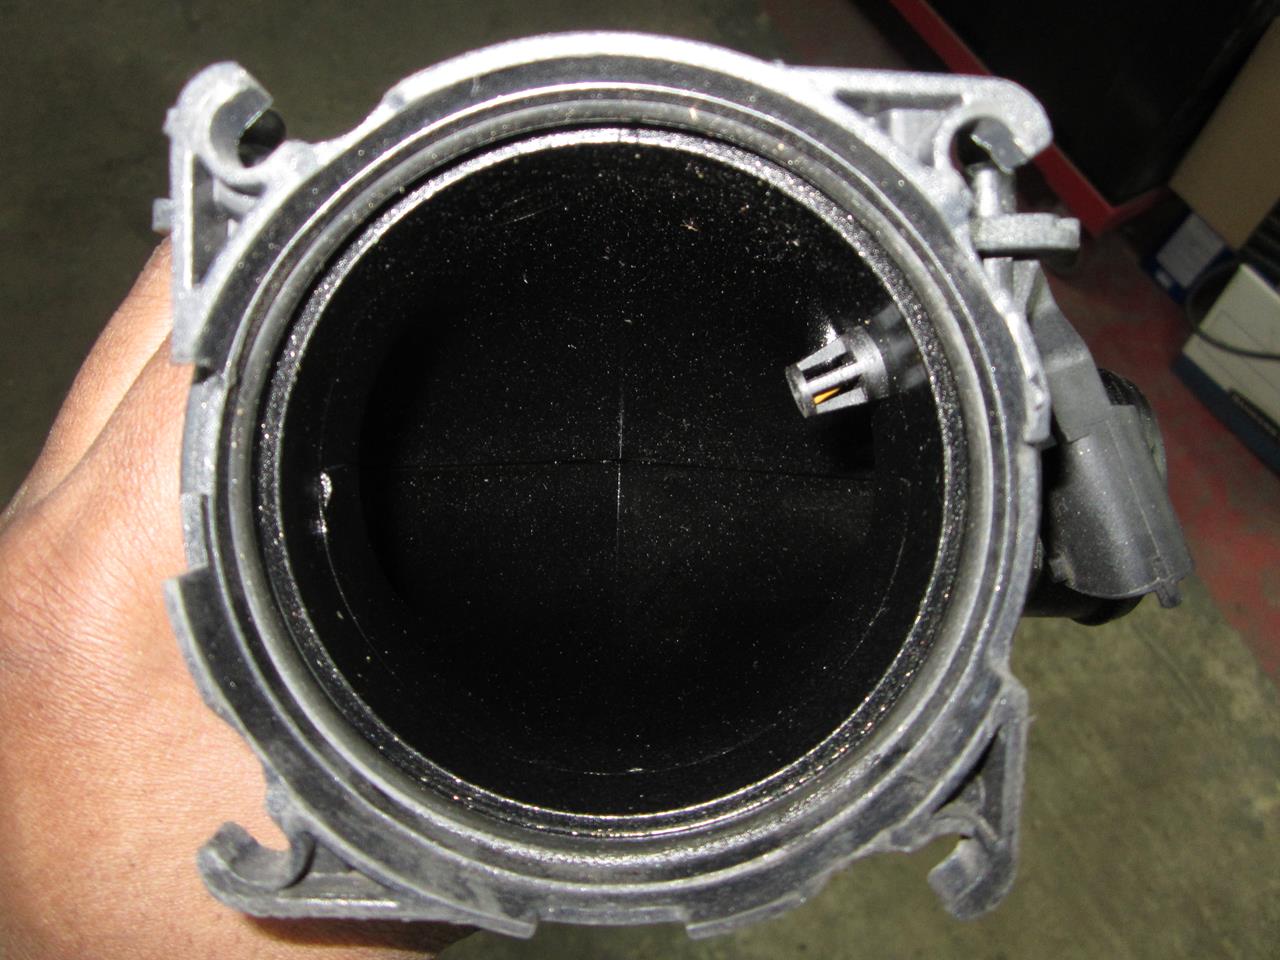
This is my starting point. You can see the plastic plenum, rubber bellow hoses, and plastic chargepipes in the from the engine. They look quite puny in stock form...
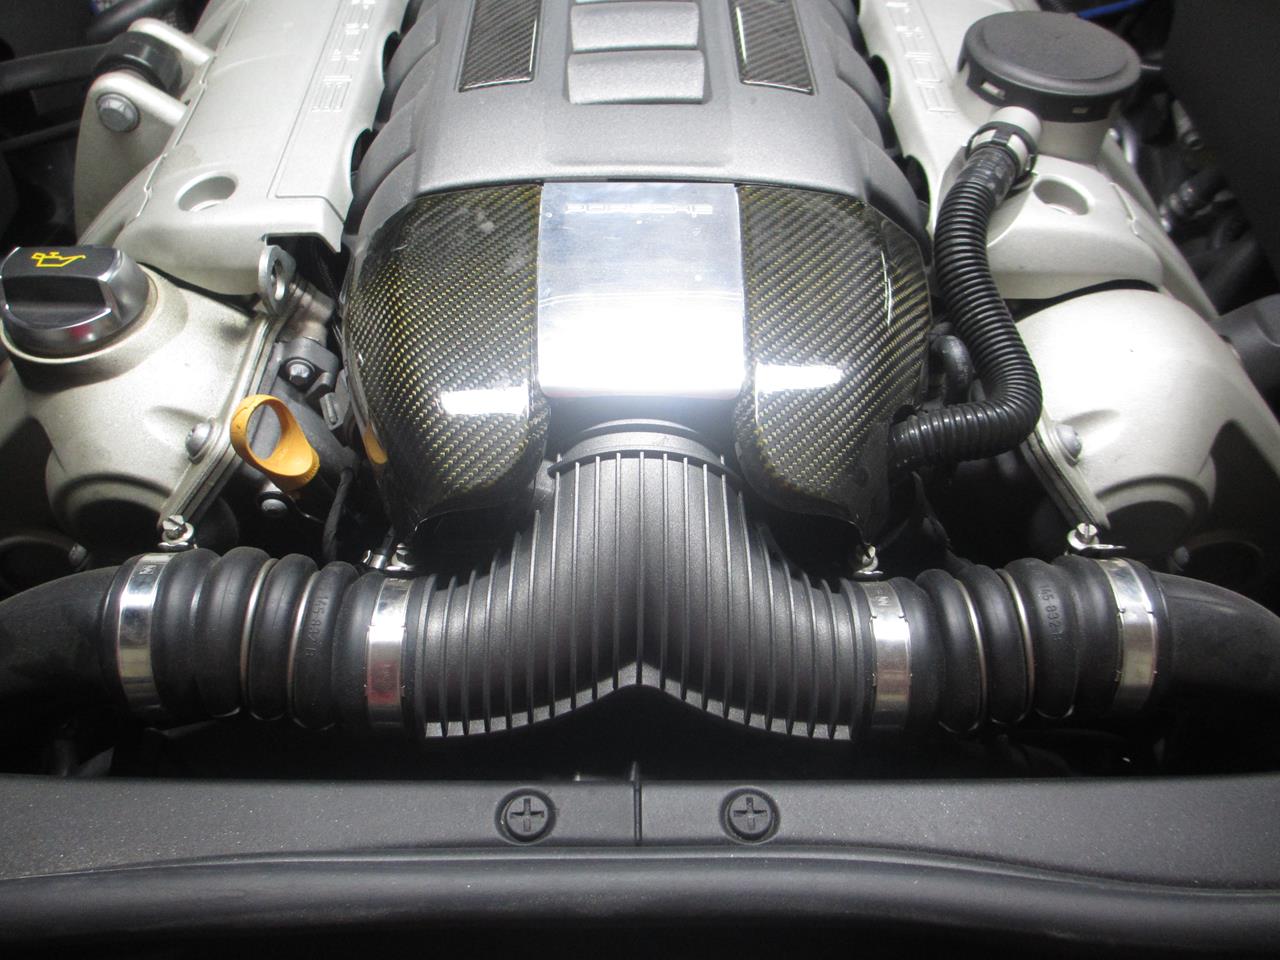
Here is my stand-in plenum from my standard turbo intake manifold. It has the same size chargepipe (intake) inlets.
You can see here that the size of the inlets are a terribly restrictive 1.8" each! According to my math, the 82mm TB, would roughly need two 2.5" pipes in order to fully max the flow of a 82mm TB (roughly 3").
So to make sure this is done right, we will build in a buffer and step up to the next size of two 2.75" pipes for overkill

Stock plenum removed. Will figure out how to use a Tbolt clamp with these extended 82mm TB screws in the way.

Here is a side-by-side of the shorter 78mm TB screw next to the longer 82mm screw. I will simply use the 78mm screws in my old intake manifold since they are tucked out of the way
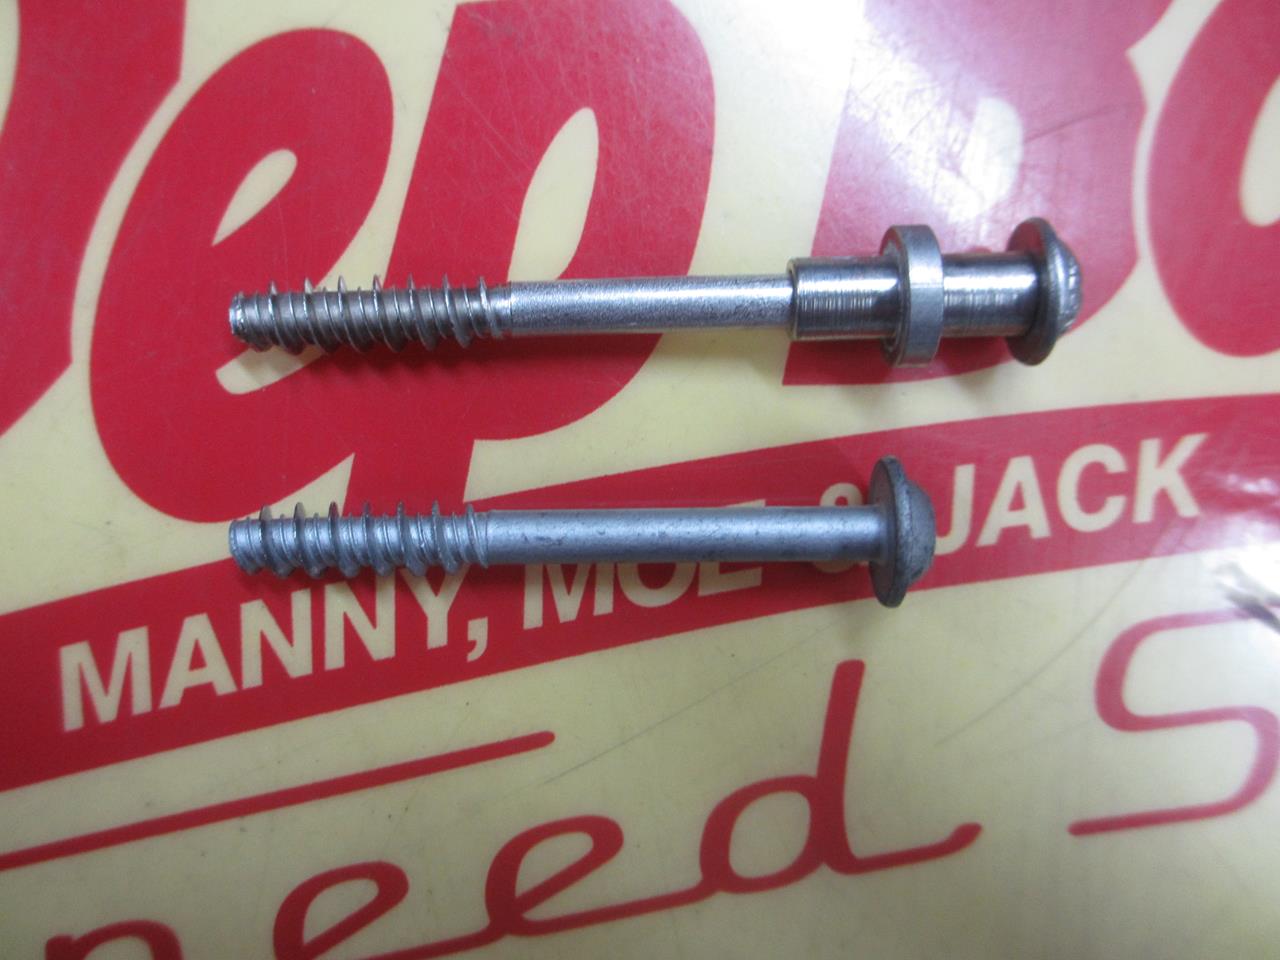
You can see one shorter screw on the left and the longer screw on the right. Just have to change them all out...
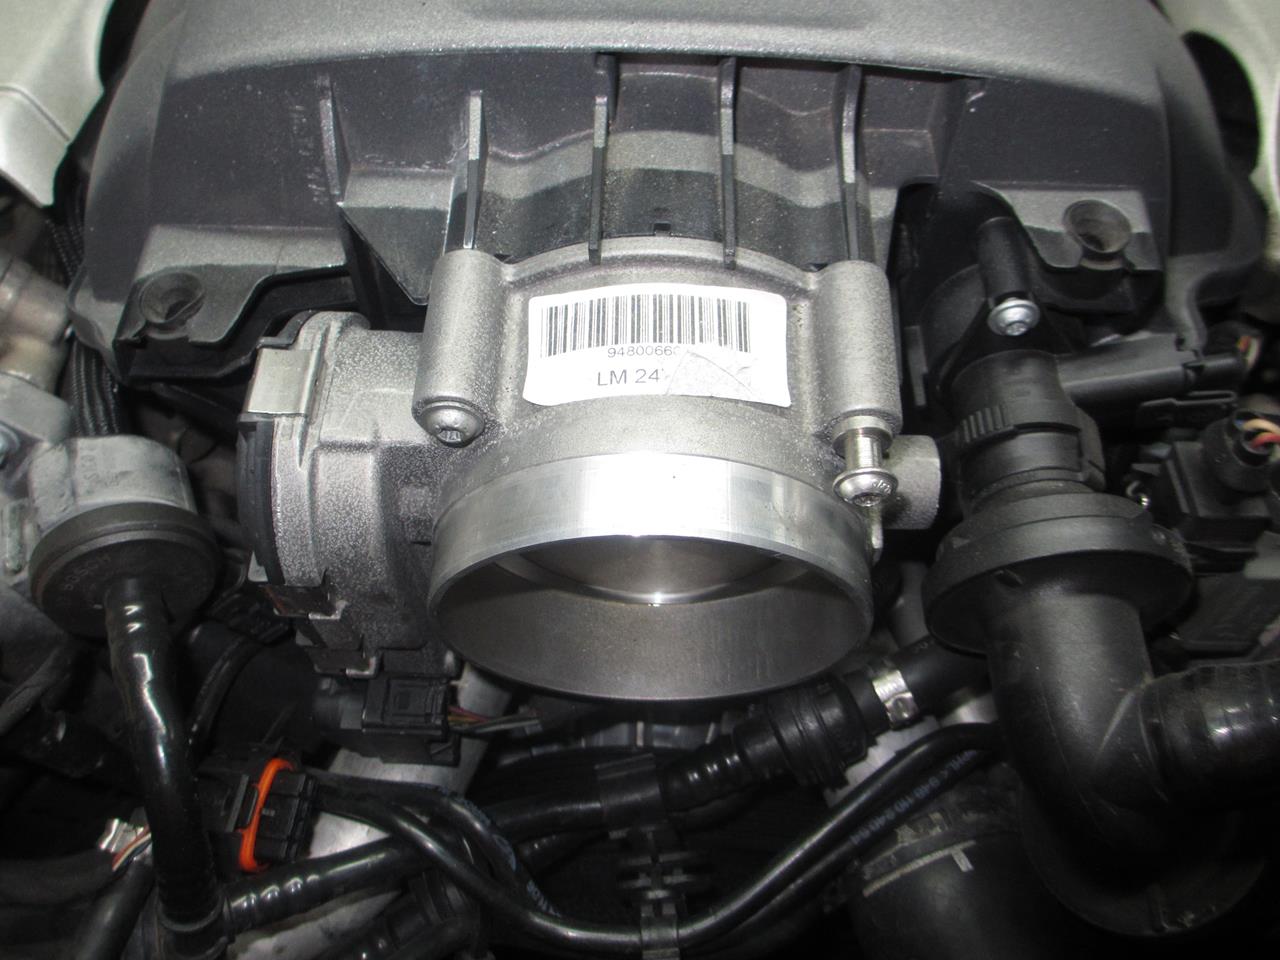
Here we go. We gained the necessary clearance in order to stretch a shortened 3.25" reducer coupler (3.5" to 3.25") over the TB lip. It is tight, but two t-bolt clamps will work here!
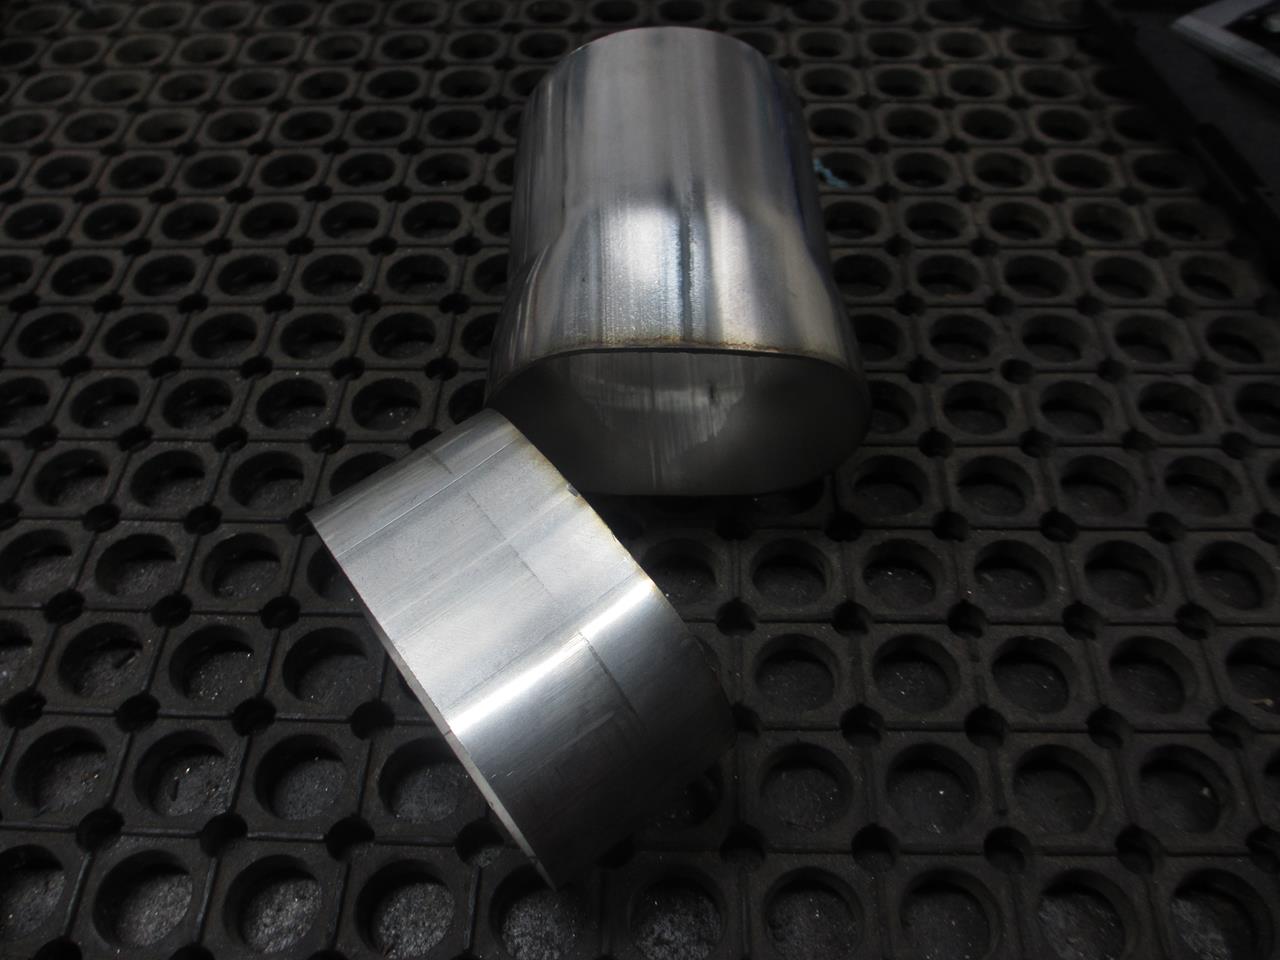
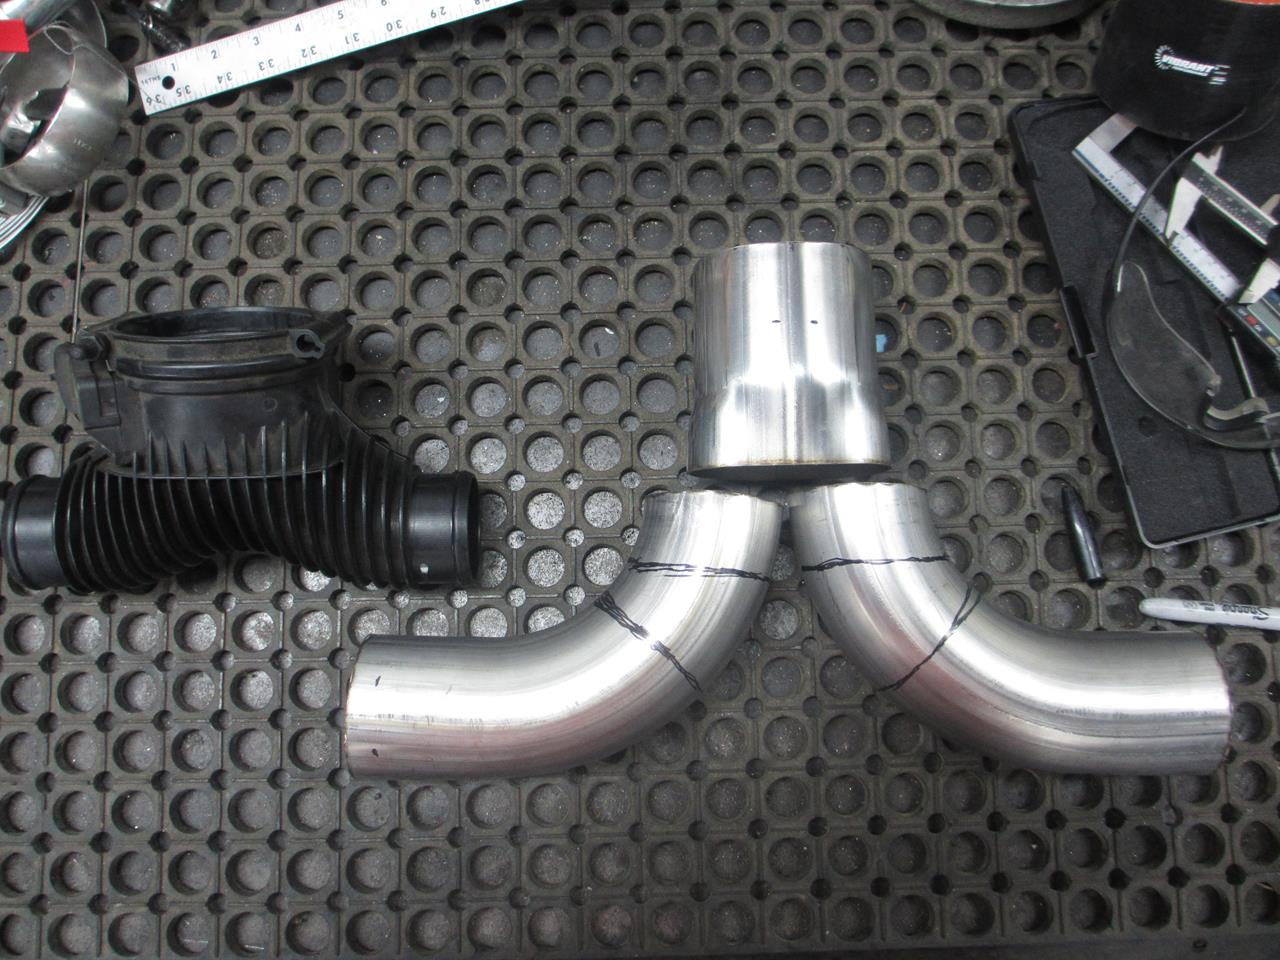
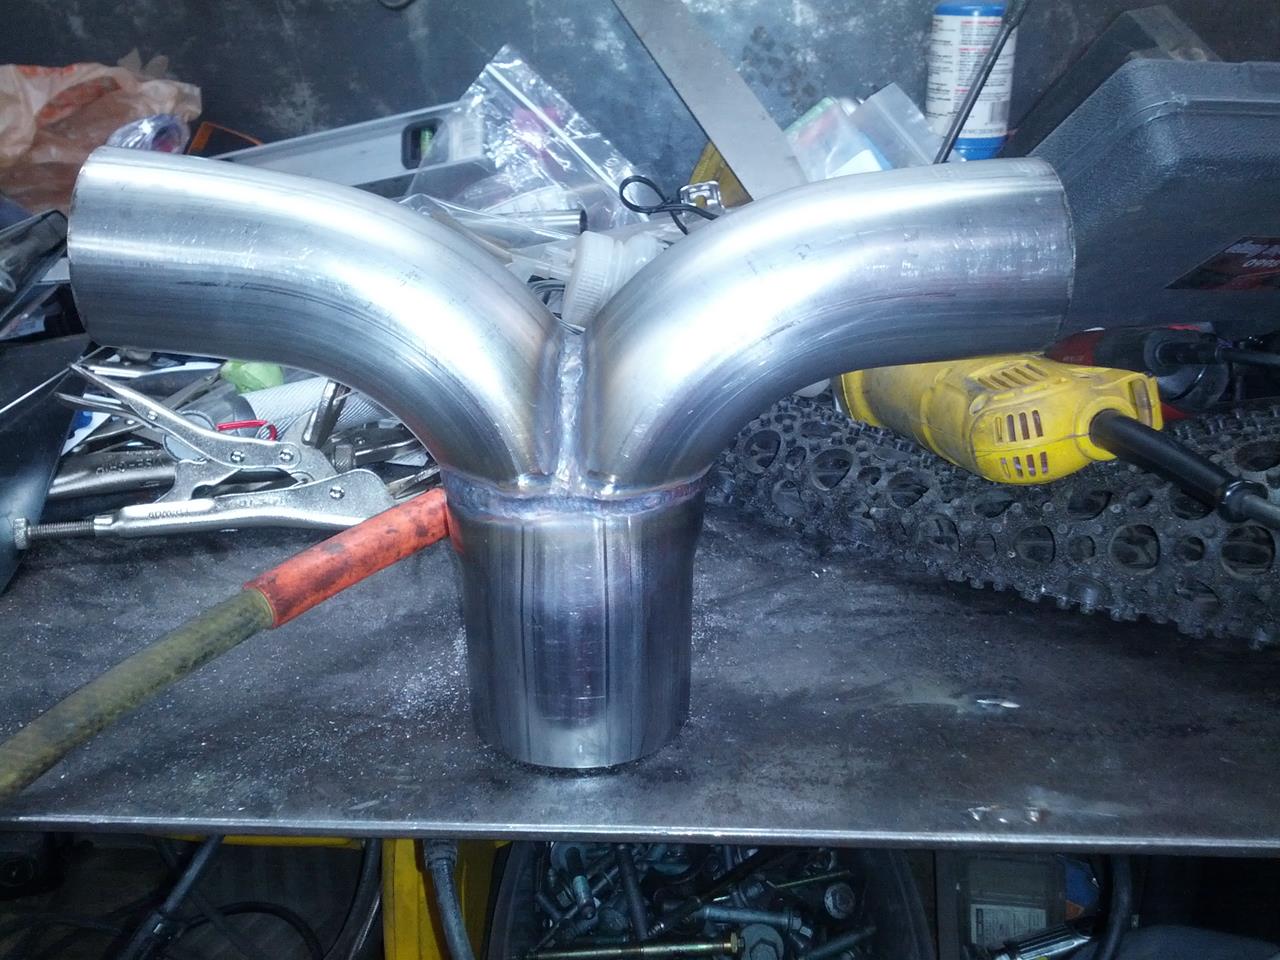
Moving on to the plenum fabrication. I will be using stainless steel for the most part since I am more comfortable with this vs aluminum. Not to mention the cleaner weld dispositions. Here is a 3.5" round to oval transition that will work for my main transition. I have already cut off the end to fit two joined 2.75" pipes.

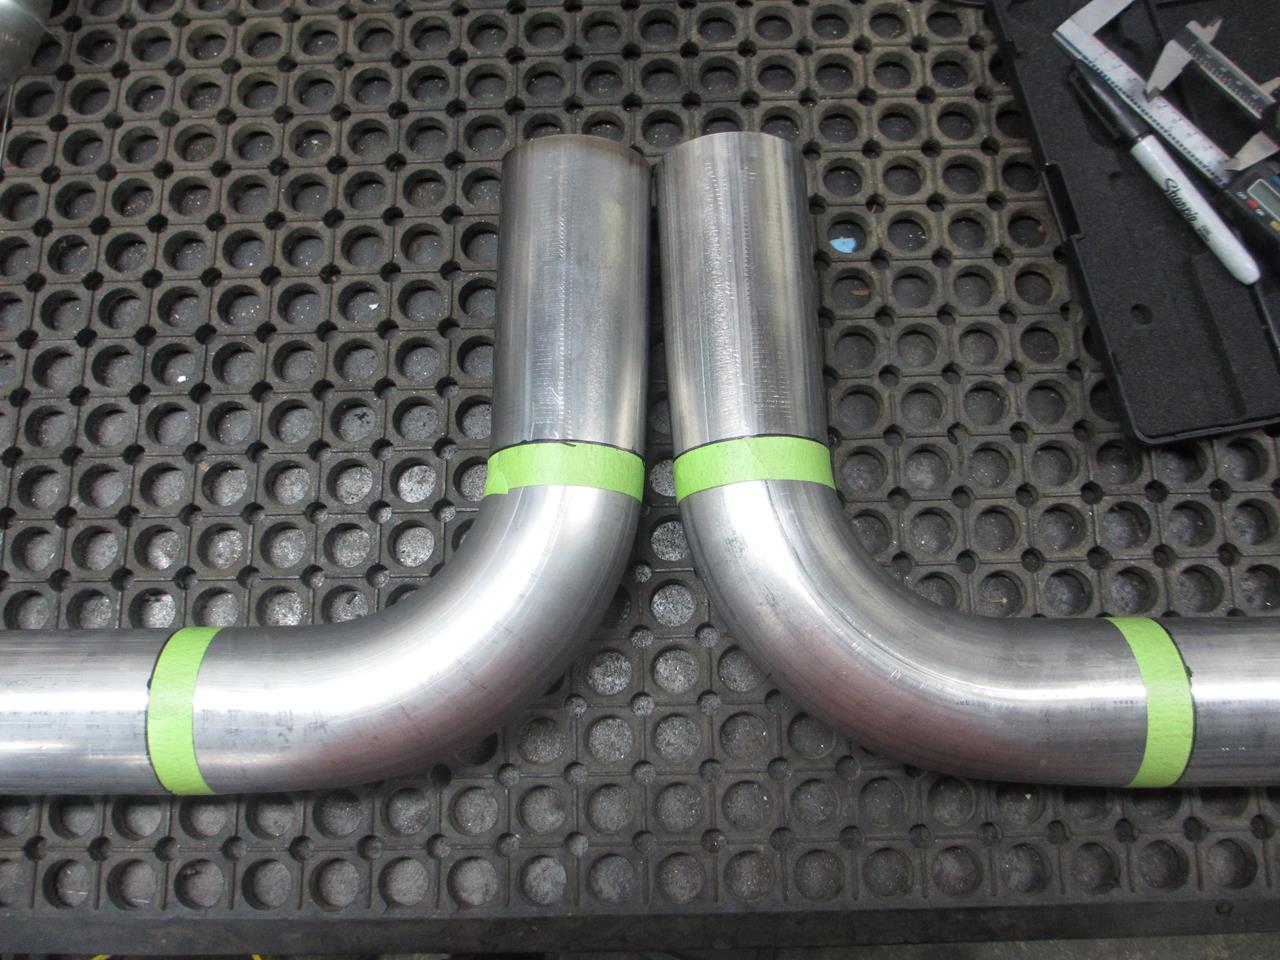
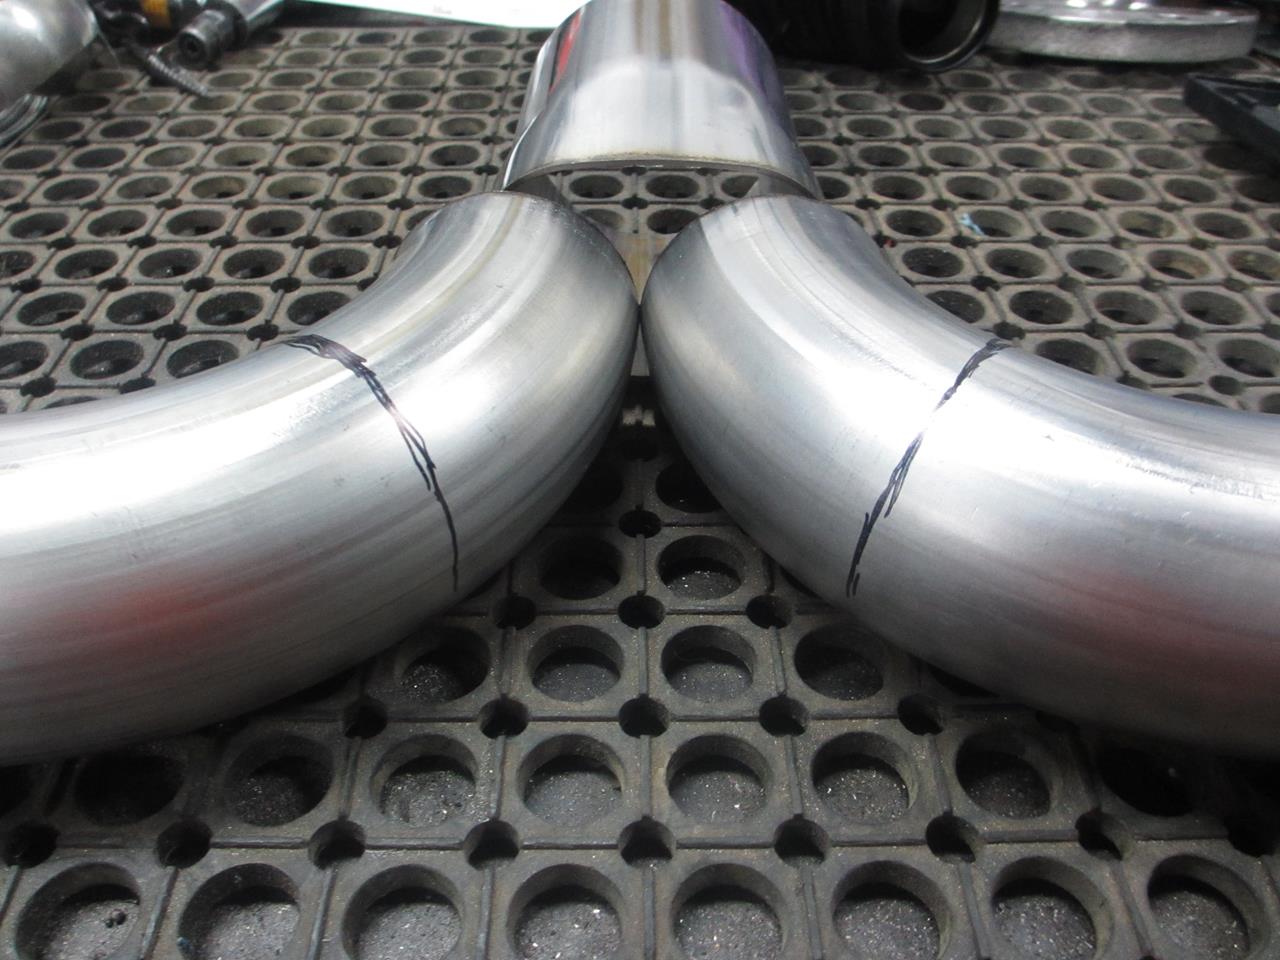
Trying to figure out the tight 90 deg bends needed to merge into the round/oval transition..
Side-by-side of rough mockup and OEM plenum..
After a few more cuts..

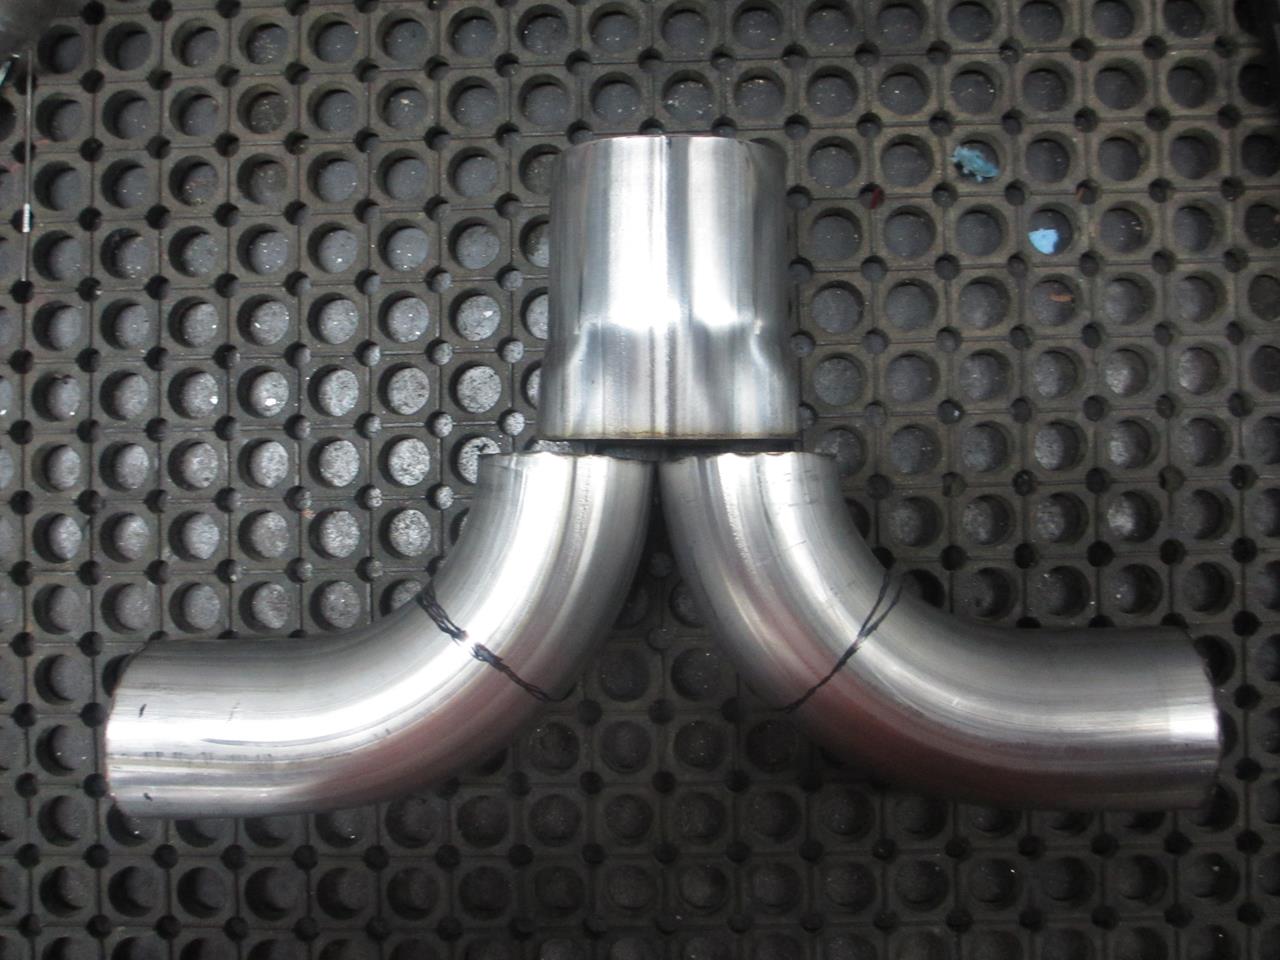
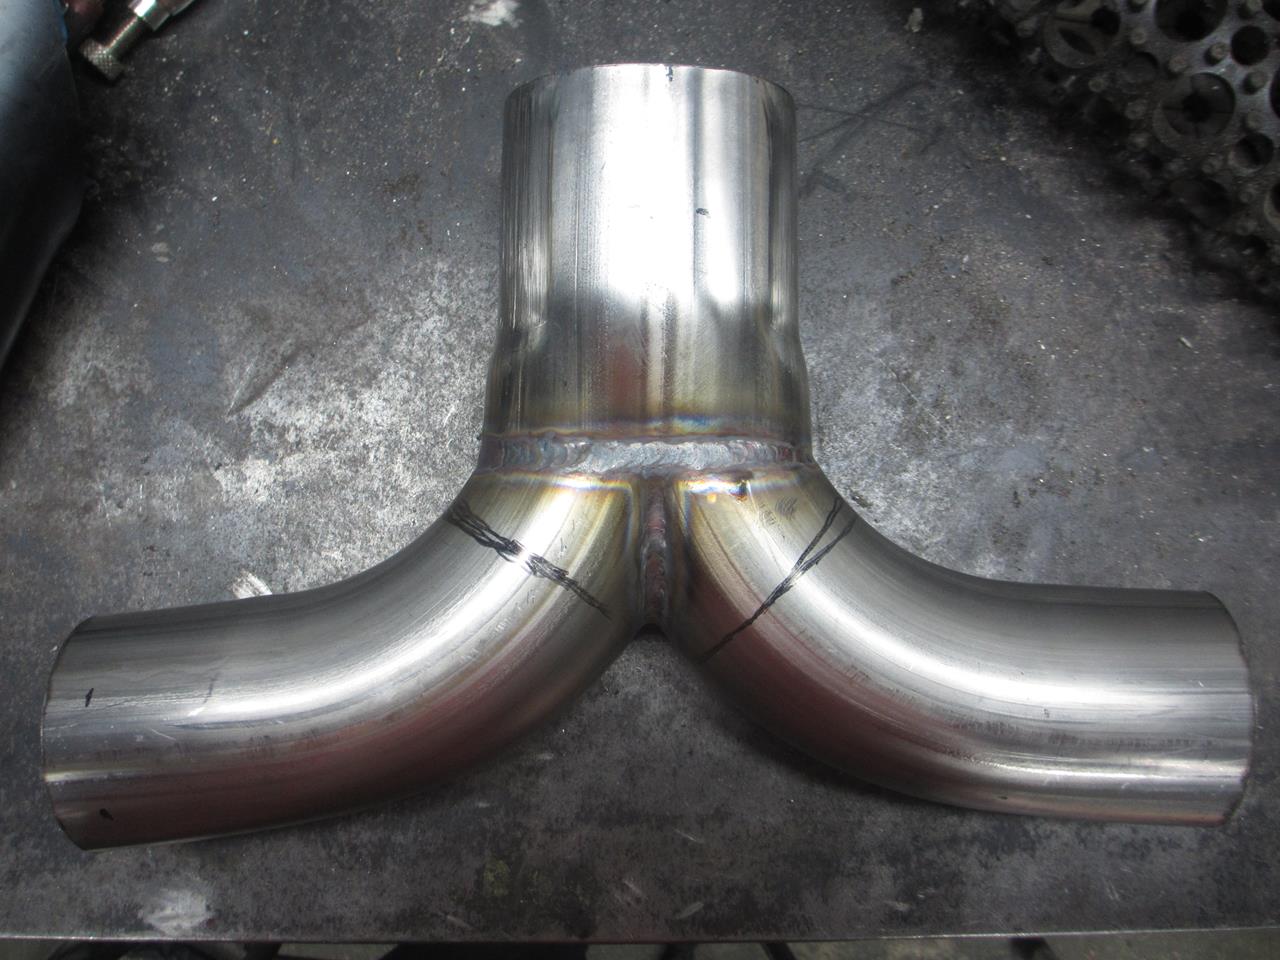
Ready to join both merging 2.75" pipes into one unit. Tacked onto welding table to begin to TIG them together.
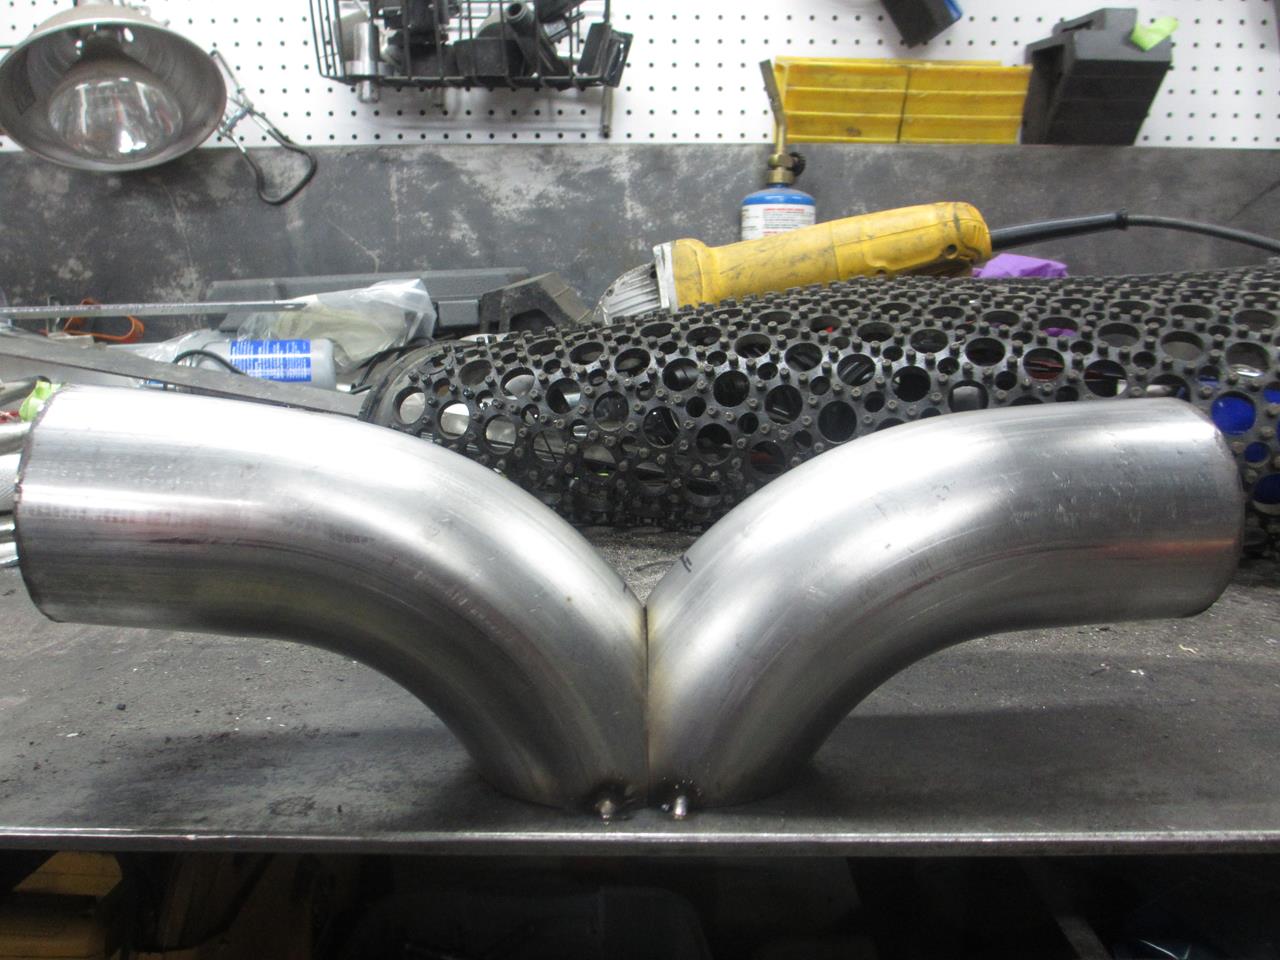
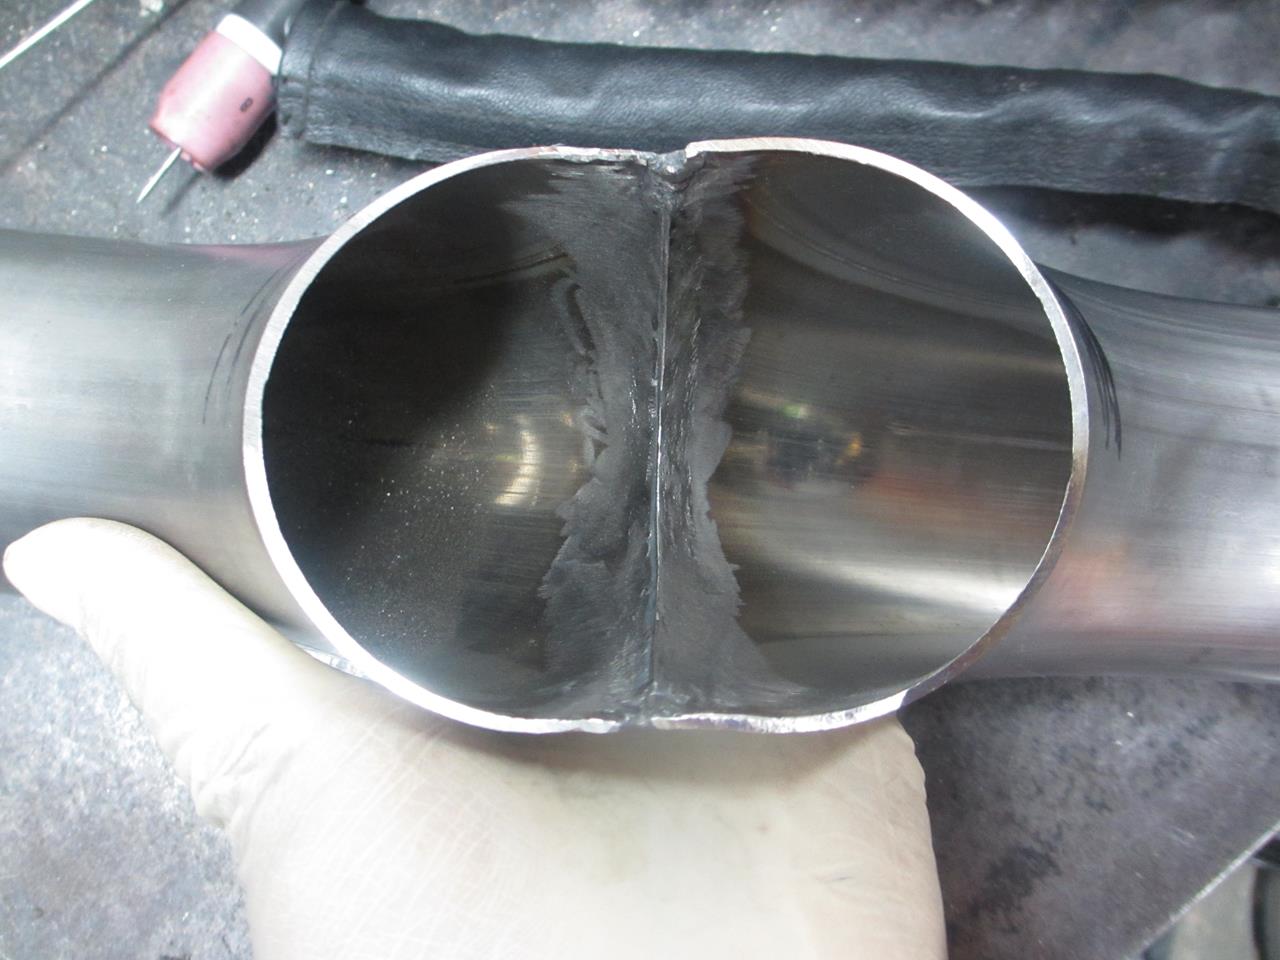
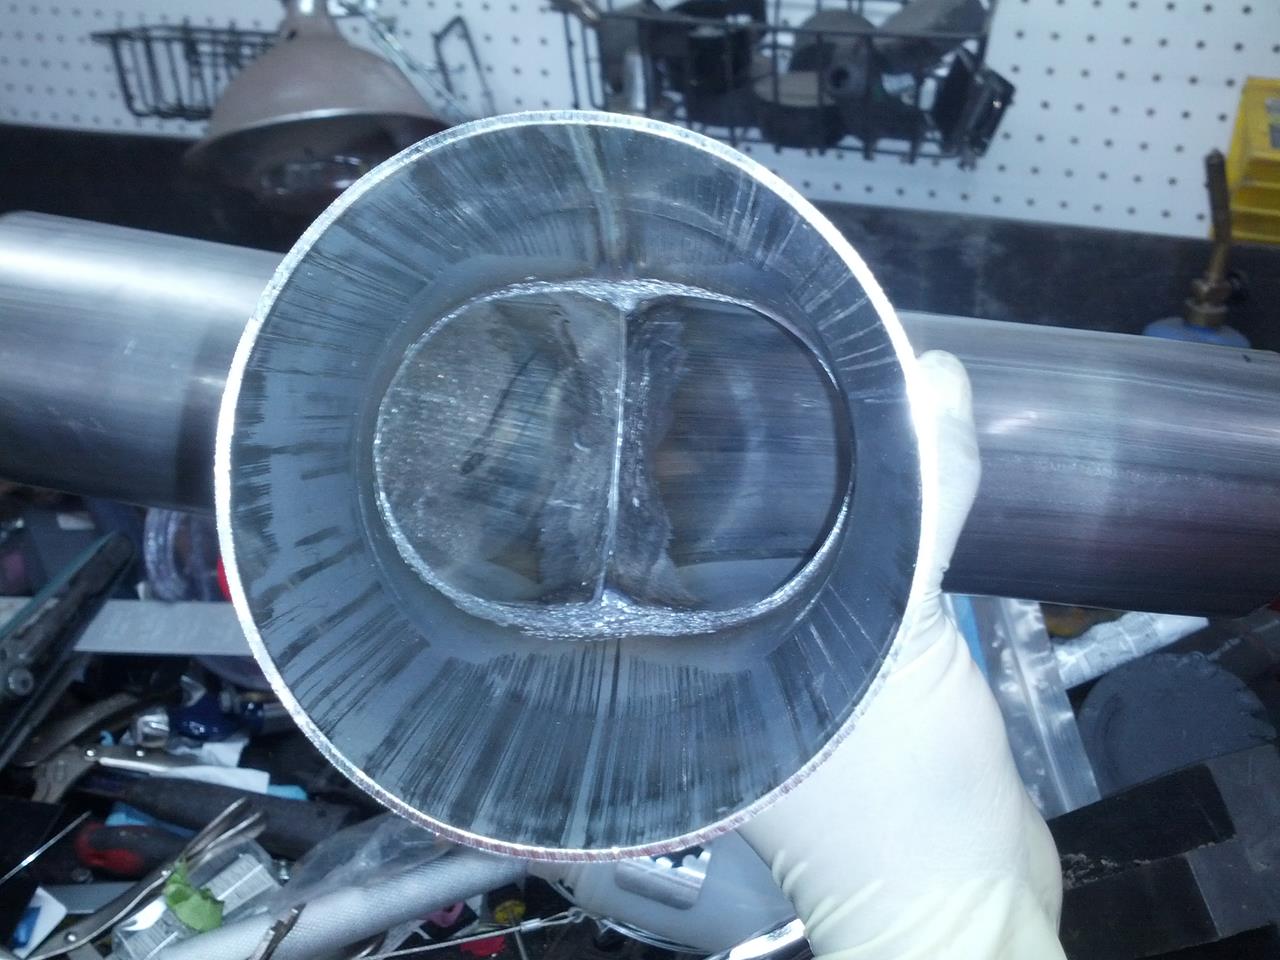
Welded together.. here is a glimpse of the inside before it joins the oval/round transition
Plenum all welded together!
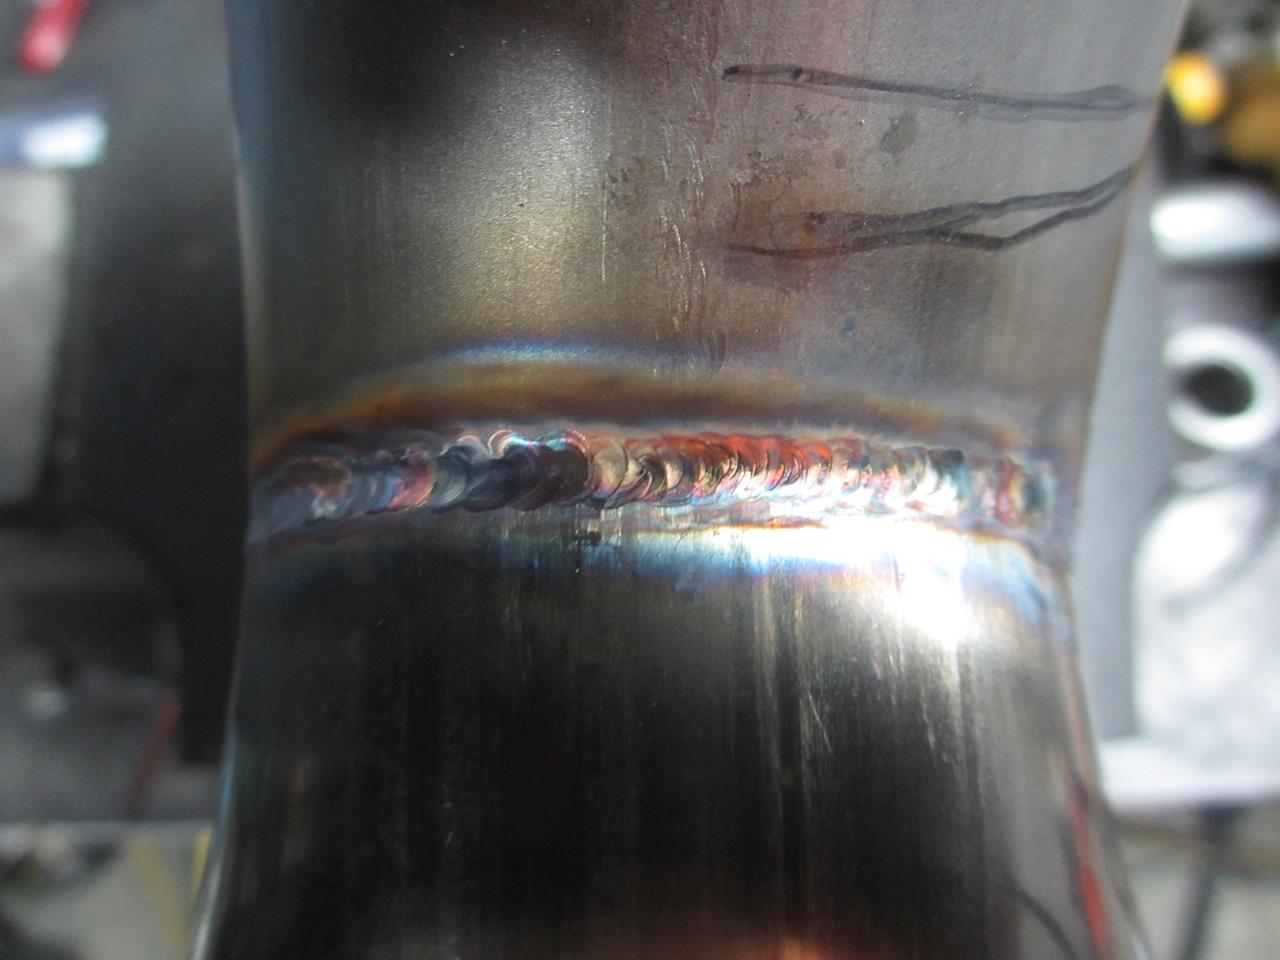
Close-up of weld
This is what the inside now looks like; nice gradual bends into the main 3.5" pipe

Another overall pic... (does this look like a set of Fallopian tubes to anyone else )
)
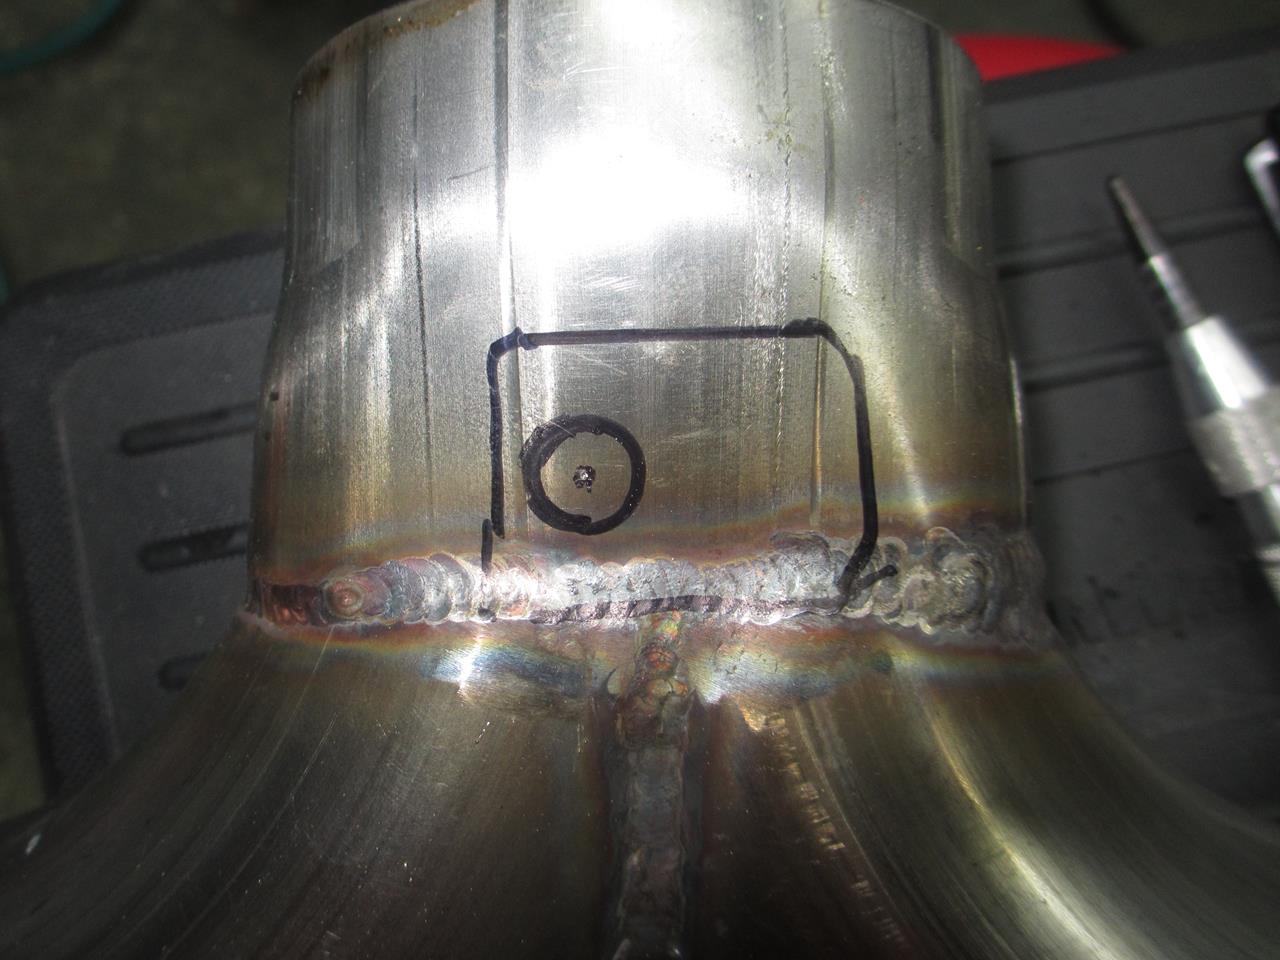
Now on to trying to add the stock plenum map sensor pictured here...
Just sketching an outline on my plenum for where the map sensor will be relocated to the bottom for a cleaner install.
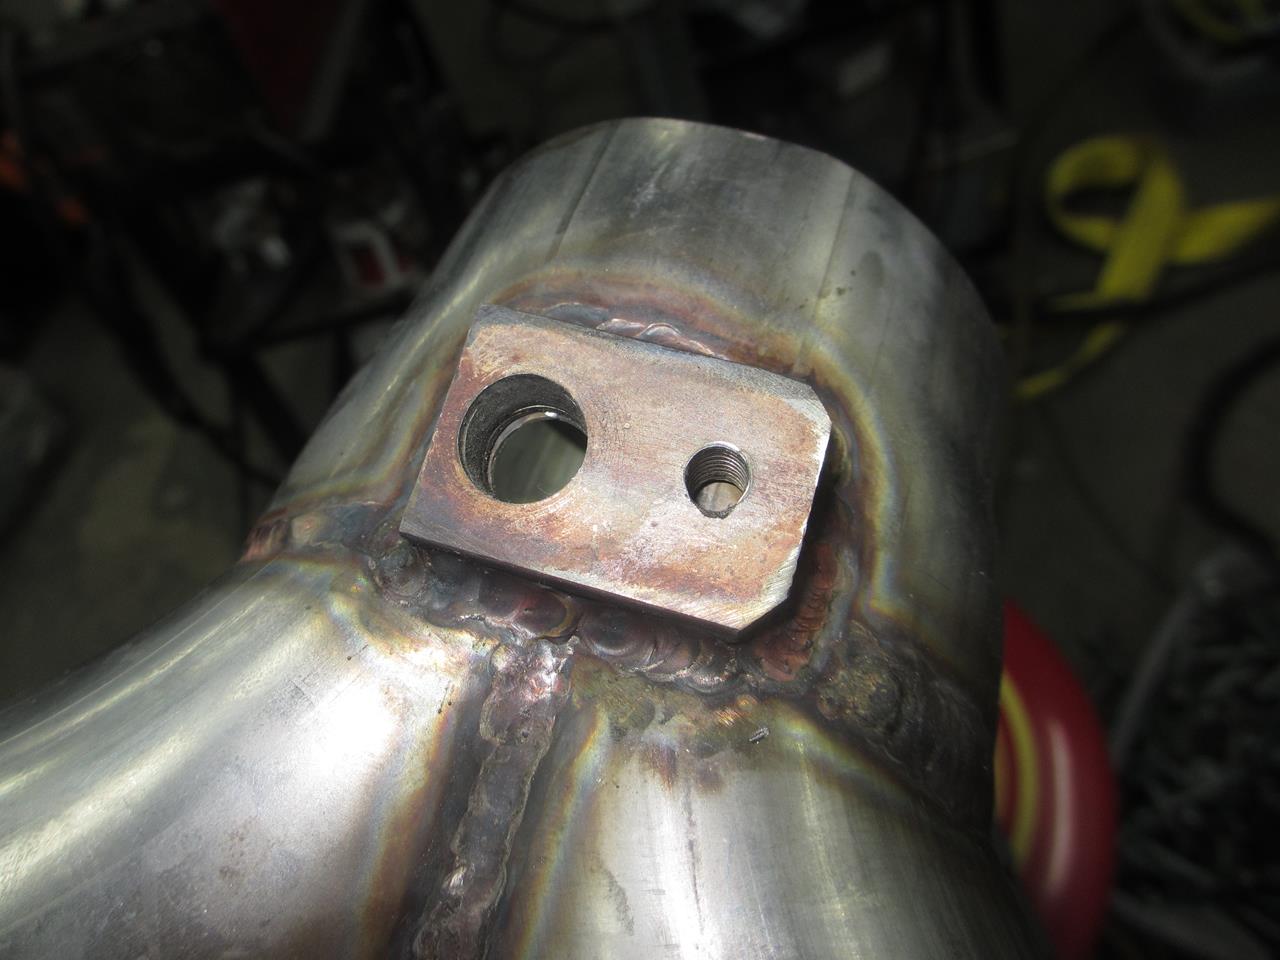
To replicate the stock piece I had to get a section of 3/8" 304SS bar and drill and tap it! /gulp
Here it is all done and welded in place
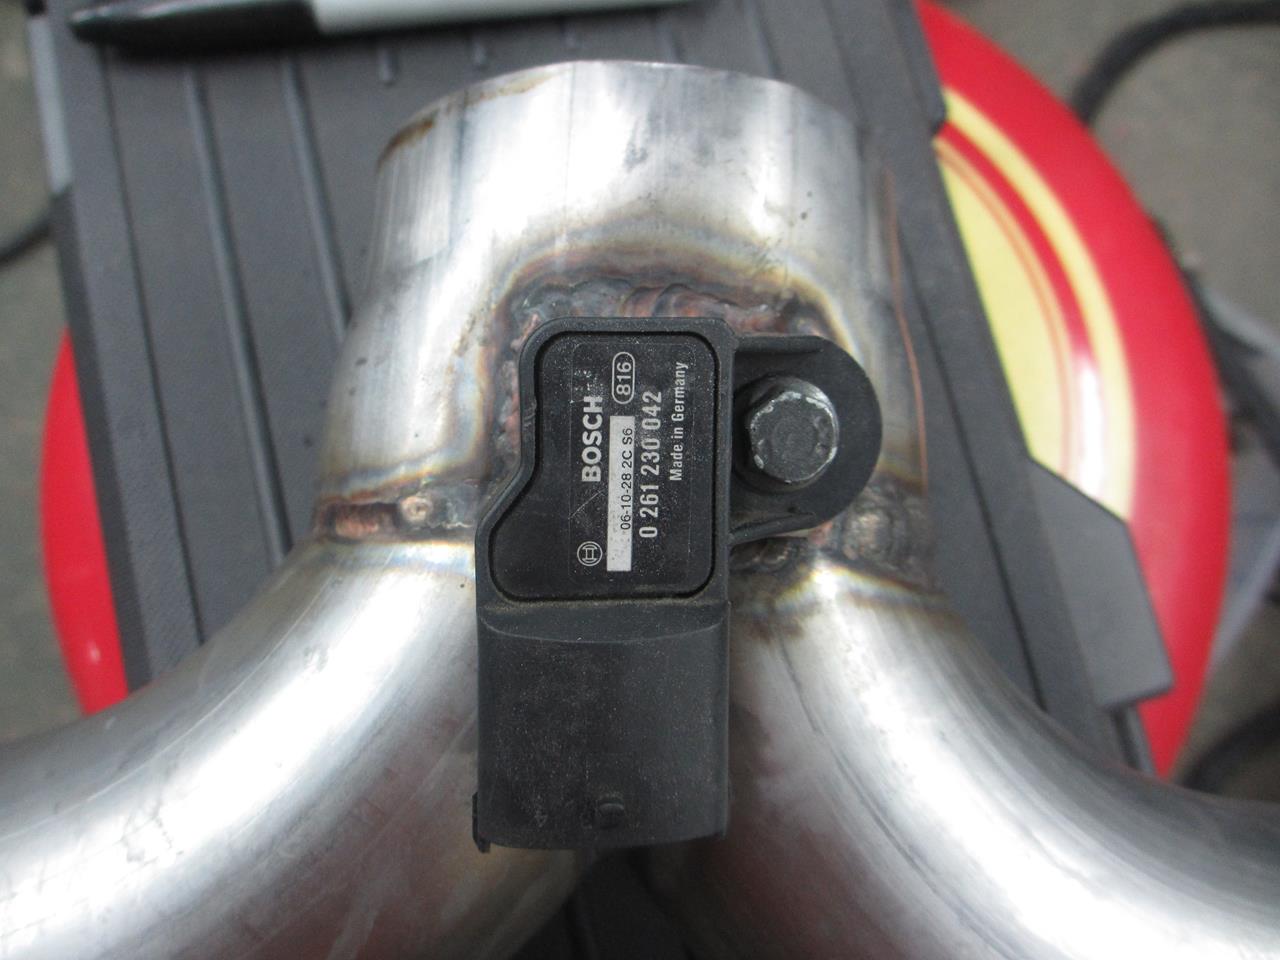
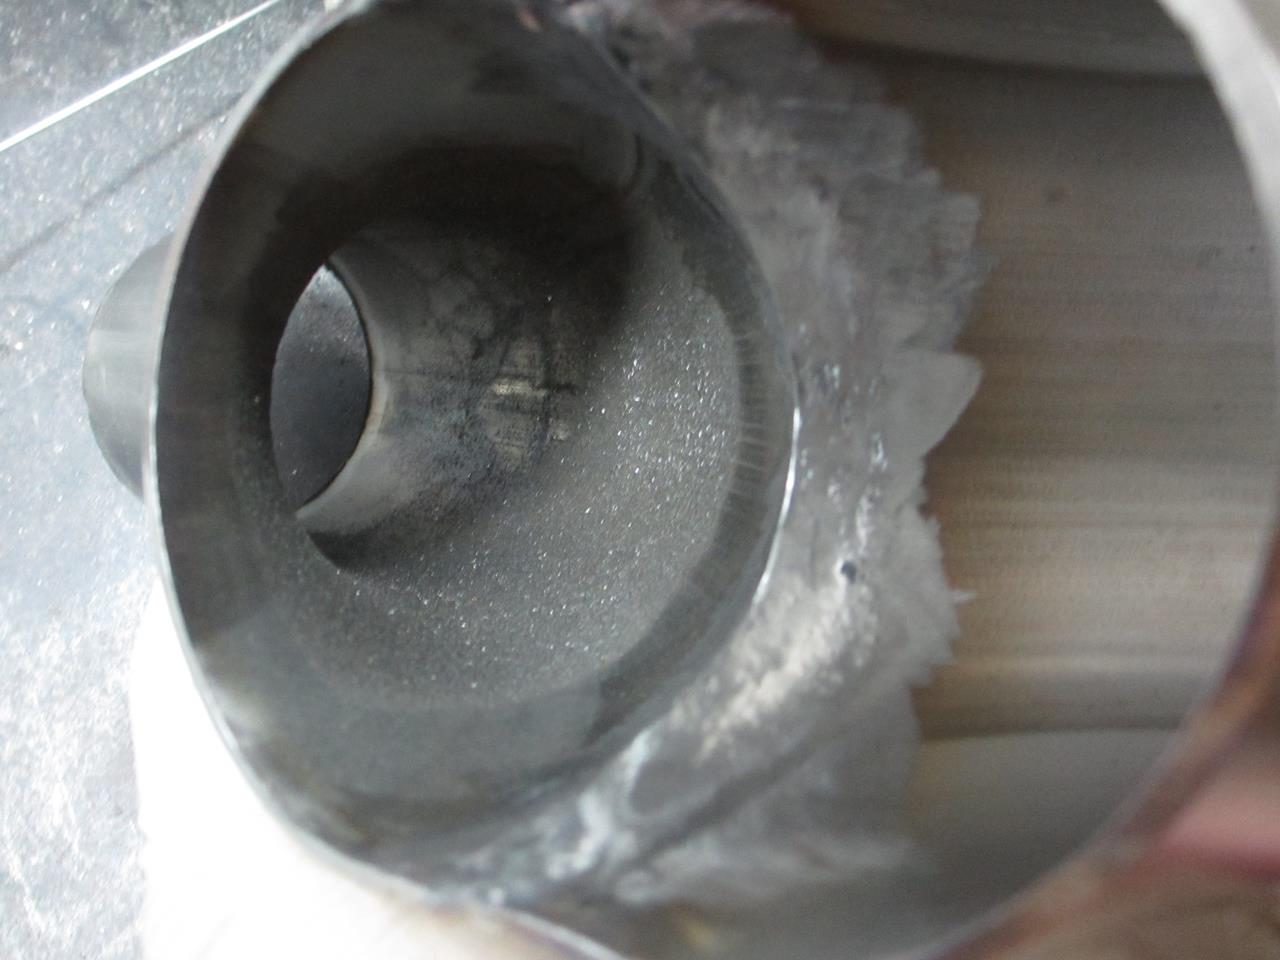
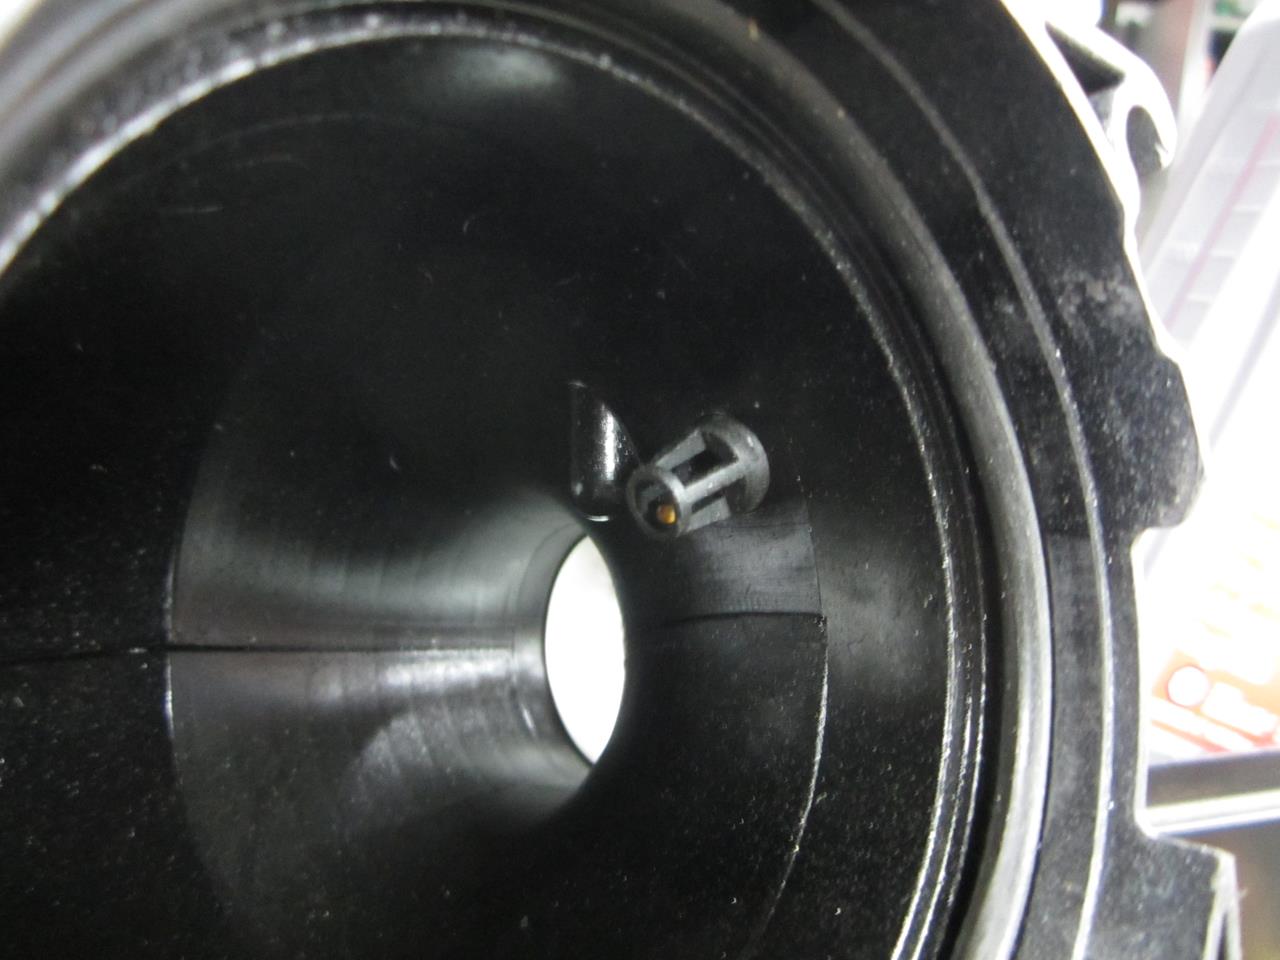
This is how the stock plenum had the map sensor intruded into the air stream. Notice there are two obstructions.
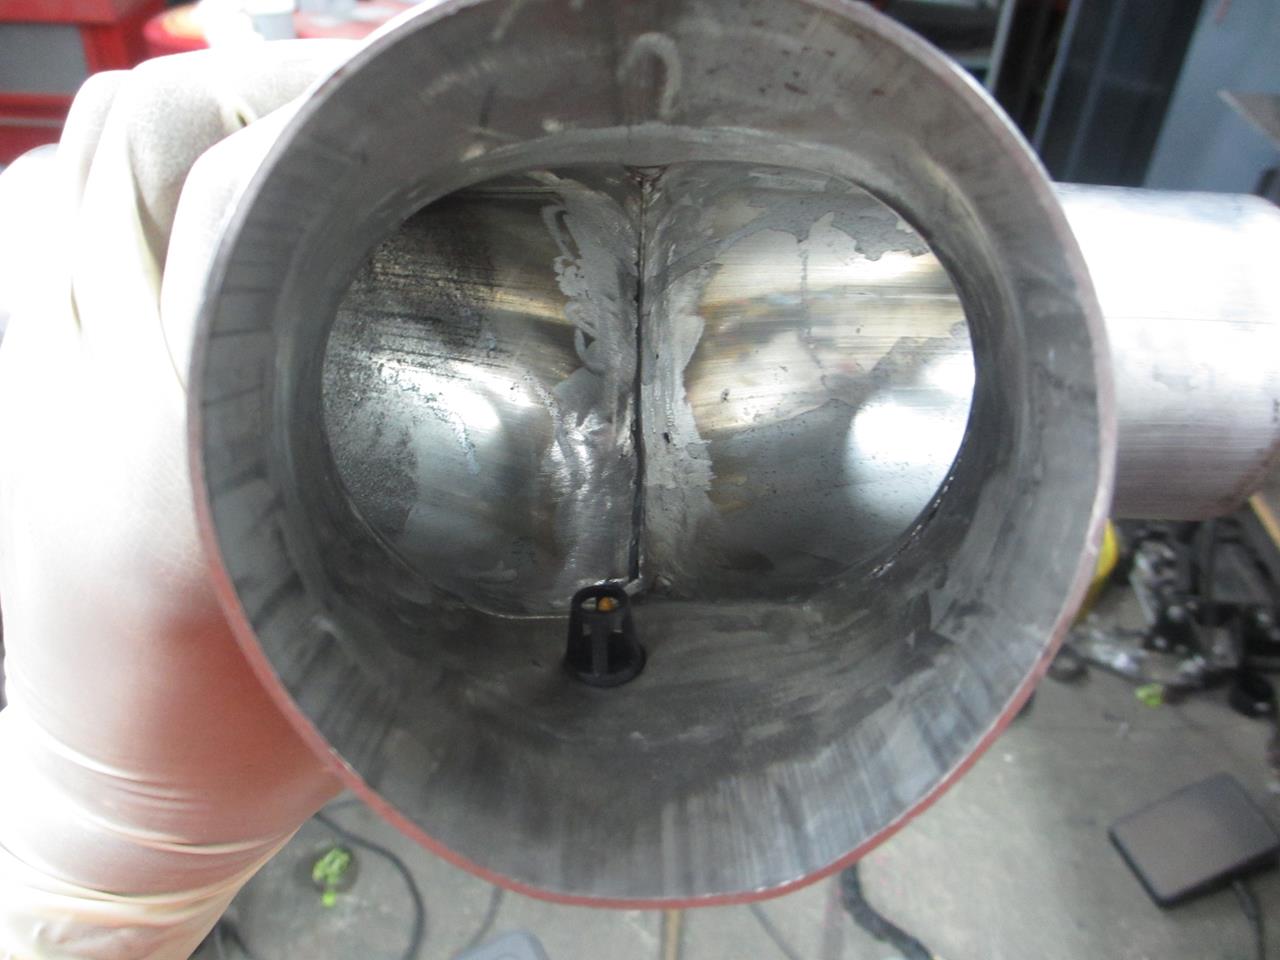
Here is where my map sensor comes into the new plenum. There is only one obstruction and it is also more centered!
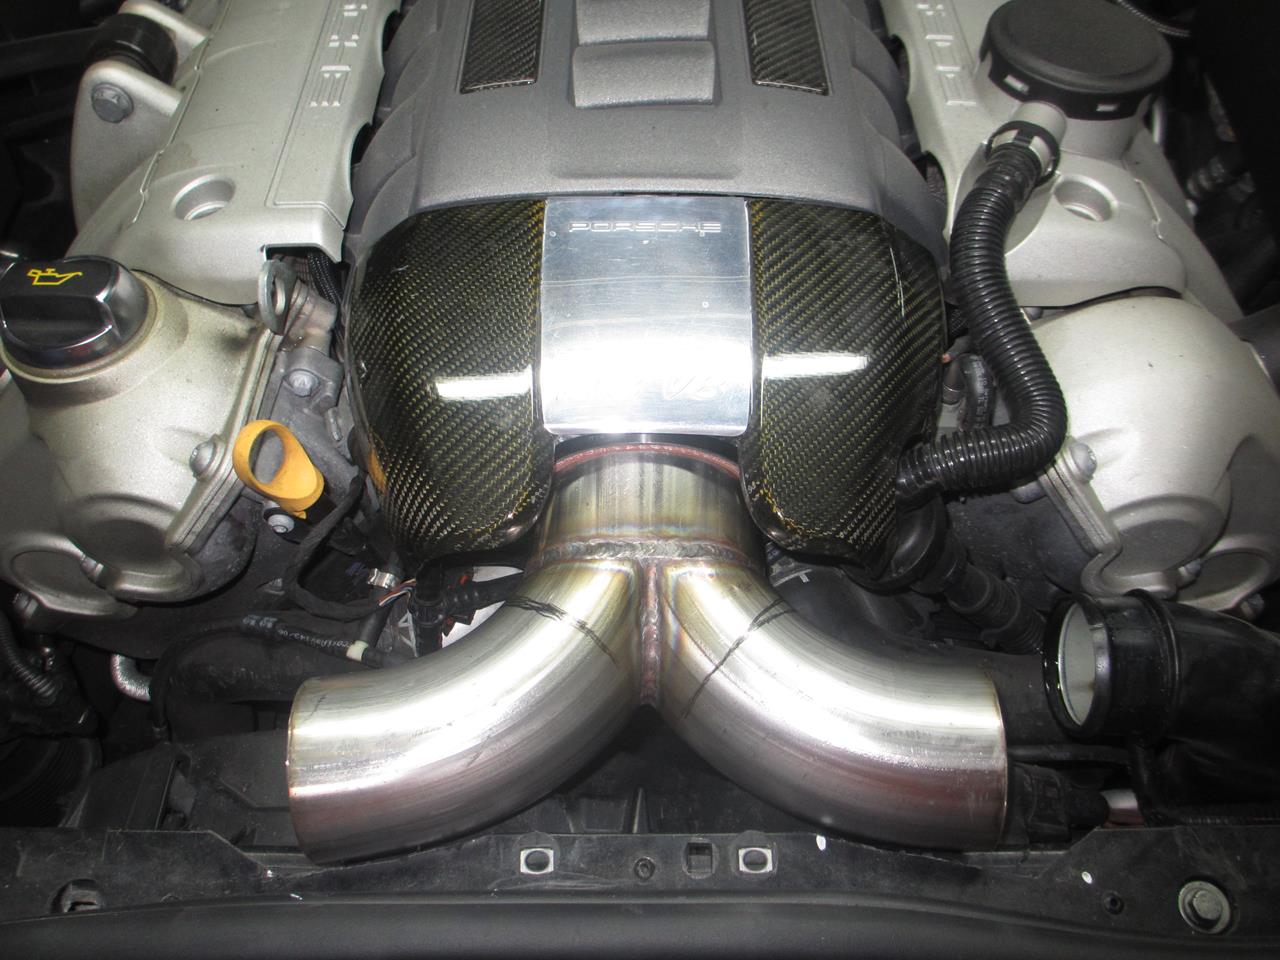
Test fitment of plenum on the throttle body...
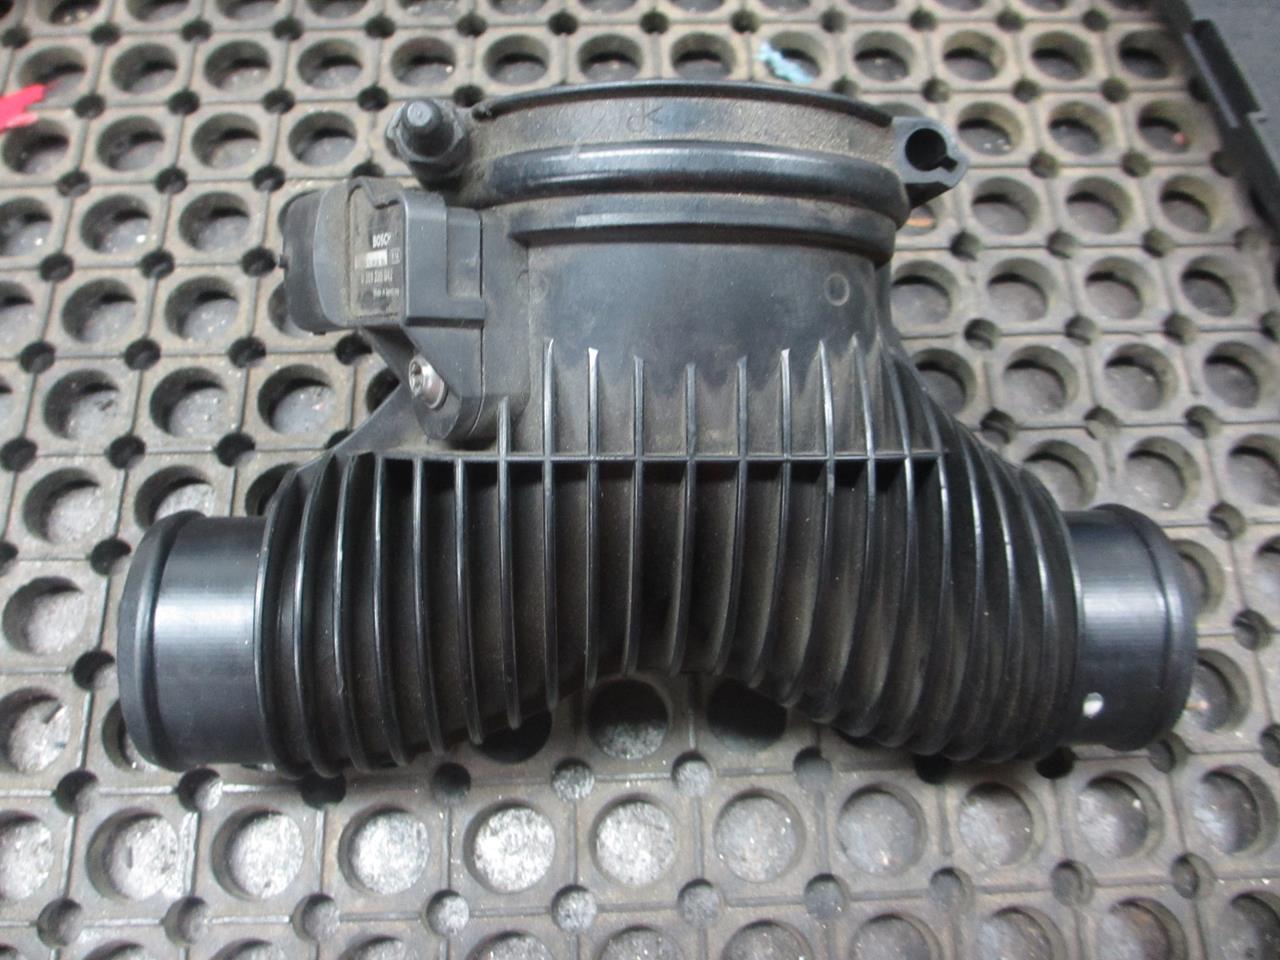
Test fitment of driver size chargepipe from plenum to intercooler...

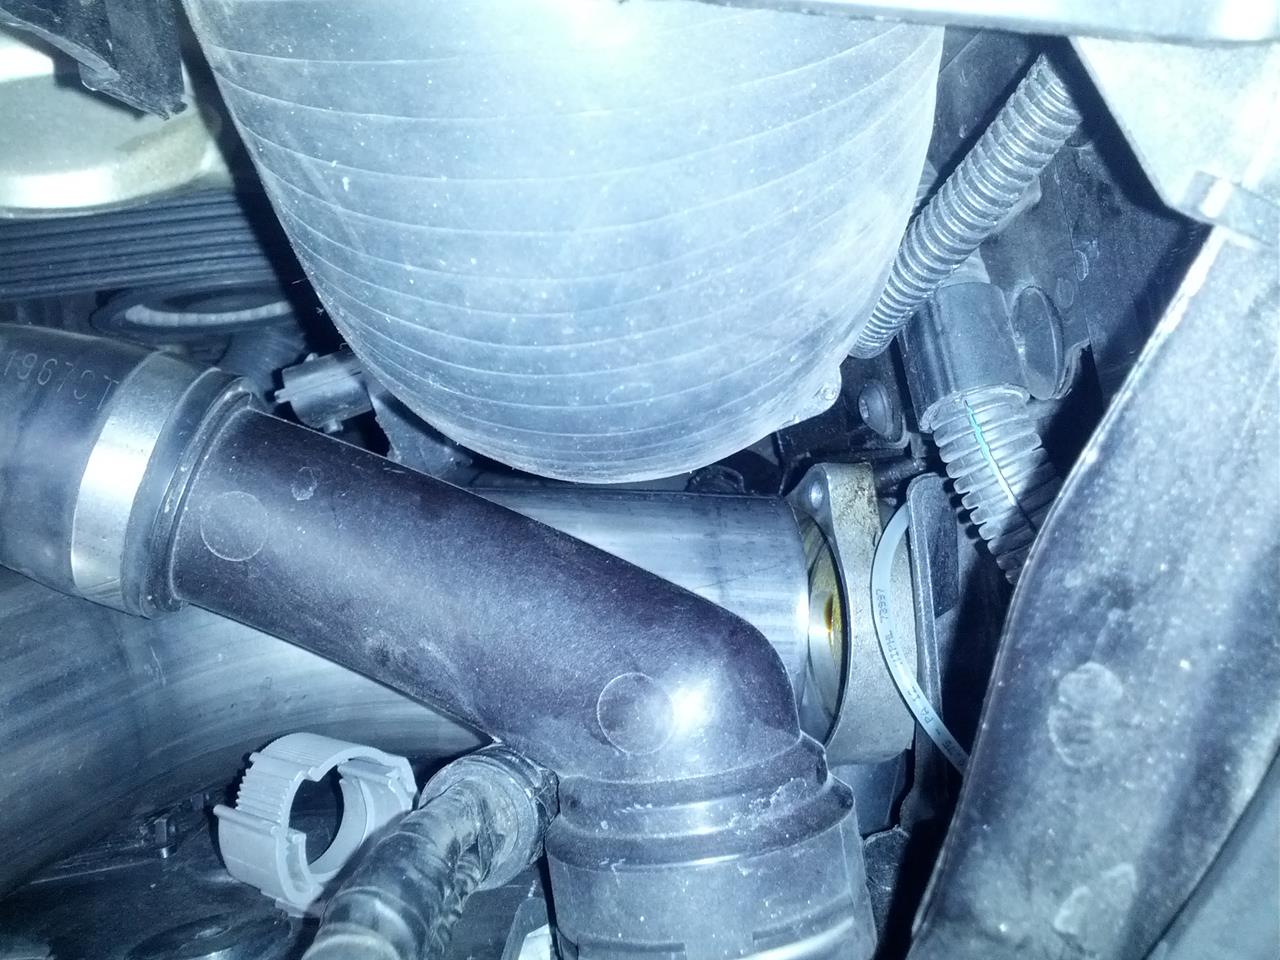
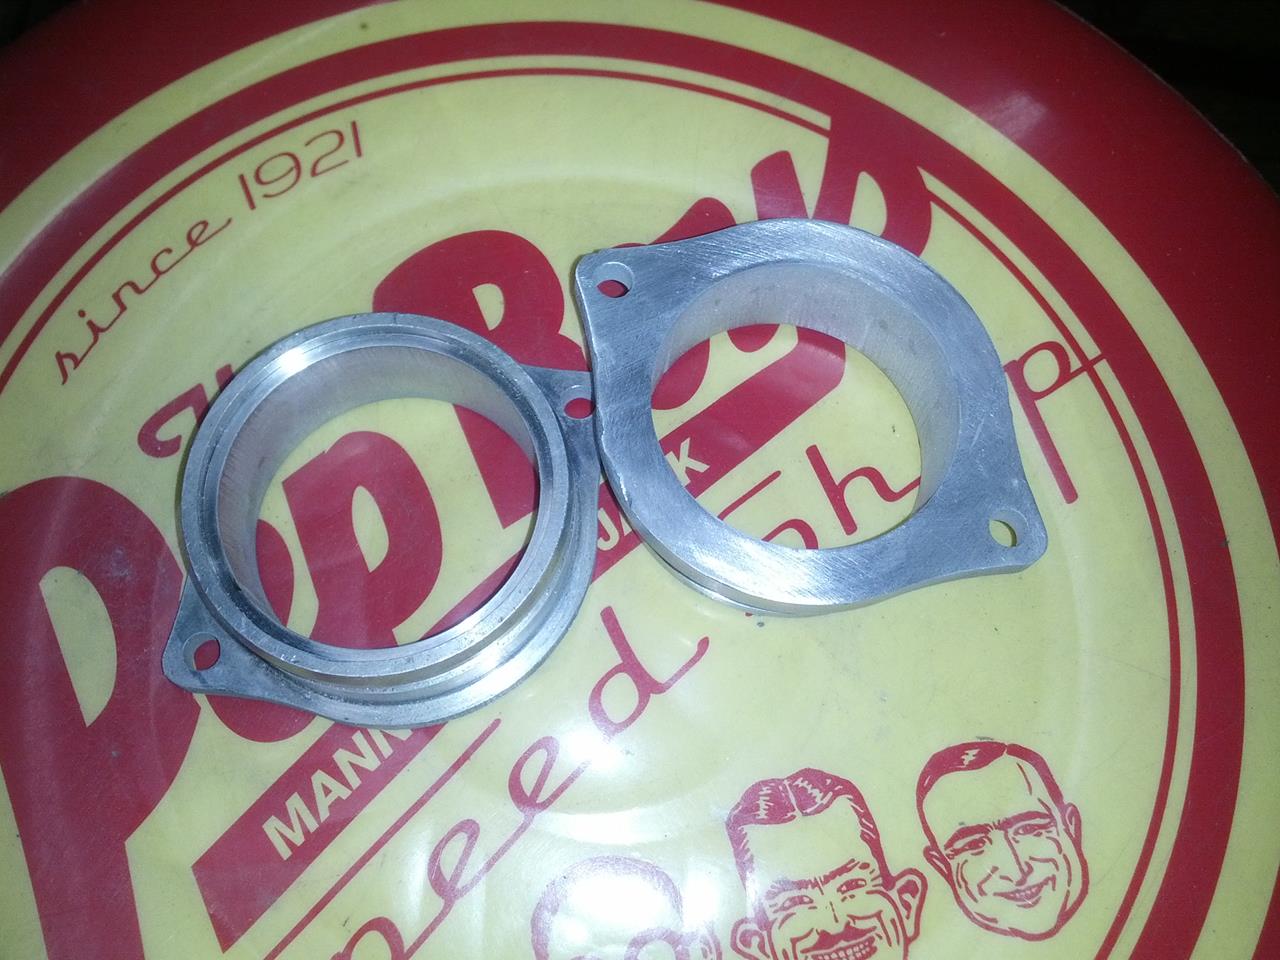
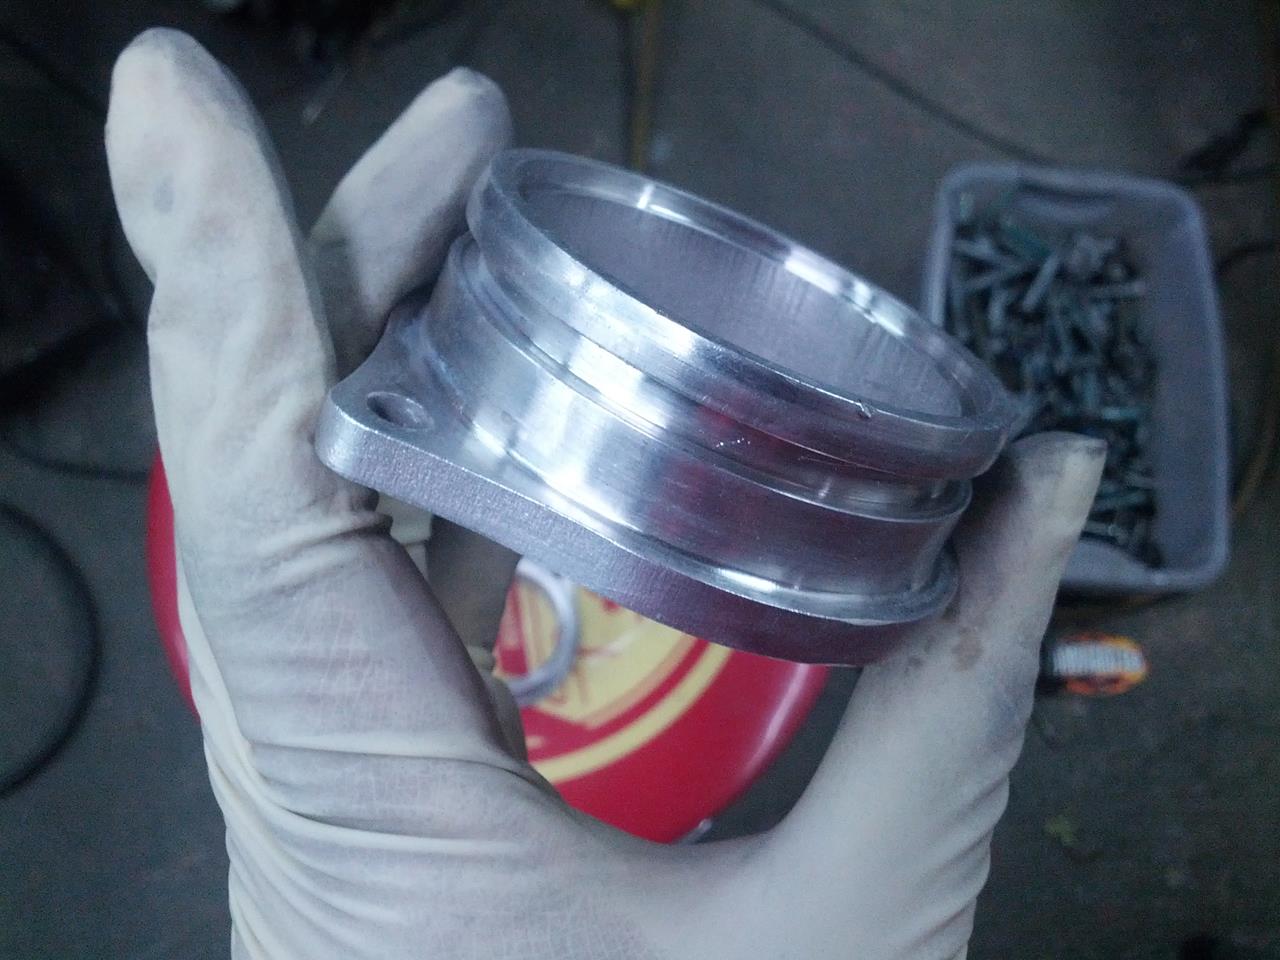
This brings me to the intercooler adapters. These are turned by hand from billet aluminum. There is one per intercooler and I will have to make a hose adapter for these...

So consider this my "pi�ce de r�sistance" as well as my farewell mod
Moving on to business, the vast majority of my performance mods were directed at opening up the intake and the exhaust backpressure, besides the methanol injection (race gas). To this end, I have an EVOMS air intake, larger 82mm throttle body and intake manifold, a cat bypass option and full 3" exhaust w/ x-pipe. The only thing missing here is an upgraded plenum and possibly upgrading the small plastic chargepipes that connect to both intercoolers.
After surveying what was available aftermarket, I was convinced there was not an option for increasing the size of the plenum and chargepipes (complete YPipe upgrade) to take full advantage of the larger 82mm throttle body. So off I went to fabricate the necessary pieces myself
DISCLAIMER
This thread is not intended for anyone to copy or imitate. I am not endorsing any products or companies. I am merely showing the steps I went through to get this working for me. If you think you want to do something similar, contact your local Porsche dealer and ask for recommendations and proceed at your own risk. I assume no responsibility for any work performed on your vehicle.
SPECIAL NOTE
Given the lengths of some of my most recent threads, I have opted instead for a photo montage punctuated with brief notes.
Skip to Conclusion with final pics here....
PHOTO MONTAGE
This is my starting point. You can see the plastic plenum, rubber bellow hoses, and plastic chargepipes in the from the engine. They look quite puny in stock form...
Here is my stand-in plenum from my standard turbo intake manifold. It has the same size chargepipe (intake) inlets.
You can see here that the size of the inlets are a terribly restrictive 1.8" each! According to my math, the 82mm TB, would roughly need two 2.5" pipes in order to fully max the flow of a 82mm TB (roughly 3").
So to make sure this is done right, we will build in a buffer and step up to the next size of two 2.75" pipes for overkill
Stock plenum removed. Will figure out how to use a Tbolt clamp with these extended 82mm TB screws in the way.
Here is a side-by-side of the shorter 78mm TB screw next to the longer 82mm screw. I will simply use the 78mm screws in my old intake manifold since they are tucked out of the way
You can see one shorter screw on the left and the longer screw on the right. Just have to change them all out...
Here we go. We gained the necessary clearance in order to stretch a shortened 3.25" reducer coupler (3.5" to 3.25") over the TB lip. It is tight, but two t-bolt clamps will work here!
Moving on to the plenum fabrication. I will be using stainless steel for the most part since I am more comfortable with this vs aluminum. Not to mention the cleaner weld dispositions. Here is a 3.5" round to oval transition that will work for my main transition. I have already cut off the end to fit two joined 2.75" pipes.
Trying to figure out the tight 90 deg bends needed to merge into the round/oval transition..
Side-by-side of rough mockup and OEM plenum..
After a few more cuts..
Ready to join both merging 2.75" pipes into one unit. Tacked onto welding table to begin to TIG them together.
Welded together.. here is a glimpse of the inside before it joins the oval/round transition
Plenum all welded together!
Close-up of weld
This is what the inside now looks like; nice gradual bends into the main 3.5" pipe
Another overall pic... (does this look like a set of Fallopian tubes to anyone else
)Now on to trying to add the stock plenum map sensor pictured here...
Just sketching an outline on my plenum for where the map sensor will be relocated to the bottom for a cleaner install.
To replicate the stock piece I had to get a section of 3/8" 304SS bar and drill and tap it! /gulp
Here it is all done and welded in place
This is how the stock plenum had the map sensor intruded into the air stream. Notice there are two obstructions.
Here is where my map sensor comes into the new plenum. There is only one obstruction and it is also more centered!
Test fitment of plenum on the throttle body...
Test fitment of driver size chargepipe from plenum to intercooler...
This brings me to the intercooler adapters. These are turned by hand from billet aluminum. There is one per intercooler and I will have to make a hose adapter for these...
Last edited by Renaissance.Man; Feb 18, 2014 at 03:09 PM.
Thread Starter
|
Moderator
Joined: Jan 2011
Posts: 1,504
From: (in my garage welding something vicious)
Rep Power: 105
After the rubber o-ring is reinstalled to make sure there are no air leaks
Looks clean to me!
Sitting in its new hose, just waiting for a reducer coupler to be installed
There we go; Ready to mate up to some beefy 2.75" pipe goodness
Test fitment of passenger side chargepipe
That 2.75" bellow hose coupler is excessively long. We will have to do something about that
After a little chat with some spare pipe and a xacto knife, we finally managed to get this down to a reasonable size.
Passenger side chargepipe positioned and welded
Driveside chargepipe being completed..
Now on to polishing! How well will stainless steel polish?

Surprisingly good! Decided to polish for a more upscale/OEM finish in lieu of something more obvious and flashy.
The size difference between the stock and new passenger side chargepipes..
On the left is the stock 1.8" bellow hose. One the right is the new 2.75" bellow hose. Which one do you want in your high HP Cayenne?
Installed pics of passenger side. Note added bung for turbo vent. Tight fit, huh?
Installed pic of driver side. EVEN TIGHTER FIT! Ouch!
Now on to building a boost test gauge to make sure I do not have any leaks.
Boost test gauge installed on the vehicle...
Last edited by Renaissance.Man; Feb 18, 2014 at 03:01 PM.

Registered User
Joined: Mar 2013
Posts: 11
From: Sacramento, CA
Rep Power: 0
I always enjoy your posts, project pics and explanations. Thanks for taking the time to share. With your projects wrapping up, we'll instead need write ups, pics and videos of your high horse power adventures. I have your "Wicked" video book marked and love it. More please!
Thread Starter
|
Moderator
Joined: Jan 2011
Posts: 1,504
From: (in my garage welding something vicious)
Rep Power: 105
")
I came REALLY close to taking some HD footage of my pepper in a closed mall parking lot, traction off, and 12" of fresh snow on the ground. The amount of wheel spin and rooster tails of snow being ejected by the front wheels was unreal!
Next time, I will make sure to grab some video.
Valid question - not sure. However, I can tell you that this was definitely worth the work. There is no question that it pulls harder through the whole power band. No surprise when you consider that the 82mm throttle could not achieve max CFM flow with two small 1.8" inlets. Now that it can get all the air it wants, it is snapping my neck on throttle on/off.
I plan on getting a dyno soon in order to quantity the gain of the 3" exhaust and upgraded YPipe. Whatever the results show, it probably close to the max that you will ever see on this platform without swapping turbos and/or cams.
Trending Topics

Thread Starter
|
Moderator
Joined: Jan 2011
Posts: 1,504
From: (in my garage welding something vicious)
Rep Power: 105
Thanks - I will update this thread when I get the dyno results. Yes, these are still the stock intercoolers since I have been more than happy with the air intake temps during several hard sessions and past dyno pull. Not to mention the methanol lowering the IAT even further.

Thread Starter
|
Moderator
Joined: Jan 2011
Posts: 1,504
From: (in my garage welding something vicious)
Rep Power: 105
I am posting this from a PM thanks to one our esteemed members, "jaatlee", who gave his expressed permission to add this useful information to this thread:
"Based on the information you have provided so far here are some quick calculations that I thought you might be interested in:
Stock Turbo Throttle Body
=========================
78.27mm = 3.08" * 3.08 * 3.14159 = 29.80" total square area
Stock Turbo Intake Pipes
=======================
1.843" * 1.843" * 3.14159 = 10.67" total square area * 2 pipes = 21.34" total square area
Upgraded Turbo S Throttle Body
=====================
84.16mm = 3.31" * 3.31 * 3.14159 = 34.41" total square area
Custom Piping
=============
2" * 2" * 3.14159 = 12.57" total square area * 2 pipes = 25.14 total square area
2.25" * 2.25" * 3.14159 = 15.90" total square area * 2 pipes = 31.8" total square area
2.5" * 2.5" * 3.14159 = 19.66" total square area * 2 pipes = 39.32" total square area
2.75" * 2.75" * 3.14159 = 23.75 total square area * 2 pipes = 47.5" total square area
So it looks like for the regular turbo manifold 2.25" internal diameter pipes would be more than enough and 2.5" internal diameter pipes be more than enough for the Turbo S throttle body.
Until you measure the internal portion of the 2.75" pipe we can not verify for sure how much airflow you have with each pipe, but my guess is that you may not have as much of an "overkill" as you thought you did, you are probably spot on!"
Thread Starter
|
Moderator
Joined: Jan 2011
Posts: 1,504
From: (in my garage welding something vicious)
Rep Power: 105
I also find it interesting this chart implies that the stock plastic chargepipes at 1.8" are unable to max out even the basic 78mm standard Turbo throttle body.
Thread Starter
|
Moderator
Joined: Jan 2011
Posts: 1,504
From: (in my garage welding something vicious)
Rep Power: 105
Hahaha! Thank for you the support and confidence! Realistically though, all the numbers say that I am maxing out these stock turbos at around 16.8 psi of boost. I am not sure how much more they have give me. Considering the new 3" exhaust, the methanol and the YPipe, I think around 40awhp is reasonable; which is around 50 hp at the crank. If that is true, that would put me around 740 hp / 765 tq total.
Thread Starter
|
Moderator
Joined: Jan 2011
Posts: 1,504
From: (in my garage welding something vicious)
Rep Power: 105
All of the stainless steel pipes were 16 gauge; which is .065" in thick. Since there are two walls to a pipe, the math to figure out the inside diameter of 2.75" is as follows:
(.065 + .065 ) - 2.75= 2.62"
The same logic applies to 2.5" pipe:
(.065 + .065 ) - 2.75= 2.37"