
lEcono Version Transaxle Oil Cooler for 996 Turbo

Thread Starter
|
Registered User
Joined: Sep 2006
Posts: 1,143
From: Duluth, GA
Rep Power: 75


lEcono Version Transaxle Oil Cooler for 996 Turbo
I did this installation last March and finally got a chance to test it last weekend at Road Atlanta. It worked nicely and brought the trans temp from 222 down to 216 in one lap. After that I did a cool-down lap and came in. That's all the data I have at this point (I cut down another tire) but I believe it is going to do what I want. It requires no trans removal, welding or anything other than a lot of your labor. You will need to remove the trans fluid and drill and tap a spot (I did it somewhere under the ring gear but neglected to take a picture of it) to install a temp sensor for your switch. Put a lot of heavy grease on the bit tips and you will retain nearly all the aluminum chips.
Tom Kerr's installation is somewhat similar to mine but he did a R&R of the trans and had bungs welded in a few places. I think his system will be better at cooling the 6th gear area than mine. He also uses a thermostatic control switch to activate the pump at a pre-determined temperature. It is hard on the pump if you make it circulate the cold oil. I had an unused voltage input on my Zeitronix so I chose to use that in conjunction with a visual and audible alarm mounted on a bracket bolted in where the left sun visor used to be. I don't know the price for a thermostatic switch and will not be including that in my parts list.
Here is a partial parts list with some approximate prices and some vendors.
Oil Pump is by Tilton and a pic will give part #. I can't find my invoice but Google it and you'll find a few suppliers. Cost is about $175. I won't include shipping costs for any of this bc yours will be different than mine.
Oil to Water cooler is a Mocal Laminova item #A43-330P with AN -8 and 38mm push-on fittings. Vendor is British American Transfer (BAT) and I bought the cooler plus most of the fittings from them so was given some good pricing. Cooler was $300.
The oil filter is a Peterson 400 series with bypass. Mine came from HRPWorld and they only carry the 60 and 75 micron version. I didn't know there was a 100 micron version available or that is what I would have purchased. I believe the 100 would work a little more efficiently than my 75. I bought a conversion kit for changing to 100 micron but as yet haven't installed it. Filter cost was about $185. Peterson PN for the 100 micron filter is 09-1430-8.
I purchased a bunch of fittings from BAT and some -8 Aeroquip line and other fittings from Port City South. I can't give an exact tally of every fitting I used and my car is presently in the shop so I can't go count them. Here are some of the more important ones. I used the drain hole as my exit point and the fill hole for the return. The person at BAT will be very helpful in assuring you get all the right pieces. You will need 2 reducers 22mm male to 16mm female to screw into the drain/fill holes. you will need 2 16mm X 1.5 banjo bolts and washers plus 2 conversion fittings for banjo 16mm to -8AN hose. About $115 for all that.
The rest of the -8AN fittings and 10 feet of -8 hose were purchased from Port City South. I had about 16" of hose left over when I was done. I got 3 90 degree elbows a couple of 45's, 4 or 5 straight hose ends a -8 to 3/8 NPT 90 degree elbow and a -8 AN flare to 3/8 NPT male, both used tor the oil pump. I also got a -8 flare union fitting to be used at the junction where I couple the suction hose to pump oil into the tranny. I may be missing another invoice for more fittings but all this came to around $225.
I got 2 1.5" silicone straight hose couplers model SIL000611 and 2 T-bolt clamps for 1.75" silicone parts #CLA000107 from Silicone Intake Systems for about $15.
I can't find the receipt for the temp sensor but it wasn't very expensive. I also don't know the cost for a thermostat switch.
There are several other minor items I won't list but all the parts ended up being just north of 1K. You would then need to add in the cost of the 2 items I mentioned above.
I'm going to post this section now and do the pictures in separate posts. I'm afraid I might screw up something in the picture posting and I don't want to lose everything.
Last edited by Al Norton; Sep 5, 2009 at 01:15 PM.
Thread Starter
|
Registered User
Joined: Sep 2006
Posts: 1,143
From: Duluth, GA
Rep Power: 75
You will see a lot of tie wraps and other temporary means for retention of various components but I didn't want to spend a lot of time milling one-off brackets until I knew this idea was going to work.
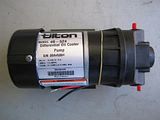
I guess you'll have to enlarge this one to get the part number.
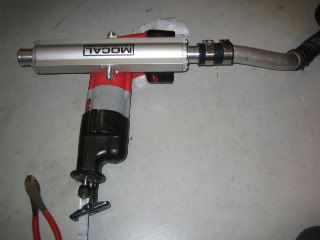
I got this one of the cooler larger and it shows what I used to cut the section out of the aluminum return line from the radiators. Be careful where you make the cut and how much you take out. The section of pipe and hose aft of the cooler needs to be positioned in such a way as not to rub against anything.
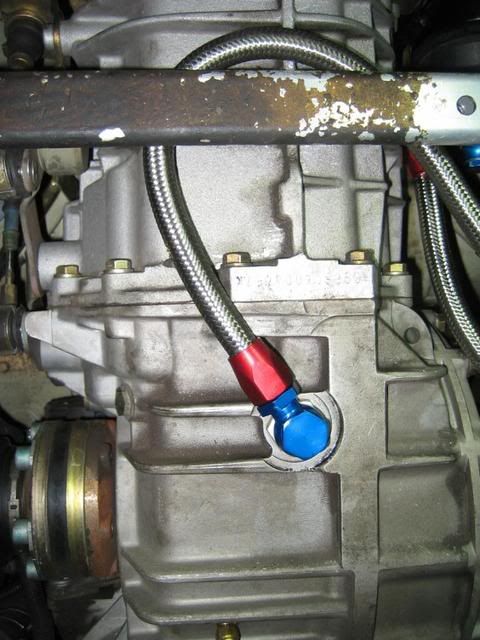
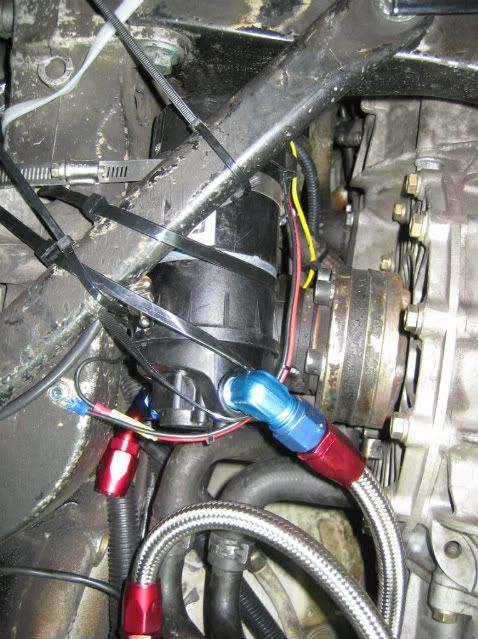
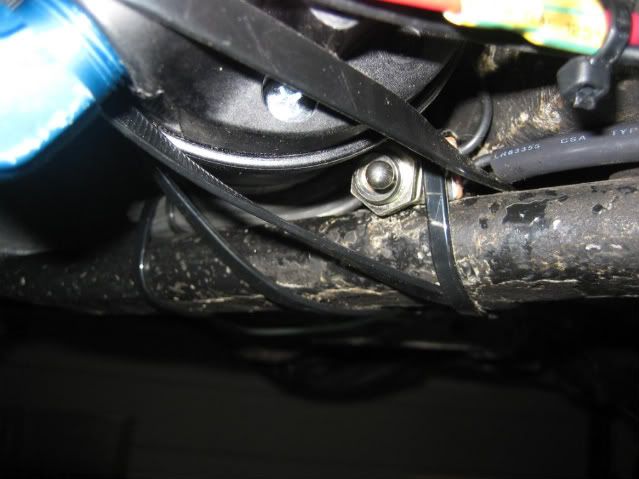
This is the banjo bolt assembly that exits the drain hole and goes to the filter.
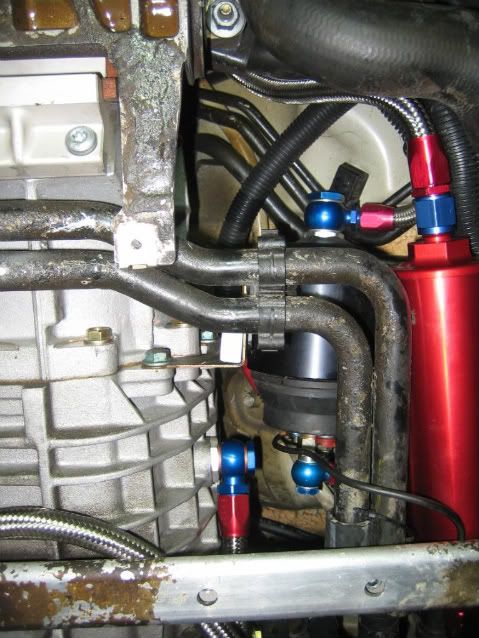
This shows the banjo assy for the fill fitting. You can also see the Peterson filter. Above all that you'll see my Bosch aux. fuel pump which has nothing to do with the oil filter system. I am realizing that as I make the comments, I am unable to see more than a little sliver of the picture.
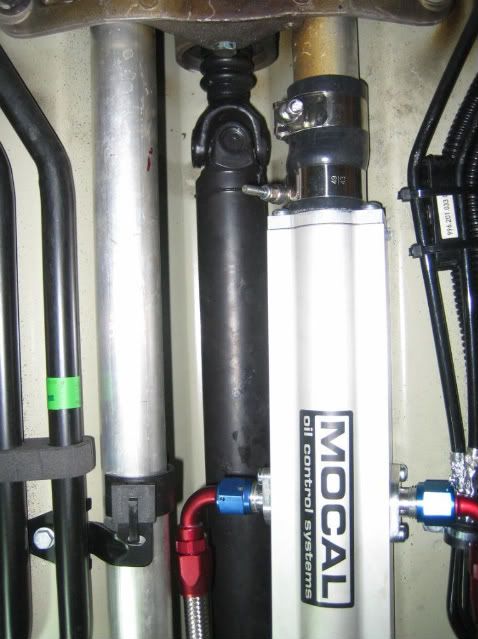
The pump with its fancy mounting method.
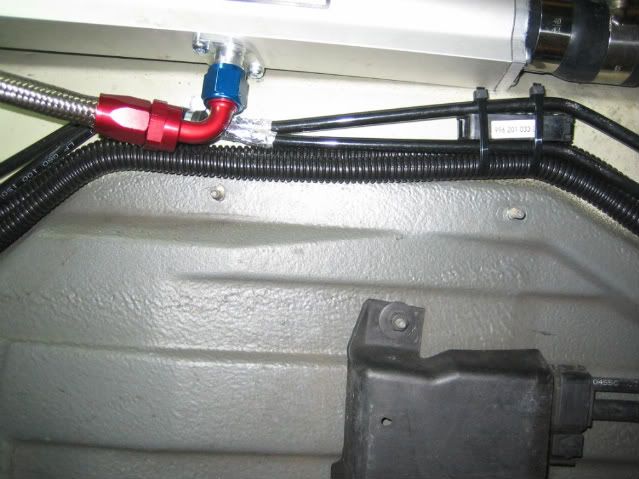
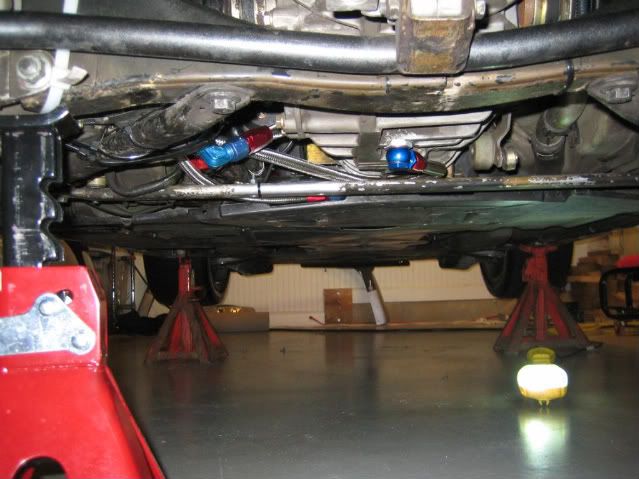
This shows the cooler with the inlet-side line in place. You can also see where the coupling was made to the front part of the radiator return line. There are 4 little plastic tubes that must be re-routed a little bit to allow the cooler to snug up tighter into the driveshaft tunnel. I put some protective wrap on a couple of the lines and looking closely you will see an adel clamp I used to stablize a couple of the lines.
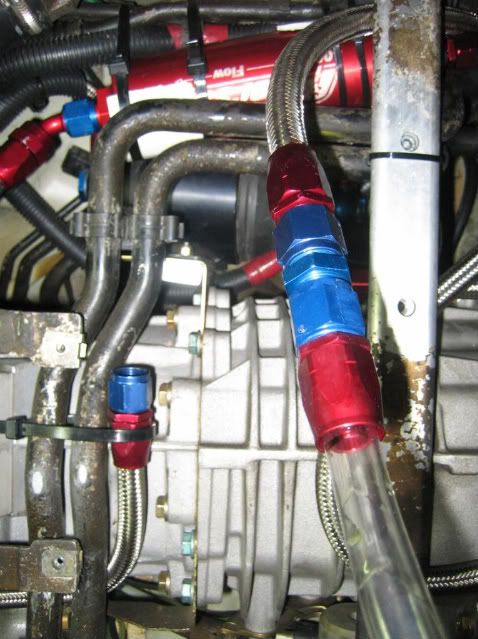
Using the driveshaft as a reference, this will give you a good idea where I made the cut in the return line. The inlet line comes from the filter and the exit line goes to the inlet side of the pump.

Here is a view of the back end of the cooler as it couples to the remaining 40mm aluminum line.

I added some insulation material I had in the shop to protect the plastic tubing from the hot oil line.
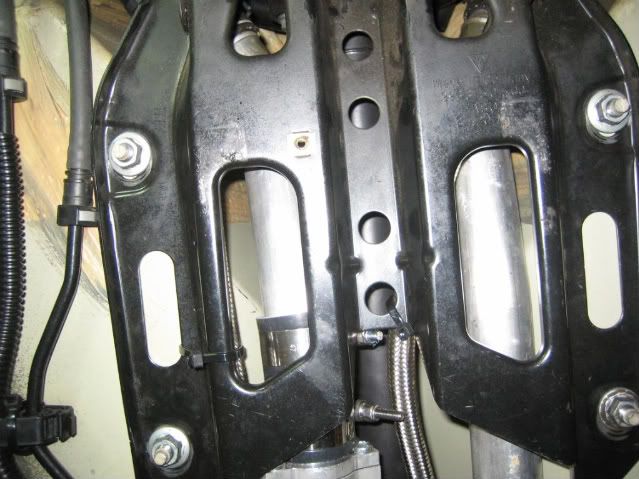
This shows the inlet return lines secured above the stabilizer plate that must be removed before you can route the lines.
I don't know how many pictures I can download at once, so I'm going to try to post this much and see how it goes. I will then continue.

I guess you'll have to enlarge this one to get the part number.
I got this one of the cooler larger and it shows what I used to cut the section out of the aluminum return line from the radiators. Be careful where you make the cut and how much you take out. The section of pipe and hose aft of the cooler needs to be positioned in such a way as not to rub against anything.
This is the banjo bolt assembly that exits the drain hole and goes to the filter.
This shows the banjo assy for the fill fitting. You can also see the Peterson filter. Above all that you'll see my Bosch aux. fuel pump which has nothing to do with the oil filter system. I am realizing that as I make the comments, I am unable to see more than a little sliver of the picture.
The pump with its fancy mounting method.
This shows the cooler with the inlet-side line in place. You can also see where the coupling was made to the front part of the radiator return line. There are 4 little plastic tubes that must be re-routed a little bit to allow the cooler to snug up tighter into the driveshaft tunnel. I put some protective wrap on a couple of the lines and looking closely you will see an adel clamp I used to stablize a couple of the lines.
Using the driveshaft as a reference, this will give you a good idea where I made the cut in the return line. The inlet line comes from the filter and the exit line goes to the inlet side of the pump.
Here is a view of the back end of the cooler as it couples to the remaining 40mm aluminum line.
I added some insulation material I had in the shop to protect the plastic tubing from the hot oil line.
This shows the inlet return lines secured above the stabilizer plate that must be removed before you can route the lines.
I don't know how many pictures I can download at once, so I'm going to try to post this much and see how it goes. I will then continue.
Last edited by Al Norton; Sep 7, 2009 at 01:38 PM.
Thread Starter
|
Registered User
Joined: Sep 2006
Posts: 1,143
From: Duluth, GA
Rep Power: 75
Continuing.
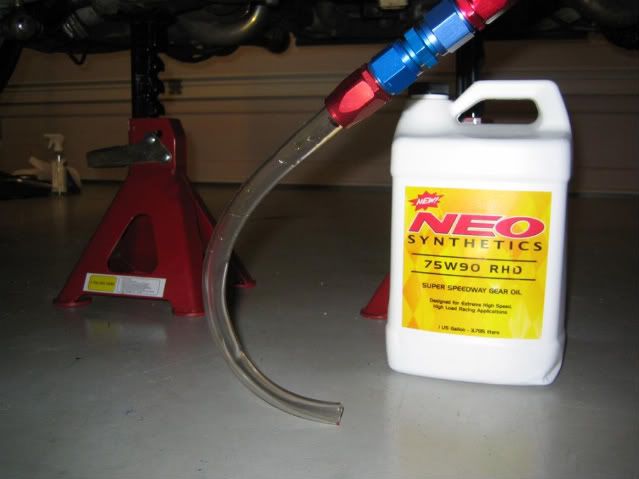
This is how the trans is filled. I went to the Home Depot garden section and found a piece of plastic tubing that fit snugly into a straight hose end. You will see that it is connected to the flare union I placed in the return line before it enters the inlet side of the pump. I have a manual switch (I will show a pic later) used to turn on the puimp and siphon up the fluid.
I routed this sexction of hose with the flare union in such a way as to remain outside the under tray when it is all buttoned up.
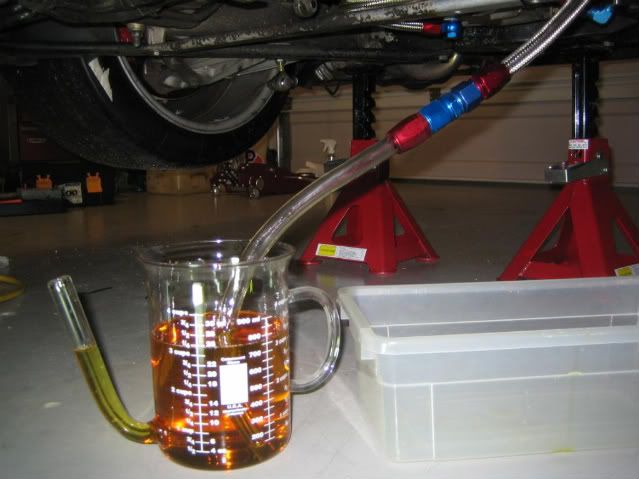
In addition to the gallon of oil siphoned in I calculated the need for an additional 24 oz. to compensate for filter, cooler, pump and lines.
The switch. I don't know why some pics come out one size and some another. This is a weatherproof spst toggle.
This shows it all buttoned up. One of the fasteners on the driver's side of the under tray must be left unfastened as the cooler extends down a bit too far to allow it. This added approximately 10 lbs. weight to the car.
I hope you can make some sense of the routing of the lines. I was unable to take pictures of large segments bc I was working in my garage floor with the car on jack stands.
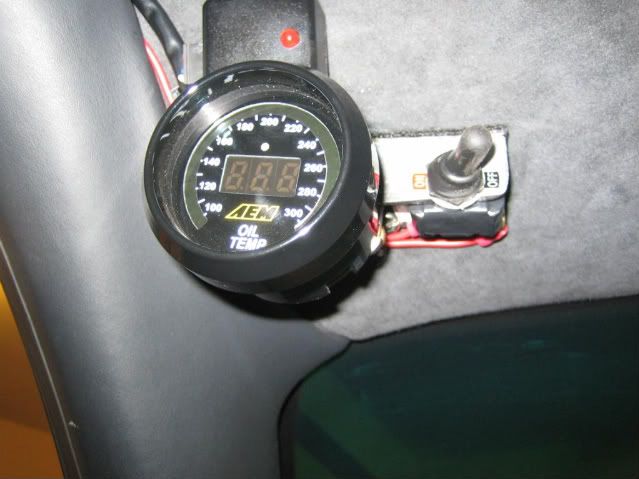
For those of you curious about the manual control system I'm using, this will help. I didn't want to use the temp controlled switch with the concern it might fail with all the vibrations induced by tracking the car. Additionally, I already had the alarm system and a spare input in the Zietronix unit so it was a more practical way for me to do it.This is right there in my face so I can know when to flip the switch. The alarm buzzer and light are activated at 240F.
Feel free to e-mail me with questions or ask them on the forum) and I'll do my best to answer them. E-mailing is easier for me than the PM system. I never have a record of my responses unless I get an additional reply.
It's been several months since I did this installation and I'm sure I've forgotten some of the subtleties in the process. Al@AtlantaLaserdentistry.com
This is how the trans is filled. I went to the Home Depot garden section and found a piece of plastic tubing that fit snugly into a straight hose end. You will see that it is connected to the flare union I placed in the return line before it enters the inlet side of the pump. I have a manual switch (I will show a pic later) used to turn on the puimp and siphon up the fluid.
I routed this sexction of hose with the flare union in such a way as to remain outside the under tray when it is all buttoned up.
In addition to the gallon of oil siphoned in I calculated the need for an additional 24 oz. to compensate for filter, cooler, pump and lines.
The switch. I don't know why some pics come out one size and some another. This is a weatherproof spst toggle.
This shows it all buttoned up. One of the fasteners on the driver's side of the under tray must be left unfastened as the cooler extends down a bit too far to allow it. This added approximately 10 lbs. weight to the car.
I hope you can make some sense of the routing of the lines. I was unable to take pictures of large segments bc I was working in my garage floor with the car on jack stands.
For those of you curious about the manual control system I'm using, this will help. I didn't want to use the temp controlled switch with the concern it might fail with all the vibrations induced by tracking the car. Additionally, I already had the alarm system and a spare input in the Zietronix unit so it was a more practical way for me to do it.This is right there in my face so I can know when to flip the switch. The alarm buzzer and light are activated at 240F.
Feel free to e-mail me with questions or ask them on the forum) and I'll do my best to answer them. E-mailing is easier for me than the PM system. I never have a record of my responses unless I get an additional reply.
It's been several months since I did this installation and I'm sure I've forgotten some of the subtleties in the process. Al@AtlantaLaserdentistry.com
Last edited by Al Norton; Sep 7, 2009 at 01:47 PM.

Thread
Thread Starter
Forum
Replies
Last Post
tropicatango
Automotive Parts & Accessories For Sale/Wanted
6
Jun 8, 2025 01:00 PM
PelicanParts.com
996 Vendor Classifieds
0
Aug 20, 2015 02:41 PM
PelicanParts.com
996 Turbo Vendor Classifieds
0
Aug 20, 2015 02:40 PM
PelicanParts.com
GT3/GT2/GT Vendor Classifieds
0
Aug 20, 2015 02:37 PM
PelicanParts.com
996 Turbo Vendor Classifieds
0
Aug 18, 2015 03:43 PM