When you click on links to various merchants on this site and make a purchase, this can result in this site earning a commission. Affiliate programs and affiliations include, but are not limited to, the eBay Partner Network.
Just received PCA badge (about 2 3/4 inches in diameter, enameled, with two 1 inch phillips head screws, washers, nuts). Wondering how install on rear spoiler, through louvers, without punching any holes. Any guidance here...? Thanks for the input.
Location: W6608 Hidden Valley Rd, Holmen, WI 54636
Age: 76
Posts: 59
Rep Power: 13
Originally Posted by fmanley2
Just received PCA badge (about 2 3/4 inches in diameter, enameled, with two 1 inch phillips head screws, washers, nuts). Wondering how install on rear spoiler, through louvers, without punching any holes. Any guidance here...? Thanks for the input.
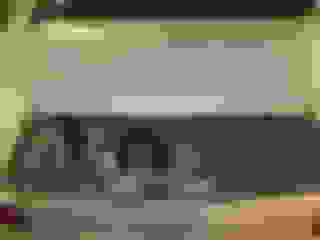
First time trying to attach a picture, not sure it worked. Picture shows rear spoiler with 4 badges installed. The top, finned portion of the spoiler needs to be removed. You will not be able to mount the badge with the screws unless you drill clearance holes in the fins. I did this on the first badge I put on. I then figured out that I could mount the badge by cross drilling the threaded stand-offs on the badge and then using a thin wire to mount the badge to the spoiler. Tough to describe but easy to do. Call me at 608-526-3517 for details.
Location: W6608 Hidden Valley Rd, Holmen, WI 54636
Age: 76
Posts: 59
Rep Power: 13
Originally Posted by sjg1138
The picture attachment didnt work. Curious to see how you installed these.
I'd be glad to disassemble the finned section of the spoiler and take pictures of how the badges are mounted. If you don't mind, I'd rather send the pictures via email. My email is lgl314@charter.net Send me your address and I'll get you the pictures some time next week. Larry
At 67 I remember badges on the grills of almost all early sport cars. Even bumper badges, you do remember bumpers? Triple A used them a lot.
My oldest daughter was born there in 1969, about 3 miles from the Porsche factory. Ask about that story. Drilled holes and used SS screws, had to notch fins.
Lots of badges online . . . from $20 to $2K . . . really cool older versions.
Raise the wing . . . remove 4 hole plugs (don't forget to put them back in when done)
Use 4mm hex allen wrench . . . these screws are pretty tight, therefore the small vise-grips for leverage. Turn each of the 4 screws only 6 - 7 full turns.
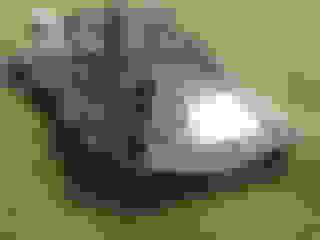
Carefully lift the rear edge of the finned wing straight up and then pull to the rear . . . may need to use plastic pry tool.
Finned wing removed . . . shows allen wrench
Inside surface of wing and upside-down finned wing.
Bolts/nuts to secure badge.
Notches cut for clearance in fins.
Screws in badge, need to be cut just right . . . and bent to clear.
Screws through fin.
Finally figured out how to wire on the badges.
Used .090" dia. galvanized wire . . . sometimes called utility or picture wire.
Cross drilled .125" dia holes through the treaded lugs.
Wire pulled thru lugs.
Wire pulled thru fin and around fin support. Twist wire, check when badge does not move, do not over twist wire.
Carefully reassemble finned section, this is a little fussy. Make sure lugs (half moon piece in picture) on finned section fit entirely into holes in wing.
Have fun! I think it really added a nice look to the back of the car.
 06-25-2015, 06:51 PM