GT3 grill on 987 install
#1
 05-03-2009, 07:22 PM

Join Date: Oct 2007
Location: MD
Posts: 292
Rep Power: 40 

GT3 grill on 987 install
Difficulty scale from 1 to 10: 5 (to remove bumper)
Tools needed:
-jackstands or ramps
-1/4 socket wrench
-7" extension
-T30 socket
-T25 socket
-5mm deep socket
-flathead screwdriver
-needlenose pliers
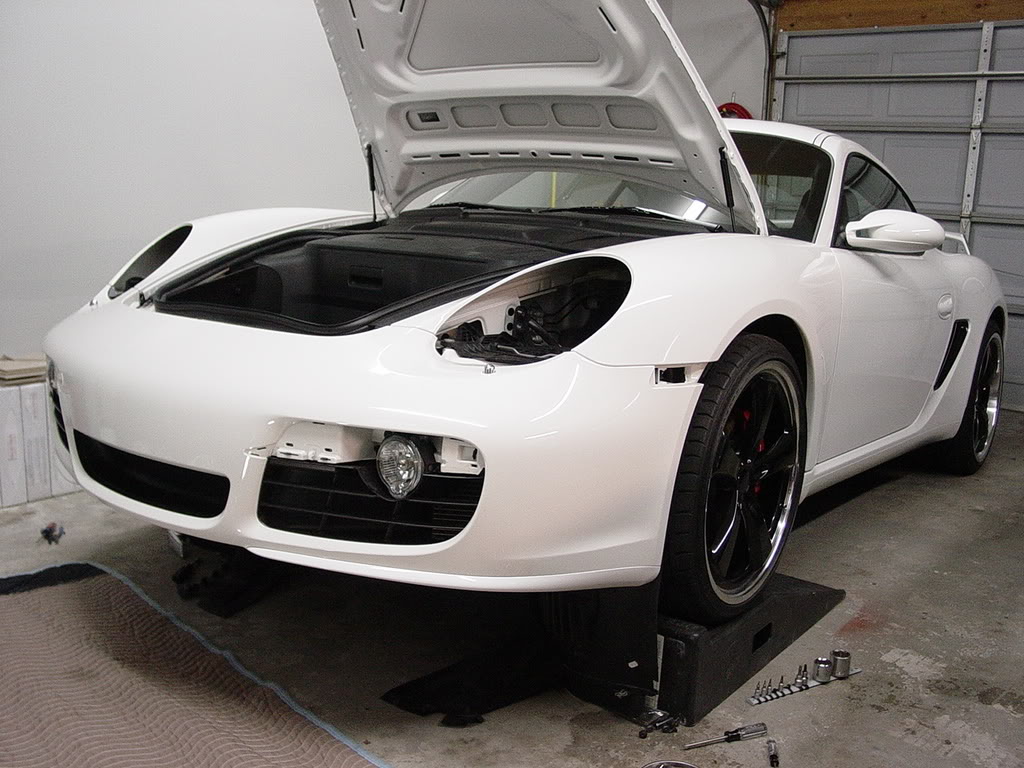
Start off by putting you car on ramps,
Pull the plastic up they are held down with hard velcro.
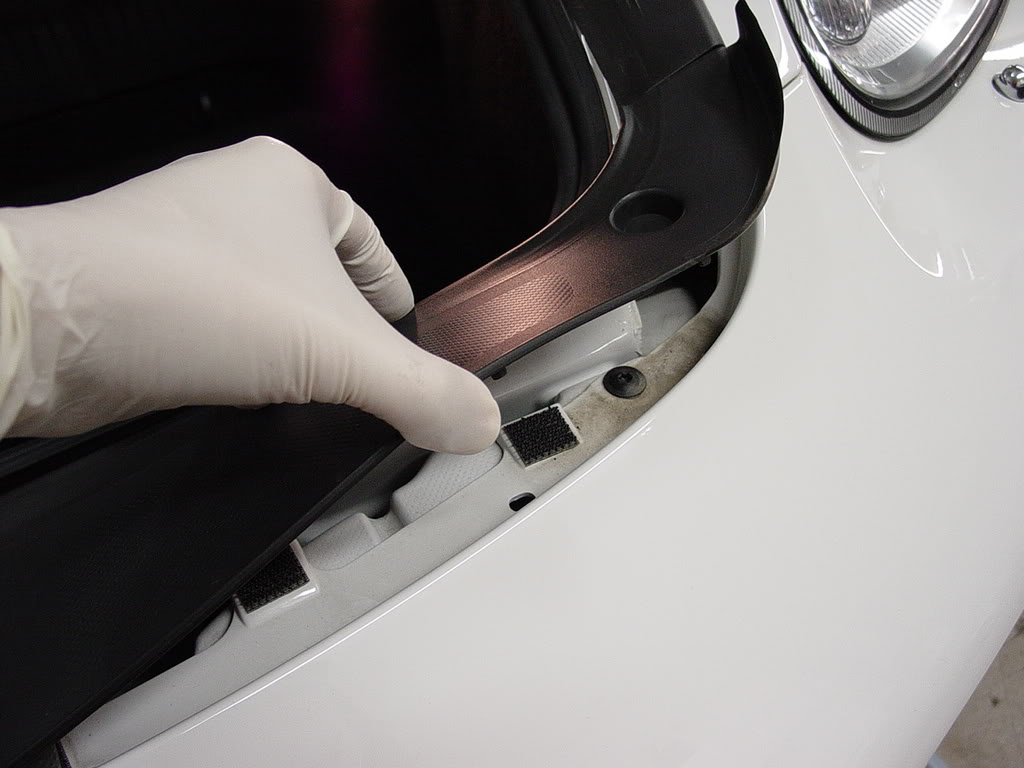
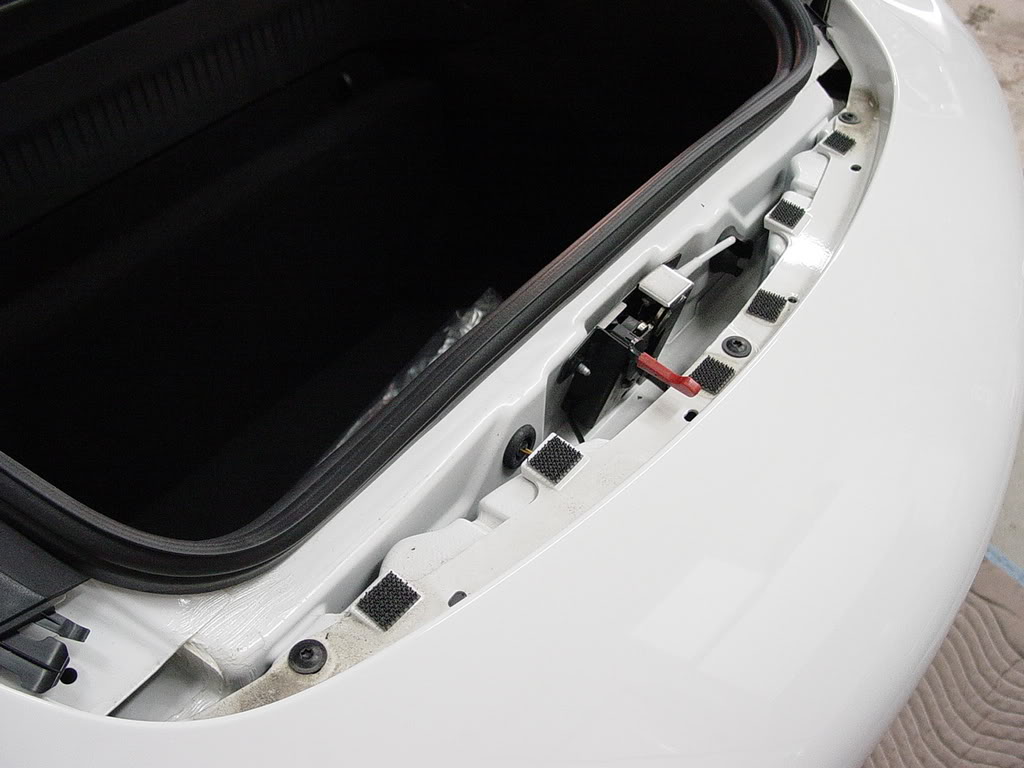
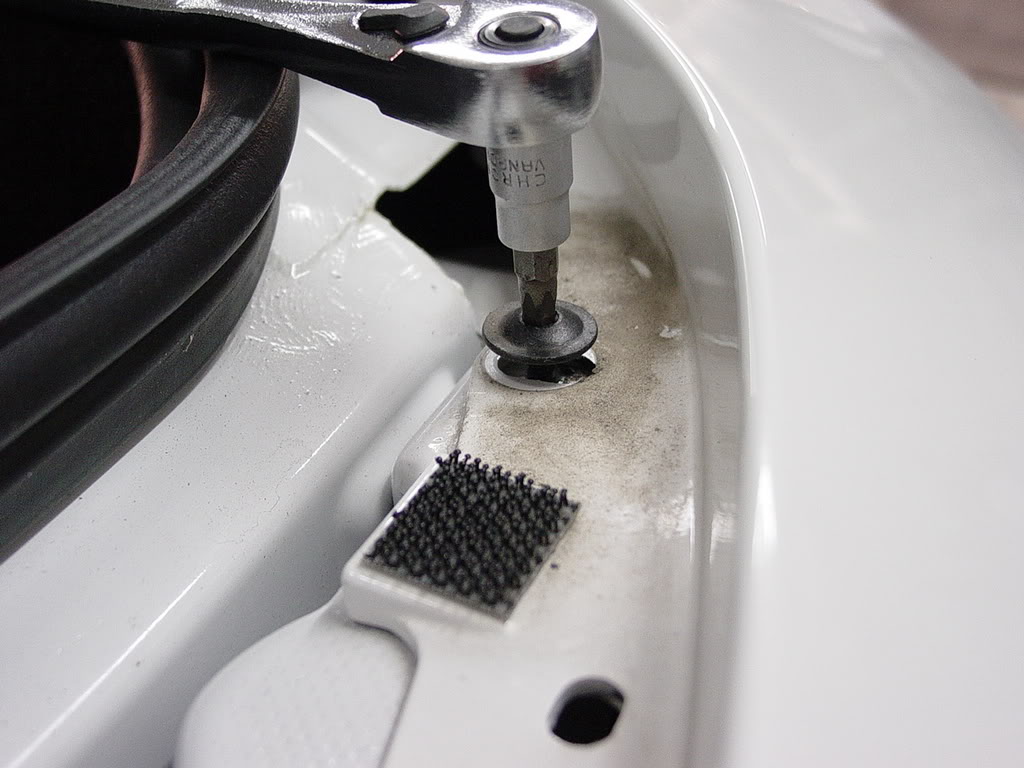
once you pull it up there are 3 T30 screws, remove them.
Now lets go to the bottom, there are a few more T30 screws under that need to come out. You will see them along the painted lower part of the bumper.
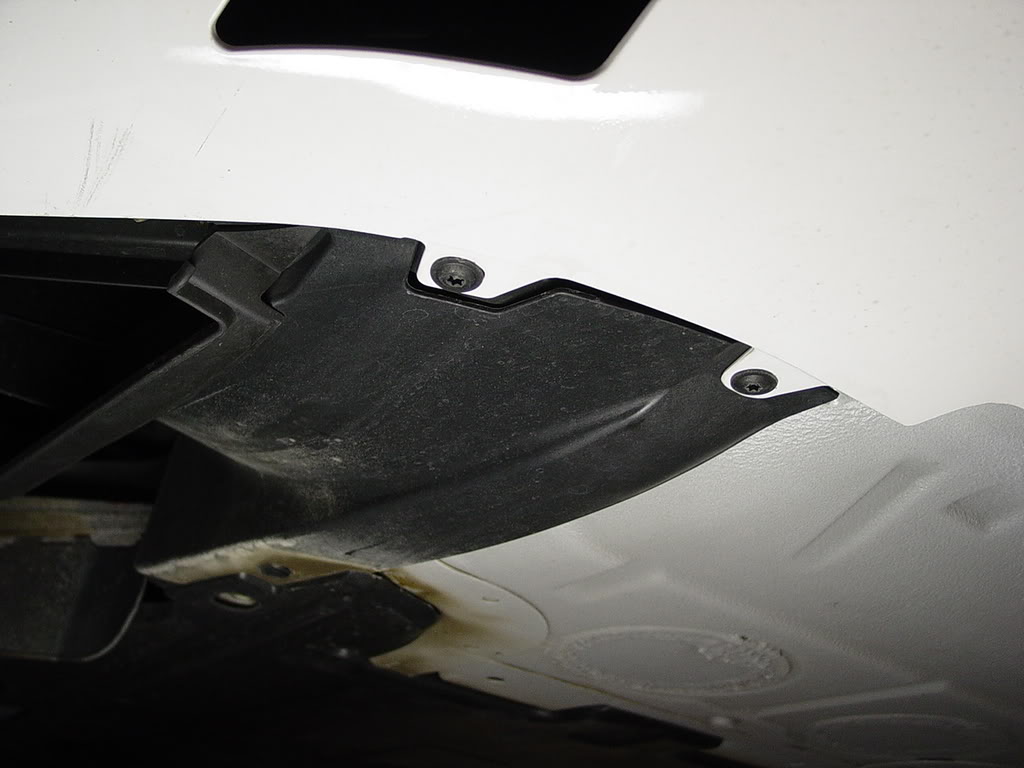
one of them are in a larger hole at the end of the lip.
dont forget to remove that one
now there is one in the back that is a T25 remove that as well. not sure why they made this one a different size.
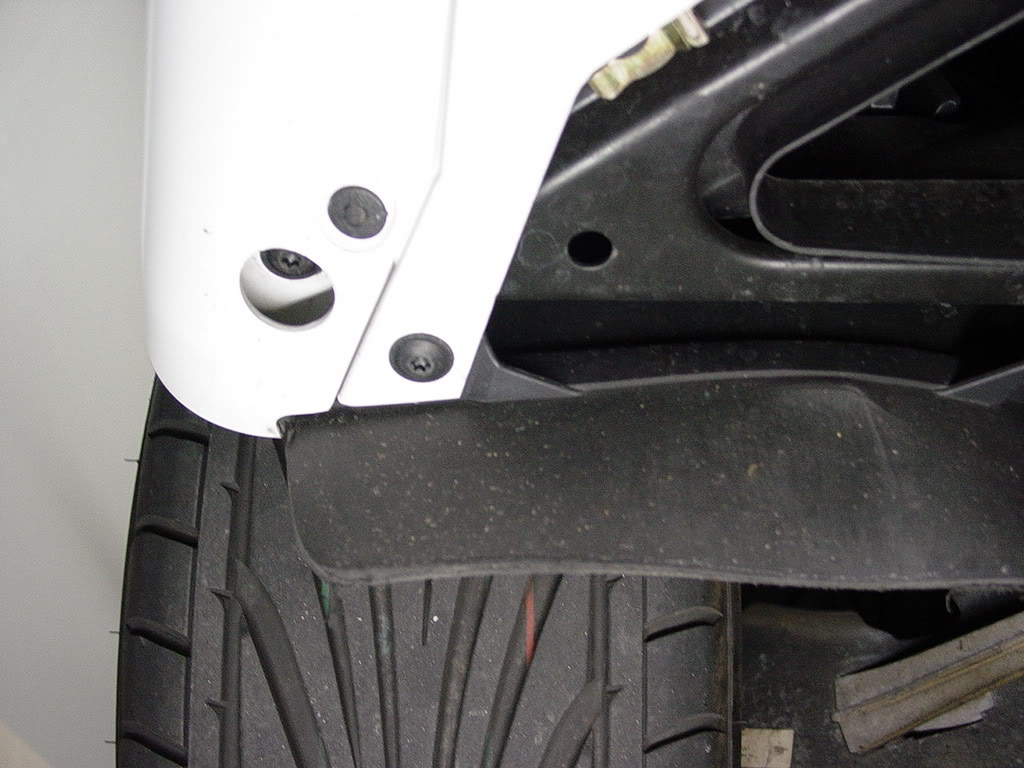
in the wheel well there are 4 more T25 screws to remove.
2 up high and 2 down low
I used the socket wrench to get to these, didnt have to remove the tires. Once you remove all of the T25 screws you should be able to pull down the liner. The side lenses have a release clip accessed through a rubber plugged hole in the fender liner (see the Owners Manual). If you force it off you may break the locking tab.
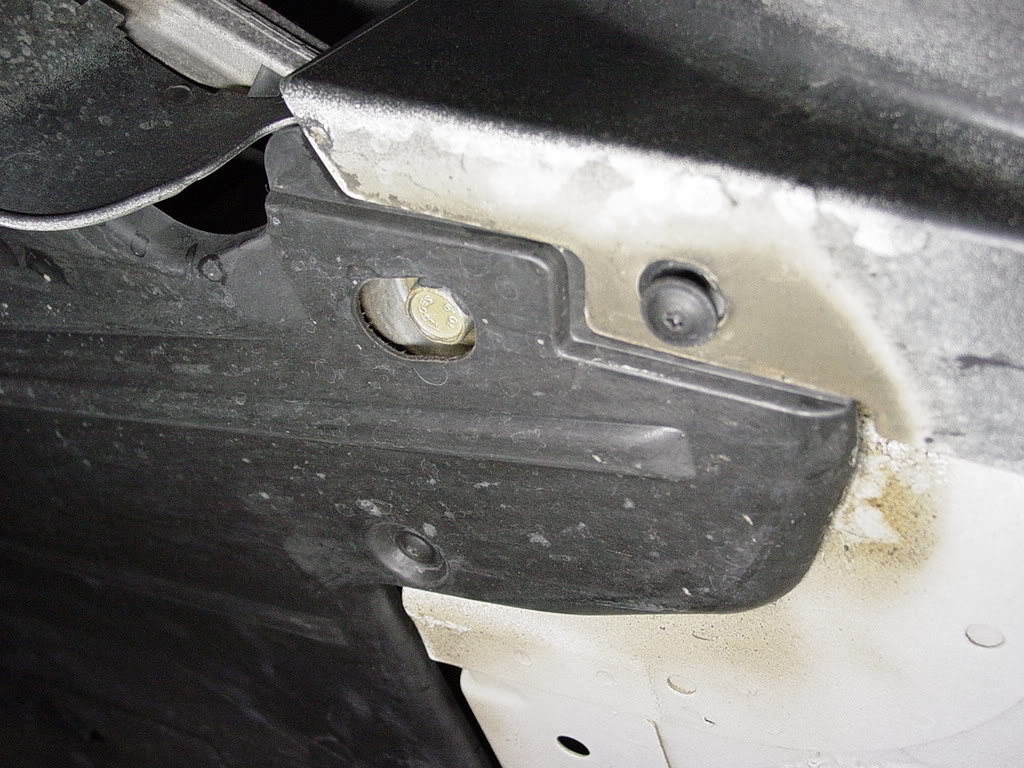
Now use your finger and pull the fender liner down.
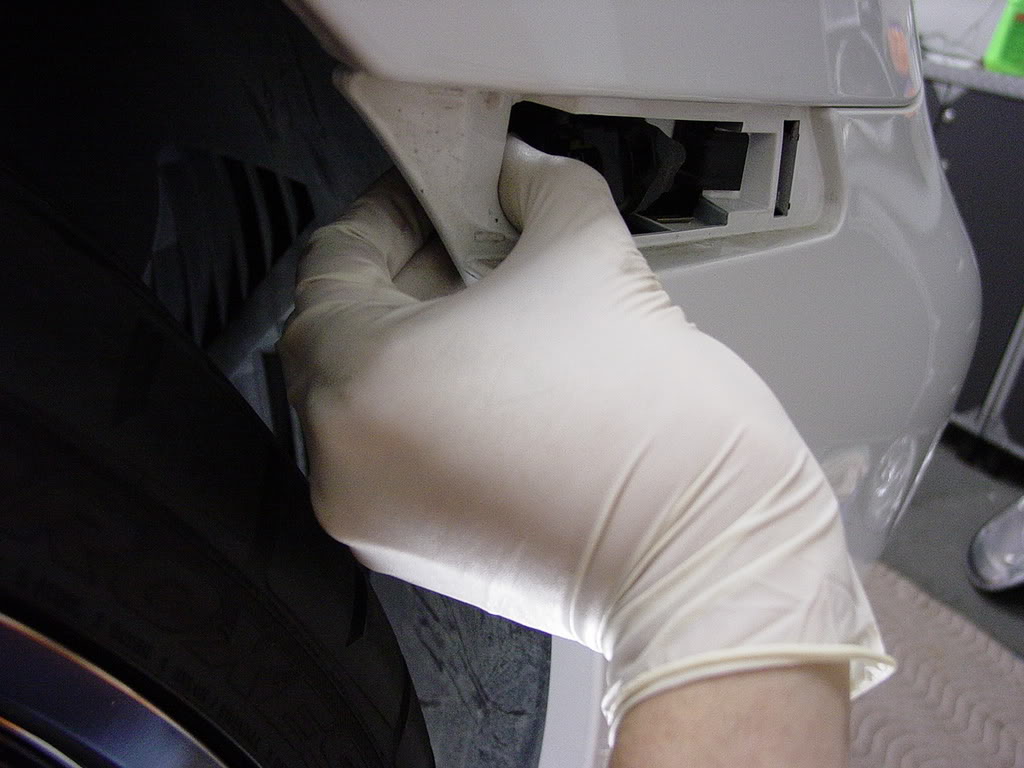
there is another T25 screw here that needs to be removed.
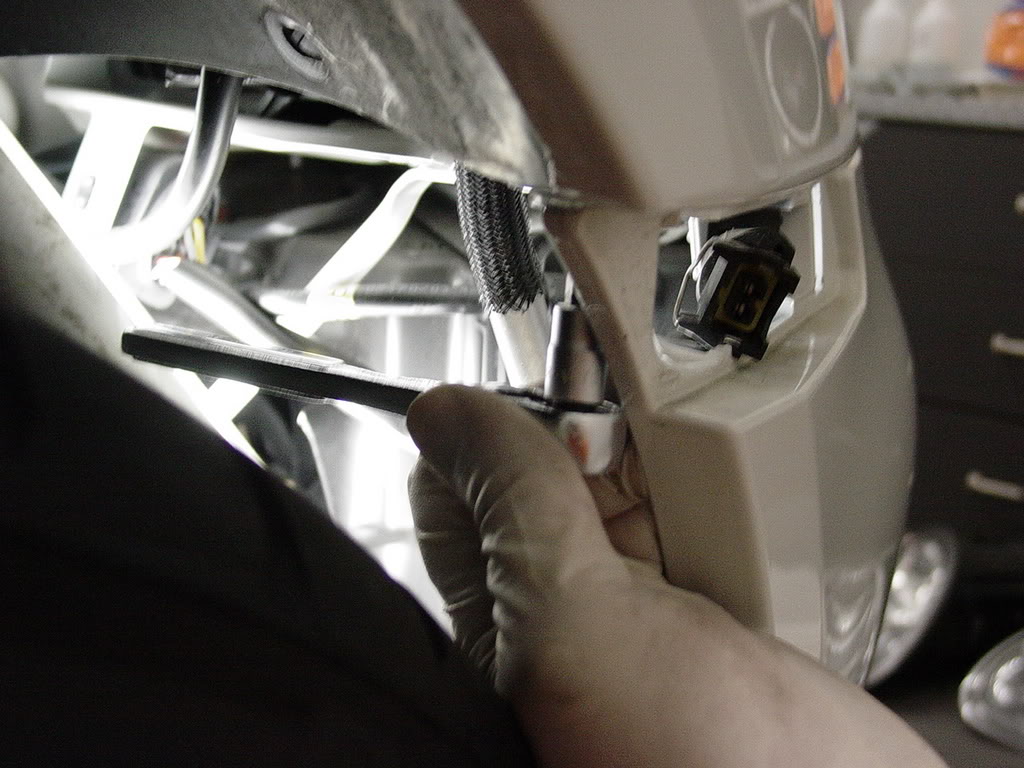
Once the screw is removed you need to disconnect the foglight clip. Use your needle nose pliers to pull the wire housing from the body of the car, then you can easily unclip it.
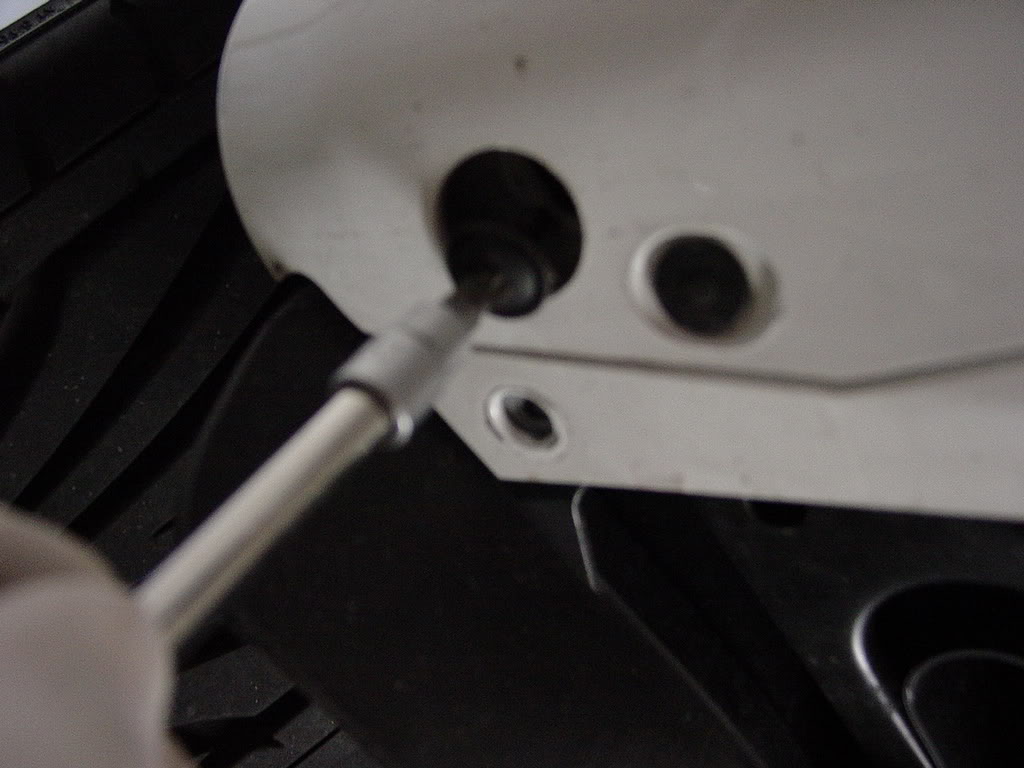
Now lets go back to the top and remove the headlights. Just unscrew the plastic tabs in the trunk and pull out the carpet. You should now see a black ****.
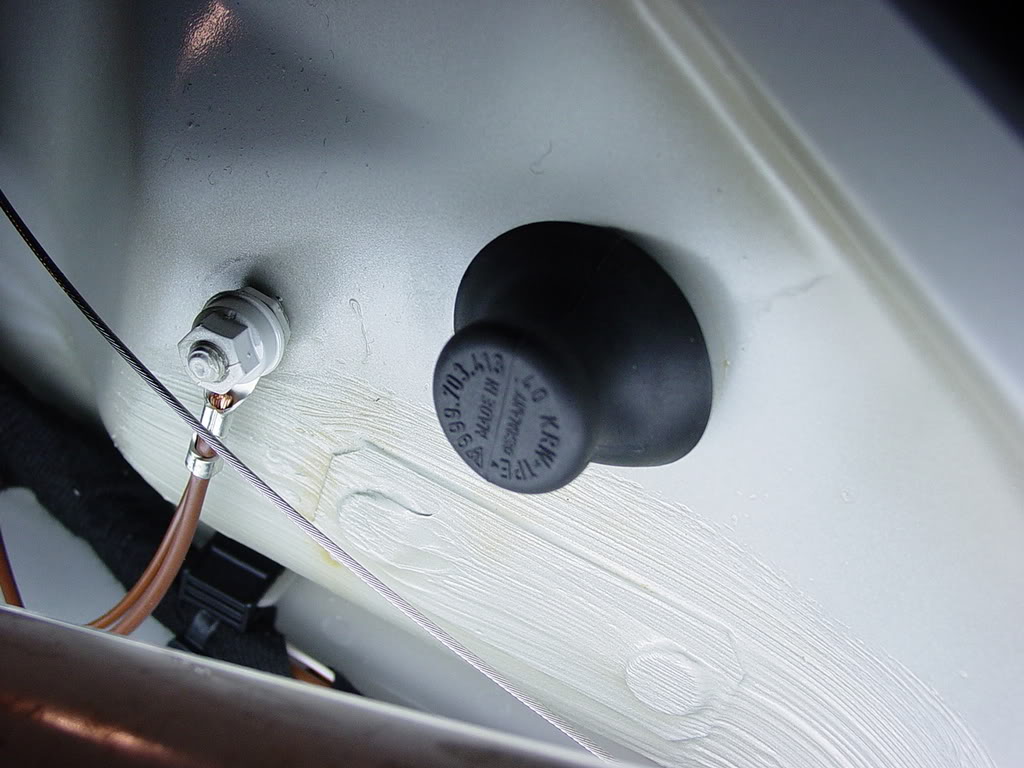
just pull it off and there is a double wall.
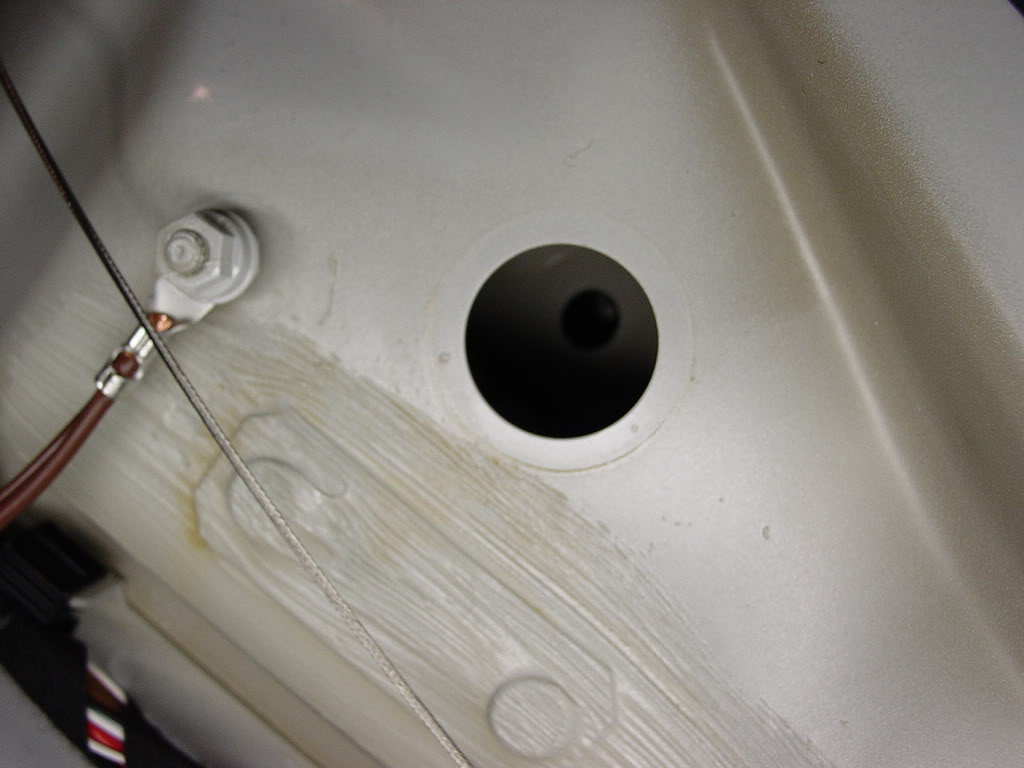
Use the 1/4" long extension and you need a 5mm deep socket.
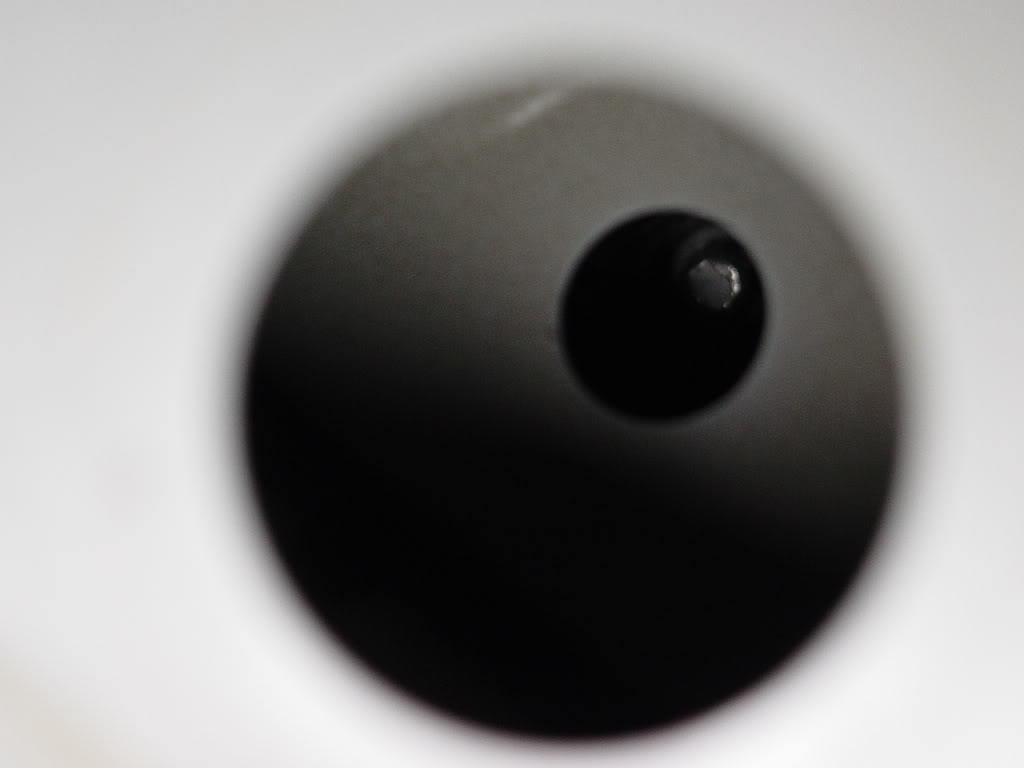
This should only be a half turn then you will hear a loud snap, like something just broke. This sound is normal, the headlight will pop up, just pull it out. There are no wires, its already disconnected.
Tools needed:
-jackstands or ramps
-1/4 socket wrench
-7" extension
-T30 socket
-T25 socket
-5mm deep socket
-flathead screwdriver
-needlenose pliers
Start off by putting you car on ramps,
Pull the plastic up they are held down with hard velcro.
once you pull it up there are 3 T30 screws, remove them.
Now lets go to the bottom, there are a few more T30 screws under that need to come out. You will see them along the painted lower part of the bumper.
one of them are in a larger hole at the end of the lip.
dont forget to remove that one
now there is one in the back that is a T25 remove that as well. not sure why they made this one a different size.
in the wheel well there are 4 more T25 screws to remove.
2 up high and 2 down low
I used the socket wrench to get to these, didnt have to remove the tires. Once you remove all of the T25 screws you should be able to pull down the liner. The side lenses have a release clip accessed through a rubber plugged hole in the fender liner (see the Owners Manual). If you force it off you may break the locking tab.
Now use your finger and pull the fender liner down.
there is another T25 screw here that needs to be removed.
Once the screw is removed you need to disconnect the foglight clip. Use your needle nose pliers to pull the wire housing from the body of the car, then you can easily unclip it.
Now lets go back to the top and remove the headlights. Just unscrew the plastic tabs in the trunk and pull out the carpet. You should now see a black ****.
just pull it off and there is a double wall.
Use the 1/4" long extension and you need a 5mm deep socket.
This should only be a half turn then you will hear a loud snap, like something just broke. This sound is normal, the headlight will pop up, just pull it out. There are no wires, its already disconnected.
#2
05-03-2009, 07:24 PM
Join Date: Oct 2007
Location: MD
Posts: 292
Rep Power: 40
GT3 grill on 987 install part 2
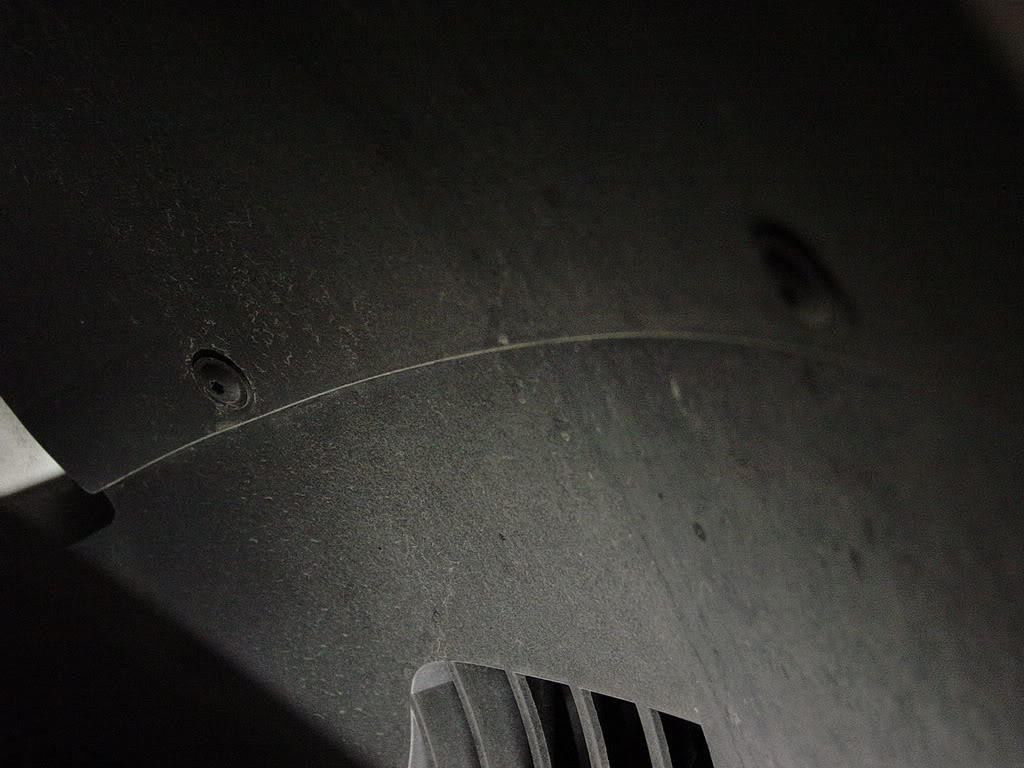
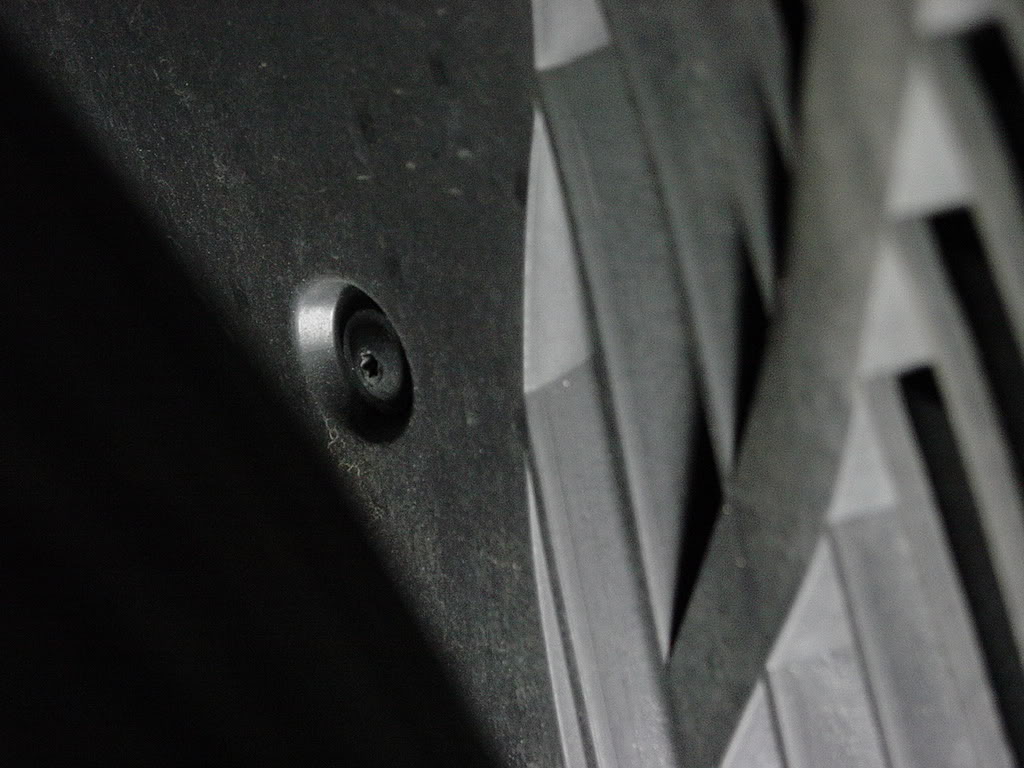
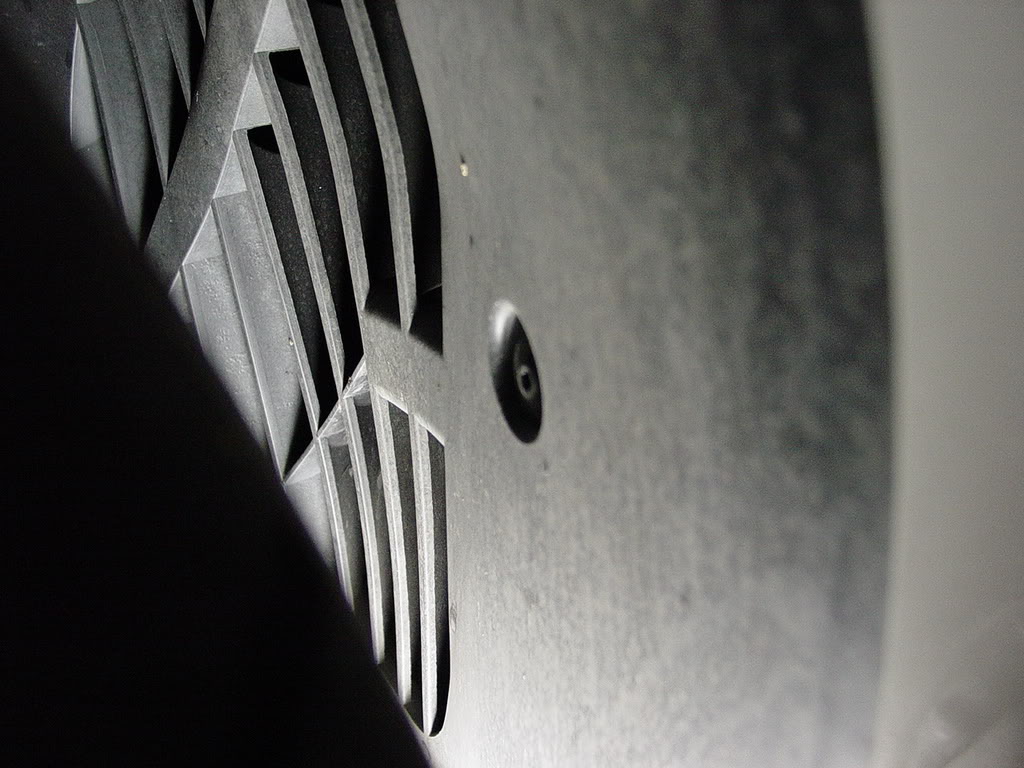
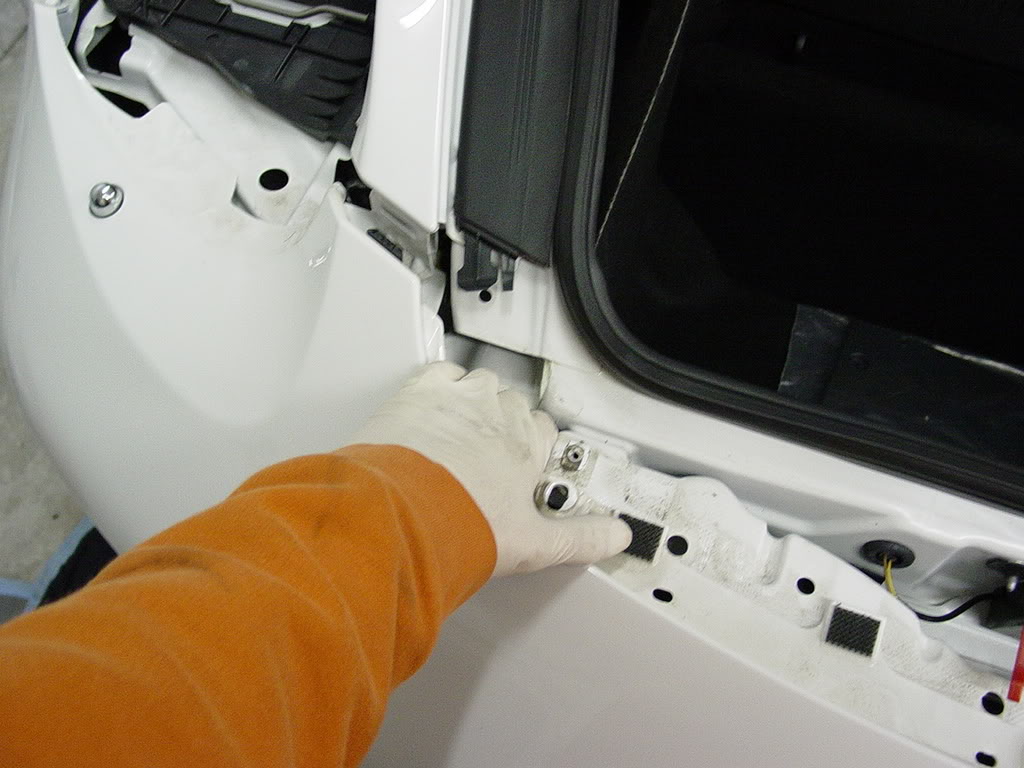
On the inside of the headlight there is a metal clip that you need to use the flathead screwdriver to push out towards the trunk. View form inside the headlight:
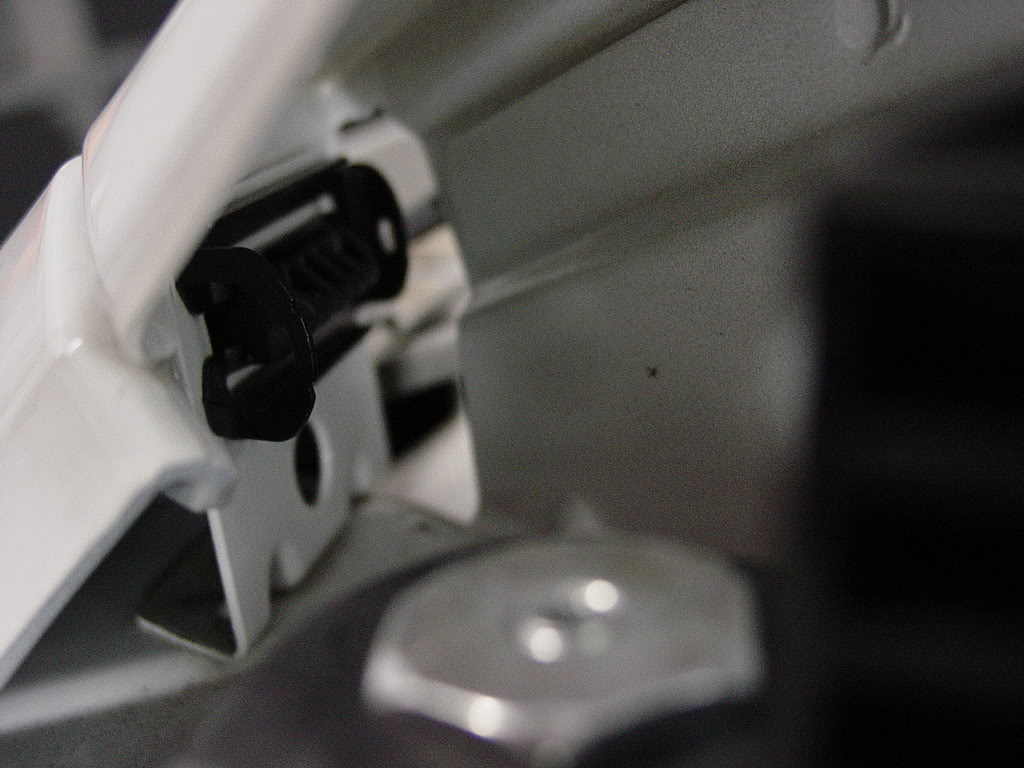
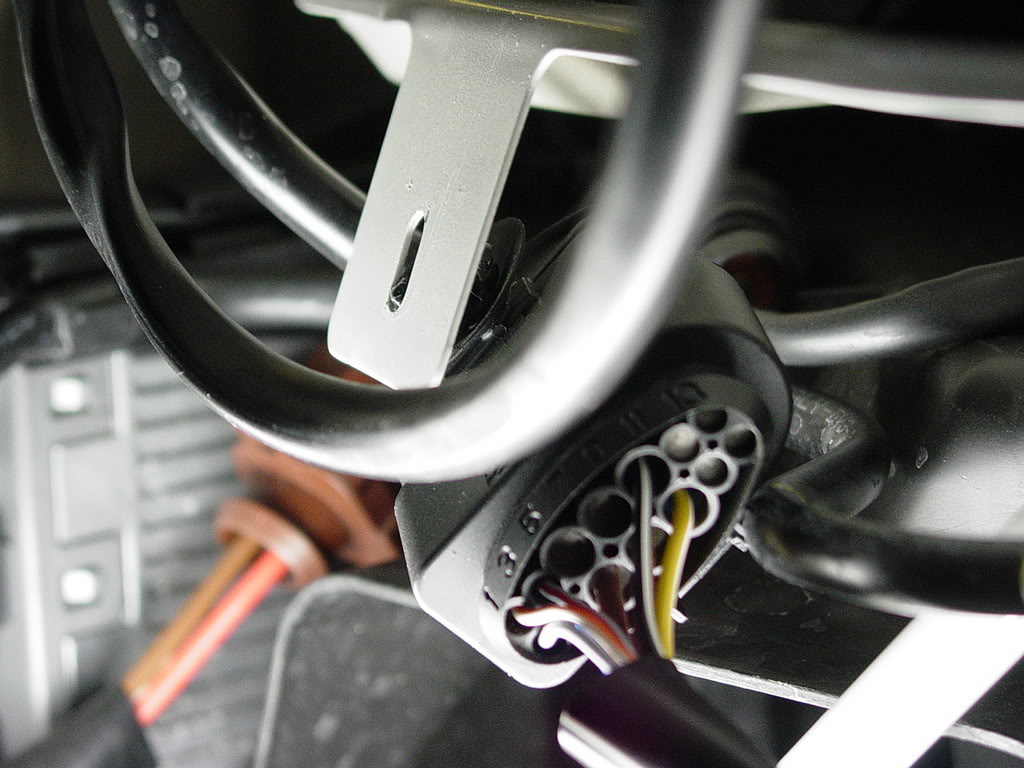
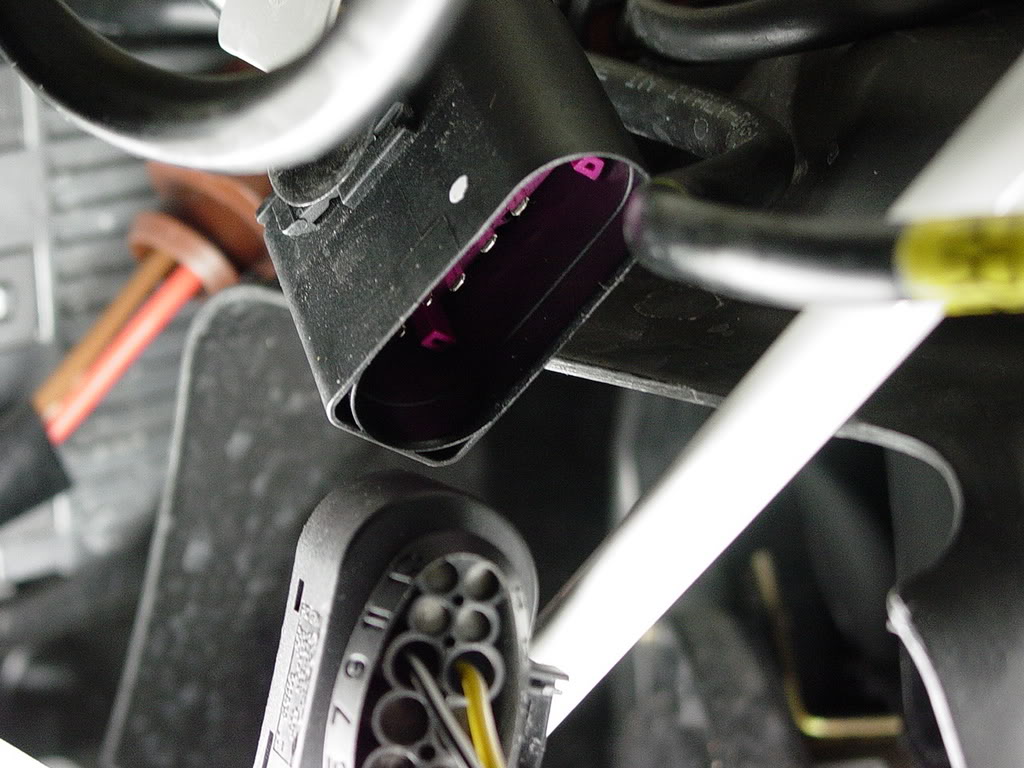
View from the trunkside:
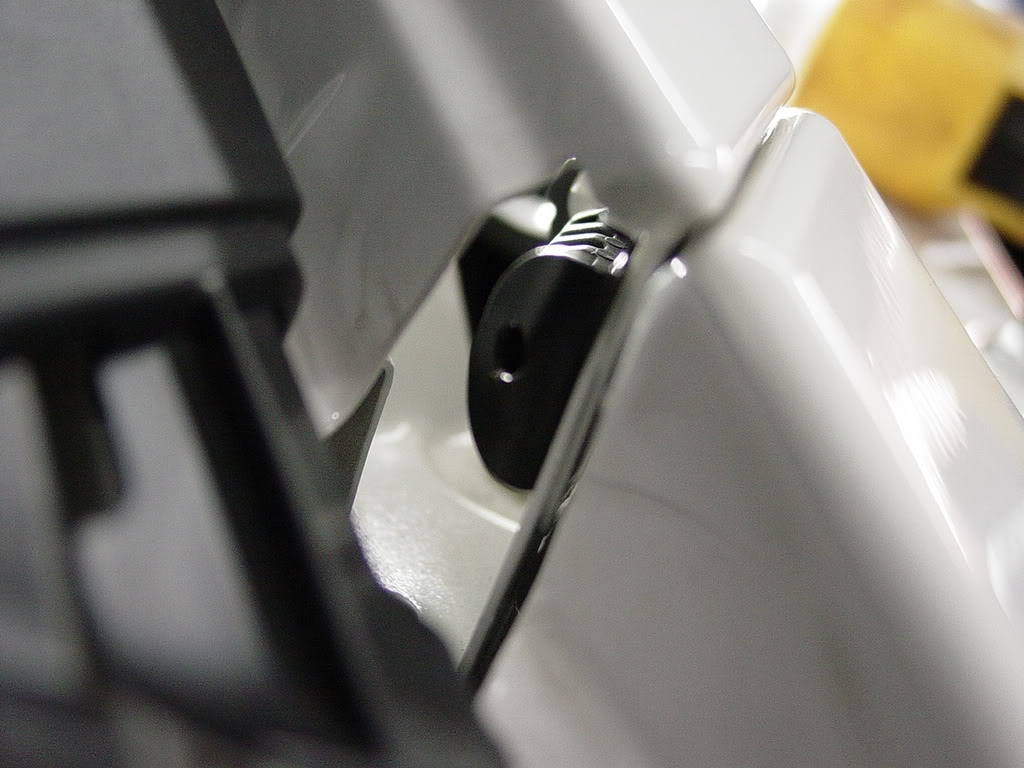
See slide it all the way out.
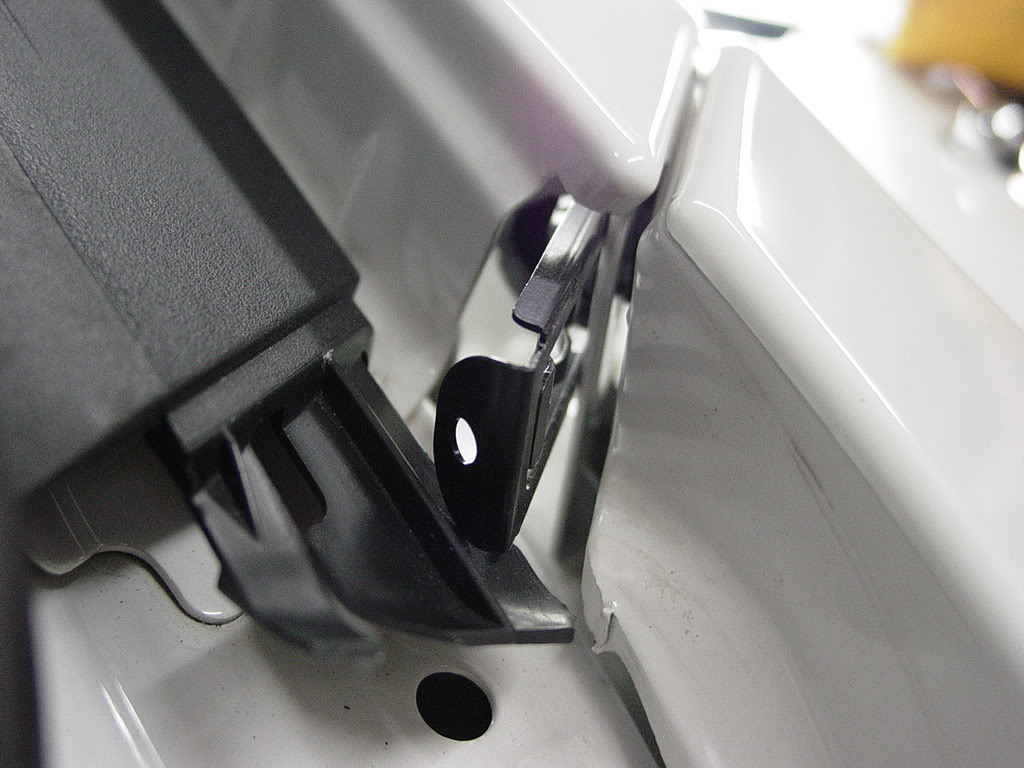
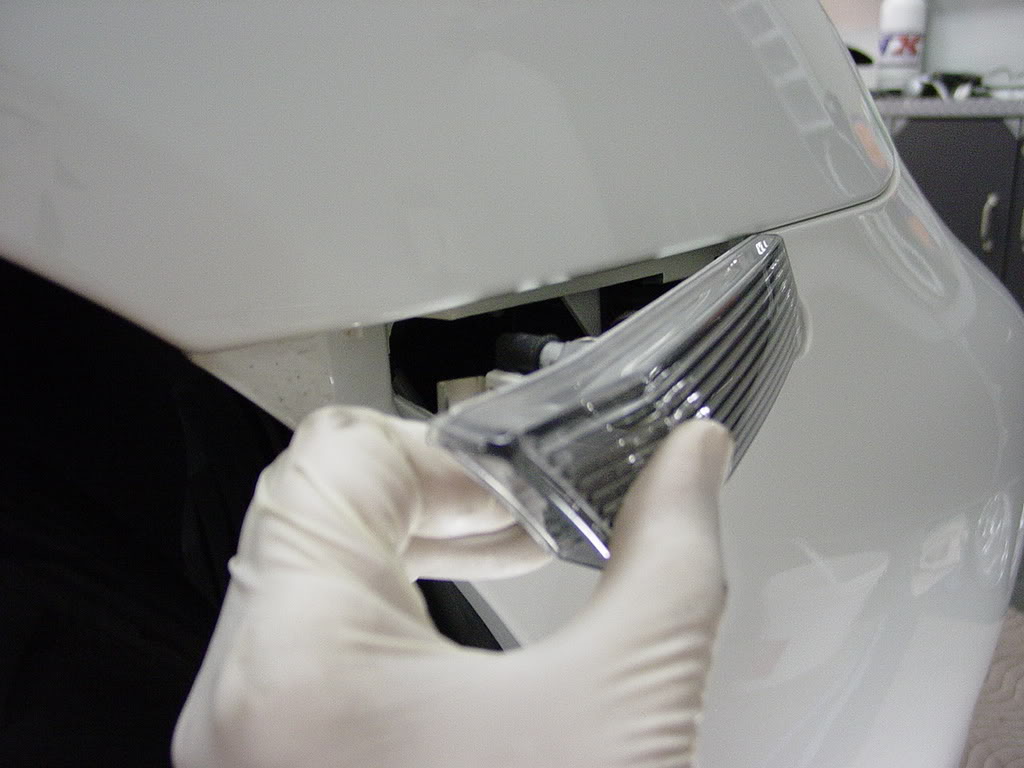
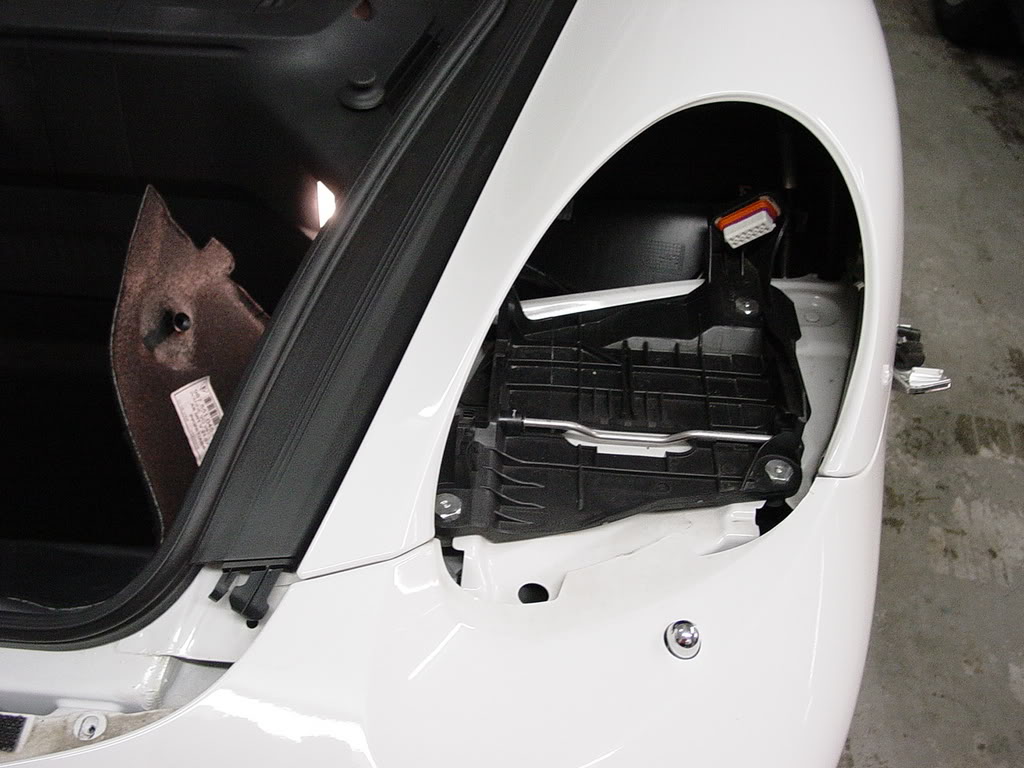
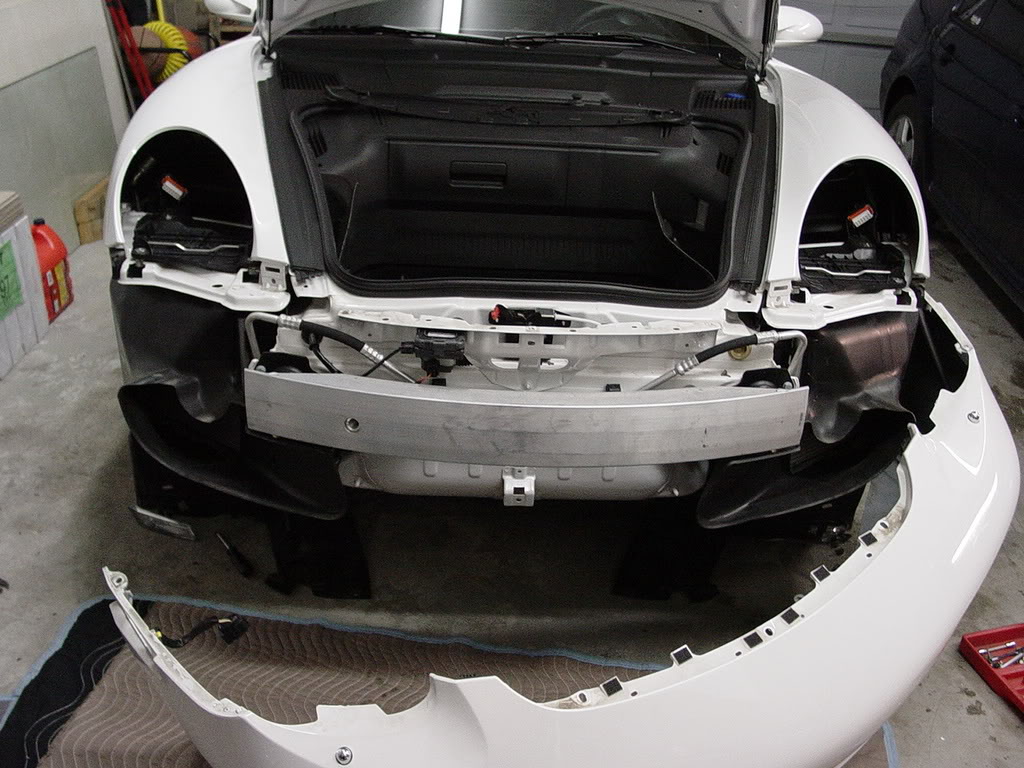
once this slides out pull the bumper out where the sidemarker is. you should hear a pop so you know it cleared the fender.
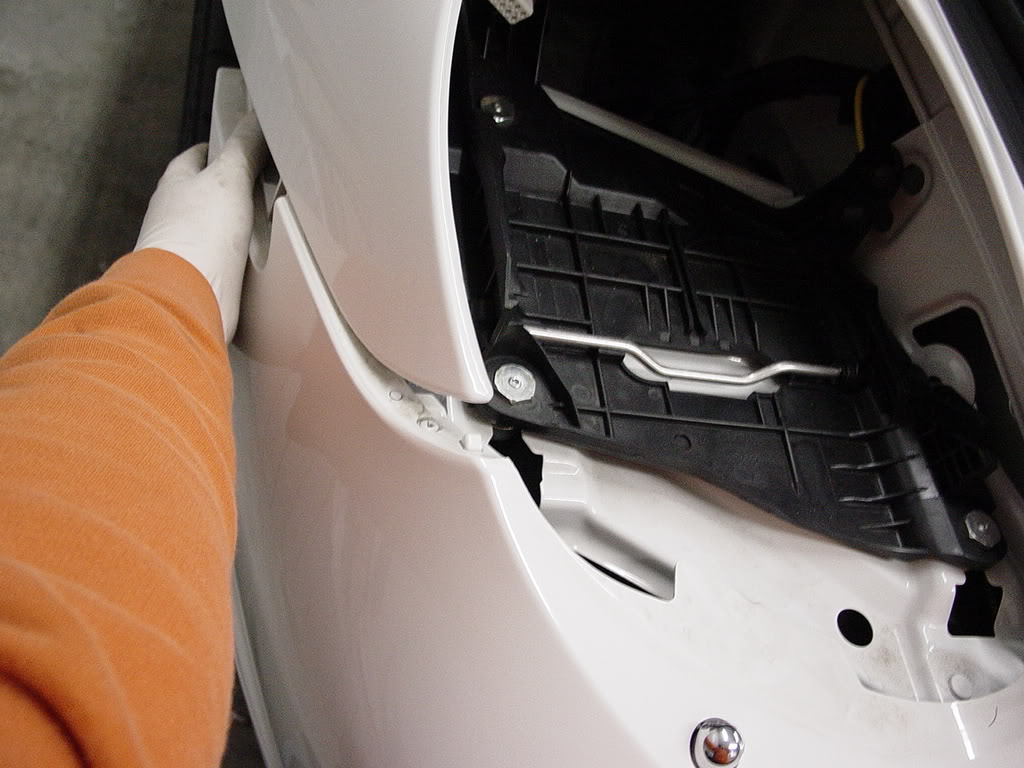
Now pull the front and WOW its off! Man the headlight washers look exactly like the ones on my audi. Hop they dont start to leak like the ones on my audi though. I've changed those 3 times in 4 years.
In my case I did not need to remove the headlight washer line, but if you need to there is a plastic horseshoe clip on the drivers side headlight, when you pull this out clamp the hose or have a bucket ready to catch washer fluid.
Difficulty rating 1 to 10: 7 (intsalling grill)
*there are several ways to install this grill. The following article is the steps I did to install it.
Tools needed:
-factory Gt3 grill part#9975753279001C
-dremel w/cut off wheel or box cutting knife
-safety goggles
-surgeons mask (really you will need this)
-10mm deep socket
-ratcheting wrench
-zip ties x3
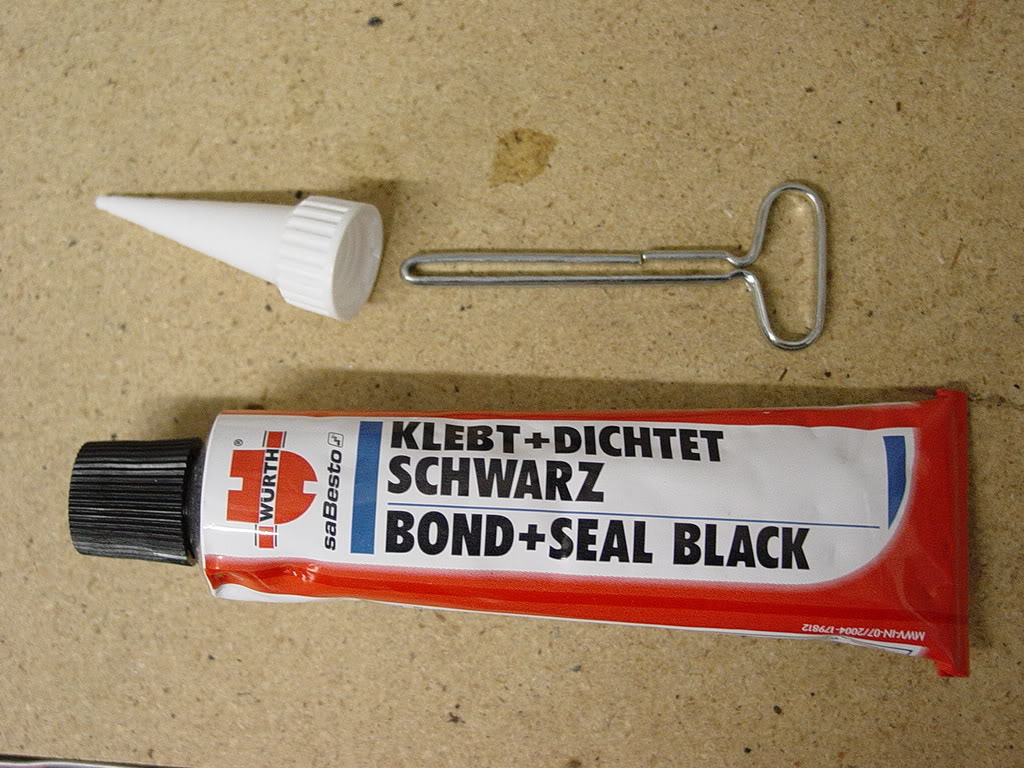
-automotive epoxy
-3M double sided tape
-China marker
-cable staples/straps x8 (plastic clips to hold the grill, remove the nails)
-painters tape
-straightline laser marker (used for flooring)
-steady hand!!!
*unfortunately the pics of the cutting process were damaged, I really did cut it myself and it was very difficult sorry
sorry
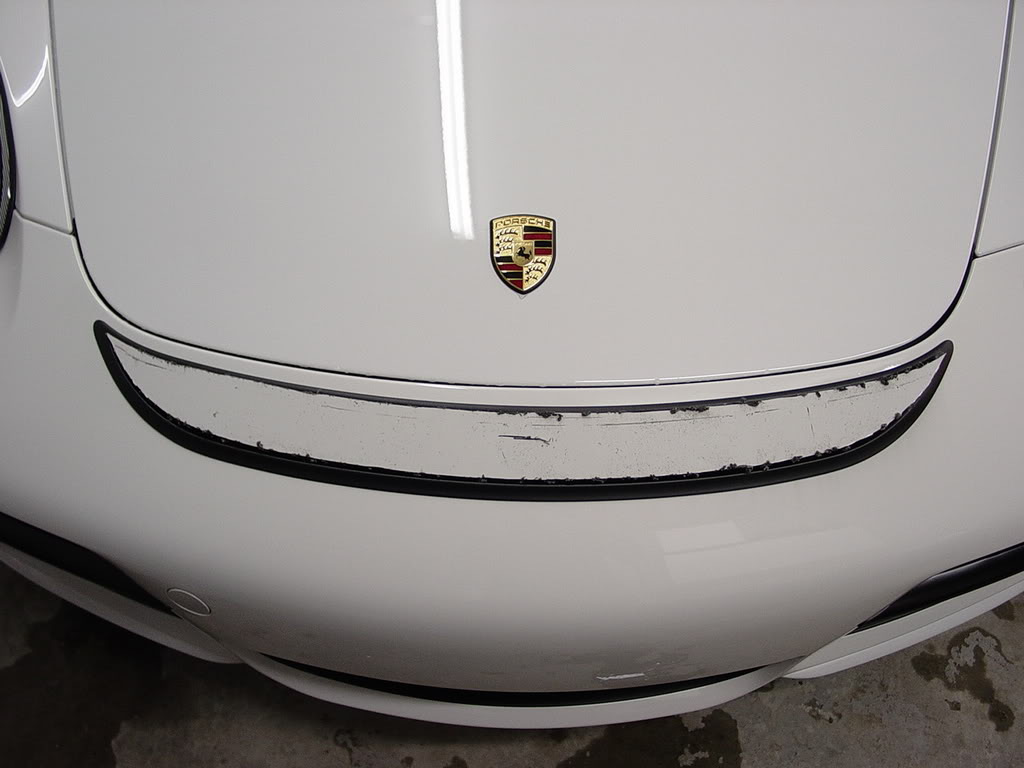
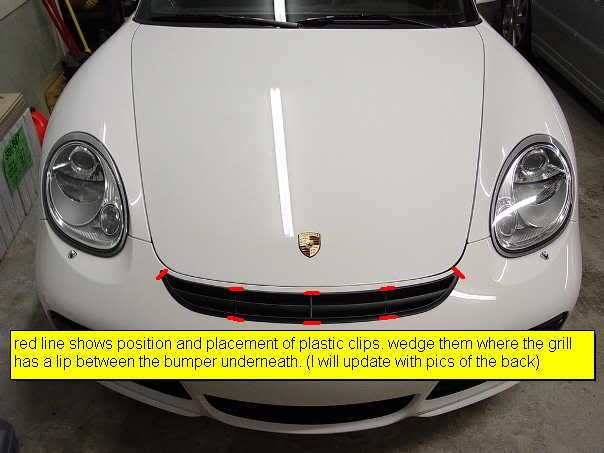
What you want to do is decide on the placement of the grill. mine is about 13mm from the top edge of the bumper.
the carrera gt is lower

I pretty much matched the techart fit, it is close to the factory GT3.

Place the lasermarker on the hood above the crest facing down. You will be able to see the middle of the bumper.
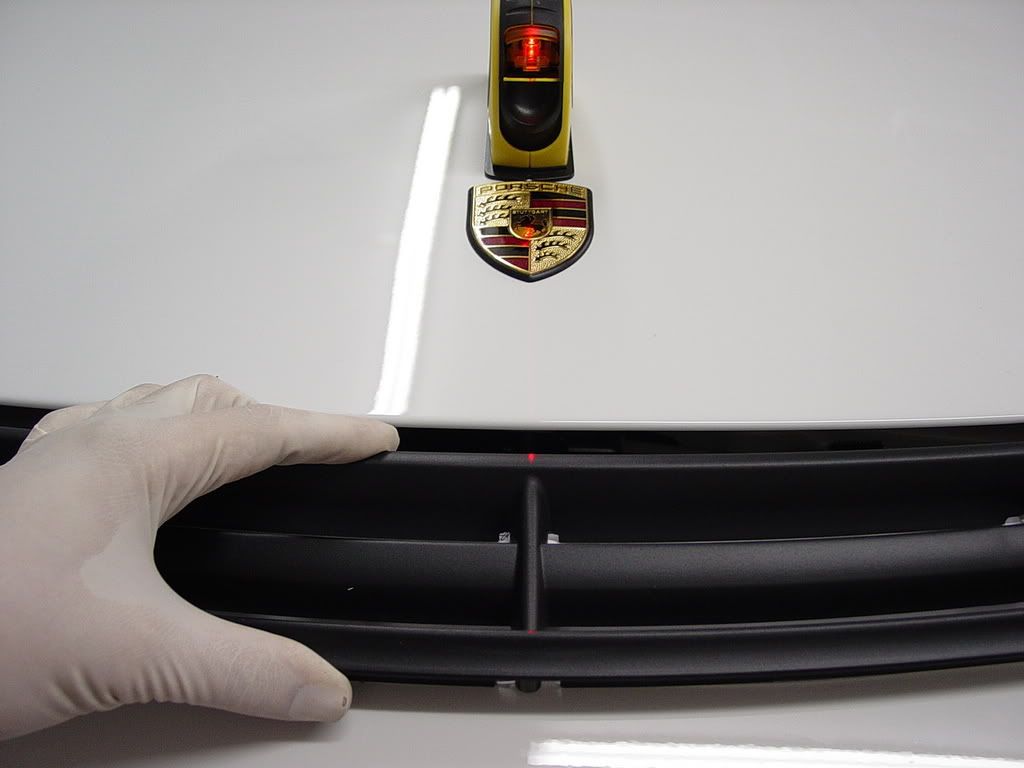
Once you decide how far off the top of the bumper you want to place it tape it down.
you want to make sure you tape it down good and measure the distance from the grill to the bumper top on both sides.
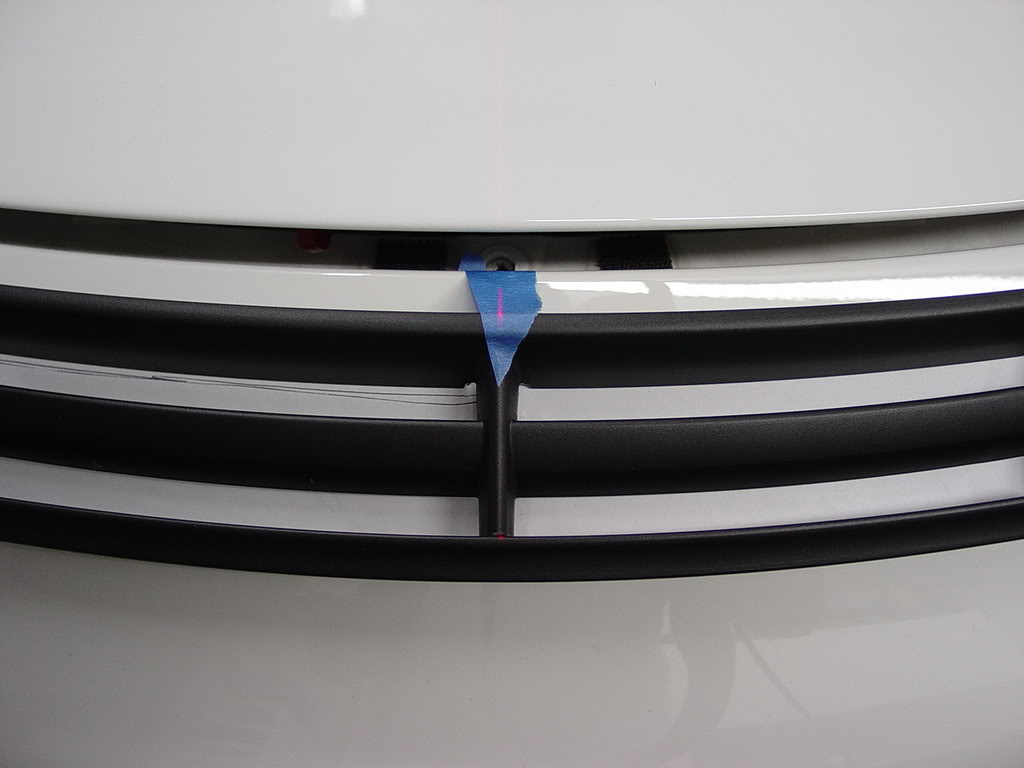
now use the china marker and trace around the shape of the bumper. There are notches that hold screws so you will have bumps on the shape.
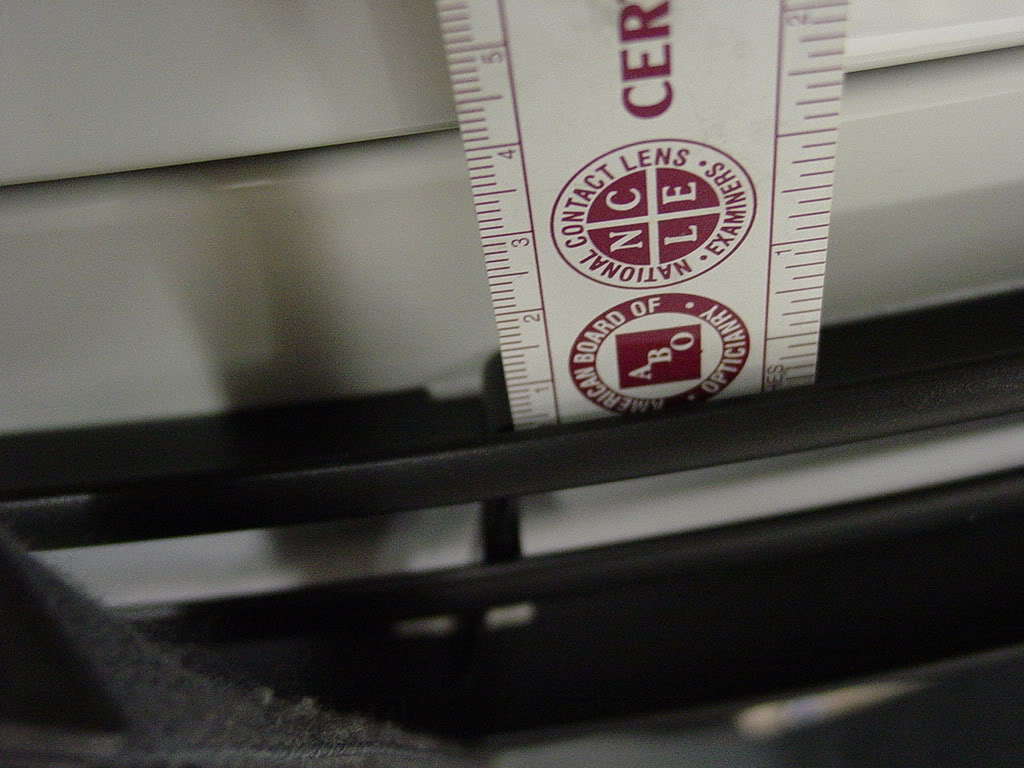
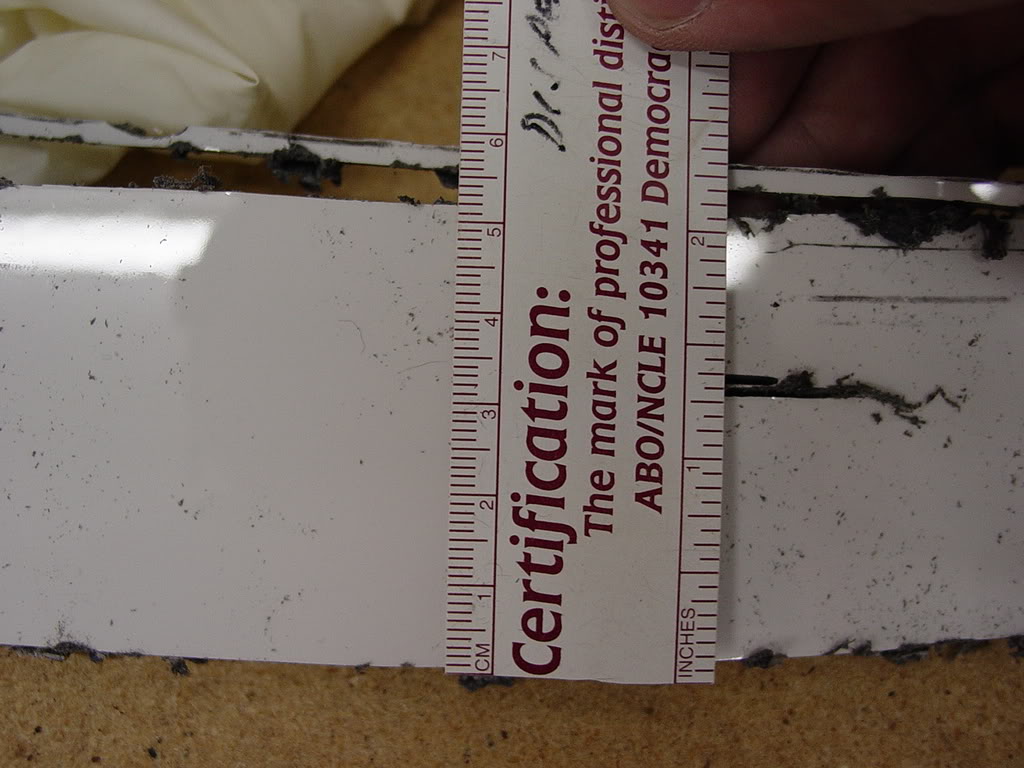
once the shape is traced remove the grill and you should have the outline of the shape. to double check yourself measure the bottom of the grill and compare to the outline you have on the bumper. Remember 55mm is how much you should cut out on the middle part, the ends get thinner.
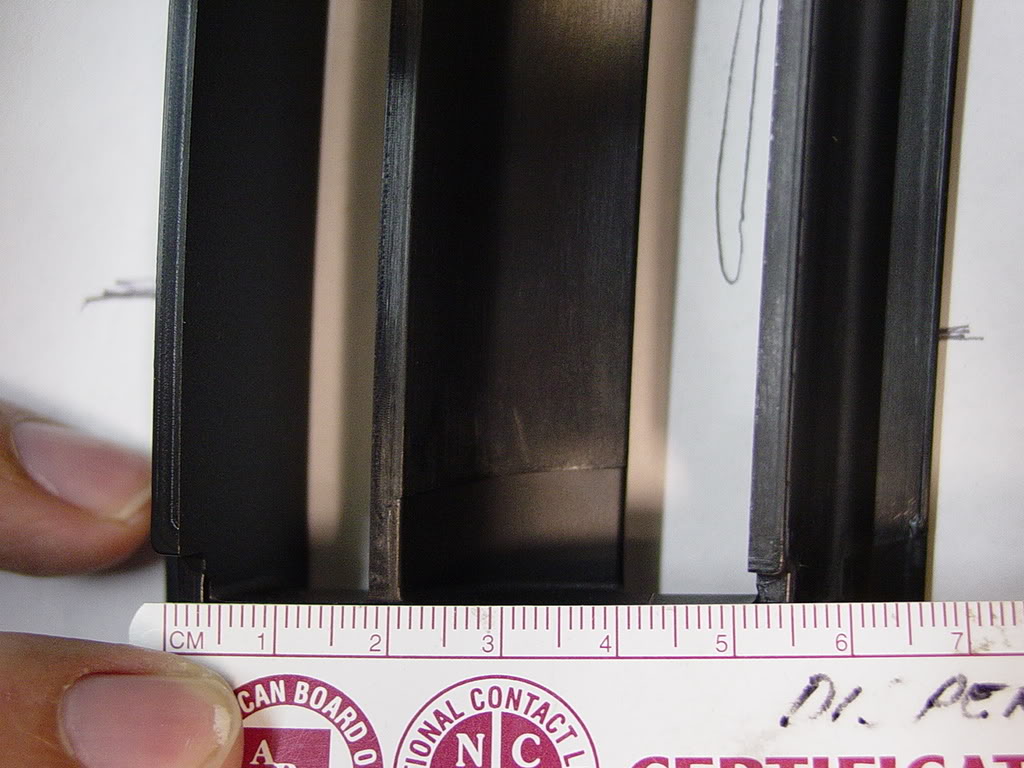
once you verify the placement and distance on both sides begin cutting with the dremel. Do not cut out the notches , should be a straight line.The bumper is about a 1/4 inch polyurethane so it will melt and spit up at your face depending on how you are holding the dremel.(you have your goggles and mask on so this doesnt bother you) Here you can see how thick the bumper is.
remember it is better to cut smaller than you think, you can always cut more if it doesnt fit.
View from the trunkside:
See slide it all the way out.
once this slides out pull the bumper out where the sidemarker is. you should hear a pop so you know it cleared the fender.
Now pull the front and WOW its off! Man the headlight washers look exactly like the ones on my audi. Hop they dont start to leak like the ones on my audi though. I've changed those 3 times in 4 years.
In my case I did not need to remove the headlight washer line, but if you need to there is a plastic horseshoe clip on the drivers side headlight, when you pull this out clamp the hose or have a bucket ready to catch washer fluid.
Difficulty rating 1 to 10: 7 (intsalling grill)
*there are several ways to install this grill. The following article is the steps I did to install it.
Tools needed:
-factory Gt3 grill part#9975753279001C
-dremel w/cut off wheel or box cutting knife
-safety goggles
-surgeons mask (really you will need this)
-10mm deep socket
-ratcheting wrench
-zip ties x3
-automotive epoxy
-3M double sided tape
-China marker
-cable staples/straps x8 (plastic clips to hold the grill, remove the nails)
-painters tape
-straightline laser marker (used for flooring)
-steady hand!!!
*unfortunately the pics of the cutting process were damaged, I really did cut it myself and it was very difficult
sorryWhat you want to do is decide on the placement of the grill. mine is about 13mm from the top edge of the bumper.
the carrera gt is lower
I pretty much matched the techart fit, it is close to the factory GT3.
Place the lasermarker on the hood above the crest facing down. You will be able to see the middle of the bumper.
Once you decide how far off the top of the bumper you want to place it tape it down.
you want to make sure you tape it down good and measure the distance from the grill to the bumper top on both sides.
now use the china marker and trace around the shape of the bumper. There are notches that hold screws so you will have bumps on the shape.
once the shape is traced remove the grill and you should have the outline of the shape. to double check yourself measure the bottom of the grill and compare to the outline you have on the bumper. Remember 55mm is how much you should cut out on the middle part, the ends get thinner.
once you verify the placement and distance on both sides begin cutting with the dremel. Do not cut out the notches , should be a straight line.The bumper is about a 1/4 inch polyurethane so it will melt and spit up at your face depending on how you are holding the dremel.(you have your goggles and mask on so this doesnt bother you) Here you can see how thick the bumper is.
remember it is better to cut smaller than you think, you can always cut more if it doesnt fit.
#3
05-03-2009, 07:27 PM
Join Date: Oct 2007
Location: MD
Posts: 292
Rep Power: 40
GT3 grill on 987 install part 3
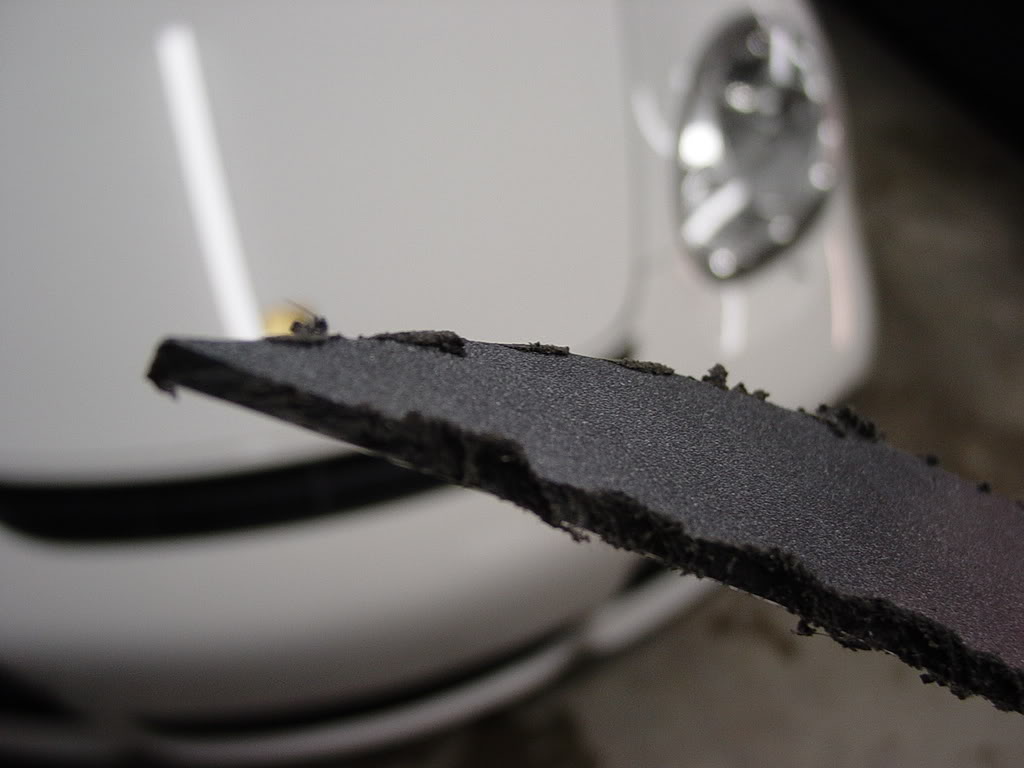
As you can see I had to cut a little extra. I only cut about 52mm the first time, then cut another 3mm. Remember 55mm.
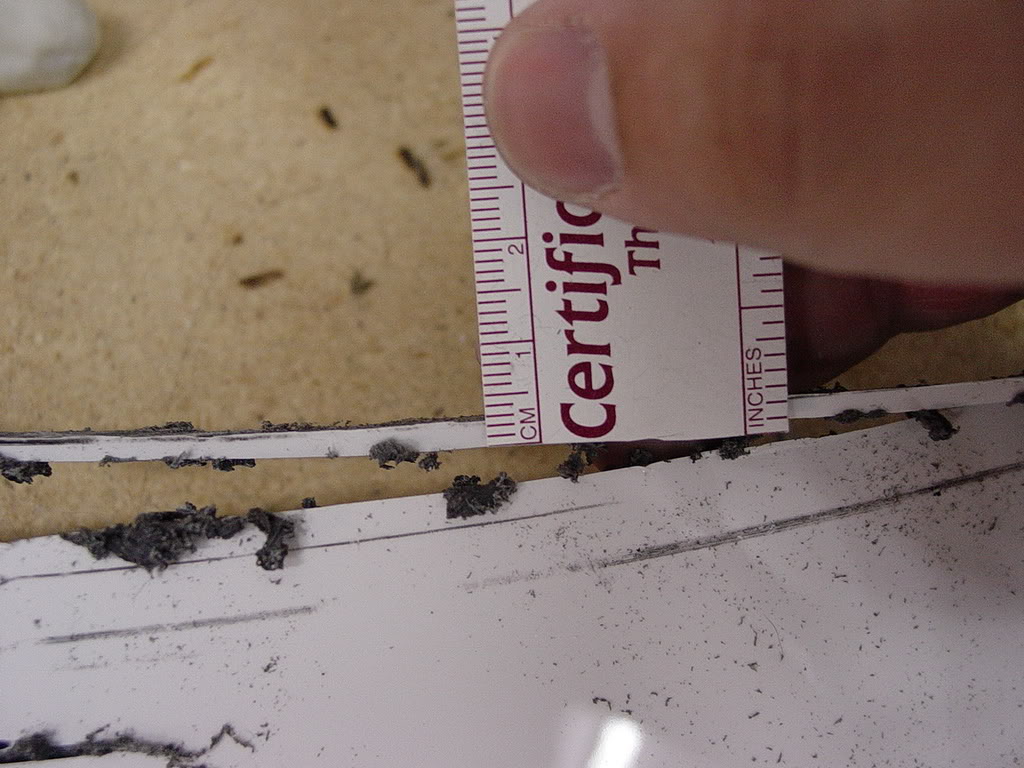
the bumper is flexible so once you cut out the shape you can bend it to pop in the grill.
you want to make sure you do not cut out the notches. Here you can see the main piece I cut out, remember I cut a few extra mm so it would fit better.
If you use a box cutting blade you can score then cut it out in a saw like motion. This way seems to be cleaner, meaning pieces of polyurethane wont fly everywhere. I did not do it this way but others have.
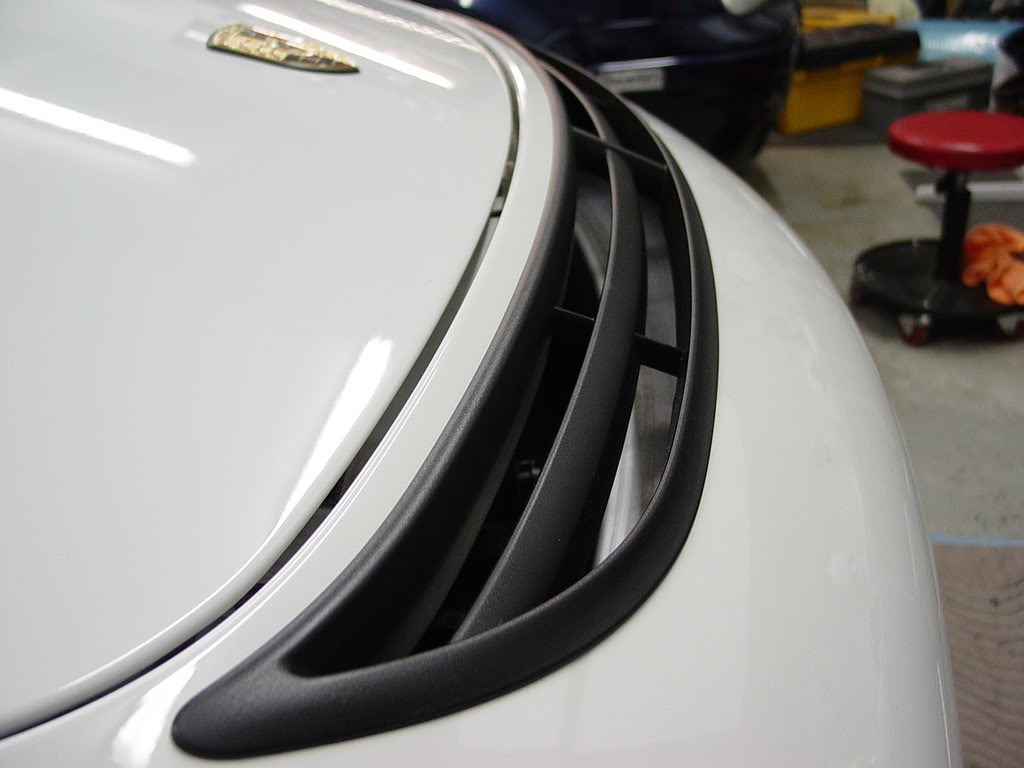
once the grill sits flat on the bumper, use the epoxy on the opposite side to glue it down. use alot remember driving 120mph there is alot of force coming out of the grill.
I used plastic clips made out of cable staples removing the nails. you can get them from Home Depot or Lowes. Take off the nails and you have to really squeeze them in. The space is perfect, make sure you put alot of the epoxy around it. This is what made the grill lip flat on the bumper. otherwise there will be gaps and it wont meet the bumper flush

Trust me it really works, ive gone 120mph since and it hasnt came off yet. I can even pull on the grill to try to pull it off and it wont come off. There is a perfect space where the screw holes are on the grill. The pressure helps support the grill.
the following pictures show how the clips should be installed/wedged into the space where the grill allows.

Remember to put epoxy on to help hold the clips in.

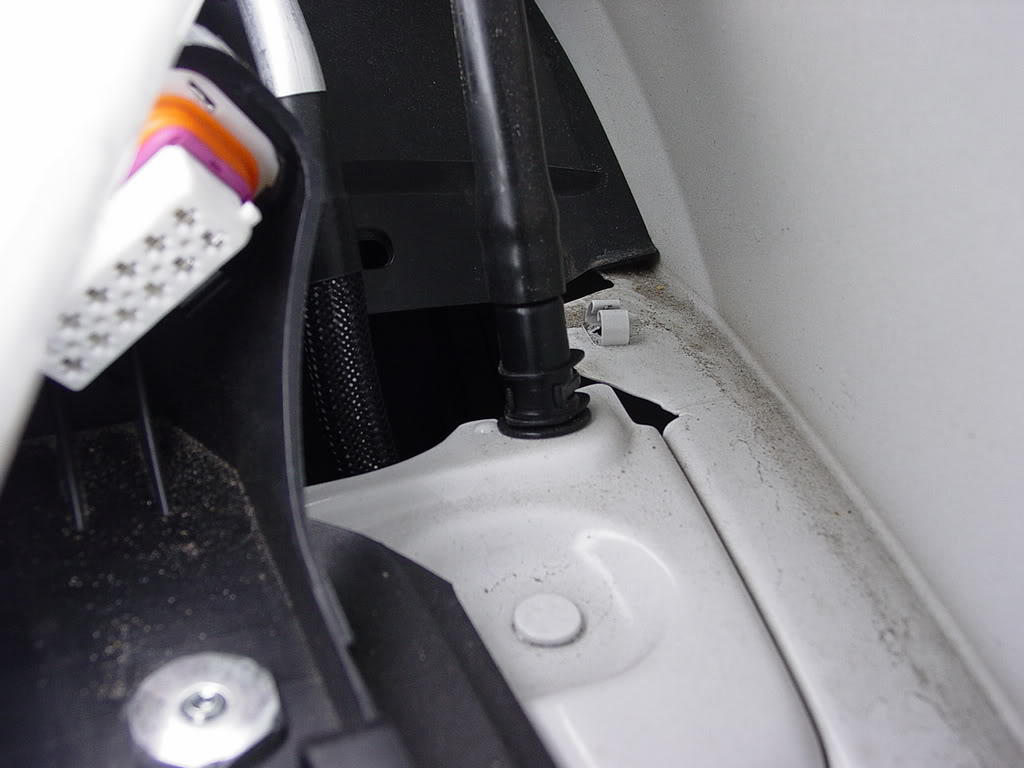
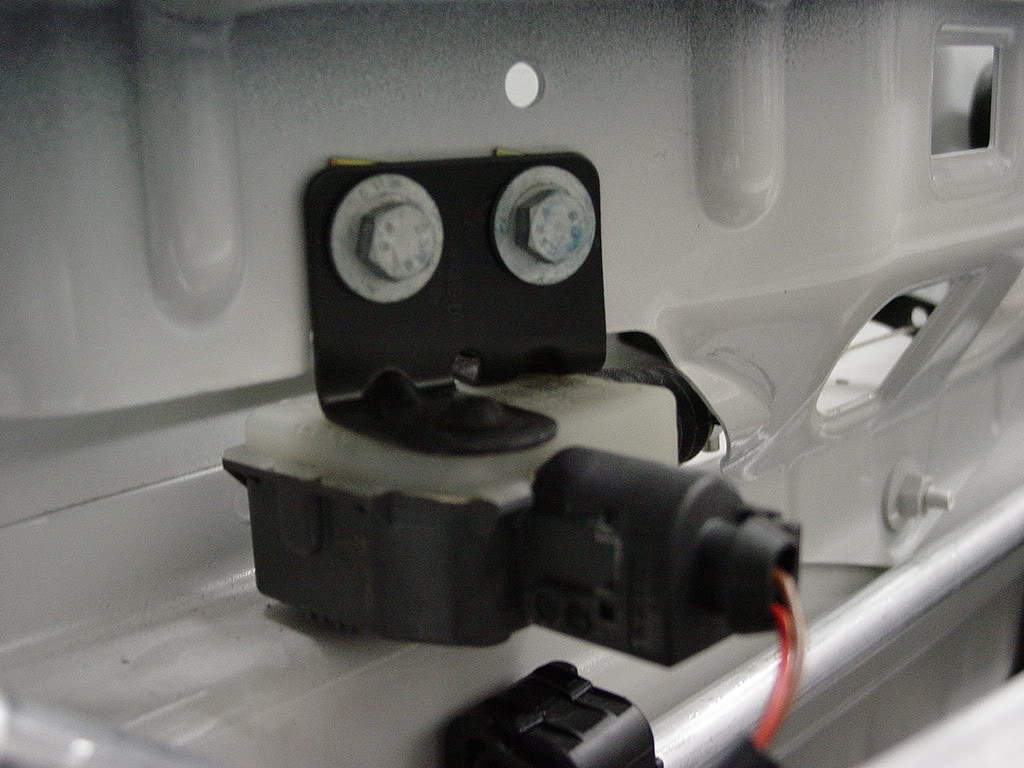
These steps are optional depending on where the placement of the grill sits. I moved the Homelink sensor closer to the body of the car. it IS waterproof but I moved it anyway. water will just fall thru the grill to the bottom of the inside of the bumper, and thru the lower spaces by the wheel wells. It does not build up inside the bottom of the bumper.
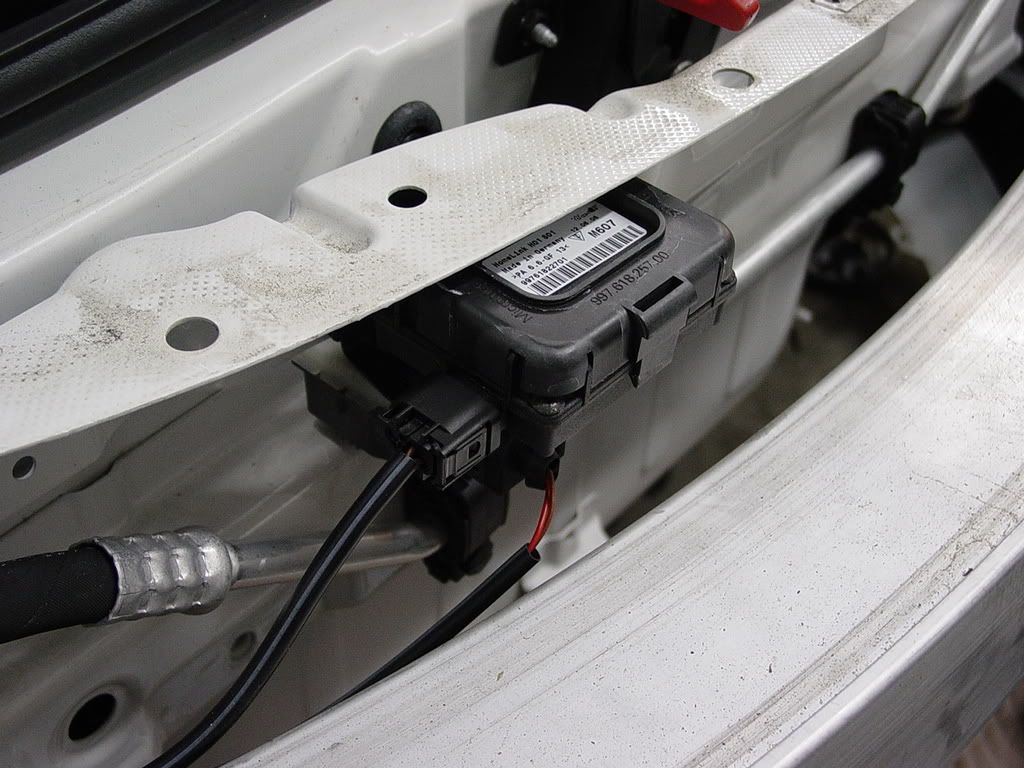
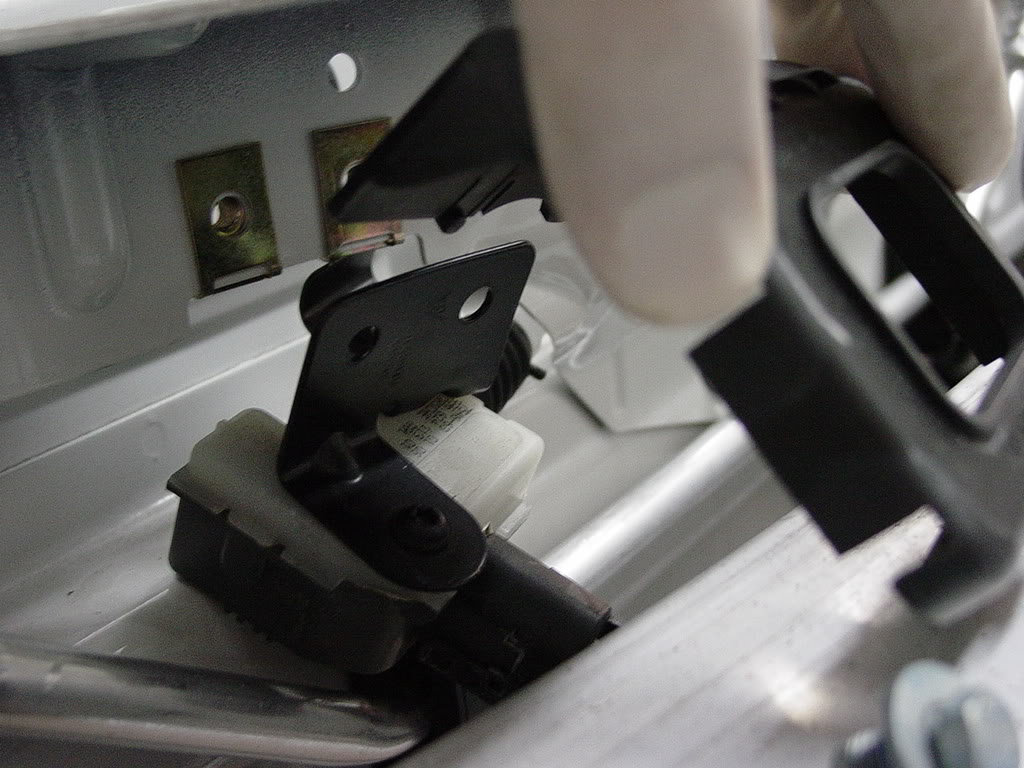
this just unclips off.
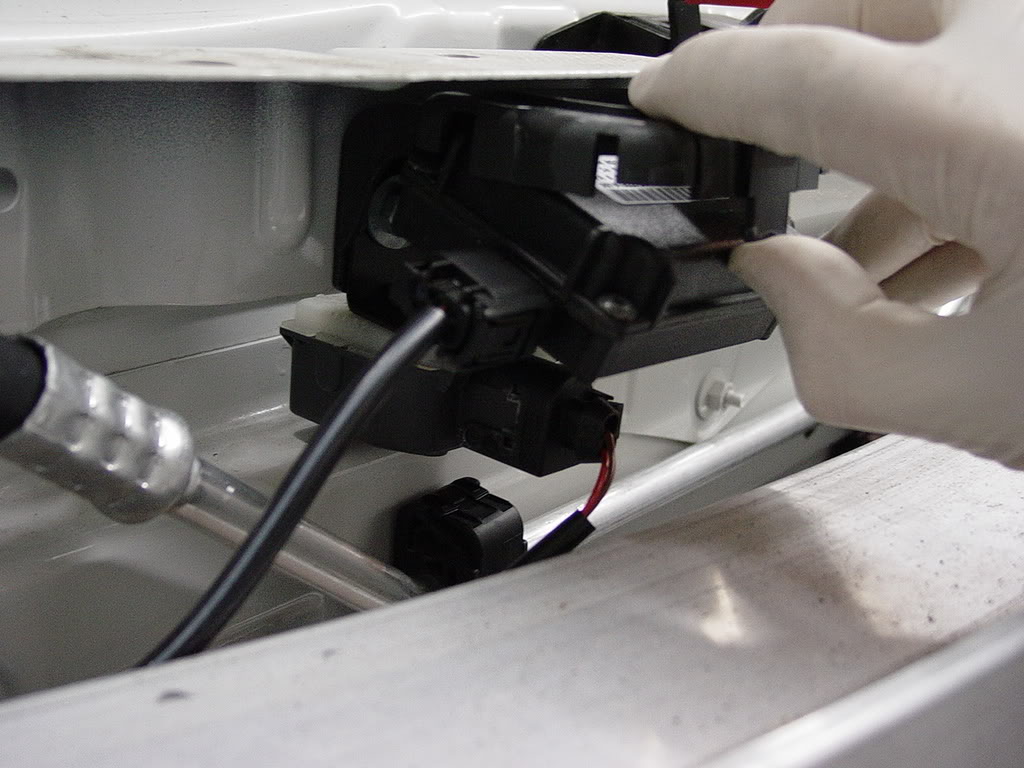
use your thumb to pry the clip off and it will drop sideways.
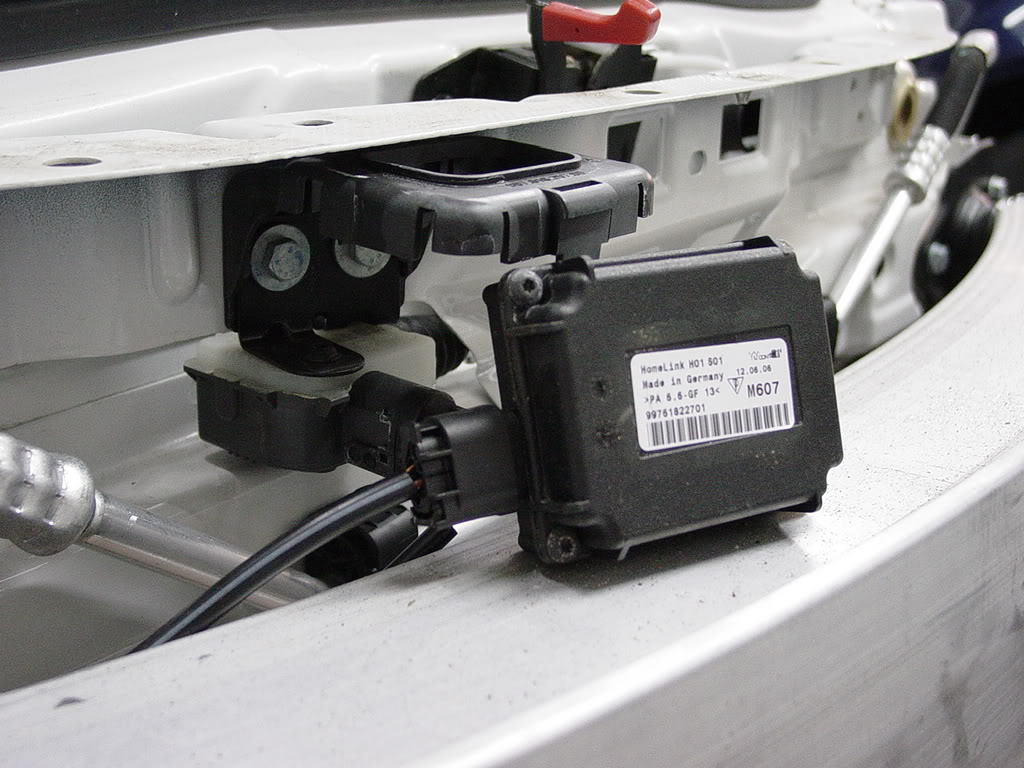
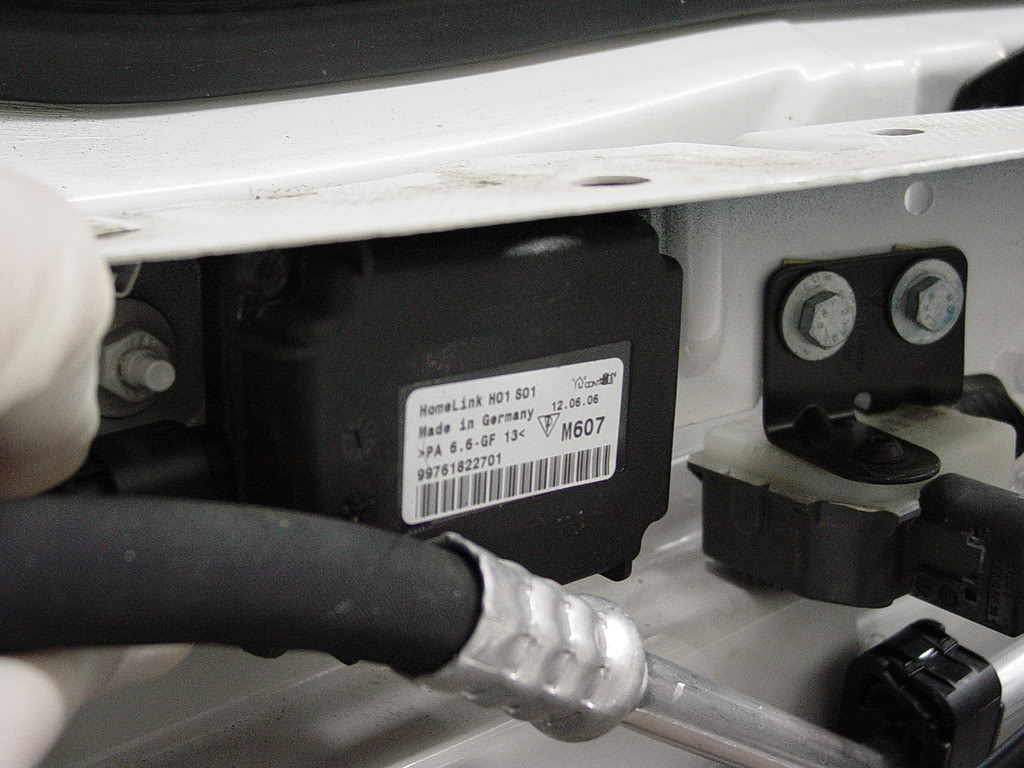
once off you have to take off the two 10mm bolts.
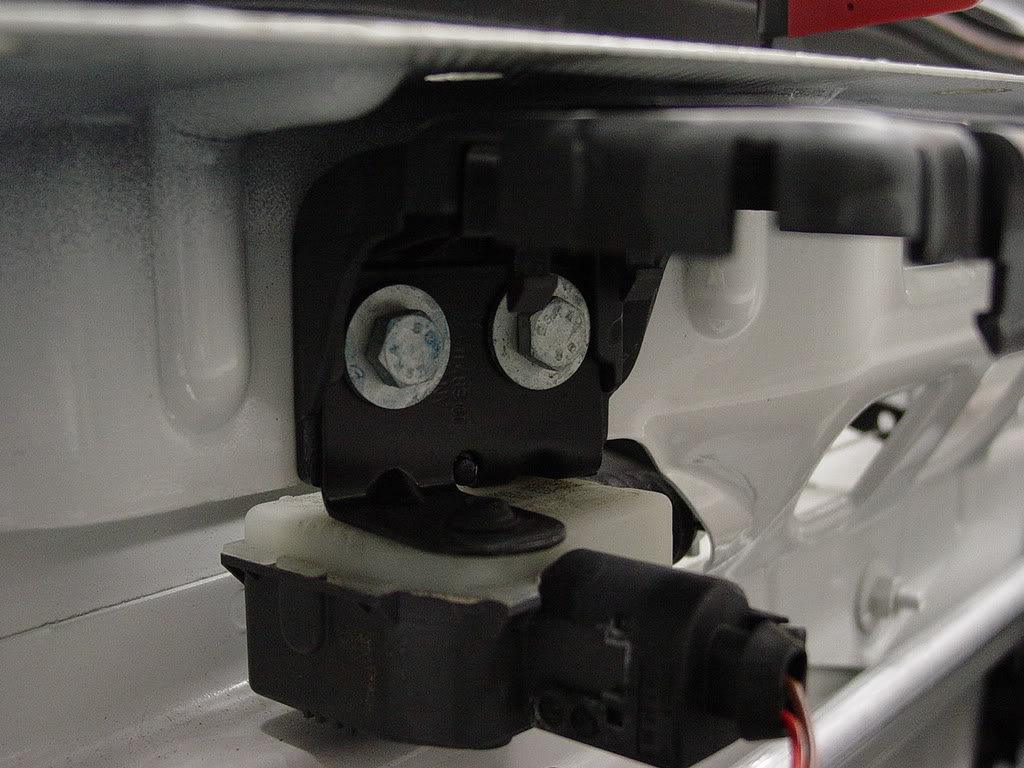
now pull off the plastic bracket that holds the HL sensor.
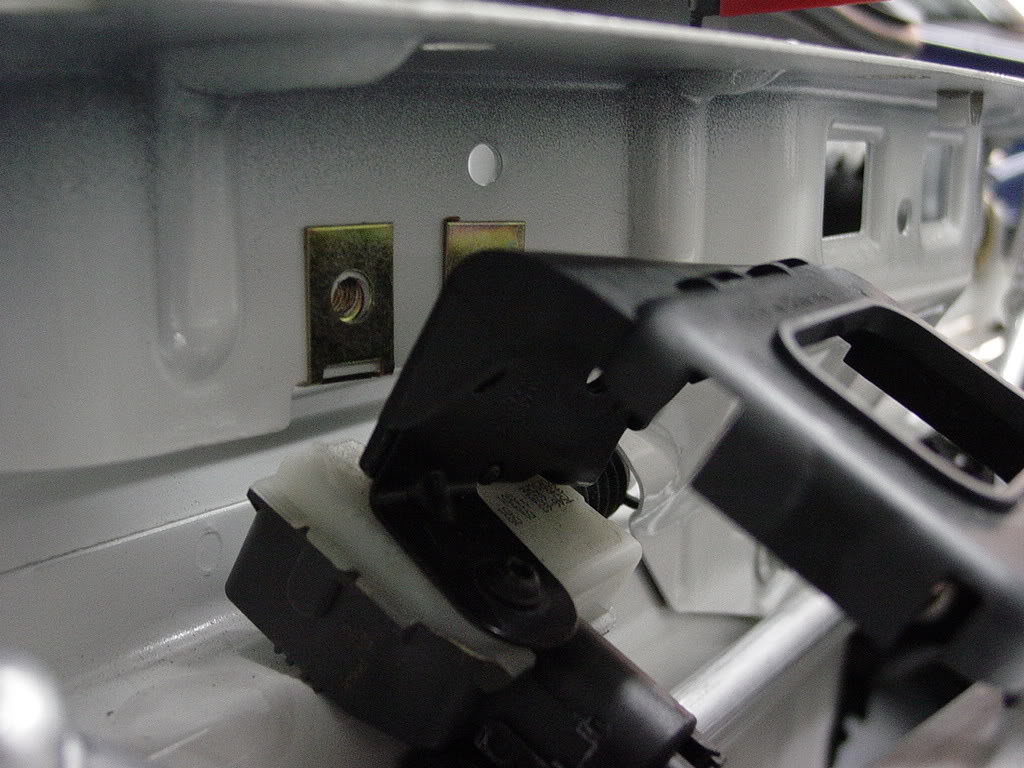
then tighten the 10mm bolts back without the bracket.
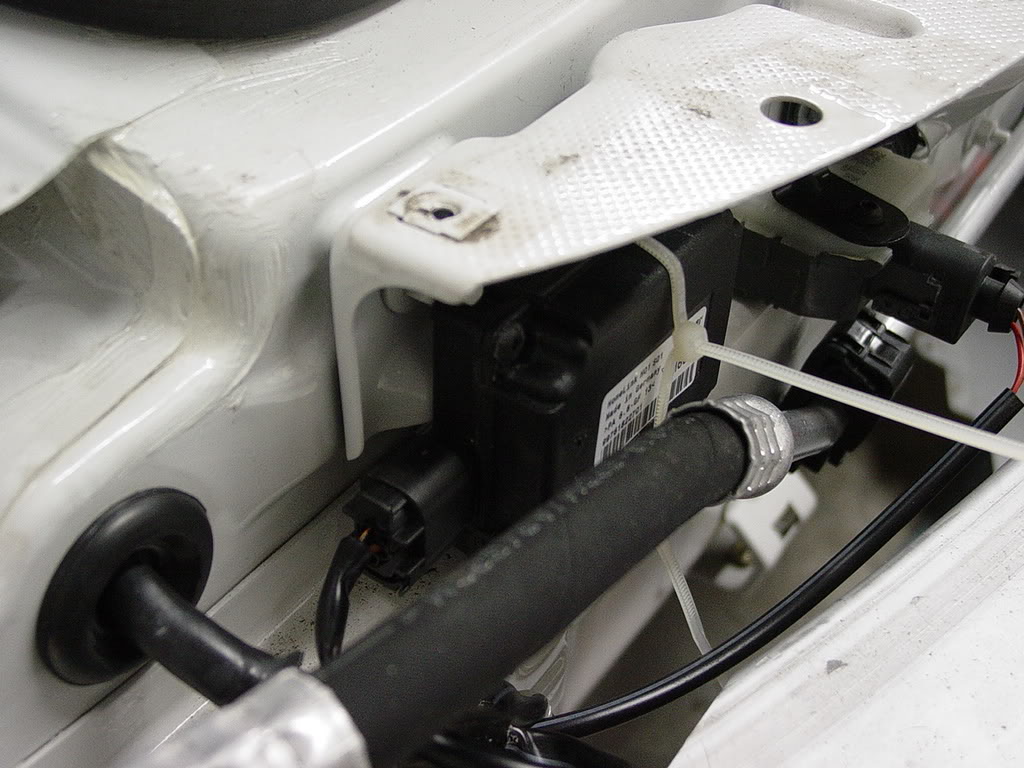
now put a ziptie in the hole on the body of the car like so. also put a piece of 3M double sided tape on the back of the HL sensor box so it will stick to the car.
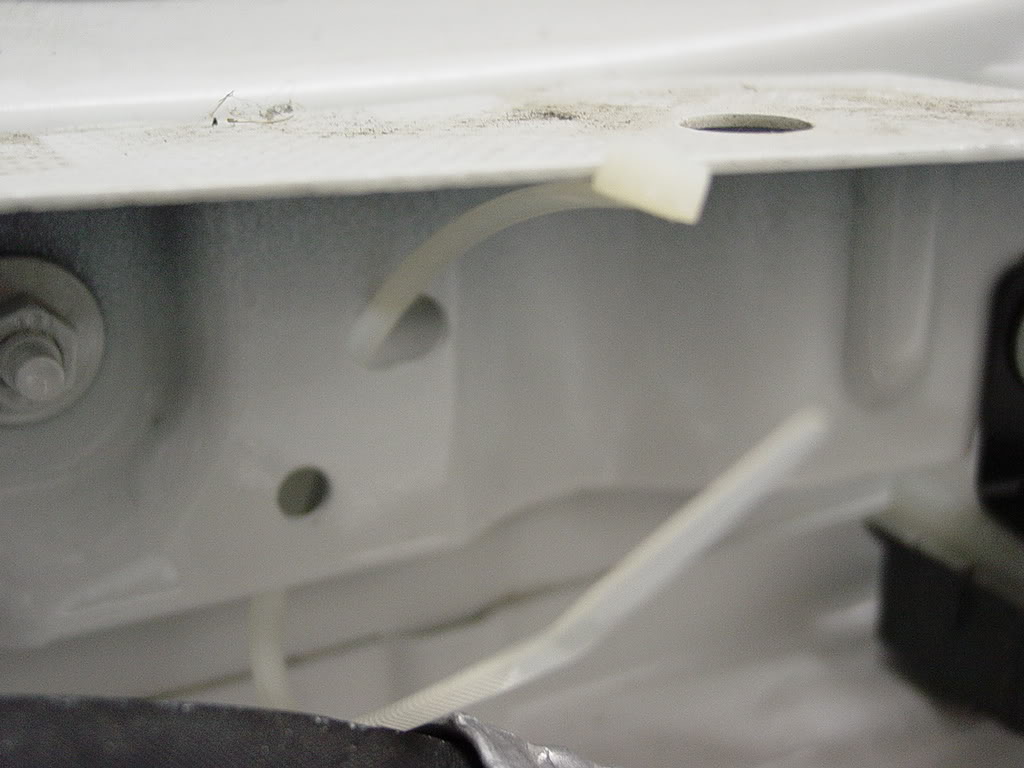
put the sensor there and zip it around.
I used a few to ensure it doesnt rattle. This did not effect the range of the Homelink sensor in my case.
now reverse the bumper installation steps, put the bumper on and you are done.
the bumper is flexible so once you cut out the shape you can bend it to pop in the grill.
you want to make sure you do not cut out the notches. Here you can see the main piece I cut out, remember I cut a few extra mm so it would fit better.
If you use a box cutting blade you can score then cut it out in a saw like motion. This way seems to be cleaner, meaning pieces of polyurethane wont fly everywhere. I did not do it this way but others have.
once the grill sits flat on the bumper, use the epoxy on the opposite side to glue it down. use alot remember driving 120mph there is alot of force coming out of the grill.
I used plastic clips made out of cable staples removing the nails. you can get them from Home Depot or Lowes. Take off the nails and you have to really squeeze them in. The space is perfect, make sure you put alot of the epoxy around it. This is what made the grill lip flat on the bumper. otherwise there will be gaps and it wont meet the bumper flush
Trust me it really works, ive gone 120mph since and it hasnt came off yet. I can even pull on the grill to try to pull it off and it wont come off. There is a perfect space where the screw holes are on the grill. The pressure helps support the grill.
the following pictures show how the clips should be installed/wedged into the space where the grill allows.
Remember to put epoxy on to help hold the clips in.
These steps are optional depending on where the placement of the grill sits. I moved the Homelink sensor closer to the body of the car. it IS waterproof but I moved it anyway. water will just fall thru the grill to the bottom of the inside of the bumper, and thru the lower spaces by the wheel wells. It does not build up inside the bottom of the bumper.
this just unclips off.
use your thumb to pry the clip off and it will drop sideways.
once off you have to take off the two 10mm bolts.
now pull off the plastic bracket that holds the HL sensor.
then tighten the 10mm bolts back without the bracket.
now put a ziptie in the hole on the body of the car like so. also put a piece of 3M double sided tape on the back of the HL sensor box so it will stick to the car.
put the sensor there and zip it around.
I used a few to ensure it doesnt rattle. This did not effect the range of the Homelink sensor in my case.
now reverse the bumper installation steps, put the bumper on and you are done.
#4
05-03-2009, 08:37 PM
Registered User
Join Date: Dec 2007
Location: Los Angeles, CA
Age: 50
Posts: 893
Rep Power: 79 
Thread
Thread Starter
Forum
Replies
Last Post
MrNurse
Boxster / Cayman
8
09-10-2015 09:44 AM
pwdrhound
Automotive Parts & Accessories For Sale/Wanted
0
08-23-2015 07:36 PM
vividracing
Boxster / Cayman
0
08-20-2015 12:17 PM