
PCCB to GT3 Cup steel rotors - bitter sweet conversion


Thread Starter
|
Registered User
Joined: Apr 2008
Posts: 1,120
From: Rocklin, California
Rep Power: 134


Porsche Ceramic Composite Brakes. Just the name and that abbreviation sound fantastic. What is not to like about the PCCB - it's new, light, less heat, minimal dust, last longer and oh, of course the god like stopping power. I was sold on PCCB when it first came out and bought my green RS with PCCB. I could not tell the difference on the street - PCCB vs conventional steel brakes until I barrel down turn 1 at Thunderhill trying to slow down the car from 135 mph .... OMG! I could not stop!? I step on the brake pedal so hard I thought I was going to yank my steering wheel off. It was one of the most scary track experience. Subsequently, I bleed the brakes and replaced with Motul and bed the heck out of PCCB - it was slightly better but nothing even close to the confidence inspiring stopping power of my M3's OEM steel brakes (one lousy piston caliper lol) with performance friction 01 pads. So for the past year, I say a prayer and give an offering to the track gods before each event hoping I can stop when I am suppose to. What I end up doing is brake way early or ridding on the brakes way before stopping zone to heat it up so it will bite. Needless to say, I will pass other then get caught up on braking zones 
What is wrong these PCCB which was shaped on the same furnace that made the Greek gods? After some research, I found out there was nothing wrong with them. The problem lies in the cost. Each rotor cost as much as Paris Hilton's purse so no one in their right mind will use a proper track pads - including Dr. Porsche. You will have some angry customers when they find out it cost more than $10K to replace all 4 PCCB rotors after some track use with proper track pads.
I was not about to shoot myself in the foot by using aggressive pads on these PCCB. The only option other than go slower and stop early on the track is to replace them with steel rotors and aggressive pads.
So, what are the options for PCCB to steel rotor conversion? The good news is that there are several options now compare with one year ago. Brembo and stoptech make two piece floating rotors which are fantastic replacement options. But what about the 997 GT3 Cup cars - they have 380 mm front and 350 mm rear steel rotors which are the same diameter as my PCCB. After inspecting them some more, I decided to go with the Cup car solution since they been tested since 2005 on the track and cost less than other options.
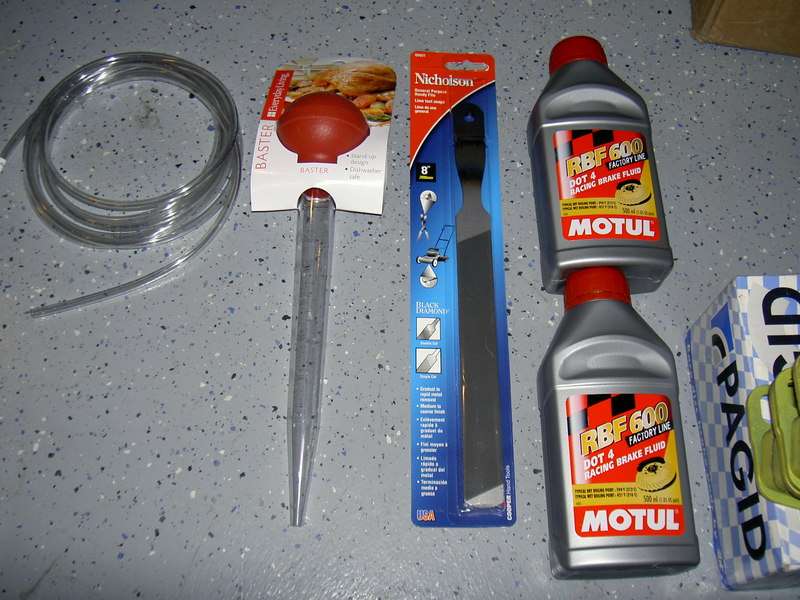
OK, let's get started with this conversion. First of all, bleed your brakes while you are at it. OEM brake fluid is crap. I used Motul RBF 600 racing brake fluid. They work well and feels much better than OEM. Craig from Rennstore is a good source for these parts
Here is a picture of Motul brake fluid. I used a turkey baster to suck out the OEM brake fluid from the brake reservoir. Ignore the file ... it was for my toenail lol
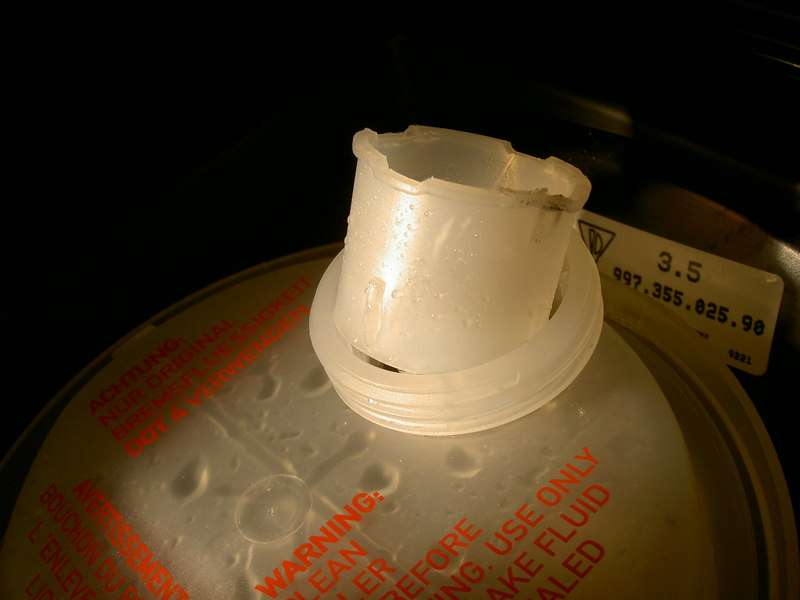
The screen on top of the brake reservoir is PITA to remove. You have to twist and turn then yank on it hard to pull it out. You have to line up the open ends of the grooves on the brake reservoir with the filter screen. Take care not to spill brake fluid on the paint - they are like paint thinner
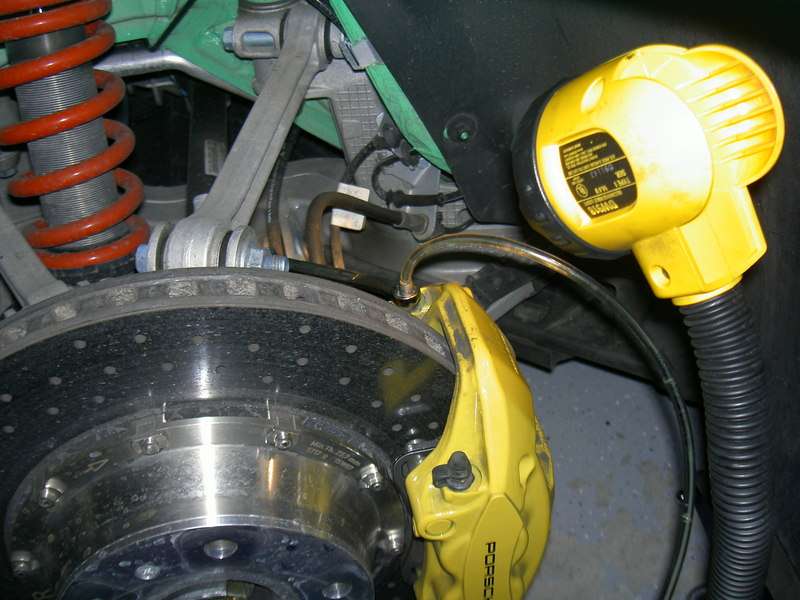
I used a pressure bleeder - much easier than manual pumping the brake pedal. Your wife will thank you

Start with the caliper furtherest from the brake reservoir and work your way in. Remember these Brembo caliper have 2 bleeder valve and you have to bleed each side. I wish the Motul brake fluid come in different color than OEM - this way you can easily tell when the new fluid start to come out
OK, now let's get the 997 GT3 Cup car rotors. When I inspect the Cup car, I noticed the rear rotors are one piece. It turns out they use 997 TT rear rotors so you can retain parking brake function and fits the wide body Cup car. I don't know if they fit narrow body GT3. They can be had from Suncoast for about $300 a pair - super cheap. The front Cup car steel rotors can be sourced from various Porsche race shops and I got my from Porsche Motorsport. Average price is around $2750 and it could be higher or lower depends on where you source the parts. Disclaimer from Porsche Motorsport: These front Cup rotors are designed for track use and not street
Here are the parts number for the front Cup rotors
(1) 993 351 407 87 L/F Rotor
(1) 993 351 408 87 R/F Rotor
(2) 996 351 415 9A Front Brake Hat
(4) 900 075 010 03 Rotor Screw
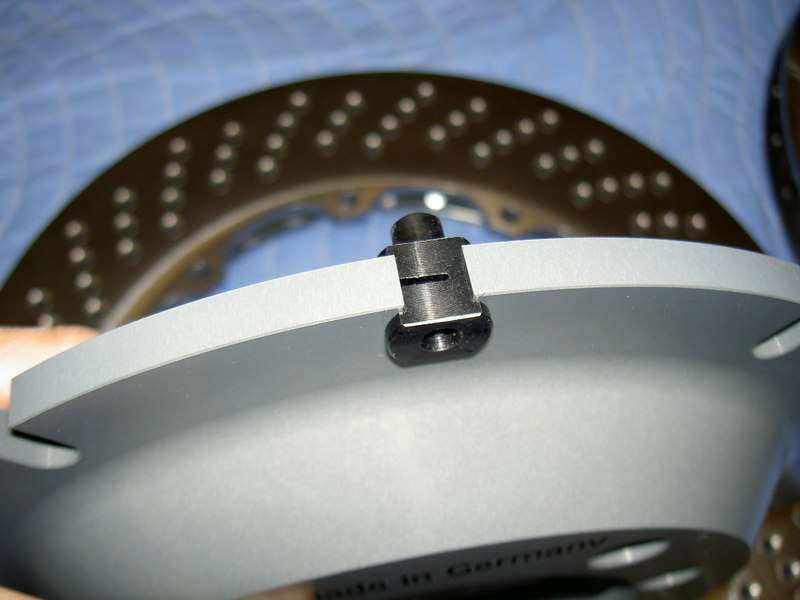
(20) 964 351 437 81 Brake Bobbin
(20) 900 378 030 09 Attachment Bolt
Here is a picture of the parts necessary for the conversion. I chose Pagid yellow RS29 brake pads for the job

OK, now let's assemble the front Cup rotors and mate the hat to the rotors with bobbins and attachment bolts

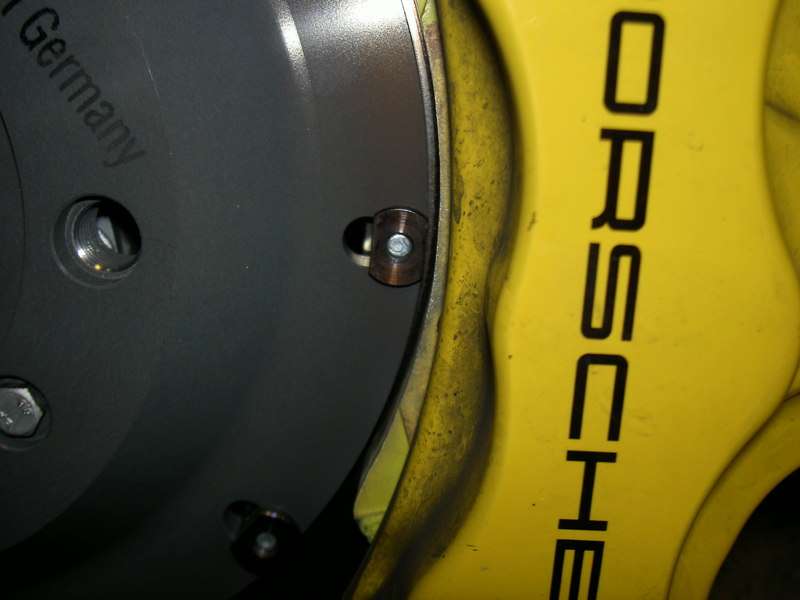
These bobbins have a slit on one end only. My PCCB's bobbin had it's slit facing the front of the car and that's what I decided to use to orient the bobbins

I hand tighten the attachment bolts first with 10 mm socket


Factory torque spec on these 10 mm attachment bolts are 9.7 NM which is only 7.15 lb/ft .. and ten of these small 10 mm bolts are suppose to hold the rotor to the hat!? OMG! Oh well, I got scared and used 8 lb/ft instead lol
I dab a small paint on each bolt after I torque them. I alternate the the bolts by going from opposite ends to make sure the hat sits evenly on the rotor

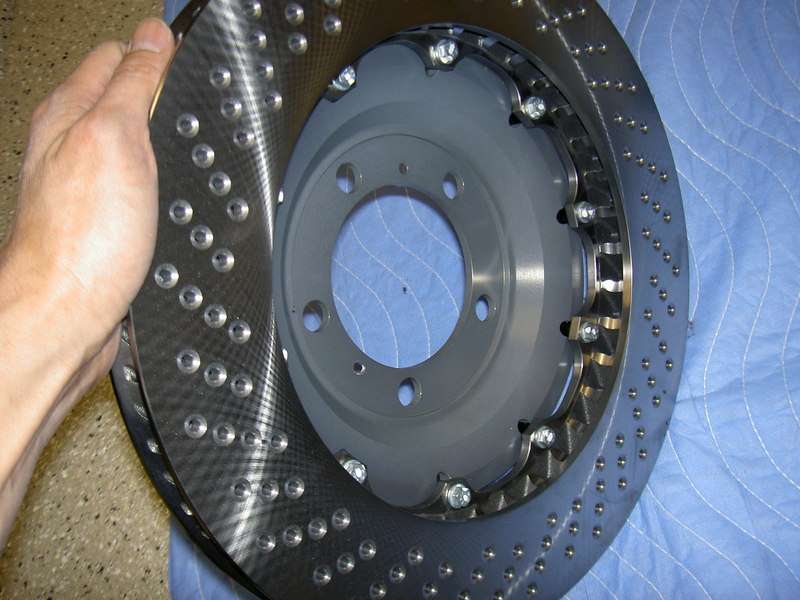
Cup rotors all assembled. They are super aggressive looking! They look good enough to frame it as an art piece lol

Notice the orientation of the cross drill holes and the cooling vent. This is the right (passenger side) rotor with the arrow like central cooling vent pointing toward the front of the car

Back side
What is wrong these PCCB which was shaped on the same furnace that made the Greek gods? After some research, I found out there was nothing wrong with them. The problem lies in the cost. Each rotor cost as much as Paris Hilton's purse so no one in their right mind will use a proper track pads - including Dr. Porsche. You will have some angry customers when they find out it cost more than $10K to replace all 4 PCCB rotors after some track use with proper track pads.
I was not about to shoot myself in the foot by using aggressive pads on these PCCB. The only option other than go slower and stop early on the track is to replace them with steel rotors and aggressive pads.
So, what are the options for PCCB to steel rotor conversion? The good news is that there are several options now compare with one year ago. Brembo and stoptech make two piece floating rotors which are fantastic replacement options. But what about the 997 GT3 Cup cars - they have 380 mm front and 350 mm rear steel rotors which are the same diameter as my PCCB. After inspecting them some more, I decided to go with the Cup car solution since they been tested since 2005 on the track and cost less than other options.
OK, let's get started with this conversion. First of all, bleed your brakes while you are at it. OEM brake fluid is crap. I used Motul RBF 600 racing brake fluid. They work well and feels much better than OEM. Craig from Rennstore is a good source for these parts
Here is a picture of Motul brake fluid. I used a turkey baster to suck out the OEM brake fluid from the brake reservoir. Ignore the file ... it was for my toenail lol
The screen on top of the brake reservoir is PITA to remove. You have to twist and turn then yank on it hard to pull it out. You have to line up the open ends of the grooves on the brake reservoir with the filter screen. Take care not to spill brake fluid on the paint - they are like paint thinner
I used a pressure bleeder - much easier than manual pumping the brake pedal. Your wife will thank you
Start with the caliper furtherest from the brake reservoir and work your way in. Remember these Brembo caliper have 2 bleeder valve and you have to bleed each side. I wish the Motul brake fluid come in different color than OEM - this way you can easily tell when the new fluid start to come out
OK, now let's get the 997 GT3 Cup car rotors. When I inspect the Cup car, I noticed the rear rotors are one piece. It turns out they use 997 TT rear rotors so you can retain parking brake function and fits the wide body Cup car. I don't know if they fit narrow body GT3. They can be had from Suncoast for about $300 a pair - super cheap. The front Cup car steel rotors can be sourced from various Porsche race shops and I got my from Porsche Motorsport. Average price is around $2750 and it could be higher or lower depends on where you source the parts. Disclaimer from Porsche Motorsport: These front Cup rotors are designed for track use and not street
Here are the parts number for the front Cup rotors
(1) 993 351 407 87 L/F Rotor
(1) 993 351 408 87 R/F Rotor
(2) 996 351 415 9A Front Brake Hat
(4) 900 075 010 03 Rotor Screw
(20) 964 351 437 81 Brake Bobbin
(20) 900 378 030 09 Attachment Bolt
Here is a picture of the parts necessary for the conversion. I chose Pagid yellow RS29 brake pads for the job
OK, now let's assemble the front Cup rotors and mate the hat to the rotors with bobbins and attachment bolts
These bobbins have a slit on one end only. My PCCB's bobbin had it's slit facing the front of the car and that's what I decided to use to orient the bobbins
I hand tighten the attachment bolts first with 10 mm socket
Factory torque spec on these 10 mm attachment bolts are 9.7 NM which is only 7.15 lb/ft .. and ten of these small 10 mm bolts are suppose to hold the rotor to the hat!? OMG! Oh well, I got scared and used 8 lb/ft instead lol
I dab a small paint on each bolt after I torque them. I alternate the the bolts by going from opposite ends to make sure the hat sits evenly on the rotor
Cup rotors all assembled. They are super aggressive looking! They look good enough to frame it as an art piece lol
Notice the orientation of the cross drill holes and the cooling vent. This is the right (passenger side) rotor with the arrow like central cooling vent pointing toward the front of the car
Back side
Last edited by mikymu; Nov 20, 2009 at 05:36 AM.
Thread Starter
|
Registered User
Joined: Apr 2008
Posts: 1,120
From: Rocklin, California
Rep Power: 134
Front brake removal/install
OK, let's get the front PCCB off. First remove the cap from the brake reservoir and make sure you don't have too much brake fluid to start out with. Check the brake reservoir often when you spread the caliper pistons to prevent overflow. Jack up both front wheels and turn the side you are working on away from you to expose the back end of the brake caliper
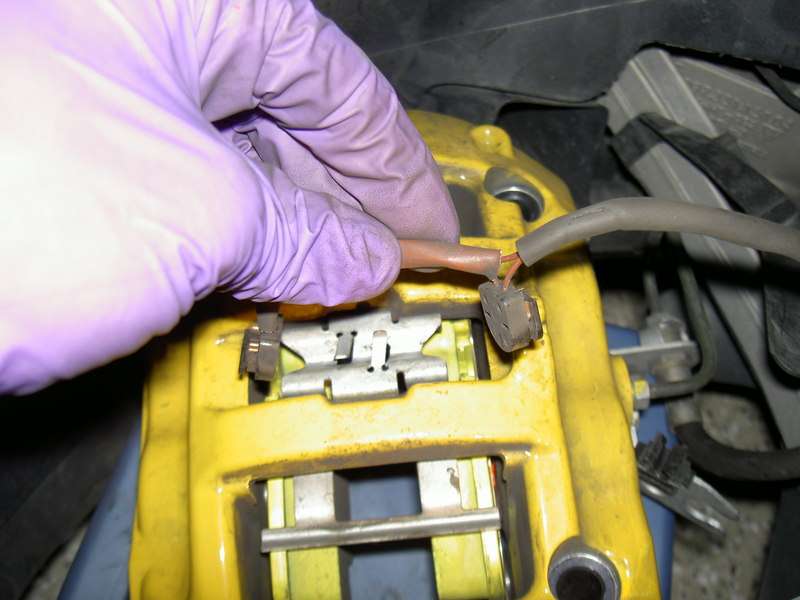
Remove the brake pad thickness sensors by gently pull on the wires and use a small flat screw driver to pry it out


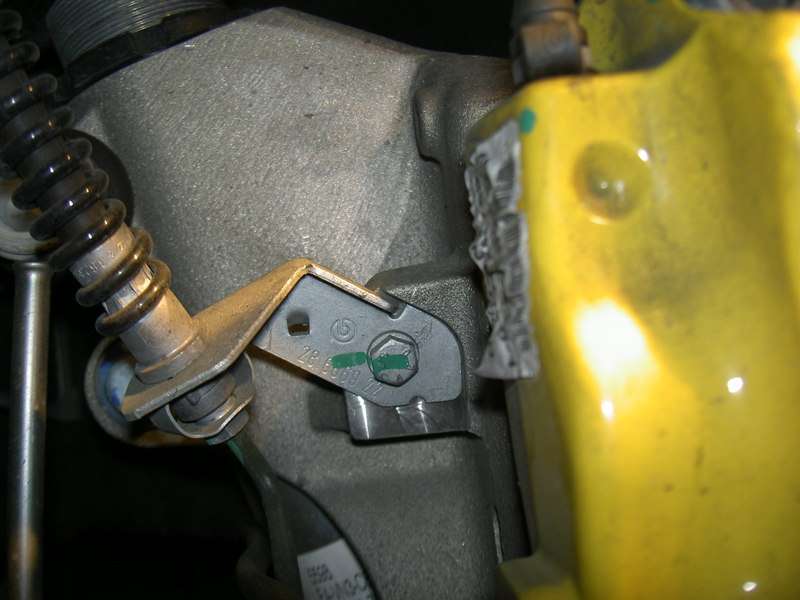
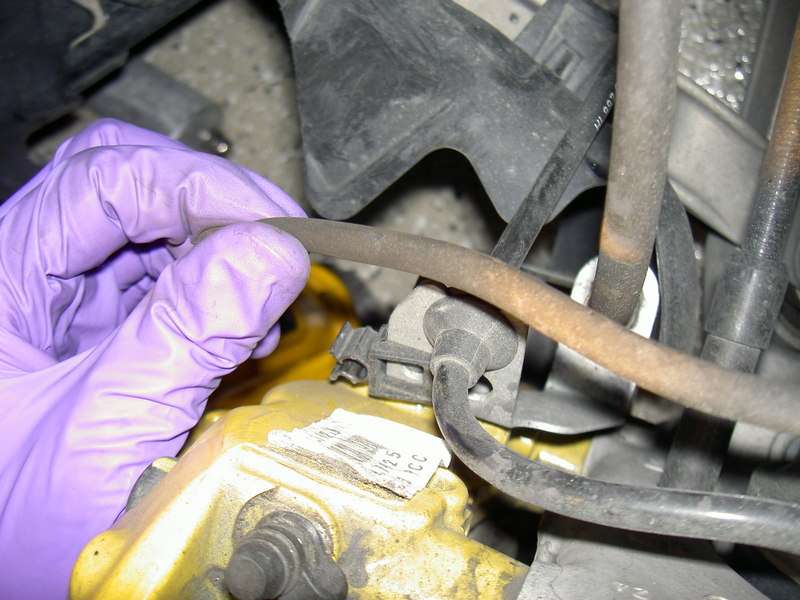
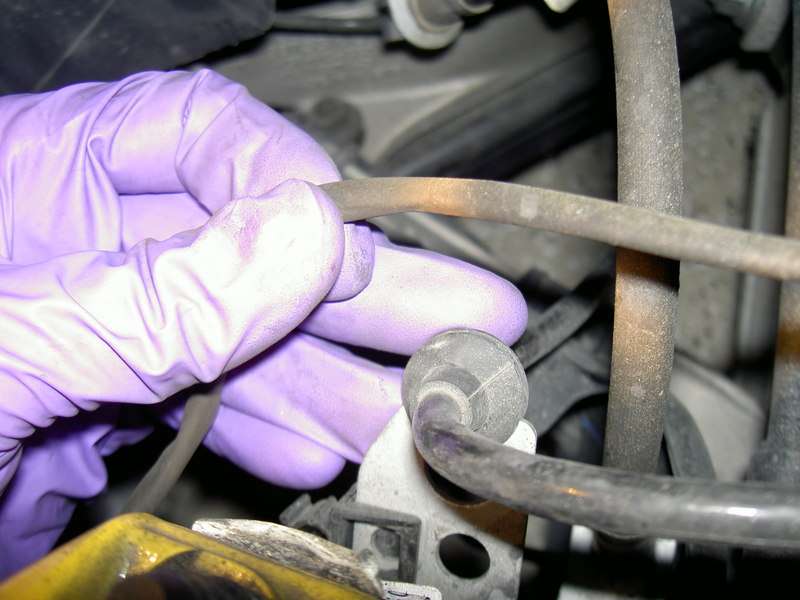
Detach the brake line bracket from the back of the caliper be removing the 10 mm bolt
Remove the 13 mm bolt which holds the large retaining spring clip from the back of the caliper

Press in on the retaining spring hard near the clip either with your thumb or a piece of wood and gently tap on the end of the clip by placing a short socket extension on the inner side with a small hammer. Take care not to bang on the brake line or caliper ... or your thumb lol
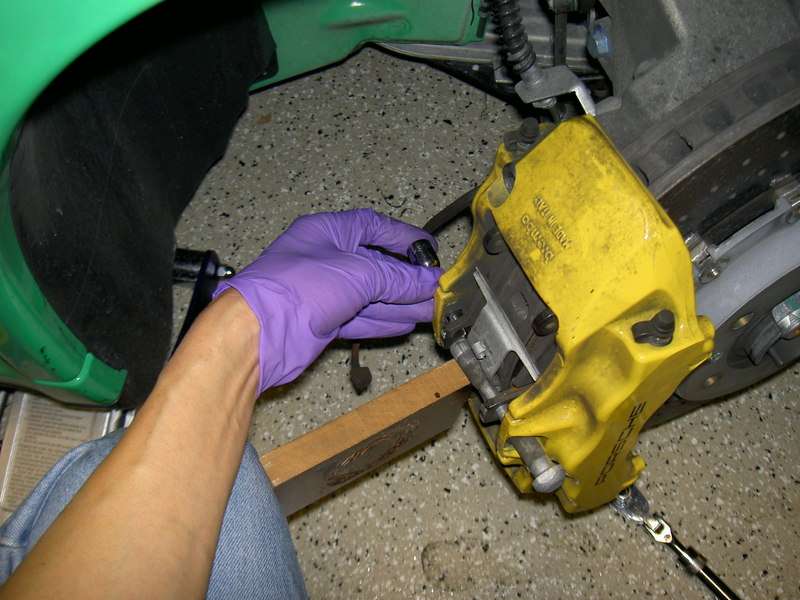
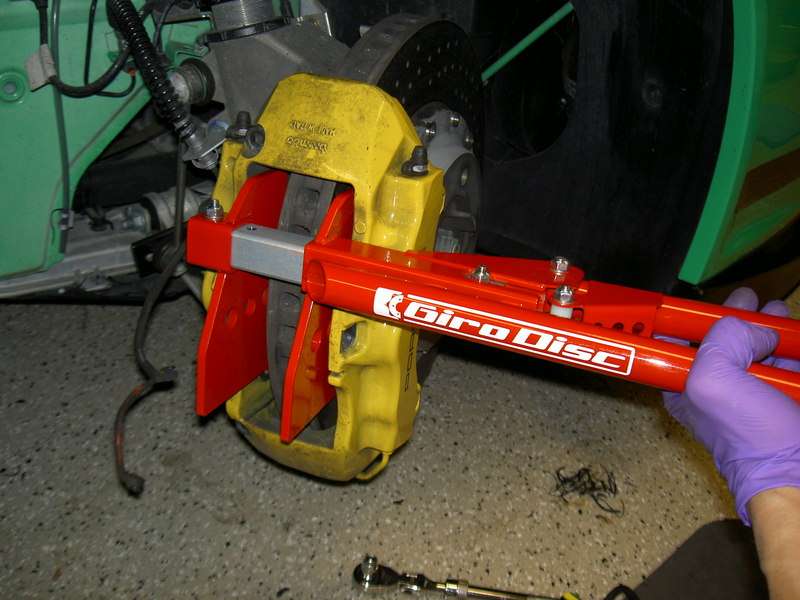
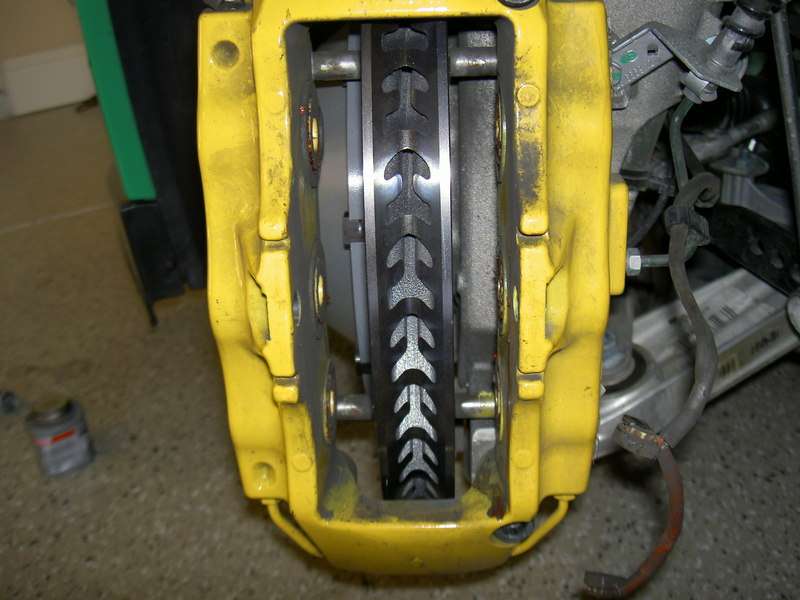
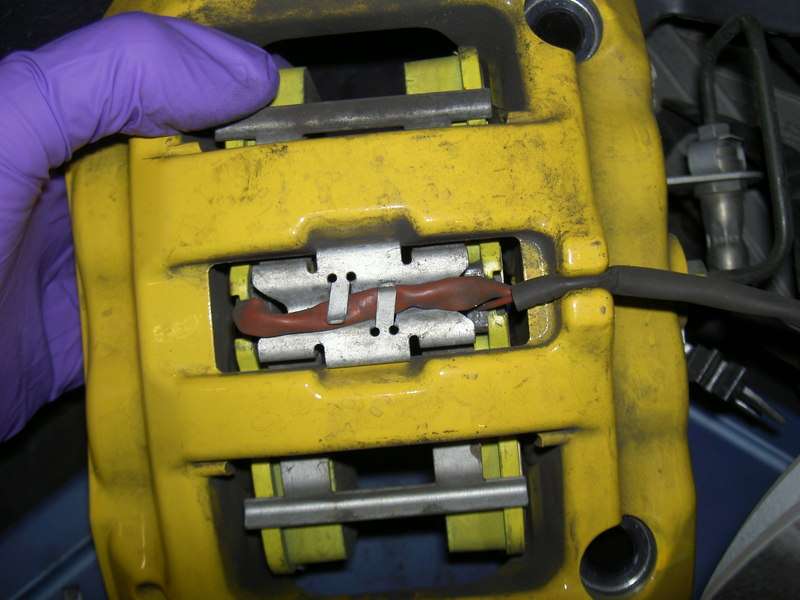
Pull the pads out once retaining spring is removed and spread the caliper pistons apart. I use Giro Disc spreader which made the job super easy
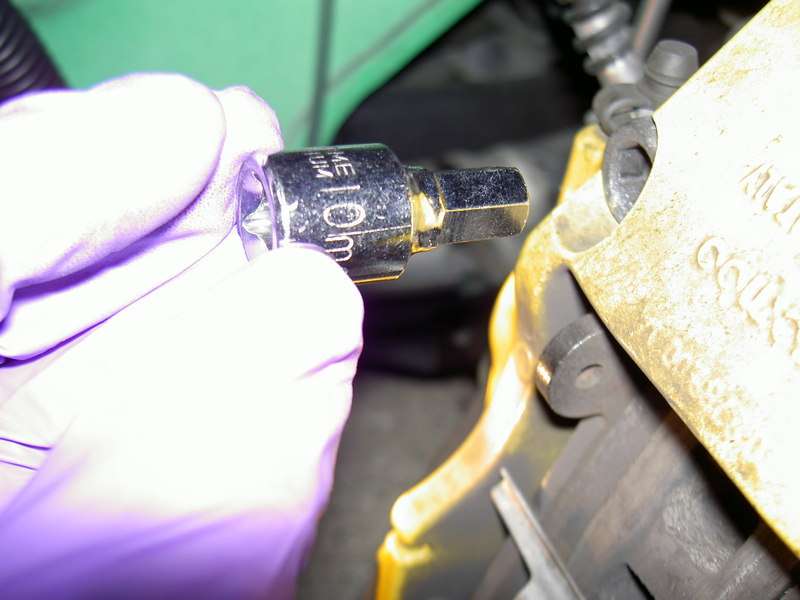
Use 10 mm allen socket to remove the two large caliper retaining bolts

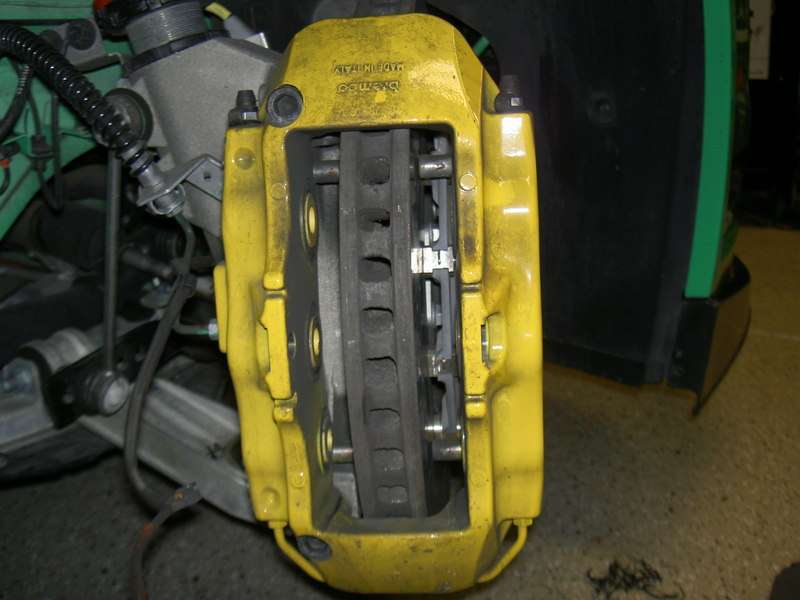
Carefully place the caliper on a box and avoid excessive twisting of the brake lines or hitting the caliper /brake line against your precious PCCB lol

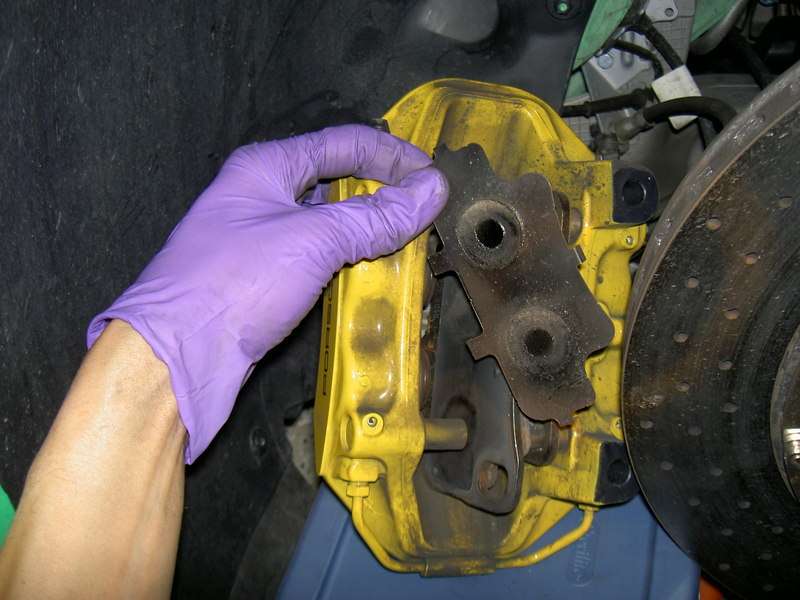
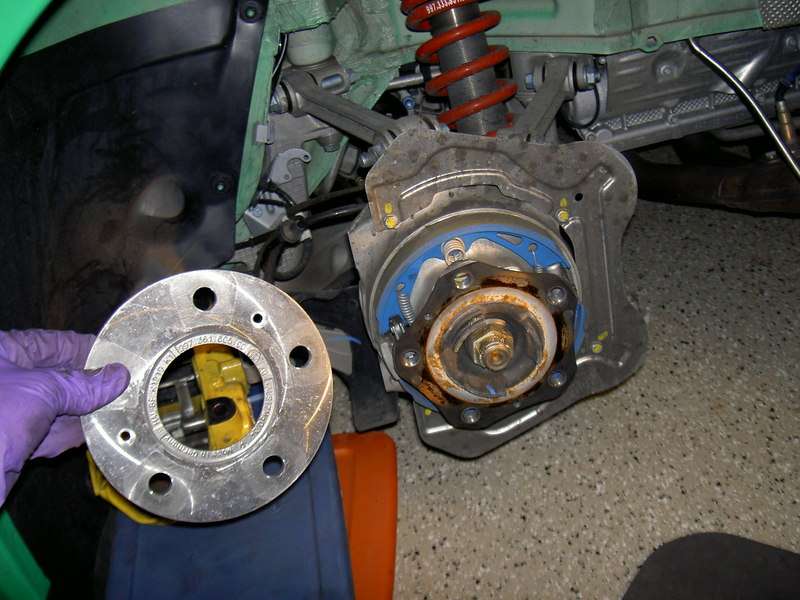
Remove the two rotor retaining Philip screws - mine literally fall on to my hand - not torqued?

This is what it looks like without the PCCB

Comparison look of the PCCB next to steel Cup rotor


PCCB rotor is thicker than steel Cup rotor

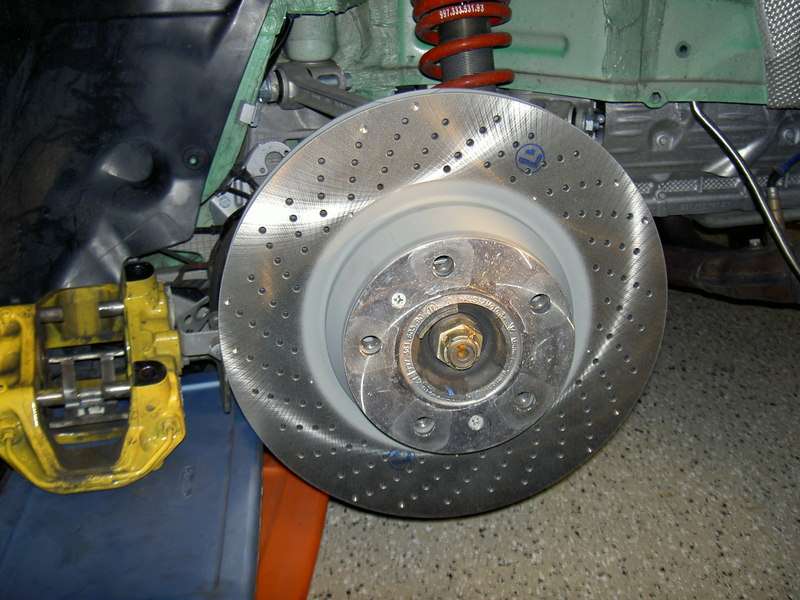
Install the steel Cup rotors. It's a good idea to apply some anti-seize on the two 10 mm rotor retaining screws and lightly hand tighten them - don't strip the bolts.

WOW!! All we need to do is slap on the brake pads and we are done for the front. This is about the easiest mod I ever did on a Porsche .... It's can't be that easy right? Yup .... Oh lord have mercy on the brake pads
Remove the brake pad thickness sensors by gently pull on the wires and use a small flat screw driver to pry it out
Detach the brake line bracket from the back of the caliper be removing the 10 mm bolt
Remove the 13 mm bolt which holds the large retaining spring clip from the back of the caliper
Press in on the retaining spring hard near the clip either with your thumb or a piece of wood and gently tap on the end of the clip by placing a short socket extension on the inner side with a small hammer. Take care not to bang on the brake line or caliper ... or your thumb lol
Pull the pads out once retaining spring is removed and spread the caliper pistons apart. I use Giro Disc spreader which made the job super easy
Use 10 mm allen socket to remove the two large caliper retaining bolts
Carefully place the caliper on a box and avoid excessive twisting of the brake lines or hitting the caliper /brake line against your precious PCCB lol
Remove the two rotor retaining Philip screws - mine literally fall on to my hand - not torqued?
This is what it looks like without the PCCB
Comparison look of the PCCB next to steel Cup rotor
PCCB rotor is thicker than steel Cup rotor
Install the steel Cup rotors. It's a good idea to apply some anti-seize on the two 10 mm rotor retaining screws and lightly hand tighten them - don't strip the bolts.
WOW!! All we need to do is slap on the brake pads and we are done for the front. This is about the easiest mod I ever did on a Porsche .... It's can't be that easy right? Yup .... Oh lord have mercy on the brake pads
Last edited by mikymu; Nov 20, 2009 at 05:30 AM.
Thread Starter
|
Registered User
Joined: Apr 2008
Posts: 1,120
From: Rocklin, California
Rep Power: 134
Front brake pad issues :(
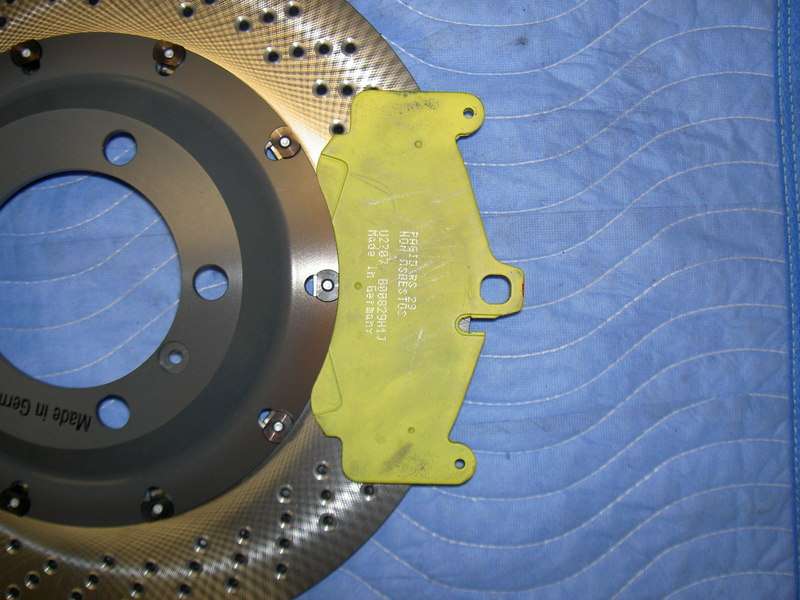
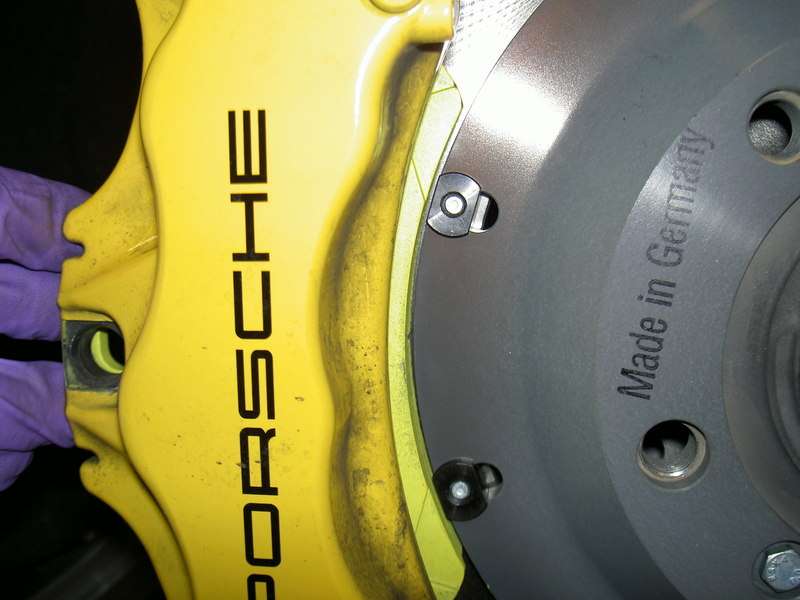
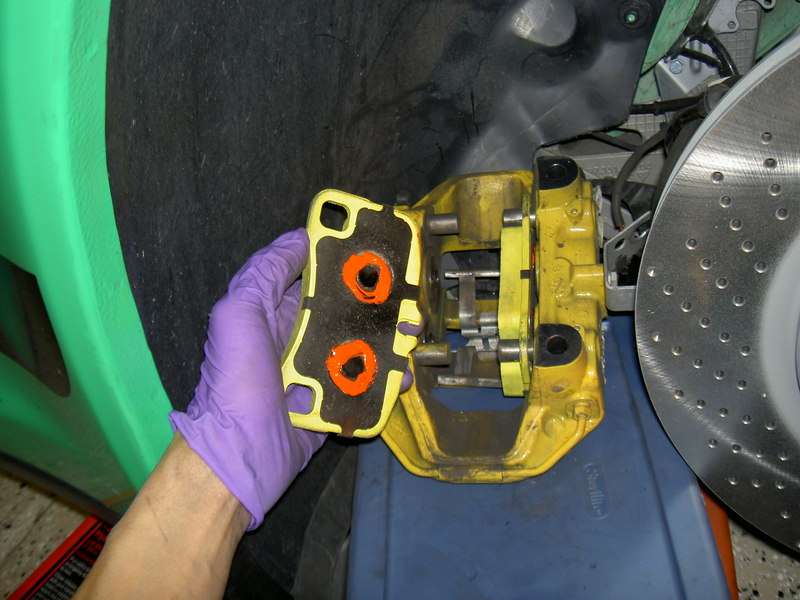
Houston, we have a problem! The Pagid RS 29 2707 pads is too wide for the steel Cup rotors!!?? It is suppose to work for the 380 mm front Porsche rotor and it fits the PCCB just fine. It is so wide it actually touch the hat of the Cup rotor and it has not even make contact with the caliper stop.
:crying:
Back side fits fine

Plenty of space between the inner edge of the brake pad and the hat of the PCCB

OK, this is a real retarded way to find out the hat of the steel Cup rotor is larger than PCCB. I can grind down the inner edge of the brake pads to fit but it will be another retarded move - it's just too much to grind. i had to drop everything and call couple people for answer. Craig at Rennstore and also Peter at TRG was gracefully enough to help. It turns out Pagid make a brake pad specifically for Cup rotor and it's a bit narrow compare with the standard pads. Only if I knew this earlier. It is the RS29 8004 pads with "scallop" inner edge.
OK, pick up a set of the Pagid RS 29 8004 Cup rotor specific pads and it fits ... but not by much though. It was market to have 5 mm space between the inner edge of the pad and the hat but I estimate it's only 2-3 mm the most

It's even closer once installed - Too close for my comfort
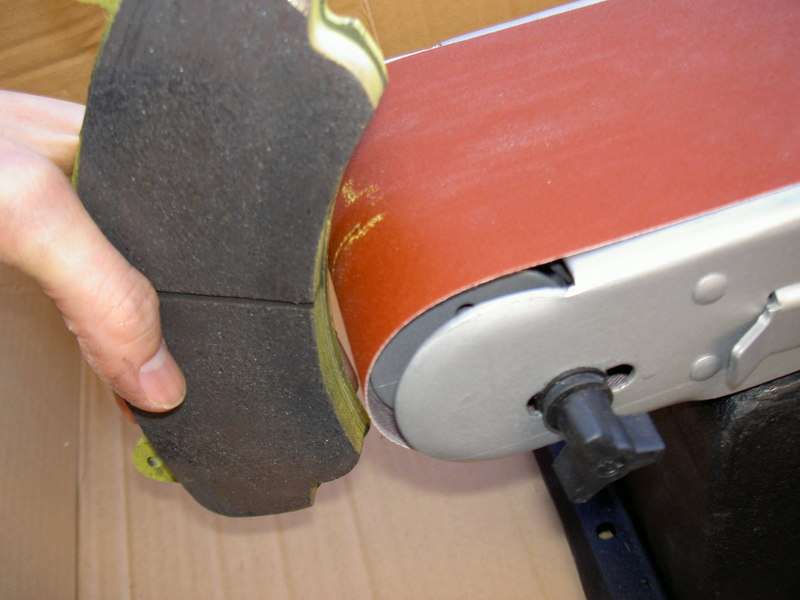
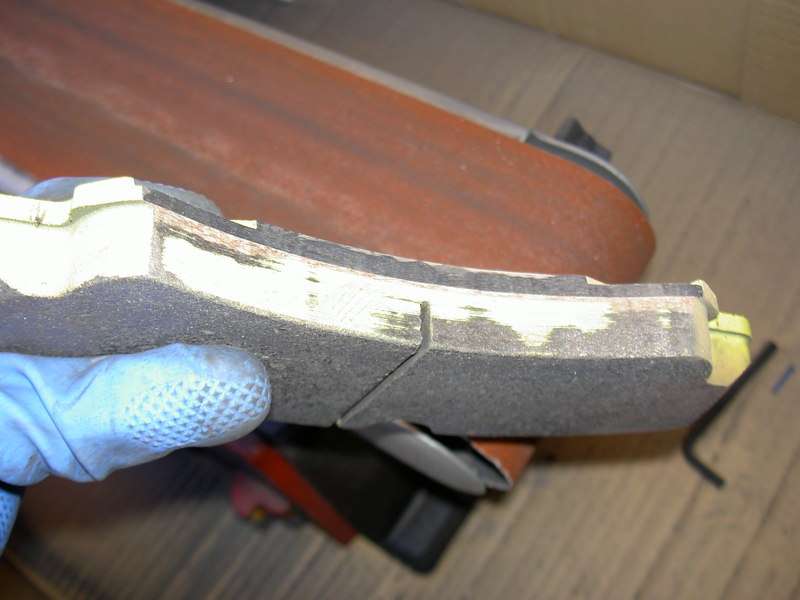
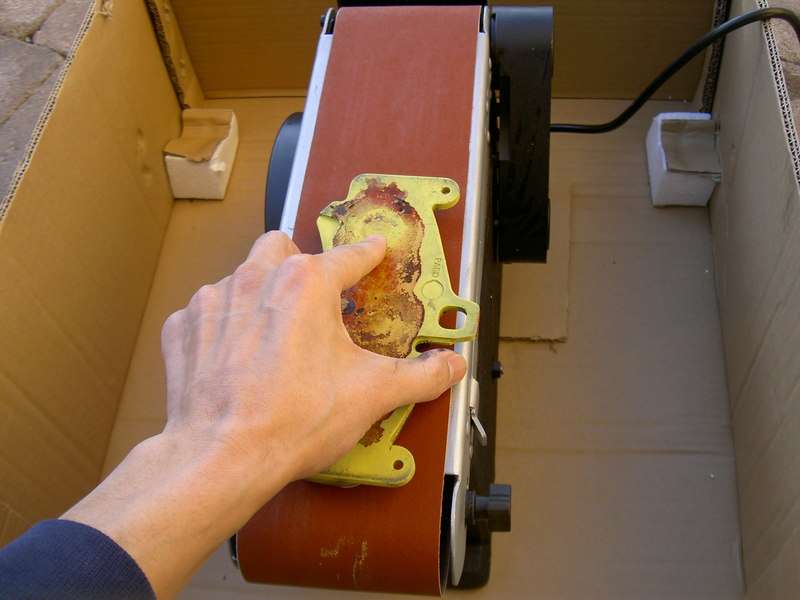
I had to bring out my belt grinder to take off the small metal lip at the inner edge of the pad to give it another 1mm of breathing room
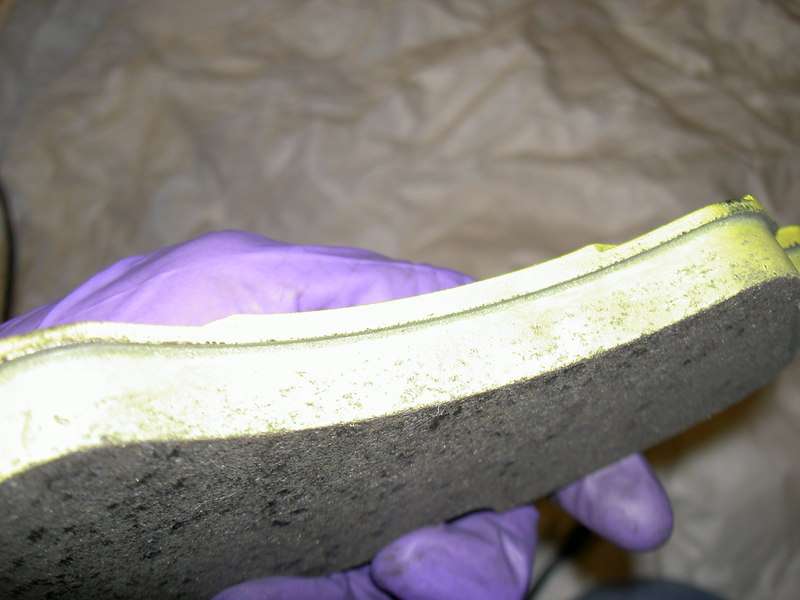
Inner edge is all smooth out
More room is better even if it's an additional 1 mm lol
It is super tight fit on the Cup car itself! Notice the small hair line crack on the Cup car rotor's cross drill holes? lol
I sand down the very edge of the pads on each side which is suppose to help quiet the pads - it did not lol. This is not a necessary step by all means

Put the caliper back on and tighten the two 10 mm allen bolts to 63 lb/ft. Porsche call for replacement of these bolts but many re-use them including Porsche mechanic. You will have to make the call.
Place the spring back and insert the spring slip by firmly pressing down the spring then thread the clip back. Make sure the outer end of the clip sit fat against the caliper. It has two flat grooves. Tighten the 13 mm bot to 23 lb/ft and clip in the pad thickness sensors. make sure you also tighten the 10 mm bolt that secure the brake line to the caliper carrier - Don't over tighten the bolt. Press down on the brake pedal couple times to compress the caliper piston against the brake pads

Now there is another problem .... I noticed the brake pads barely fit especially the inner one. It turns out the Cup rotor sits just so slightly toward the inside - it is not centered like the PCCB rotor
The rotors was so tight I can barely rotate it. I drove the car anyway thinking the pads will just get grind down after two stop signs ... yeah right! The rotor got so hot from pressing firmly against the front rotors which makes the steering wheel shutter :banghead: I limp home after 1 miles of test drive and had to remove the front pads for more modification
Off to the grinder I go. I had to grind down about 1 mm on the inner pad to make it fit. I also can not use any metal plates on the back of the inner pad to help quiet the brake
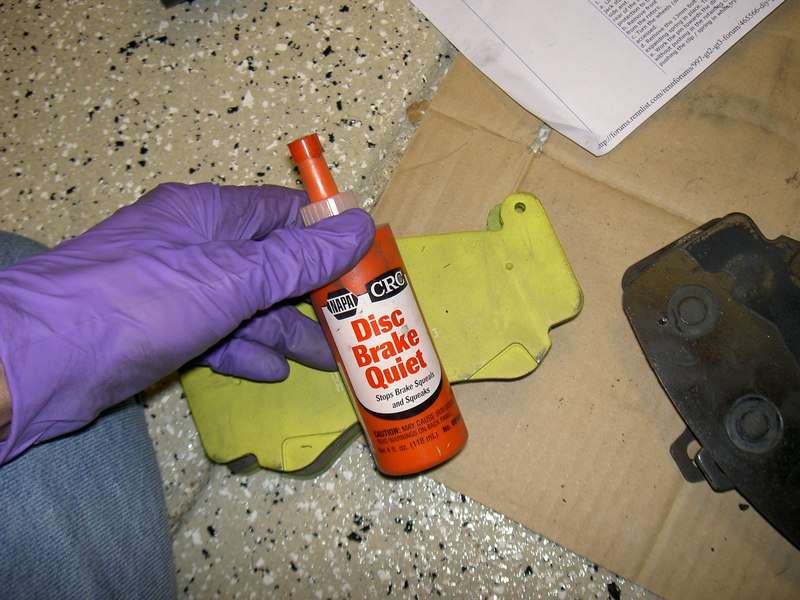
Apply some brake quiet on the back side of the front pads and install the pads again! This whole issue with the front pads are super frustrating but none the less challenging. I think all the problem solving helped sharpen my mind as to delay on set of Alzheimer disease by three months lol
:crying:
Back side fits fine
Plenty of space between the inner edge of the brake pad and the hat of the PCCB
OK, this is a real retarded way to find out the hat of the steel Cup rotor is larger than PCCB. I can grind down the inner edge of the brake pads to fit but it will be another retarded move - it's just too much to grind. i had to drop everything and call couple people for answer. Craig at Rennstore and also Peter at TRG was gracefully enough to help. It turns out Pagid make a brake pad specifically for Cup rotor and it's a bit narrow compare with the standard pads. Only if I knew this earlier. It is the RS29 8004 pads with "scallop" inner edge.
OK, pick up a set of the Pagid RS 29 8004 Cup rotor specific pads and it fits ... but not by much though. It was market to have 5 mm space between the inner edge of the pad and the hat but I estimate it's only 2-3 mm the most
It's even closer once installed - Too close for my comfort
I had to bring out my belt grinder to take off the small metal lip at the inner edge of the pad to give it another 1mm of breathing room
Inner edge is all smooth out
More room is better even if it's an additional 1 mm lol
It is super tight fit on the Cup car itself! Notice the small hair line crack on the Cup car rotor's cross drill holes? lol
I sand down the very edge of the pads on each side which is suppose to help quiet the pads - it did not lol. This is not a necessary step by all means
Put the caliper back on and tighten the two 10 mm allen bolts to 63 lb/ft. Porsche call for replacement of these bolts but many re-use them including Porsche mechanic. You will have to make the call.
Place the spring back and insert the spring slip by firmly pressing down the spring then thread the clip back. Make sure the outer end of the clip sit fat against the caliper. It has two flat grooves. Tighten the 13 mm bot to 23 lb/ft and clip in the pad thickness sensors. make sure you also tighten the 10 mm bolt that secure the brake line to the caliper carrier - Don't over tighten the bolt. Press down on the brake pedal couple times to compress the caliper piston against the brake pads
Now there is another problem .... I noticed the brake pads barely fit especially the inner one. It turns out the Cup rotor sits just so slightly toward the inside - it is not centered like the PCCB rotor
The rotors was so tight I can barely rotate it. I drove the car anyway thinking the pads will just get grind down after two stop signs ... yeah right! The rotor got so hot from pressing firmly against the front rotors which makes the steering wheel shutter :banghead: I limp home after 1 miles of test drive and had to remove the front pads for more modification
Off to the grinder I go. I had to grind down about 1 mm on the inner pad to make it fit. I also can not use any metal plates on the back of the inner pad to help quiet the brake
Apply some brake quiet on the back side of the front pads and install the pads again! This whole issue with the front pads are super frustrating but none the less challenging. I think all the problem solving helped sharpen my mind as to delay on set of Alzheimer disease by three months lol
Last edited by mikymu; Nov 21, 2009 at 12:59 AM.
Thread Starter
|
Registered User
Joined: Apr 2008
Posts: 1,120
From: Rocklin, California
Rep Power: 134
Rear rotor swap
Thank god the rear rotor swap is super easy! No pad issue what so ever! lol
First release e-brake. Remove the pad wear sensor wire and e-brake cable from the clips on the back of the caliper
Remove the two 10 mm allen screws and carefully pull the caliper off and place on a box as not to stretch the brake line

Remove the pads one at a time by pulling it off the stops on the caliper - it's easy.

Take care not to stretch the pad wear sensor wires and take the first clip on plate off to access the pad sensor
Gently pull on the pad wear sensor wire just enough to use a flat head screw drive to work both sensors off. It will come off if yank on the wire hard enough but you will risk breaking the wire and Mr. Porsche will charge you $100 each for replacement lol

Spread the caliper piston apart

Remove the PCCB rotor by loosen the two Phillip screw. Both the 5 mm spacer and PCCB rotor will come off easily

This is what the 5 mm spacer and the rear wheel/caliper carrier with e-brake looks like
Install the rear TT steel rotor and secure the rotor retaining screw. Again, it is a good idea to use some anti-seize on the retaining screw and don't over tighten the screws
There are only enough space for one of the metal plate backing or you will encounter the same issue with the front brakes. I use the one that clip on the back of the brake pad and apply some brake quiet
carefully clip both wear sensors back in the brake pads. Install the caliper and tighten each 10 mm allen bolts to 63 lb/ft. Replace these bolts if you chose to and secure the pad wear sensor wires and e-brake cable on the back of the caliper. Press down on the brake pedal couple time to seat the pads then you are done for the rear brakes!! I also sand down the edge of the rear pads a bit hoping to quiet the pads - it is not a necessary step.
First release e-brake. Remove the pad wear sensor wire and e-brake cable from the clips on the back of the caliper
Remove the two 10 mm allen screws and carefully pull the caliper off and place on a box as not to stretch the brake line
Remove the pads one at a time by pulling it off the stops on the caliper - it's easy.
Take care not to stretch the pad wear sensor wires and take the first clip on plate off to access the pad sensor
Gently pull on the pad wear sensor wire just enough to use a flat head screw drive to work both sensors off. It will come off if yank on the wire hard enough but you will risk breaking the wire and Mr. Porsche will charge you $100 each for replacement lol
Spread the caliper piston apart
Remove the PCCB rotor by loosen the two Phillip screw. Both the 5 mm spacer and PCCB rotor will come off easily
This is what the 5 mm spacer and the rear wheel/caliper carrier with e-brake looks like
Install the rear TT steel rotor and secure the rotor retaining screw. Again, it is a good idea to use some anti-seize on the retaining screw and don't over tighten the screws
There are only enough space for one of the metal plate backing or you will encounter the same issue with the front brakes. I use the one that clip on the back of the brake pad and apply some brake quiet
carefully clip both wear sensors back in the brake pads. Install the caliper and tighten each 10 mm allen bolts to 63 lb/ft. Replace these bolts if you chose to and secure the pad wear sensor wires and e-brake cable on the back of the caliper. Press down on the brake pedal couple time to seat the pads then you are done for the rear brakes!! I also sand down the edge of the rear pads a bit hoping to quiet the pads - it is not a necessary step.
Last edited by mikymu; Nov 20, 2009 at 04:28 AM.
Thread Starter
|
Registered User
Joined: Apr 2008
Posts: 1,120
From: Rocklin, California
Rep Power: 134
Finish prodcut
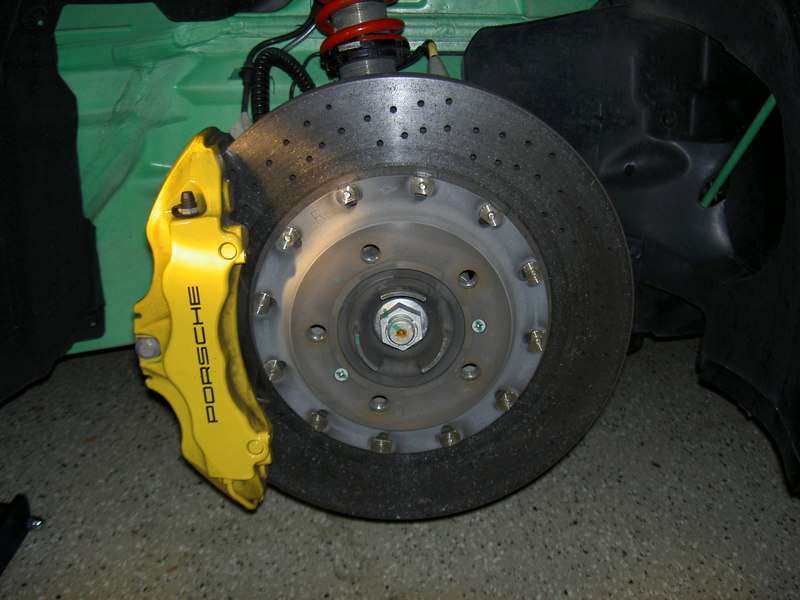
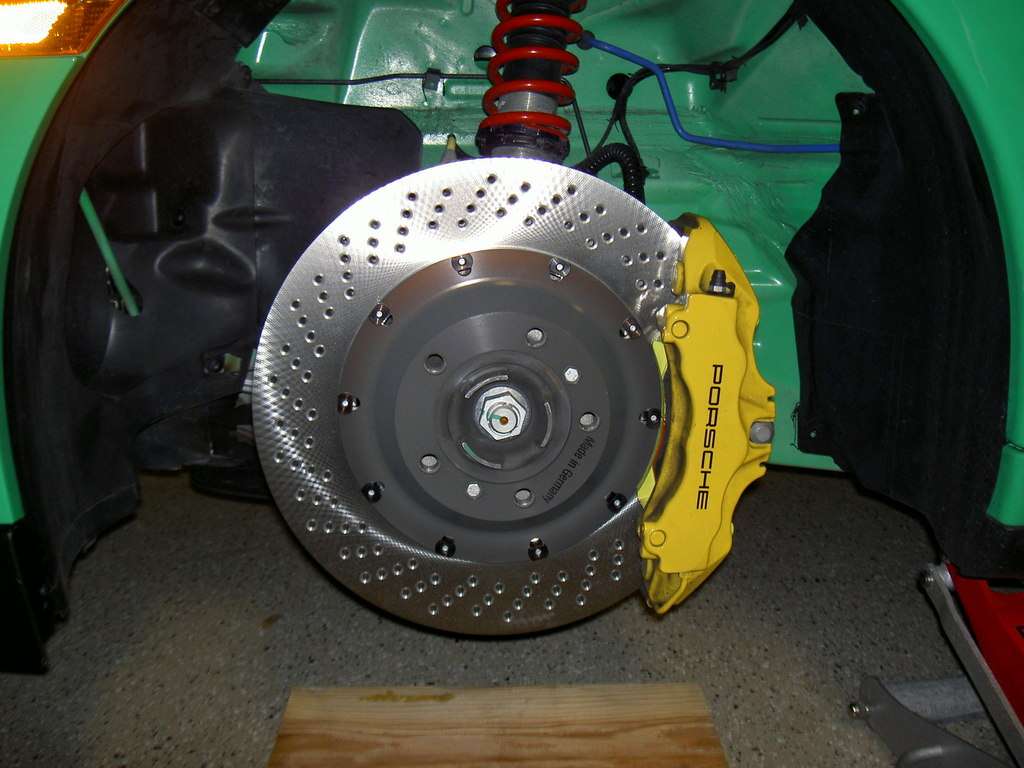
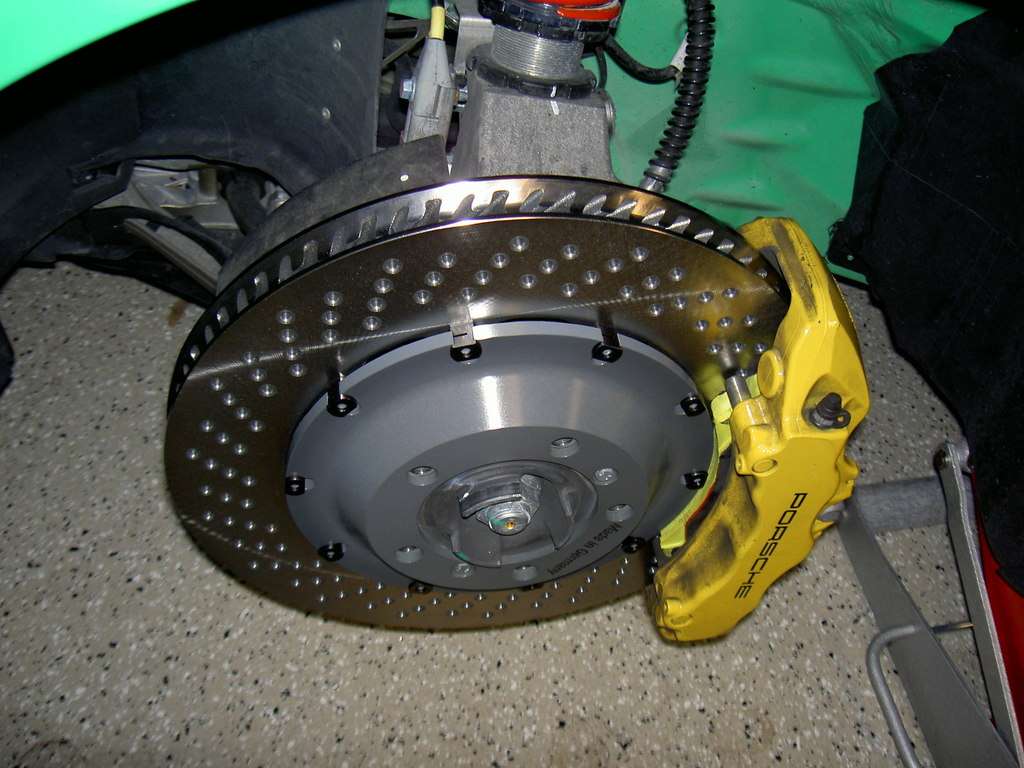
This is what the front steel Cup rotor and rear TT rotor looks like after install 

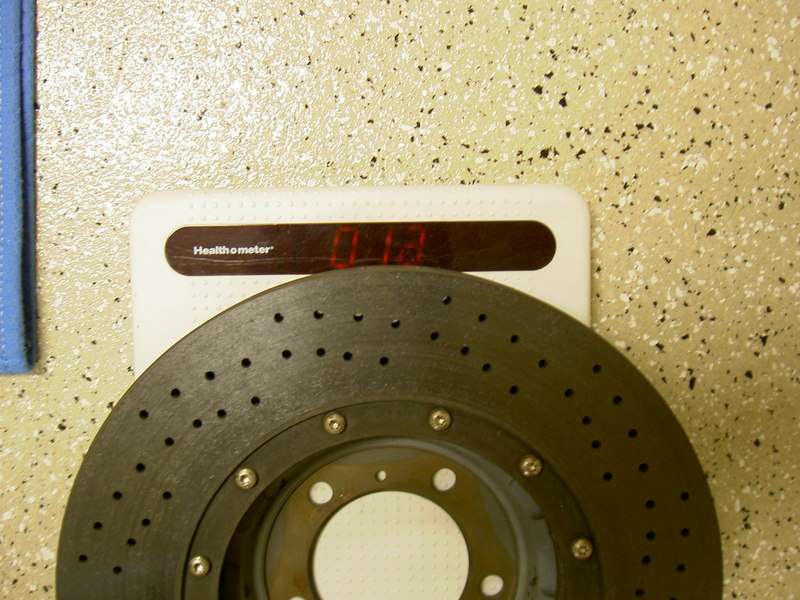
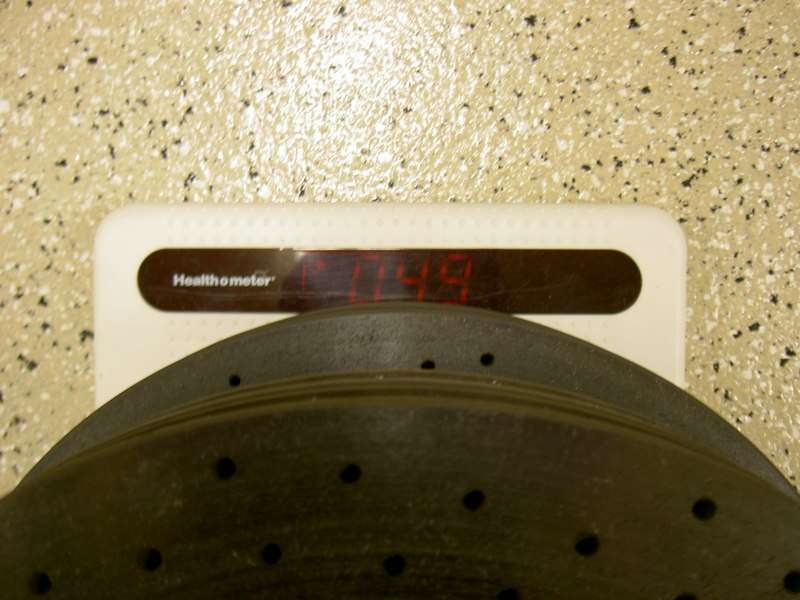
What is the the weight penalty going from PCCB to steel rotors? let's take a look:
Front steel Cup rotor weigh about 21-22 lbs. My bathroom scale is not the best lol

Front PCCB 12 lbs which is 10 lbs lighter than Cup steel rotor
Rear TT steel rotor: 21-22 lbs. Just like front steel Cup rotor
Rear PCCB 12 lbs also just like front PCCB
Combine weight of front and rear steel rotors about 88 lbs

Combine PCCB front and rear about 48-49 lbs so the total weight penalty is about 40 lbs or 10 lbs each wheel going form PCCB to steel
Driving impression? I can feel the extra weight of the steel brakes. The car has lost some of it's peep on the "instant jump" on hard acceleration. This may not be a bad thing on the track so the car is not so jumpy with hard acceleration especially in turns.
Breaking difference? I will shed more light on that after track day at Infinion this Saturday. I had a chance to brake hard during bedding process - that is very brisk stop from 60 mph down to 10 mph 8 times in a roll. The car can definitely stop a-lot faster but it seems to be more controlled instead of the on and off feel of the PCCB. There were no fade what so ever.
I hope you find this post helpful and a good reference on what it takes to go from PCCB to steel rotors. It is not an easy mod as you can see a-lot of modification is needed when it comes to front brake pads. You can use this post as a general guide to either replace brake pads or worn out rotors. I learned a-lot in the process and I may try more aggressive pads on my PCCB next year if I am brave enough. Will give more feedback at that time.
This is what the front cup steel rotor and rear TT rotor look like on my RS. IMHO, not bad looking at all. Yes, those are my wife's PCCB shoes in the back ground

What is the the weight penalty going from PCCB to steel rotors? let's take a look:
Front steel Cup rotor weigh about 21-22 lbs. My bathroom scale is not the best lol
Front PCCB 12 lbs which is 10 lbs lighter than Cup steel rotor
Rear TT steel rotor: 21-22 lbs. Just like front steel Cup rotor
Rear PCCB 12 lbs also just like front PCCB
Combine weight of front and rear steel rotors about 88 lbs
Combine PCCB front and rear about 48-49 lbs so the total weight penalty is about 40 lbs or 10 lbs each wheel going form PCCB to steel
Driving impression? I can feel the extra weight of the steel brakes. The car has lost some of it's peep on the "instant jump" on hard acceleration. This may not be a bad thing on the track so the car is not so jumpy with hard acceleration especially in turns.
Breaking difference? I will shed more light on that after track day at Infinion this Saturday. I had a chance to brake hard during bedding process - that is very brisk stop from 60 mph down to 10 mph 8 times in a roll. The car can definitely stop a-lot faster but it seems to be more controlled instead of the on and off feel of the PCCB. There were no fade what so ever.
I hope you find this post helpful and a good reference on what it takes to go from PCCB to steel rotors. It is not an easy mod as you can see a-lot of modification is needed when it comes to front brake pads. You can use this post as a general guide to either replace brake pads or worn out rotors. I learned a-lot in the process and I may try more aggressive pads on my PCCB next year if I am brave enough. Will give more feedback at that time.
This is what the front cup steel rotor and rear TT rotor look like on my RS. IMHO, not bad looking at all. Yes, those are my wife's PCCB shoes in the back ground
Last edited by mikymu; Nov 20, 2009 at 05:19 AM.

Registered User
Joined: Oct 2009
Posts: 274
From: Calabasas, CA
Rep Power: 34
As the first reply here, I would like to say- THANK YOU for your time and hard work to make one of the nicest / most detailed threads I have ever seen on any car forum in my entire life.
Thanks,
Alex
Thanks,
Alex
Thread Starter
|
Registered User
Joined: Apr 2008
Posts: 1,120
From: Rocklin, California
Rep Power: 134
Thanks for your kind words Alex. Hope you find this post informative
Trending Topics


Banned
Joined: Oct 2009
Posts: 272
From: Bay Area, CA
Rep Power: 27
Mike,
I think that we had this discussion initially with you when we did your roll bar.
Congrats, and good luck with the new brakes. This is a great write up and I think that honestly if we were to have a DIY spokesman for 6speed it should be you.
The details you provide most of the members is incredible, I think my 5 year old could do this after your write ups.
Thanks again for your time on helping the community out.
BTW, can i have your gyrodisc?
Robb
Last edited by BRracing; Nov 20, 2009 at 09:38 AM.
Registered User
Joined: Apr 2007
Posts: 3,633
From: Maryland
Rep Power: 277
Great write up. I'm curious as to why you decided to go with drilled rotors for the track? I understand they are 2 piece rotors so will be easier to change, but a slotted rotor would give you more wear between changes.
Registered User
Joined: Jan 2008
Posts: 8,875
From: Vancouver
Rep Power: 684
Nice write up. a few things that I do that might hep people in the future.
I use two 12" zap straps to hold the caliper up when I remove them for rotor replacement. One around the caliper, and the other one through the first one and then up and around the spring in the Coil Over.
I don't use the metal backer plates on my Pagid pads, and things work fine without them.
Not a good idea to use a Torque wrench to remove the caliper bolts (not sure if you did that, or if your wrench head looks like the head of my Torque wrench).
It is recommended that when replacing the rotors that the caliper bolts be replaced as well. The Caliper bolt is a stretch bolt and should be replaced after each usage, I did a side by side, a new vs old and didn't see a difference. I did replace them as I don't like the idea of my brakes coming apart over a few $4 bolts.
Otherwise very nice, I really like you caliper spreader, I might get one!