
Porsche 914 Racecar

Thread Starter
|
Registered User
Joined: Sep 2010
Posts: 64
From: Hillsboro, OR
Rep Power: 18

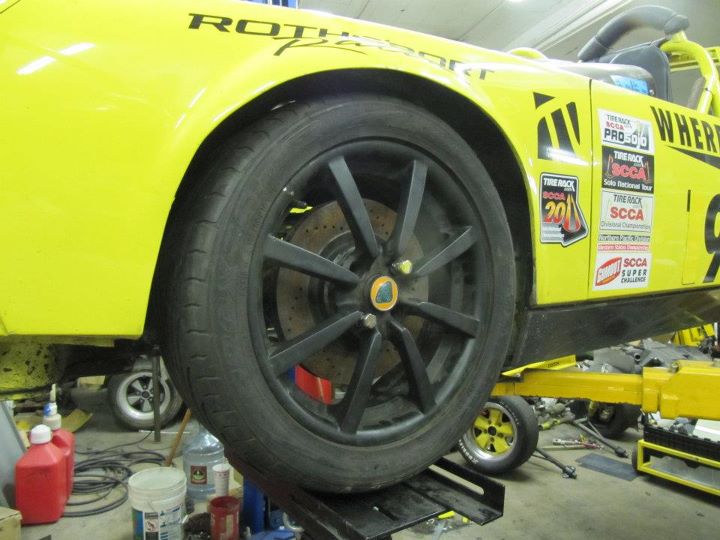
Here is a video of the car at the Packwood ProSolo this past weekend. We were doing 1.8sec 60ft times on the launch...however I did red light 3 times in a row!
http://www.youtube.com/watch?v=cp4KiVPQSr8
http://www.youtube.com/watch?v=cp4KiVPQSr8


Thread Starter
|
Registered User
Joined: Sep 2010
Posts: 64
From: Hillsboro, OR
Rep Power: 18
Now that the winter is upon us, it is time to further develop the car. One thing that is pretty obvious is that the 40+ year old Porsche suspension has some serious shortcomings when compared to modern cars. Therefore, I have decided to go down the path of converting the chassis to a double a-arm set-up and I am starting with Lotus components.
I was able to get the front and rear suspension parts from a wrecked Lotus. I was also able to source the both subframes. The rear unbolts from the car and the front required a little sawzall action.
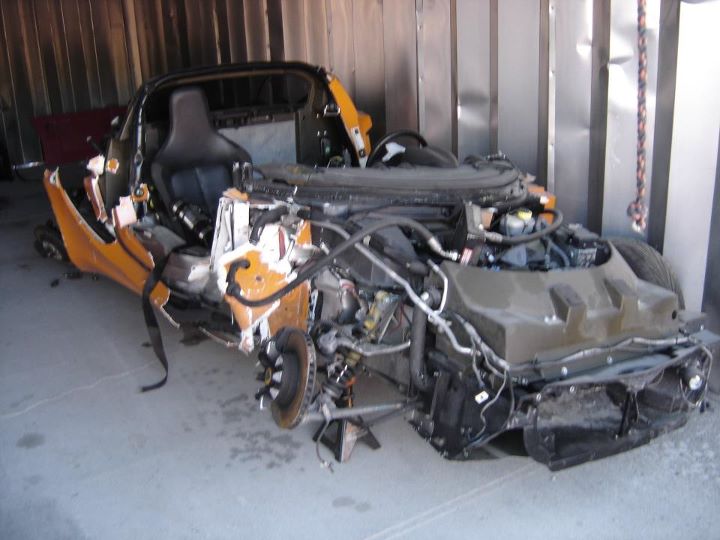
Here are all the components I sourced from the wrecked Lotus. The passenger front upper control arm and the passenger rear lower control arms are bent and new ones will need to be sourced.
I was able to get the front and rear suspension parts from a wrecked Lotus. I was also able to source the both subframes. The rear unbolts from the car and the front required a little sawzall action.
Here are all the components I sourced from the wrecked Lotus. The passenger front upper control arm and the passenger rear lower control arms are bent and new ones will need to be sourced.
Last edited by Britain Smith; Oct 28, 2011 at 12:02 PM.
Thread Starter
|
Registered User
Joined: Sep 2010
Posts: 64
From: Hillsboro, OR
Rep Power: 18
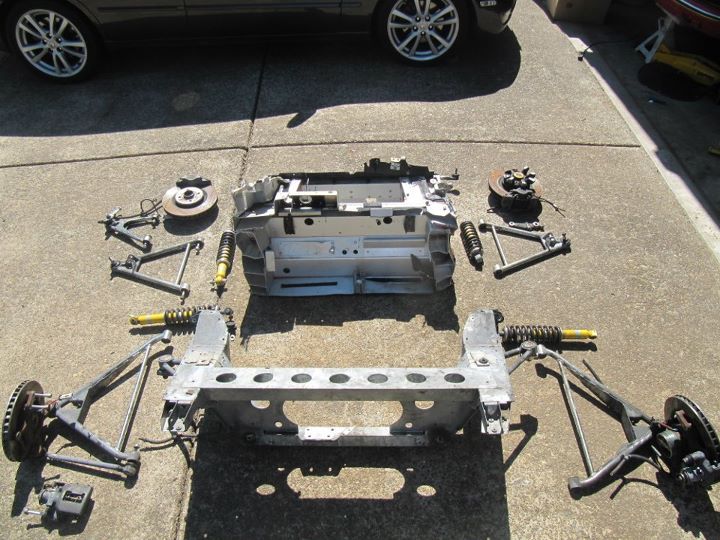
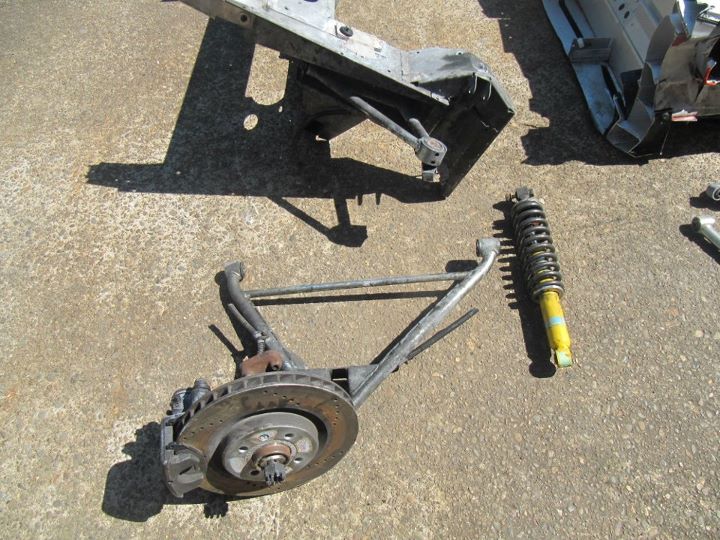
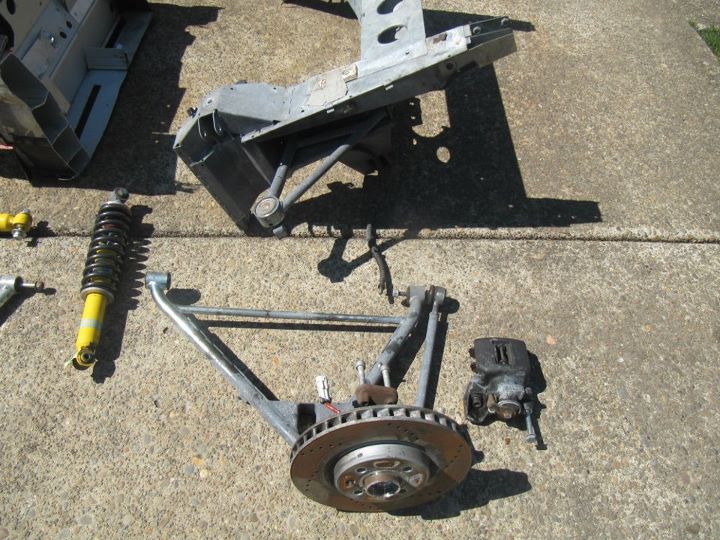
Passenger rear components. This arm is actually bent and will be replaced
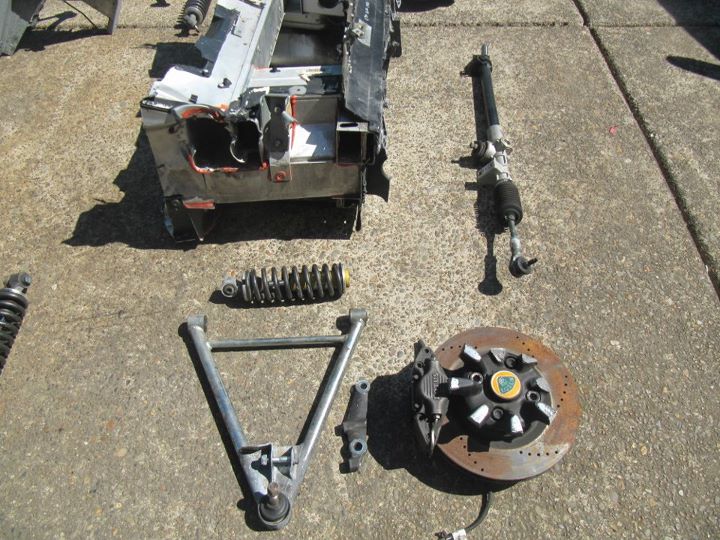
Front passenger components. Everything check out here...still need to get the proper 14mm star bit to remove the broken wheel center from the hub. Check out the broken shock.
Front driver side components. Everything here checked out fine.
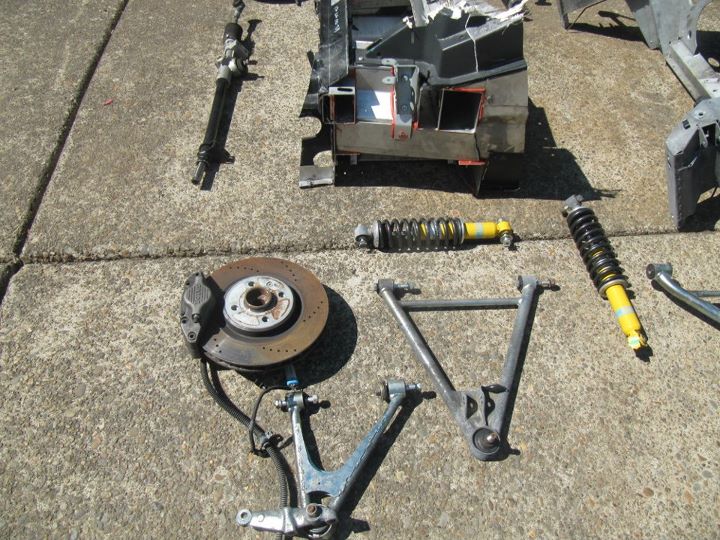
Driver side rear...all good here as well.
Front passenger components. Everything check out here...still need to get the proper 14mm star bit to remove the broken wheel center from the hub. Check out the broken shock.
Front driver side components. Everything here checked out fine.
Driver side rear...all good here as well.
Last edited by Britain Smith; Oct 28, 2011 at 12:03 PM.
Thread Starter
|
Registered User
Joined: Sep 2010
Posts: 64
From: Hillsboro, OR
Rep Power: 18
This is the front subframe assembly after about 3 hours of trimming with the combination plasma cutter, sawzall, cut-off wheel. That is the scrap pile in the back I must say that Lotus engineers did a great job in packaging on these cars. All the pick-up points appears to be intact and should be good for mock-up.
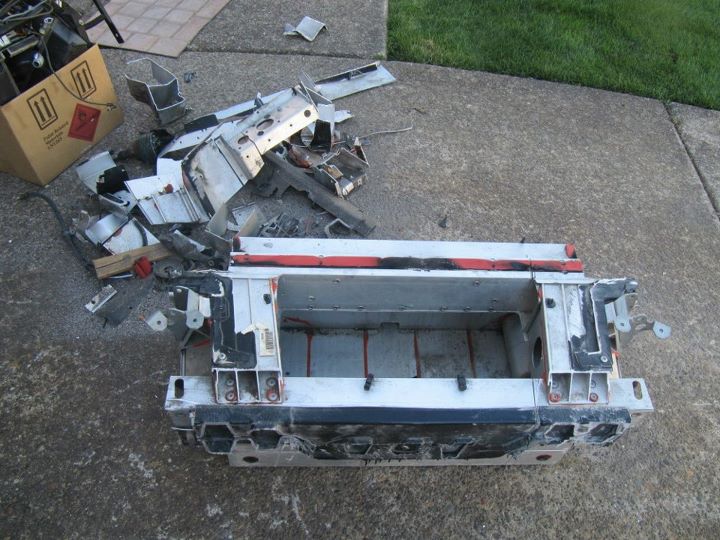
All excess material trimmed around each suspension pick-up point in order to aid in bolting and unbolting the components during mock-up.

All the components cleaned up and laid out. Having a little issue removing the rusted bolts holding the rotors on the hubs, I will tackle that again later.
All excess material trimmed around each suspension pick-up point in order to aid in bolting and unbolting the components during mock-up.
All the components cleaned up and laid out. Having a little issue removing the rusted bolts holding the rotors on the hubs, I will tackle that again later.
Last edited by Britain Smith; Oct 28, 2011 at 12:03 PM.
Thread Starter
|
Registered User
Joined: Sep 2010
Posts: 64
From: Hillsboro, OR
Rep Power: 18
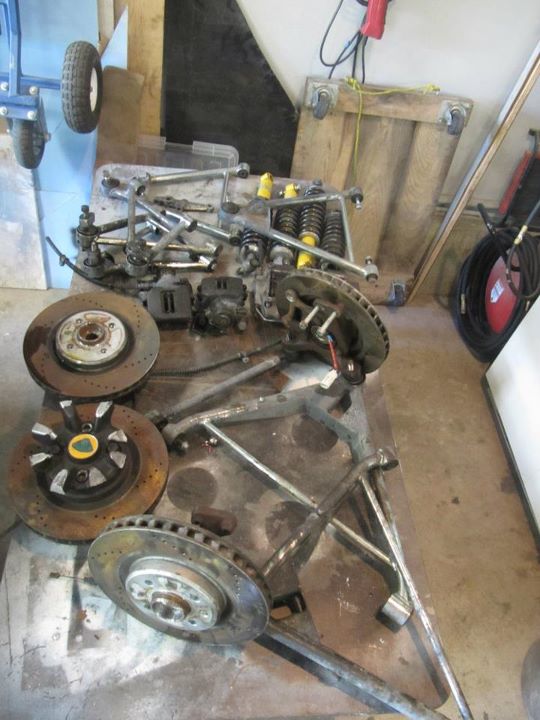
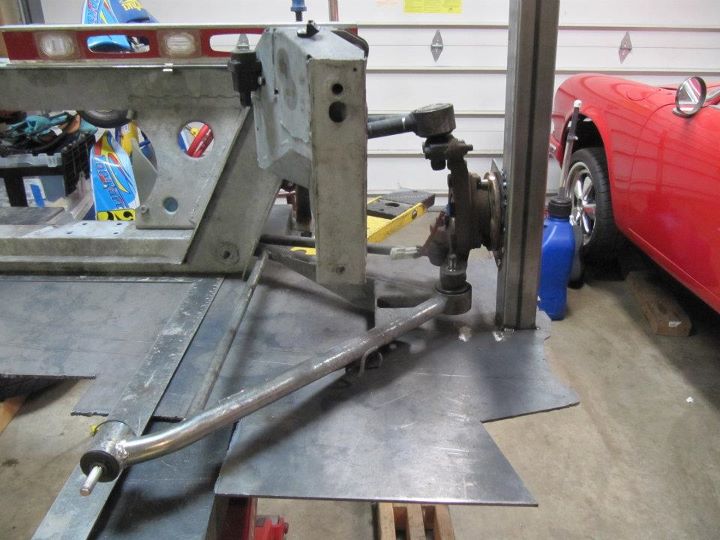
I began by mocking up the Lotus suspension assembly in the Lotus front subframe.

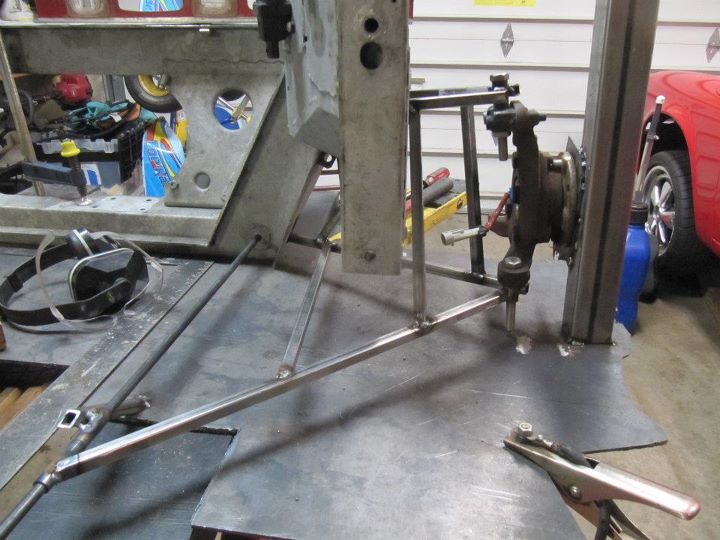
Then I secured the hub and built a quick jig to locate the chassis pick-up points to translate to the 914 chassis.
Then I secured the hub and built a quick jig to locate the chassis pick-up points to translate to the 914 chassis.
Thread Starter
|
Registered User
Joined: Sep 2010
Posts: 64
From: Hillsboro, OR
Rep Power: 18
Start of rear suspension mock-up. The lower front mount is actually part of the Lotus chassis and not part of the rear sub-frame assembly so I had locate it separately for the jig to be properly built.
Driver side rear mock-up.
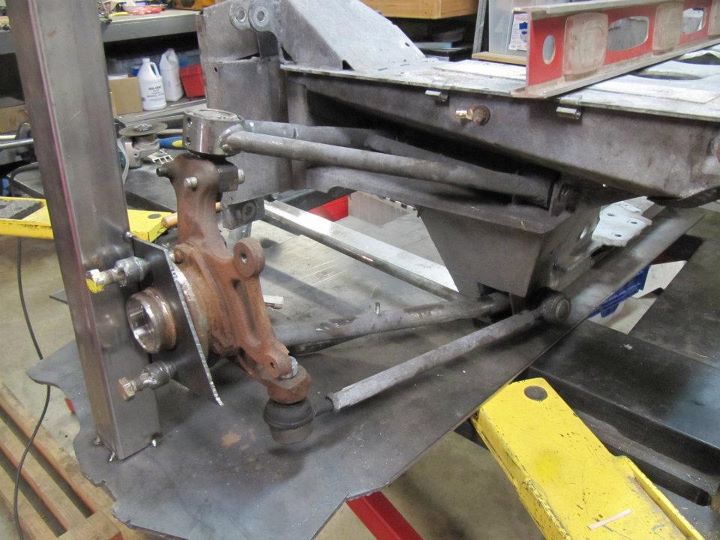
Driver side rear mock-up.
Thread Starter
|
Registered User
Joined: Sep 2010
Posts: 64
From: Hillsboro, OR
Rep Power: 18
Driver side rear jig in place.
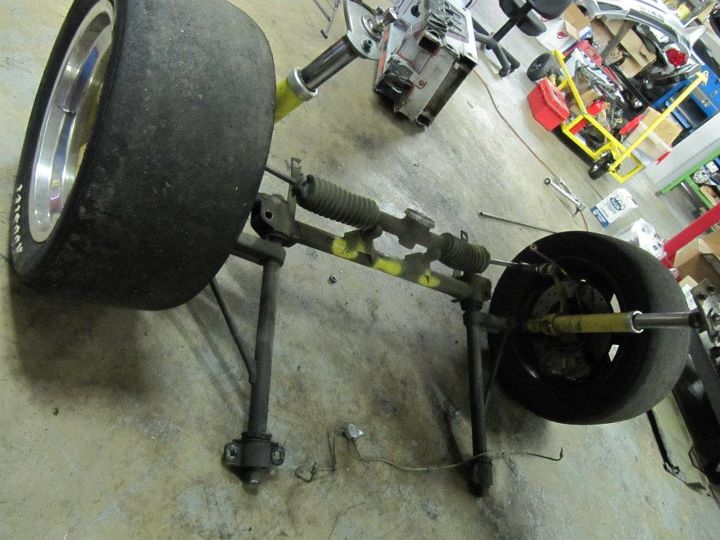
Driver-side front and rear jigs completed. I passed a solid rod through the lower pick-up points and it is interesting that the arm length of both front and rear are the same.

Driver-side front and rear jigs completed. I passed a solid rod through the lower pick-up points and it is interesting that the arm length of both front and rear are the same.
Thread Starter
|
Registered User
Joined: Sep 2010
Posts: 64
From: Hillsboro, OR
Rep Power: 18
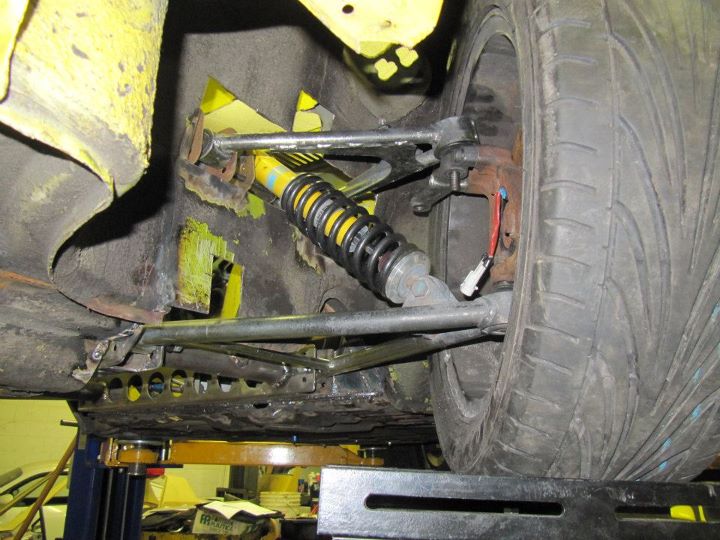
With the jigs completed, it was time to remove the stock Porsche suspension. It is amazing how much time and effort one can put into the stock set-up and still not overcome the compromises...I call it "polishing a turd" 
Thread Starter
|
Registered User
Joined: Sep 2010
Posts: 64
From: Hillsboro, OR
Rep Power: 18
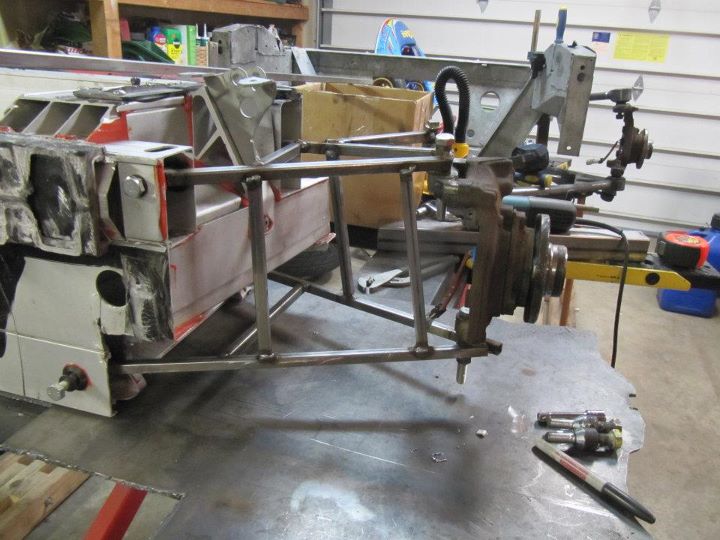
Now....skip ahead 4 days of gruel work...and you get this...
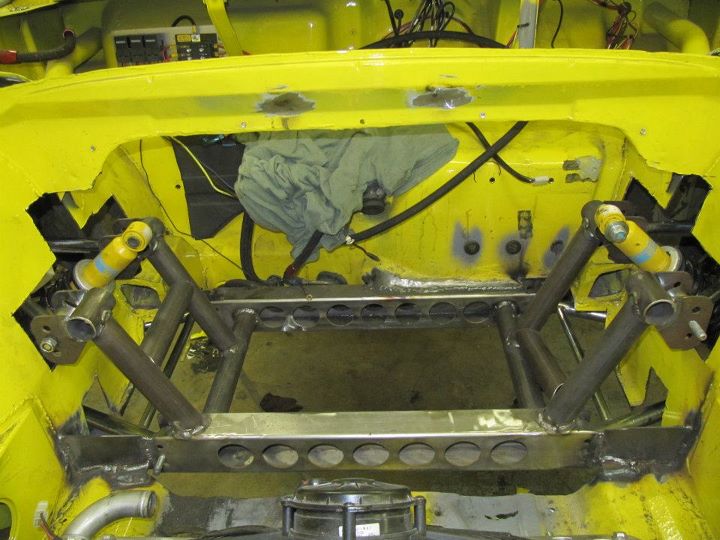
I did my best to integrate into the stock unibody of the 914 chassis in the spirit of the SCCA rules. Additional support will be added once the shock mounts are completed and the cage is tied in.
I did my best to integrate into the stock unibody of the 914 chassis in the spirit of the SCCA rules. Additional support will be added once the shock mounts are completed and the cage is tied in.
Thread Starter
|
Registered User
Joined: Sep 2010
Posts: 64
From: Hillsboro, OR
Rep Power: 18
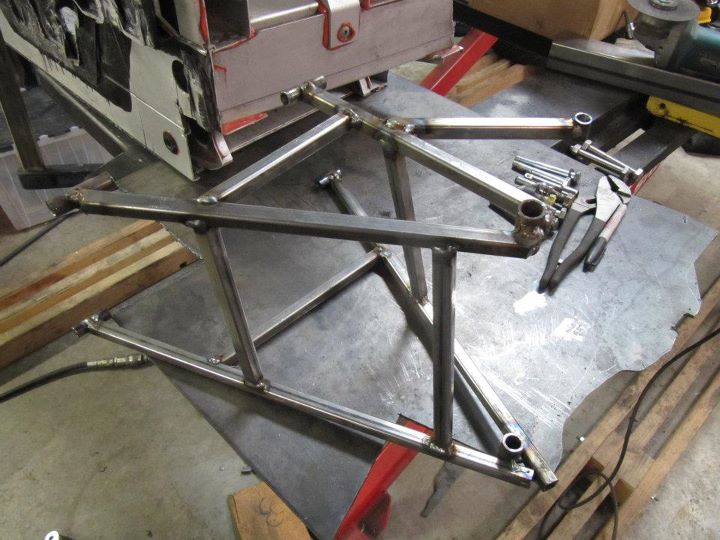
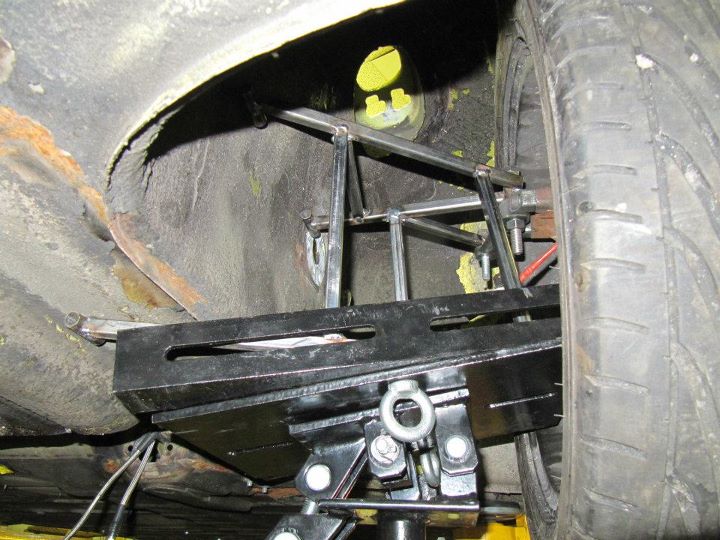
Inside look of the control arms and the lower subframe. One of theses days I will strip all the undercoating and make it look all pretty.
Placement of the steering rack. Adjustment built in to allow for changes in both the control arm height and bump-steer. Again, additional bracing will be added to the mounts as the steering rack takes a lot of force.
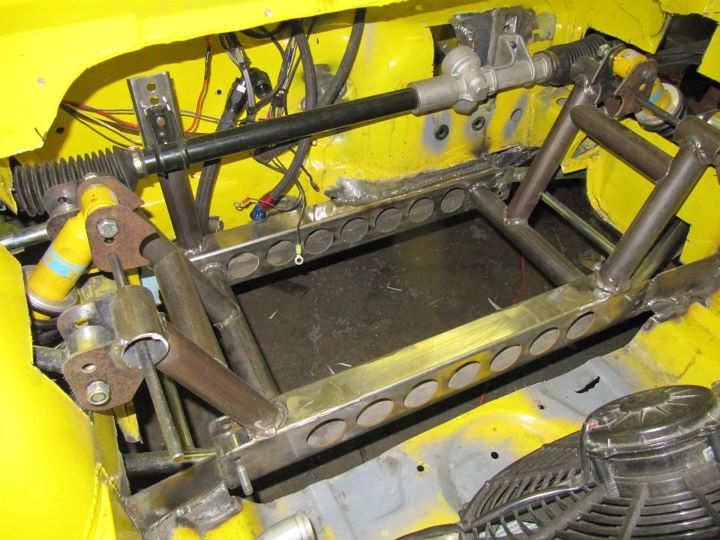
Placement of the steering rack. Adjustment built in to allow for changes in both the control arm height and bump-steer. Again, additional bracing will be added to the mounts as the steering rack takes a lot of force.