

Rear Bumper Removal & Carbon Fiber Rear Diffuser

Thread Starter
|
Registered User
Joined: Sep 2012
Posts: 254
From: Crosslake, MN & Frisco, TX
Rep Power: 38


Rear Bumper Removal & Carbon Fiber Rear Diffuser
To go along with the CF front lip that I've already posted here, forum member "Mercedes Benz" also sent me a CF diffuser for trial installation. Removing the OEM plastic rear diffuser is pretty simple once you know how it goes together. I didn't take picture of that process, but it goes something like this;
I have to admit that I had a hard time fitting the CF diffuser on and actually gave up. I couldn't get the tabs to go in and apply enough force to lock them in place. The main reason for this is you have no access to the back of the bumper cover to push the other way. Frustrated, I re-installed the OEM part and went for a few beers to clear my head.
I decided to try again this morning but this time I'd remove the rear bumper cover completely to allow access to the back side. I'm a decent wrench, but the thought of taking my new Porsche apart was a little overwhelming. Once underway, I was amazed at how easy and simple the cover came off and went back together. For those of you sweating the air filter change, don't worry! I attempted to document the process with pictures below. So here goes.
1. Remove the fans as a unit by pulling up on the rear most section to unlock the (2) vertical tabs and then pull the whole assembly toward you to unlock the (4) front horizontal tabs. Now that I think about it, I'm not even sure this step is necessary.
2. Pop off the (2) covers hiding the tail lights screws.
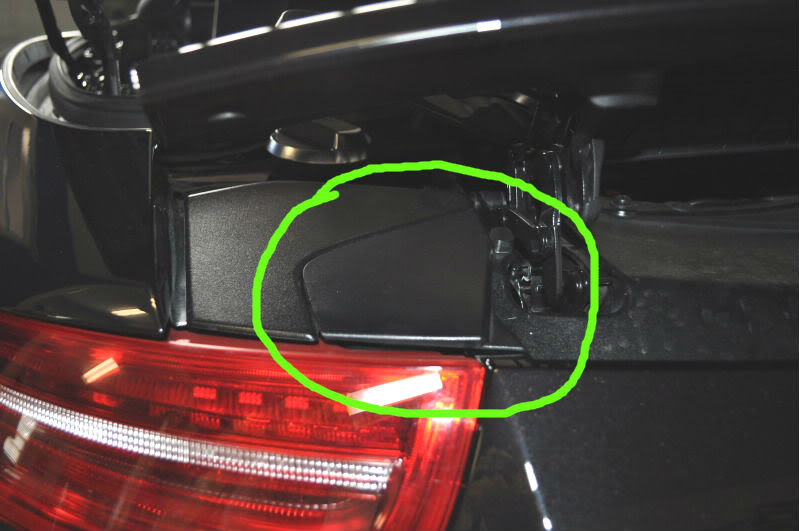
3. Remove the screws holding the tail lights. There's (2) per side. The tail lights come right off.
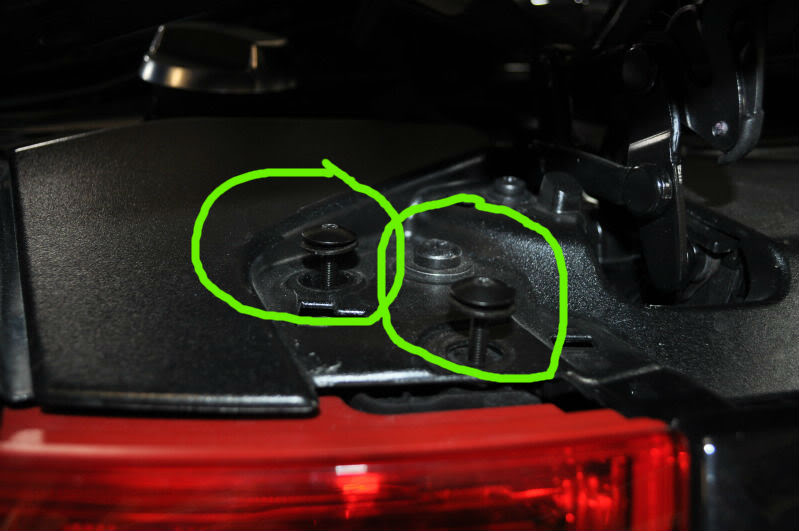
4. There's a bigger torx screw on each side of the tail lights access. Remove them.
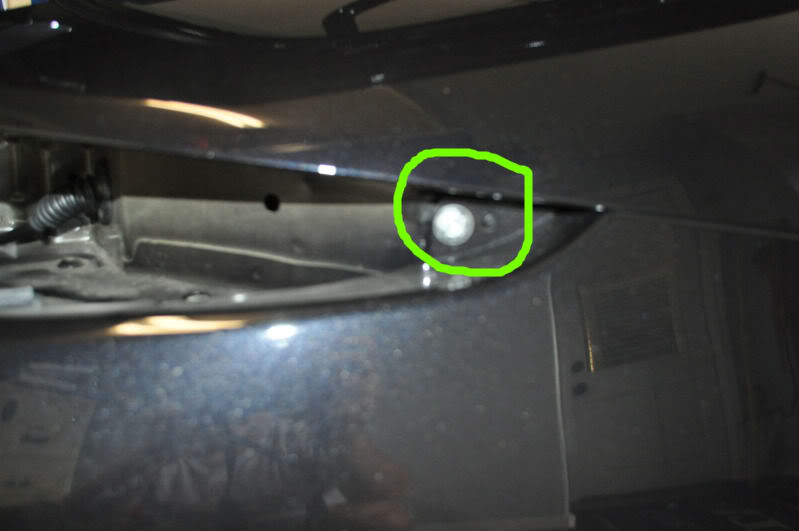
5. Remove all the smaller torx screws holding the cover. There's (3) in each wheel well, (2) under the cover behind each wheel facing up, (2) under the center and lastly (4) on top.

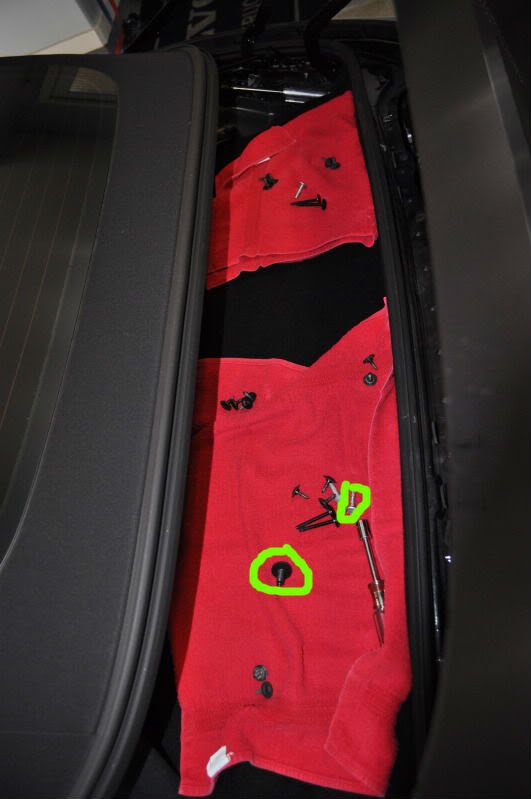
6. This is all the fasteners I removed. I know I took off some that were not needed such as the bigger ones highlighted.
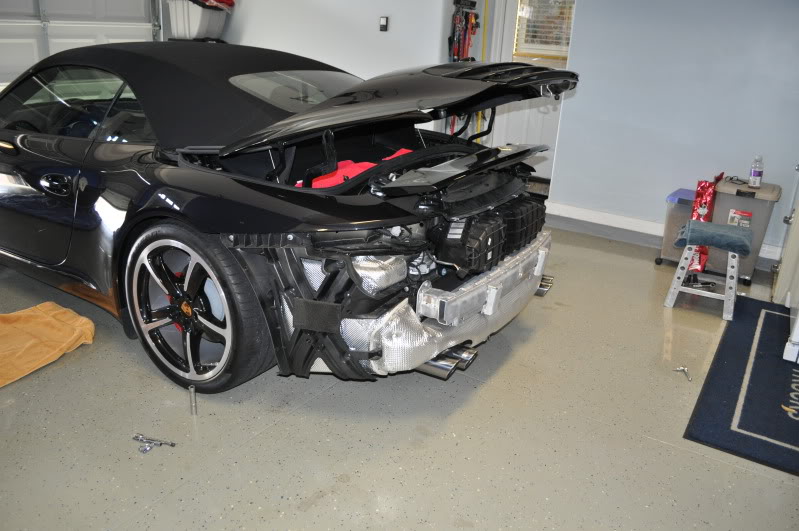
7. There you have it, a naked rear end! I was able to remove the cover by myself with no trouble. Unplug a single connector and you're home free. There's a video on youtube from Freemont Porsche titled Deconstructing a 991 that was helpful. The tech shows the motions necessary to remove the cover. You basically just start wiggling it side-to-side and it comes right off.
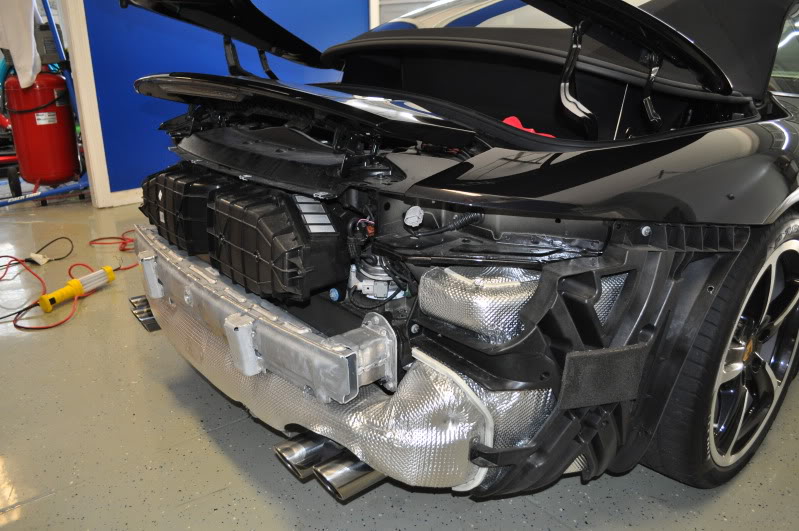
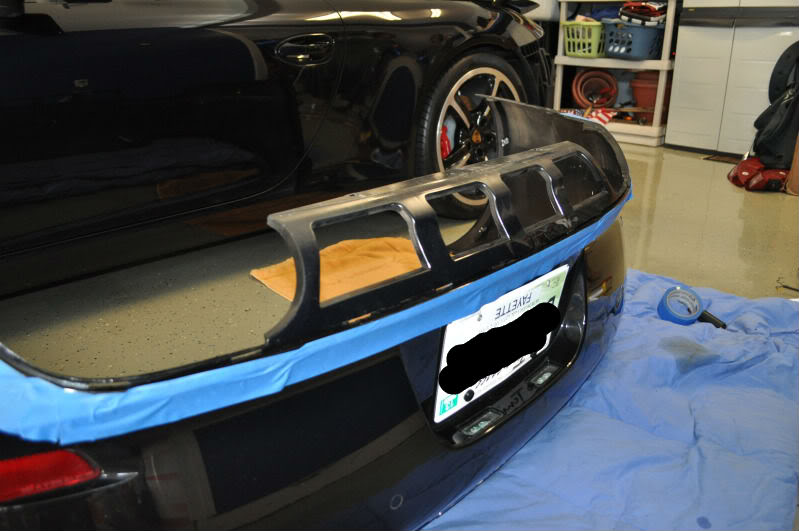
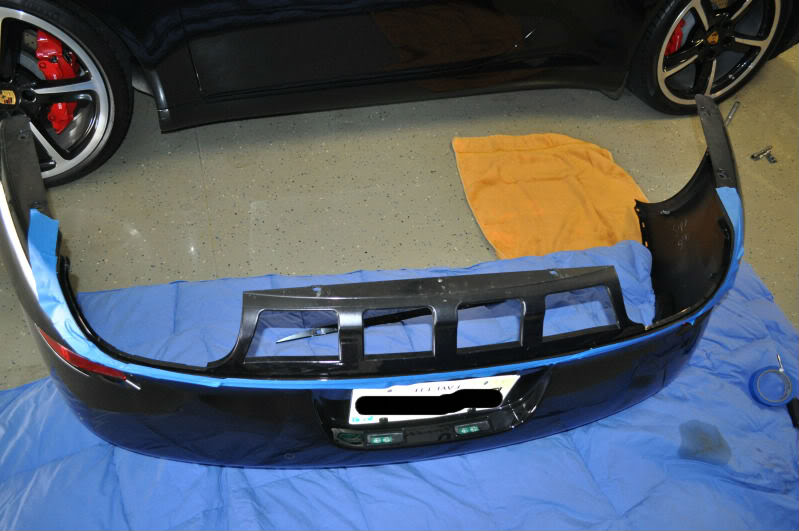
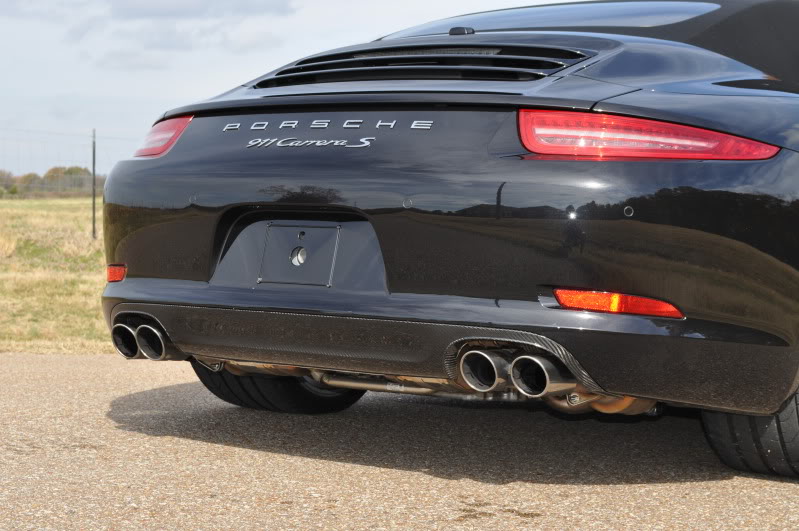
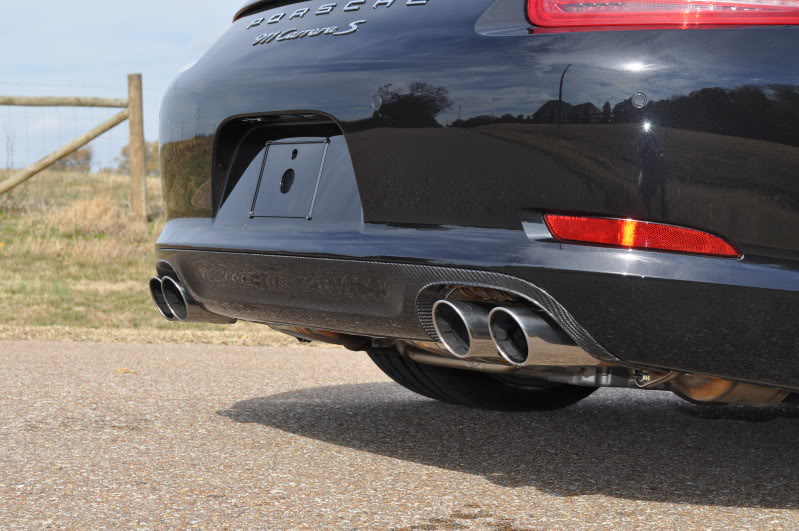
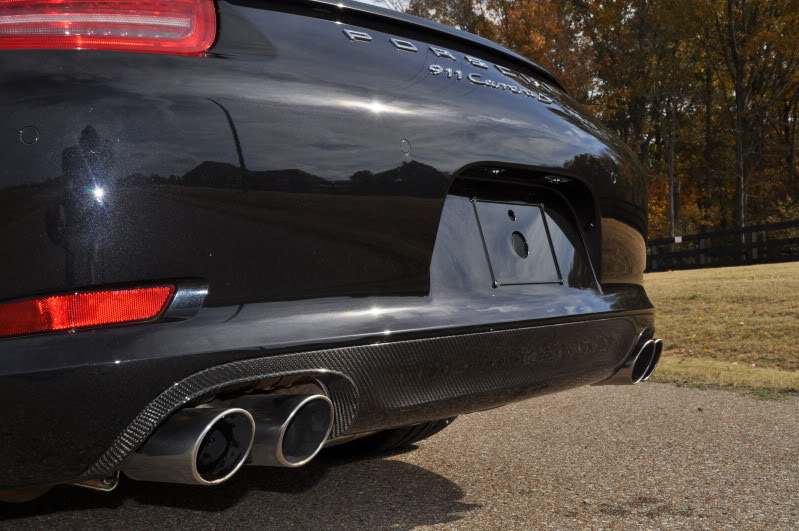
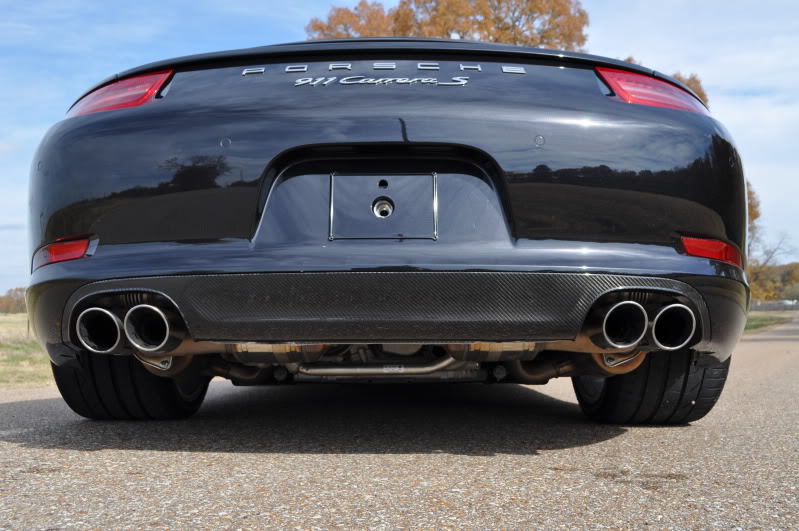
8. Cover ready for CF diffuser marriage. I taped the cover to prevent any scratches or marring. OEM diffuser is already off.
Re-assembly is reverse and straight forward. I did get my wife to help me guide the cover back on to avoid any accidental scratches.
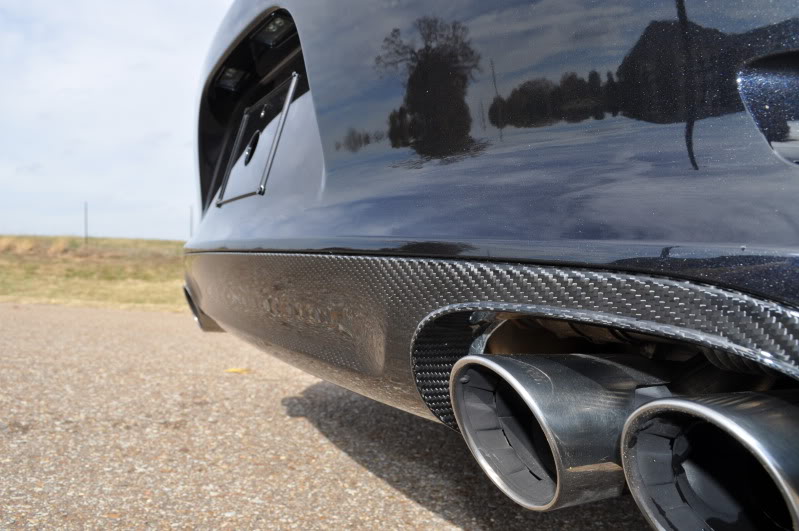
Back together with a little bling. I personally think it looks awesome. Contact "Mercedes Benz" for any and all product information.
- Remove the (2) screws under the diffuser and drill out the small center rivet.
- The OEM diffuser is actually (3) seperate pieces consisting of the main part and (2) trim pieces around the exhaust cut-outs. Remove the exhaust cut-outs by pushing them forward, toward the front of the car. It requires a little force, but the tabs will unlock.
- Pull off the main part of the diffuser by pulling it straight off the car. Like the exhaust cut-outs, it requires some force, but the tabs will unlock and the diffuser comes right off.
I have to admit that I had a hard time fitting the CF diffuser on and actually gave up. I couldn't get the tabs to go in and apply enough force to lock them in place. The main reason for this is you have no access to the back of the bumper cover to push the other way. Frustrated, I re-installed the OEM part and went for a few beers to clear my head.
I decided to try again this morning but this time I'd remove the rear bumper cover completely to allow access to the back side. I'm a decent wrench, but the thought of taking my new Porsche apart was a little overwhelming. Once underway, I was amazed at how easy and simple the cover came off and went back together. For those of you sweating the air filter change, don't worry! I attempted to document the process with pictures below. So here goes.
1. Remove the fans as a unit by pulling up on the rear most section to unlock the (2) vertical tabs and then pull the whole assembly toward you to unlock the (4) front horizontal tabs. Now that I think about it, I'm not even sure this step is necessary.
2. Pop off the (2) covers hiding the tail lights screws.
3. Remove the screws holding the tail lights. There's (2) per side. The tail lights come right off.
4. There's a bigger torx screw on each side of the tail lights access. Remove them.
5. Remove all the smaller torx screws holding the cover. There's (3) in each wheel well, (2) under the cover behind each wheel facing up, (2) under the center and lastly (4) on top.
6. This is all the fasteners I removed. I know I took off some that were not needed such as the bigger ones highlighted.
7. There you have it, a naked rear end! I was able to remove the cover by myself with no trouble. Unplug a single connector and you're home free. There's a video on youtube from Freemont Porsche titled Deconstructing a 991 that was helpful. The tech shows the motions necessary to remove the cover. You basically just start wiggling it side-to-side and it comes right off.
8. Cover ready for CF diffuser marriage. I taped the cover to prevent any scratches or marring. OEM diffuser is already off.
Re-assembly is reverse and straight forward. I did get my wife to help me guide the cover back on to avoid any accidental scratches.
Back together with a little bling. I personally think it looks awesome. Contact "Mercedes Benz" for any and all product information.
Last edited by I'mAllIn; Nov 11, 2012 at 05:55 PM. Reason: Broken link to pictures


Registered User
Joined: Sep 2012
Posts: 356
From: Santa Cruz, CA
Rep Power: 32
Trending Topics


Looks great and excellent tutorial

Thread Starter
|
Registered User
Joined: Sep 2012
Posts: 254
From: Crosslake, MN & Frisco, TX
Rep Power: 38
No Problem
Glad it helped. Great color combo on your car!