Replace my shocks or go for coil overs.

#32
 07-02-2015, 11:15 PM
I so would like you to do measurements on those drop links while they are out. I want to see if I can build a set like the DIY dog bones. Im such a cheap bastard lol.
#33
07-03-2015, 05:08 AM
what i would do, given the strut mounts themselves are about 250 each? is replace the parts you mentioned and once you visually inspect the top mounts themselves make a decision re replacing them or not unless you just want to get at them all and know they are "done" with until next time.. again, the bearings are cheap ( 50 ) vs 250 for the top mounts themselves. but having said all that..i think most folks change out those parts simultaneously for obvious reasons.
mine were crumbled and shot in the same way the trans mount looks when toasted. crumbled rubber bits
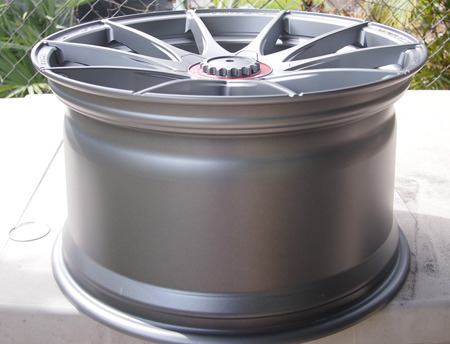
btw..OT but love the cf10's on your cayenne. if they had made 18's? i'd have em too. xlnt taste

#34
07-03-2015, 07:29 AM
Yea that looks different than what they sent me. I think you have the revised version.


#36
07-03-2015, 10:58 AM
'02996ttx50, I always diy everything. I have done suspension installs many times in the past but being that my body doesn't seem to recover as quickly as it used to in the old days from contorting myself in the garage (sux not being 20 anymore lol + I have no lift) I am seriously considering handing this job off to a shop. I will be building a detached garage with lift hopefully within the next year or so but in the mean time I may just sub this job out (as much as it kills me not to do it myself). I think I'm just going to grab the mounts being that I'm not upgrading them to something better at least they will be new.
Thanks for the compliments on the CTT I agonized over what to do about wheels on that truck for months. I wanted wheels that were lighter than stock and had a hard time getting load ratings from some of the wheel builders. Most wheels that would handle the load of the truck were 22" (which I did not want bc of the excess weight mainly as well as increased overall diameter). Forgestar was able to provide me with load ratings and the CF10 20x10's with tires ended up being quite a bit lighter than the stock 19x9's wheel tire combo.
I am going with a very similar 10 spoke design on the 996TT as well....shhh ...sneak peak---->>>
(sorry for OT btw)
Thanks for the compliments on the CTT I agonized over what to do about wheels on that truck for months. I wanted wheels that were lighter than stock and had a hard time getting load ratings from some of the wheel builders. Most wheels that would handle the load of the truck were 22" (which I did not want bc of the excess weight mainly as well as increased overall diameter). Forgestar was able to provide me with load ratings and the CF10 20x10's with tires ended up being quite a bit lighter than the stock 19x9's wheel tire combo.
I am going with a very similar 10 spoke design on the 996TT as well....shhh
...sneak peak---->>> (sorry for OT btw)


#39
07-03-2015, 07:09 PM

When it comes to shocks on a car that is mainly used on the street I always suggest solution that is going to prove better comfort and more durability. There is really only a single option available that will give you those two things on the 996 TT.
That is the Koni Yellow Sports.
You simply cannot design a Mono-Tube shock to compete in the real world with a Twin-Tube for the street.
Any Mono Tube that is Durable will ride poorly and perform poorly. The same is true of any Mono Tube Shock that Performs well as it will not be durable.
The limitation of the free piston design is obvious to engineers. If you want to seal the surface for durability your will have high levels of friction. If you want it to perform with low levels of friction you are left with less sealing. There is a reason most high end shocks have nitrogen ports. Its because you need to check/adjust your pressures often in many race shocks I have measured 10-20psi drop in just a few months time.
#40
07-03-2015, 08:46 PM
Join Date: Jan 2014
Location: Melbourne, Australia
Posts: 519
Rep Power: 74 


I had a long email from Tarret for correct installation and you know how some of these installers read and apply instructions
") .
. Yes super smooth and plenty of clearance in my driveway
 but some of the roads are pretty bad around here.
#41
07-04-2015, 05:57 AM
i'm the opposite, cant exactly DIY? but i'm always standing there
gl with the new wheels and also apologies jim for the OT diversions.
really waiting for your after install notes. so, dumb question of the AM.. can anyone enlighten me as to what the FRONT toe links will improve..? camber?!? or what more/less can be dialed in/out. TIA for any explanation!
gl with the new wheels and also apologies jim for the OT diversions.
really waiting for your after install notes. so, dumb question of the AM.. can anyone enlighten me as to what the FRONT toe links will improve..? camber?!? or what more/less can be dialed in/out. TIA for any explanation!
#42
07-04-2015, 10:35 PM
Thanks, I'm a bit nervous to have the Tarret ones now after all the issues I here about, I feel like just using the revised ones that come with the PSS10's
I had a long email from Tarret for correct installation and you know how some of these installers read and apply instructions.
Yes super smooth and plenty of clearance in my driveway but some of the roads are pretty bad around here.
I had a long email from Tarret for correct installation and you know how some of these installers read and apply instructions
. Yes super smooth and plenty of clearance in my driveway
but some of the roads are pretty bad around here.
Just make sure you install them correctly
Cheers mate
#43
07-05-2015, 12:11 AM
Join Date: Jan 2014
Location: Melbourne, Australia
Posts: 519
Rep Power: 74 I'm not installing them, my PSS10 supplier is installing them.
This is the email from Tarret regarding installation.
Hi Jim,
I believe the bent link problem they are referring to was related to my links in combination with Ohlins shocks. The link for the PSS10 is different. Below are some instructions we’re working on for installing the drop links. Also note that the link end with the two short spacers connects to the bar, on the inner side. Feel free to contact me with any questions.
Regards,
Ira
Setting Drop Link Preload and Rod End Phasing
Setting the link length to about the same size as stock is a good starting point. For #996FDLNK, set length to allow for swaybar arm to be relatively parallel to the LCA, with the suspension loaded. The drop links install the same as the stock ones. It’s not critical, but you should try to get the swaybar close to perpendicular to the drop link. For the front on a C4, it’s most important to make sure that the swaybar does not contact the axle when the suspension is compressed. Then make sure it doesn’t contact the lower control arm when the suspension is hanging. Clearing the axle is more important if you need to choose between the two. In many cases the front swaybar will lightly contact the LCA when the suspension is hanging.
With the car on flat ground, you can adjust out preload by adjusting the drop link length on one side. The front wheels need to be pointing straight ahead. With the locking nuts loose, rotate the link in either direction to make the drop link shorter or longer. If you rotate the wrong direction, the preload will increases, and it will get harder to rotate the link. Rotating the correct direction will make it easier to turn. At the point of no preload, you will feel the link be completely loose.
Next step is to phase the rod ends so they don't bind. You can do this with the car off the ground, and the wheels off for better access. Be careful not to rotate the links much and throw off your preload. The back is easy, requiring that the rod ends be relatively parallel to each other. The front requires much more attention. With the wheels pointing straight ahead, rotate both rod ends the same direction completely, as far as they will go.
Tighten the loose locking nut. Rotate the steering to full lock in both directions, checking for any binding by rotating the complete link (with rod ends) in either direction. The rod ends should still have some room to allow for some rotation before they are maxed out.
If they bind in one lock position, and not the other, you may need to do some fine tuning on the phase angle between the rod ends so there is no binding in either lock position. Now tighten the locking nuts on each link.
#44
07-05-2015, 06:54 AM
bit of a head scratcher that although ira there is super helpful there are for so many these caveats and special instructions one *might* have to utilize in order that their truly great stuff can simply be installed in place of the oem it is replacing.
the camber plates came with nothing more than a sticker identifying the parts, and yet some plug and play zero issues, and then some such as myself, while not actually "diy"ing" sat there with my friend who has probably himself alone done 100 FULL rwd conversions and we had NO "luck". strange.
of course if there HAD been instructions?... whatever lol