When you click on links to various merchants on this site and make a purchase, this can result in this site earning a commission. Affiliate programs and affiliations include, but are not limited to, the eBay Partner Network.
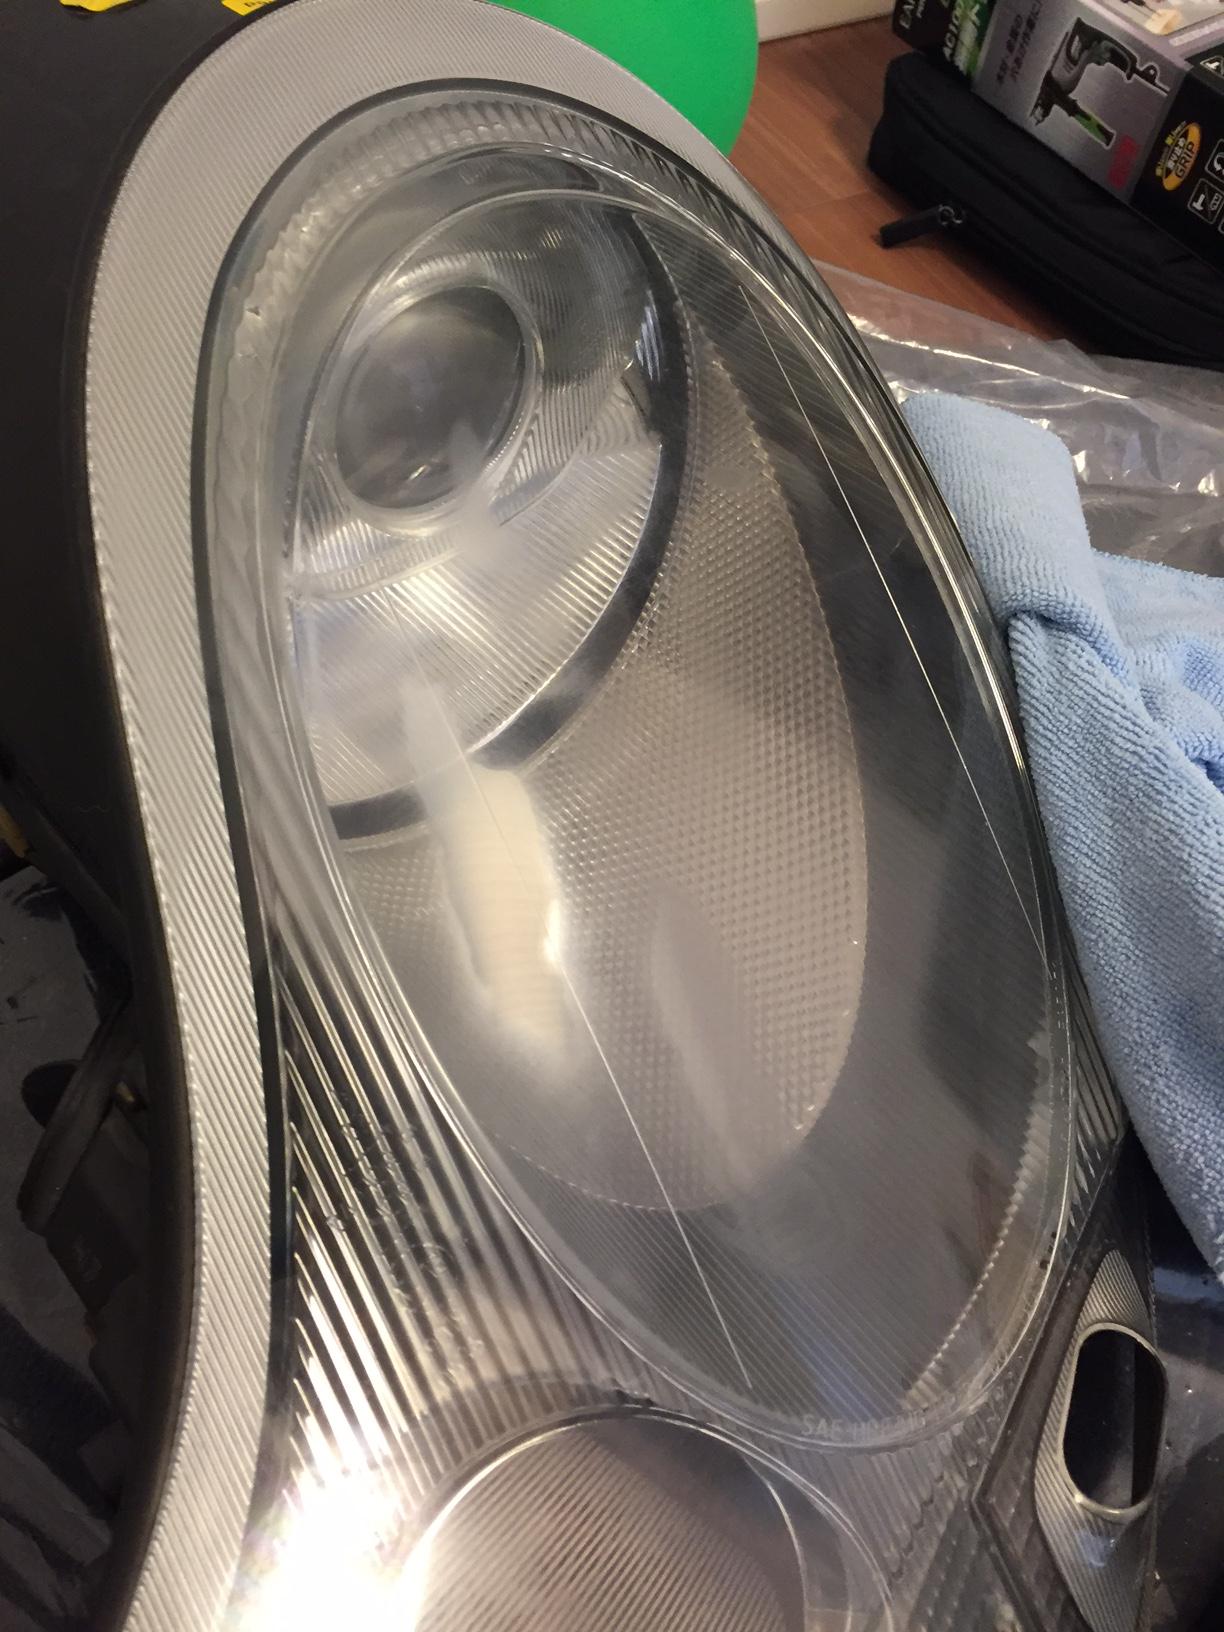
So I'm trying to restore my headlight using the 3M restorer, except I think I'm going from bad to worse. I first tried with a random orbiter and the P500 discs, but that didn't go so well - I scratched up the lens more than I restored it. So I aborted and restarted using a drill. But I have these "hot spots" on the lens that I just can't seem to get rid of (see picture). What am I doing wrong? I am running at the prescribed 1,200 rpm or so (my drill has a speed limiter, is a 2,400 rpm max drill, and I have it set at about 50%). I am not exercising excessive pressure. I'm also making sure I don't stay in one spot for too long a time (if I had to describe my process, a single pass takes me about 3 seconds from one end of the lens to the other). The lens doesn't really "frost up" as 3M shows, and overall, the process doesn't seem to be quite working - and my headlight is progressively getting worse.
Any advice, or should I start shopping for a new headlight?
I did my lights in the summer and started with 800 grit wet & dry paper
then moved on to 1500 and then finally 2000 grit, all by hand.
As you work on the lights you do get those small patches as you take off the
surface layer of Polish/protection. keep working on the lights and eventually
the whole area will turn 'milky', don't spend too long on any one area and
keep well lubricated with water. The headlight looks quite opaque after the final
sanding but when it has been polished it comes back to a nice shine.
Make sure that you polish the light with a UV protective coating or you will
be doing it all over again in 6 months time.
As with any wet sanding, did you ensure you had plenty of lubrication? Continually misting water from a spray bottle will create the "froth" you are looking for. The froth is a mix of material being removed mixed with the lubricant - water in this case.
Here is a headlight I did for a chum a couple years ago that involved no sanding at all. I compounded the light with a microfibre cutting pad (very similar to the one for your drill in the Maguires kit) then polished it out with a couple different pads - medium to fine polish.
Before
After
I polished and ceramic coated my 911 headlights this past summer also.
My suggestion would be to source out the Maguires kit (yes, I know, more money) but since you have a good supply of sanding discs already, you can use the hand applicator to control the amout of force you are using. ALWAYS sand in one direction, NEVER EVER in circles or the wax-on/wax-off motion. Also, continually check for heat buildup if you are going to use your drill as the plastic will warm up fast, as you already know.
Before starting, get a small bucket wtih warm water and let your sanding discs soak for a little while. Also get a spray bottle ready with some water ready to heavily soak the headlight before, AND during sanding. Start with the 500 disc and work your way up to the 3000 trizact disc. At this point you 'should' be ready to use the polish and pad to finish the lense.
As with any wet sanding, did you ensure you had plenty of lubrication? Continually misting water from a spray bottle will create the "froth" you are looking for. The froth is a mix of material being removed mixed with the lubricant - water in this case.
.....
Before starting, get a small bucket wtih warm water and let your sanding discs soak for a little while. Also get a spray bottle ready with some water ready to heavily soak the headlight before, AND during sanding. Start with the 500 disc and work your way up to the 3000 trizact disc. At this point you 'should' be ready to use the polish and pad to finish the lense.
Thanks for the advice. Hmm .. I am not using any water at all. I've re-read the 3M manual several times, and they only mention spraying the lens with a finer grit (the 2000 or so) - not for the 500 and not for the 800. Should I spray the lens?
I would spray the lense and the pad prior to sanding then periodically during the process
Understood. I'll give it a go again. How do I gauge my progress? Those "heat spots" - is that what I am actually aiming at, so they should be becoming larger until the entire lens is basically like that?
At first, using the toughest grit, the whole lens will cloud right up and you shouldn't see through it. As you progress up through the grits, the clarity will also improve. Once you reach the 3000/4000/5000 grits you should be ready to start polishing with the supplied pad and polish.
At first, using the toughest grit, the whole lens will cloud right up and you shouldn't see through it. As you progress up through the grits, the clarity will also improve. Once you reach the 3000/4000/5000 grits you should be ready to start polishing with the supplied pad and polish.
Nothing of the sort happened. The 500 grit just glides over the lens, and it looks sorta like what I sent in the picture. I just did a few runs over it with water, but it's not really gotten any cloudier.
I wonder if the top UV layer is so tough that it needs a harsher grit to go anywhere?...
It is possible that you have either used too much water and the sandpaper is actually hydroplaning over the lense and/or the the disc is clogged with material you have already removed.
Where are you located? Either taking it the dealer or finding a detailer near you may be the next if you aren't comfortable tackling this yourself, I'd hate to see you actually damage the lense cover.
Last edited by scott240; Jan 3, 2016 at 06:21 AM.
Reason: spelling
It is possible that you have either used too much water and the sandpaper is actually hydroplaning over the lense and/or the the disc is clogged with material you have already removed.
Where are you located? Either taking it the dealer or finding a detailer near you may be the next if you aren't comfortable tackling this yourself, I'd hate to see you actually damage the lense cover.
I'm in Japan, so both of those options are somewhat iffy at the moment.
I ordered the Sylvania kit. At the very least, I want to see if maybe I just wasn't aggressive enough to get the other UV layer off ...
Those kits are a waste of time. Tape off around the edge of the lens to protect the paint, get some wet paper ( I start with 2000 and adjust as needed) and wet and your little a** off lol. When you wipe of all the water it will look dull. Hit the lens with 3 coats of compound fine grit, then 3 coats of polish and 3 coats of wax. The comping and polish will bring back the beautiful shine and the wax will protect them. Anytime you detail your car always details your lenses as well.