$2 DRL solution for fog lights


#197
 06-05-2012, 08:45 AM

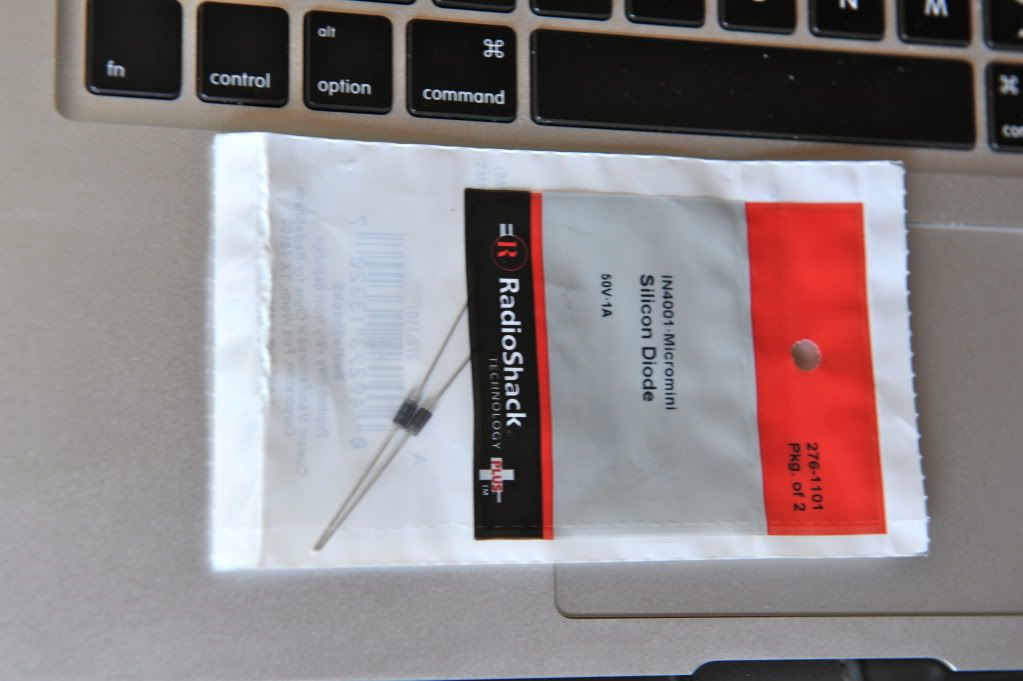
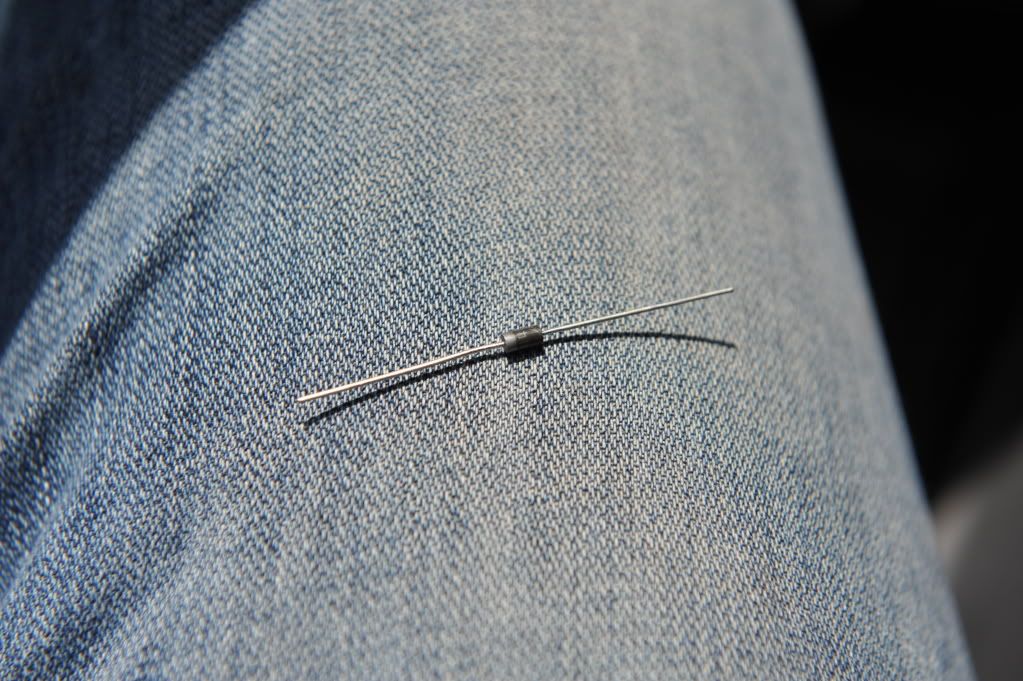
I used the exact diode from Radio Shack. I removed the plugs, and installed the legs of the diode. No matter how hard I tried, I could not re-insert the plugs with the legs of the diode in place. Thus, I removed the diode and re-installed the plugs. I pushed in the legs of the diode as far as they would go, and I taped everything in place, as show. No problems.
#198
06-05-2012, 09:12 AM
Registered User
Join Date: Sep 2009
Location: Treasure Island, FL - Home of the Wide Beach
Posts: 340
Rep Power: 32 
m3drei - Great photos
kes7u - I inserted the Diode in heat shrink tubing first for that extra layer of protection & removed a small amount at the bottom of the legs.
Inserted the Diode in the back side of the holes and the wires in the front & they locked in.
I wrapped everything w/ electric tape & put an extra coating of "liquid" electric tape on the tape.
The reason I took these extra steps was because I did the DRL Hack 1 & had to take care of those wire cuts also.
#199
06-08-2012, 12:16 AM

Well I guess I'm only one having a hard time getting the wire out of the harness???? I feel like pulling on the wires may strip them. Any hints on how to do this safely???
Last edited by musicmovesme; 06-08-2012 at 12:28 AM.
#200
06-08-2012, 06:09 AM
Kevin
#201
06-08-2012, 07:44 AM
Registered User
Join Date: Sep 2009
Location: Treasure Island, FL - Home of the Wide Beach
Posts: 340
Rep Power: 32 Be careful when you cut/snip the zip tie so don't catch any of the wires.
Last edited by na011; 06-08-2012 at 07:47 AM.
#202
06-20-2012, 07:28 AM

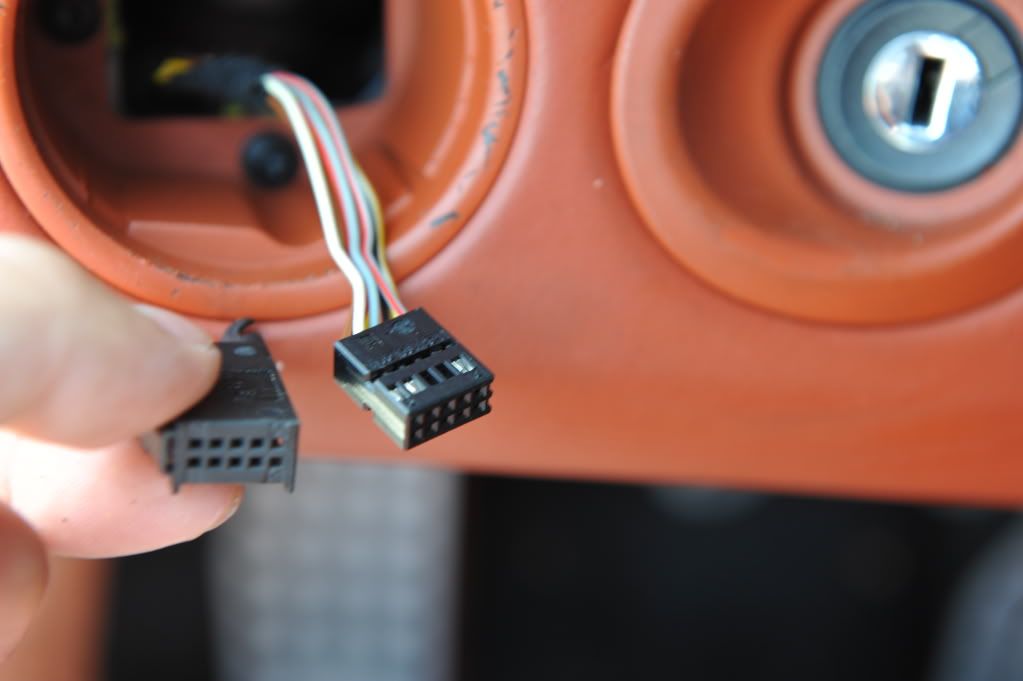
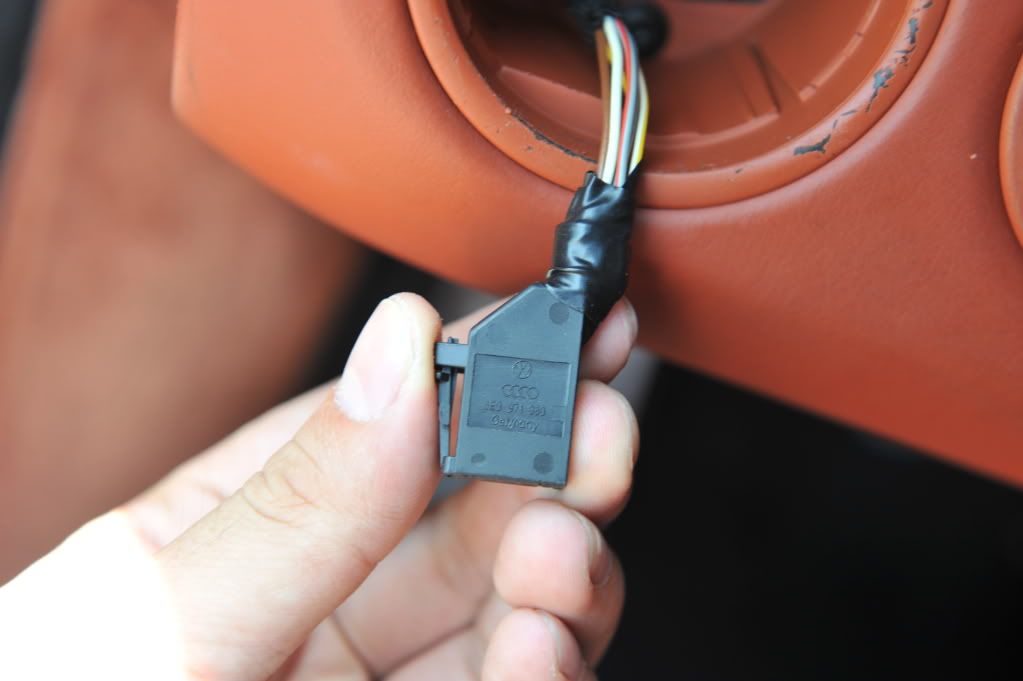
I'm having trouble separating the black plastic part that connects into the headlight switch from the wiring connector (4th pic in this series). Can anyone provide any detail on how they come apart?
#203
06-20-2012, 08:07 AM
Registered User
Join Date: Sep 2009
Location: Treasure Island, FL - Home of the Wide Beach
Posts: 340
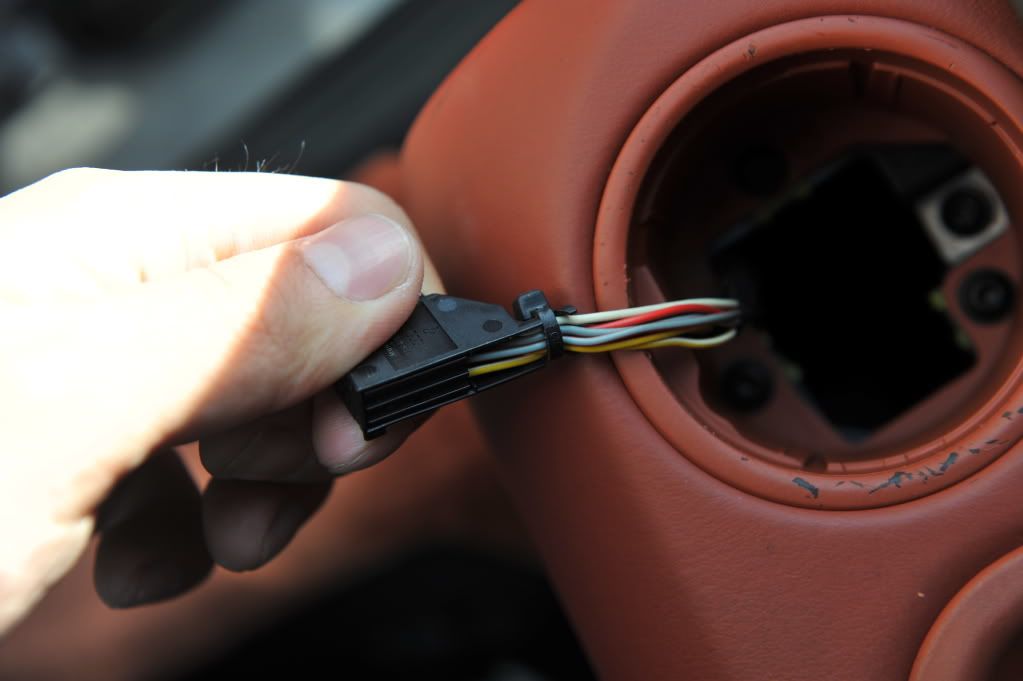
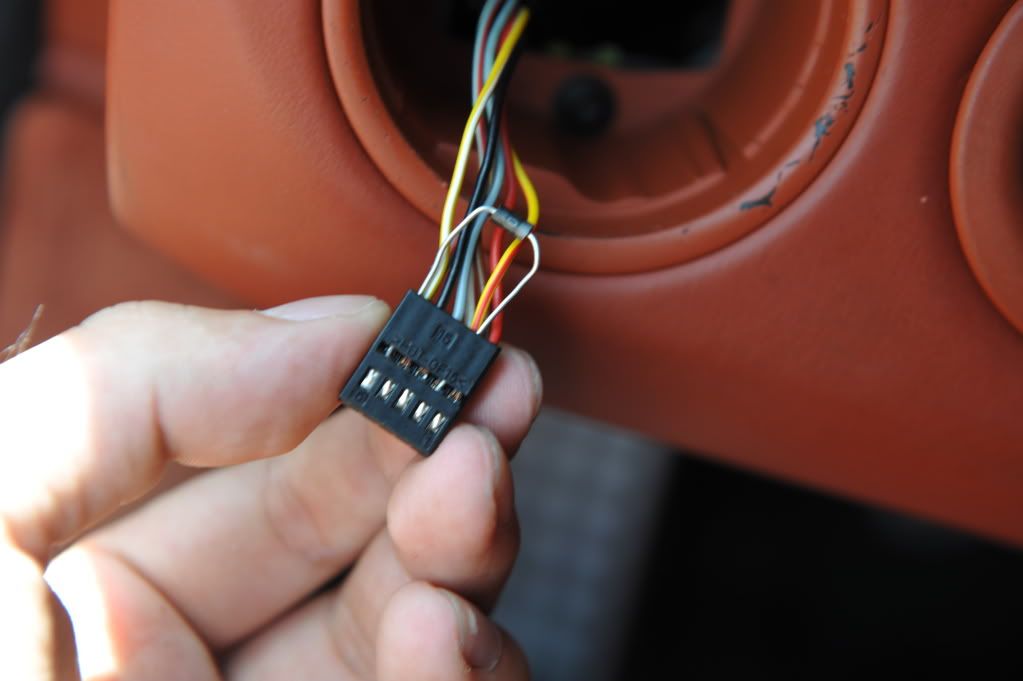
Rep Power: 32 To take apart the wire block see picture 4 & clip the zip tie as shown in picture 3. Watch that you don't cut or nick the wires.
Last edited by na011; 06-20-2012 at 08:11 AM.
#204
06-20-2012, 08:15 AM
Thanks. I got it off the switch fine, zip tie cut, but it's separating the two pieces/taking apart the wire block shown in pic 4 that is the current challenge. I feel there's probably some really easy way to do it and, while usually pretty handy, this one is a bit of a head-scratcher. Any tips?
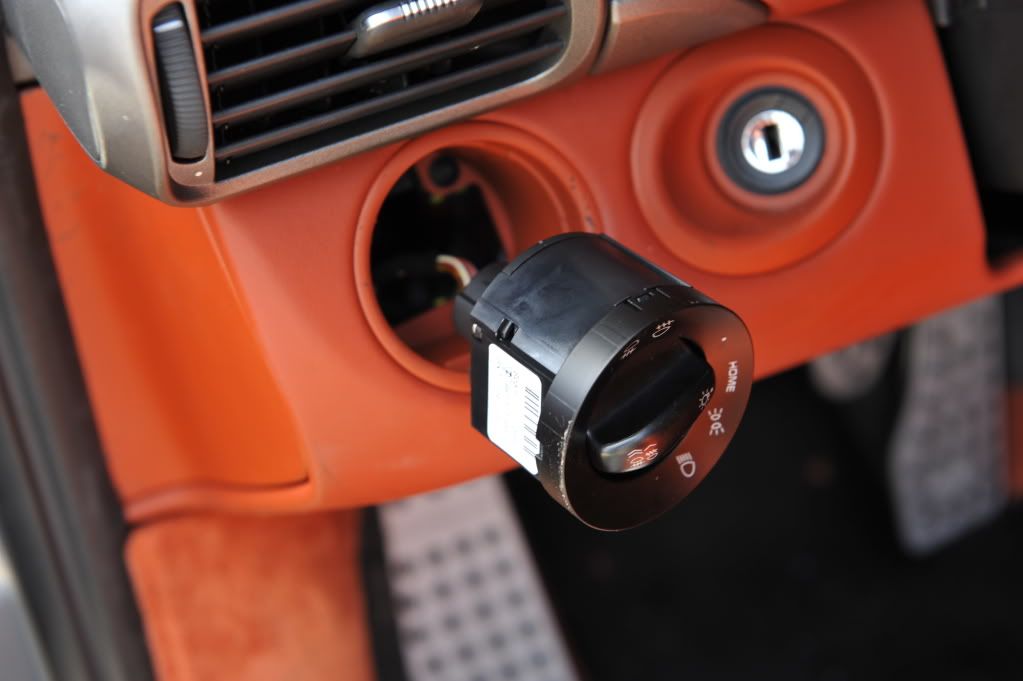
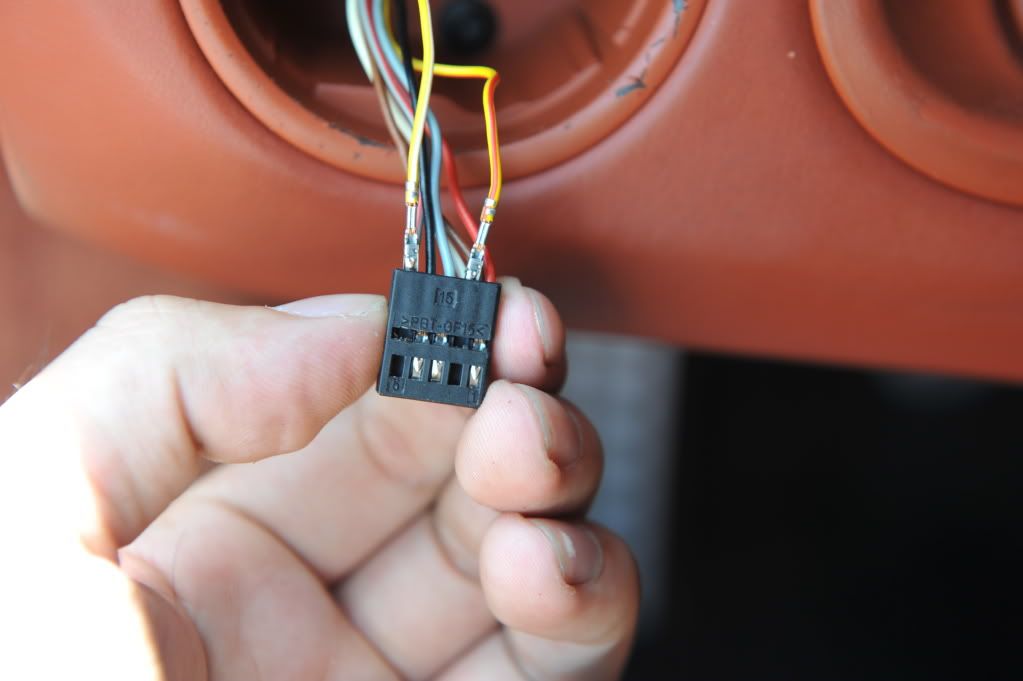
To get the wire block (3rd picture) off the switch, press the side of the release on the wire block. See picture 8 for a good photo of the release.
To take apart the wire block see picture 4 & clip the zip tie as shown in picture 3. Watch that you don't cut or nick the wires.
To take apart the wire block see picture 4 & clip the zip tie as shown in picture 3. Watch that you don't cut or nick the wires.
#205
06-20-2012, 08:34 AM
Registered User
Join Date: Sep 2009
Location: Treasure Island, FL - Home of the Wide Beach
Posts: 340
Rep Power: 32 Thanks. I got it off the switch fine, zip tie cut, but it's separating the two pieces/taking apart the wire block shown in pic 4 that is the current challenge. I feel there's probably some really easy way to do it and, while usually pretty handy, this one is a bit of a head-scratcher. Any tips?
I think this is what I did using my baby Swiss Army knife. See the edited pictures:
#206
06-20-2012, 08:39 AM
Thanks, this lets me know I'm on the right track. I was using a small, flat screwdriver but am doing a little damage to the cover piece and decided to stop and consult the experts. Maybe I need a knife blade like you used, but so far nothing is budging. Installing the 2 front LED assemblies was a snap compared with this
#207
06-20-2012, 08:58 AM
Registered User
Join Date: Sep 2009
Location: Treasure Island, FL - Home of the Wide Beach
Posts: 340
Rep Power: 32 Thanks, this lets me know I'm on the right track. I was using a small, flat screwdriver but am doing a little damage to the cover piece and decided to stop and consult the experts. Maybe I need a knife blade like you used, but so far nothing is budging. Installing the 2 front LED assemblies was a snap compared with this
#208
06-20-2012, 01:29 PM
Finally got it apart (with the help of my trusty Leatherman) and back together with the diode installed/taped. Front DRLs (mine from Revolution Motorsports) now work as described by OP and others in this thread. A few notes for others trying this: I didn't have to remove the two wires in order to fit the ends of the diode down into the connector, just used a little bit of force. Also, note beforehand which way the wire block plugs into the headlight switch. A rookie mistake, but I managed to reinstall mine backwards resulting in headlights never on, power to headlight switch in Off position & other oddities. Once I flipped the connector around all was good but caused some annoyance for a few minutes. Now that I've done it (and assuming no battery drain) it's a pretty easy and worthwhile mod. Thanks to everyone who contributed to this thread!
descrip
descrip
It did mine a couple of months ago don't remember any issues. The only things I used were my Swiss Army knife that hangs on my key ring, electrical tape, heat shrink tube, hair dryer, liquid electrical tape (to add a layer of protection from the DRL hack I), diode & zip tie. I even used the knife blade to poke in the barbs that are on the wire ends so I could pull them out of the block.