

Suncoast Pedals - Brake Pedal DIY advice

Thread Starter
|
Registered User
Joined: Jan 2012
Posts: 329
From: Los Angeles
Rep Power: 36


Suncoast Pedals - Brake Pedal DIY advice
Hi all -
2009 997.2 C2.
This summary isn't intended to be a full DIY on how to install Suncoast pedals in a 997. Lots of DIY info on this site and Rennlist should give a good overview on how to install pedals. However, I thought I'd post some advice on how to more accurately center and drill the brake pedal - which is by far the hardest step of this pretty simple DIY.
The Installation guide directs you to put masking tape on the exposed metal pedal (you've already removed the old rubber pedal of course), and place the new pedal on top of the masking tape to mark the drill points with a pen. I would suggest this is not an 'optimal' method because I don't believe you can easily get the PDK brake pedal - due primarily to it's size - centered and level using this approach without trial and error. Thus I came up with an alternative.
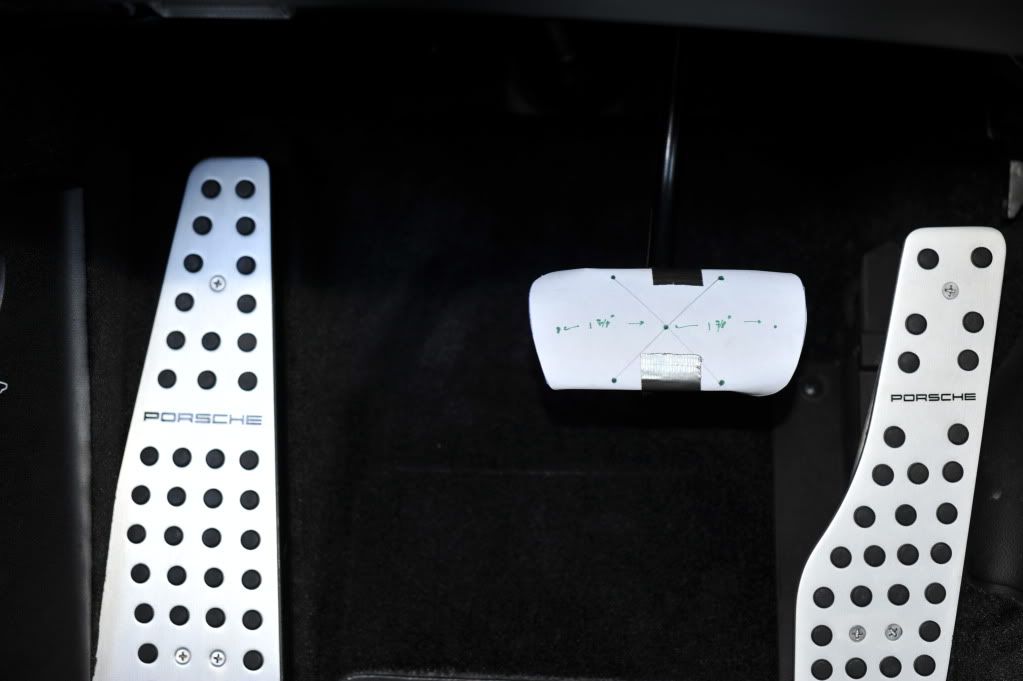
Step 1. Place masking tape on the top row and bottom row of the pedal (as directed).
Step 2. Holding the brake pedal in your hand, place a piece of paper under the pedal and trace around the outside of the pedal.
Step 3. Use a pen through the brake pedal to get each of the four holes marked on the template. Cut out the template.

Step 4. Take your template and center it on the brake pedal - about 1 7/8" side to center. Level top two points and bottom two points. Mark them with a pen so the points show up on the masking tape.
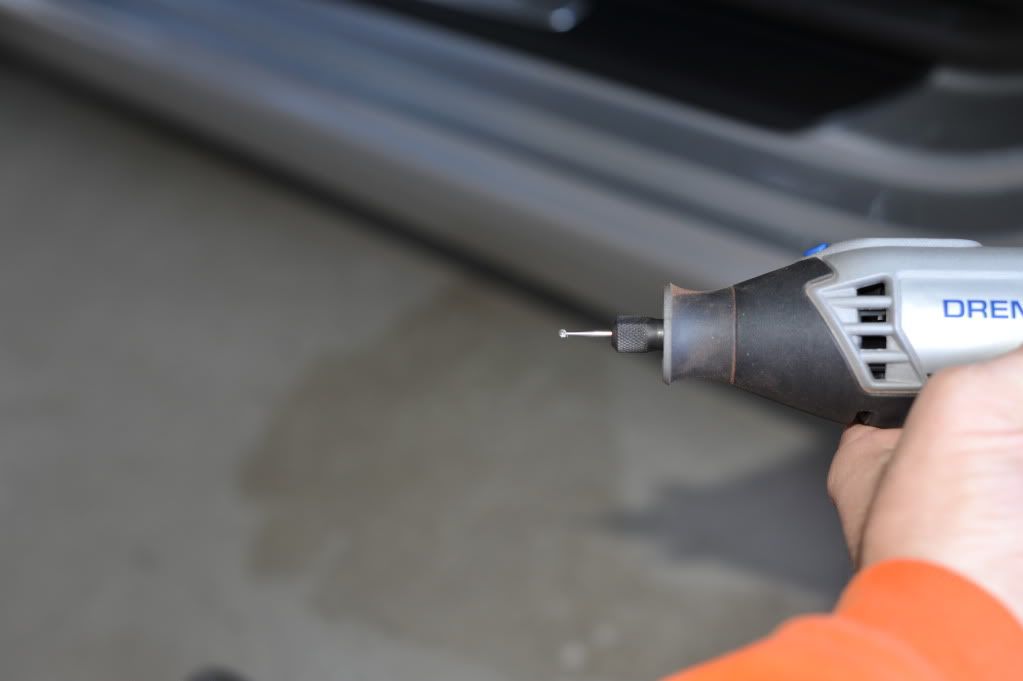
Step 5. Take your handy dandy dremmel and use the metal router bit to mark the four drill points. The router bit will make beautiful divots for which you can then use a drill (I found the dremmel drill bits too soft) to make the four holes.

Step 6. Once you've drilled your four holes, get a hex key and a 5.5mm socket (I'm sure there is an SAE socket you can use, but I never reach for them ) to secure the screw and nylon nut.

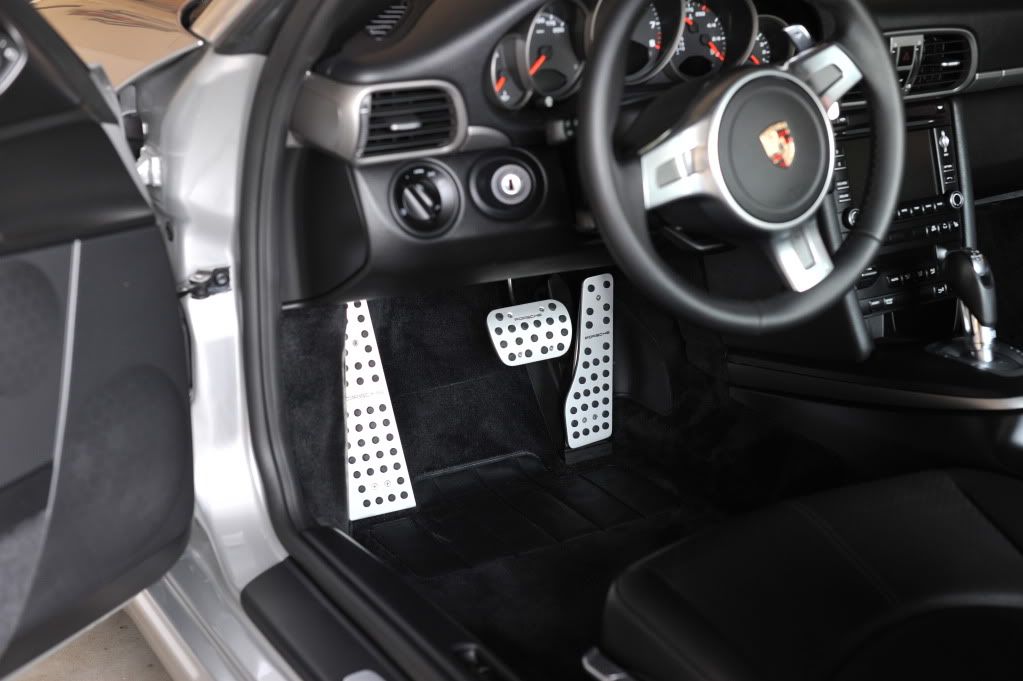
Finished job. Pedal on straight and centered.
2009 997.2 C2.
This summary isn't intended to be a full DIY on how to install Suncoast pedals in a 997. Lots of DIY info on this site and Rennlist should give a good overview on how to install pedals. However, I thought I'd post some advice on how to more accurately center and drill the brake pedal - which is by far the hardest step of this pretty simple DIY.
The Installation guide directs you to put masking tape on the exposed metal pedal (you've already removed the old rubber pedal of course), and place the new pedal on top of the masking tape to mark the drill points with a pen. I would suggest this is not an 'optimal' method because I don't believe you can easily get the PDK brake pedal - due primarily to it's size - centered and level using this approach without trial and error. Thus I came up with an alternative.
Step 1. Place masking tape on the top row and bottom row of the pedal (as directed).
Step 2. Holding the brake pedal in your hand, place a piece of paper under the pedal and trace around the outside of the pedal.
Step 3. Use a pen through the brake pedal to get each of the four holes marked on the template. Cut out the template.
Step 4. Take your template and center it on the brake pedal - about 1 7/8" side to center. Level top two points and bottom two points. Mark them with a pen so the points show up on the masking tape.
Step 5. Take your handy dandy dremmel and use the metal router bit to mark the four drill points. The router bit will make beautiful divots for which you can then use a drill (I found the dremmel drill bits too soft) to make the four holes.
Step 6. Once you've drilled your four holes, get a hex key and a 5.5mm socket (I'm sure there is an SAE socket you can use, but I never reach for them
) to secure the screw and nylon nut. Finished job. Pedal on straight and centered.
Last edited by daberlin; Apr 7, 2012 at 08:56 AM.
Registered User
Joined: Jun 2008
Posts: 1,342
From: USA
Rep Power: 104
The pedals look great and your use of the dremel was a great way to set pilot holes for final drilling. The marked screw holes on the brake pedal however don't appear to give you much metal to work with for attachment of the brake pedal. Did you use metal screws or bolts with lock washers and nuts to secure the pedal ?
Thread Starter
|
Registered User
Joined: Jan 2012
Posts: 329
From: Los Angeles
Rep Power: 36
I used the four supplied screws that come with nylon nuts. Old design used lock washers. Included directions say new design will prevent loosening over time.

Thread
Thread Starter
Forum
Replies
Last Post
ECS Tuning - VW
VW Vendor Classifieds
0
Sep 2, 2015 09:03 AM
ECS Tuning - VW
VW Vendor Classifieds
0
Aug 20, 2015 03:07 PM