


Check Raised Brake Light Fix

Thread Starter
|
Registered User
Joined: Jan 2013
Posts: 63
From: North Carolina
Rep Power: 16

Check Raised Brake Light Fix
Hi All,
I thought I'd share my weekend DIY for fixing a non-working spoiler brake light since it wasn't a bad LED assembly and not a fuse or something more "plug-n-play". I apologize for the lack of pics here too, wish had snapped shots during each step of the process but wasn't thinking of the forum use until it was complete. I'd searched this topic before both here and on rennlist, but none of the solutions worked for me in particular. I figured folks might like an under $5 DIY since most repairs for our cars cost a touch more than that!
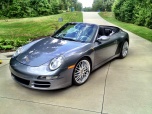
BACKGROUND: Car delivered on 1/12 (05 carrera S cabrio), upon first drive to 75mph, the spoiler deployed as excpected and the first time I pressed the brake I get "beep" and a message stating "Check Raised Brake Light". I called the dealer I purchased from and he was awesome in helping me trouble-shoot. Our first try was him buying and sending a new LED assembly, which unfortunately did not work. The next step was to check wiring... (we didn't even look to fuses b/c the fixed third brake light worked fine)
Discovery: the first step was to unclip the accordian looking dust cover that goes from the boot lid to the raised spoiler, tedious! I started with 9 clips going from one end to the other and when I put the dust cover back, I only had 6! Oops. Once I was able to get under the dust cover the problem was VERY apparent. The wiring for the light is thin, and I assume the opening and closing of the spoiler over time simply cut the wires (first pic attached below is what I saw immediately).
Fix: The fix was amazingly simple but also very tedious and cost all of $2.69 (O'reilly auto parts for a box of butt connectors '2nd pic attached'). All I had to do was reconnect the wires. Anyone can do this and my explanation will be overkill for lots of people...but I would have needed it explained this way since I'm not in the least bit mechanically inclined.
Step 1: remove the rubber gasket leading the wires into the spoiler (first pic)
Step 2: expose wires (about 1/4" on each broken end) -- both wires severed = 4 ends. ** this is tedious b/c the wires are small and thin, it's easy to cut through the wires themselves when exposing them from the rubber outer wire cover.** I had about 2" of slack I could use from the bottom of the wires, mine was severed right where the wires entered the rubber gasket going into the spoiler.
Step 3: insert the exposed wire ends into opposite ends of the butt connector, (you will need two butt connectors if both wires are severed) and crimp wire into connector on both ends. In other words, reconnect the wire via the butt connector.
Step 4: wrap it all up tight with electrical tape, or you can get heatable shrink wrap if you really want it to look pretty.
Step 5: replace the accordian cover (carefully!) **this cover btw attaches under the boot lid...there are 9 "nipples" that fit through corresponding grommet-like holes (one is underneath the freaking fan housing!) and are held in place via small round clips that fit over the "nipple"**
Step 6: Enjoy your working raised brake light and not having to listen to the dash beeping at you! (last pic)
***check to make sure the light is working as soon as you complete step 2! so you don't put it all back together and realize you didn't connect something properly!)
I thought I'd share my weekend DIY for fixing a non-working spoiler brake light since it wasn't a bad LED assembly and not a fuse or something more "plug-n-play". I apologize for the lack of pics here too, wish had snapped shots during each step of the process but wasn't thinking of the forum use until it was complete. I'd searched this topic before both here and on rennlist, but none of the solutions worked for me in particular. I figured folks might like an under $5 DIY since most repairs for our cars cost a touch more than that!
BACKGROUND: Car delivered on 1/12 (05 carrera S cabrio), upon first drive to 75mph, the spoiler deployed as excpected and the first time I pressed the brake I get "beep" and a message stating "Check Raised Brake Light". I called the dealer I purchased from and he was awesome in helping me trouble-shoot. Our first try was him buying and sending a new LED assembly, which unfortunately did not work. The next step was to check wiring... (we didn't even look to fuses b/c the fixed third brake light worked fine)
Discovery: the first step was to unclip the accordian looking dust cover that goes from the boot lid to the raised spoiler, tedious! I started with 9 clips going from one end to the other and when I put the dust cover back, I only had 6! Oops. Once I was able to get under the dust cover the problem was VERY apparent. The wiring for the light is thin, and I assume the opening and closing of the spoiler over time simply cut the wires (first pic attached below is what I saw immediately).
Fix: The fix was amazingly simple but also very tedious and cost all of $2.69 (O'reilly auto parts for a box of butt connectors '2nd pic attached').
All I had to do was reconnect the wires. Anyone can do this and my explanation will be overkill for lots of people...but I would have needed it explained this way since I'm not in the least bit mechanically inclined.Step 1: remove the rubber gasket leading the wires into the spoiler (first pic)
Step 2: expose wires (about 1/4" on each broken end) -- both wires severed = 4 ends. ** this is tedious b/c the wires are small and thin, it's easy to cut through the wires themselves when exposing them from the rubber outer wire cover.** I had about 2" of slack I could use from the bottom of the wires, mine was severed right where the wires entered the rubber gasket going into the spoiler.
Step 3: insert the exposed wire ends into opposite ends of the butt connector, (you will need two butt connectors if both wires are severed) and crimp wire into connector on both ends. In other words, reconnect the wire via the butt connector.
Step 4: wrap it all up tight with electrical tape, or you can get heatable shrink wrap if you really want it to look pretty.
Step 5: replace the accordian cover (carefully!) **this cover btw attaches under the boot lid...there are 9 "nipples" that fit through corresponding grommet-like holes (one is underneath the freaking fan housing!) and are held in place via small round clips that fit over the "nipple"**
Step 6: Enjoy your working raised brake light and not having to listen to the dash beeping at you! (last pic)
***check to make sure the light is working as soon as you complete step 2! so you don't put it all back together and realize you didn't connect something properly!)
Thread Starter
|
Registered User
Joined: Jan 2013
Posts: 63
From: North Carolina
Rep Power: 16
*** oh, and don't forget to re-route the connected wires through the rubber gasket and pop it back into it's place in the spoiler. Depending on where the wires are severed though, you may not have to remove the rubber gasket at all.***

Thread
Thread Starter
Forum
Replies
Last Post
eclip5e
Automobiles For Sale
6
Jul 29, 2019 11:13 AM
Walorus
Boxster / Cayman
0
Aug 18, 2015 01:39 PM


