

Third Radiator & Custom Grills


Thread Starter
|
Registered User
Joined: Aug 2009
Posts: 267
From: VA
Rep Power: 29

Third Radiator & Custom Grills
I recently completed installation of the factory third radiator option on my 997 and thought I'd share my experience. Overall it was a pretty easy install, but at times required some patience since I also tackled adding grills to the front bumper which proved to be the hardest part.
Special thanks goes out to N0tt0N on dorkiphus for generously allowing me to borrow his brand new airlift tool. Also, to my good friend Alex for allowing me to take over his garage while performing the install.
DIY's referenced:
Front Bumper Removal
Third Radiator Install
Coolant Flush Procedure
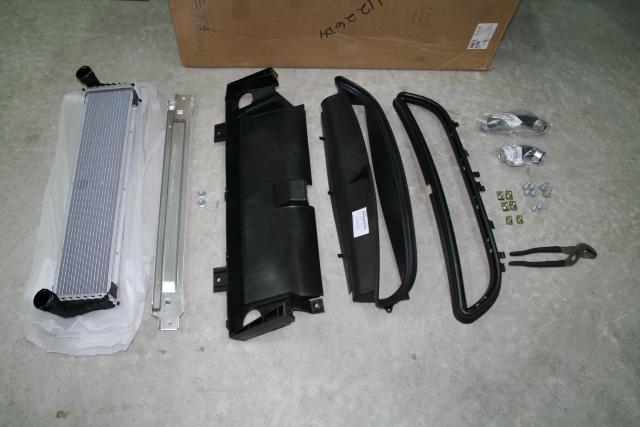
Third radiator kit
While this is not a complete DIY post it goes without saying... before working on your cars cooling system components make sure the vehicle is cold.
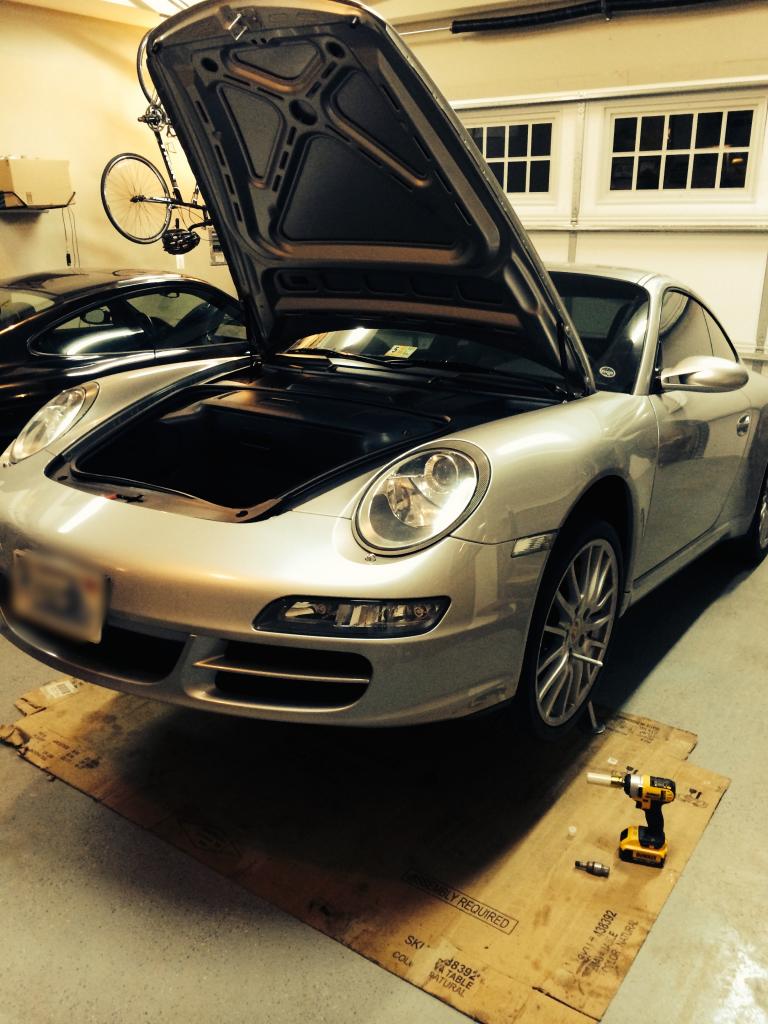
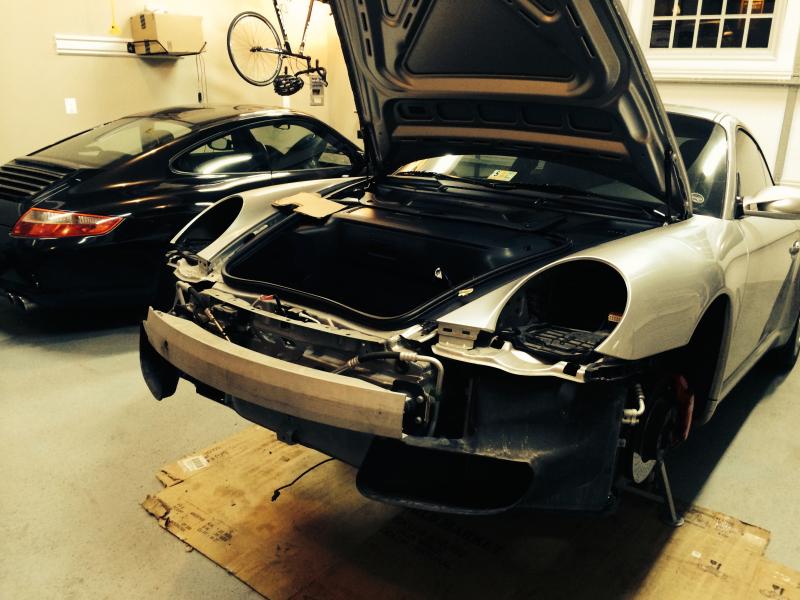
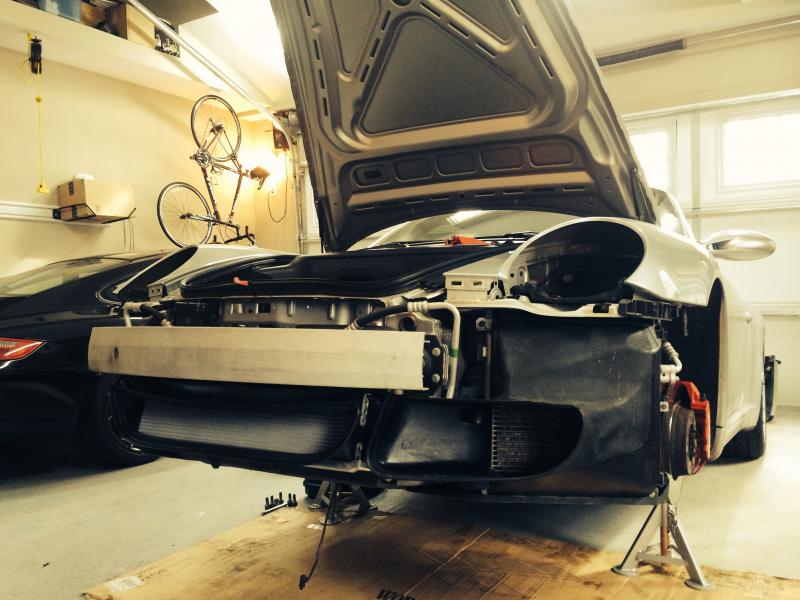
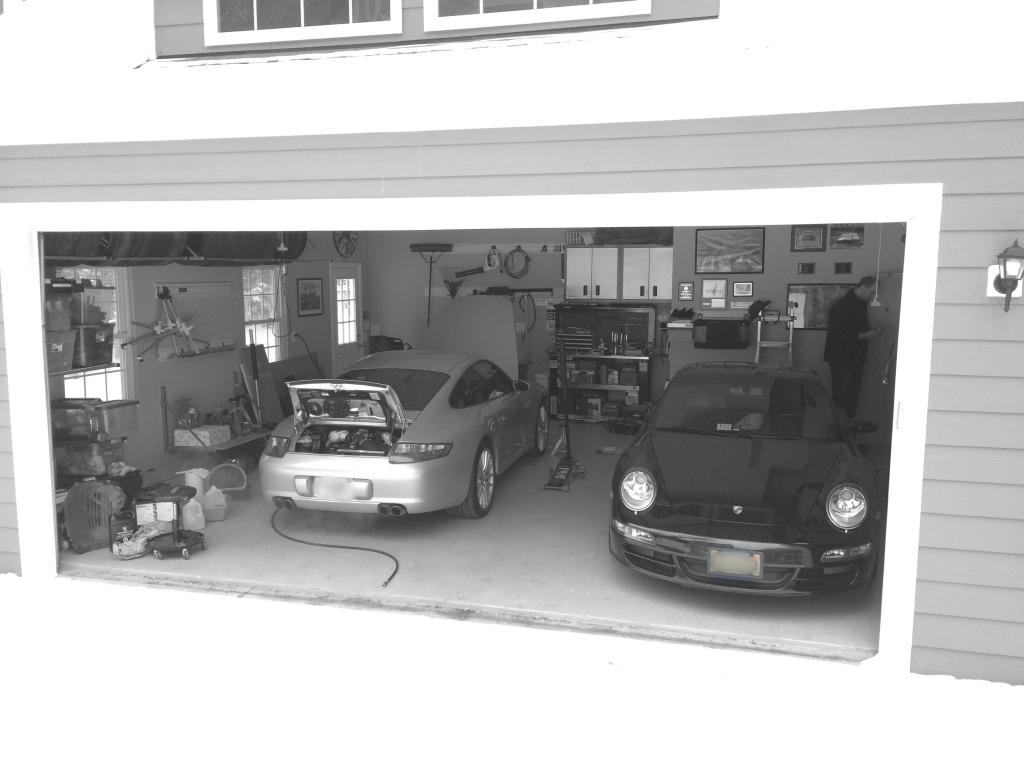
First the car getting ready to have it's bumper pulled.
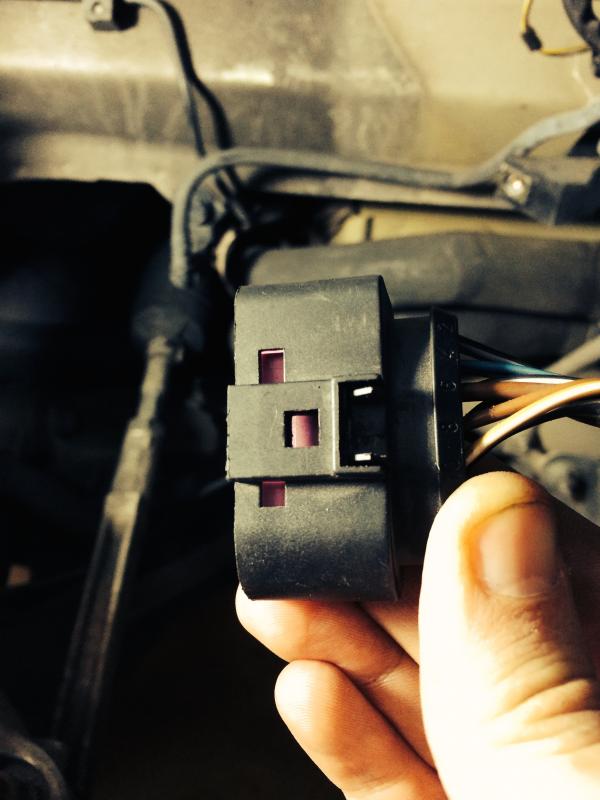
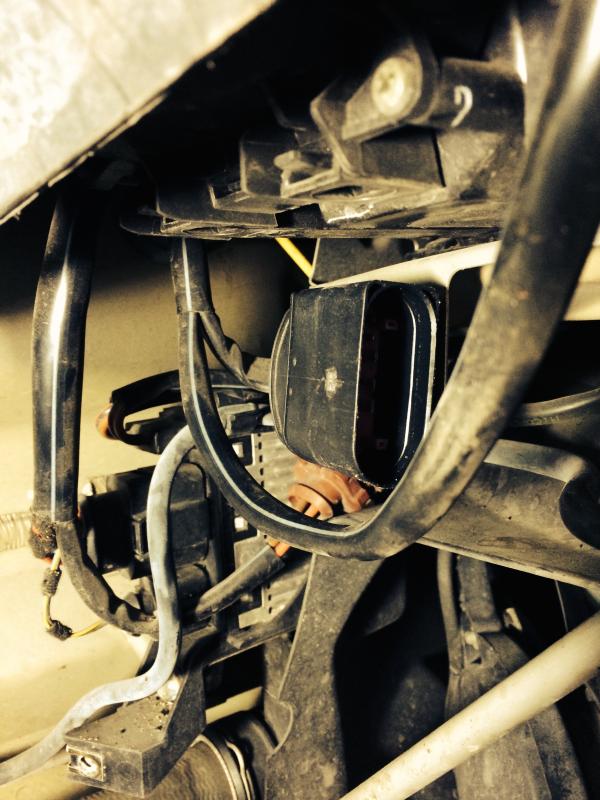
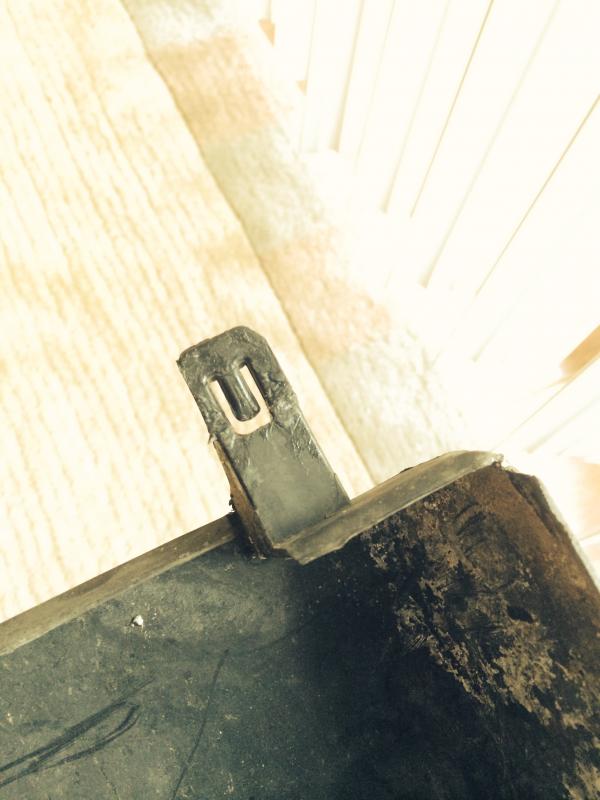
Removal of the bumper is well documented so I won't post exact steps. I will mention that the bumper wiring harness can be tricky to get off and that the tab that holds it on looks like this.
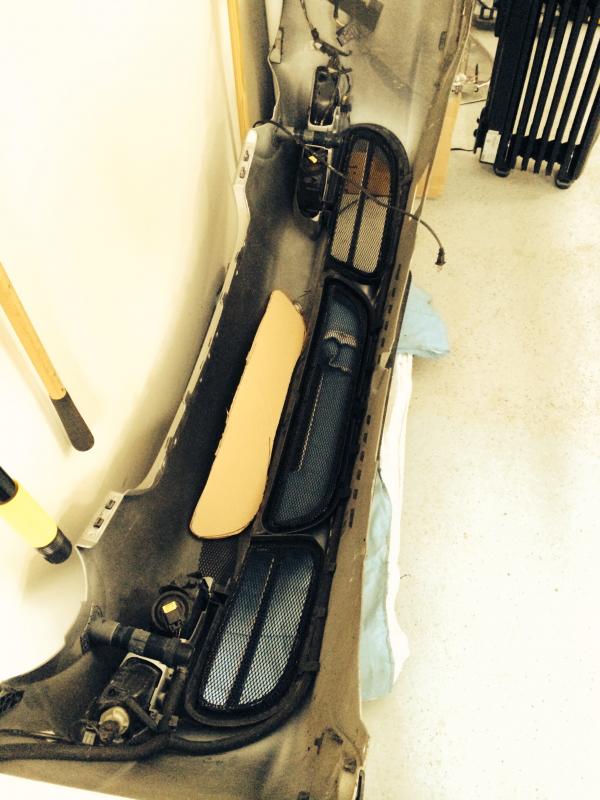
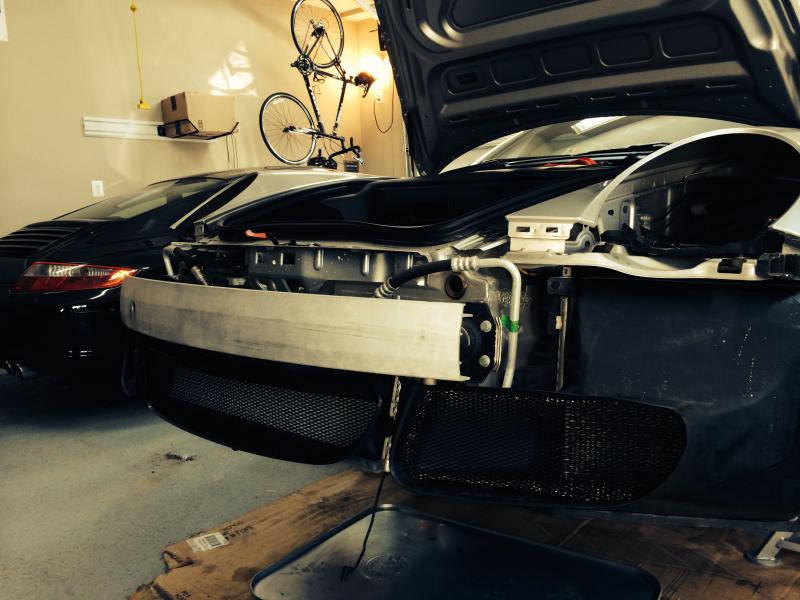
Once the bumpers off you're ready to start assembling the third radiator parts and removing the fan shrouds to simplify installation. I also removed the bumper support to make it easier to mount the third radiator.
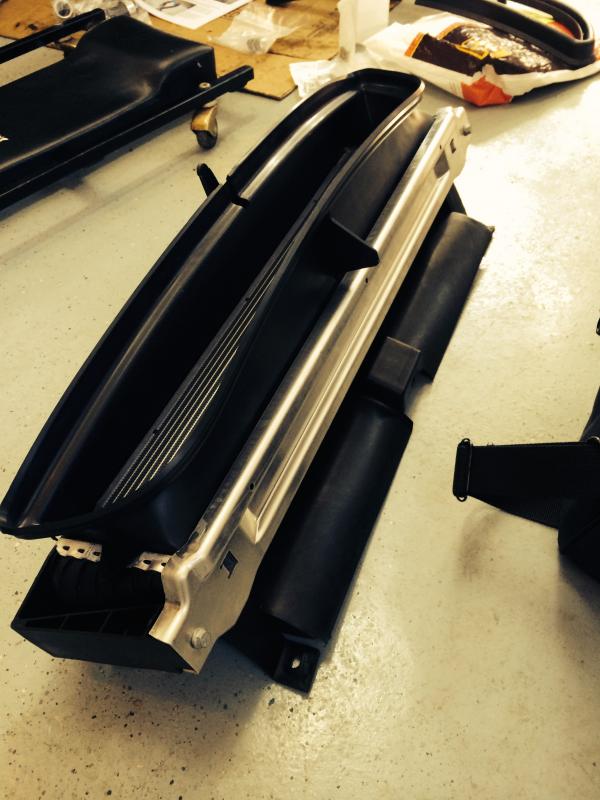
Here's the third radiator assembled
When removing the fan shrouds be very careful to not break the tabs as they can be very brittle. I broke mine during removal and had to order a new one for the left side. :bang:
Next up, you'll need to drain the coolant from each side radiator. I used a pair of needle nose pliers to get a good grip on each plug. Gently wiggle the plug out, this will ensure the coolant comes out at a controlled rate. If you pull it completely out you'll have a real mess on your hands. Note the position of each clip as you'll need to reinstall them in the same location.
Once the coolant is completely drained from both sides it's time to bolt up the third radiator and install the connections.
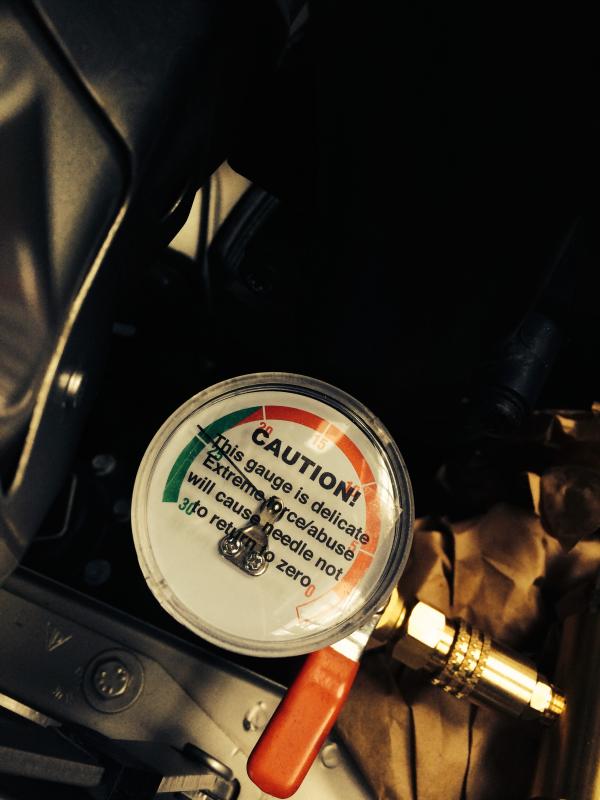
Once all connections are secure it's time to burp the system using the airlift tool.
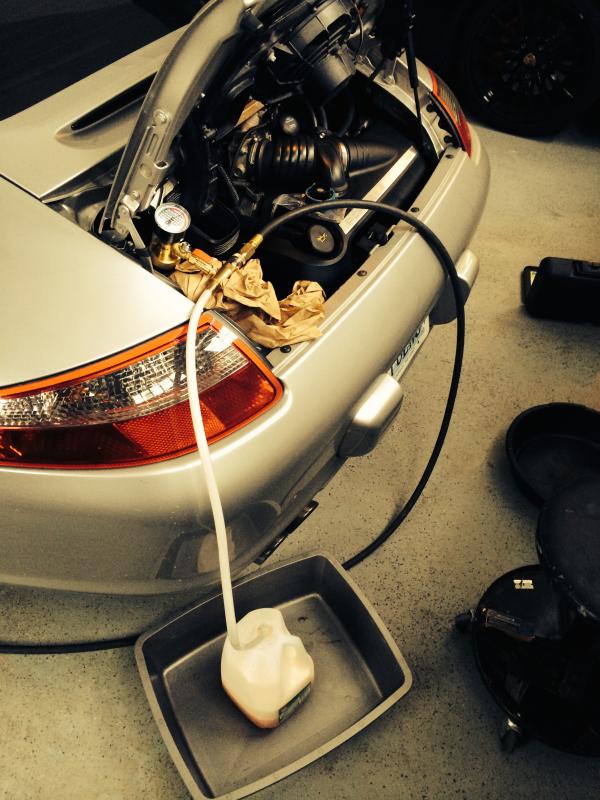
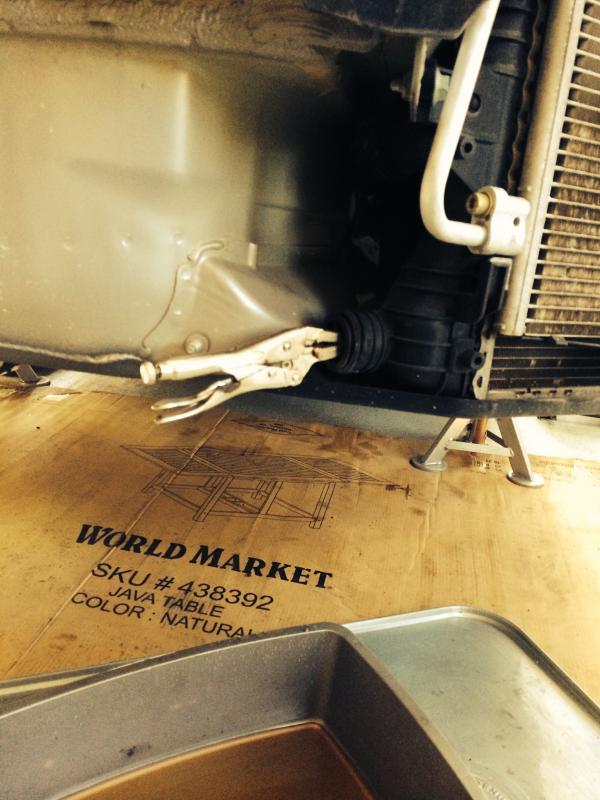
After attaching the airlift tool make sure you crimp the overflow tube which is shown here. This will ensure you do not get air leaking back into the system through the overflow tube.
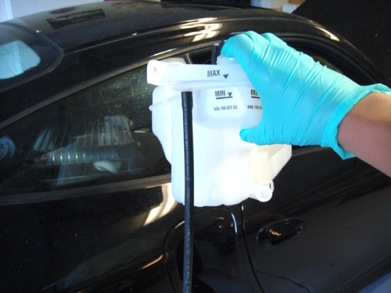
Once the system is back up to proper pressure (roughly 25 & higher) it's time to refill the system.
Once the system has been burped it's time to start her up and let the engine come up to operating temp.
Next up I started cutting out the grill material to mold it into the fan shrouds.

The best advice I can give is to mold the grill material inside each plastic radiator shroud. The mesh material should be cut so that it's roughly half an inch into each shroud. This will ensure that the bumper can properly seat on each duct and seat against the mesh material. This took quite a lot of trial and error. In the end I was happy with the center radiator mesh install and may redo the sides at some point.
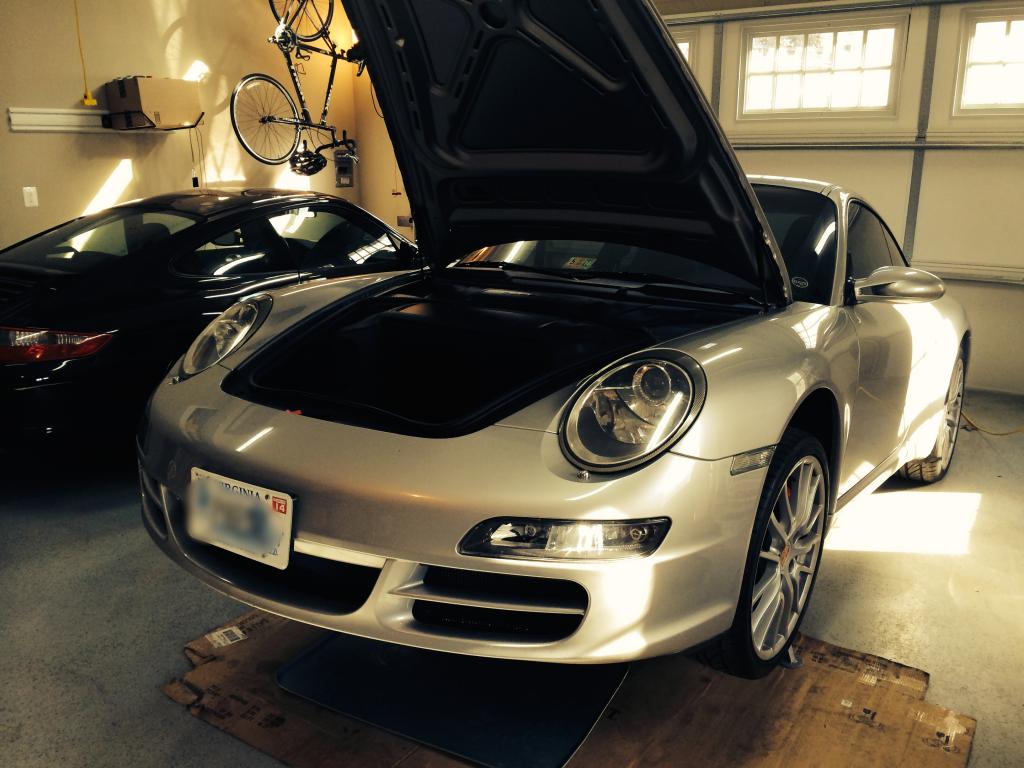
All back in one piece...
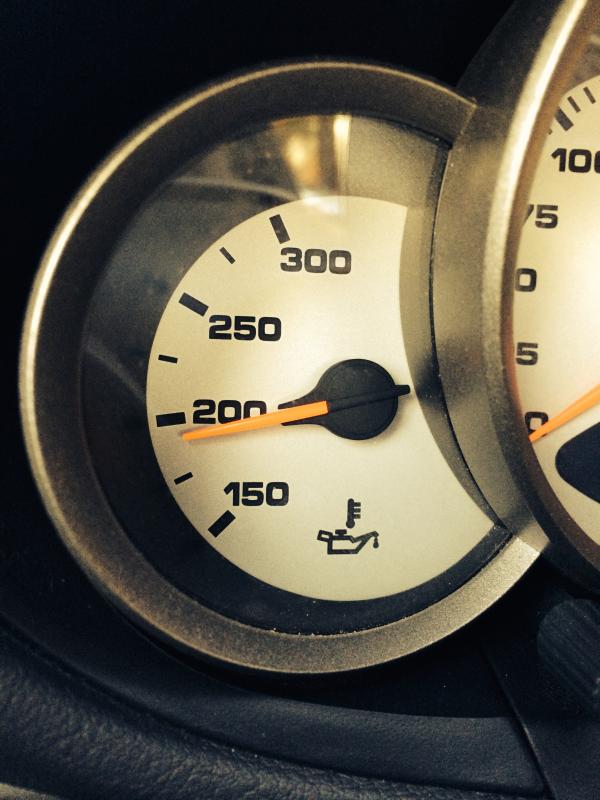
I'm happy to report that my average oil operating temperature has dropped to just below 200 when driving in clean air. If I'm in traffic it will cree up above 200 but no where near as high as it used to (225).
Special thanks goes out to N0tt0N on dorkiphus for generously allowing me to borrow his brand new airlift tool. Also, to my good friend Alex for allowing me to take over his garage while performing the install.
DIY's referenced:
Front Bumper Removal
Third Radiator Install
Coolant Flush Procedure
Third radiator kit
While this is not a complete DIY post it goes without saying... before working on your cars cooling system components make sure the vehicle is cold.
First the car getting ready to have it's bumper pulled.

Removal of the bumper is well documented so I won't post exact steps. I will mention that the bumper wiring harness can be tricky to get off and that the tab that holds it on looks like this.


Once the bumpers off you're ready to start assembling the third radiator parts and removing the fan shrouds to simplify installation. I also removed the bumper support to make it easier to mount the third radiator.

Here's the third radiator assembled

When removing the fan shrouds be very careful to not break the tabs as they can be very brittle. I broke mine during removal and had to order a new one for the left side. :bang:

Next up, you'll need to drain the coolant from each side radiator. I used a pair of needle nose pliers to get a good grip on each plug. Gently wiggle the plug out, this will ensure the coolant comes out at a controlled rate. If you pull it completely out you'll have a real mess on your hands. Note the position of each clip as you'll need to reinstall them in the same location.

Once the coolant is completely drained from both sides it's time to bolt up the third radiator and install the connections.

Once all connections are secure it's time to burp the system using the airlift tool.

After attaching the airlift tool make sure you crimp the overflow tube which is shown here. This will ensure you do not get air leaking back into the system through the overflow tube.
Once the system is back up to proper pressure (roughly 25 & higher) it's time to refill the system.

Once the system has been burped it's time to start her up and let the engine come up to operating temp.

Next up I started cutting out the grill material to mold it into the fan shrouds.


The best advice I can give is to mold the grill material inside each plastic radiator shroud. The mesh material should be cut so that it's roughly half an inch into each shroud. This will ensure that the bumper can properly seat on each duct and seat against the mesh material. This took quite a lot of trial and error. In the end I was happy with the center radiator mesh install and may redo the sides at some point.

All back in one piece...

I'm happy to report that my average oil operating temperature has dropped to just below 200 when driving in clean air. If I'm in traffic it will cree up above 200 but no where near as high as it used to (225).

Registered User
Joined: May 2013
Posts: 602
From: Miami
Rep Power: 41
Great explanation and work! I don't have a third radiator on my car and my oil temperature is usually right or under 200. I may go to 210-15 in bumper to bumper traffic or after driving it hard on sport mode (PDK). Do I need a third radiator? Thanks
Thread Starter
|
Registered User
Joined: Aug 2009
Posts: 267
From: VA
Rep Power: 29
Thanks, it sounds like your car is running at around the same temps as mine. Something to keep in mind with my situation is that the car has 77k miles on it and the side radiators aren't in perfect condition. I would guess as long as your car stays well below 250 you should be fine.
Registered User
Joined: Aug 2008
Posts: 1,574
From: CA Bay Area, US
Rep Power: 100

My son and I did the same install a few years back. It was a lengthy but not too complex activity. You describe it well. I purchased the grill pre-cut - and my son did that part of the install. The vacuuming of the coolant system is key, a process I learned from the fellow/tech who services my Ford GT. I ended up buying the vacuum device on his recommendation. The darnd'est tool I ever played with.
My temp swings were not as varied as yours but I installed it more for the insurance and for the challenge of adding something to the car.
Thanks,
Rich
My temp swings were not as varied as yours but I installed it more for the insurance and for the challenge of adding something to the car.
Thanks,
Rich
Registered User

Joined: Jul 2009
Posts: 812
From: South Florida
Rep Power: 71
Where can I buy those beautiful black mesh cut outs? Those are JUST what I need for my 3rd (and side) radiators!!

Registered User
Joined: Aug 2006
Posts: 1,098
From: HB.. That's in the OC Biach!
Rep Power: 80
I added the 3rd radiator also a few yrs back when I added the GT3 front end.. Not a need to have but a nice to have..
Trending Topics

Thread
Thread Starter
Forum
Replies
Last Post
eclip5e
Automobiles For Sale
6
Jul 29, 2019 11:13 AM
PelicanParts.com
BMW Vendor Classifieds
0
Aug 25, 2015 03:55 PM
PelicanParts.com
Mini Cooper Vendor Classifieds
0
Aug 25, 2015 03:43 PM
PelicanParts.com
Boxster/Cayman Vendor Classifieds
0
Aug 25, 2015 03:35 PM
PelicanParts.com
GT3/GT2/GT Vendor Classifieds
0
Aug 25, 2015 03:27 PM