
DIY: Telum01's Catch Can Kit Installation


Thread Starter
|
Registered User

Joined: Apr 2009
Posts: 4,366
From: NoVa
Rep Power: 295


DIY: Telum01's Catch Can Kit Installation
I made this overly-wordy to get across a few key points. I highly recommend reading this DIY in its entirety before proceeding. The installation is quick and easy except that caution is needed to keep from damaging the fittings that connect the hoses to the catch can. I tested three different types of fittings before selecting these. The only downside is the inherent weakness of the plastic (metal fittings are an option, but they are an extremely expensive one). Otherwise, this is a very straight-forward and simple installation.
In case anyone has missed it, I put together a kit to install an oil catch can on my '07 V8V. This is the original thread: https://www.6speedonline.com/forums/...catch-can.html
Here's basically what comes with the kit:
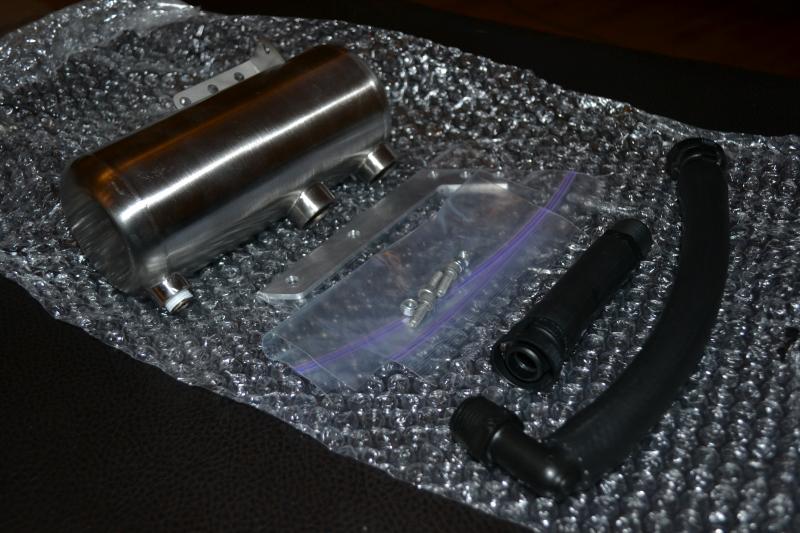
Doesn't look like much, but here's what you get:
http://www.holley.com/AT984010ERL.asp
http://www.holley.com/AT984410ERL.asp
(Please note that I won't be able to say how well they fit with the catch can until I receive them. I'll update this post once I do.)
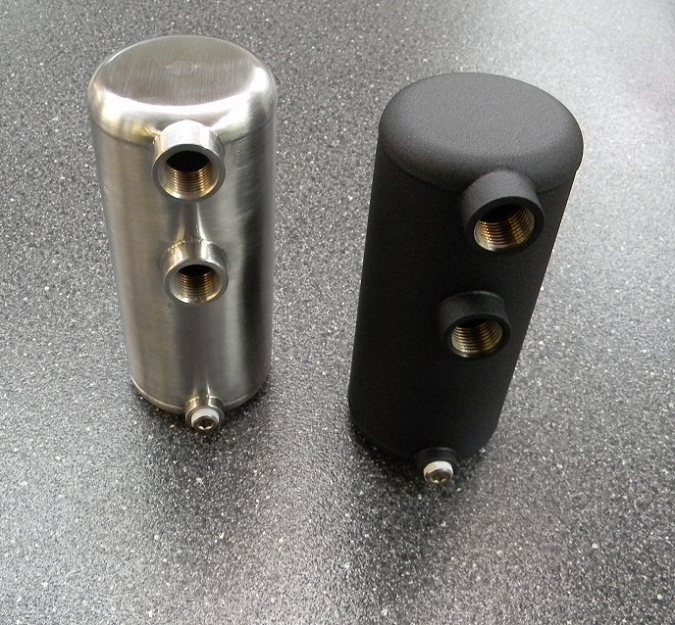
This kit was designed for a catch can made by 42 Draft Designs. Here's what it looks like:
These are the tools you'll need:
10mm socket or box wrench
8mm socket or box wrench
5mm allen key
Crescent wrench
A paper towel or two
Standard disclaimer applies: I am not a professional mechanic or engineer. I'm just a poor boy, from a poor family. Spare me my life from any mishap or monstrosities. I take no responsibility for anything at all whatsoever. That means, simply, you're doing this at your own risk and blaming anything that goes wrong on "some guy from the internet" isn't going to work. And always be safe. You're an expensive human working on an expensive car. Don't forget that.
Step 1
CAUTION: This is the most difficult part of this installation! Be EXTREMELY careful!!
Connect the hoses to the catch can. Start by hand and be careful. The long hose with the 90-degree fitting goes into the top hole, do that one first. After the long hose is connected, do the short one. It goes into the bottom (middle of the can) hole. Once the fitting is threaded enough, use the crescent wrench to finish it. Notice the final orientation of the 90-degree fitting:
Again, be extremely careful. The threads are self-sealing. That means the further you tighten them, the more difficult it will become. The plastic of the fittings is very soft compared to the metal catch can, and the threads inside the can easily cross-thread on the fitting. This is difficult because of the patience it requires - especially when you get toward the end of the threads, as it will be very easy for the crescent wrench to slip and scuff the plastic fitting. I was able to get it fully seated, but I used a pair of pliers to do so. This worked very well, but left teeth marks in the fitting. How you proceed with this is up to you!
Step 2
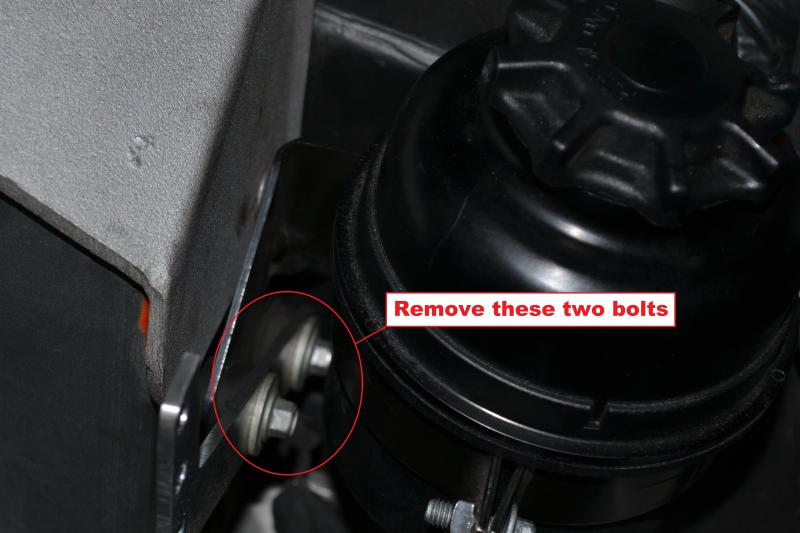
Use the 8mm socket to remove the bolt holding the power steering fluid reservoir in its bracket. The bracket will pop open once the bolt is loosened, so don't be alarmed.

Move the power steering fluid reservoir to the side so you can access the next two bolts. DO NOT disconnect the hoses from it! Use the 8mm socket to remove those two bolts.
Step 3
Install the catch can mounting bracket and re-install the two bolts you just removed. The bracket will go between the bolt heads and the rubber isolators. DO NOT over-tighten the bolts! Inside the rubber isolators there are metal cylinders that can crush if the bolts are over-tightened. Here's the order the pieces should each be in:
Step 4
Put the power steering fluid reservoir back into its mounting bracket and re-install the bolt that holds it in place.
Step 5
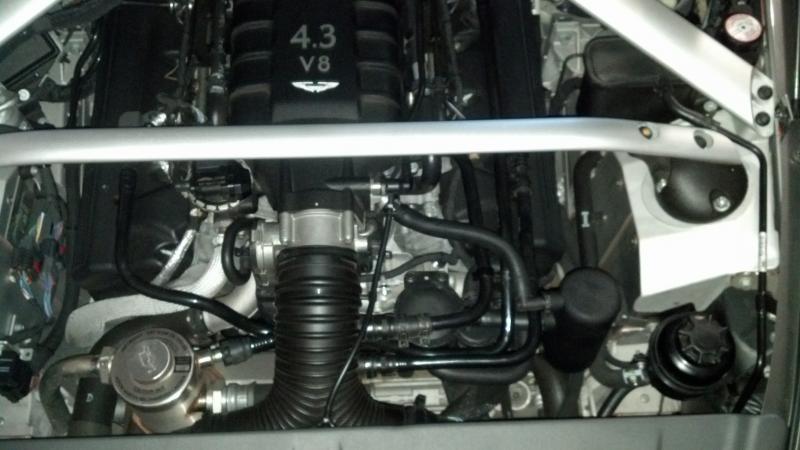
Remove the hard plastic hose going from the PCV to the intake manifold. Bag and tag it, keep it safe in case you decide to remove this kit down the road. This hose costs $15-20 dollars, depending on where you get it from. Not expensive on its own, but it adds up. Trust me, I know, I've ordered a dozen of them so far.

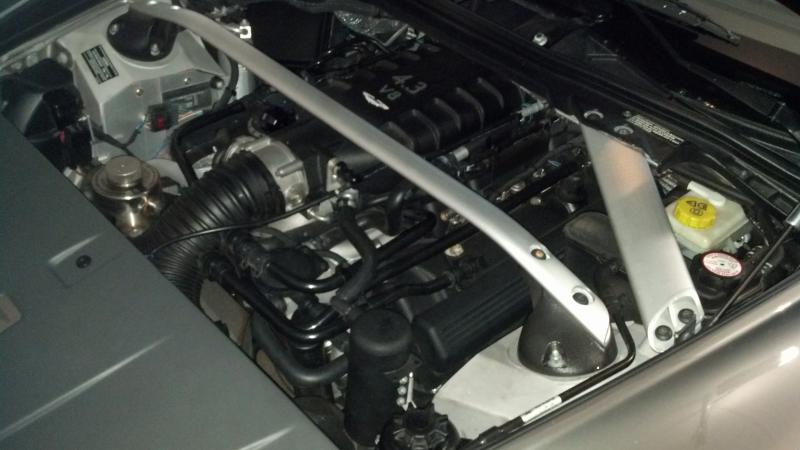
Step 6
Install the catch can! There are three hard plastic hoses that run parallel to each other. The long hose coming from the top of the catch can will go above these and connect to the intake manifold. The short hose coming from the catch can will go below the three hard plastic hoses and connect to the PCV. Once the hoses are connected, the catch can will rest in place.
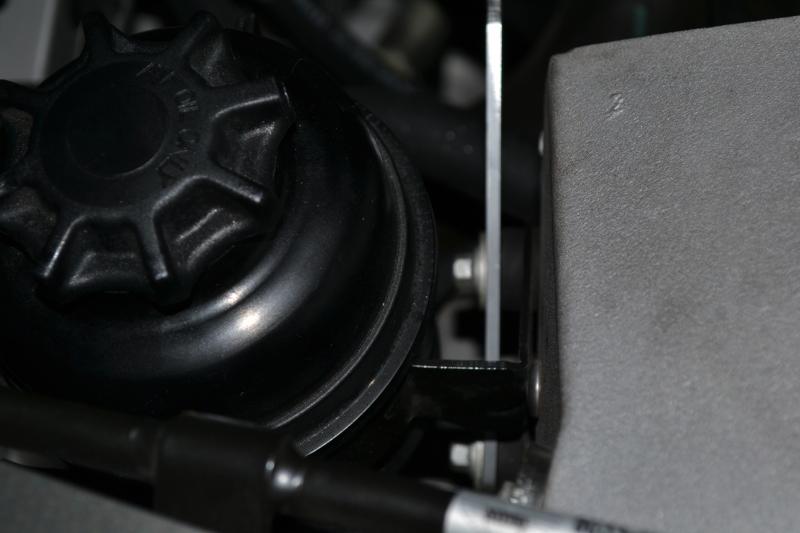
Step 7
Use the 10mm socket and 5mm allen key to install the three bolts (or just two, if you prefer) to attach the catch can to its mounting bracket. It should now look like this:
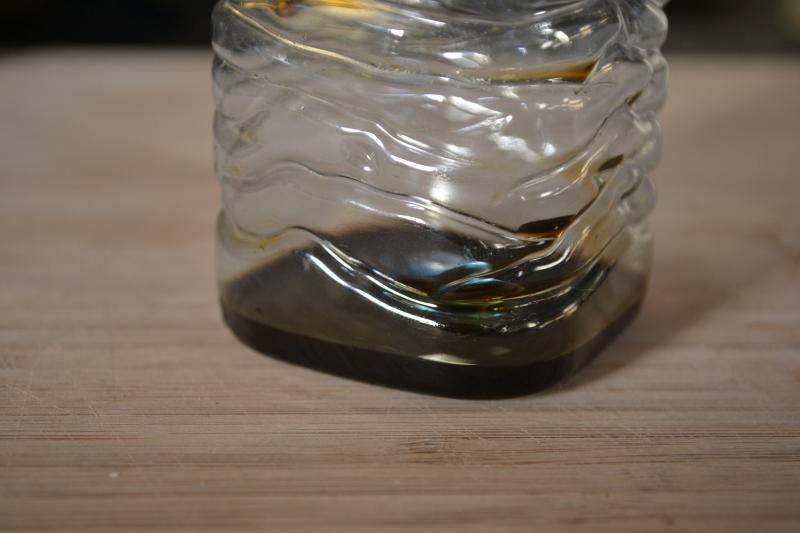
Final note: Remember to occasionally empty the catch can! This is the stuff it collects:
Please feel free to ask any questions if I glossed over anything!
In case anyone has missed it, I put together a kit to install an oil catch can on my '07 V8V. This is the original thread: https://www.6speedonline.com/forums/...catch-can.html
Here's basically what comes with the kit:
Doesn't look like much, but here's what you get:
- High quality hose that is made for this type of application and will not degrade over time.
- OEM Aston Martin quick-connectors - the same ones on the hose being replaced, which ensures a proper, leak-free fit. (These little turds were expensive to get! Thank you to Stuart for easing the pain!)
- An aluminum mounting bracket that is strong but lightweight.
- Nuts and bolts.
- 100% reversible kit - the hose being replaced is not damaged in any way. If you decide to sell your car and want to remove the kit, simply reverse the directions below.
- A cleaner running engine! I noticed tons of oil getting into my intake manifold through this pathway, which is why I came up with this kit.
http://www.holley.com/AT984010ERL.asp
http://www.holley.com/AT984410ERL.asp
(Please note that I won't be able to say how well they fit with the catch can until I receive them. I'll update this post once I do.)
This kit was designed for a catch can made by 42 Draft Designs. Here's what it looks like:
These are the tools you'll need:
10mm socket or box wrench
8mm socket or box wrench
5mm allen key
Crescent wrench
A paper towel or two
Standard disclaimer applies: I am not a professional mechanic or engineer. I'm just a poor boy, from a poor family. Spare me my life from any mishap or monstrosities. I take no responsibility for anything at all whatsoever. That means, simply, you're doing this at your own risk and blaming anything that goes wrong on "some guy from the internet" isn't going to work. And always be safe. You're an expensive human working on an expensive car. Don't forget that.
Step 1
CAUTION: This is the most difficult part of this installation! Be EXTREMELY careful!!
Connect the hoses to the catch can. Start by hand and be careful. The long hose with the 90-degree fitting goes into the top hole, do that one first. After the long hose is connected, do the short one. It goes into the bottom (middle of the can) hole. Once the fitting is threaded enough, use the crescent wrench to finish it. Notice the final orientation of the 90-degree fitting:
Again, be extremely careful. The threads are self-sealing. That means the further you tighten them, the more difficult it will become. The plastic of the fittings is very soft compared to the metal catch can, and the threads inside the can easily cross-thread on the fitting. This is difficult because of the patience it requires - especially when you get toward the end of the threads, as it will be very easy for the crescent wrench to slip and scuff the plastic fitting. I was able to get it fully seated, but I used a pair of pliers to do so. This worked very well, but left teeth marks in the fitting. How you proceed with this is up to you!
Step 2
Use the 8mm socket to remove the bolt holding the power steering fluid reservoir in its bracket. The bracket will pop open once the bolt is loosened, so don't be alarmed.
Move the power steering fluid reservoir to the side so you can access the next two bolts. DO NOT disconnect the hoses from it! Use the 8mm socket to remove those two bolts.
Step 3
Install the catch can mounting bracket and re-install the two bolts you just removed. The bracket will go between the bolt heads and the rubber isolators. DO NOT over-tighten the bolts! Inside the rubber isolators there are metal cylinders that can crush if the bolts are over-tightened. Here's the order the pieces should each be in:
Step 4
Put the power steering fluid reservoir back into its mounting bracket and re-install the bolt that holds it in place.
Step 5
Remove the hard plastic hose going from the PCV to the intake manifold. Bag and tag it, keep it safe in case you decide to remove this kit down the road. This hose costs $15-20 dollars, depending on where you get it from. Not expensive on its own, but it adds up. Trust me, I know, I've ordered a dozen of them so far.
Step 6
Install the catch can! There are three hard plastic hoses that run parallel to each other. The long hose coming from the top of the catch can will go above these and connect to the intake manifold. The short hose coming from the catch can will go below the three hard plastic hoses and connect to the PCV. Once the hoses are connected, the catch can will rest in place.
Step 7
Use the 10mm socket and 5mm allen key to install the three bolts (or just two, if you prefer) to attach the catch can to its mounting bracket. It should now look like this:
Final note: Remember to occasionally empty the catch can! This is the stuff it collects:
Please feel free to ask any questions if I glossed over anything!
Last edited by telum01; Feb 3, 2014 at 09:54 AM.

Thread
Thread Starter
Forum
Replies
Last Post
PelicanParts.com
Mercedes/AMG Vendor Classifieds
0
Aug 21, 2015 01:37 PM
PelicanParts.com
Audi Vendor Classifieds
0
Aug 21, 2015 01:28 PM
PelicanParts.com
Mini Cooper Vendor Classifieds
0
Aug 20, 2015 04:01 PM
PelicanParts.com
BMW Vendor Classifieds
0
Aug 20, 2015 03:22 PM