Greetings from Niagara, Ontario, Canada

#181
 06-05-2017, 05:32 PM

Join Date: Apr 2017
Location: Niagara Region
Age: 52
Posts: 400
Rep Power: 28 


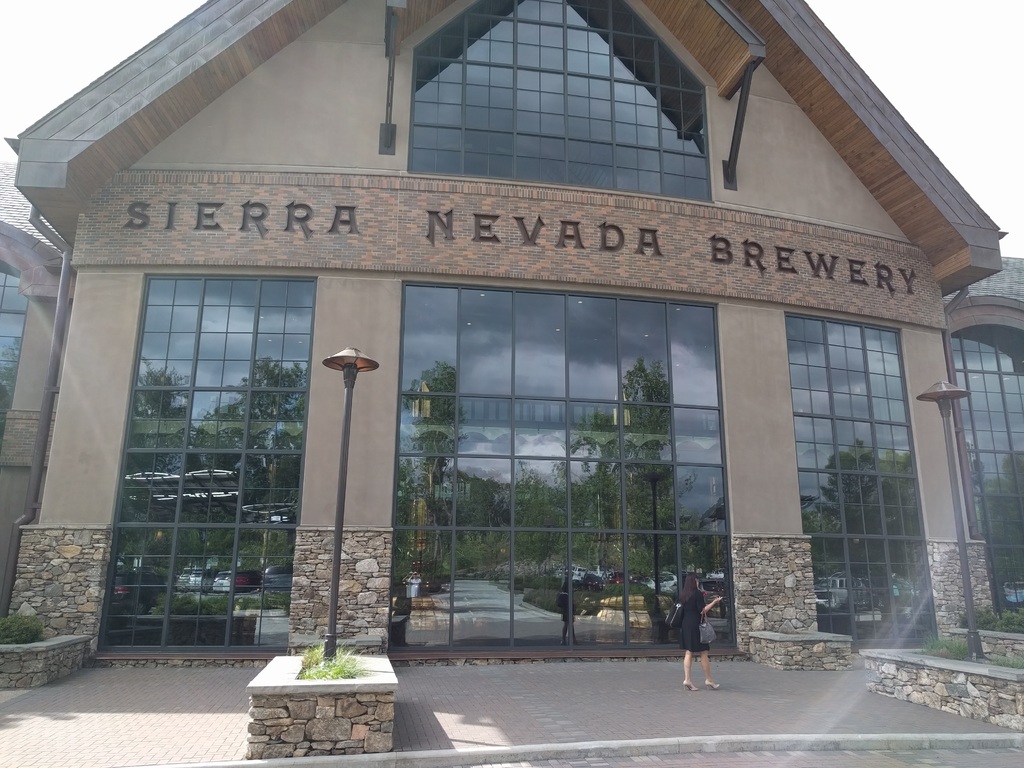
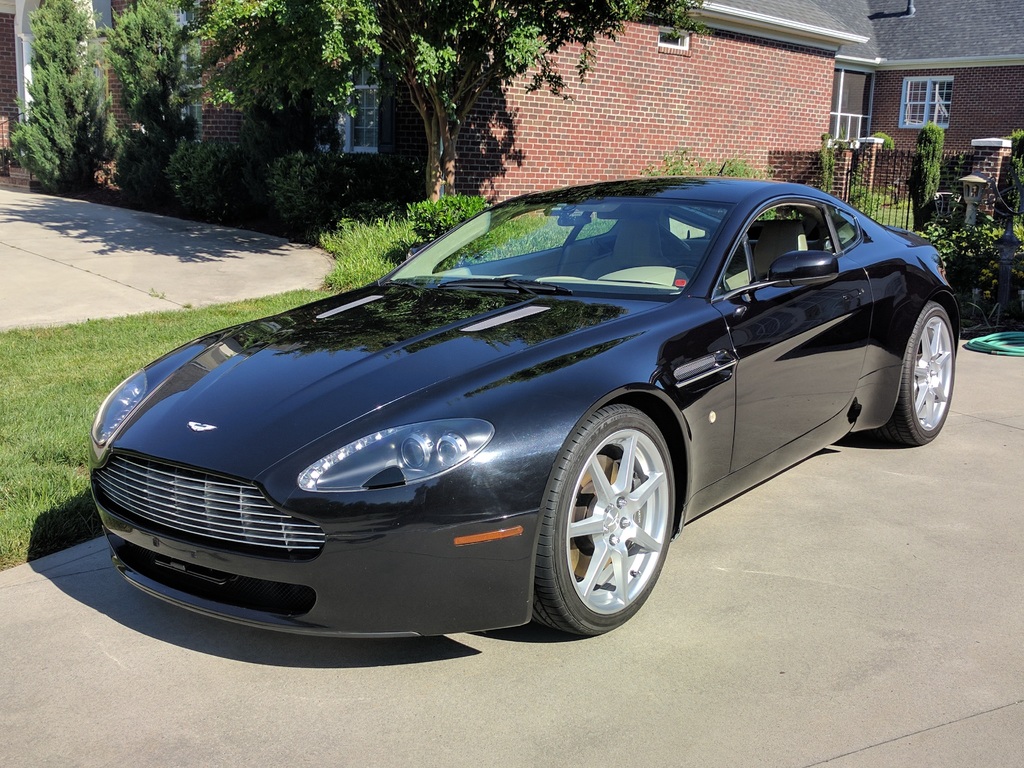
At Sierra Nevada Brewing Company:


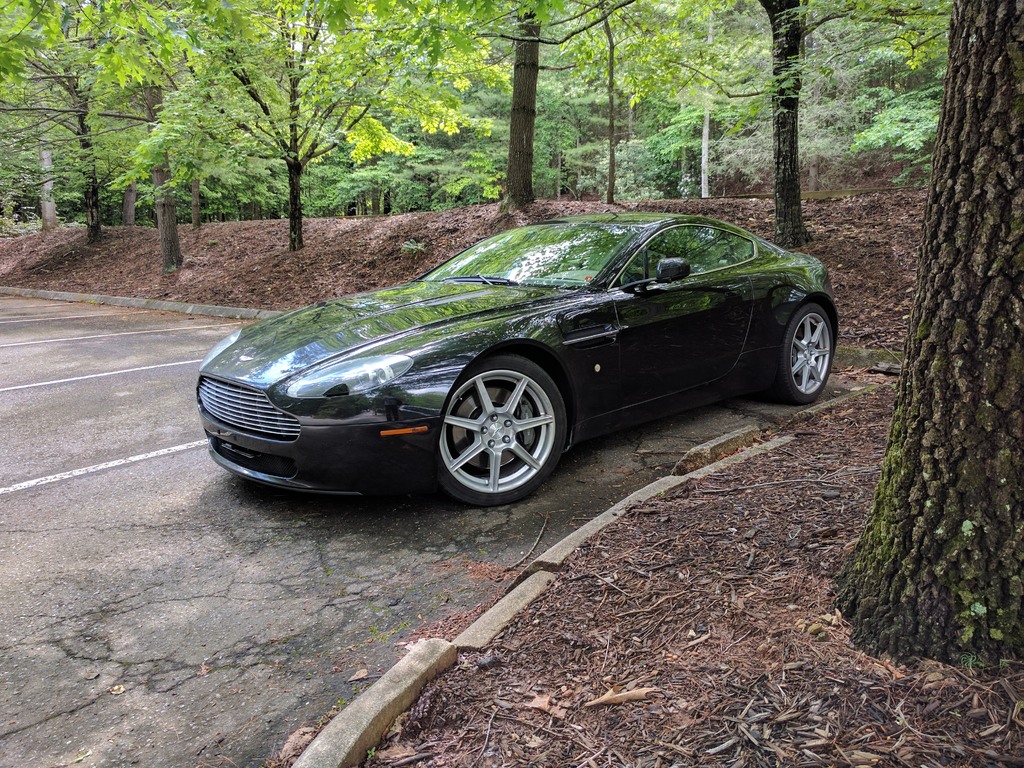
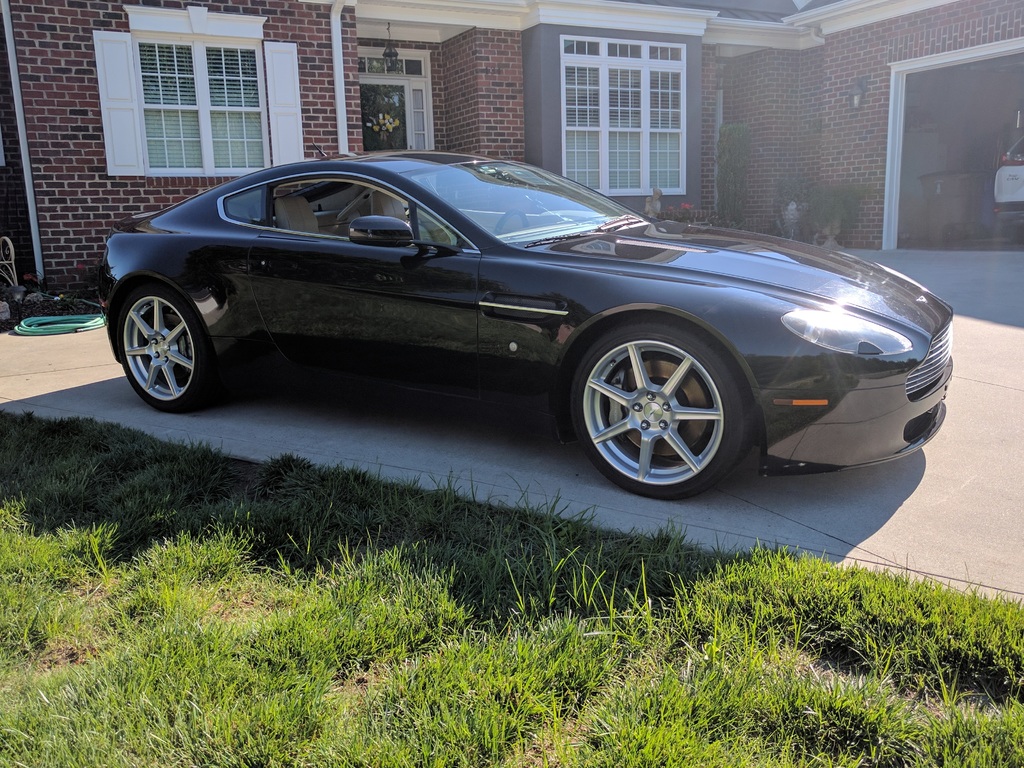
Detailing car for first time:

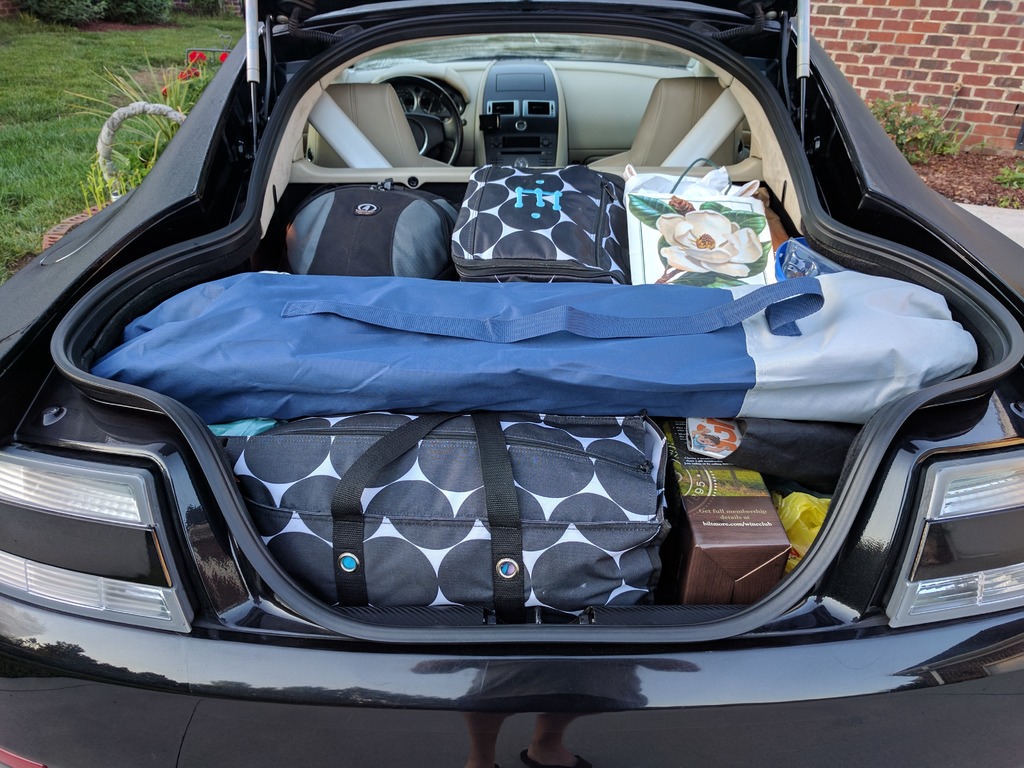
Definitely more stuff going home

Last edited by 007V8Vantage; 04-13-2018 at 04:06 PM.
#182
06-05-2017, 05:42 PM

Registered User
Join Date: Oct 2015
Location: Ottawa, Ontario, Canada
Age: 59
Posts: 1,471
Rep Power: 90 
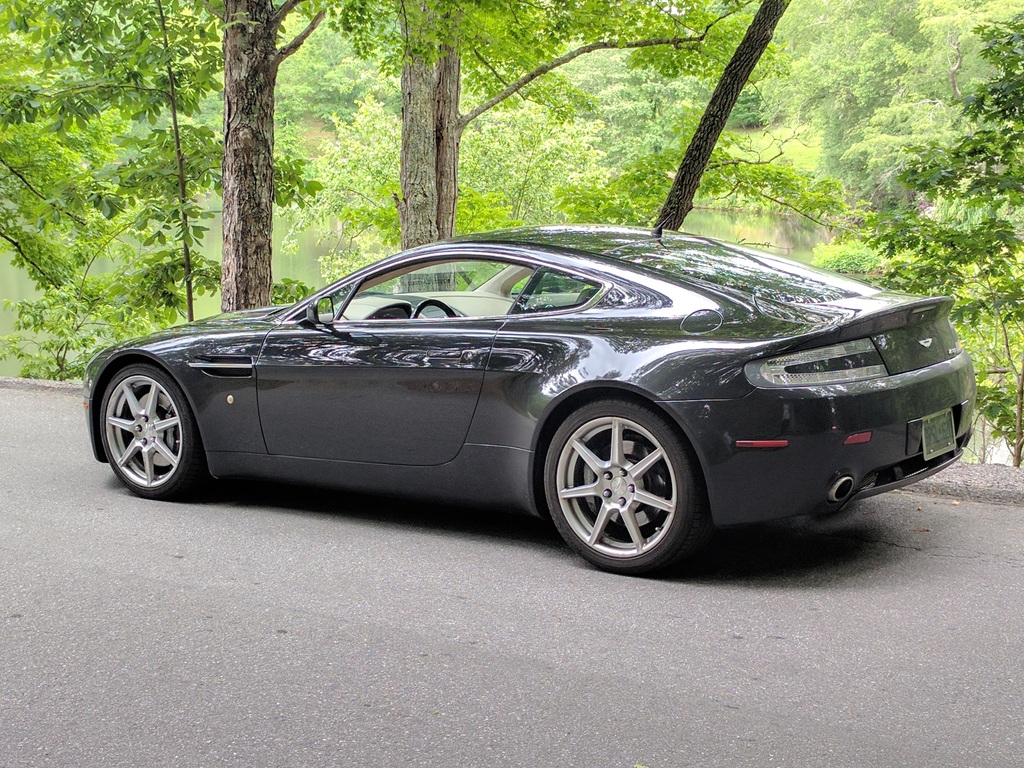
Great pics, don't think you could have fit more in the trunk... Glad you had a good trip as temperature and weather here in Ontario has been pretty miserable.
#183
06-05-2017, 06:00 PM
Registered User
Join Date: Jun 2016
Location: South Jersey
Age: 65
Posts: 1,495
Rep Power: 73
Nice trip. Though I'd rather put a couple thousand miles on a new used car local just to make sure it's reliable enough to drive 1000 miles away where getting service is questionable, but at least you were on the AM thruway with dealers all along the route
I still can't stop going outside at 1am and walking around it, or having a seat from that low angle side "Vantage" point and just stare! Always makes me happy.
As for the pebble, I think we're all wondering when we'll get one after Dougie Dipsh!t did his video on it, which used to be short and to the point and at the end he said it was just a pebble and the dealer charged him nothing [but the tow cost him plenty!], but he changed it into a long winded drawn out commentary.
#184
06-06-2017, 12:08 PM
Join Date: Apr 2017
Location: Niagara Region
Age: 52
Posts: 400
Rep Power: 28 Nice trip. Though I'd rather put a couple thousand miles on a new used car local just to make sure it's reliable enough to drive 1000 miles away where getting service is questionable, but at least you were on the AM thruway with dealers all along the route
I still can't stop going outside at 1am and walking around it, or having a seat from that low angle side "Vantage" point and just stare! Always makes me happy.
As for the pebble, I think we're all wondering when we'll get one after Dougie Dipsh!t did his video on it...
I still can't stop going outside at 1am and walking around it, or having a seat from that low angle side "Vantage" point and just stare! Always makes me happy.
As for the pebble, I think we're all wondering when we'll get one after Dougie Dipsh!t did his video on it...
#185
06-06-2017, 12:37 PM
Registered User
Join Date: Jun 2016
Location: South Jersey
Age: 65
Posts: 1,495
Rep Power: 73
I'd love to be a half full but I tend to err on the cautious side and a couple thousand miles in an untested car could leave you in a very unexpected predicament 1000 miles from home and 300 miles from service or parts. Not the best way to spend a vacation. But since all ended well, ignore my ramblings
I thought about driving mine home from Boise instead of shipping it, not that I really wanted to drive it that far, but I could have made several personal family stops on the way. But knowing I could break down in Wyoming with a possible 500 mile tow to some type British dealer that could possibly fix it, in a few weeks or months when they could get parts, just didn't seem wise. And 20/20, I would have gotten 100 miles, realized it needed a clutch, and have been limping it home for 2600 more miles, fuming at having just overpaid for a car that needed another bucket of cash thrown at it.
I thought about driving mine home from Boise instead of shipping it, not that I really wanted to drive it that far, but I could have made several personal family stops on the way. But knowing I could break down in Wyoming with a possible 500 mile tow to some type British dealer that could possibly fix it, in a few weeks or months when they could get parts, just didn't seem wise. And 20/20, I would have gotten 100 miles, realized it needed a clutch, and have been limping it home for 2600 more miles, fuming at having just overpaid for a car that needed another bucket of cash thrown at it.
#186
06-06-2017, 06:08 PM
Join Date: Apr 2017
Location: Niagara Region
Age: 52
Posts: 400
Rep Power: 28
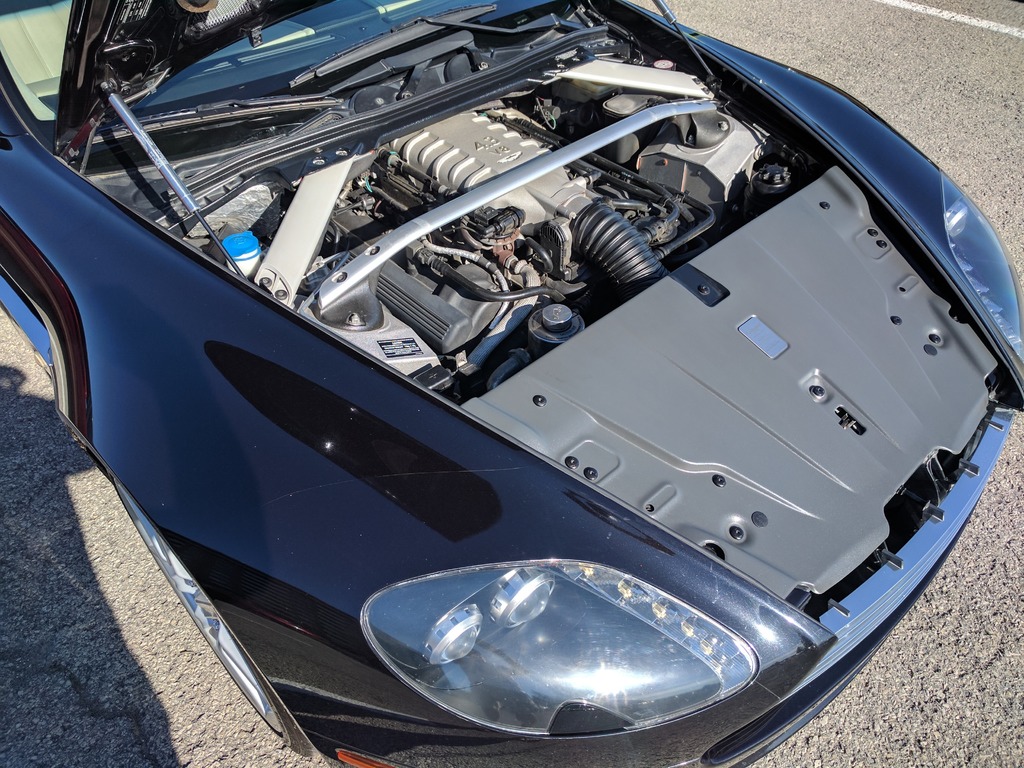
Yeah, I acknowledge I took a risk and wouldn't have heard the end of it if we broke down, but I got away with it. 
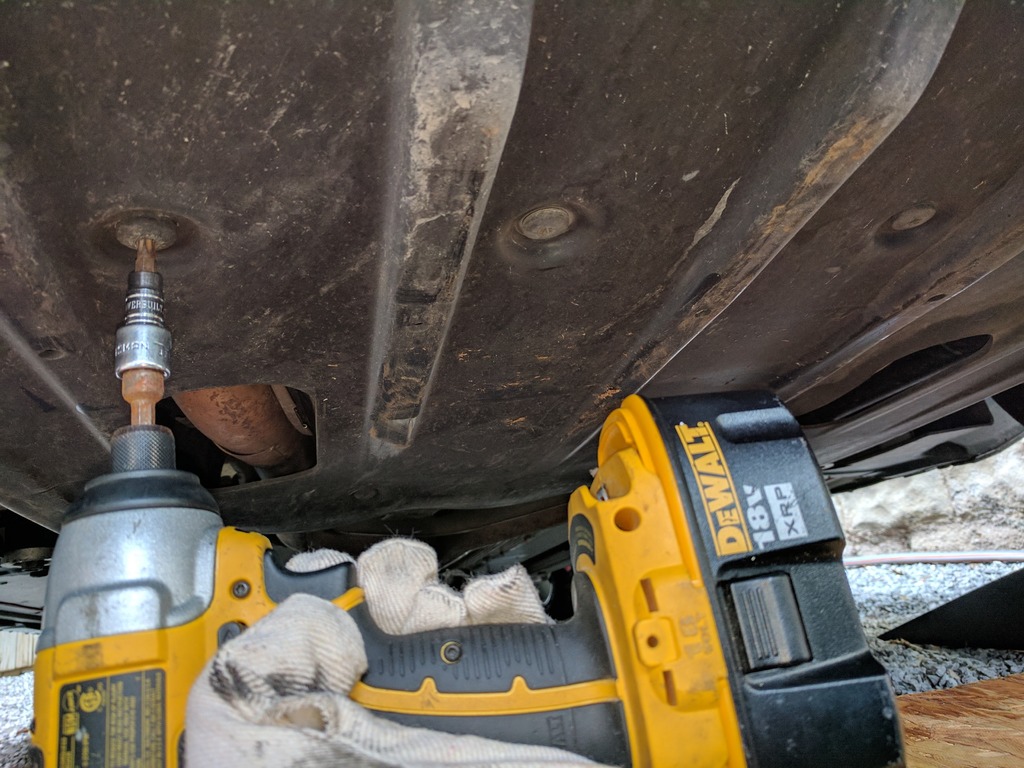
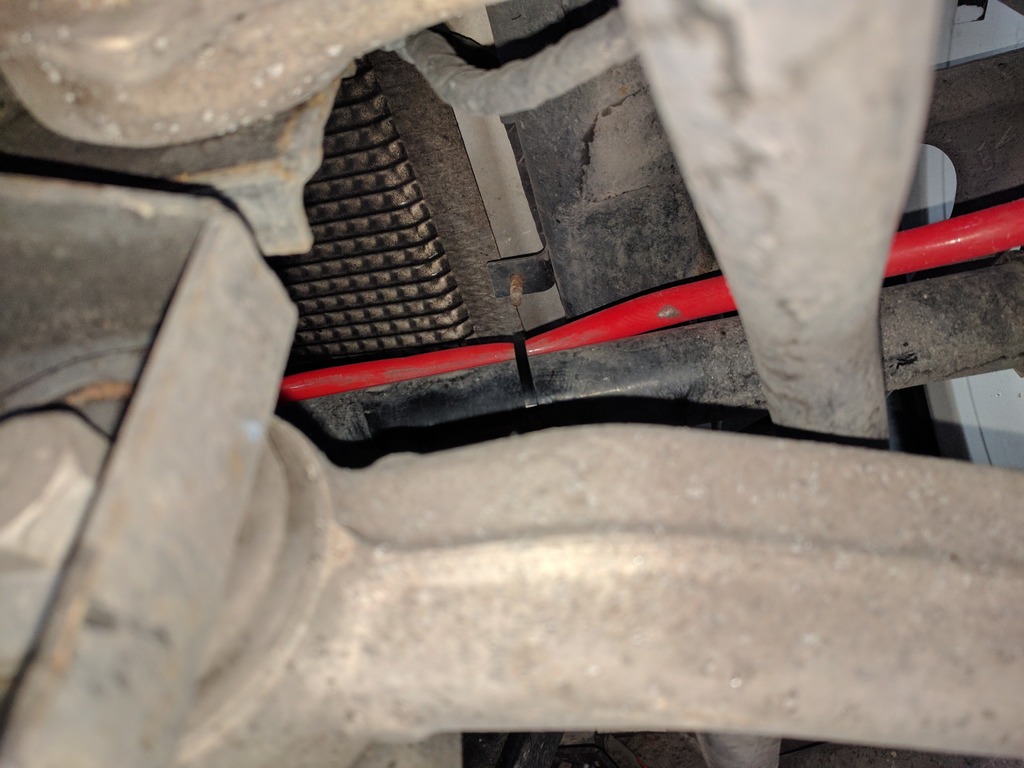
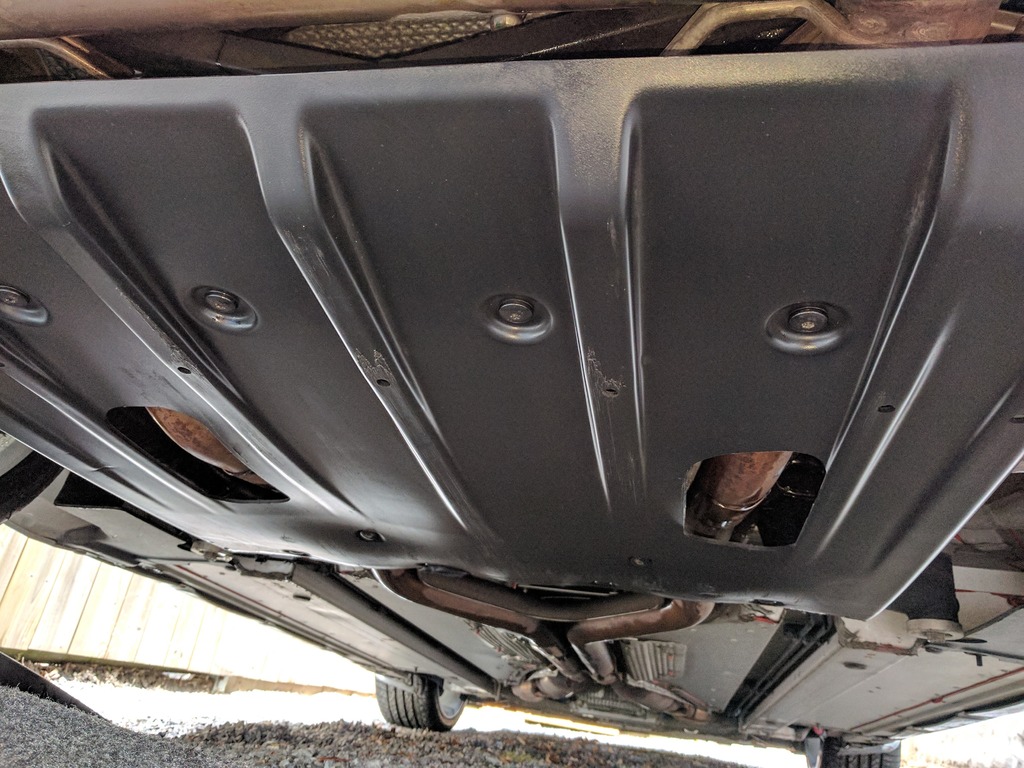
As previously mentioned, without great service history, I am assuming all fluids are due to be changed this year... so next up is the transaxle fluid.
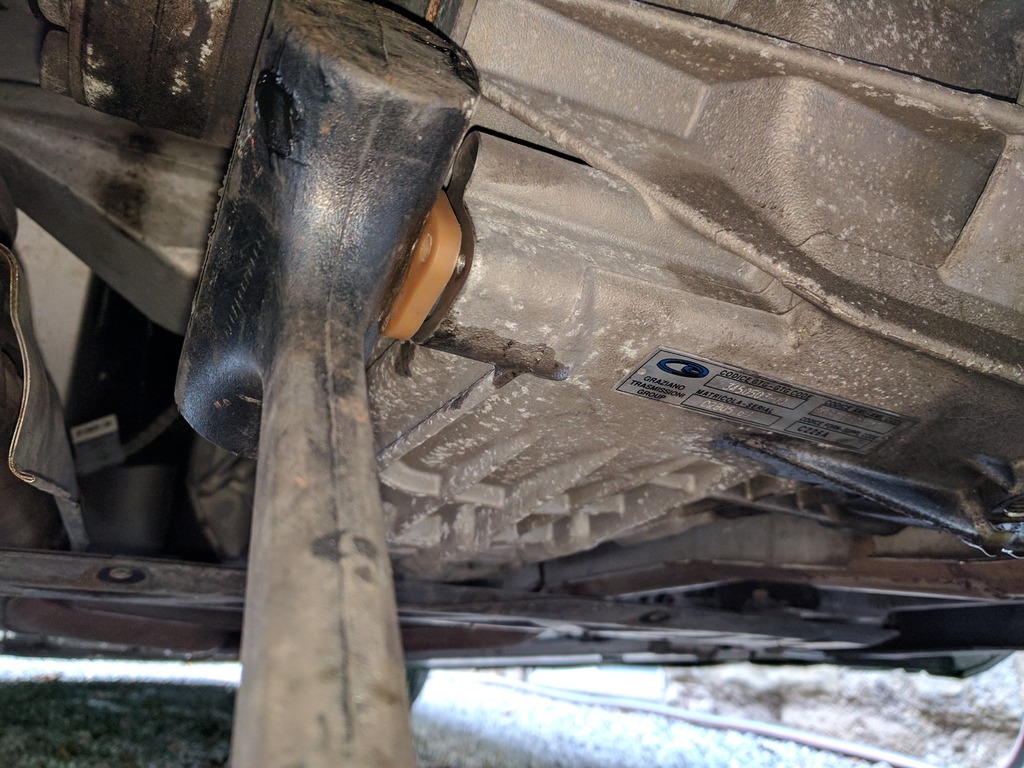
First up remove more Torx bolts to gain access:
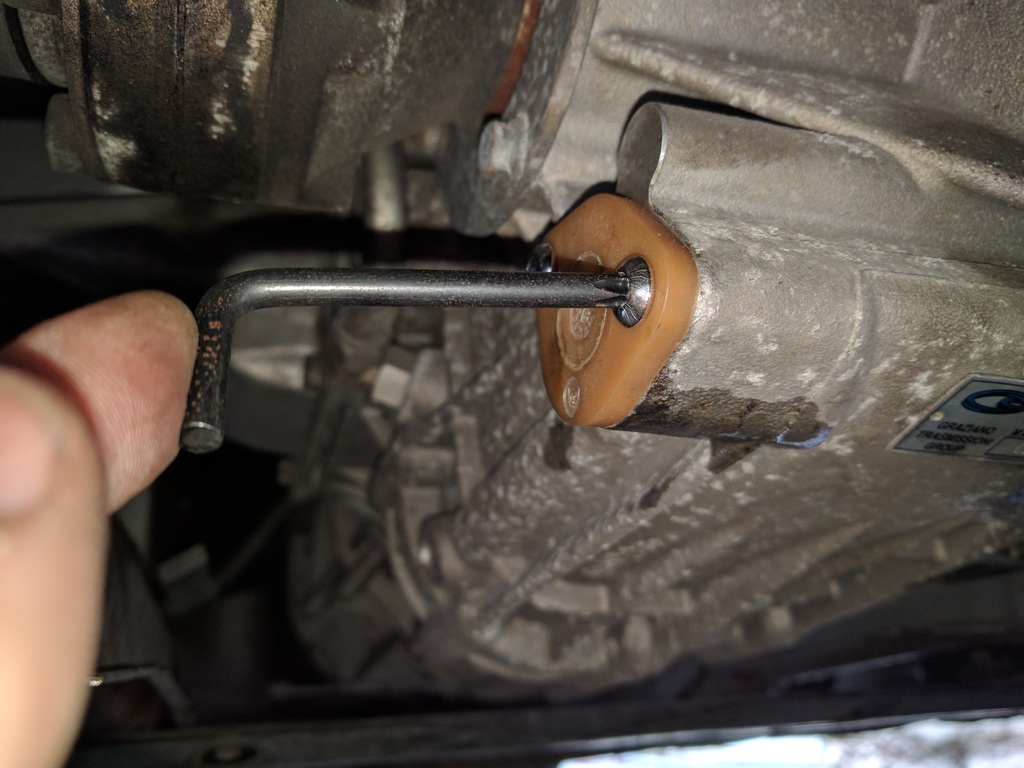
I wasn't impressed with how the filter cover was barely held in by one half unthreaded bolt:
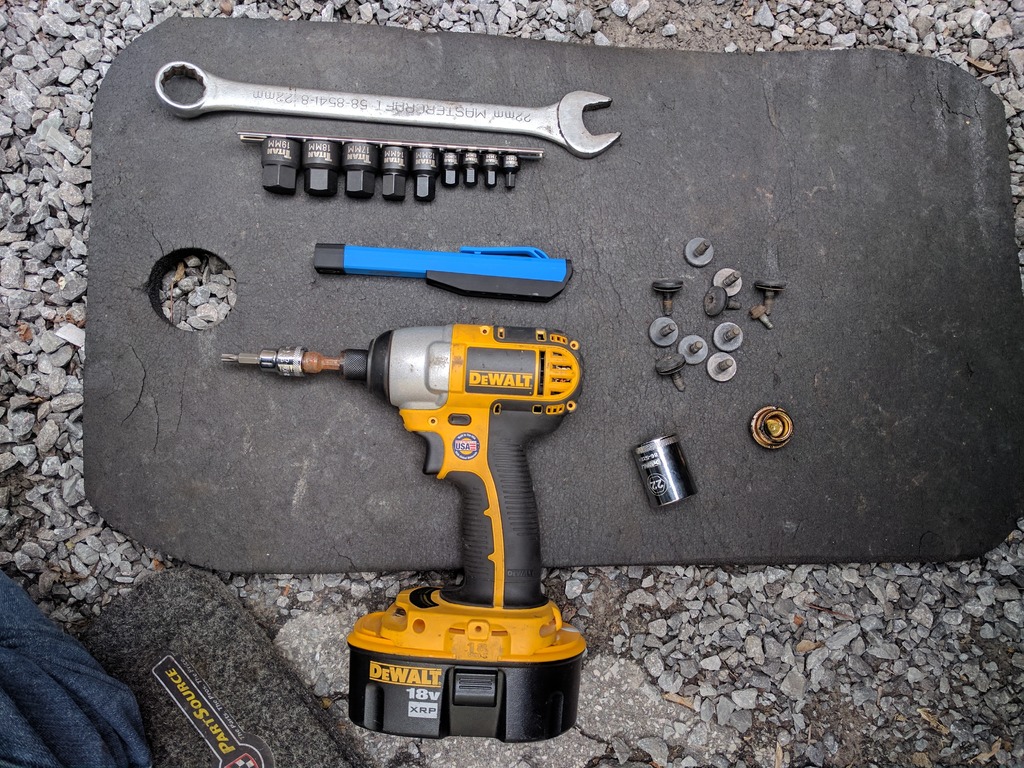
Tools for the job:
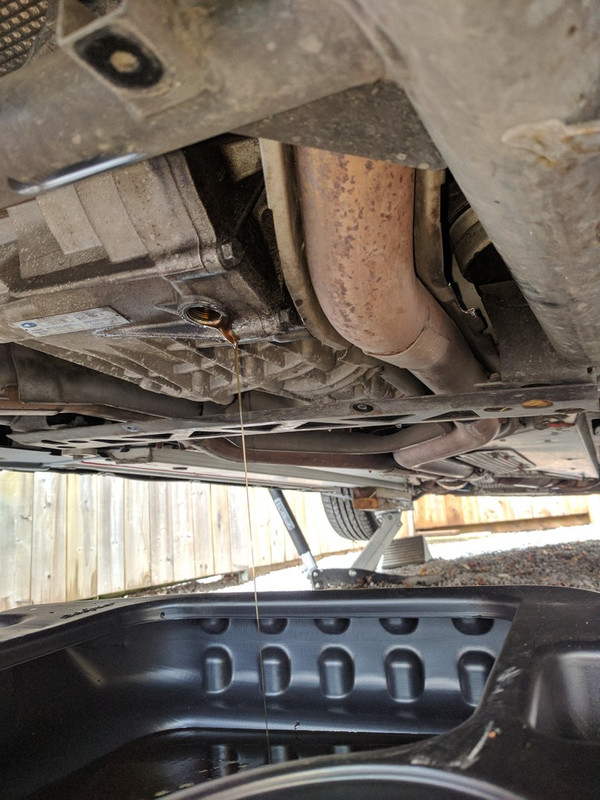
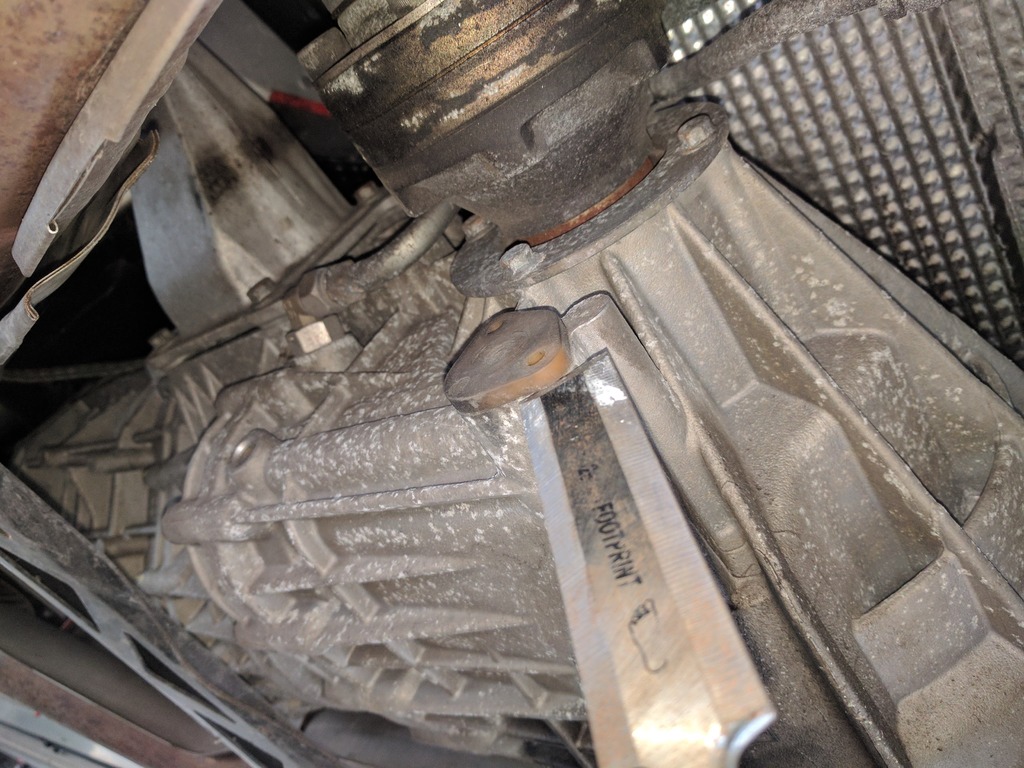
I jacked up the front left of car to make the drain plug the lowest point of the transaxle and proceeded to gravity drain the unit:
If you prefer personal comfort over speed you can use this method to refill:
Just run a hose from the fill hole to a higher point outside the rear wheel and let gravity do it's thing while you have a beer:
4 Litres came out so either some still in the cooler or it was low on fluid - color wasn't so good:
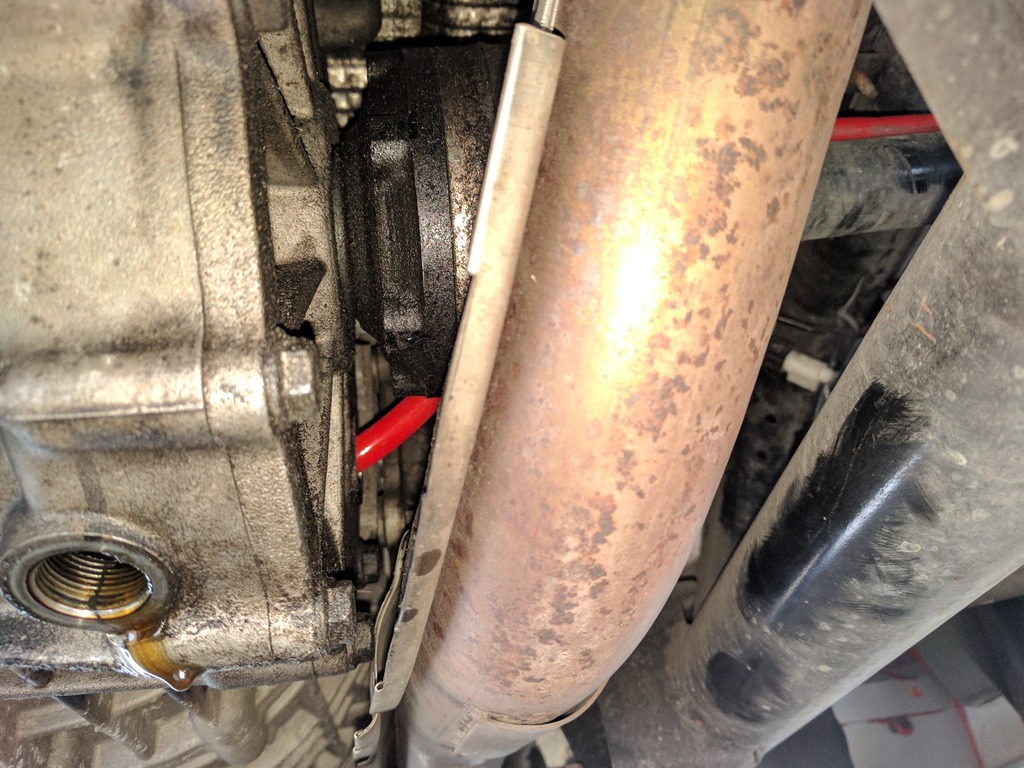
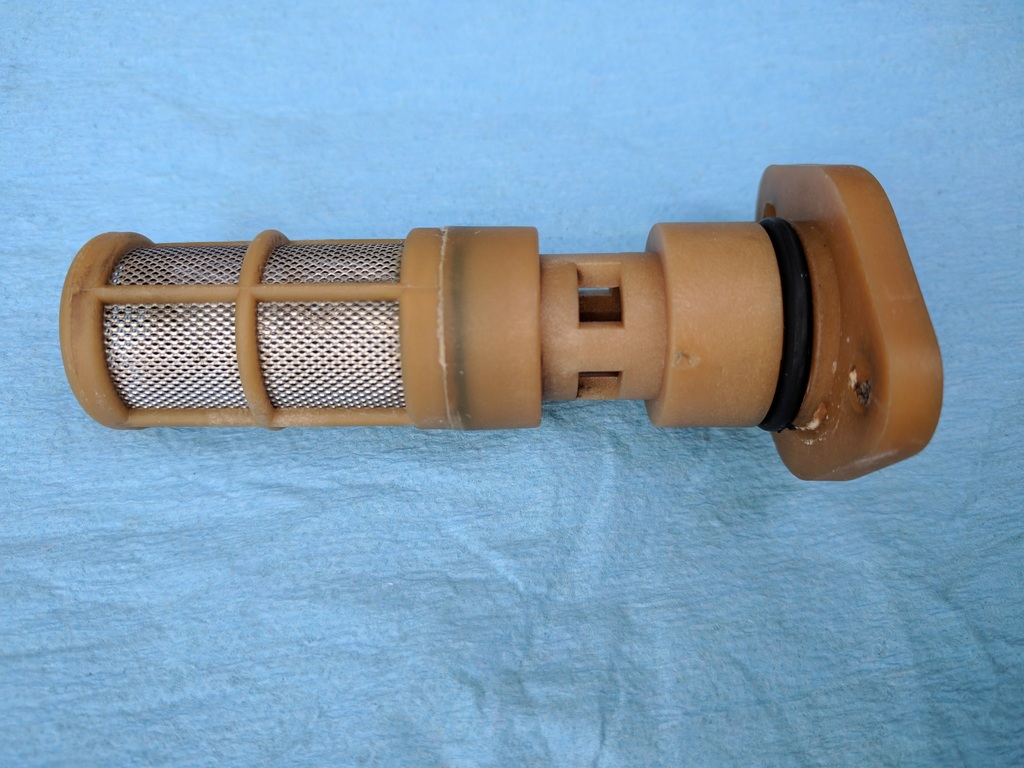
On the other hand, after popping the filter out, there wasn't any metal or debris to be found so I cleaned it up:

Like the Oil scavenge filters, the O-ring provides the seal and the bolts just keep it seated, so just use a rubber mallet to reinstall it:
The only stainless machine screws I had handy to replace the original and missing one was a security Torx, so I left a key in the glovebox for now:
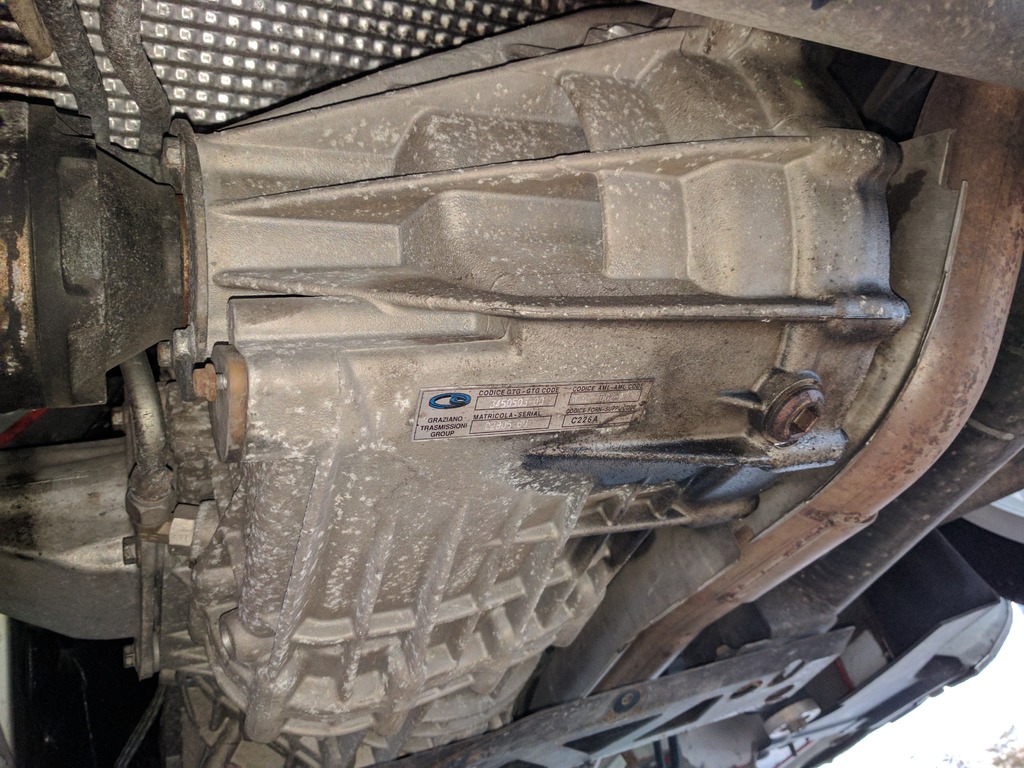
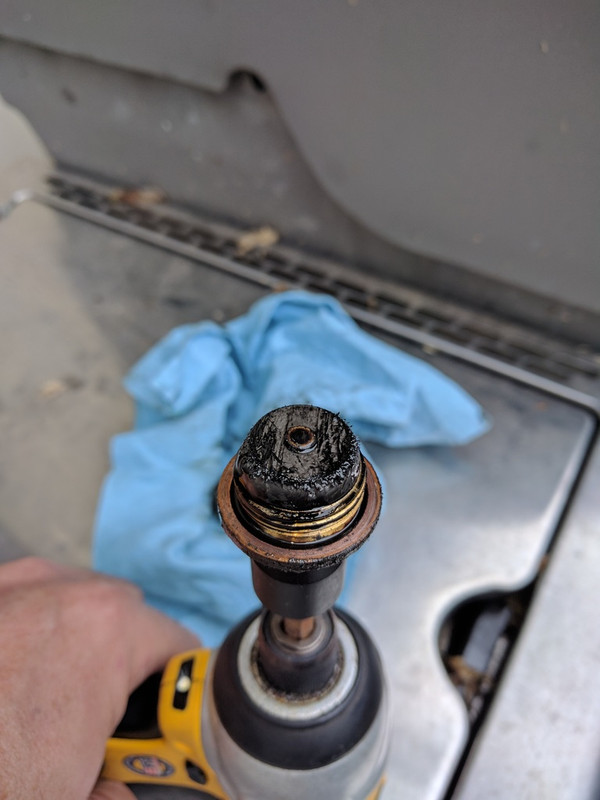
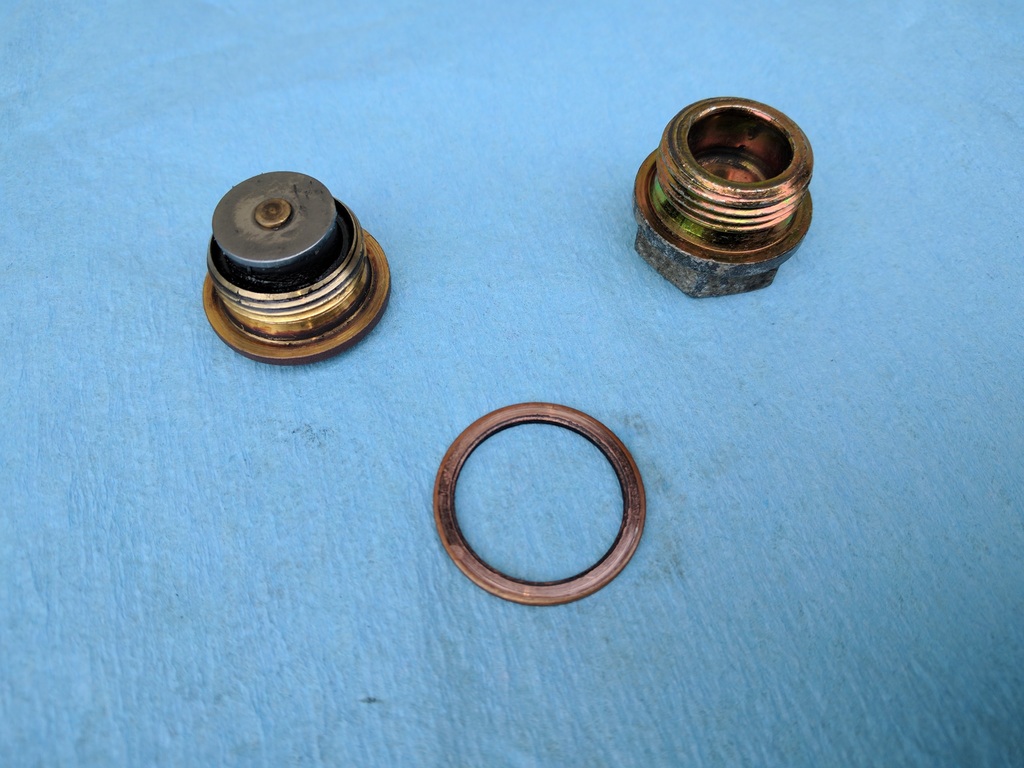
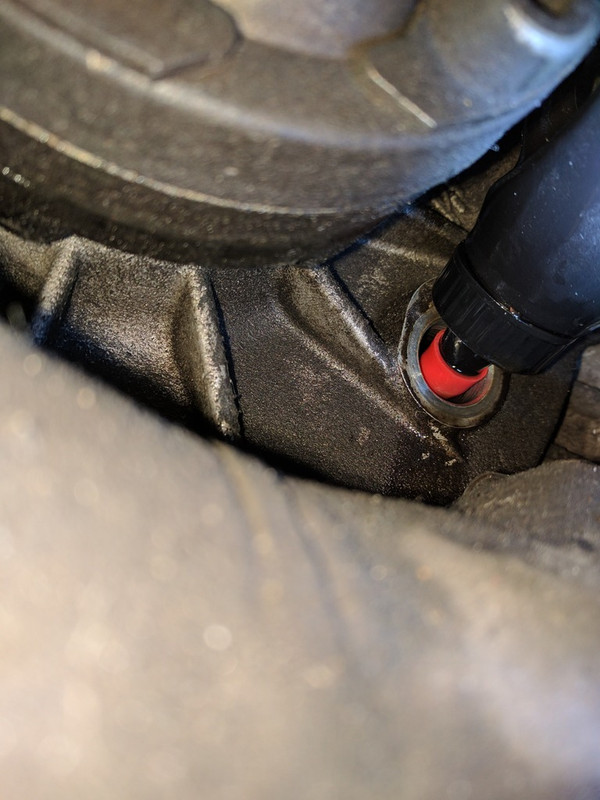
Here's the magnetic plug, once removed with a M14 Hex (correct me if I'm wrong on that size as memory is good, but short!). Not bad, I've seen a lot worse in my Porsche transaxles:
Clean up and replace the O-rings (I used the convenient kit Redpants supply's for a reasonable price):
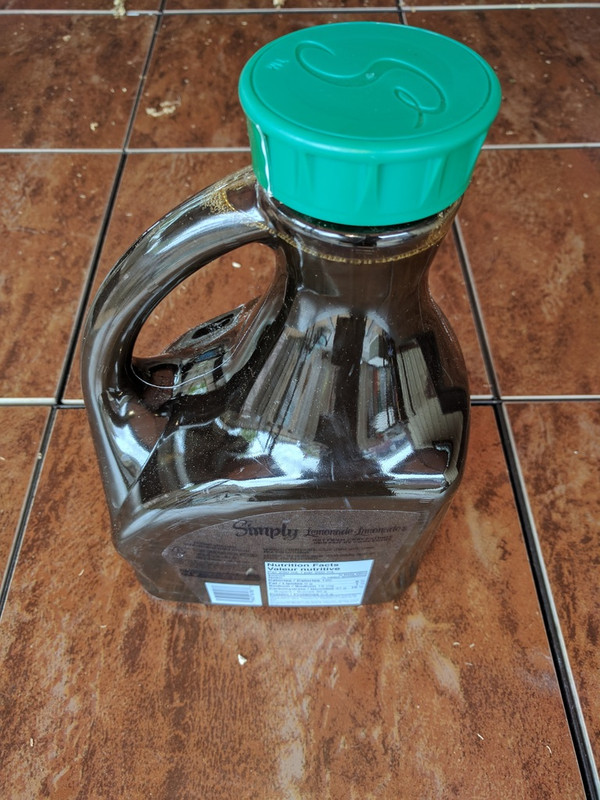
My new drain pan has a nice pour spout on it, so it was easy to measure how much oil came out by pouring into wide cap juice bottles:
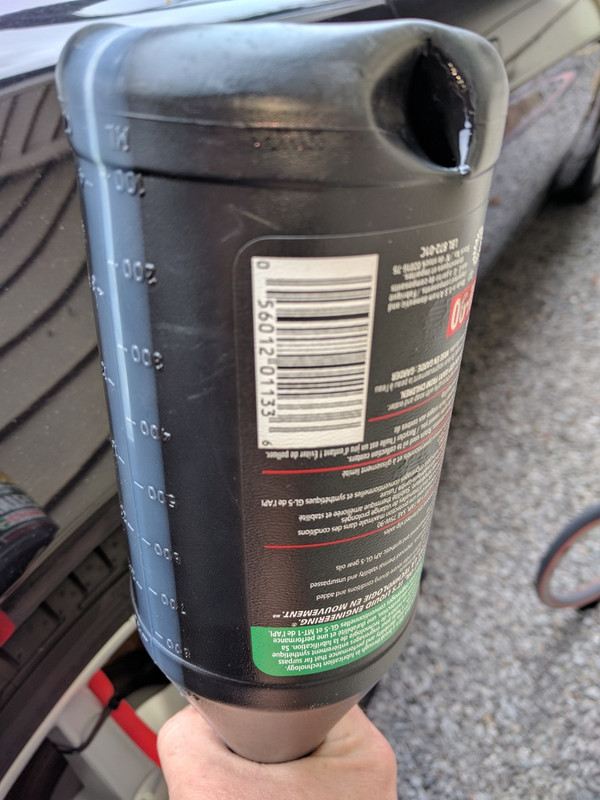
If you're going with the lazy method, snip a hole in the bottle to speed up gravity fill:
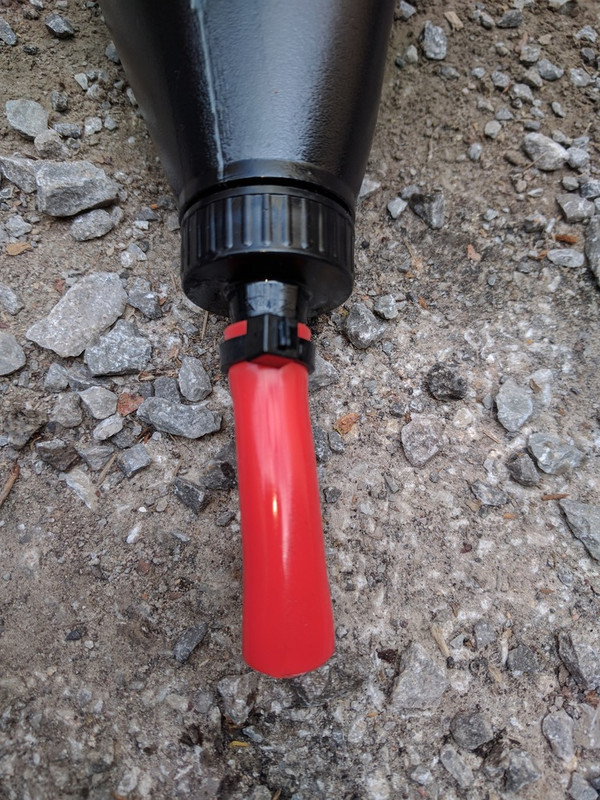
If you're going to squeeze the bottles in underneath, use a short piece of hose to make things easy it you are not using a bottle with a built-in extendable spout:
I used a block of 2x4 so I didn't have to stay under the car while each bottle was filling the transaxle:
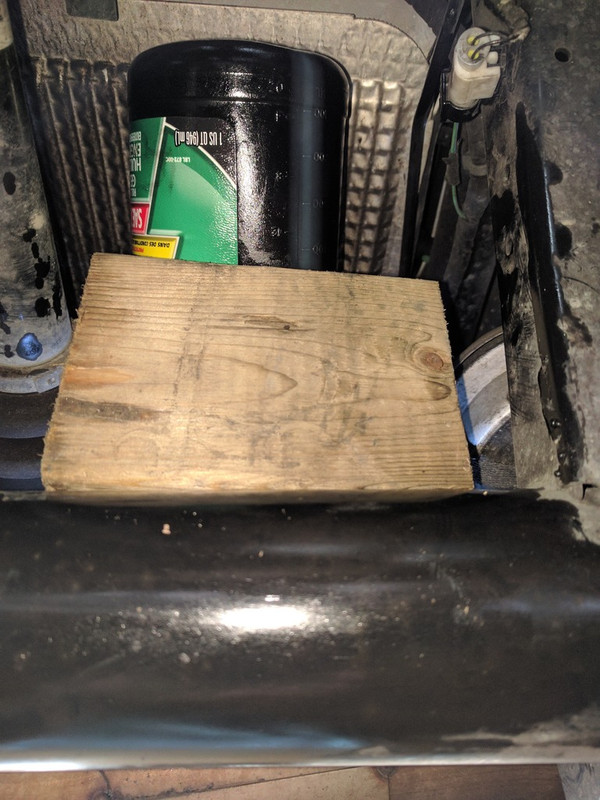
Because I had the rear of the car on car ramps (so I could crawl underneath) and the transaxle wasn't level, I put about 5- 1/2 bottles in then lowered the car to the ground so that the extra would drain to the perfect fill level:
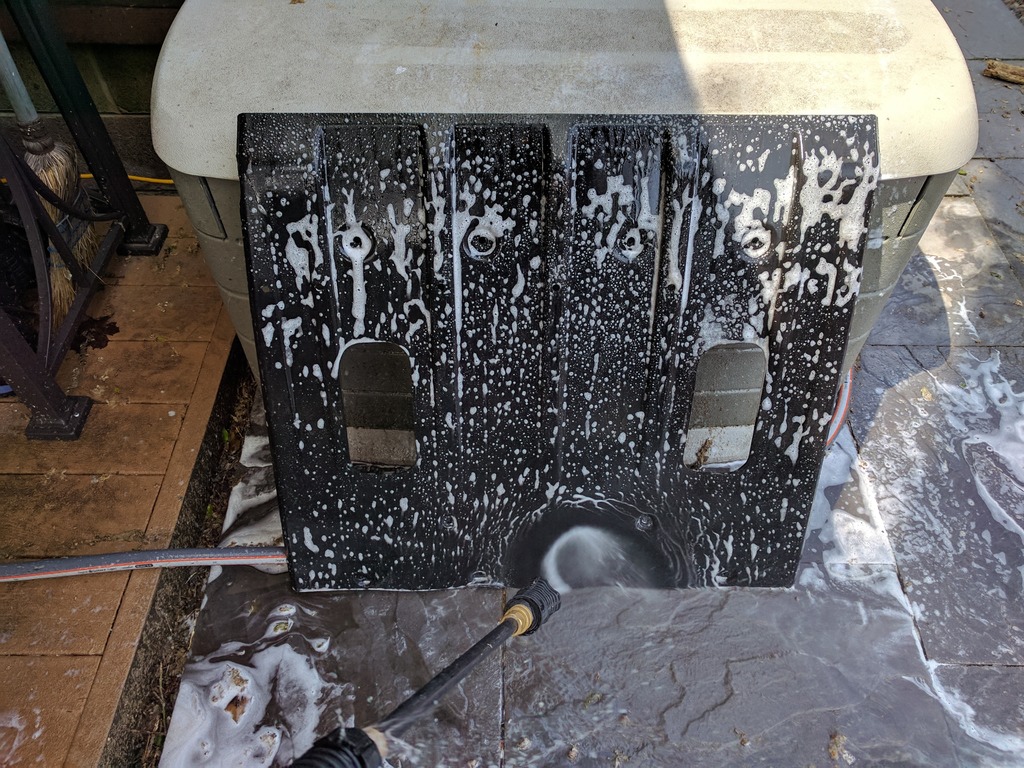
Time for more cleaning, I even metal polished the muffler lol (never done that before):
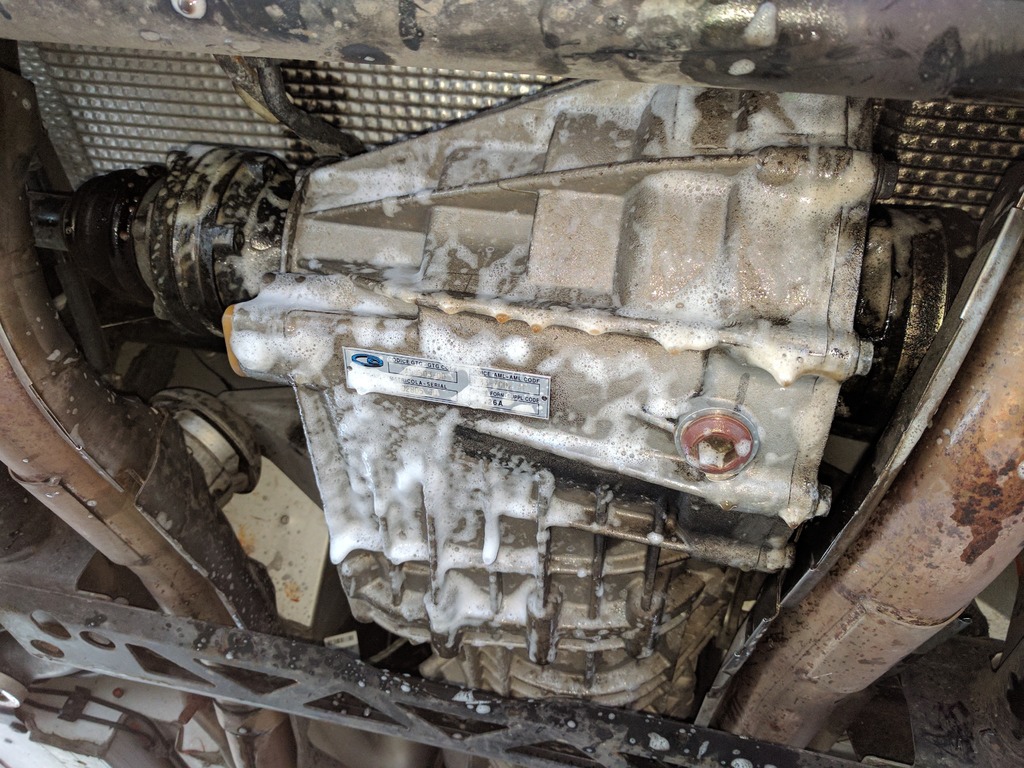
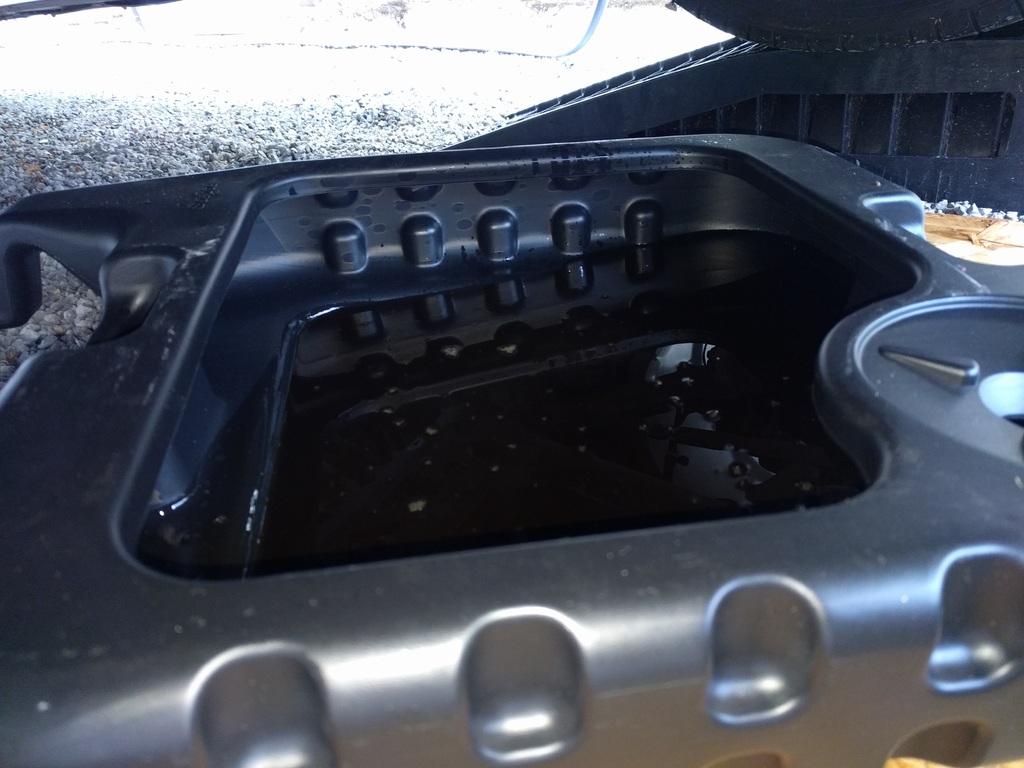
Well at least I know the transaxle is clean even though it's covered from view. The cover is extra shiny due to using tire shine on it, but I'm sure it won't look that way for long:
Job done after easing through all the gears and test drive to get fluid up to temp. Shifting wasn't bad before, but everything seems fine with the fluid I used in temps 50 degrees plus so far.
As previously mentioned, without great service history, I am assuming all fluids are due to be changed this year... so next up is the transaxle fluid.
First up remove more Torx bolts to gain access:
I wasn't impressed with how the filter cover was barely held in by one half unthreaded bolt:
Tools for the job:
I jacked up the front left of car to make the drain plug the lowest point of the transaxle and proceeded to gravity drain the unit:
If you prefer personal comfort over speed you can use this method to refill:
Just run a hose from the fill hole to a higher point outside the rear wheel and let gravity do it's thing while you have a beer:
4 Litres came out so either some still in the cooler or it was low on fluid - color wasn't so good:
On the other hand, after popping the filter out, there wasn't any metal or debris to be found so I cleaned it up:
Like the Oil scavenge filters, the O-ring provides the seal and the bolts just keep it seated, so just use a rubber mallet to reinstall it:
The only stainless machine screws I had handy to replace the original and missing one was a security Torx, so I left a key in the glovebox for now:
Here's the magnetic plug, once removed with a M14 Hex (correct me if I'm wrong on that size as memory is good, but short!). Not bad, I've seen a lot worse in my Porsche transaxles:
Clean up and replace the O-rings (I used the convenient kit Redpants supply's for a reasonable price):
My new drain pan has a nice pour spout on it, so it was easy to measure how much oil came out by pouring into wide cap juice bottles:
If you're going with the lazy method, snip a hole in the bottle to speed up gravity fill:
If you're going to squeeze the bottles in underneath, use a short piece of hose to make things easy it you are not using a bottle with a built-in extendable spout:
I used a block of 2x4 so I didn't have to stay under the car while each bottle was filling the transaxle:
Because I had the rear of the car on car ramps (so I could crawl underneath) and the transaxle wasn't level, I put about 5- 1/2 bottles in then lowered the car to the ground so that the extra would drain to the perfect fill level:
Time for more cleaning, I even metal polished the muffler lol (never done that before):
Well at least I know the transaxle is clean even though it's covered from view.
The cover is extra shiny due to using tire shine on it, but I'm sure it won't look that way for long:Job done after easing through all the gears and test drive to get fluid up to temp. Shifting wasn't bad before, but everything seems fine with the fluid I used in temps 50 degrees plus so far.
Last edited by 007V8Vantage; 04-13-2018 at 01:08 PM.
#187
06-07-2017, 08:52 AM
Yeah, I acknowledge I took a risk and wouldn't have heard the end of it if we broke down, but I got away with it.
As previously mentioned, without great service history, I am assuming all fluids are due to be changed this year... so next up is the transaxle fluid.
First up remove more Torx bolts to gain access:

I wasn't impressed with how the filter cover was barely held in by one half unthreaded bolt:

Tools for the job:

I jacked up the front left of car to make the drain plug the lowest point of the transaxle and proceeded to gravity drain the unit:

If you prefer personal comfort over speed you can use this method to refill:

Just run a hose from the fill hole to a higher point outside the rear wheel and let gravity do it's thing while you have a beer:


4 Litres came out so either some still in the cooler or it was low on fluid - color wasn't so good:

On the other hand, after popping the filter out, there wasn't any metal or debris to be found so I cleaned it up:


Like the Oil scavenge filters, the O-ring provides the seal and the bolts just keep it seated, so just use a rubber mallet to reinstall it:


The only stainless machine screws I had handy to replace the original and missing one was a security Torx, so I left a key in the glovebox for now:

Here's the magnetic plug, once removed with a M14 Hex (correct me if I'm wrong on that size as memory is good, but short!). Not bad, I've seen a lot worse in my Porsche transaxles:

Clean up and replace the O-rings (I used the convenient kit Redpants supply's for a reasonable price):

My new drain pan has a nice pour spout on it, so it was easy to measure how much oil came out by pouring into wide cap juice bottles:

If you're going with the lazy method, snip a hole in the bottle to speed up gravity fill:

If you're going to squeeze the bottles in underneath, use a short piece of hose to make things easy it you are not using a bottle with a built-in extendable spout:

I used a block of 2x4 so I didn't have to stay under the car while each bottle was filling the transaxle:

Because I had the rear of the car on car ramps (so I could crawl underneath) and the transaxle wasn't level, I put about 5- 1/2 bottles in then lowered the car to the ground so that the extra would drain to the perfect fill level:

Time for more cleaning, I even metal polished the muffler lol (never done that before):


Well at least I know the transaxle is clean even though it's covered from view. The cover is extra shiny due to using tire shine on it, but I'm sure it won't look that way for long:

Job done after easing through all the gears and test drive to get fluid up to temp. Shifting wasn't bad before, but everything seems fine with the fluid I used in temps 50 degrees plus so far.
As previously mentioned, without great service history, I am assuming all fluids are due to be changed this year... so next up is the transaxle fluid.
First up remove more Torx bolts to gain access:
I wasn't impressed with how the filter cover was barely held in by one half unthreaded bolt:
Tools for the job:
I jacked up the front left of car to make the drain plug the lowest point of the transaxle and proceeded to gravity drain the unit:
If you prefer personal comfort over speed you can use this method to refill:
Just run a hose from the fill hole to a higher point outside the rear wheel and let gravity do it's thing while you have a beer:
4 Litres came out so either some still in the cooler or it was low on fluid - color wasn't so good:
On the other hand, after popping the filter out, there wasn't any metal or debris to be found so I cleaned it up:
Like the Oil scavenge filters, the O-ring provides the seal and the bolts just keep it seated, so just use a rubber mallet to reinstall it:
The only stainless machine screws I had handy to replace the original and missing one was a security Torx, so I left a key in the glovebox for now:
Here's the magnetic plug, once removed with a M14 Hex (correct me if I'm wrong on that size as memory is good, but short!). Not bad, I've seen a lot worse in my Porsche transaxles:
Clean up and replace the O-rings (I used the convenient kit Redpants supply's for a reasonable price):
My new drain pan has a nice pour spout on it, so it was easy to measure how much oil came out by pouring into wide cap juice bottles:
If you're going with the lazy method, snip a hole in the bottle to speed up gravity fill:
If you're going to squeeze the bottles in underneath, use a short piece of hose to make things easy it you are not using a bottle with a built-in extendable spout:
I used a block of 2x4 so I didn't have to stay under the car while each bottle was filling the transaxle:
Because I had the rear of the car on car ramps (so I could crawl underneath) and the transaxle wasn't level, I put about 5- 1/2 bottles in then lowered the car to the ground so that the extra would drain to the perfect fill level:
Time for more cleaning, I even metal polished the muffler lol (never done that before):
Well at least I know the transaxle is clean even though it's covered from view.
The cover is extra shiny due to using tire shine on it, but I'm sure it won't look that way for long:Job done after easing through all the gears and test drive to get fluid up to temp. Shifting wasn't bad before, but everything seems fine with the fluid I used in temps 50 degrees plus so far.
Ron
#189
06-07-2017, 05:25 PM
I could have fixed his pebble in the rotor problem on all four wheels in the time it took to make his stupid dougie dip wad video !!!!
People like him should take the bus . and the dealership should have charged him a stupid fee on his invoice .
People like him should take the bus . and the dealership should have charged him a stupid fee on his invoice .
#190
06-07-2017, 05:32 PM
Registered User
Join Date: Jun 2016
Location: South Jersey
Age: 65
Posts: 1,495
Rep Power: 73
The real dip wad videos were the one where he used it as a snowplow, and the other where he parks it on an incline and then complains about the doors not staying open. Of course more about entertainment than stupidity, we were all happy when he sold it and moved onto making fun of whatever he's driving now.
As for the pebble, if I hadn't seen that stupid video then I wouldn't have a clue that if I ever heard that, it's just a pebble, call somebody with a screwdriver, not a tow truck
[maybe I should check under the parcel shelf where the tow hook is, isn't there a screwdriver in there?]
As for the pebble, if I hadn't seen that stupid video then I wouldn't have a clue that if I ever heard that, it's just a pebble, call somebody with a screwdriver, not a tow truck
[maybe I should check under the parcel shelf where the tow hook is, isn't there a screwdriver in there?]
#191
06-08-2017, 07:36 PM
Join Date: Apr 2017
Location: Niagara Region
Age: 52
Posts: 400
Rep Power: 28
Did some minor interior tweaks:
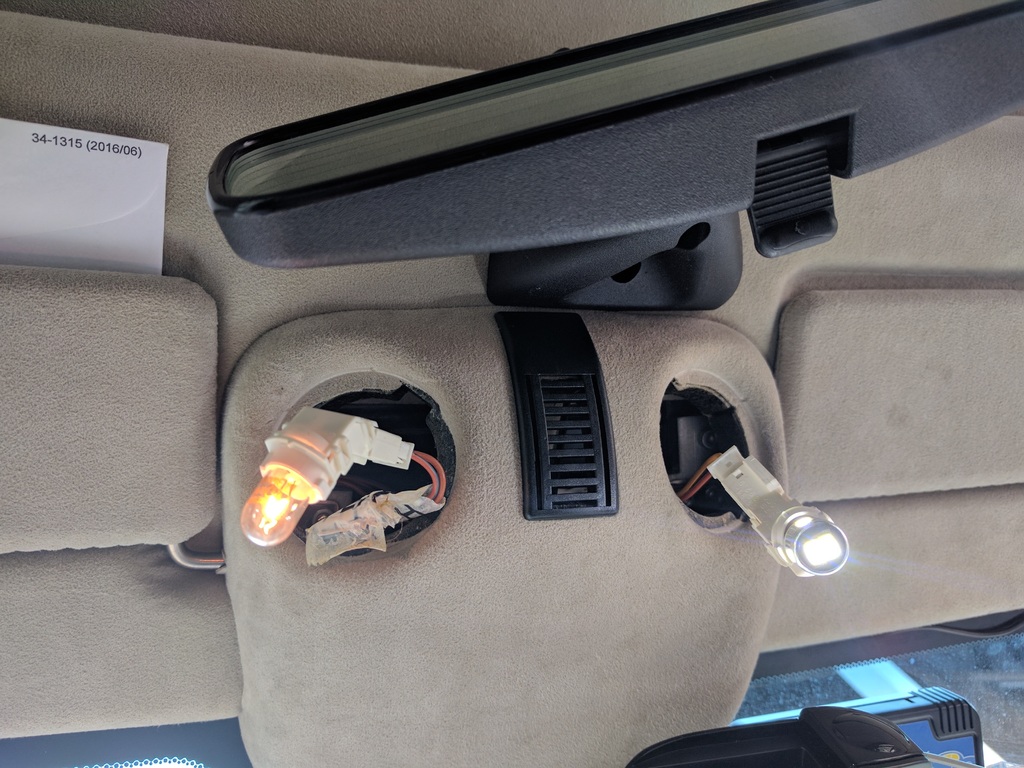
Swap map lights to LED - just a plug and play swap:
While the white looks more modern and is just personal taste, the real advantage is seen at night with the additional light they provide
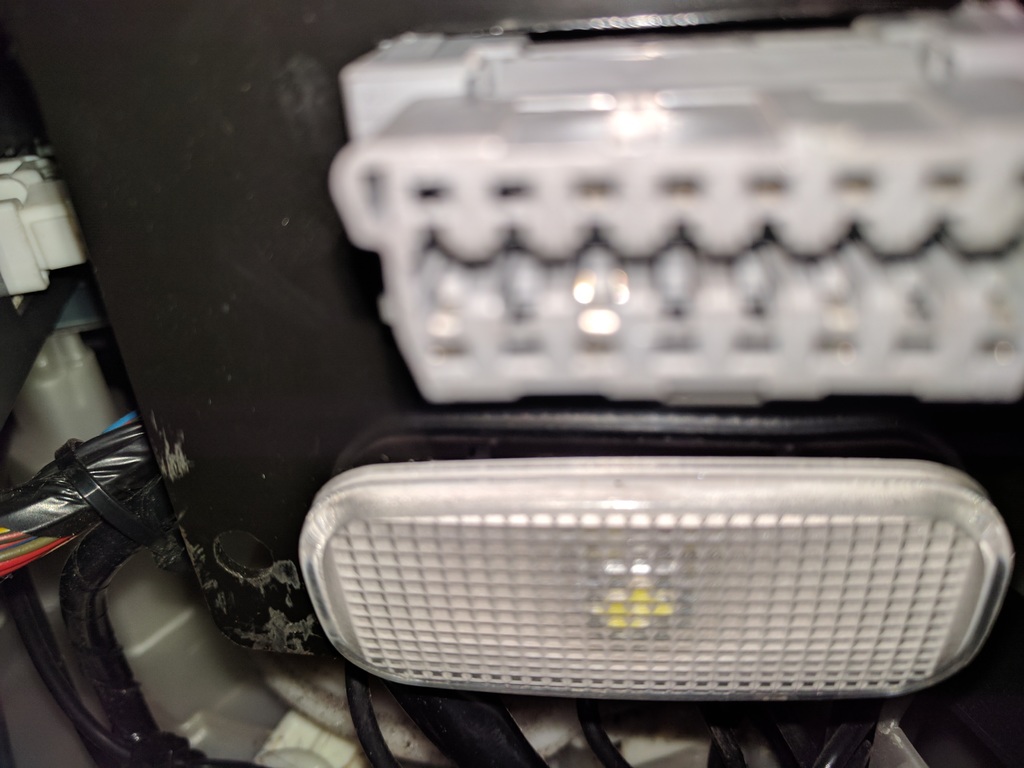
Unfortunately the luggage compartment bulbs are different so if anyone has a suggestion (from a good experience) on what to buy to swap these, let me know:
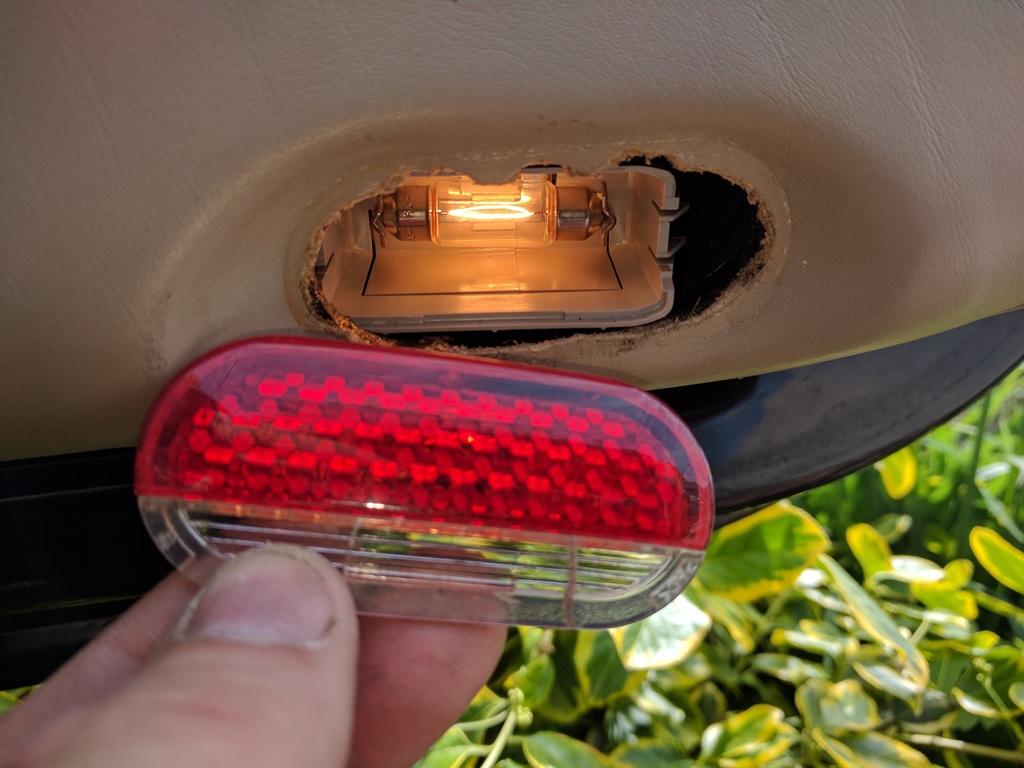
Likewise for the door lights:
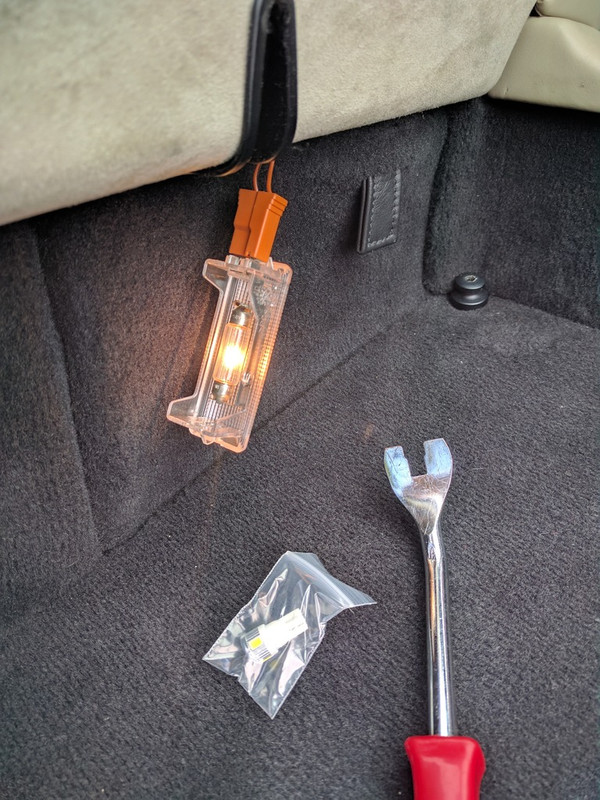
Next was the footwell lights - what a pain in the **** to access if you want to see what you're doing! Using my phone as a mirror was taking to long, so I bit the bullet and laid on my back in the footwells for the job. I'm not surprised Rich doesn't have a video on this job yet, so I snapped a few pictures to show you what the lights look like. It was only much later when I saw them at night did it seem like a worthwhile task - not so much at the time.
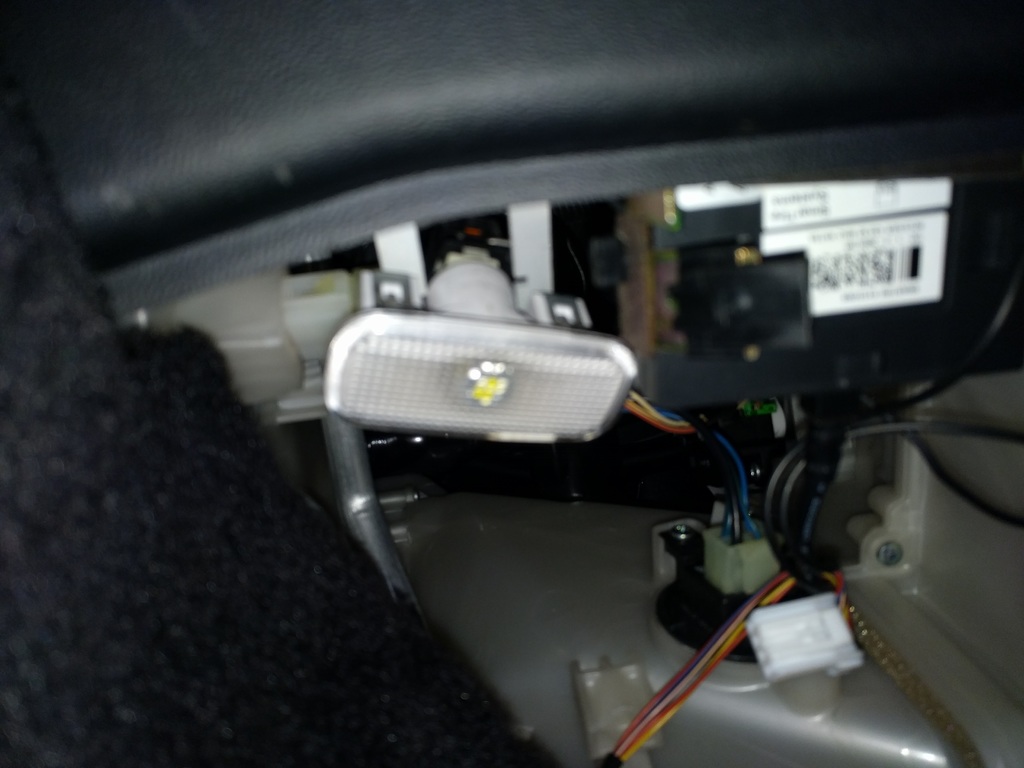
As you can see they are asymmetrical so the release tabs are on one side and only go back in one way:
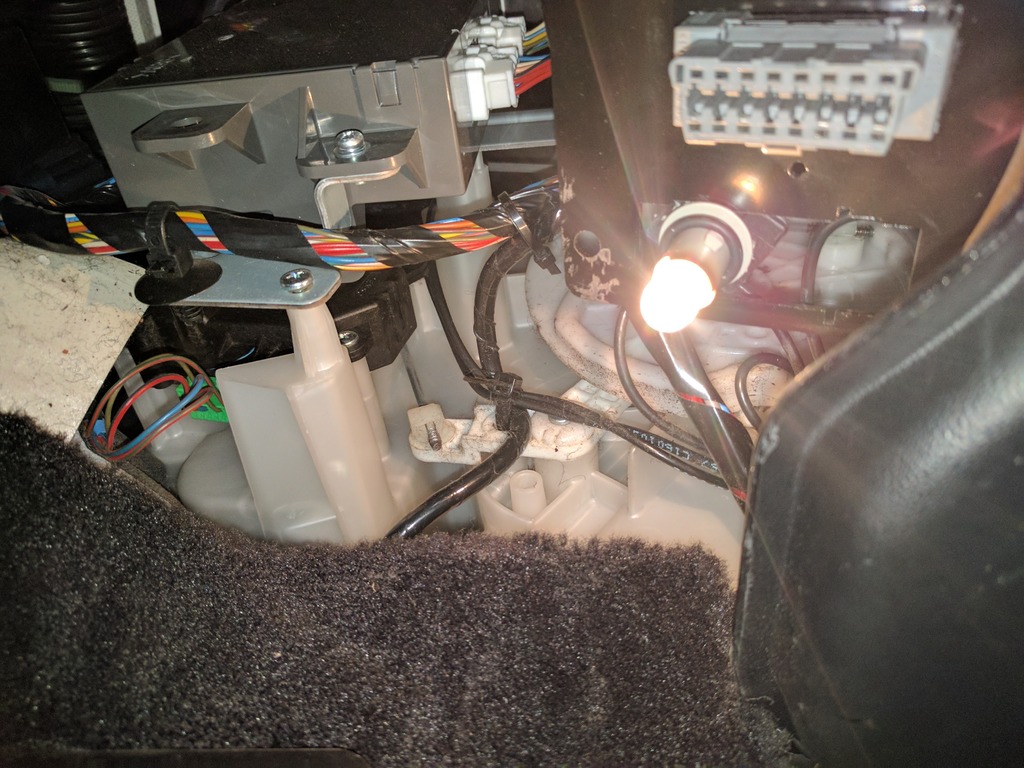
Good news is the second one takes half the time once you've figured out how to swap the first side...
Swap map lights to LED - just a plug and play swap:
While the white looks more modern and is just personal taste, the real advantage is seen at night with the additional light they provide
Unfortunately the luggage compartment bulbs are different so if anyone has a suggestion (from a good experience) on what to buy to swap these, let me know:
Likewise for the door lights:
Next was the footwell lights - what a pain in the **** to access if you want to see what you're doing! Using my phone as a mirror was taking to long, so I bit the bullet and laid on my back in the footwells for the job. I'm not surprised Rich doesn't have a video on this job yet, so I snapped a few pictures to show you what the lights look like. It was only much later when I saw them at night did it seem like a worthwhile task - not so much at the time.
As you can see they are asymmetrical so the release tabs are on one side and only go back in one way:
Good news is the second one takes half the time once you've figured out how to swap the first side...
Last edited by 007V8Vantage; 04-13-2018 at 04:09 PM.
#192
06-12-2017, 02:55 PM
Join Date: Apr 2017
Location: Niagara Region
Age: 52
Posts: 400
Rep Power: 28
Some more interior updates...
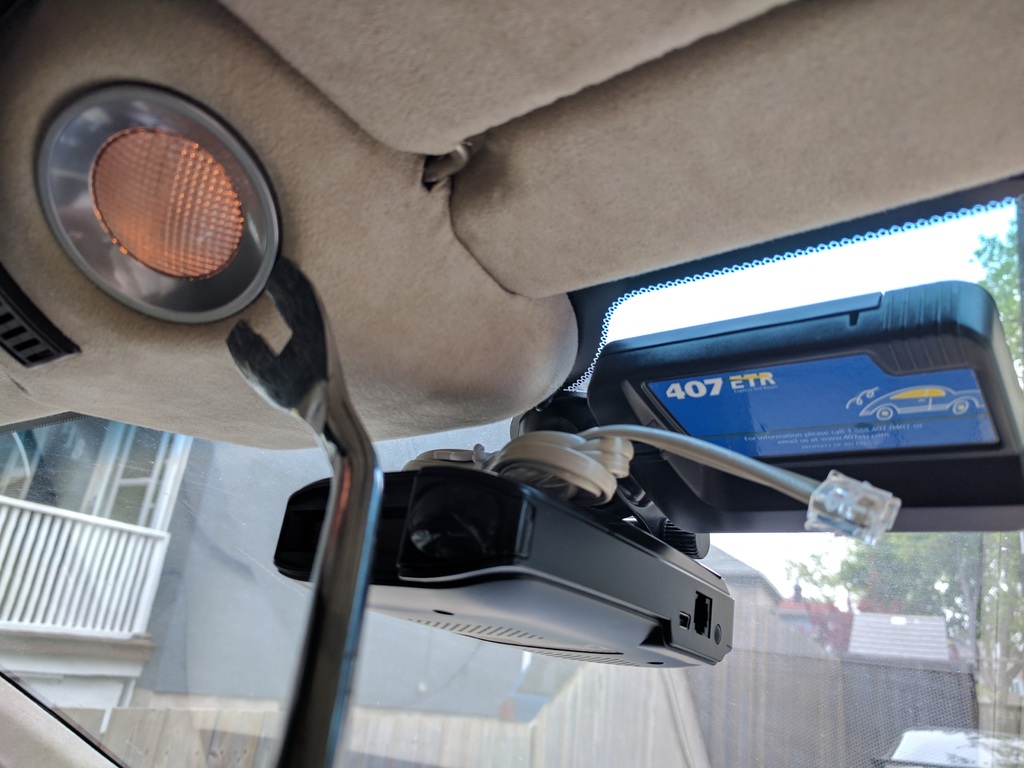
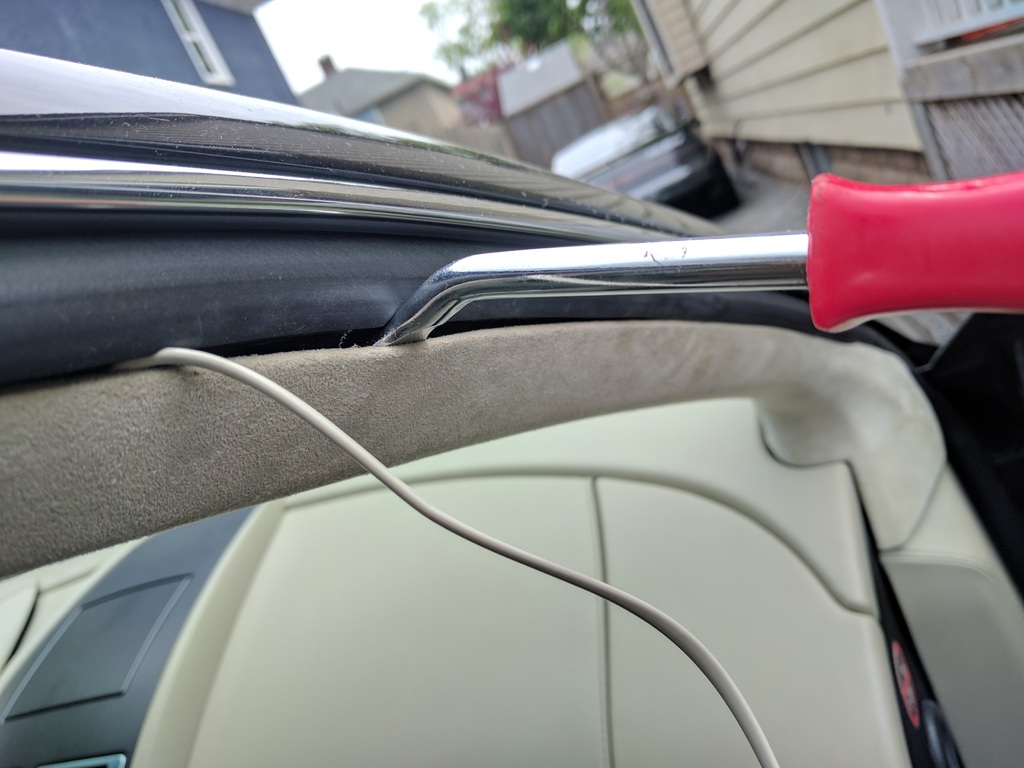
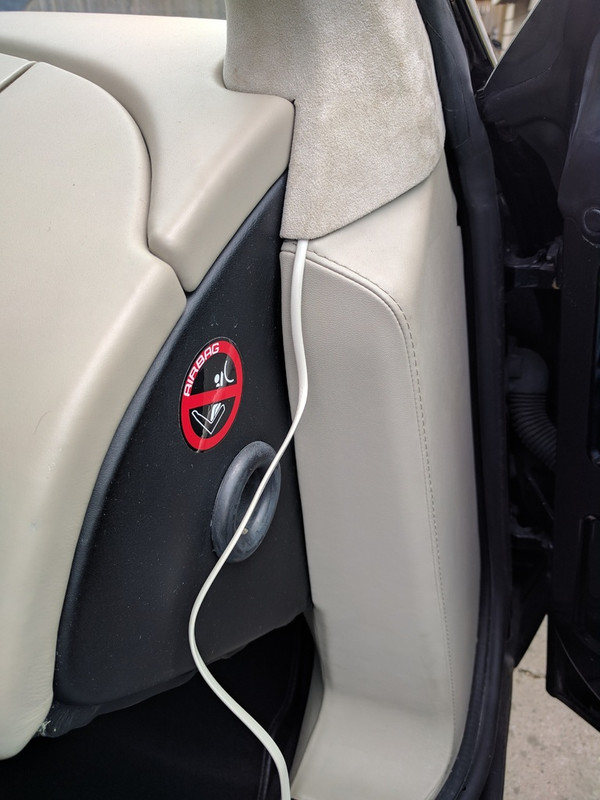
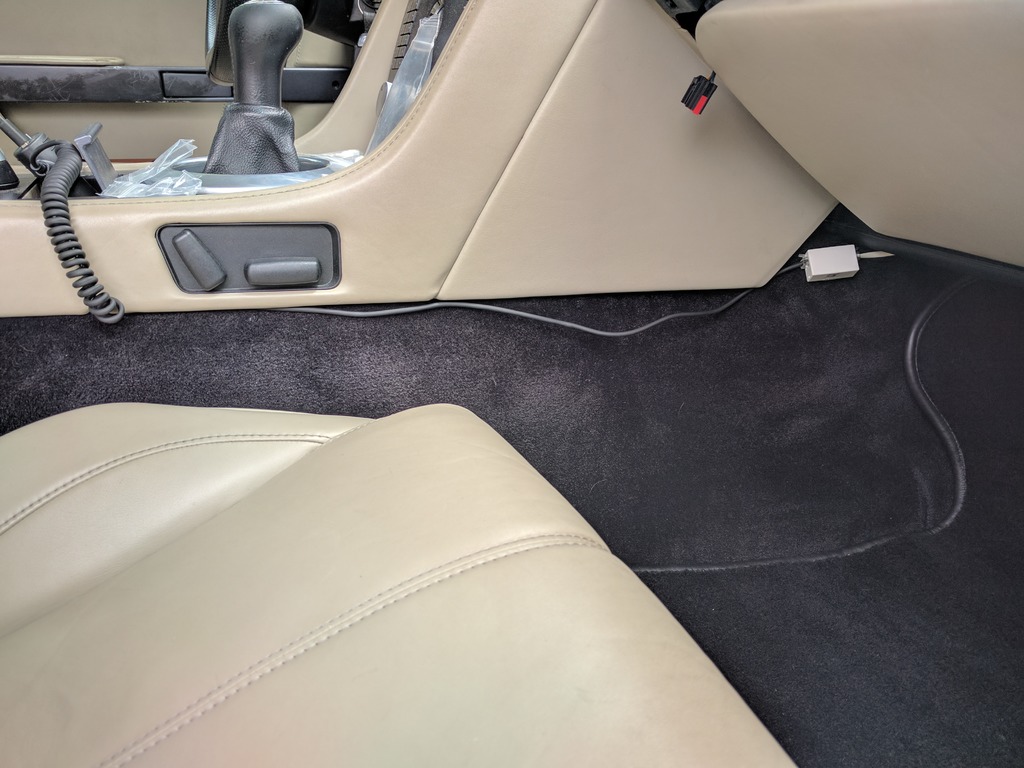
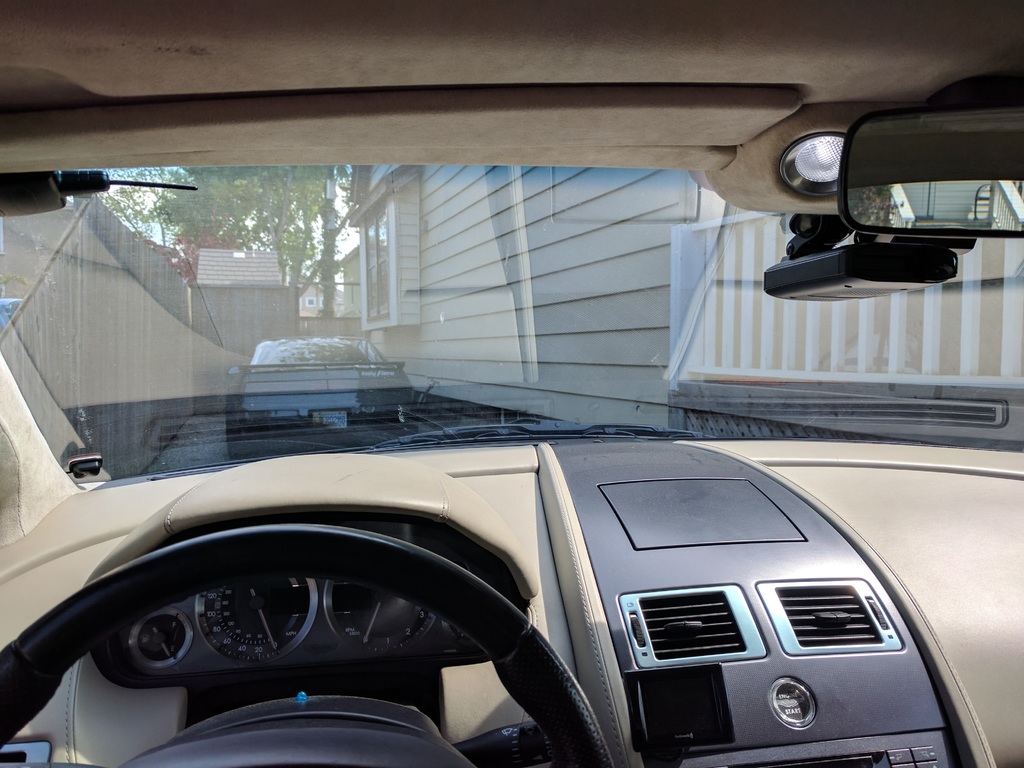
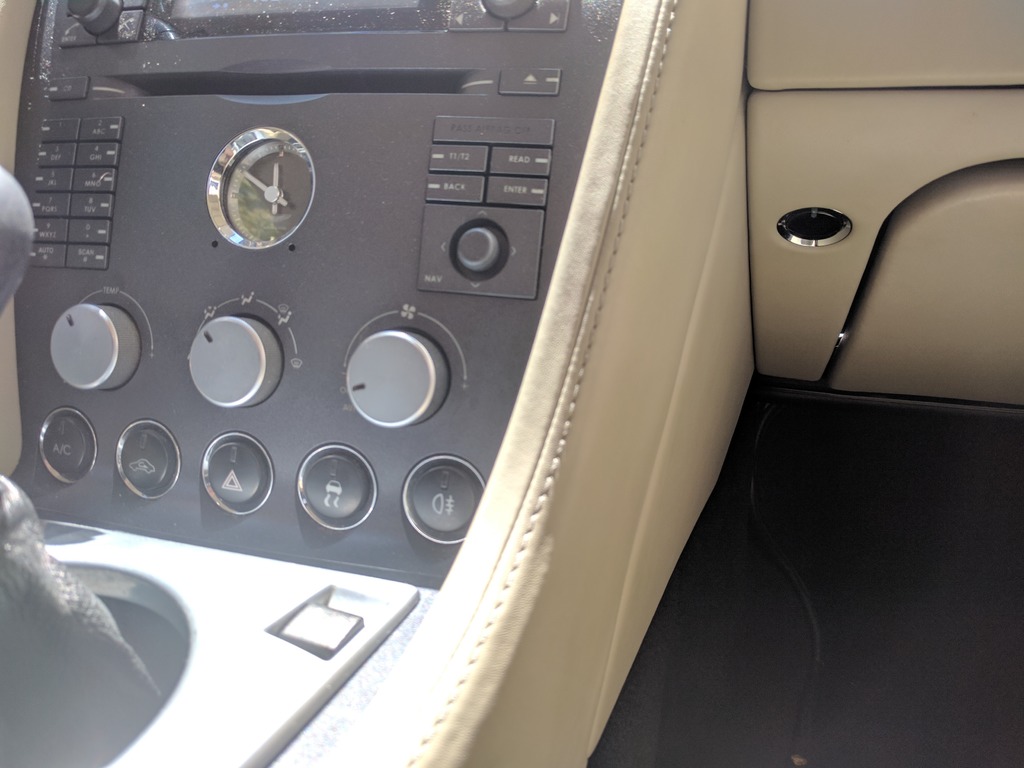
Installed and hid a wire to use as a power cable for windshield mounted devices:

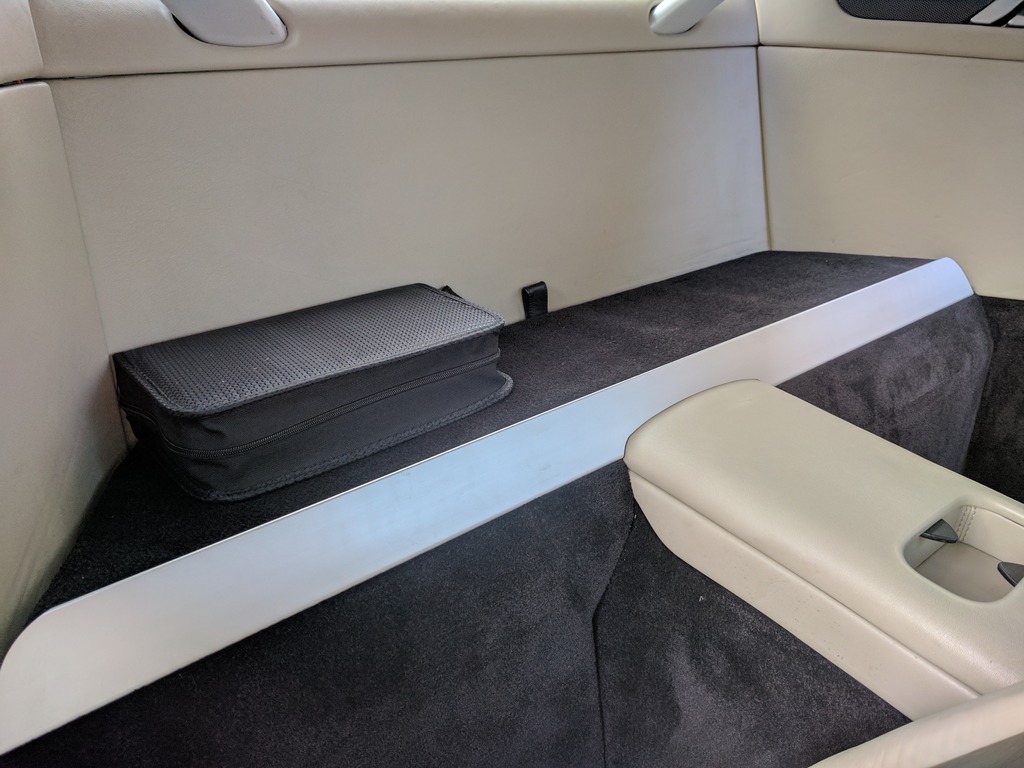
Detailing products and microfiber cloths are being stored in the trunk cubby:

Went through all my CD's and made a "Best of" case that will store nicely on the parcel shelf:
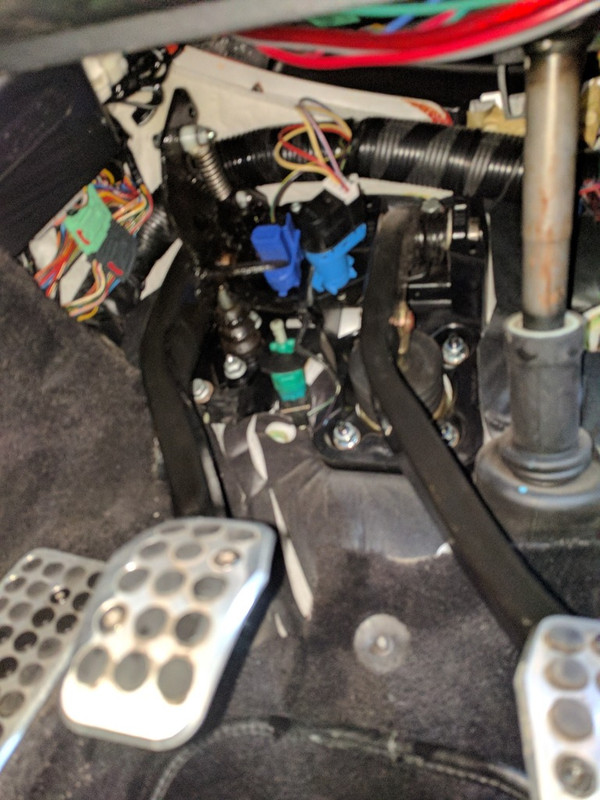
Cleaned and lubricated my clutch pedal as it was starting to squeak and would only get worse and annoying left unattended:
During our roadtrip, one of my rules that was respected was "no feet on the dash"
While it was respected, there was some leg crossing that kept resulting in accidental opening of the glove box. My solution was to swap out the round plastic button with a glass recessed one from Redpants. While not a cheap solution, it did solve the problem and no feelings were hurt in the process
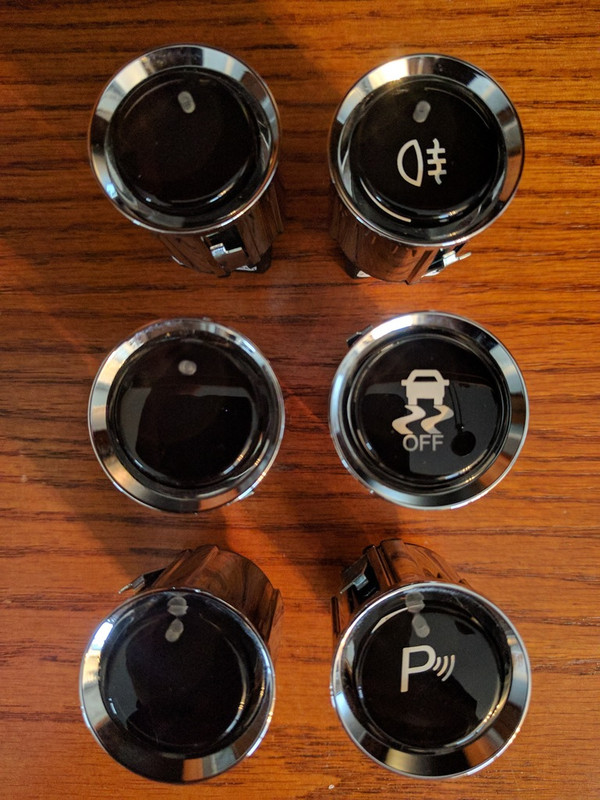
I decided not to use the other two blank switches as seatback releases. They are out of view and generally you are reaching for them blindly.
Therefore the unrecessed button is easier to feel for and press. Stay tuned as I have other plans for those glass buttons later on:
Installed and hid a wire to use as a power cable for windshield mounted devices:
Detailing products and microfiber cloths are being stored in the trunk cubby:
Went through all my CD's and made a "Best of" case that will store nicely on the parcel shelf:
Cleaned and lubricated my clutch pedal as it was starting to squeak and would only get worse and annoying left unattended:
During our roadtrip, one of my rules that was respected was "no feet on the dash"
While it was respected, there was some leg crossing that kept resulting in accidental opening of the glove box. My solution was to swap out the round plastic button with a glass recessed one from Redpants. While not a cheap solution, it did solve the problem and no feelings were hurt in the process
I decided not to use the other two blank switches as seatback releases. They are out of view and generally you are reaching for them blindly.
Therefore the unrecessed button is easier to feel for and press. Stay tuned as I have other plans for those glass buttons later on:
Last edited by 007V8Vantage; 04-13-2018 at 04:11 PM.
#193
06-12-2017, 03:18 PM
Join Date: Apr 2017
Location: Niagara Region
Age: 52
Posts: 400
Rep Power: 28
Also had a few spots were the carpet in the trunk was pulling out from the hatch seal due to faulty glue. I had seen this on several cars during the shopping process. I used a 3M spray adhesive to solve this issue. The trick is to allow the spray to get tacky a minute or two prior to reattaching in position. Then reattach the rubber seal over the carpet edge and if necessary use tape to temp hold it in position until the glue drys:
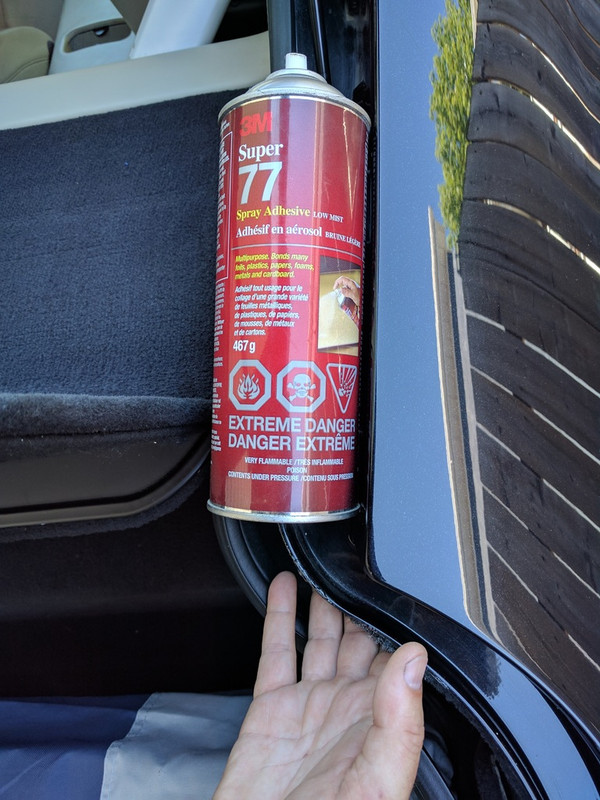
I'm assuming there are others with this issue so just posting what worked for me
I'm assuming there are others with this issue so just posting what worked for me
Last edited by 007V8Vantage; 04-13-2018 at 04:12 PM.
#194
06-13-2017, 08:26 PM
Join Date: Apr 2017
Location: Niagara Region
Age: 52
Posts: 400
Rep Power: 28
Easiest to do this with a full tank as it's easiest to recreate that situation accurately for future reference retests:
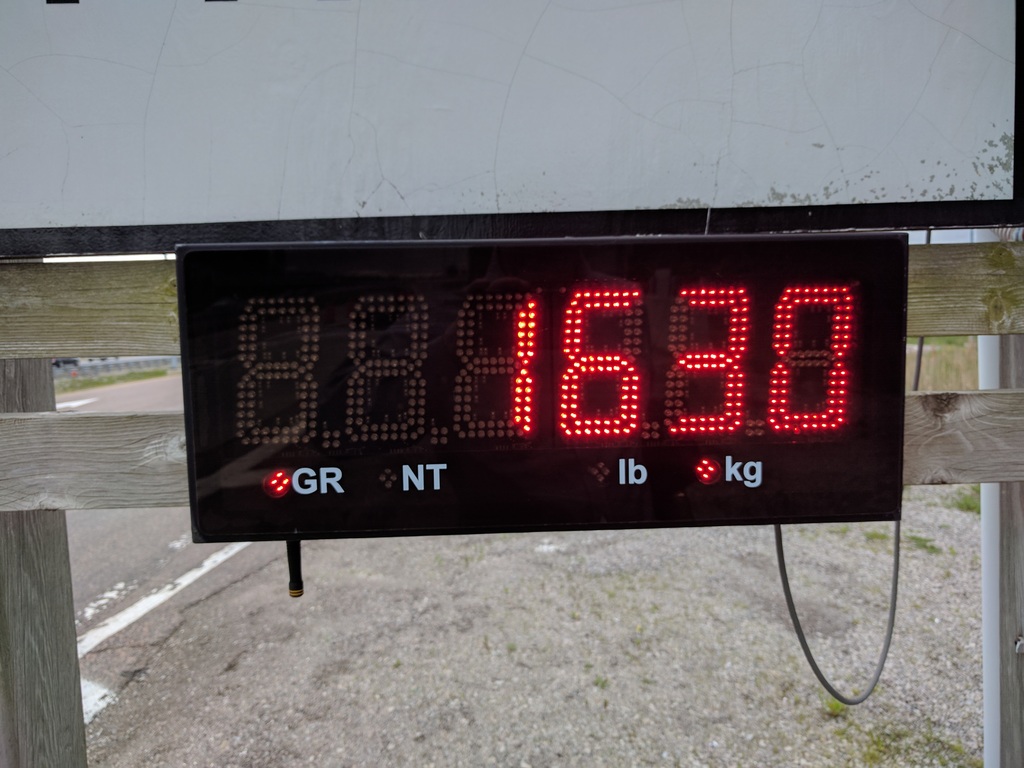
For comparision sake on the same scale with full tanks of fuel, my 2013 Subaru BRZ SportTech was 1220 and my 1984 Pontiac Fiero with V8 engine and 12inch wheelbase stretch was 1430.
Unfortunately those numbers are in kilograms not pounds
Therefore my Vantage at 1630 kg converts to 3594 pounds.
Since the scale goes in 10 kg increments, it's accurate within 22.05 pounds
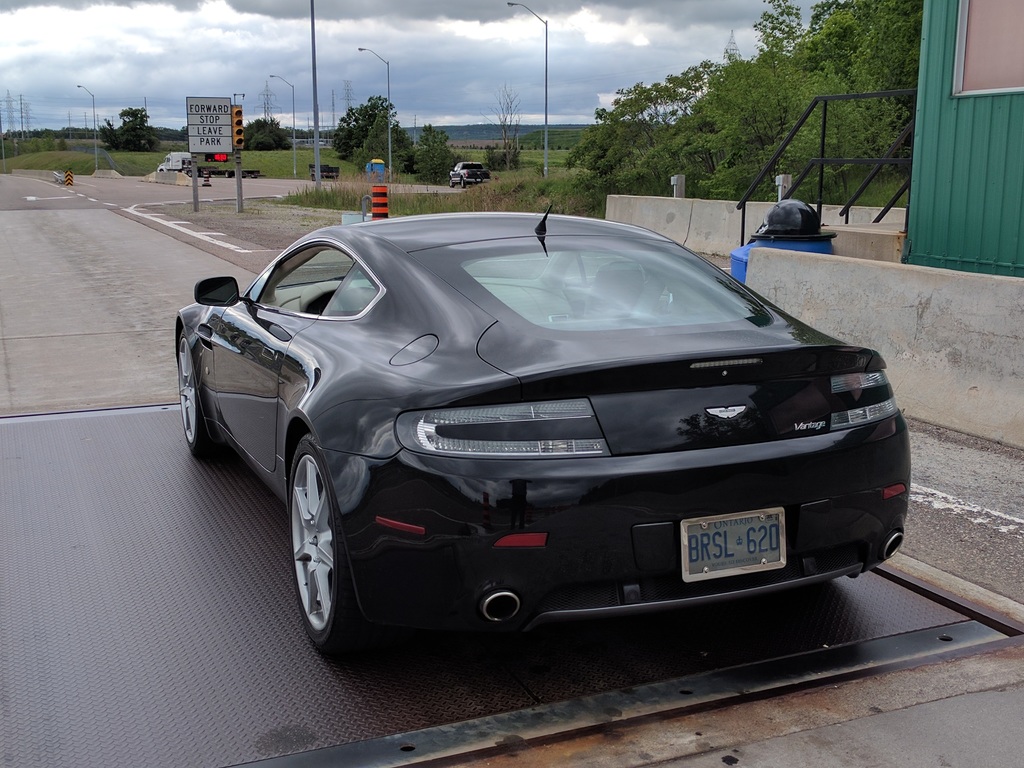
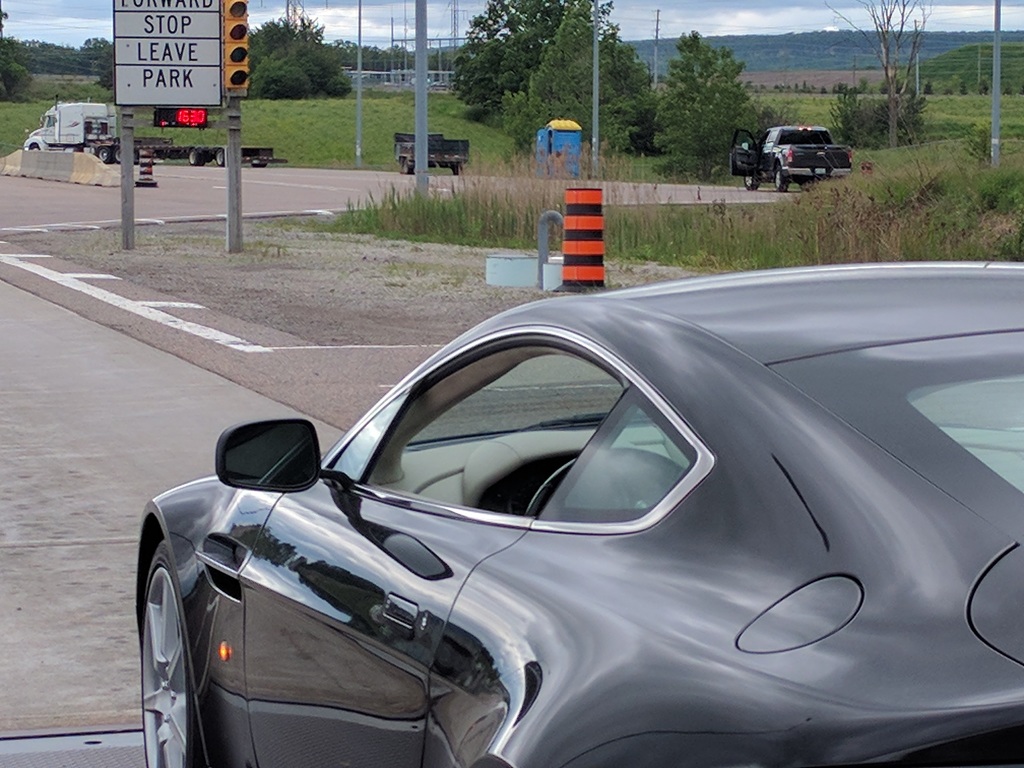
FYI for Ontario residents pull off highway at any Truck inspection station after hours for a free weigh-in as they always leave the scales turned on...
Cheers, Ryan
For comparision sake on the same scale with full tanks of fuel, my 2013 Subaru BRZ SportTech was 1220 and my 1984 Pontiac Fiero with V8 engine and 12inch wheelbase stretch was 1430.
Unfortunately those numbers are in kilograms not pounds
Therefore my Vantage at 1630 kg converts to 3594 pounds.
Since the scale goes in 10 kg increments, it's accurate within 22.05 pounds
FYI for Ontario residents pull off highway at any Truck inspection station after hours for a free weigh-in as they always leave the scales turned on...
Cheers, Ryan
Last edited by 007V8Vantage; 04-13-2018 at 04:13 PM.
#195
06-13-2017, 08:40 PM
Join Date: Apr 2017
Location: Niagara Region
Age: 52
Posts: 400
Rep Power: 28
Made it out to first cruise night of the season...
Now the the car is presentable and the weather has improved
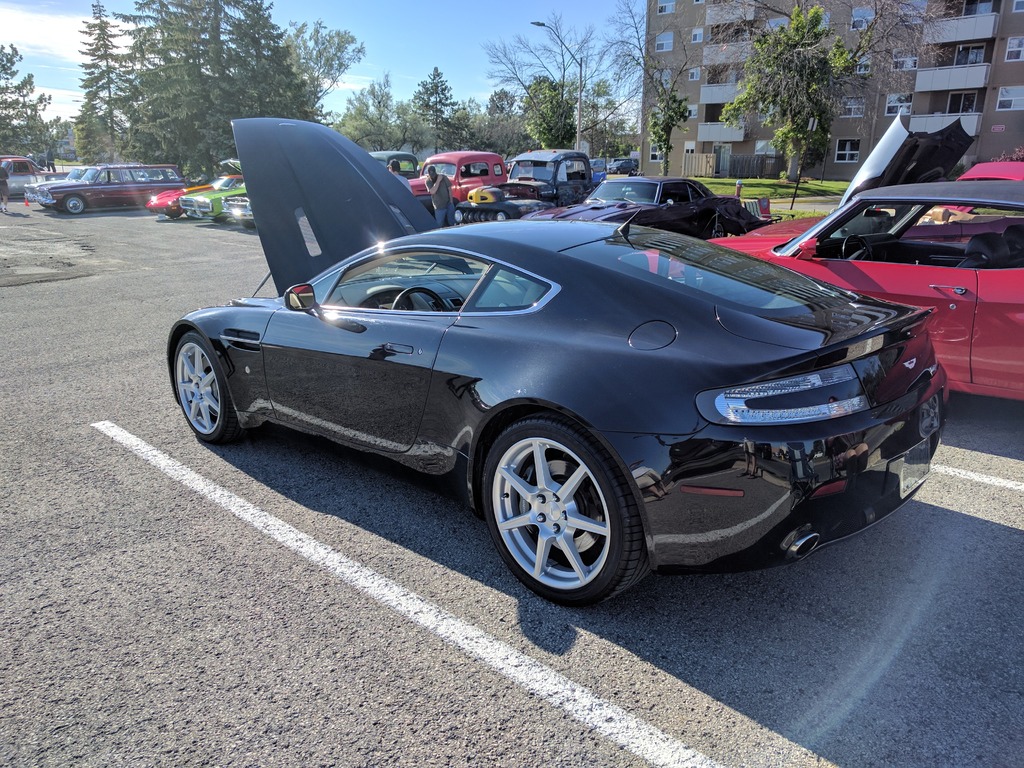
Lots of people asking if it's new which reassures me that it's looking good
Lots of people asking if it's new which reassures me that it's looking good
Last edited by 007V8Vantage; 04-13-2018 at 04:14 PM.