Bentley From the original 3 Litre to the current Continental GT and Mulsanne

Pulled my Engine

Thread Tools
 
Search this Thread
 
Rate Thread
 
  #31  
Old 02-05-2017, 04:10 PM
Zaos's Avatar
Registered User
Thread Starter
Join Date: Nov 2014
Location: Belford, NJ
Posts: 192
Rep Power: 40
Zaos has a reputation beyond reputeZaos has a reputation beyond reputeZaos has a reputation beyond reputeZaos has a reputation beyond reputeZaos has a reputation beyond reputeZaos has a reputation beyond reputeZaos has a reputation beyond reputeZaos has a reputation beyond reputeZaos has a reputation beyond reputeZaos has a reputation beyond reputeZaos has a reputation beyond repute
Next, I will replace the O2 sensors. Figured, Its easy enough and not too expensive.


I picked these Walker direct replacement sensors instead of the Bentley ones, saving over $500
 
  #32  
Old 02-05-2017, 05:42 PM
Rons GT Speed's Avatar
Registered User
Join Date: Jun 2016
Location: Santa Rosa Claifornia
Age: 84
Posts: 134
Rep Power: 13
Rons GT Speed will become famous soon enough
Originally Posted by Zaos
Had a look today on the vacuum lines on top of the transmission and they were all cracked:

Hello Zaos. I am very disappointed seeing the poor quality of vac hoses used. It is too bad that they did not install stainless. It almost is as if the factory engineers built in a time/mileage failure. Do think that possibly your failure could be the Nevada cold temp and snow? What year is your GT and mileage? Are you changing the starter? Its a long way back. Great pictures. I will continue following your venture.

Thanks for sharing Ron
 
  #33  
Old 02-06-2017, 09:18 AM
Zaos's Avatar
Registered User
Thread Starter
Join Date: Nov 2014
Location: Belford, NJ
Posts: 192
Rep Power: 40
Zaos has a reputation beyond reputeZaos has a reputation beyond reputeZaos has a reputation beyond reputeZaos has a reputation beyond reputeZaos has a reputation beyond reputeZaos has a reputation beyond reputeZaos has a reputation beyond reputeZaos has a reputation beyond reputeZaos has a reputation beyond reputeZaos has a reputation beyond reputeZaos has a reputation beyond repute
Looks like the cause of the splitting hoses is because the Tee connection they are attached to. This Hex Nut looking tee is a very large piece of metal, which easily absorbs heat and expand a lot due to its size, then contracts when it is cold. I saw the splitting hose problem at both locations where this tee connection is used, on top of the transmission and behind the steering rack. I did not find any other places with cracked plastic hoses.
 

Last edited by Zaos; 02-06-2017 at 09:28 AM.
  #34  
Old 02-06-2017, 09:25 AM
Zaos's Avatar
Registered User
Thread Starter
Join Date: Nov 2014
Location: Belford, NJ
Posts: 192
Rep Power: 40
Zaos has a reputation beyond reputeZaos has a reputation beyond reputeZaos has a reputation beyond reputeZaos has a reputation beyond reputeZaos has a reputation beyond reputeZaos has a reputation beyond reputeZaos has a reputation beyond reputeZaos has a reputation beyond reputeZaos has a reputation beyond reputeZaos has a reputation beyond reputeZaos has a reputation beyond repute
My car is an 05 model with circa 50K on it. Not a lot, but I am usually driving it everyday. While I am having my engine out, I opted to change the following:

Spark Plugs
Serpentine Belt
O2 Sensors

I decided not to change the starter. I know a few people have had a problem with it, but it isn't that bad reputation type of part and should be good for a lot longer. The starter reliability issue would be in the same class type as the water pump and many other parts.
 
  #35  
Old 02-06-2017, 09:35 AM
stevenrmusic's Avatar
Registered User
Join Date: Apr 2010
Location: Worldwide
Posts: 2,731
Rep Power: 145
stevenrmusic has a reputation beyond reputestevenrmusic has a reputation beyond reputestevenrmusic has a reputation beyond reputestevenrmusic has a reputation beyond reputestevenrmusic has a reputation beyond reputestevenrmusic has a reputation beyond reputestevenrmusic has a reputation beyond reputestevenrmusic has a reputation beyond reputestevenrmusic has a reputation beyond reputestevenrmusic has a reputation beyond reputestevenrmusic has a reputation beyond repute
Good points about the starter and water pump. In the Ferrari we always R/R'ed the water pump yet haven't heard issues with that in the Bentley. As for the starter, i'd R/R it while you're in there since you got a 2005 yet that's your call of course.

Great work you're doing, very impressive!
 

Last edited by stevenrmusic; 02-06-2017 at 09:58 AM.
  #36  
Old 02-06-2017, 11:30 AM
jim2331's Avatar
Registered User
Join Date: Jan 2017
Location: san francisco
Age: 79
Posts: 431
Rep Power: 0
jim2331 can only hope to improve
....You'r probably spot on as to cause of splitting. Do you have any idea as type metal the T-Block is, looks like acting as heat sink. I am not metallurgist but I know one. It would be interesting to know if either design or composition of T-Block is changed in recent years...again excellent pictures...I'm real old school...how is motor attached in place of the old rubber motor mounts...at how many points attached...are there any guide pins for reinstall...JimB
 
  #37  
Old 02-06-2017, 02:00 PM
Zaos's Avatar
Registered User
Thread Starter
Join Date: Nov 2014
Location: Belford, NJ
Posts: 192
Rep Power: 40
Zaos has a reputation beyond reputeZaos has a reputation beyond reputeZaos has a reputation beyond reputeZaos has a reputation beyond reputeZaos has a reputation beyond reputeZaos has a reputation beyond reputeZaos has a reputation beyond reputeZaos has a reputation beyond reputeZaos has a reputation beyond reputeZaos has a reputation beyond reputeZaos has a reputation beyond repute
Not sure what metal

Engine mounts are clearly visible in several of the pictures. The engine bolts in to the chassis bottom up using 22mm bolts. There are 4 main mounting points (no guidance posts), you can see them in the pictures being shiny metal surfaces with no dirt on them.
 
  #38  
Old 02-07-2017, 12:52 AM
Rons GT Speed's Avatar
Registered User
Join Date: Jun 2016
Location: Santa Rosa Claifornia
Age: 84
Posts: 134
Rep Power: 13
Rons GT Speed will become famous soon enough
Originally Posted by Zaos
Looks like the cause of the splitting hoses is because the Tee connection they are attached to. This Hex Nut looking tee is a very large piece of metal, which easily absorbs heat and expand a lot due to its size, then contracts when it is cold. I saw the splitting hose problem at both locations where this tee connection is used, on top of the transmission and behind the steering rack. I did not find any other places with cracked plastic hoses.
I notice the vacuum hoses are not clamped. I think just push-on was a factory mistake. Possibly a clamp would have stopped the splitting. I would guess the hoses are brittle because of heat from the transmission.
Thanks Ron
 
  #39  
Old 02-07-2017, 01:10 AM
ExSF's Avatar
Registered User
Join Date: Sep 2013
Location: Europe
Posts: 646
Rep Power: 41
ExSF is a name known to allExSF is a name known to allExSF is a name known to allExSF is a name known to allExSF is a name known to allExSF is a name known to all
I noticed the Audi/VW logo on some of the parts close to the split hoses. I wonder if the Audi or W12 Phaeton have the same hose problems.
 
  #40  
Old 02-09-2017, 02:48 PM
jim2331's Avatar
Registered User
Join Date: Jan 2017
Location: san francisco
Age: 79
Posts: 431
Rep Power: 0
jim2331 can only hope to improve
....are the various vacuum circuits separate as against being all tied in to one major system...what are the major systems that are controlled by vacuum...what were the symptoms that were so bad that you knew leaks had to be fixed...we are all looking forward to more pictures on the re-install, the pictures are great...
 
  #41  
Old 02-09-2017, 03:04 PM
Zaos's Avatar
Registered User
Thread Starter
Join Date: Nov 2014
Location: Belford, NJ
Posts: 192
Rep Power: 40
Zaos has a reputation beyond reputeZaos has a reputation beyond reputeZaos has a reputation beyond reputeZaos has a reputation beyond reputeZaos has a reputation beyond reputeZaos has a reputation beyond reputeZaos has a reputation beyond reputeZaos has a reputation beyond reputeZaos has a reputation beyond reputeZaos has a reputation beyond reputeZaos has a reputation beyond repute
Jim,
Vacuum is created by the engine intake sucking in air, not from various sources. Hope this helps.

In my case I had a plethora of errors in my VAG and an engine, which could stall if I let the gas up too quickly.

Sunday,22,January,2017,14:12:31:40483
VCDS -- Windows Based VAG/VAS Emulator Running on Windows 10 x64
VCDS Version: 16.8.4.2 (x64)
Data version: 20161129 DS267.0
www.Ross-Tech.com


--------------------------------------------------------------------------------
--------------------------------------------------------------------------------


Address 01: Engine Labels: 07C-906-018-BEB1.clb
Control Module Part Number: 07C 906 018 AF
Component and/or Version: BY-6.0L-TT G ª6503
Software Coding: 0000173
Work Shop Code: WSC 00000 000 08192
VCID: 69D9C52943E7C10A7E-5140
4 Faults Found:

18322 - Pressure Sensor for Brake Boost (G294)
P1914 - 008 - Implausible Signal
18331 - Please Check DTC Memory of ECU Number 2
P1923 - 008 -
17831 - Secondary Air Injection System; Bank 1
P1423 - 002 - Insufficient Flow - MIL ON
18693 - Boost Pressure Control Valve (N249)
P2261 - 008 - Mechanical Malfunction

Readiness: 0000 0000

--------------------------------------------------------------------------------
--------------------------------------------------------------------------------


Address 11: Engine II Labels: 07C-906-018-BEB2.clb
Control Module Part Number: 07C 906 018 AF
Component and/or Version: BY-6.0L-TT G ª6503
Software Coding: 0000173
Work Shop Code: WSC 00000 000 00000
VCID: 69D9C52943E7C10A7E-5140
3 Faults Found:

16558 - Fuel Trim; Bank 2
P0174 - 004 - System Too Lean - Intermittent
19540 - Turbo/Super Charger Bypass Valve; Bank 2
P3084 - 008 - Mechanical Malfunction
17819 - Secondary Air Injection System; Bank 2
P1411 - 002 - Insufficient Flow - MIL ON
 

Last edited by Zaos; 02-09-2017 at 03:07 PM.
  #42  
Old 02-10-2017, 07:39 AM
Zaos's Avatar
Registered User
Thread Starter
Join Date: Nov 2014
Location: Belford, NJ
Posts: 192
Rep Power: 40
Zaos has a reputation beyond reputeZaos has a reputation beyond reputeZaos has a reputation beyond reputeZaos has a reputation beyond reputeZaos has a reputation beyond reputeZaos has a reputation beyond reputeZaos has a reputation beyond reputeZaos has a reputation beyond reputeZaos has a reputation beyond reputeZaos has a reputation beyond reputeZaos has a reputation beyond repute
Ok time to replace my bad CV boot.


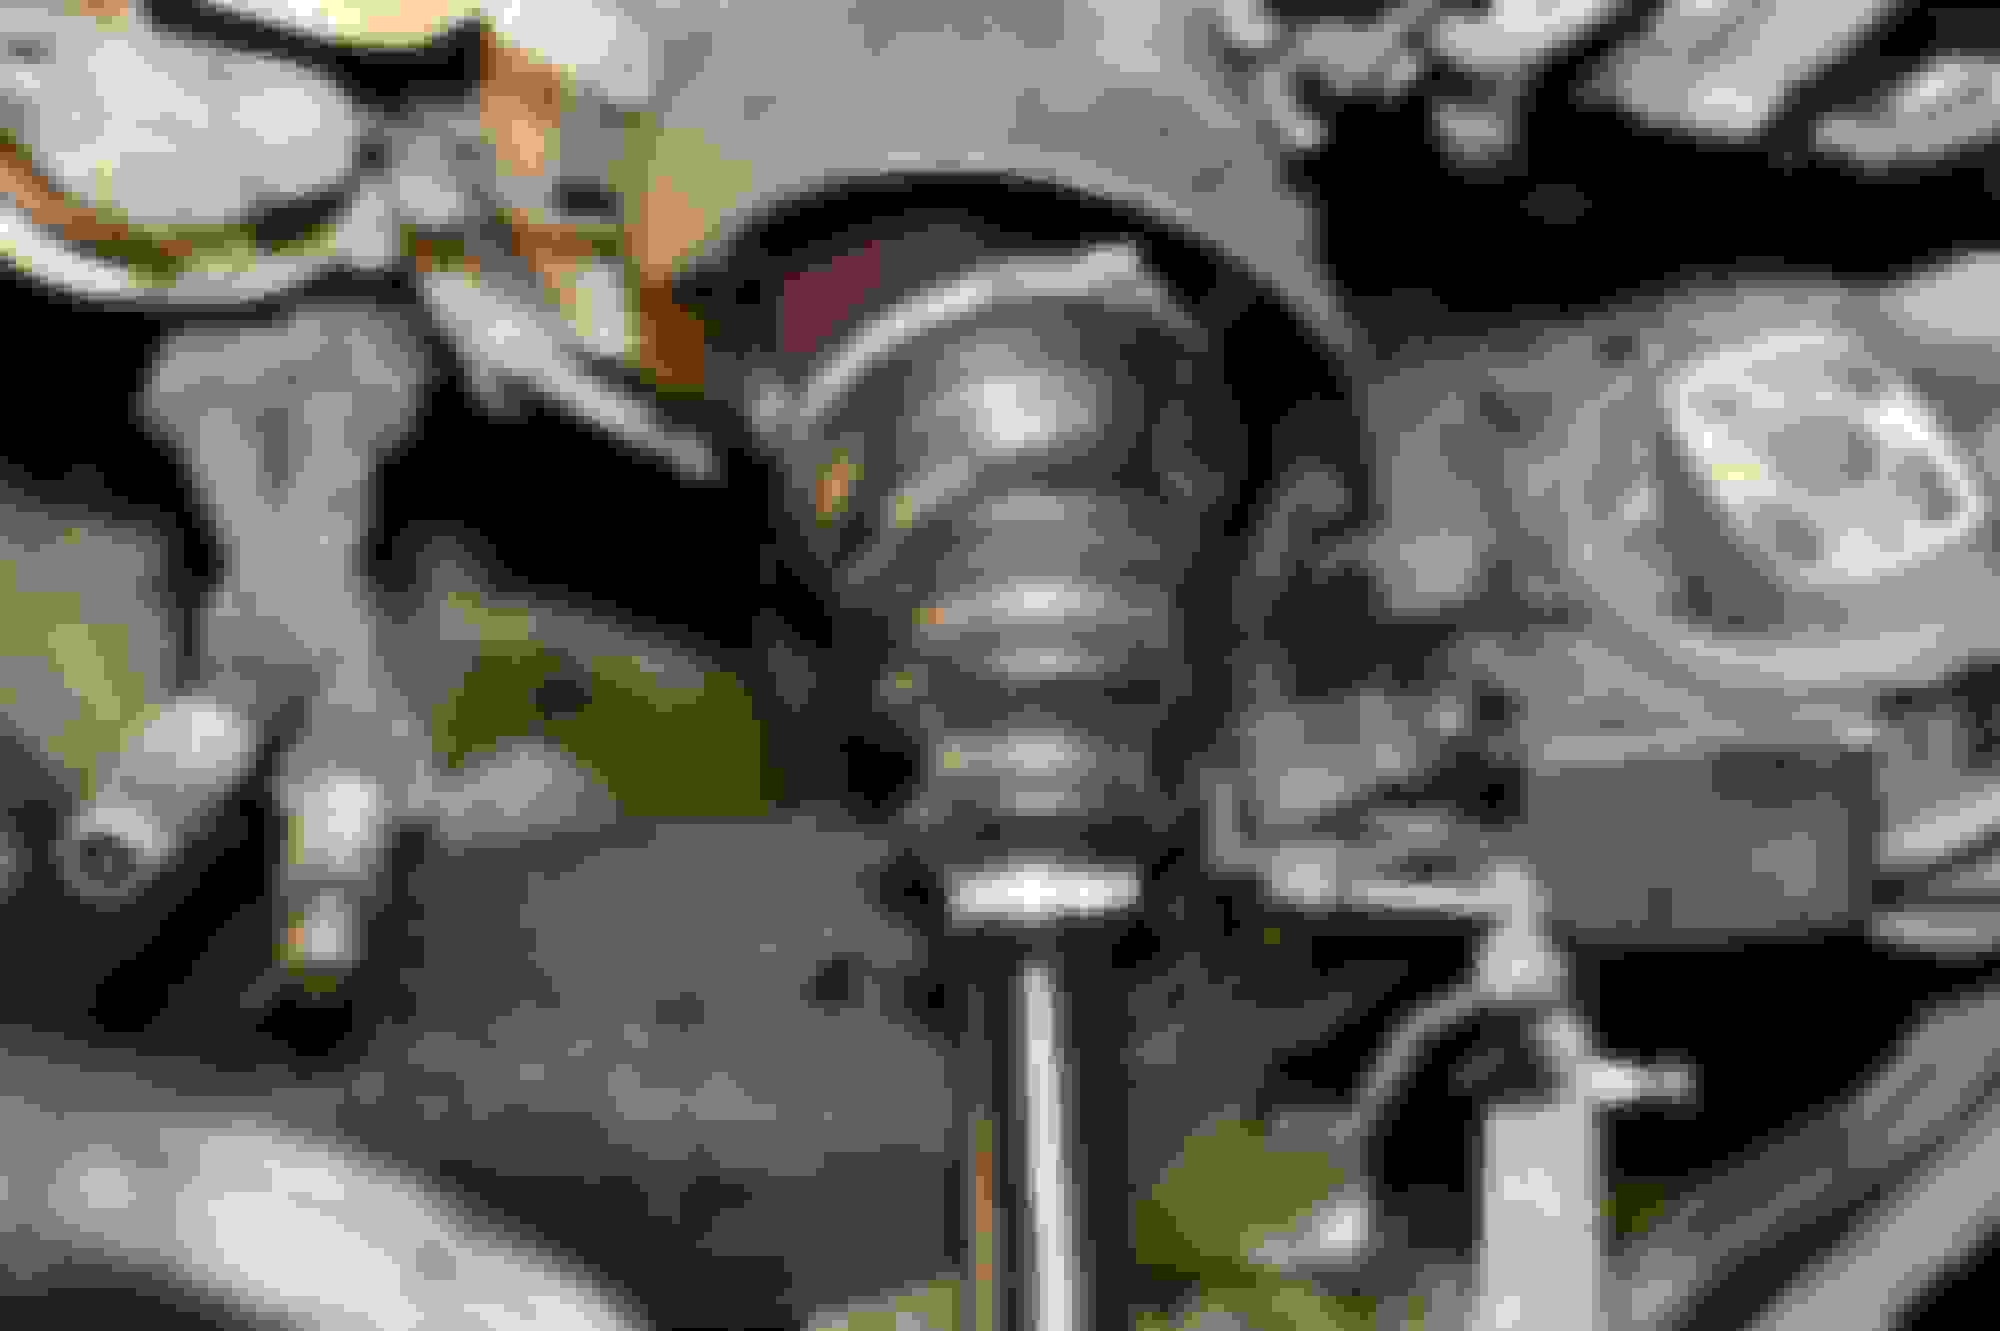
First, I removed the air shock and disconnected the upper suspension linkages. Decided to take the easy way out and not disconnecting the outer spline of the shaft.


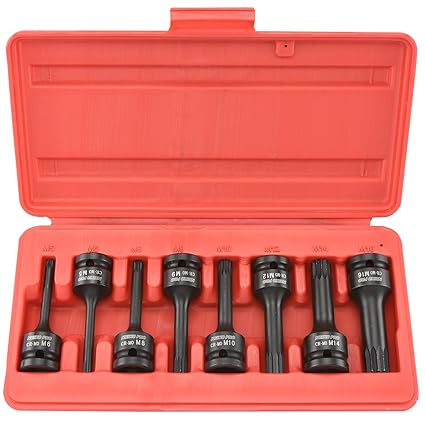
Yes, you do require a special tool to remove the inner mount, called a 10mm double box bit. This is not a torx. If you try using a torx rather than a double box, you will strip the bolt. I used an impact wrench to unbolt the mount, making it really easy.


Use a hammer to knock out the casing from the rollers.


Remove the spring clip and then the rollers


Remove the outer spring clip (the thicker clip), then the rest the CV boot. Clean everything really good afterwards.


Note: the rollers has two different sides. Here a picture of the beveled side. This side faces outward toward the wheels when installed again


Here is a picture of the flat inner side.


Install the new boot, big spring clip and use a socket like this to tap the rollers back into place, far enough so you can install the inner spring clip


Smother the rollers with CV grease and fill the casing and boot with the rest of the CV joint grease supplied in the kit. Then install and tighten the clips on the boot and you are done. Easy Job when you have all the right tools


Last edited by Zaos; 02-12-2017 at 07:08 PM. Reason: time
  #43  
Old 02-10-2017, 08:02 AM
Zaos's Avatar
Registered User
Thread Starter
Join Date: Nov 2014
Location: Belford, NJ
Posts: 192
Rep Power: 40
Zaos has a reputation beyond reputeZaos has a reputation beyond reputeZaos has a reputation beyond reputeZaos has a reputation beyond reputeZaos has a reputation beyond reputeZaos has a reputation beyond reputeZaos has a reputation beyond reputeZaos has a reputation beyond reputeZaos has a reputation beyond reputeZaos has a reputation beyond reputeZaos has a reputation beyond repute
Working on VAG, you really need this these sockets. There are several uses for this tool like on doors etc

 
  #44  
Old 02-10-2017, 01:46 PM
Johnny Hotspur GT's Avatar
Administrator
Join Date: Jul 2014
Location: Montgomery NJ
Posts: 3,219
Rep Power: 1002
Johnny Hotspur GT Is a GOD !Johnny Hotspur GT Is a GOD !Johnny Hotspur GT Is a GOD !Johnny Hotspur GT Is a GOD !Johnny Hotspur GT Is a GOD !Johnny Hotspur GT Is a GOD !Johnny Hotspur GT Is a GOD !Johnny Hotspur GT Is a GOD !Johnny Hotspur GT Is a GOD !Johnny Hotspur GT Is a GOD !Johnny Hotspur GT Is a GOD !
Hello Zaos,


Hope you are enjoying the progress you are making, to me it's that you know yourself how the job was done, if I may ask, I see in one of your pictures a black plastic pipe still in place, just being sure you did not miss one.... that would suck... no really, that would suck air in....


.
 
Attached Thumbnails Click image for larger version

Name:	_jts9278_bea71b34905bc279ee021615706ce1c45a4452bf.jpg
Views:	698
Size:	1.39 MB
ID:	469499  
  #45  
Old 02-10-2017, 03:08 PM
Johnny Hotspur GT's Avatar
Administrator
Join Date: Jul 2014
Location: Montgomery NJ
Posts: 3,219
Rep Power: 1002
Johnny Hotspur GT Is a GOD !Johnny Hotspur GT Is a GOD !Johnny Hotspur GT Is a GOD !Johnny Hotspur GT Is a GOD !Johnny Hotspur GT Is a GOD !Johnny Hotspur GT Is a GOD !Johnny Hotspur GT Is a GOD !Johnny Hotspur GT Is a GOD !Johnny Hotspur GT Is a GOD !Johnny Hotspur GT Is a GOD !Johnny Hotspur GT Is a GOD !
Originally Posted by Zaos
Jim,
Vacuum is created by the engine intake sucking in air, not from various sources. Hope this helps.


Hello All,


Actually there are different circuits of vacuum, and a electric vacuum pump that supplies the vacuum to the brake booster, the vacuum lines on top of the transmission, and others, these vacuum circuits do get vacuum from the intake a Zaos stated, but these same circuits also get vacuum from the electric pump when the engine is at a low vacuum RPM, such as the turbos building positive pressure in the intake, not vacuum, so, that is why when the lines are cracked and leaking and you press the brake pedal you will hear the electric vacuum pump run on, the vacuum pump is located behind the fender liner on the drivers side as shown in picture.


Also just a note, for others who may read Zaos' thread here for vacuum leaks, and those people may have a Flying Spur, I have read in the past on other threads some saying the "lines may be leaking on top of the trans" in reference to a Flying Spur, the only problem is the FS never had the vacuum lines on top of the trans, the lines and solenoids are located up behind the air intake manifold on the FS, along with the other lines along the firewall (steering rack) same as GT, see pic of FS engine trans combo, I have looked at many 06/07 FS engine/trans packages and none ever had the vacuum lines on the trans, I have only seen the VL on the trans with the 04/05/06 GT engine/trans packages, the 07 and forward GT years have the vacuum lines and solenoids just like the FS, up behind the air intake manifold, and of course along the firewall as stated.


.
 
Attached Thumbnails Click image for larger version

Name:	Vacuum pump.jpg
Views:	364
Size:	1.48 MB
ID:	469501   Click image for larger version

Name:	s-l1600lllkjj.jpg
Views:	2069
Size:	906.4 KB
ID:	469502  


You have already rated this thread Rating: Thread Rating: 1 votes, 5.00 average.

Quick Reply: Pulled my Engine


All times are GMT -6. The time now is 07:05 AM.