Purge valve
#16
Yeah Sage advice Eric....So many things I do as "good practice" over the many years, and I sometimes forget to mention things that are so automatic for me, that I assume everyone knows. Add to it - don't pull plugs out of a hot aluminum engine, let cool down completely, albeit pretty difficult to get everything off that you need to remove and still have a hot motor...haha.
Also, torque plugs to spec, and DO NOT apply anything to the threads. Old school used to apply anti-seize to spark plugs going into alum heads, which completely changes the "clamping torque" (clamp force). Plug manufacturers, NGK being one, now apply a dry anti-seize in manufacturing so the installer doesn't need to muck with it anymore.
Use some dielectric grease on the rubber boot and O-ring of the coil (NOT needed on the conductor). This keeps the rubber from drying out and burning onto the cam cover housing.
I'm sure I'm forgetting lots....but it'll come eventually...LOL...
#17
YES...I snapped that pic RIGHT before I stuffed shop rags in each. A small piece of hardware falling into a turbo tube would be devastating if not caught, and if so, use a magnet probe. I have 3 or 4 of these tools on different types of wands. They have found lost/dropped hardware for me several times.
#19
Did you do this with the console out and switchpack unplugged?
Not sure why you'd run a scan if you had a lot disconnected. I can walk you through lots of this stuff, but there are faults pretty much everywhere. Also, did you do something with the steering wheel? Do you have the original 4 spoke, or did you switch to a 3 spoke. If either, I can walk you through the coding if I know what you have in the car and what you've done. Hopefully, the prev owner didn't spill coffee into the steering wheel electronics too....haha!
One red flag, don't know the recent history, but you NEED to fix (get rid of) the P0174. Lean code, in this case, bank 2 is not good on any engine but especially a boosted one. P0174 is set when the ECU maxes out (exceeds 25% rich adjustment) on how much it can adjust AFR in closed loop. It won't set a limp mode, but will set a CEL. P0174 and P0171 for Bank 1, sometimes is set BC you have a vac leak at the manifold. Even with leaking vac lines all over the place, the intake manifold will still be the richest source of vac unless there is a leak right at the manifold or a hose in very close proximity.
And, BTW, if all these faults are historical and not active, it would be good to do a global delete and start with a clean slate.
Last edited by BWings; 04-26-2019 at 08:43 AM.
#20
Actually no. I had just pulled in the garage and set my laptop up. I didn’t notice when I came back to the car ( I walked away for a few mins) no lights were on on the dash but the HVAC was illuminated. Kinda thought that was odd but I was tired and just let it finished. I cleared the codes and ran it again. Once I take the wife to pick her car up later, I’ll rerun it and stay with it this time. I think I still have the print out from Jan or Feb, I’ll look and compare the two.
Also, I still have (unfortunately) the 4 spoke steering wheel.
Also, I still have (unfortunately) the 4 spoke steering wheel.
Last edited by TeamJones1962; 09-28-2019 at 05:18 PM.
#21

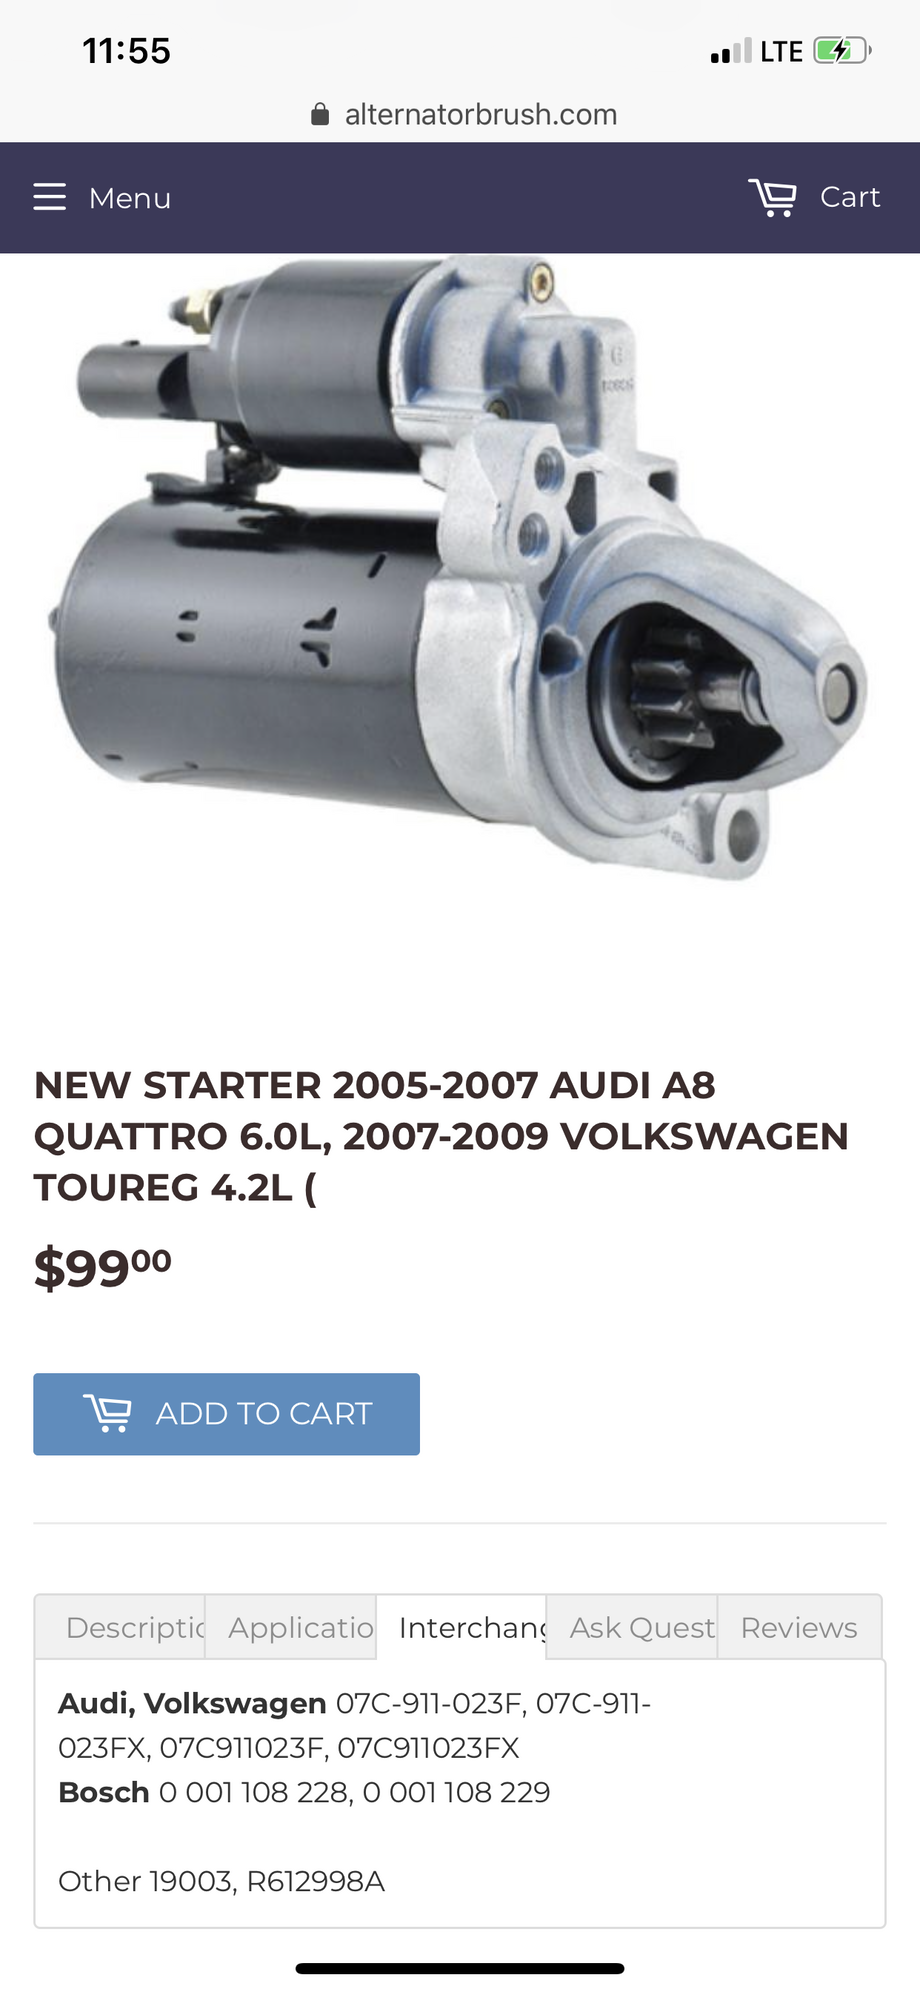
1eapplebaum, BWings and Rico.Adams I just want to thank you for the help thus far. I decided to start on getting parts for the engine out vacuum line job. Just makes sense. I ran across this while looking for a starter. That price (if itís real) looks like a real great deal. Looked my butt off and cross reference the OEM starter Bosch one. What are other parts that I should be looking into also? Thanks again!!
#22

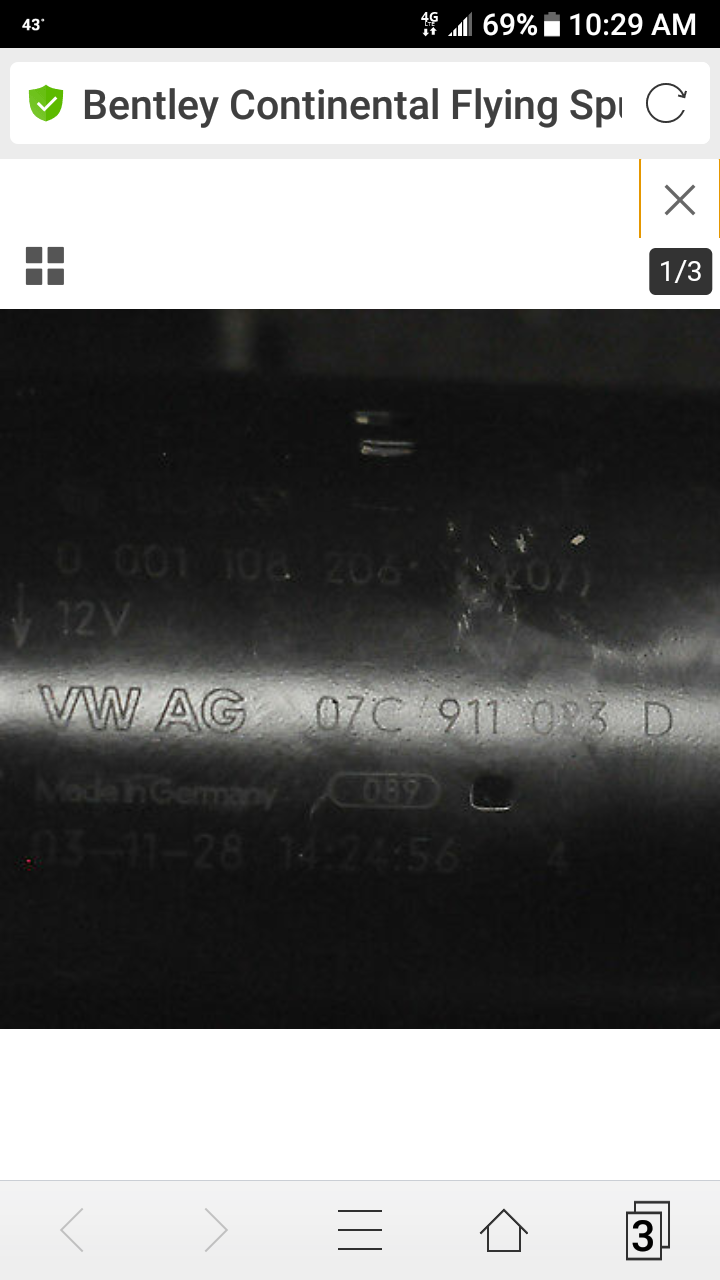
Here is an image of the part number off a Bentley starter. That would be wonderful if $99 is the magic number for a Bentley starter.
Should you pull the trigger on the engine out may I suggest changing the Lambda / oxygen sensors.
Would you be kind enough to share with us why you believe the engine needs to come out? LOL we don't want you working 7 days a week for the rest of your life.😉
#23

Here is an image of the part number off a Bentley starter. That would be wonderful if $99 is the magic number for a Bentley starter.
Should you pull the trigger on the engine out may I suggest changing the Lambda / oxygen sensors.
Would you be kind enough to share with us why you believe the engine needs to come out? LOL we don't want you working 7 days a week for the rest of your life.😉
I only seen one post saying you donít have to take the engine out but it was for a VW Pheaton. With having a turbo and drop pipe blocking the starter I donít see any other way. By no means am I a mechanic so please help me out if it is a way. Might as well change everything I can since it has to come out to do the vacuum lines. And good looking on the O2 sensors!
#24
Sorry to say but engine out on the starter.
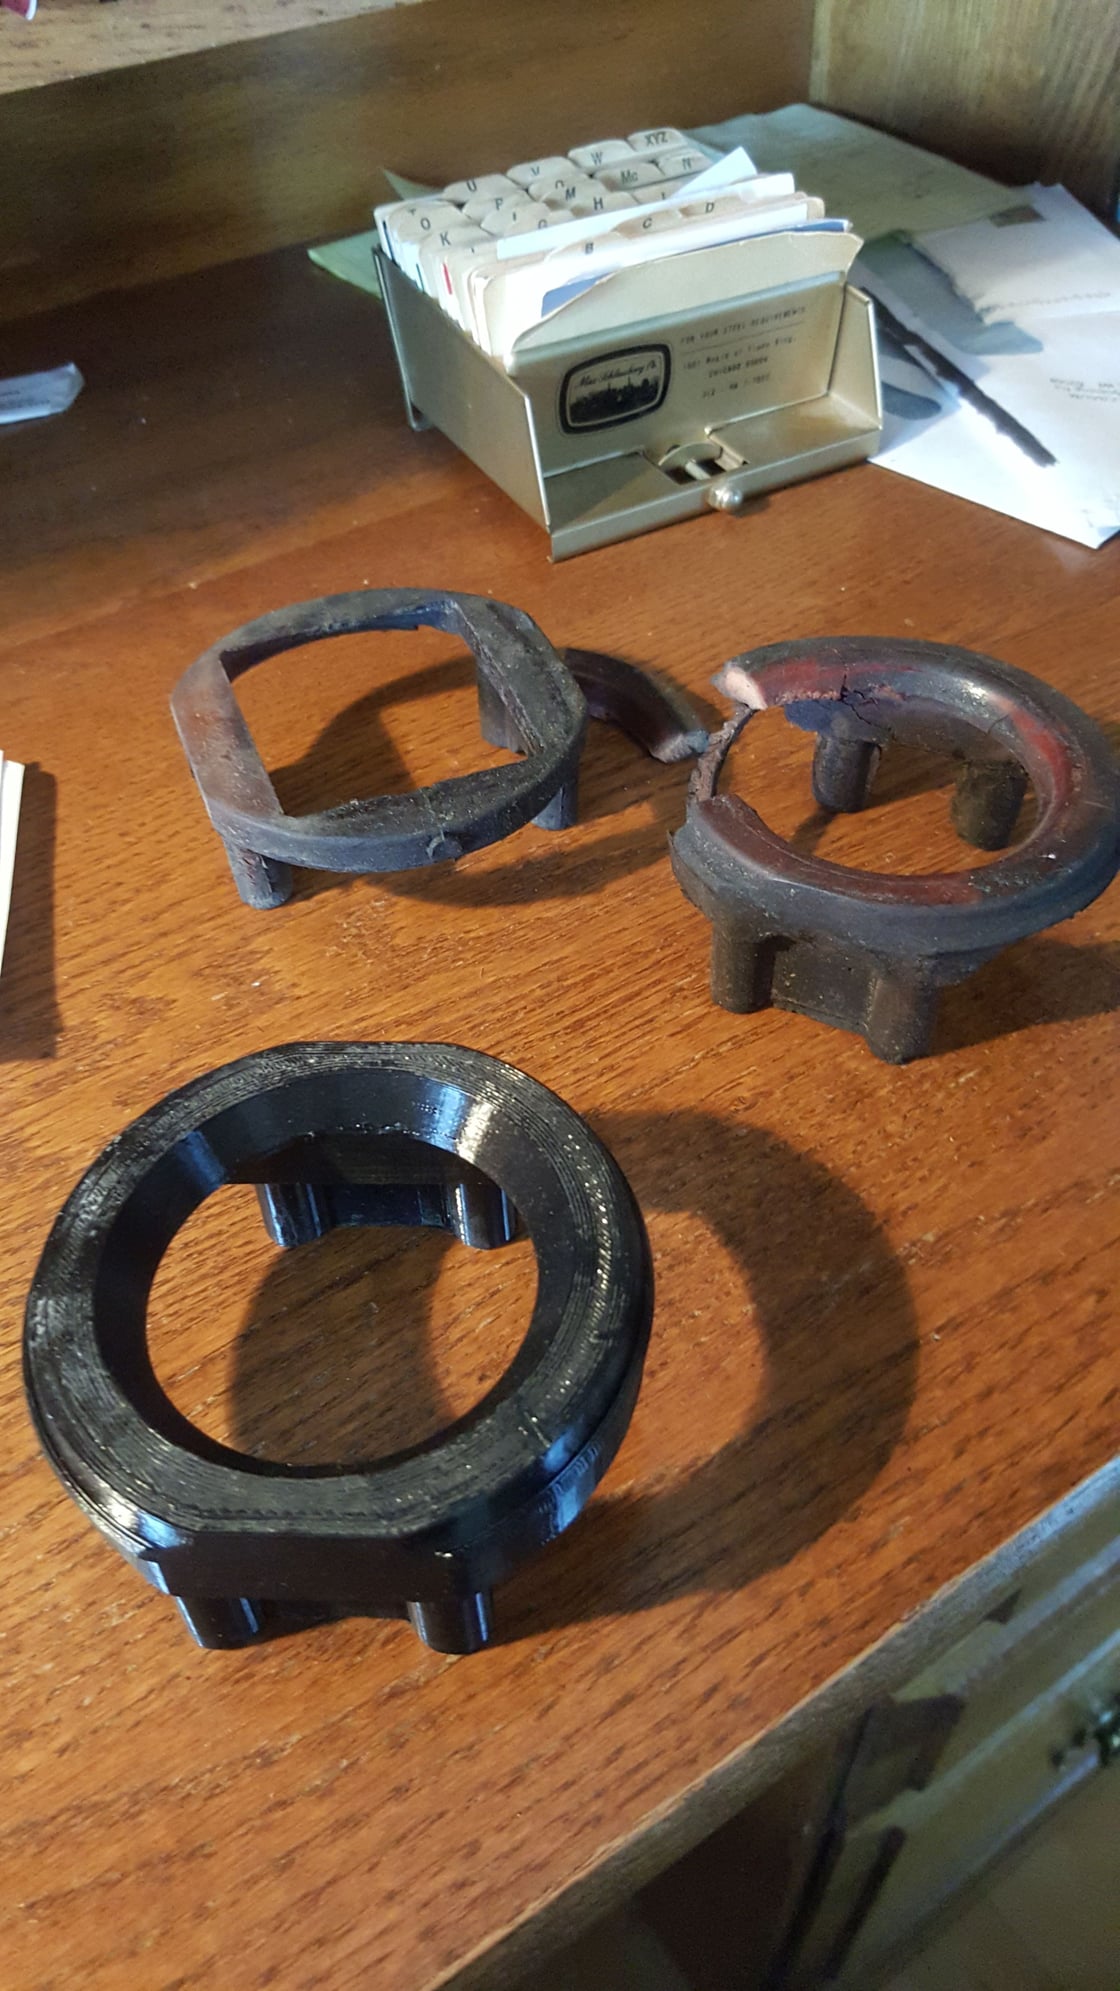
One thing to investigate when the engine is out are the engine subframe mounts. The front ones tend to crack. This is a subtle deterioration. The fronts are two units each side one installed from the top and then a second one pressed in from the bottom. Essentially two bushings pressed together on the front. They can only be replaced with the cradle out of the car. These bushing type were used universally on Mercedes BMW Etc. They all crack with age. The rubber inside the bushing cracks. (I am not referring to the motor mounts those are different). The engine cradle subframe mounts can eventually become the source of vibration and or strange clunking noises when going from drive to reverse. The rear engine cradle subframe mounts are bigger and usually survive a lot longer. However there is a little upper and lower rubber insert in the the rear engine cradle subframe bushing that crumbles. That insert is not available. I had to 3D print mine.
One thing to investigate when the engine is out are the engine subframe mounts. The front ones tend to crack. This is a subtle deterioration. The fronts are two units each side one installed from the top and then a second one pressed in from the bottom. Essentially two bushings pressed together on the front. They can only be replaced with the cradle out of the car. These bushing type were used universally on Mercedes BMW Etc. They all crack with age. The rubber inside the bushing cracks. (I am not referring to the motor mounts those are different). The engine cradle subframe mounts can eventually become the source of vibration and or strange clunking noises when going from drive to reverse. The rear engine cradle subframe mounts are bigger and usually survive a lot longer. However there is a little upper and lower rubber insert in the the rear engine cradle subframe bushing that crumbles. That insert is not available. I had to 3D print mine.
#25

Sorry to say but engine out on the starter.
One thing to investigate when the engine is out are the engine subframe mounts. The front ones tend to crack. This is a subtle deterioration. The fronts are two units each side one installed from the top and then a second one pressed in from the bottom. Essentially two bushings pressed together on the front. They can only be replaced with the cradle out of the car. These bushing type were used universally on Mercedes BMW Etc. They all crack with age. The rubber inside the bushing cracks. (I am not referring to the motor mounts those are different). The engine cradle subframe mounts can eventually become the source of vibration and or strange clunking noises when going from drive to reverse. The rear engine cradle subframe mounts are bigger and usually survive a lot longer. However there is a little upper and lower rubber insert in the the rear engine cradle subframe bushing that crumbles. That insert is not available. I had to 3D print mine.
One thing to investigate when the engine is out are the engine subframe mounts. The front ones tend to crack. This is a subtle deterioration. The fronts are two units each side one installed from the top and then a second one pressed in from the bottom. Essentially two bushings pressed together on the front. They can only be replaced with the cradle out of the car. These bushing type were used universally on Mercedes BMW Etc. They all crack with age. The rubber inside the bushing cracks. (I am not referring to the motor mounts those are different). The engine cradle subframe mounts can eventually become the source of vibration and or strange clunking noises when going from drive to reverse. The rear engine cradle subframe mounts are bigger and usually survive a lot longer. However there is a little upper and lower rubber insert in the the rear engine cradle subframe bushing that crumbles. That insert is not available. I had to 3D print mine.
#26
Can you Please send the program of the ones you printed and of course if you want payment just let me know how much. And here I am thing a friend was crazy for buying some Pursa 3D machine just to tinker around with. Just let me know what type of filament I need and any special instructions if your willing to send it.
#27
Can you Please send the program of the ones you printed and of course if you want payment just let me know how much. And here I am thing a friend was crazy for buying some Pursa 3D machine just to tinker around with. Just let me know what type of filament I need and any special instructions if your willing to send it.
Josh 608 574 5936
#28
By the way if you need the part numbers for the engine cradle subframe front bushings I can pass those to you as well. The printed parts are for the engine cradle rear subframe bushing inserts. In my opinion the front engine cradle subframe bushing should be replace no matter what. The type of rubber they use is either cracked or will crack. This type of preventive maintenance doesn't get much coverage, out of sight out of mind. Cars from the early 2000s are ready for this service..
Thread
Thread Starter
Forum
Replies
Last Post
Dale D
Cayenne 955/957
19
08-12-2018 06:45 AM


