Smoked Detailed - Major correction, Gloss It put to the test
#1
 07-04-2008, 06:52 PM

Join Date: Jun 2008
Location: New Jersey
Posts: 272
Rep Power: 27 
Smoked Detailed - Major correction, Gloss It put to the test
update
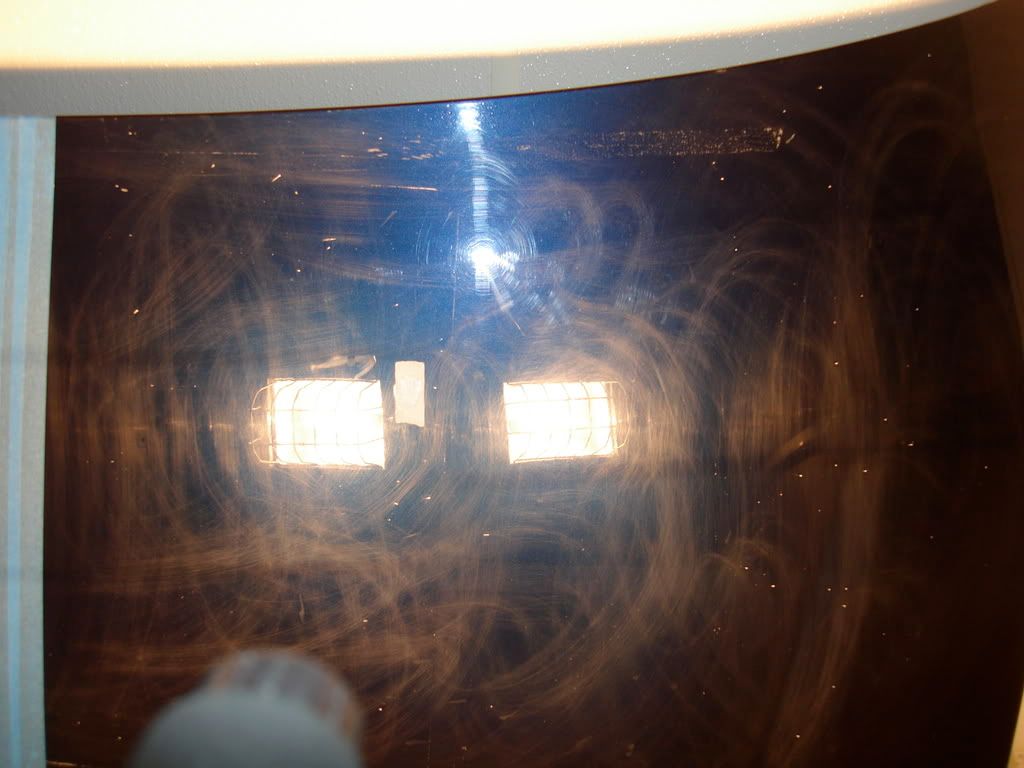
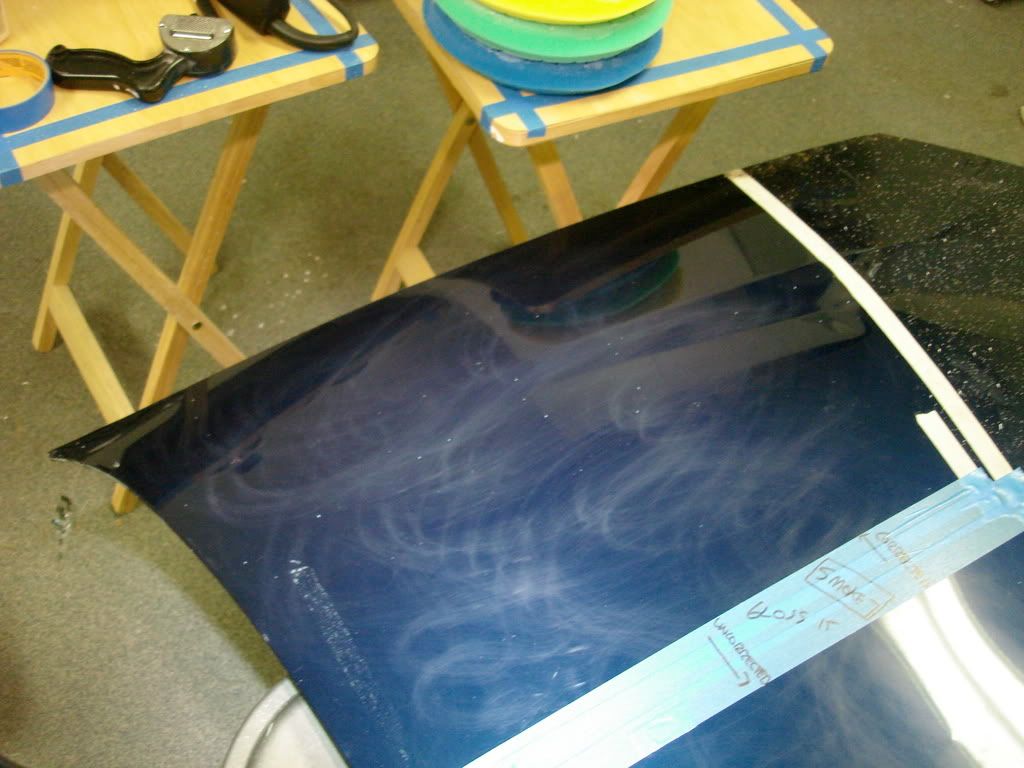
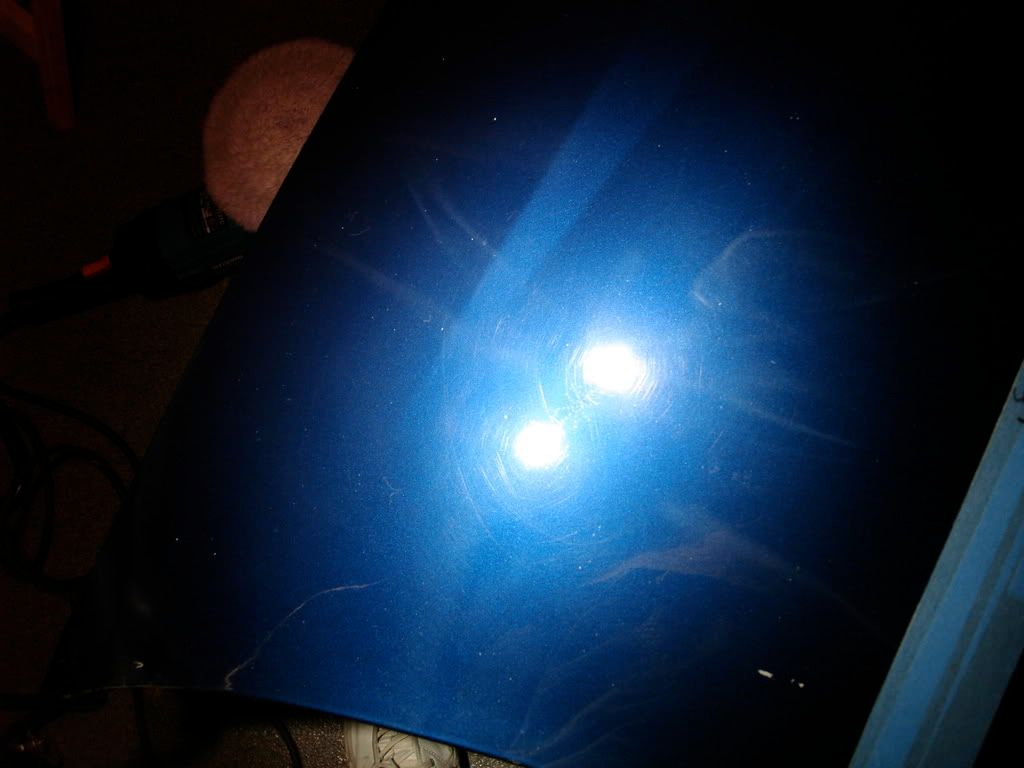
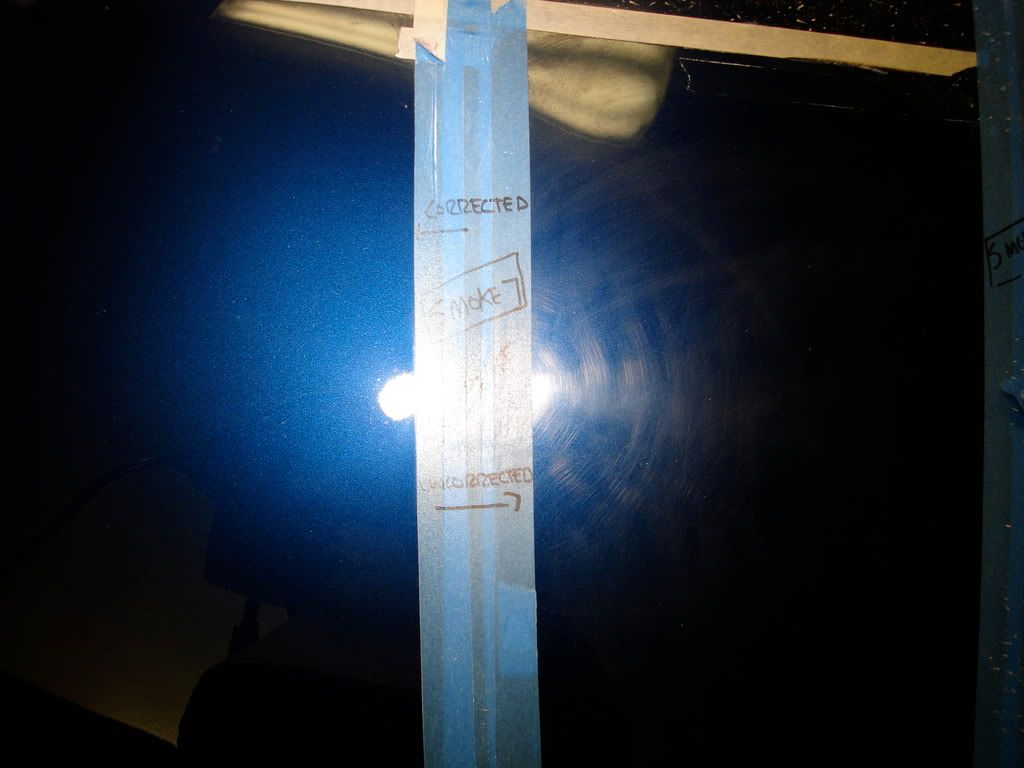
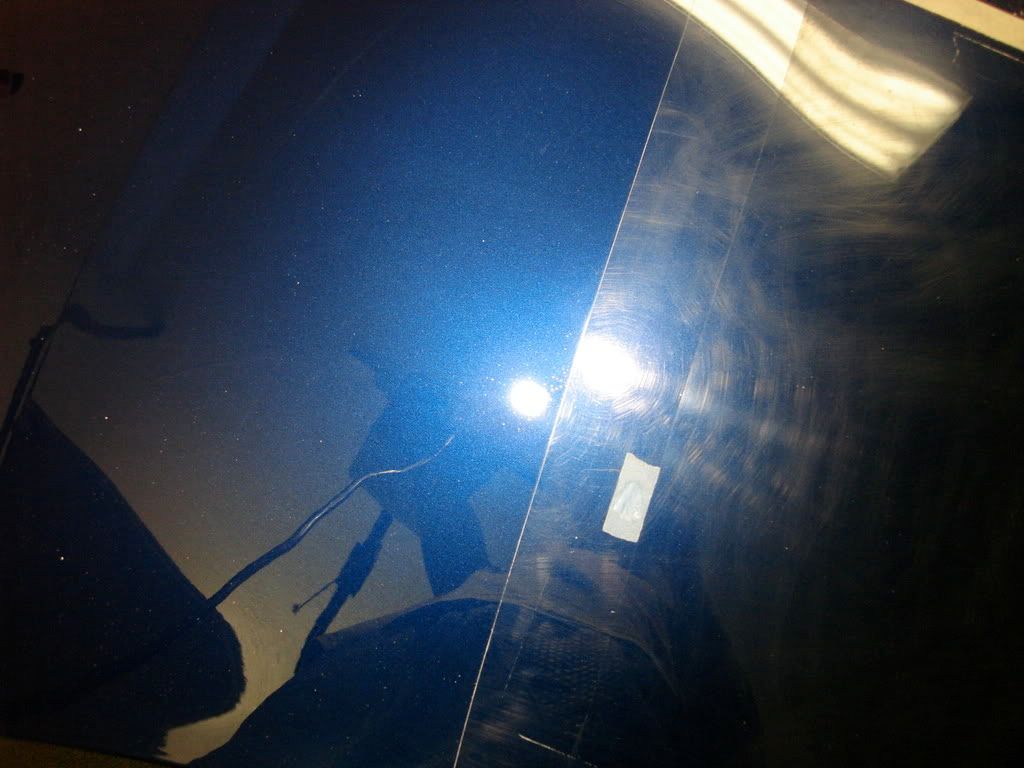
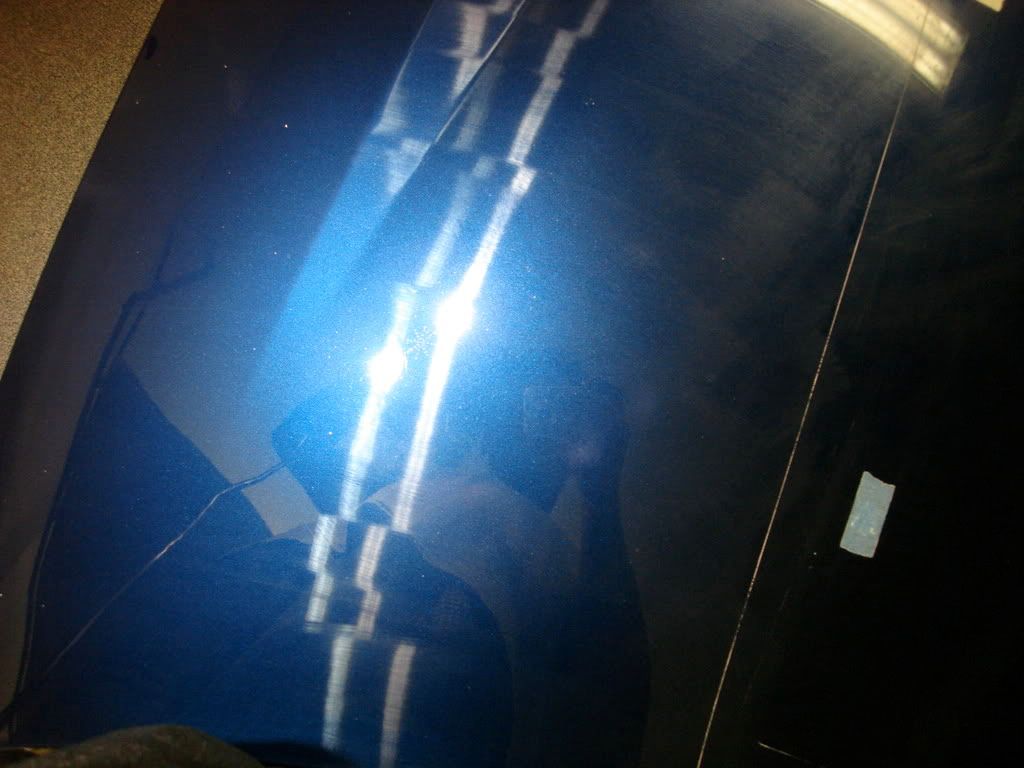
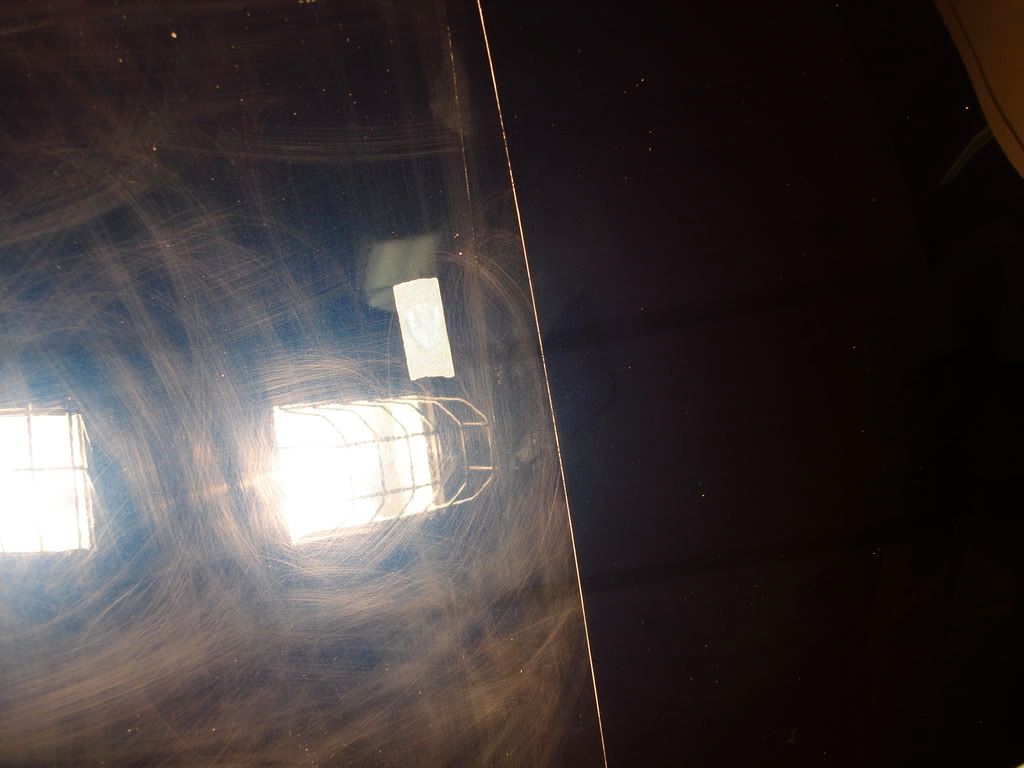
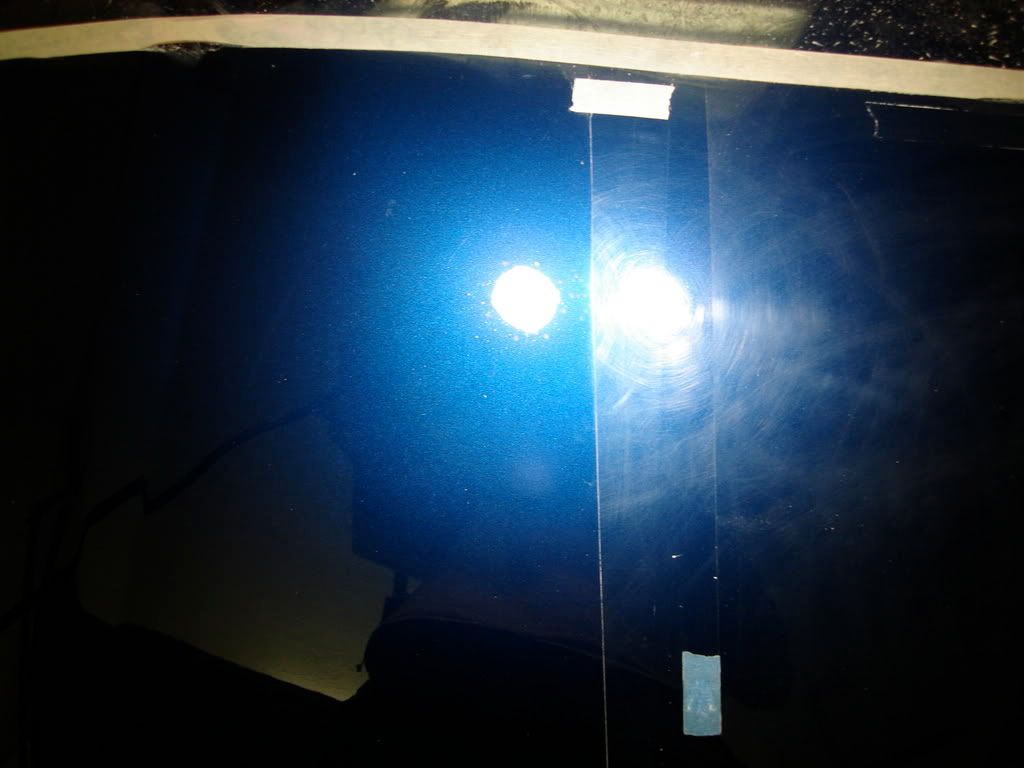
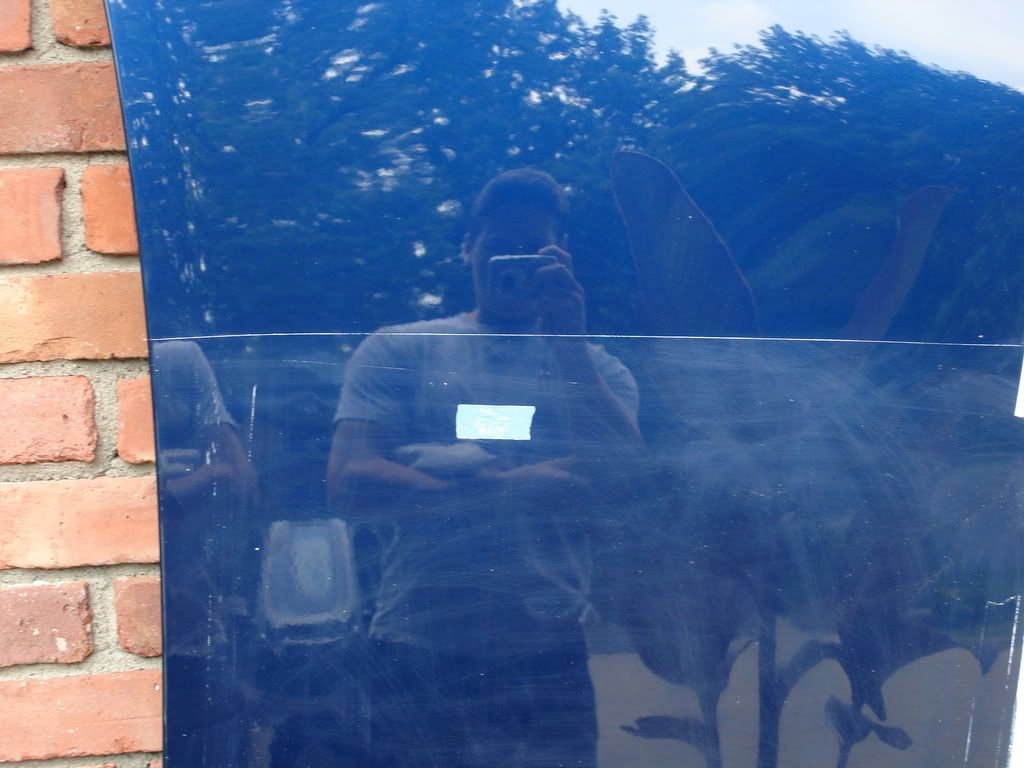
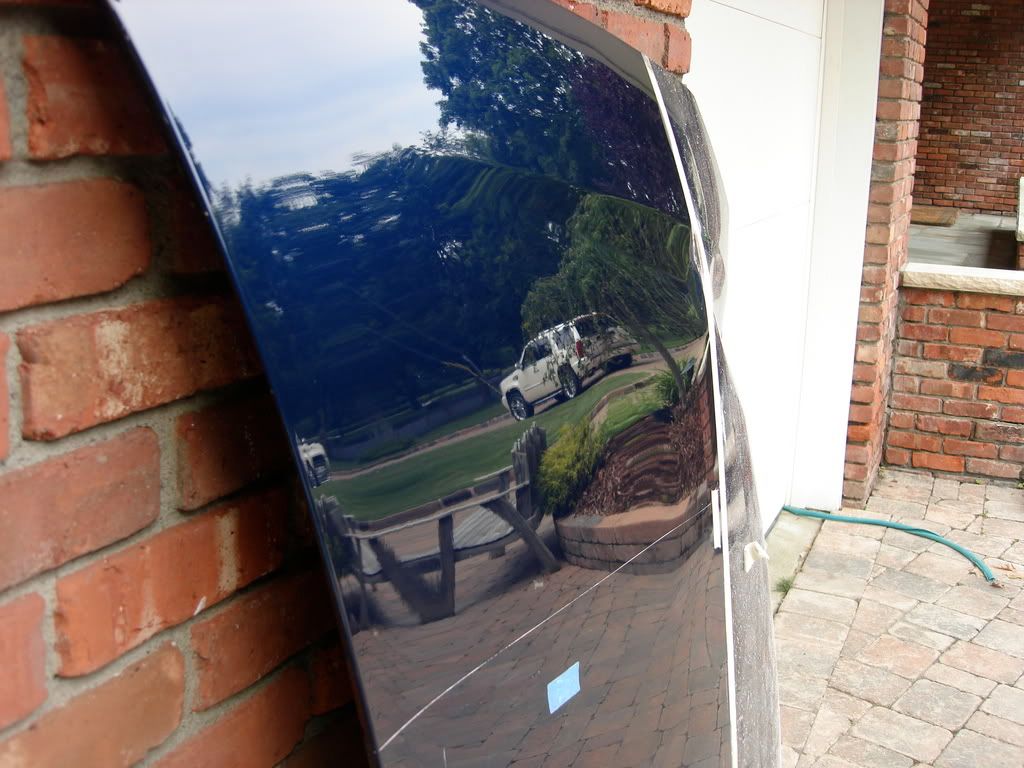
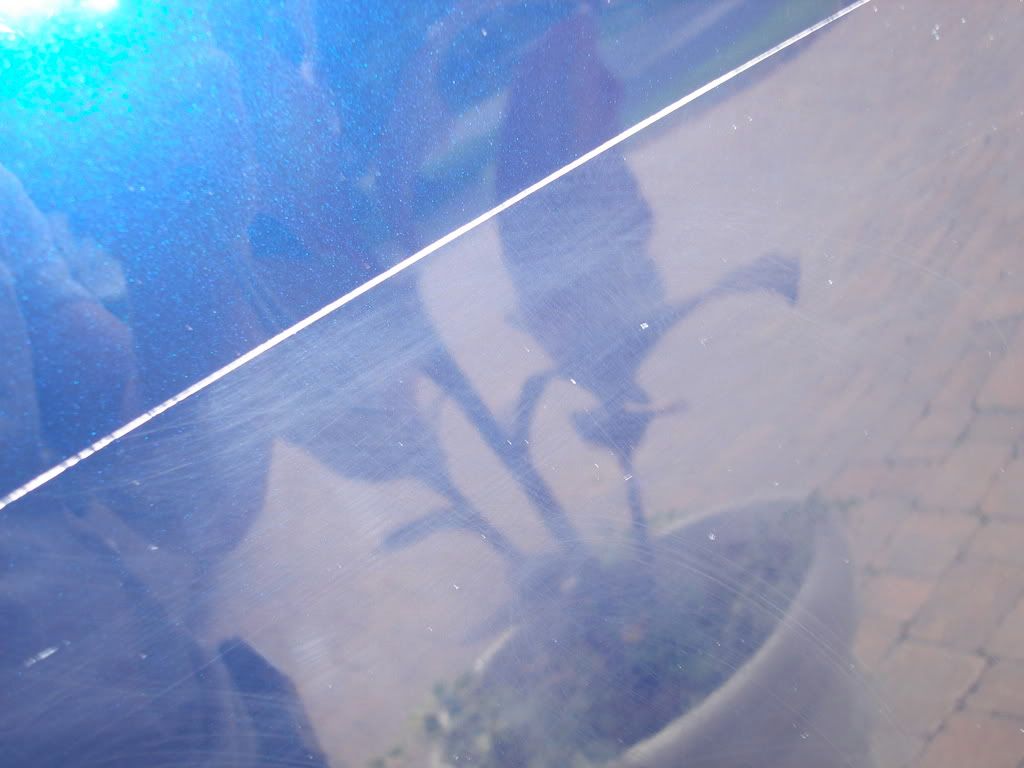
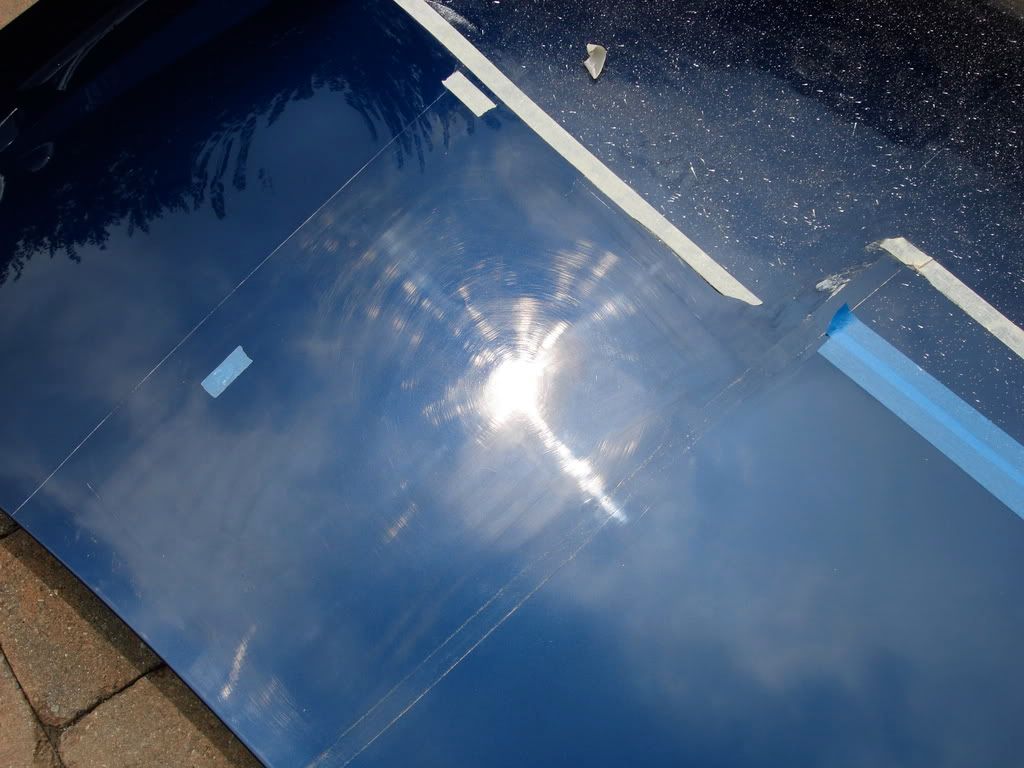
I started with a scrap hood that I use to test products on. The finish was already clean so I used fine grade steel wool followed by a stiff bristle carpet brush to induce heavy swirls marks, marring and some fine scratches.
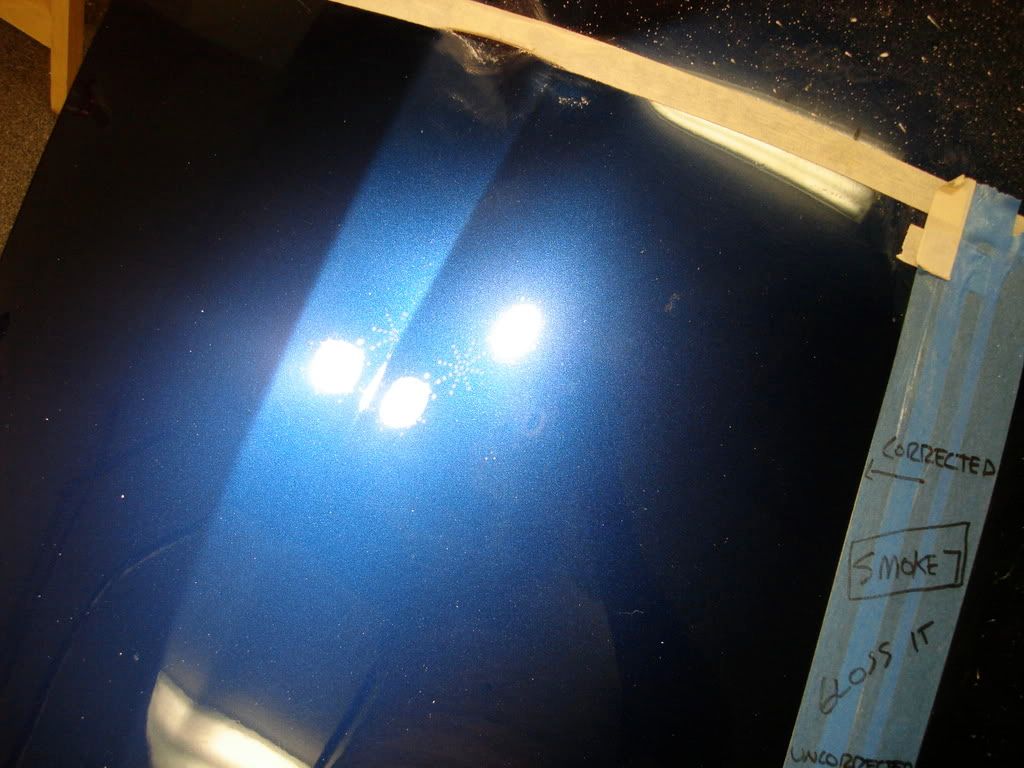
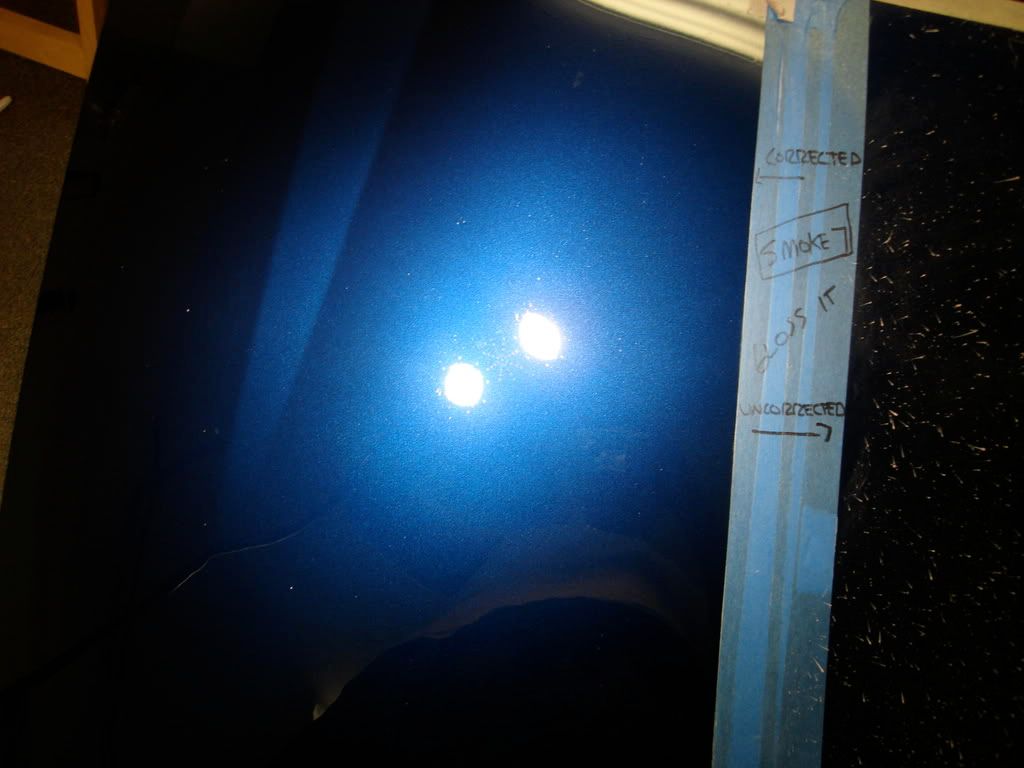
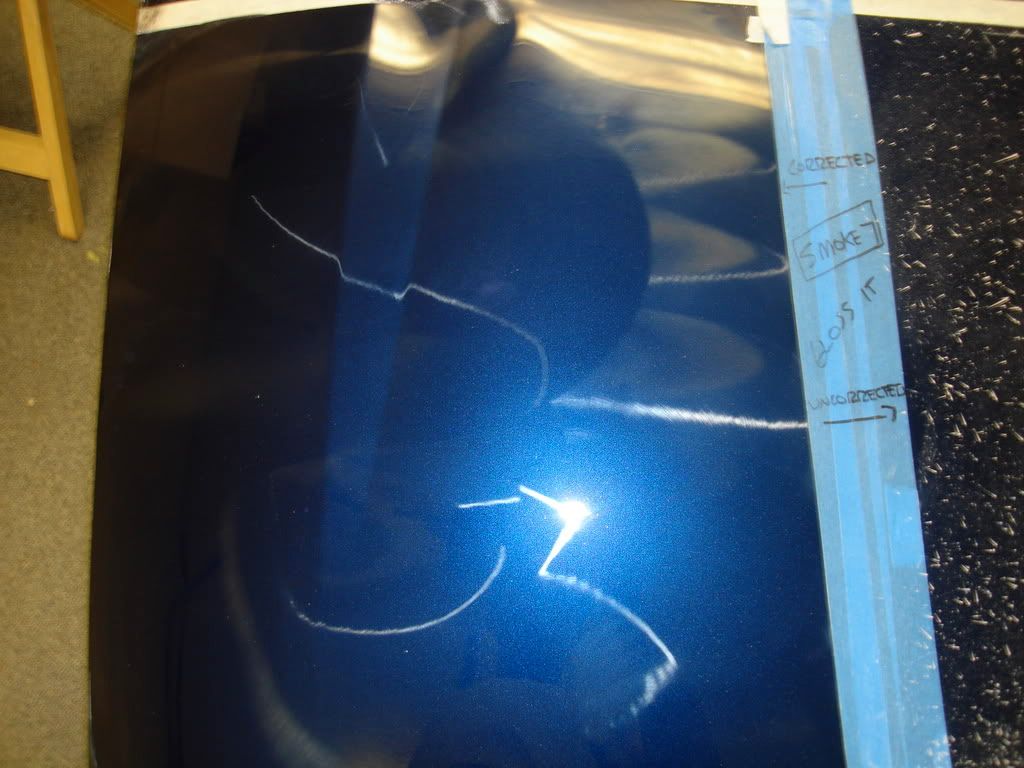
The finish looked like this after. (I labled the center tape w/ sharpie in my handwriting to show that the side I corrected was in fact as trashed as the other)
Left side will be corrected Right side will not
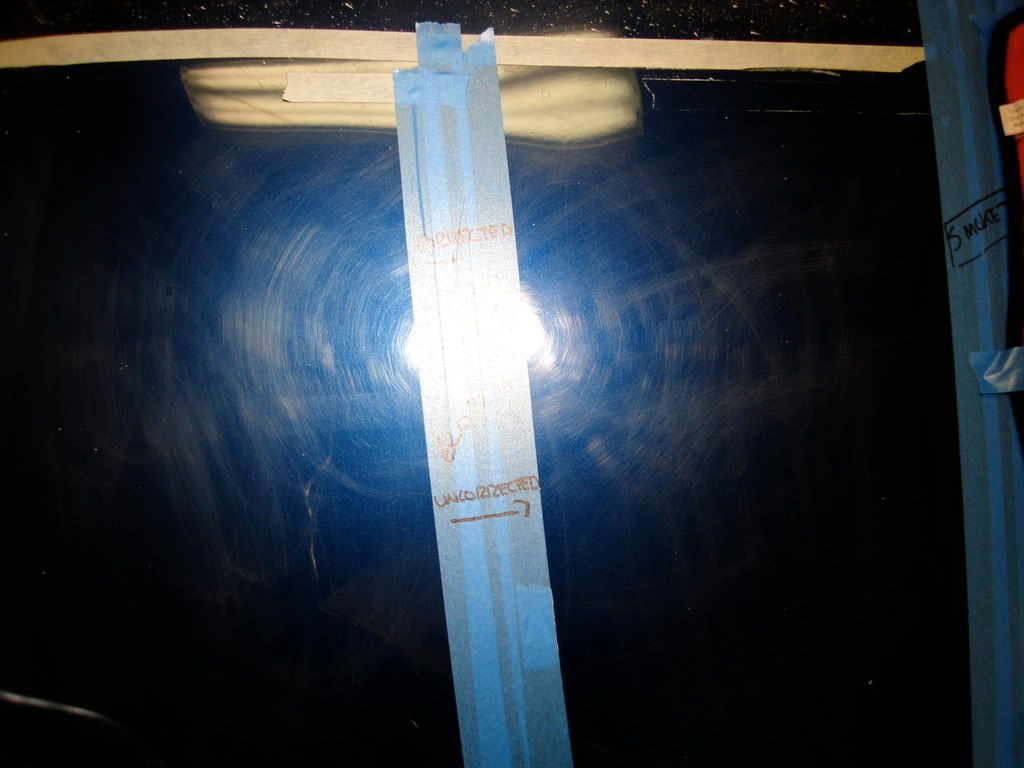
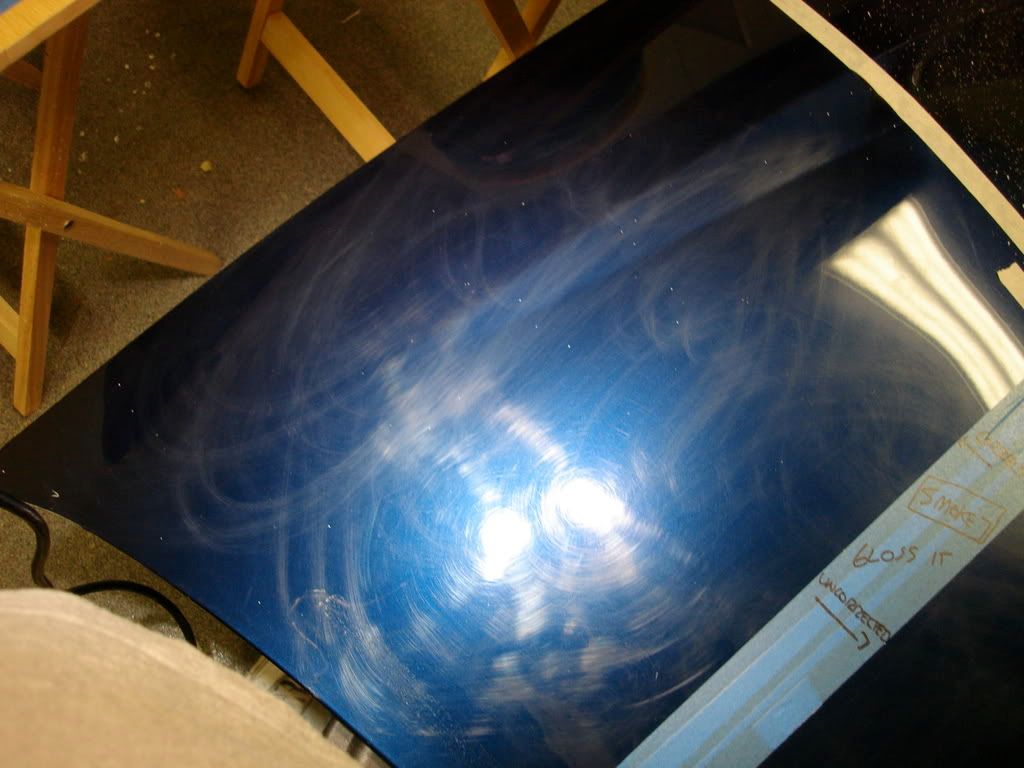
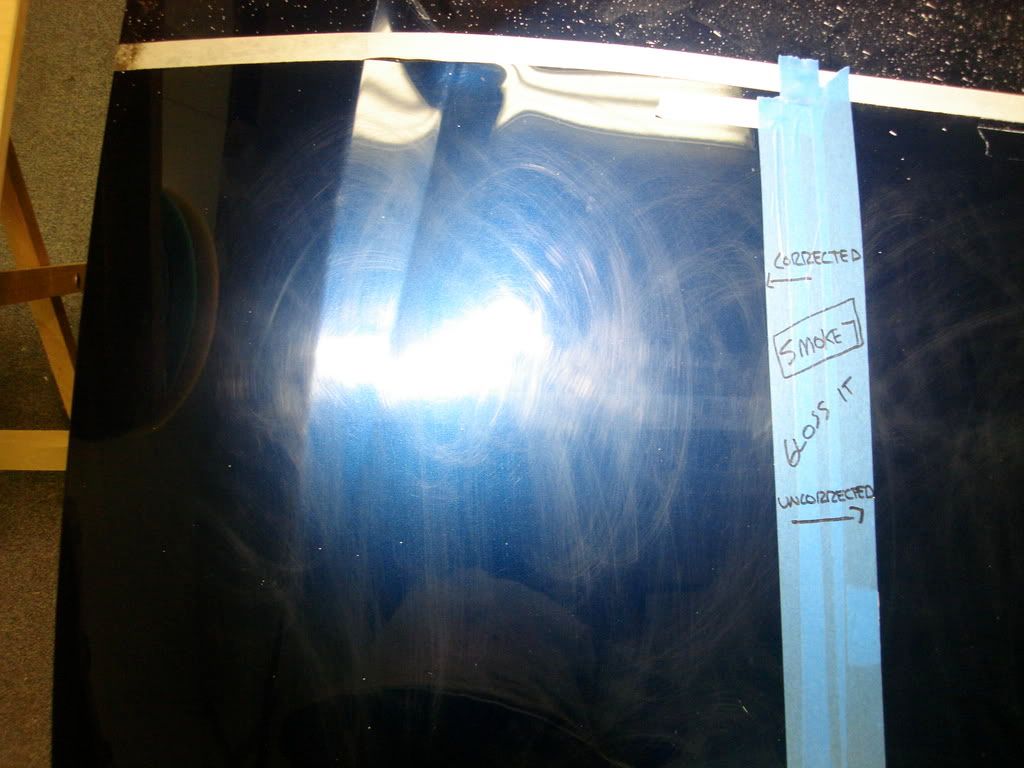
You get the idea of how bad the finish was
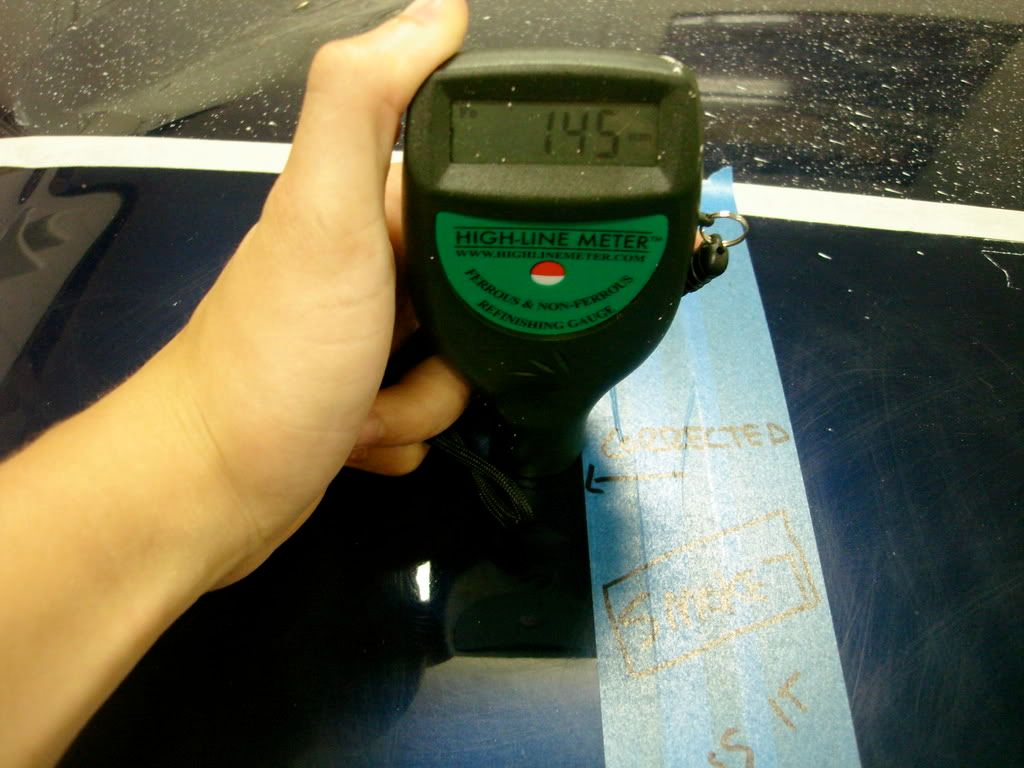
I took a quick reading to make sure I had enough clear to work with
#2
07-04-2008, 06:53 PM
Join Date: Jun 2008
Location: New Jersey
Posts: 272
Rep Power: 27
After a thourugh IPA wipedown and inspection with the Infratech I thought I may have been a little to "aggressive" in marring the finish and that it would need more than machine corretion, perhaps wetsdaning.
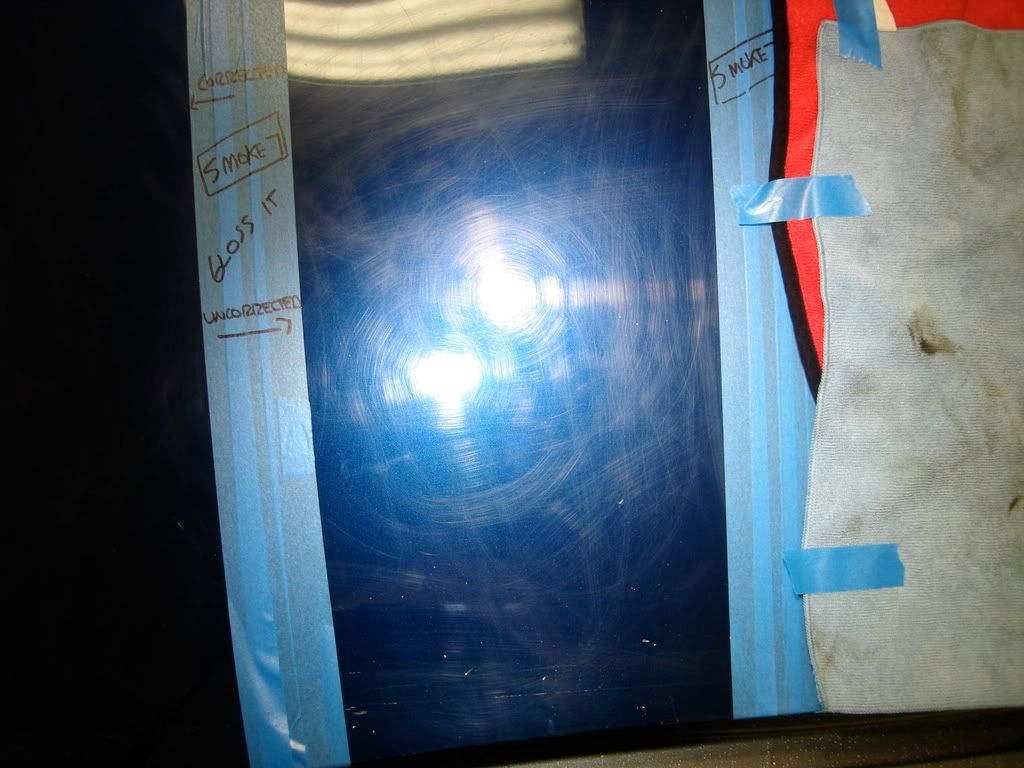
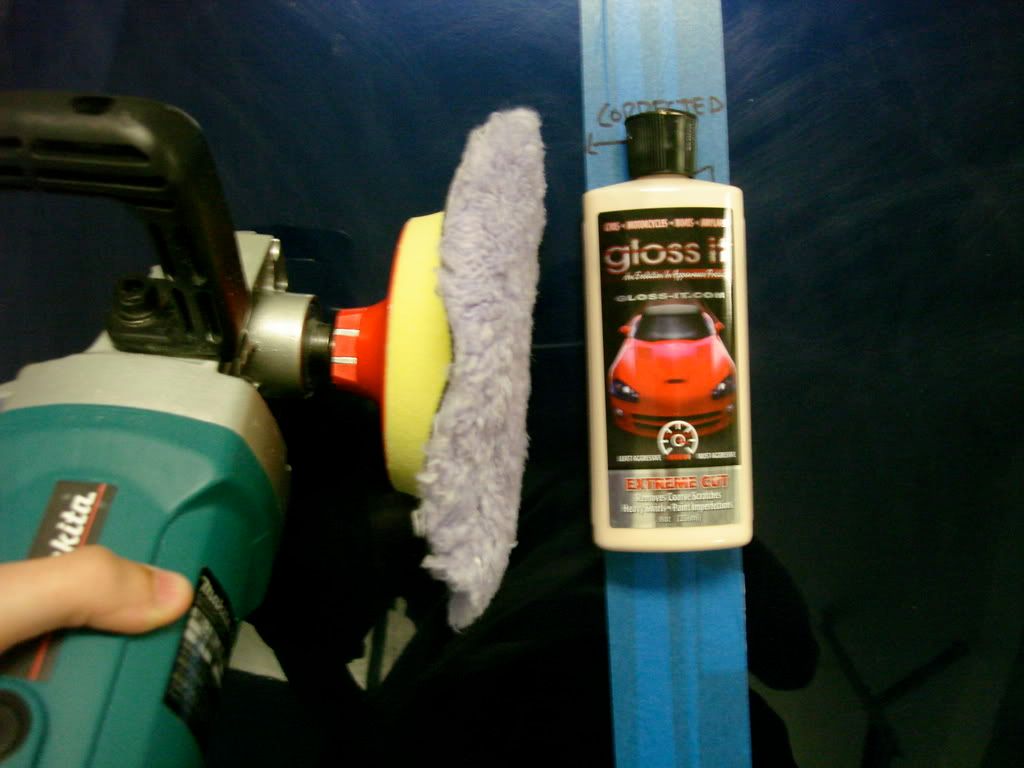
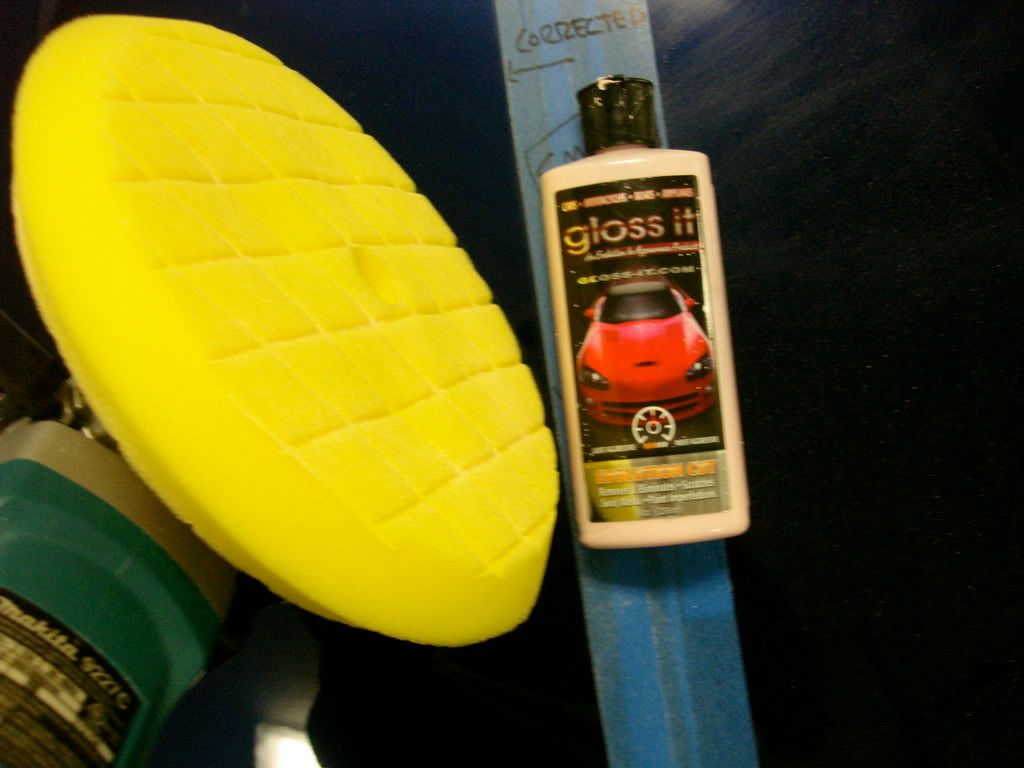
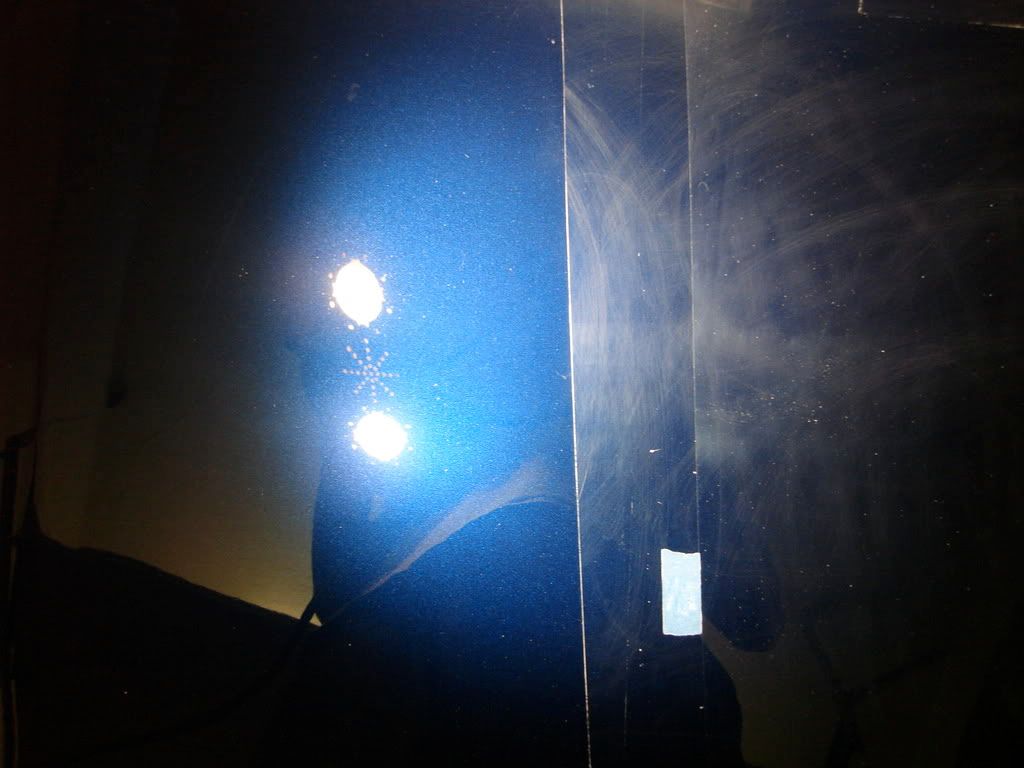
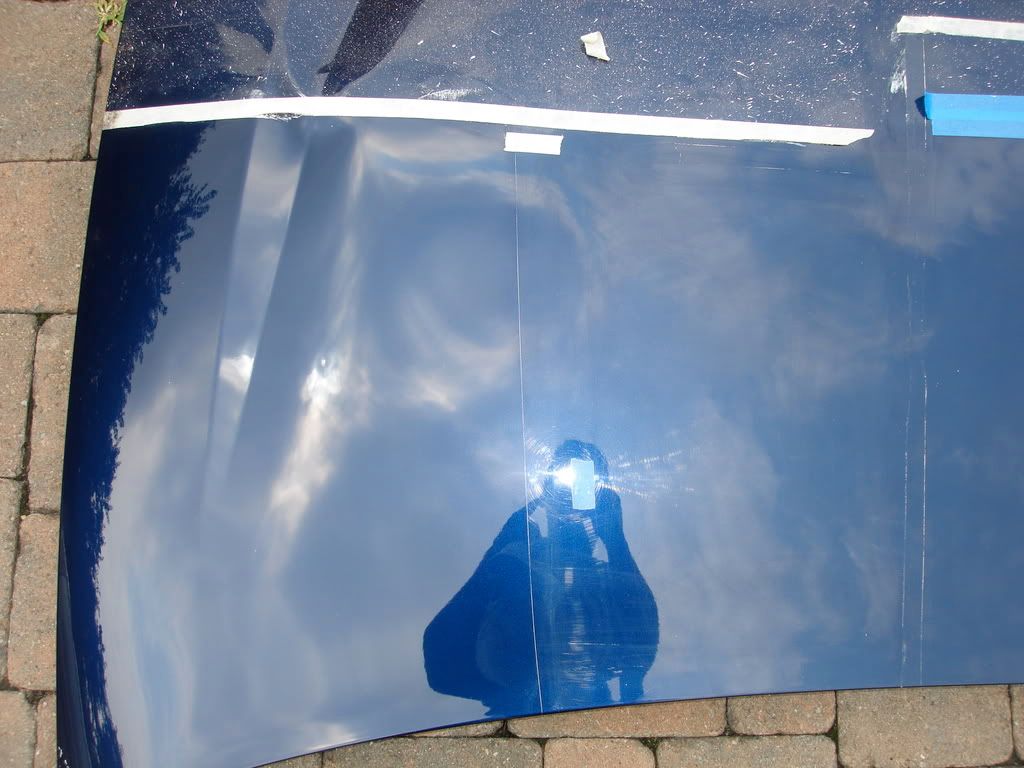
I decided to begin with Gloss It Extreme Cut on a 6.5inch Lake Country purple foamed wool
After working the panel with slow passes at 1500rpm to my suprise the finish looked like this, a very good amount of defect was removed but some deep swirls and RIDS still remained along with holograms
I used Extreme Cut one more time, this time bumping the speed up to about 1700 on the Makita hoping to work out those deeper RIDS with teh PFW. After this step the majority of defect was gone and it was time to move to a less aggressive pad and polish.
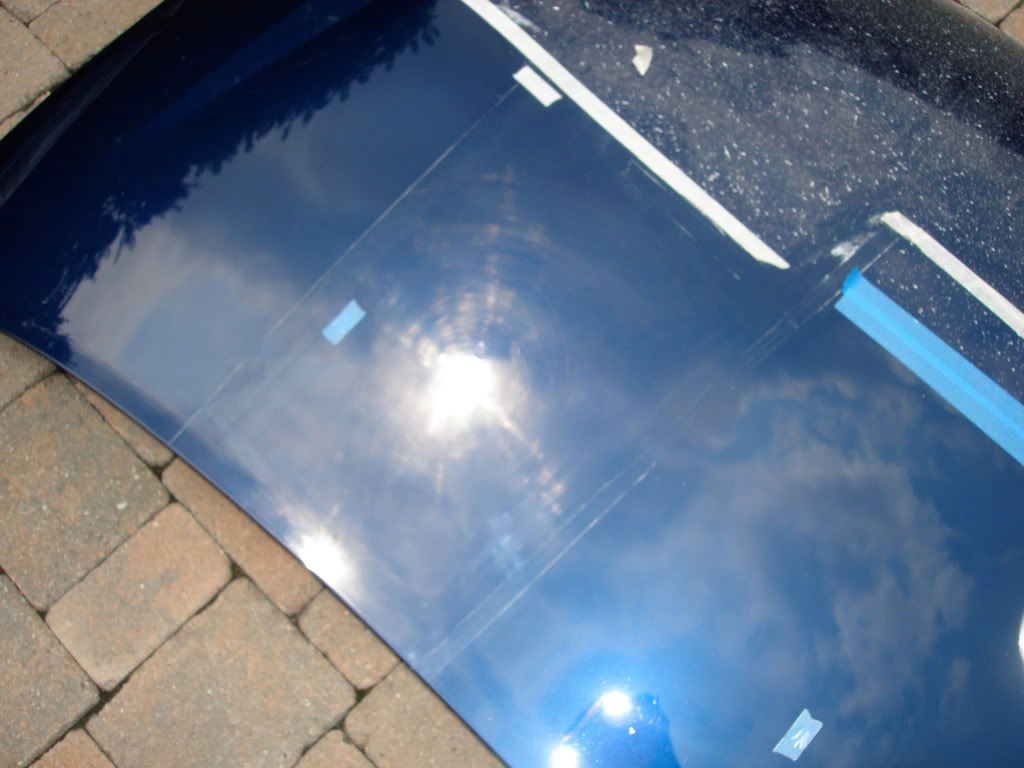
I used Gloss It Evolution cut( a milder cutting polish) with a new Edge 3K CCX 8" cutting pad)
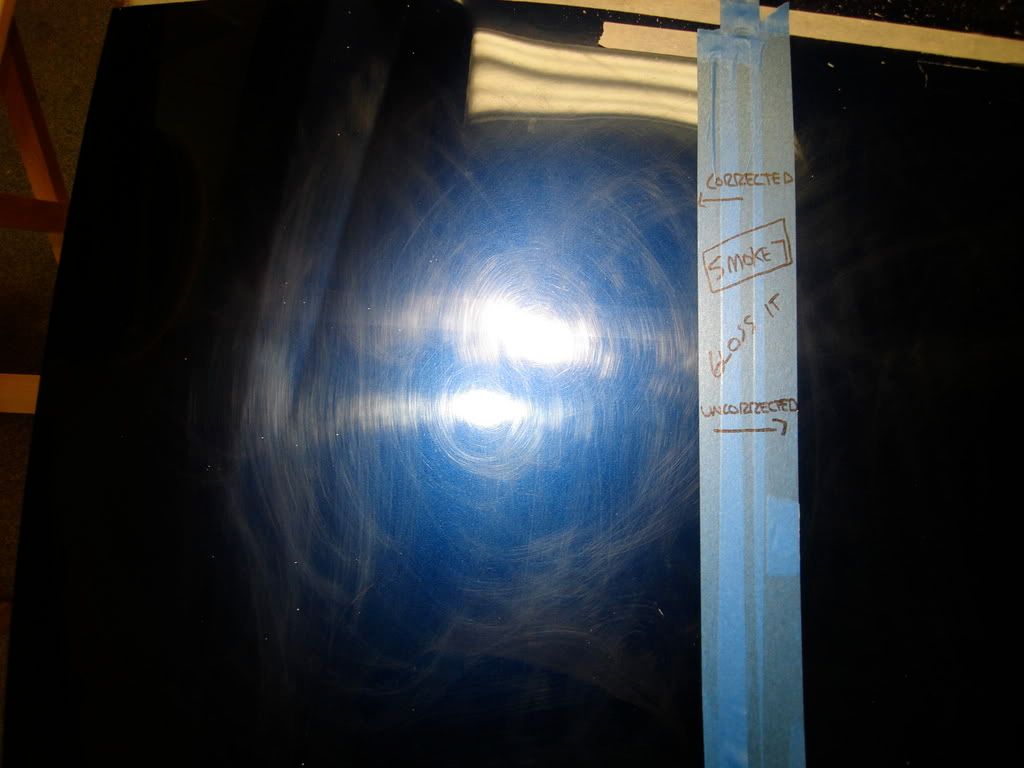
After this stage the finish looked like this
Just about all the defect was gone at this point, now onto refining the finish and polishing out any last fine swrils
I chose to use Evolution cut with a green CCX 8" polishing pad from edge for this
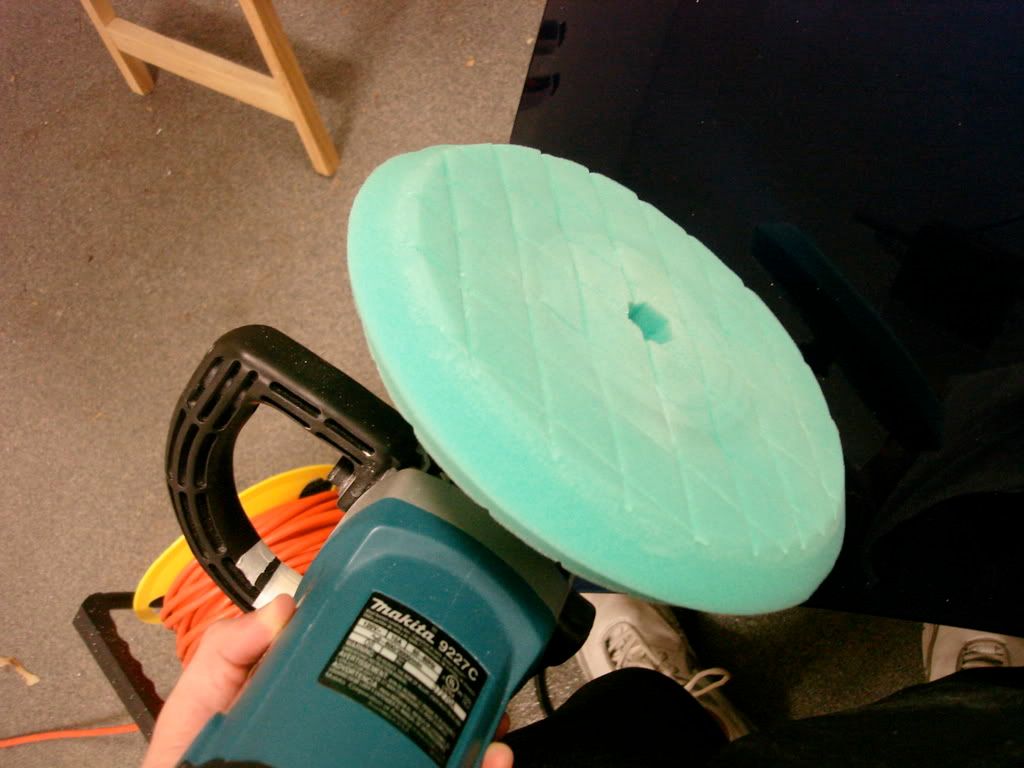
I decided to begin with Gloss It Extreme Cut on a 6.5inch Lake Country purple foamed wool
After working the panel with slow passes at 1500rpm to my suprise the finish looked like this, a very good amount of defect was removed but some deep swirls and RIDS still remained along with holograms
I used Extreme Cut one more time, this time bumping the speed up to about 1700 on the Makita hoping to work out those deeper RIDS with teh PFW. After this step the majority of defect was gone and it was time to move to a less aggressive pad and polish.
I used Gloss It Evolution cut( a milder cutting polish) with a new Edge 3K CCX 8" cutting pad)
After this stage the finish looked like this
Just about all the defect was gone at this point, now onto refining the finish and polishing out any last fine swrils
I chose to use Evolution cut with a green CCX 8" polishing pad from edge for this
#3
07-04-2008, 06:54 PM
Join Date: Jun 2008
Location: New Jersey
Posts: 272
Rep Power: 27
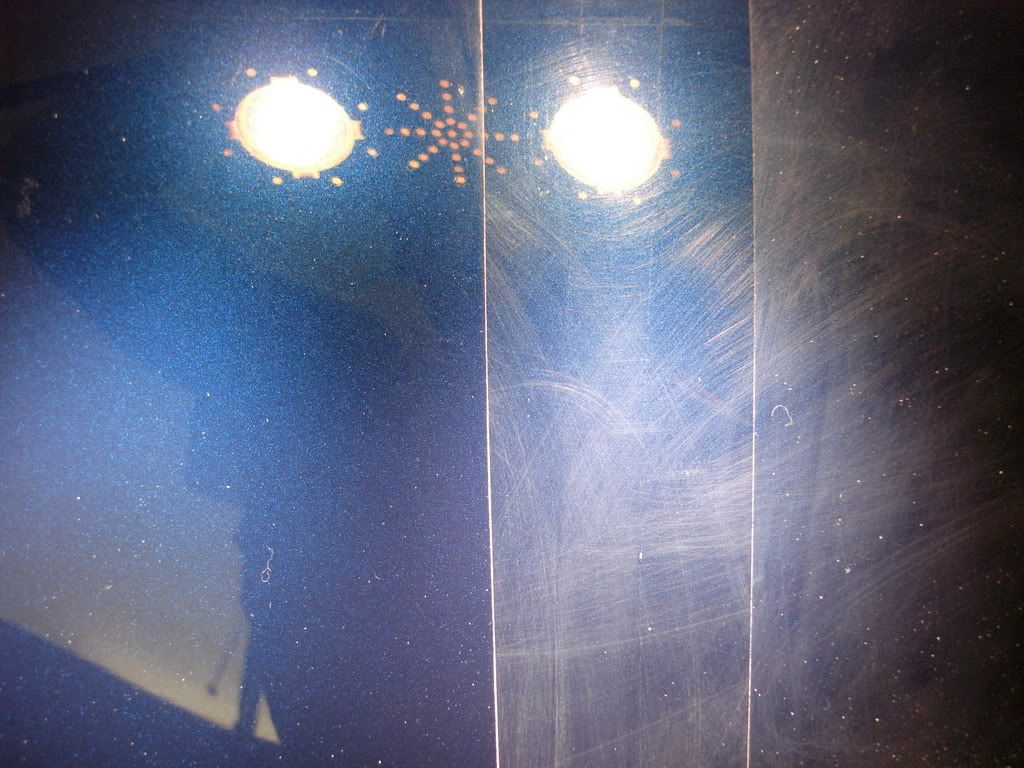
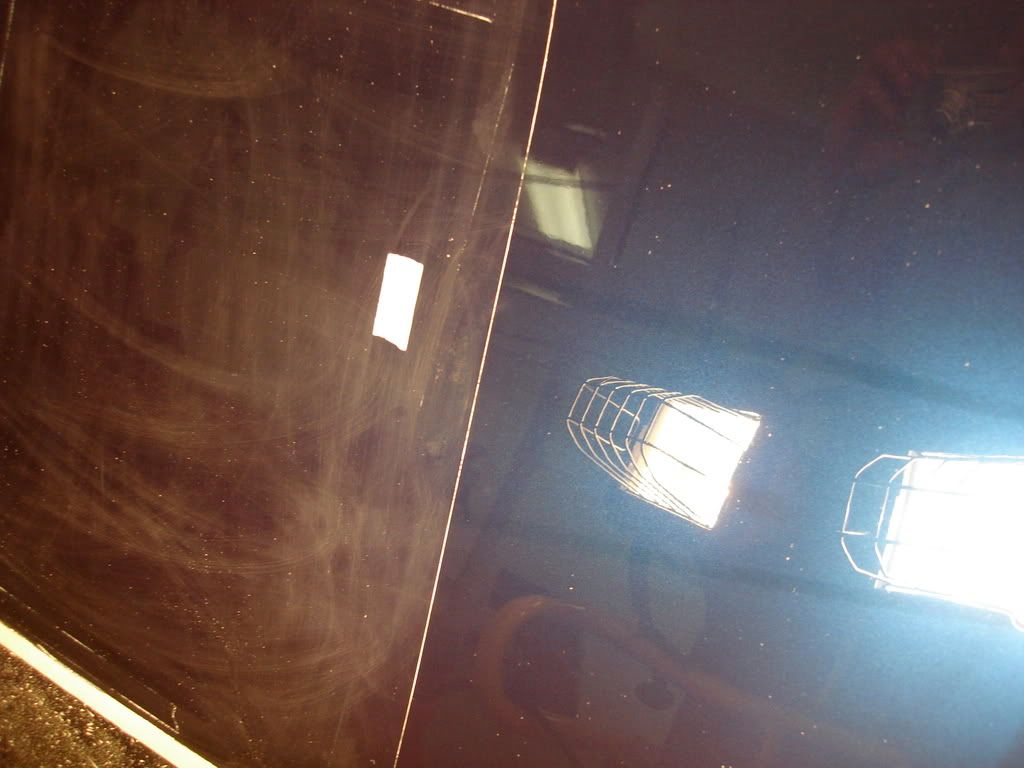
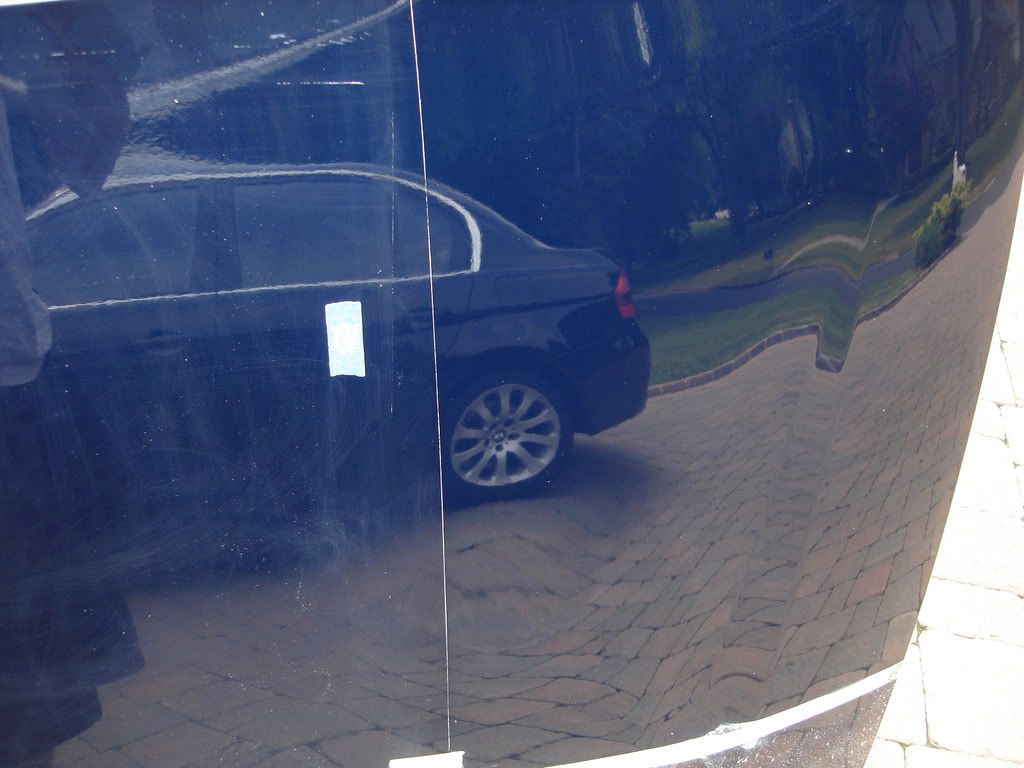
The result after Evolution cut and an edge green pad and an IPA wipedown, at this pint I was very happy with teh correction and finished achieved. The panel was LSP ready..but I decided to go one more step to make sure it was really perfect before applying Gloss Finish
I used a LC white polishing pad and Evolution polish at no more than about 1000rpm to refine the finish further and to bring out maximum gloss while removing any slight holograms which may have remained after the correction
Evoution polish working
The result after an IPA wipedown with no LSP.
some 50/50 shots

Mind the lights cord in this picture
I used a LC white polishing pad and Evolution polish at no more than about 1000rpm to refine the finish further and to bring out maximum gloss while removing any slight holograms which may have remained after the correction
Evoution polish working
The result after an IPA wipedown with no LSP.
some 50/50 shots
Mind the lights cord in this picture
#4
07-04-2008, 06:55 PM
Join Date: Jun 2008
Location: New Jersey
Posts: 272
Rep Power: 27
Now that the panel was fully corrected and finished it was time to apply Gloss It Gloss Finish.
I sprayed the panel with Gloss It Gloss Enhancer QD spray as prep (similar to Zaino Z6) and then appied a dime size amount of Gloss Finish to a hand applicator and spread evenly across the panel, a little goes a long way with this stuff!
I then buffed the panel, Gloss Finish doesnt need to cure for a very long time and no additives are needed. It buffs off super easy with no streaking at all.
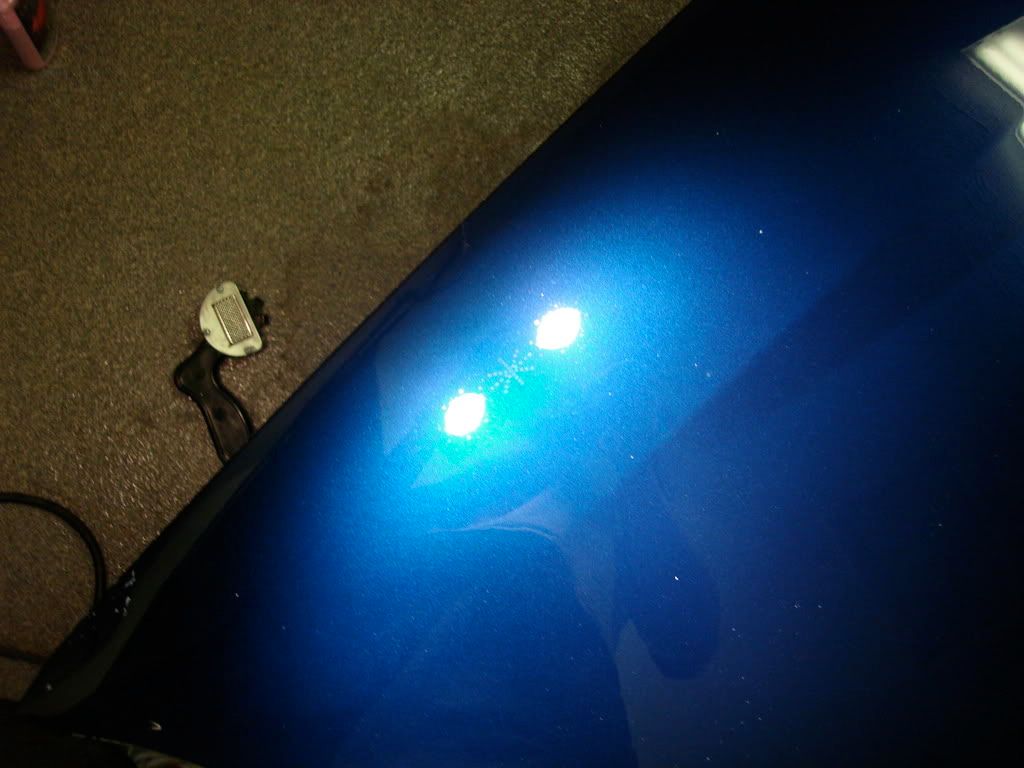
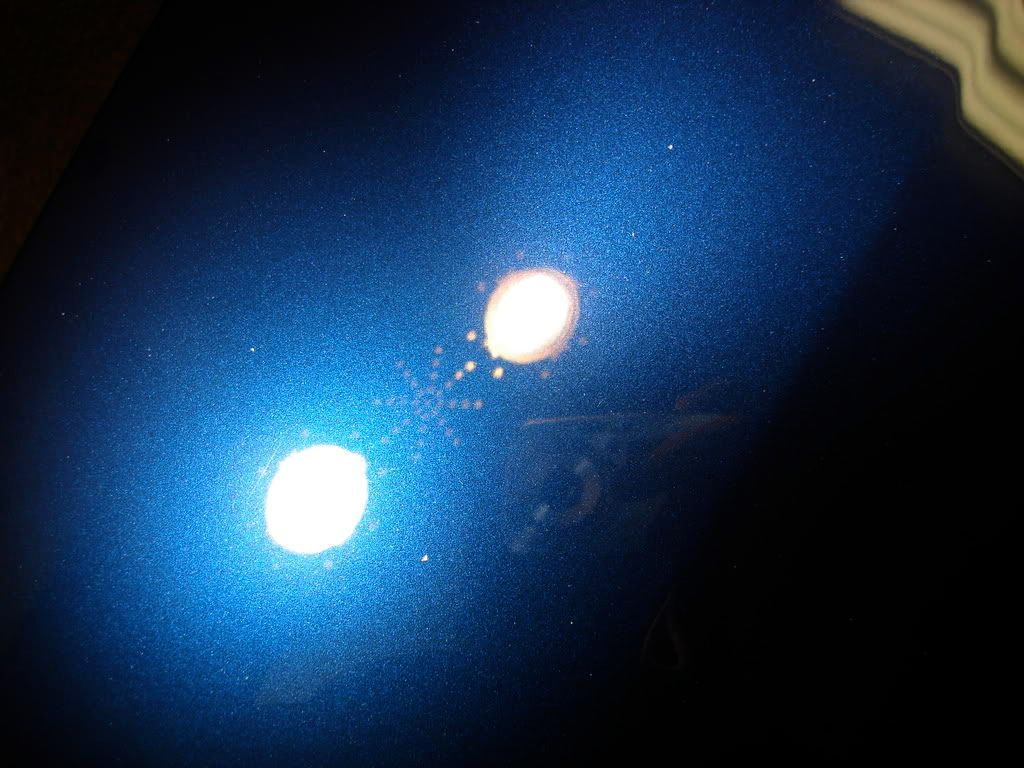
This is a 50/50 in my dark garage after 1 coat of gloss finish and then a quick Gloss Enhancer QD wipedown. I fliped the panel upside down so I could take some photos thats why the corrected side is now on the right.
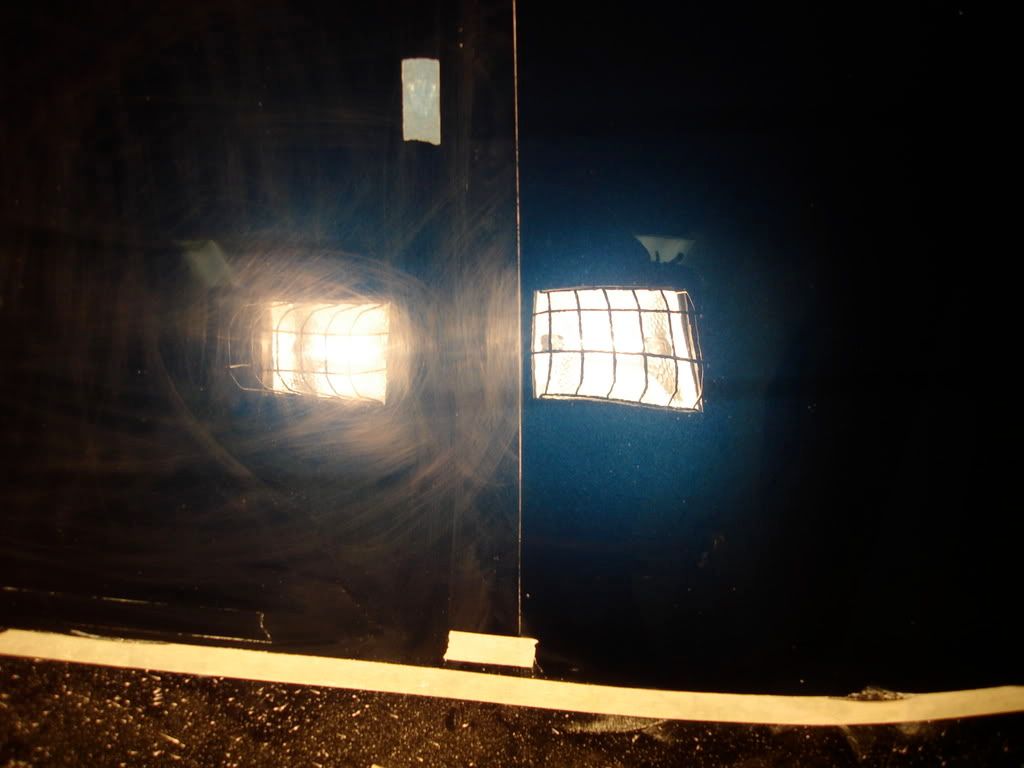
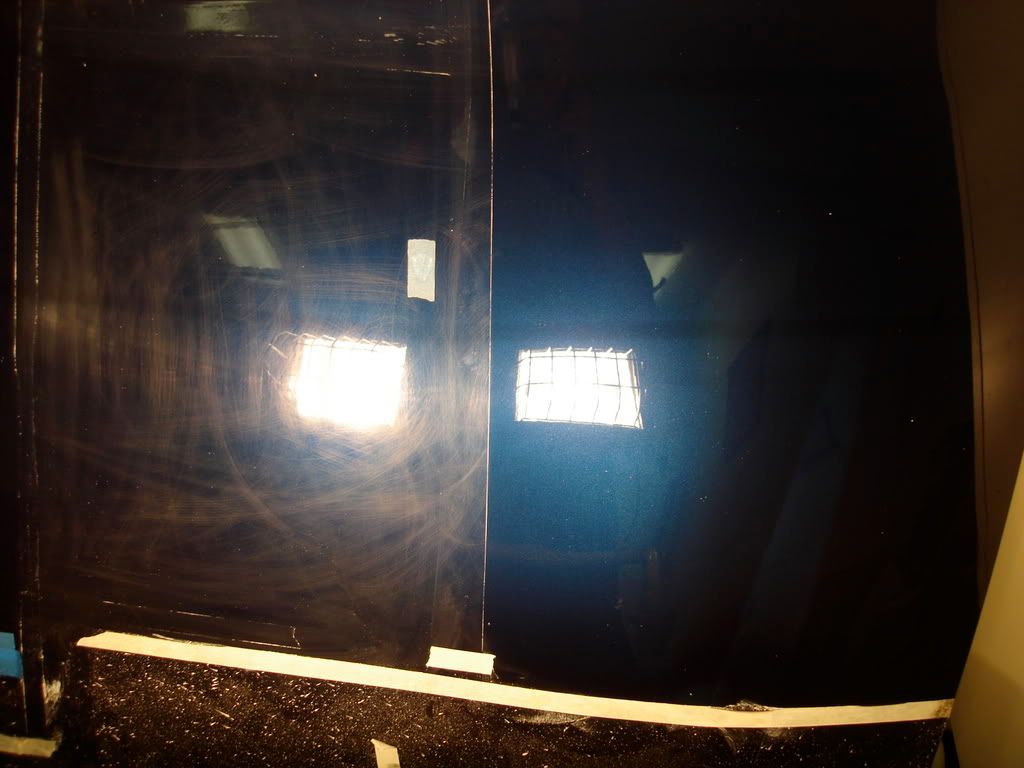
The before
The after
I ended up correcting both sides and leaving the center piece of the panel uncorrected, you can see how dull the finish is and the light is refracted all over the place
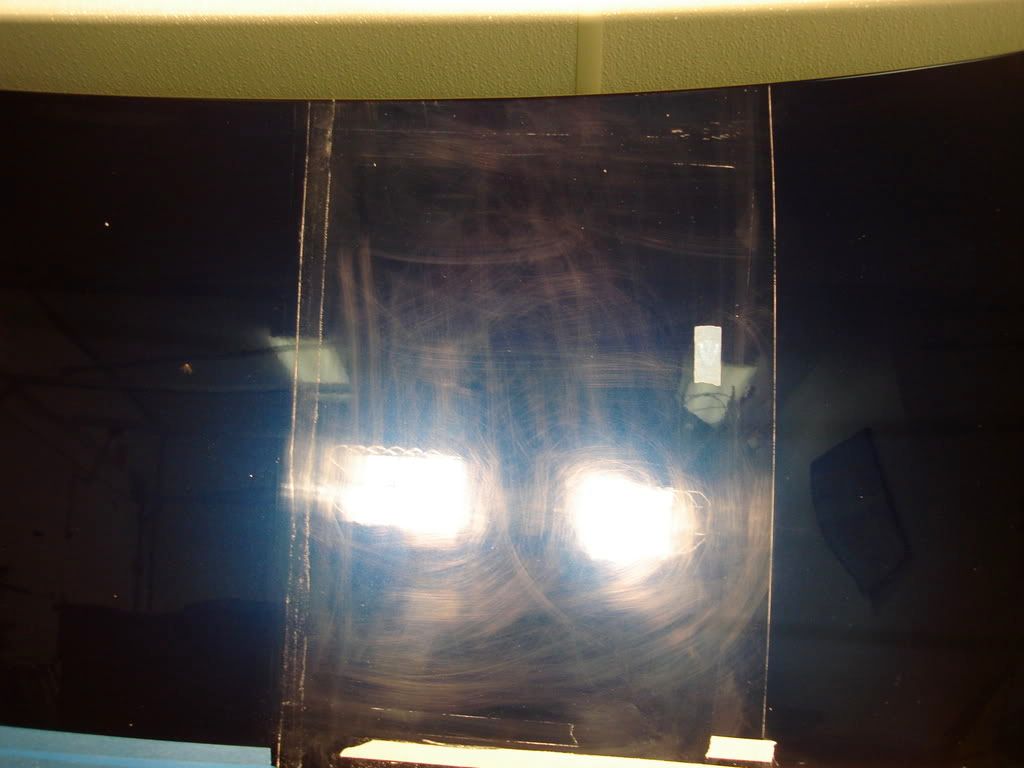
Gloss finish really brought out the flake

I sprayed the panel with Gloss It Gloss Enhancer QD spray as prep (similar to Zaino Z6) and then appied a dime size amount of Gloss Finish to a hand applicator and spread evenly across the panel, a little goes a long way with this stuff!
I then buffed the panel, Gloss Finish doesnt need to cure for a very long time and no additives are needed. It buffs off super easy with no streaking at all.
This is a 50/50 in my dark garage after 1 coat of gloss finish and then a quick Gloss Enhancer QD wipedown. I fliped the panel upside down so I could take some photos thats why the corrected side is now on the right.
The before
The after
I ended up correcting both sides and leaving the center piece of the panel uncorrected, you can see how dull the finish is and the light is refracted all over the place
Gloss finish really brought out the flake
#5
07-04-2008, 06:56 PM
Join Date: Jun 2008
Location: New Jersey
Posts: 272
Rep Power: 27
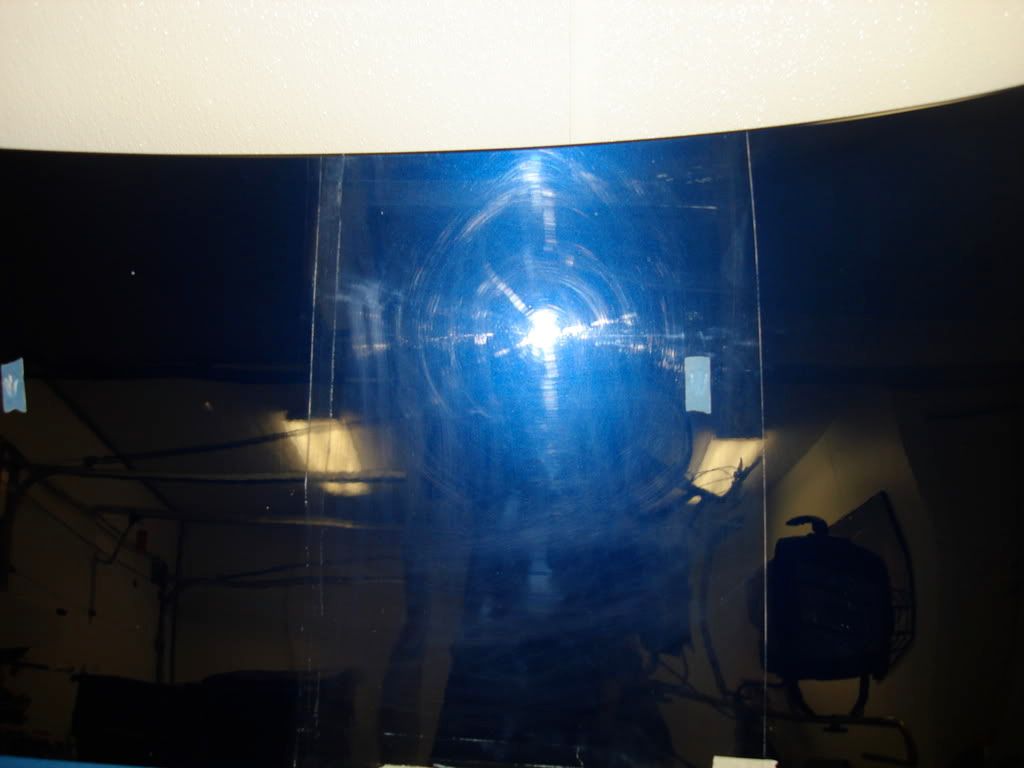
It was cloudy all day and tried to get some shots in the sun. This was the best I could do

Great clarity!
From this
To this

Now I was able to use the 3 step Gloss It system to achive 100% correction from that panel, I have only used Gloss It products 3 other times prior to this! My process was as follows:
Extreme cut w/ LC purple foamed wool x2 - 1500,1700rpm
Evolution Cut w/ Edge 3k yellow CCX cutting pad 12-1500rpm
Evolution Cut w/ Edge 3k green polishing pad 1200rpm
Please note that with this process above the panel was fully corrected and 100% LSP ready, in this case Gloss Finish ready.
Also the LC foamed wool pad I was using is not a "very" aggressive pad, if I had it in time I would have used the Gloss It lambswool pad with Extreme cut instead and probably saved some time in having to use it once instead of twice. Also I bumped up the speed to 1700rpm the second time with Extreme Cut because I wanted to make sure the deep deep swirls and RIDS came out perfect. I would never approach 1700rpm on a rotary with a foam pad! Because I was using wool the heat didnt build as quickly and I was able to polish saftley at that speed.
I went one step further to enhace the finish at the end a bit more by polishing with a white LC polishing pad and Evolution polish at no more than 1000rpm and then proceeded to apply Gloss Finish.
After I wrecked that panel with steel wool I didnt think I would be able to bring it back, I was really impressed this time around with Gloss It.
Oh an Happy 4th of July everyone.
Great clarity!
From this
To this
Now I was able to use the 3 step Gloss It system to achive 100% correction from that panel, I have only used Gloss It products 3 other times prior to this! My process was as follows:
Extreme cut w/ LC purple foamed wool x2 - 1500,1700rpm
Evolution Cut w/ Edge 3k yellow CCX cutting pad 12-1500rpm
Evolution Cut w/ Edge 3k green polishing pad 1200rpm
Please note that with this process above the panel was fully corrected and 100% LSP ready, in this case Gloss Finish ready.
Also the LC foamed wool pad I was using is not a "very" aggressive pad, if I had it in time I would have used the Gloss It lambswool pad with Extreme cut instead and probably saved some time in having to use it once instead of twice. Also I bumped up the speed to 1700rpm the second time with Extreme Cut because I wanted to make sure the deep deep swirls and RIDS came out perfect. I would never approach 1700rpm on a rotary with a foam pad! Because I was using wool the heat didnt build as quickly and I was able to polish saftley at that speed.
I went one step further to enhace the finish at the end a bit more by polishing with a white LC polishing pad and Evolution polish at no more than 1000rpm and then proceeded to apply Gloss Finish.
After I wrecked that panel with steel wool I didnt think I would be able to bring it back, I was really impressed this time around with Gloss It.
Oh an Happy 4th of July everyone.
#6
07-04-2008, 11:24 PM
Nice write up Smoke.
What was the hood from? What car and year?? just curious how hard or soft the clear coat was.
I'd love to see Gloss It put to that same test on an extremely hard clear like a C5 or C6 Corvette, VW, or Audi..... or you can just wait for me to do it as soon as I get my hands on some, but that won't be for at least another 2-3 weeks at the earliest.
Again nice work.
Josh

Trending Topics
#8
07-05-2008, 09:15 AM

Registered User
Join Date: May 2008
Location: Radiator Springs
Posts: 42
Rep Power: 18
Thats crazy! I just received my gloss it products and I am about to do a full correction on my 56 T-Bird, so expect a write up with my findings. Great to see what machines, speeds and pads you used for this correction test.
I have a 2001 Z06 hood (blue) and a 2001 BMW 330Ci hood (silver) also I have two Porsche tops for my 04 911, one a black and the other yellow. I need to do some work on all these parts and looks like Gloss-It will be the ideal product. This stuff look amazing and its going to be nice to get rid of all the current products I use and not have to worry about multi-steps from zaino.
Great write up and great photos!
#9
07-05-2008, 09:46 AM
Join Date: Jun 2008
Location: New Jersey
Posts: 272
Rep Power: 27 Thats crazy! I just received my gloss it products and I am about to do a full correction on my 56 T-Bird, so expect a write up with my findings. Great to see what machines, speeds and pads you used for this correction test.
I have a 2001 Z06 hood (blue) and a 2001 BMW 330Ci hood (silver) also I have two Porsche tops for my 04 911, one a black and the other yellow. I need to do some work on all these parts and looks like Gloss-It will be the ideal product. This stuff look amazing and its going to be nice to get rid of all the current products I use and not have to worry about multi-steps from zaino.
Great write up and great photos!
#10
07-05-2008, 10:59 AM
Registered User
Join Date: May 2008
Location: Radiator Springs
Posts: 42
Rep Power: 18
I just talked with Rich of Gloss-It and he is going to be sending me the same pads that you used in this write up monday.
I normally use 3M & Meguiars pads, but I really want to try exactly the same pads that you used.
This is all new to me as far as paint correction with an orbit. I have always used either the Porter Cable 7424 or my Cyclo. I am very excited to get these pads from Gloss-It and start to try to accomplish what you have shown in your photos.
Keep the write up and photos coming as I am learning a ton just from you.
#11
07-05-2008, 11:17 AM
I just talked with Rich of Gloss-It and he is going to be sending me the same pads that you used in this write up monday.
I normally use 3M & Meguiars pads, but I really want to try exactly the same pads that you used.
This is all new to me as far as paint correction with an orbit. I have always used either the Porter Cable 7424 or my Cyclo. I am very excited to get these pads from Gloss-It and start to try to accomplish what you have shown in your photos.
Keep the write up and photos coming as I am learning a ton just from you.
I normally use 3M & Meguiars pads, but I really want to try exactly the same pads that you used.
This is all new to me as far as paint correction with an orbit. I have always used either the Porter Cable 7424 or my Cyclo. I am very excited to get these pads from Gloss-It and start to try to accomplish what you have shown in your photos.
Keep the write up and photos coming as I am learning a ton just from you.
To be honest, I don't think you're going to get the same results as he did since he was using a rotary and you have a PC and Cyclo.....
PC and Cyclo will not give you those results. You'll get decient results but not like you would if you were skilled with a rotary.
Josh
#12
07-06-2008, 11:51 AM
Join Date: Jun 2008
Location: New Jersey
Posts: 272
Rep Power: 27 To be honest, I don't think you're going to get the same results as he did since he was using a rotary and you have a PC and Cyclo.....
PC and Cyclo will not give you those results. You'll get decient results but not like you would if you were skilled with a rotary.
Josh
PC and Cyclo will not give you those results. You'll get decient results but not like you would if you were skilled with a rotary.
Josh
Now the Flex is considerably more powerful than a PC or UDM but IMO nothing comes close to a rotary. No vibration and polishes breakdown super smooth and more completley. I, like so many others was affraid to use a rotary for fear of buring a clear but if you just do some practice beforehand and realize its limits you will be fine.
#13
07-06-2008, 12:52 PM
Registered User
Join Date: May 2008
Location: Radiator Springs
Posts: 42
Rep Power: 18
I am just as good with my Makita than with my 7424 and cyclo. I also have the flex, and I like all the machines. I only break out the makita when I have to remove heavy sand scratches and really deep swirls. I like to use the 7424 and flex mostly to do my paint correction and finish up with my Cyclo.
Just good to see how others are using the Gloss-It polishes and Makita and newer pads for correction. Will have to do some testing with mine when my Gloss-it pads come in.
cheers...
Just good to see how others are using the Gloss-It polishes and Makita and newer pads for correction. Will have to do some testing with mine when my Gloss-it pads come in.
cheers...
#14
07-10-2008, 10:14 AM

Can someone breakdown for me the "advantage" of the Maktia over say the PC 7424 in regards to the rotary issue? I've been an avid PC guy for awhile and have seen the Cyclo's at work as well. Recently, I've detailed a few cars with deeper scratches and couldn't help but wonder if there was a better machine that didn't take as long.
#15
07-10-2008, 03:43 PM
Join Date: Jun 2008
Location: New Jersey
Posts: 272
Rep Power: 27 Can someone breakdown for me the "advantage" of the Maktia over say the PC 7424 in regards to the rotary issue? I've been an avid PC guy for awhile and have seen the Cyclo's at work as well. Recently, I've detailed a few cars with deeper scratches and couldn't help but wonder if there was a better machine that didn't take as long.
With a rotary you can achieve much higher levels of paint correction and defect removal, in about a fraction of the time. When using a rotary the polish breaks down super smooth and more completely because of its single direction orbit and added power, the difference is night and day. Think of the PC as being a Honda and the Makita as a Porsche turbo . Note that rotary polisher speeds are in RPM and dual action speeds are in OPM(orbitals per minute)
BUT the downside to a rotary is that you can actually cause damage to the paint finish if its used incorrectly. A common mistake people make is called "burning the clear" which basically means they generated to much heat with the polisher and the pad burnt away a piece of clear coat, buring a clear coat is not fixable unless a respray is done. Another common mistake which is super common among unprofessional detail shops that is actually fixable is holograming. Holograms happen when the buffer is moved across the surface to quickly or set at a very high speed,a gumed up pad and other things can cause holograms as well.

This is a basic outline of the use of a rotary polisher. Hope this helps.