Removing Project BMW E46’s Subframe Bushings
Removing subframe bushings, DIY style, can be messy, and involve a torch.
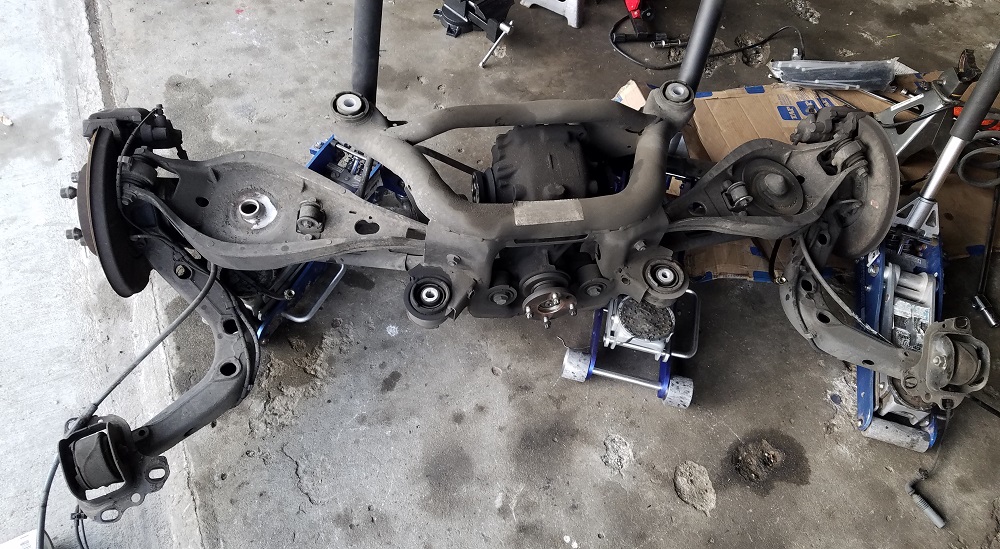
Welcome back to another installment of Project E46, the weekly updates on my $1,500 budget BMW drift build. Two weeks ago, I removed the rear suspension and subframe assembly from the car, and last week, I inspected the chassis for the infamous E46 subframe-to-chassis cracking issue. There was some damage, but it wasn’t as bad as it could have been, which is a relief.
This week, with the subframe assembly out of the car, it’s time to replace the bushings. The stock rubber bushings, presumably the originals, have 210,000 miles of age on them, and need to be replaced. But it’s more than that. On the track, the stock bushings allow for too much deflection, or movement. This not only causes dynamic alignment change, which makes for unpredictable handling, but can accelerate chassis fatigue. Both of those things are bad, so I am replacing the stock bushings with solid polyurethane.
Of course, this all sounds great, until it’s time to actually put in the labor to get the job done.
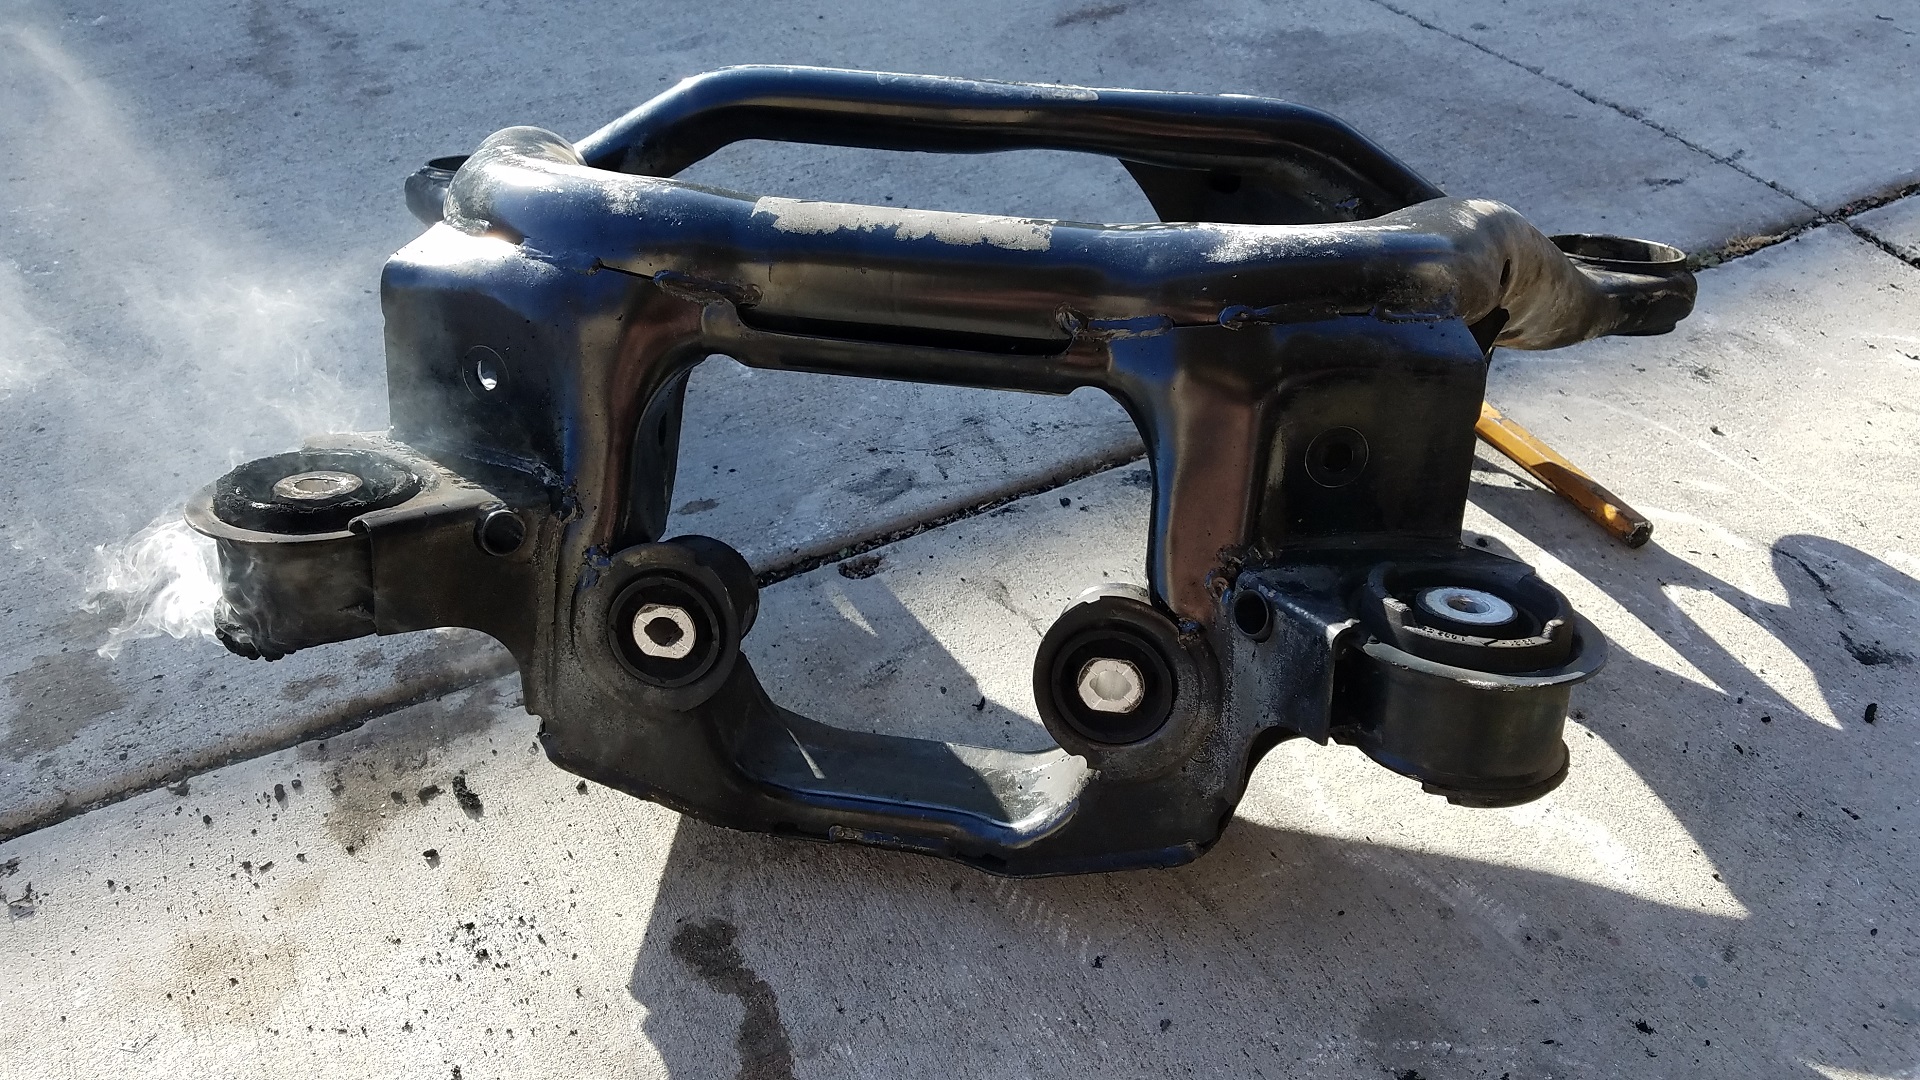
The stock rubber bushings are press fit into the subframe, and after nearly 20 years of use, they aren’t too keen to just slip out of their cozy nest. So, the pro tip here isn’t really a pro tip, this job takes a lot of elbow grease, and some power tools.
What is the plan?
The bushings can be pressed out of the subframe assembly. But that obviously requires a press, which I don’t have.
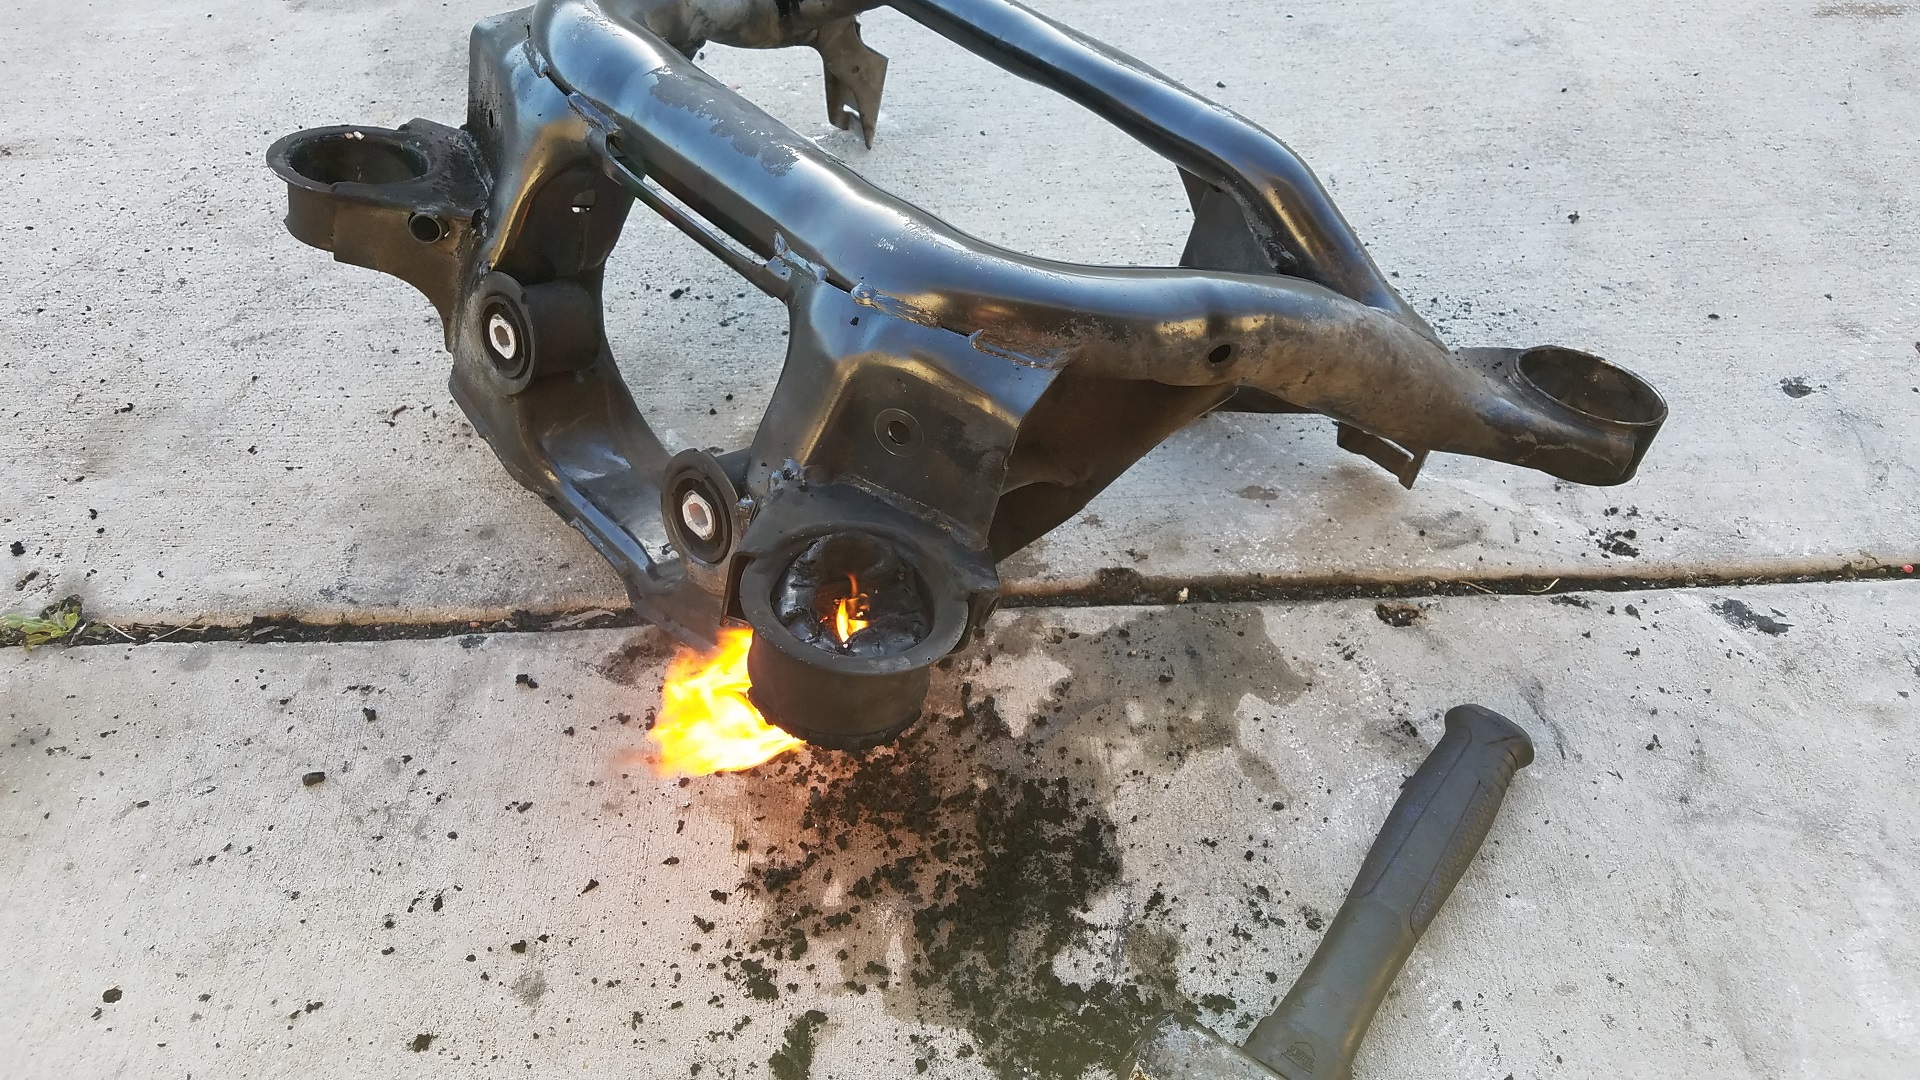
The alternative, and much less professional way to remove suspension bushings, involves a torch, a hammer and a hacksaw. Guess which method I chose.
The methodology here is to torch the bushings, and then hammer out the scalding hot metal core. Once that is out of the way, use a hacksaw and saw through the bushing, perpendicular to the housing in which is sits. The goal is to saw towards the subframe until the bushing is cut all the way through. From there, the bushings can be hammered all the way out.
The subframe assembly houses six bushings in all, four at the subframe mounting points, and two more to secure the differential. All of them will be removed in a similar fashion.
Step 1: Torch.
As the bushing begins to smoulder, it’s the perfect time to bring out the handy 5-pound sledgehammer and knock out that pesky metal core.
Step 2: Hammer.
One really good, hard thwack will do the trick. The subframe is a sturdy piece, so a knock here and there is fine. Usually one direct strike will have the metal core separate from the rubber bushing and fall out.
Step 3: Hacksaw.
Start on the inside of the bushing where the knocked out metal core has left a void. Aim the blade towards and the outside of the bushing, and the subframe assembly and get to sawing. This type of bushing is rubber, but utilizes a metal outer core to stay located in the pocket of the subframe. We have to cut through that metal casing to free the bushing.

Step 3.5: More torch (optional).
Sometimes, you just want to watch the whole world burn. Other times, the bushing cools down too quickly and gets stubborn.
Step 4: Hammer out the bushing.
With the majority of the bushing innards cleared, and the metal casing cut away, pry the casing down and out. This will give you something nice and sturdy to hit with the hammer. The image below showcases the casing bent in, and ready for whacking. A few good knocks and the bushing remains will fall out of the subframe. Rinse and repeat for all six bushings.
The first bushing took about 45 minutes to figure out the process and tempo. From there, each bushing came out in about 15 minutes. The garage smelled awful and molten rubber was everywhere, including on me, but I had a bare subframe ready to be fitted with new, polyurethane goodness.
That’s it for this episode of Project BMW E46. Next week I will be addressing the rear trailing arm bushings. These are another notorious weak spot on the E46 platform and there’s no better time to do them than when the whole car is taken apart. So, stay tuned for that, next Monday!
You must be logged in to post a comment.