
Daedalus 996TT Build Thread - RUF/ADV.1/Rottec/AP

Thread Starter
|
Registered User
Joined: Jan 2007
Posts: 3,081
From: Omaha, NE
Rep Power: 185


Got the 2nd seat put in. Took the belts out from routing through the top portion of the seat and only through the bottom and it's perfect. Very comfortable and easy to use.
Also got the custom caps in from ADV.1. They look SAWEET!
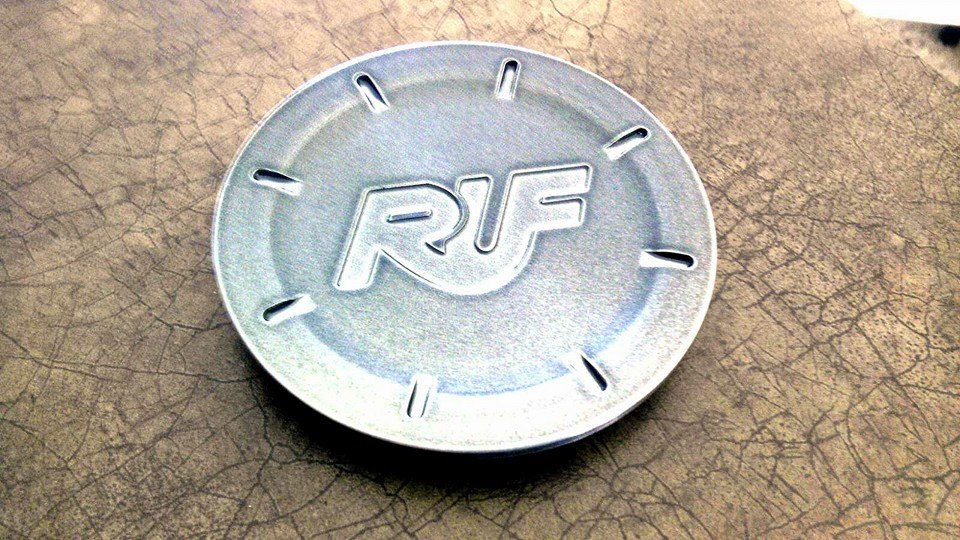
Also got the custom caps in from ADV.1. They look SAWEET!
How did the Agency Power air intake turn out? I am thinking about doing that, but I'm not sure how well it fits and if it really does anything aside from look cool in carbon. My car has some fancy aftermarket red turbo hoses and I'm not sure it will fit right.
Thread Starter
|
Registered User
Joined: Jan 2007
Posts: 3,081
From: Omaha, NE
Rep Power: 185
The PSS's were on backorder so they didn't get installed before the snow fell so we'll have to wait until spring to see the wheels. I've got the car prepped for a full paint correction over the winter and sending the headlights off to be refinished to look new again as the next project.
Haven't got the intake in yet either so i'll update this thread when I do that install as well (probably nearer to spring).
Haven't got the intake in yet either so i'll update this thread when I do that install as well (probably nearer to spring).
Does anyone else reading this thread have experience with that intake? Supposedly an extra 10-ish HP and it definitely looks cool being carbon. But I'm concerned I'd take something that works just fine and "mess it up"
Thread Starter
|
Registered User
Joined: Jan 2007
Posts: 3,081
From: Omaha, NE
Rep Power: 185
Small update:
Headlights have had the UV layer fail in certain areas (it lived in Las Vegas for most of it's life) and my attempts to refurb them have been unsuccessful. I don't feel comfortable aggressively sanding them down and am going to leave it to the pro's. Based on some recommendations from members here i'm sending them out to http://www.innovativedetailing.com/ for their Level 3 refurb service. I sent them an email to inquire about the cost and got a call the next day from the owner who was very knowledgeable and helpful. Anyway - thus far i'm very impressed so far.
I will be touching up all the rock chips on the car, sanding them down, re-applying, etc until they are filled in flat and then doing the entire paint correction on the car over the next 2 weeks so it's done and looking good by the time the headlights get back. More pics of the touchups/paint correction coming soon!
Registered User
Joined: Apr 2012
Posts: 914
From: Boise, Idaho
Rep Power: 99
Car looks great man! Headlights are not that difficult! I just did the ones on my cayenne to remove stone chips from the lenses! I had to go down to 600 grit to get them out! Took like an hour and a half for each one but they came out like new! I went "All wet sanded" 600, 800, 1000, 1500, and 3000 and then buffed the shi t out of them with my rotary buffer and some 3M compound! One tip is every time you change sand paper grit to go the opposite direction! I go from vertical to horizontal with each grit change! Its pretty hard to mess them up! Worse case you will just be sanding on them a long time! 
Thread Starter
|
Registered User
Joined: Jan 2007
Posts: 3,081
From: Omaha, NE
Rep Power: 185
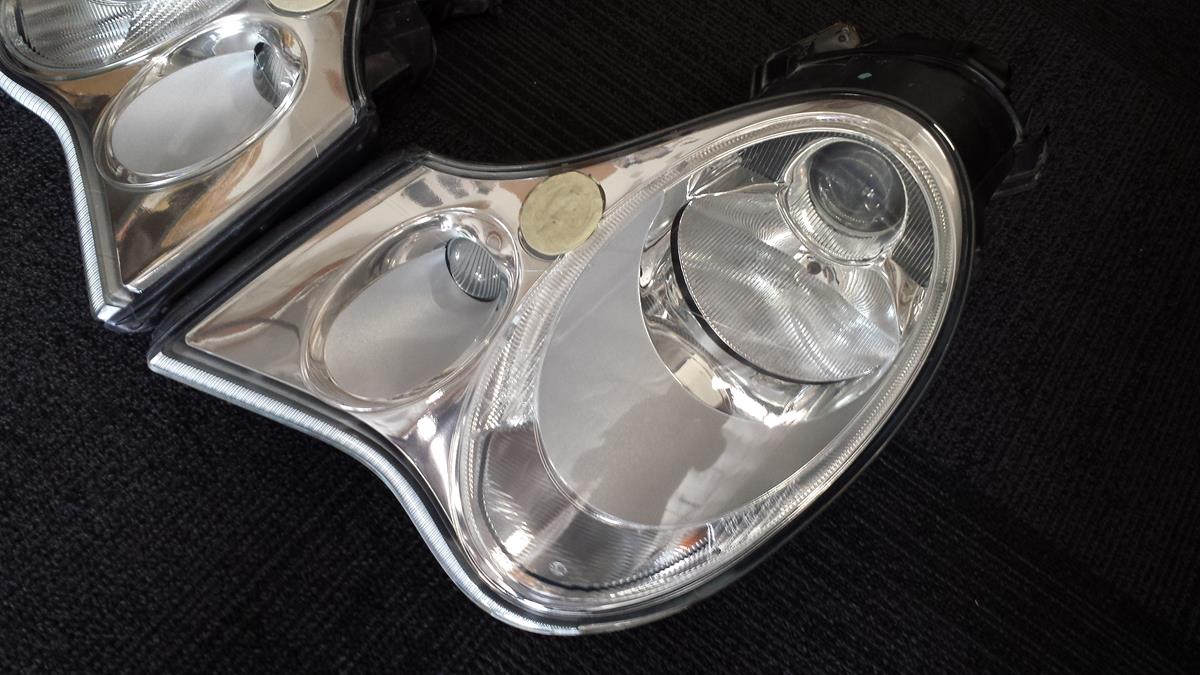
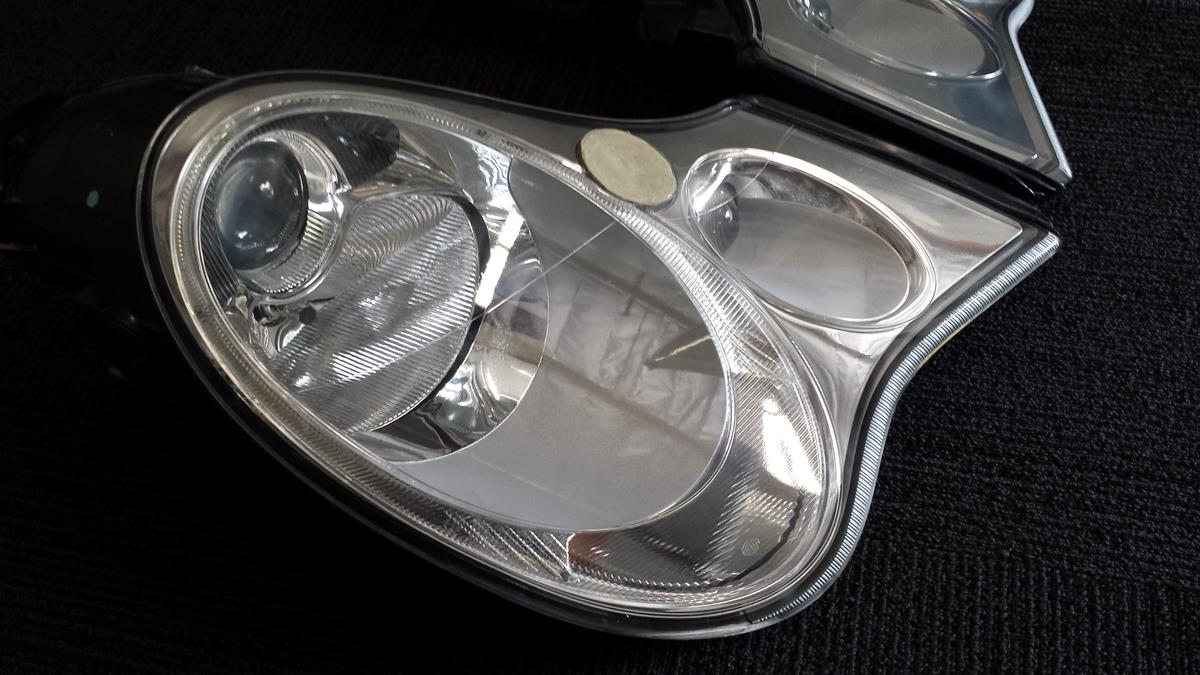
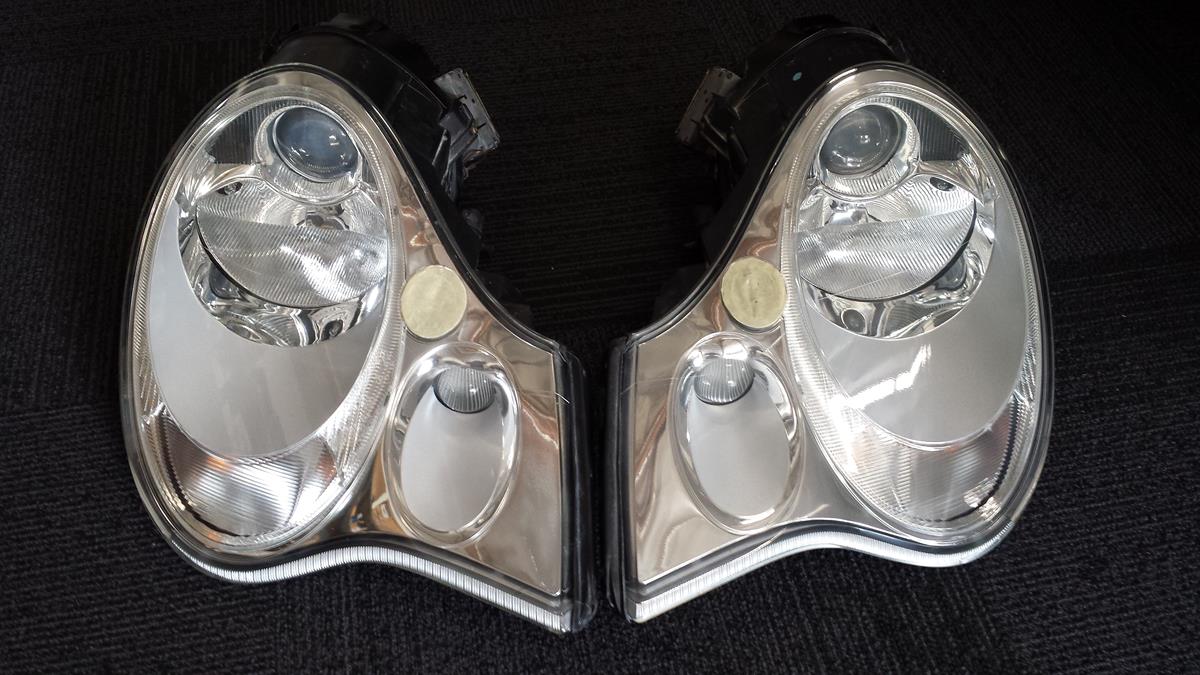
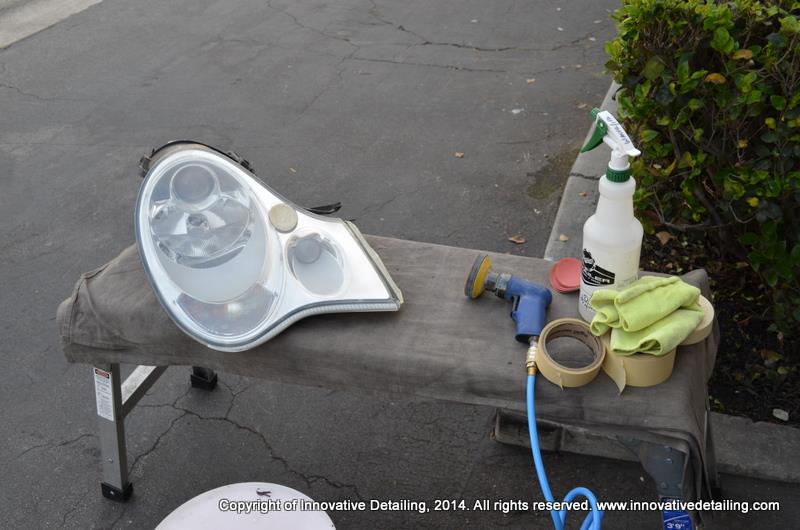
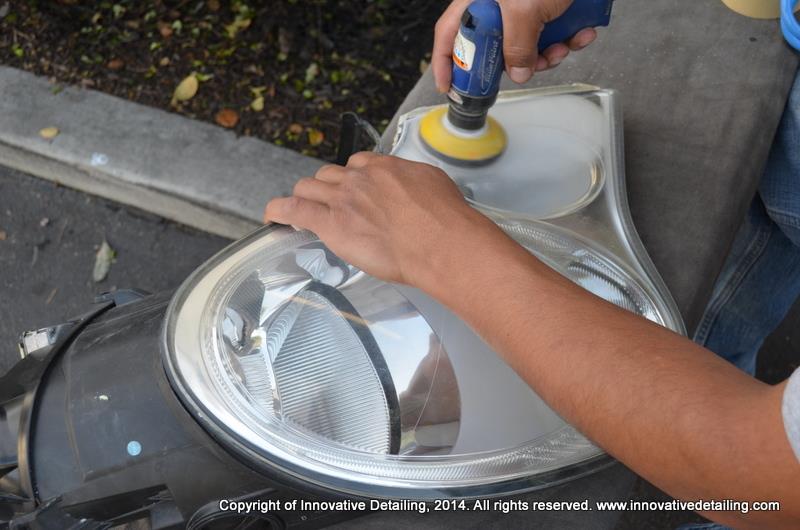
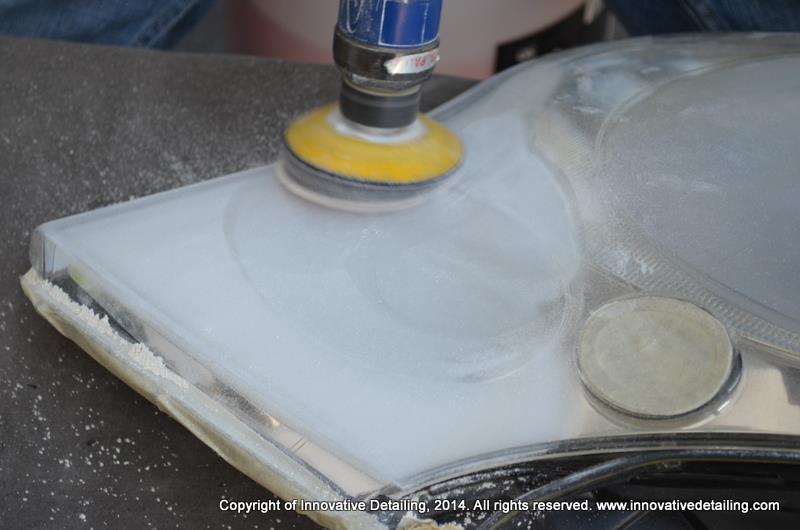
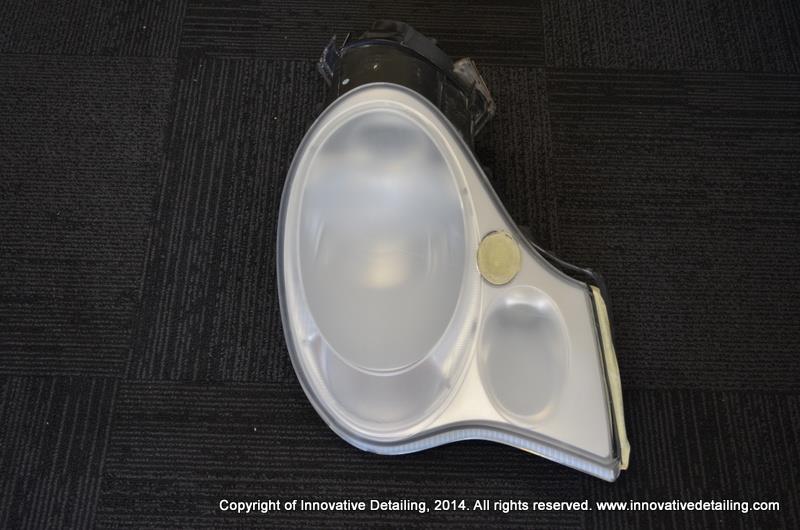
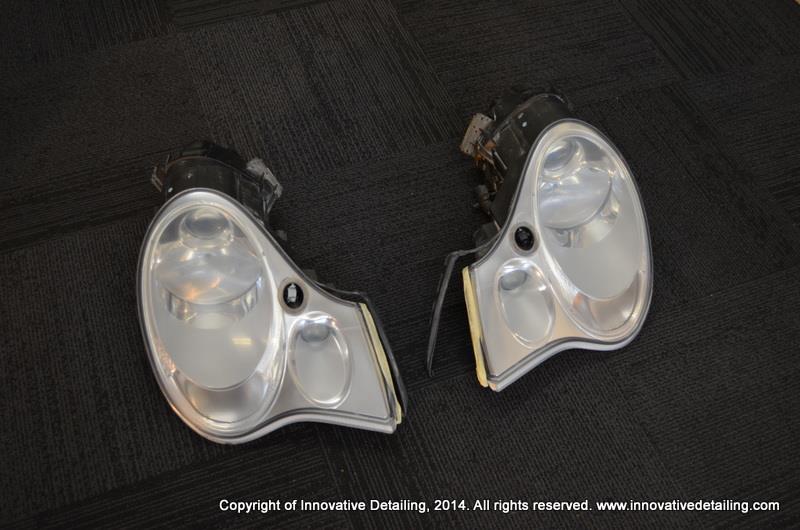
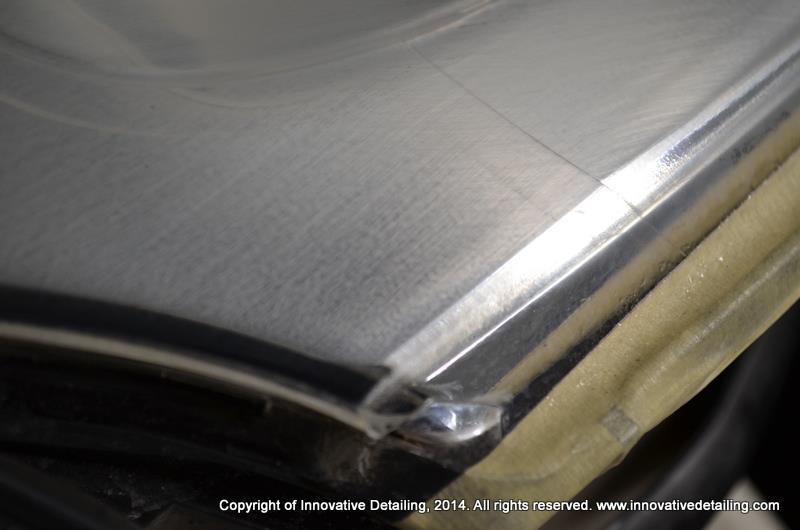
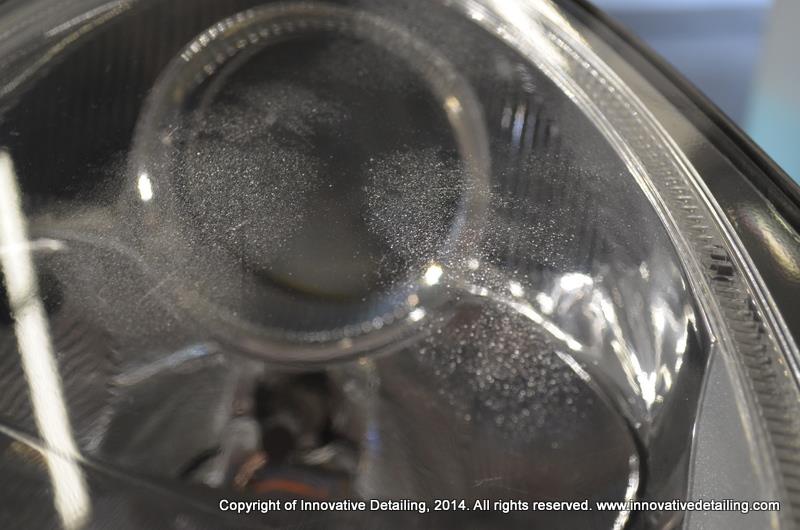
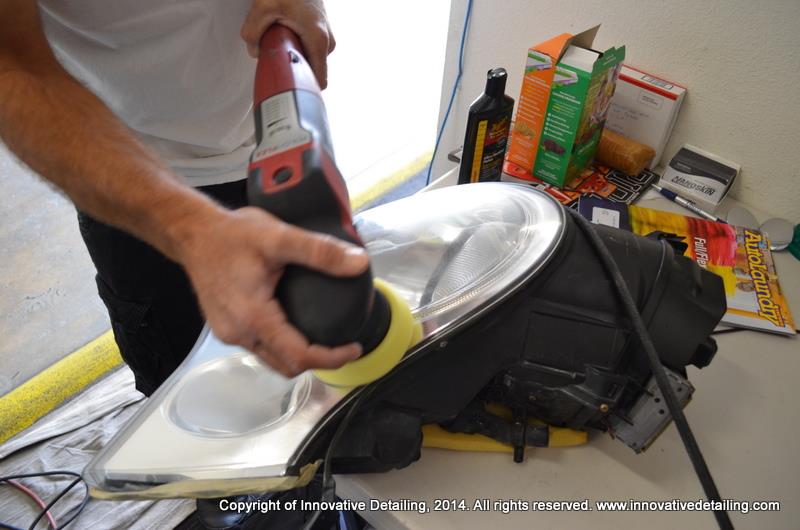
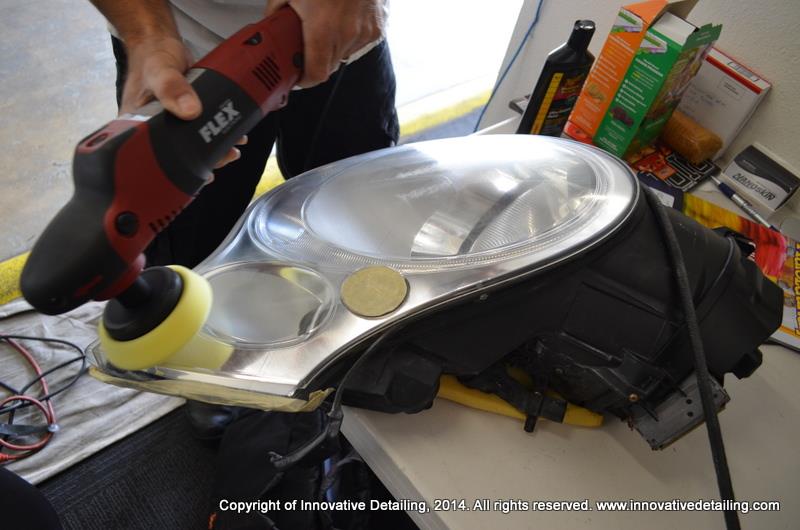
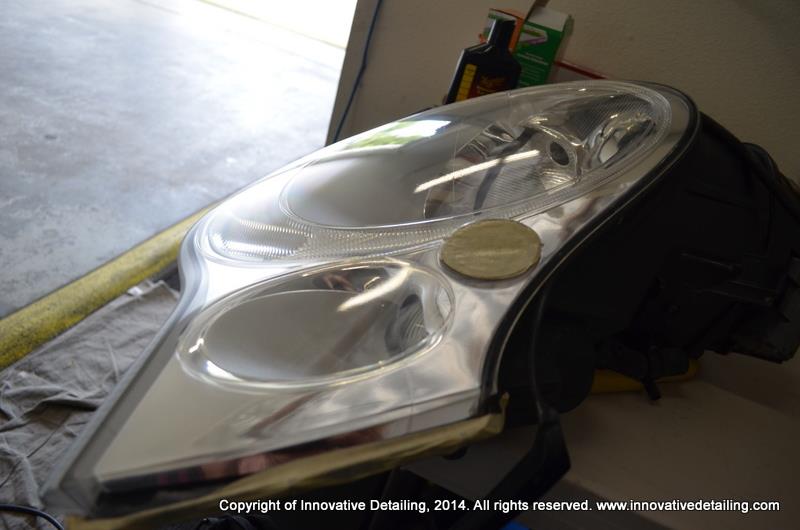
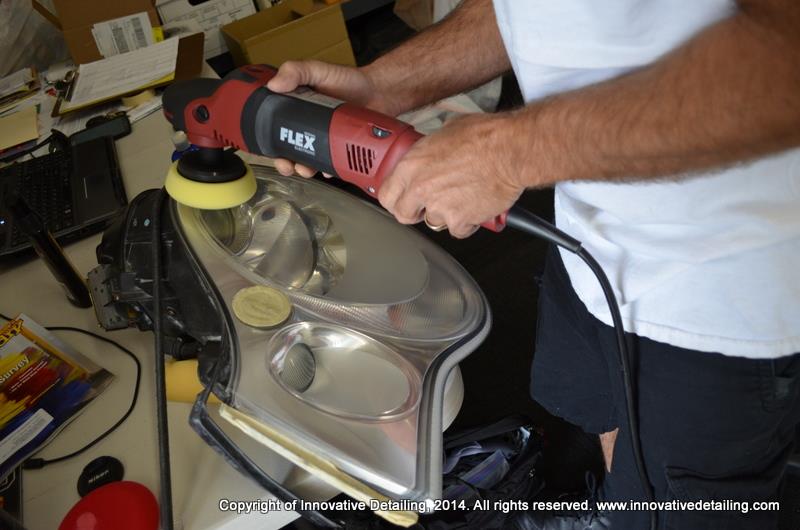
Got a few work in progress shots from Innovative Detailing today. What happened to my lenses was actually the OEM UV coating had failed and been removed in parts of the lens, but not other parts which is why I thought it was clear coat overspray.
Anyway, they stripped them down and made them look like new again. These are going over to get a new UV Laminate applied over the top of them today to protect them from any future failing and rock chips.
Doing a full rock chip touch up to the entire car the last few days and got a few more days to go which i'll post up before/afters shortly.
Then just need to do the paint correction and get my wheels installed finally.
Thread Starter
|
Registered User
Joined: Jan 2007
Posts: 3,081
From: Omaha, NE
Rep Power: 185
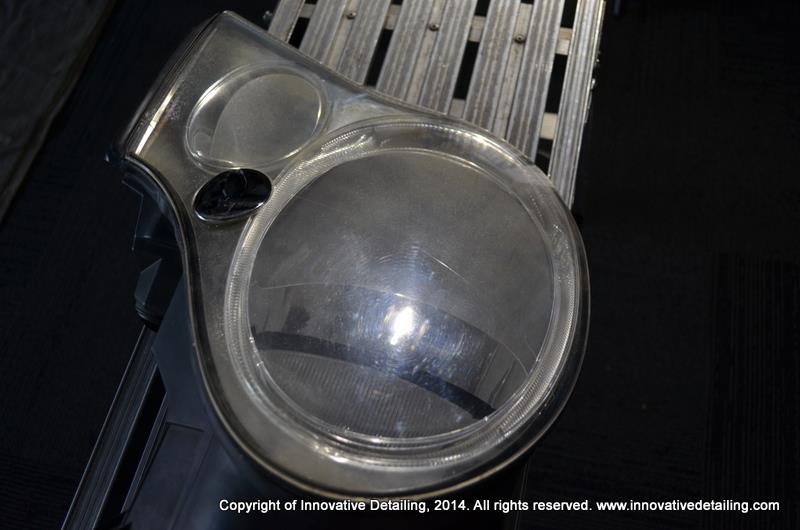
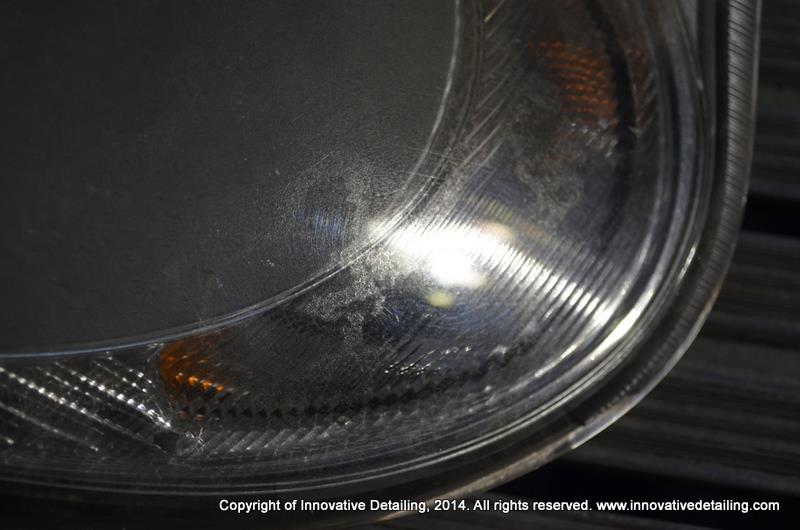
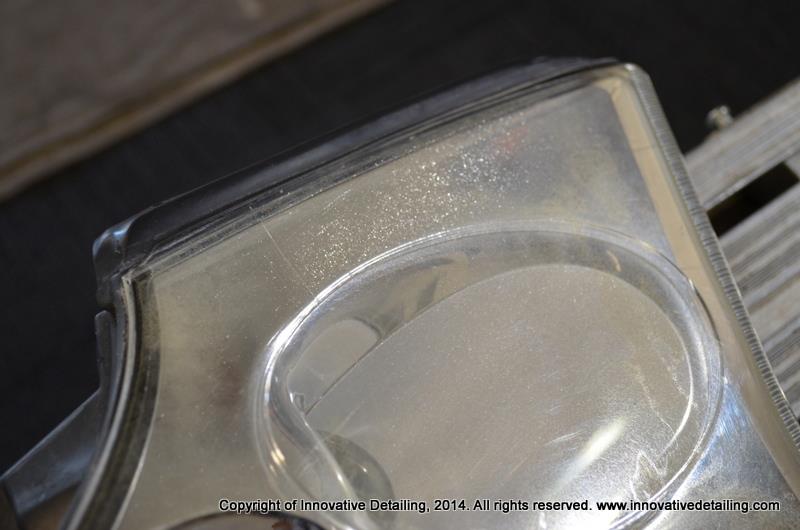
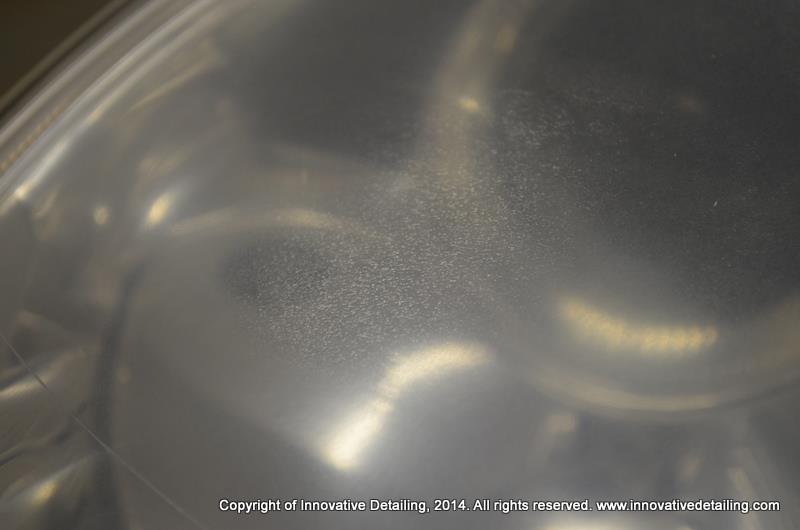
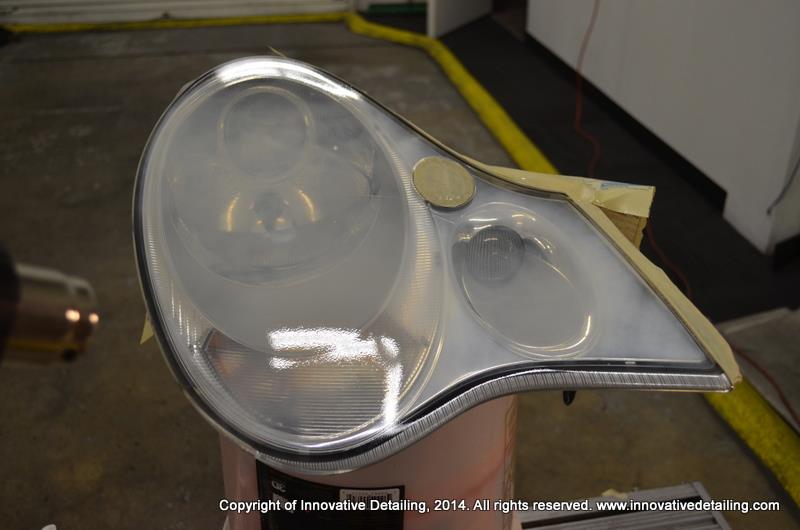
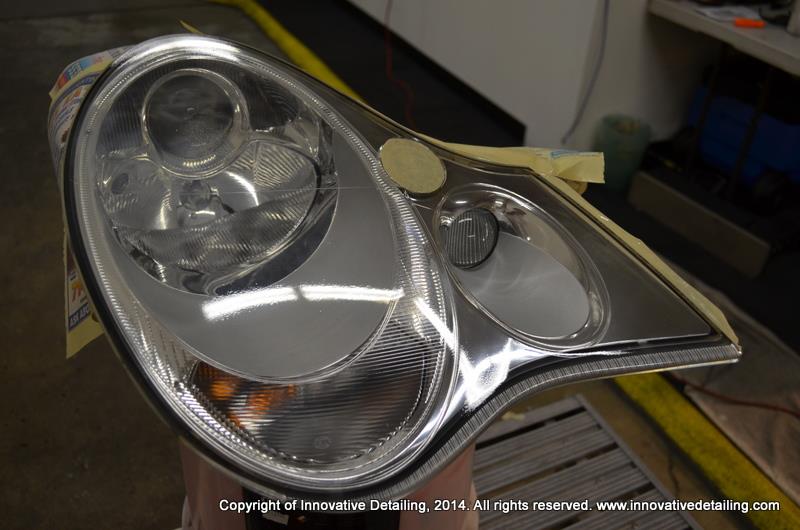
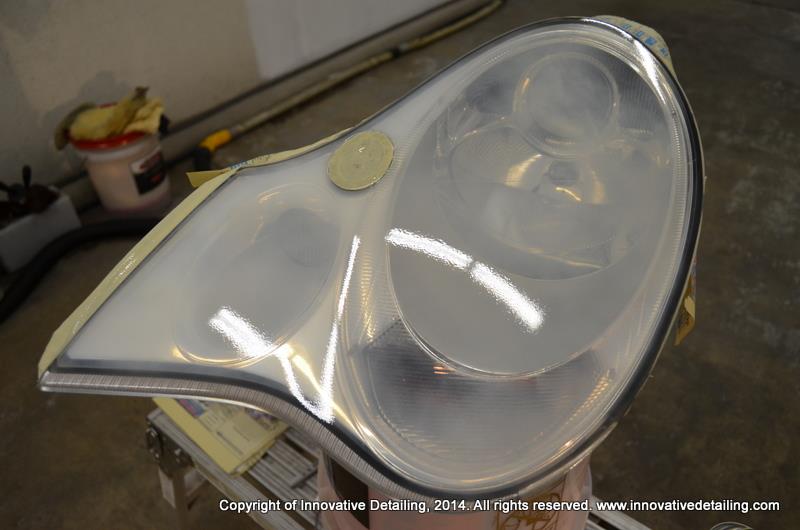
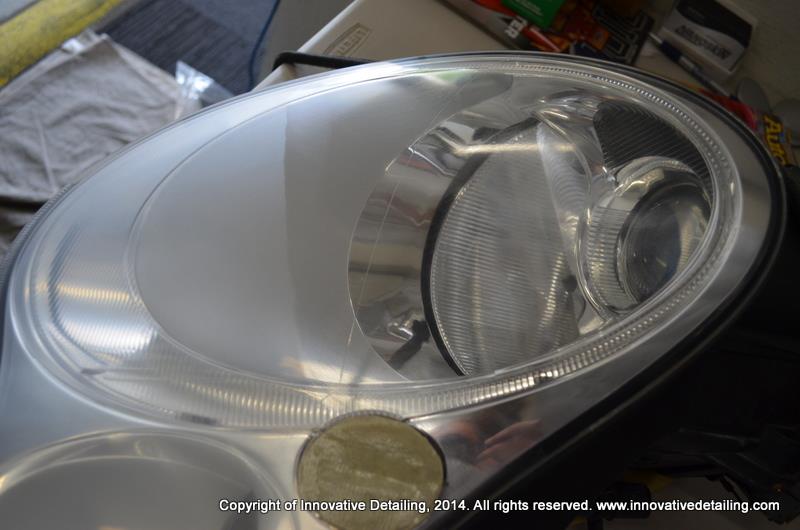
Day 186: Headlight Restoration
Ok so my headlights were in awful shape as the before pictures directly below will indicate. The original UV coating had failed (the car lived most of it's life in Vegas getting a lot of sun before I purchased it). My attempts to remove it had failed and the levels of correction needed weren't something I was comfortable with. Based on a similar thread by FI_FTW he recommended Innovative Detailing to do his repair and raved about the results so I contacted them.
Dave, the owner called me the next day and explained the options and what he thought was wrong with them based on the pics I had sent him. The price was more than reasonable and the work they did (not to mention documenting the entire process for me) and calling me to update me on it numerous times was more than impressive. I cannot say enough good things about Dave or the company so if you have similar looking lights - check them out here: www.innovativedetailing.com or www.headlightlensrestoral.com
Anyway - they are on their way back to me now and I can't wait to get them back in. It's been an embarrassing part of the car for me until now so i'm glad it's finally fixed and brought back to life.
Onto the pics!
Before:
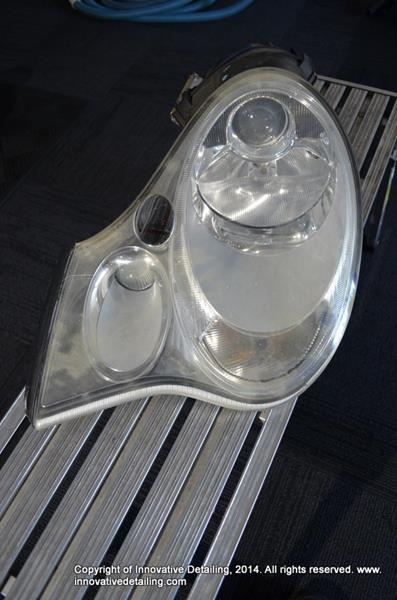
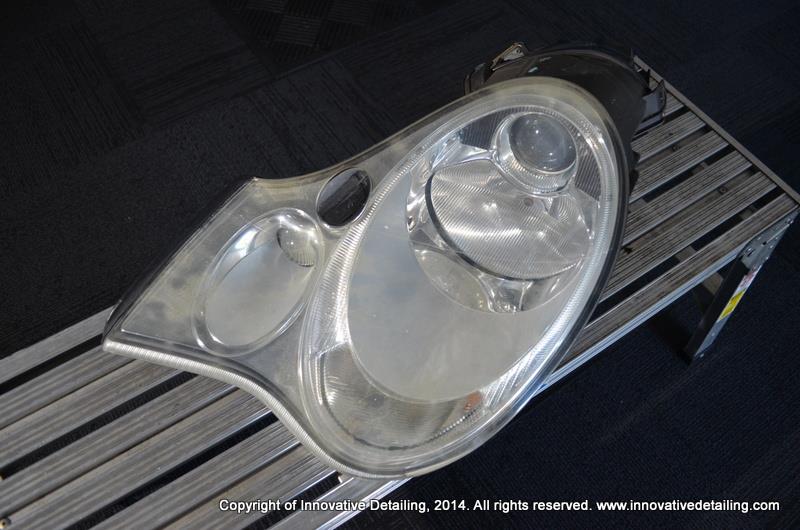
Correction:


Ok so my headlights were in awful shape as the before pictures directly below will indicate. The original UV coating had failed (the car lived most of it's life in Vegas getting a lot of sun before I purchased it). My attempts to remove it had failed and the levels of correction needed weren't something I was comfortable with. Based on a similar thread by FI_FTW he recommended Innovative Detailing to do his repair and raved about the results so I contacted them.
Dave, the owner called me the next day and explained the options and what he thought was wrong with them based on the pics I had sent him. The price was more than reasonable and the work they did (not to mention documenting the entire process for me) and calling me to update me on it numerous times was more than impressive. I cannot say enough good things about Dave or the company so if you have similar looking lights - check them out here: www.innovativedetailing.com or www.headlightlensrestoral.com
Anyway - they are on their way back to me now and I can't wait to get them back in. It's been an embarrassing part of the car for me until now so i'm glad it's finally fixed and brought back to life.
Onto the pics!
Before:
Correction: