
My DIY CF Wrap

Registered User
Joined: Feb 2009
Posts: 211
From: San Diego
Rep Power: 29

Okay - finally got around to playing with the fabric and I do have to say that it looks much better with a top coat, more like real CF than raw CF fabric, as you might expect. I'm not finished testing yet - there are a couple more topcoats I plan on playing with. What I did is applied the CF wrap to an old piece of corian (leftover from the kitchen remodel) with 3M Super 77 adhesive. I used the corian because I wanted something hard like the armrest/door pocket lids. I didn't fully wrap the piece because I wanted to let the ends flap to see if the finish would crack on a flexible surface.
The first conclusion, based on two observations, is yes, IMHO the CF wrap more closely approximates the look of real CF with a gloss top coat. I picked up an acrylic top coat intended for car paint touchup at a car part store and another acrylic top coat (sort of for giggles, plus it was a lot cheaper - Minwax Polyacrylic High Gloss which is intended to be used on furniture as a top coat over wood stain) at Home Depot. Both were aerosol sprays, both approximated the appearance of resin after applied and both left the fabric flexible - not as flexible without, but still more "fabricy" than "plasticy" when dry. The auto top coat was a little thinner and took several layers to build up the depth, but the finish was hard and smooth. The Minwax was thicker than the auto stuff but dried to the touch much faster, so I could put more coats on it sooner (plus it didn't smell, which was a consideration for my wife). I didn't let any of the Minwax coats fully cure, so fingerprints made impressions (but leveled out after a time)... I'm now giving the last coat a full 24 hour cure to test for hardness... It's preliminary, but the Minwax product is giving me the look I was looking for...
I still want to try a high gloss resin and one more type of auto top coat - they're on order and as soon as I receive them, I'll try them out. But right now, the Minwax stuff looks like it will do. By the way, neither finish cracked, but I'll reserve that conclusion until both finishes have fully cured.
Rudy

Registered User
Joined: Feb 2009
Posts: 211
From: San Diego
Rep Power: 29
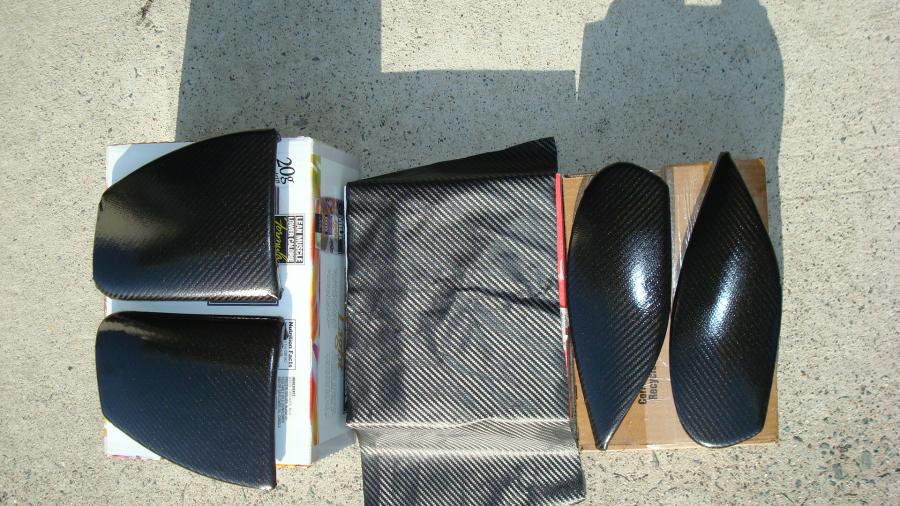
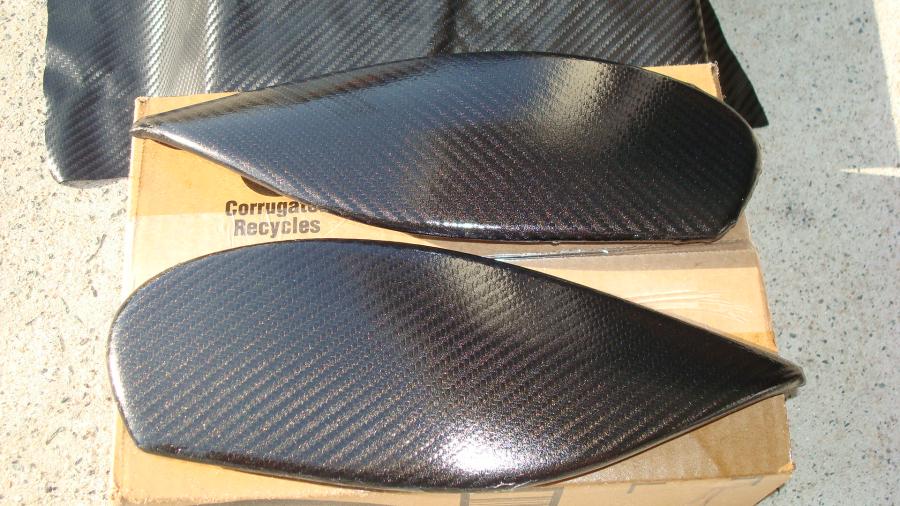
Experiment completed - I didn't wait for the other two items, but instead just went with the Minwax Gloss Polycrylic. I figured that if it was tough enough for furniture, it would be certainly tough enough for what I had in mind for the car. I realize that some folks prefer the raw CF look (or CF leather look, as I've heard it called) - me, I wanted the carbon fiber look without the CF price of solid CF items. I think I got that and am really happy with the result.
Hopefully this batch of pics will show the difference.
And here's how it looks installed - sorry about the picture quality and mess, I wanted to take pictures right away so I could complete this post.
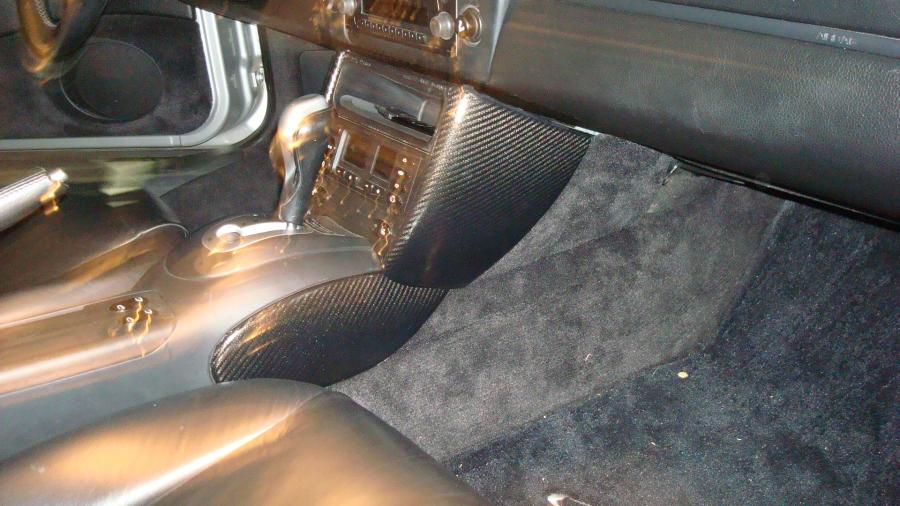
Anyway - as you can see, I'm working on the console lid now.
Rudy
Hopefully this batch of pics will show the difference.
And here's how it looks installed - sorry about the picture quality and mess, I wanted to take pictures right away so I could complete this post.
Anyway - as you can see, I'm working on the console lid now.
Rudy
Registered User
Joined: Feb 2009
Posts: 211
From: San Diego
Rep Power: 29
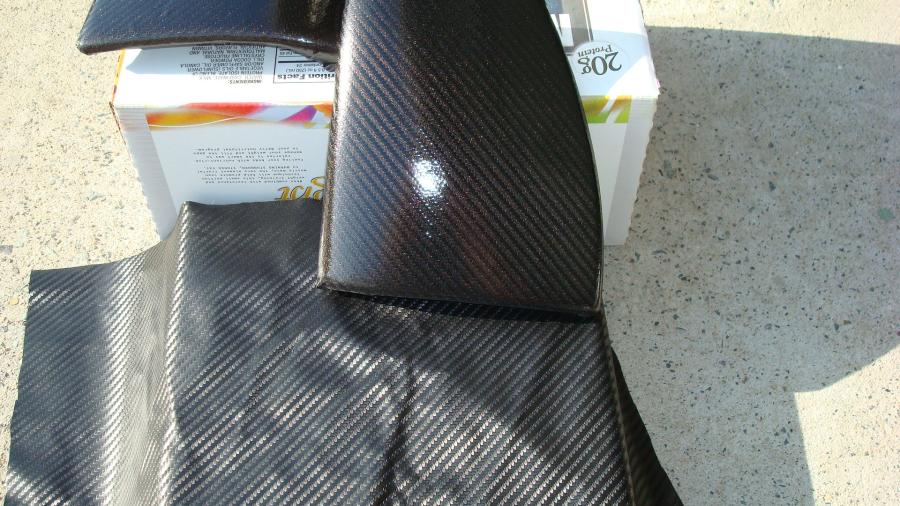
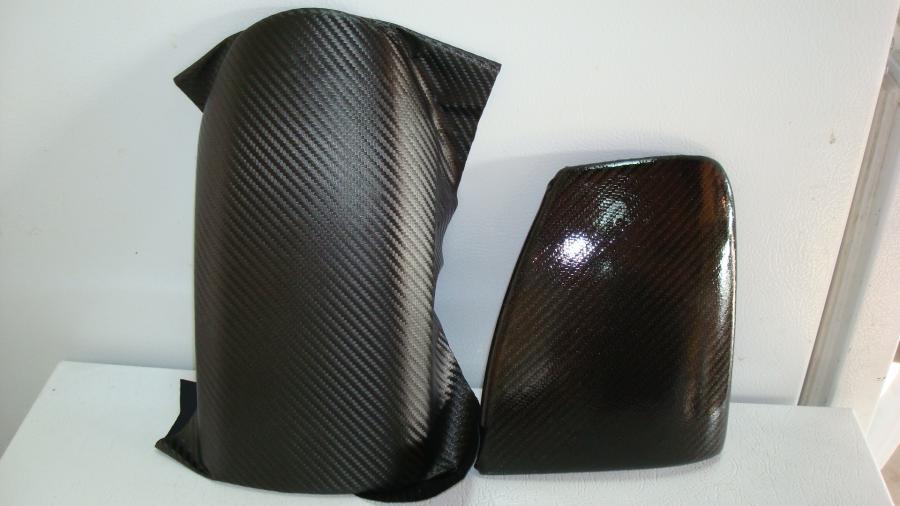
 There are a number of flaws in each piece that I could forgive, but not sure anyone else would...
 The key for me though is the top coat. As you can see, it really looks a lot different without a topcoat; but with a topcoat it's hard to tell that it isn't a solid CF piece - as it should be, because it really is carbon fiber. I hypothesized that if this polycrylic can enhance and bring out the grain in wood, that it should do the same for the fabric and it did. Anyway, I'm more happy spending the $30 or so on these pieces then I would on the $500 I would have to spend on solid CF - more money to spend on other mods!
Thanks,
Rudy
Registered User
Joined: Jul 2008
Posts: 193
Rep Power: 37

Damn Rudy, you did an awesome job. Ever since this thread started I had been thinking of ordering the material & testing different clears & everything like you did but never got around to it. I'm glad you did it though, it lit up my motivation to start mine. Whenever I stop being lazy, I'll order the stuff... By the way, have you gotten around to the center console paint match?
Registered User
Joined: Feb 2009
Posts: 211
From: San Diego
Rep Power: 29
Damn Rudy, you did an awesome job. Ever since this thread started I had been thinking of ordering the material & testing different clears & everything like you did but never got around to it. I'm glad you did it though, it lit up my motivation to start mine. Whenever I stop being lazy, I'll order the stuff... By the way, have you gotten around to the center console paint match?
Rudy
Registered User
Joined: Feb 2009
Posts: 211
From: San Diego
Rep Power: 29
Thanks! I really appreciate you bringing up the idea - this completely filled the bill, an honest to goodness carbon fiber piece at a small fraction of the cost.
Rudy
Rudy
