

Alpine INE-W927HD Install Write up


Thread Starter
|
Registered User
Joined: Nov 2012
Posts: 267
From: Montreal
Rep Power: 26

Alpine INE-W927HD Install Write up
Hi,
Given all of the excellent DIY articles here I decided to do a write up on my experience of installing the Alpine 7" Nav unit. My way of saying thanks! This will be a write up of installing the Alpine INE-W927HD with the Nav-TV Most-HUR for integration with the Bose system in a 997 TT.
First of all I will not go into all of the steps where there are already write ups around the web but I will give my experience of following all those DIY's and add some that do not appear on the web, in particular installing a panel mount USB connected in the center console storage area as well as installing a wireless backup camera.
To start with, I purchased the excellent 997 Double DIN installation kit from Ebay from Euromotorspeed. The kit has all you need to install the radio including the tools as well. A nice touch.
Here is a picture from euromotorspeed of the finished install:

and the kit:
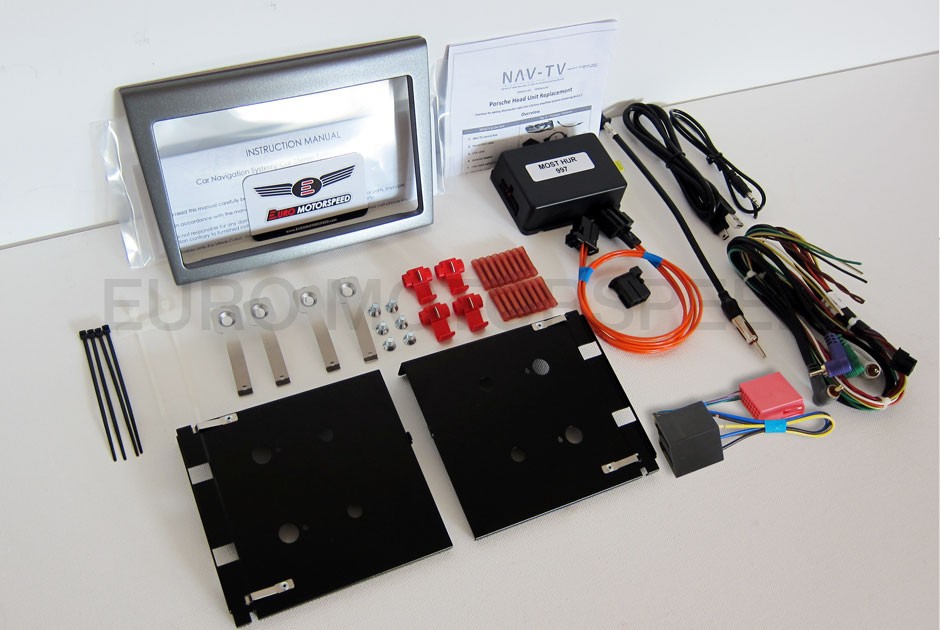
Loi at Euromotorspeed provided excellent support during the install even to the point of calling me to proactively remind me of some things during the install. Highly recommended.
There are other kits available as well. Delray Customs makes one as well. They also have tons of videos about the installation.
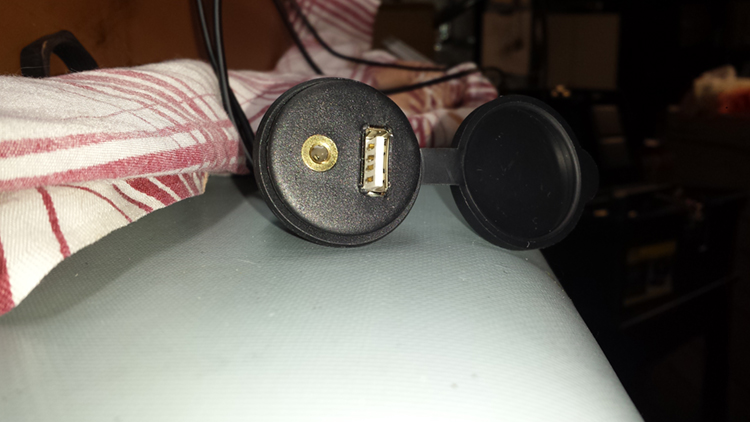
Ok, so I started with adding a USB - Auxiliary input in the center console storage compartment. I chose one from amazon.com that had the same diameter as the Power plug in the storage area. I took a chance as to the size....as it turned out it was a perfect fit. I bought 2, one was to be used in outdoor hot tubes and the other just a generic plug. Do not buy the outdoor plug. Too big. Here is a picture of the plug:
Now, the first step is to remove the center console. This is actually quite easy and you can follow these directions on youtube
In my opinion, the trickiest part of this was to remove the shift boot. It was easy enough to put a wedge under the boot and pry up but the forward clips proved to be more difficult. However, removing the trim in the front of the boot made it quite easy. Note, that to remove the center console you do NOT have to remove the boot from the shifter. It will fit through the hole of the console on problem.
Once the console was out (about 45 minutes) next I had to remove the power plug. Piece of cake. Took only 1 hour!!!! Seriously, the service manual said push the tabs on the sides and push out. Ya right, no tabs to be found. So finally in an act of desperation, I just pushed and it slipped right off. Go figure.
This is the end result:
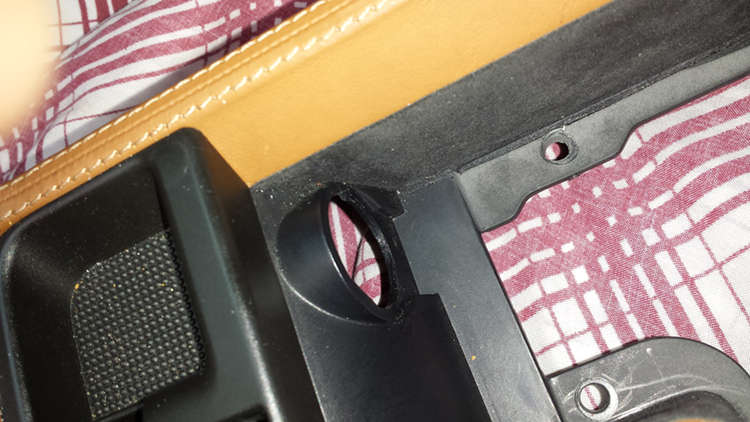
As I mentioned, the USB plug is a perfect fit on the inside of the storage compartment:

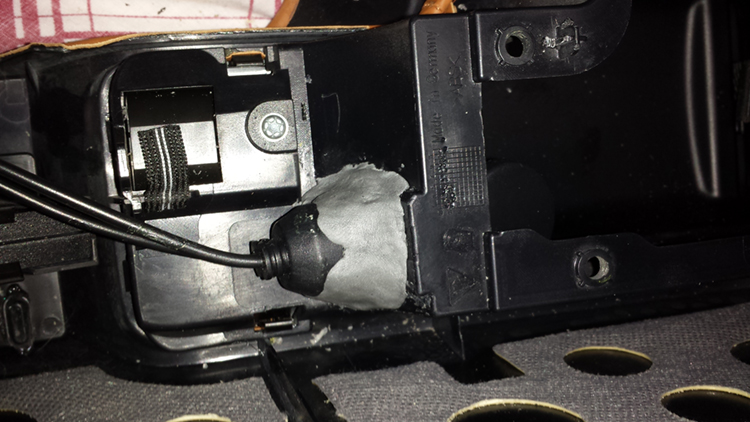
Not so around the rear. The surface is curved so it was not possible to use the large nut that came with the device. So i tried, silicone sealant to stick it in place, and hot glue. Both failed immediately. I finally decided to use epoxy putty as show here:
If I ever have a failure in the jack, I guess it's time for the carbon center console!!
Installing the GPS antenna is also pretty easy. Again there are write ups on the web. Here is one:
Making the slit in the grommet is pretty tough. However there is a much better solution. In my case just pushing hard on the grommet pushed it into the passenger compartment along with a small piece of circular carpet that is stuck to the firewall with sticky tape. Once it was pushed, it just fell into the footwell and I had full access to make a slit, route the wire and stick it back. The mounting of the antenna under the cowl seems to be a really good spot. The unit picks up the satellites very quickly.
Ok now on to the radio install. There are many write ups here. It's actually pretty easy to remove the radio. Make sure you disconnect the negative lead from your battery first!
Here's one:
The instructions that come with the Euromotorspeed kit show how the radio is connected. Heat shrink solder connectors are supplied and I used a lighter to melt and shrink the wires. Building the wiring harness is easy if you have electronics experience but if not Loi offers doing the wiring if you send the radio harness to him.
Now the fun starts....there's not a lot of room back there! I mounted the MOST HUR under the steering column. There is a nice ledge free of anything which will take the unit. The first thing to do is hook up everything (and I mean everything) and try the radio to make sure it works. In my case it worked perfectly. Even the reverse wire will switch the radio into rear camera mode, and the steering wheel controls will control volume, source and next track perfectly. It does not control the phone however.
My first try of putting the radio into the opening failed. There was still an inch to go! So I removed the wiring harness and I cut off all wires that were not used such as the second zone audio, various cameras, the speaker outputs and unused audio outputs. This made the harness much smaller. But still no no! In all it took me about 4 hours to get that darn radio in the opening but finally it made it! Did I mention to test everything first before finalizing things? More on that later.
Couple of hints:
If you look into the opening at the top left is a nice opening at the back which allows you to route all of the preamp outputs of the radio. At the bottom left is a smaller opening that the USB, GPS and microphone can be fed through. At the top of the opening is the original harness. This should be pushed up as far as possible and all of the fiber optic cables and others should be fixed to the back of the opening. Make sure that nothing is touching the bottom of the opening! This is what was stopping many attempts to push it in. Also do not put any wires out the side of the opening.
Did I tell you to check everything before finalizing the install?
Finally everything was installed, wires tie wrapped and operational. All panels were re-installed. Well almost...
Installing the rear backup camera:
I bought the following camera fom Ebay: The Pyle license plate backup camera and a wireless video transmitter.


I tested these on the bench before installing everything and it worked really well with the Alpine.
Installing it on the car is a piece of cake.
First thing is to remove your license plate and plastic mounting surface under it. There you will find a nice big hole in the bumper:

Route the wires of the camera through here and cut a narrow slot in the top of the plastic license mounting plate as so:

Now on the inside of the engine, remove the airfilter box and you will notice that on the left of the center of the bumper is a grommet where the wires from the license plate lights come out:

Easy job to fish the two wires through here and through the grommet.
Next take off the drivers side rear light. (Two screws) and route the wire from the transmitter into one of the two holes as shown here:

Finally connect the red wire (+) to the blue wire of the backup light and the black to the brown wire of the backup light:

Voila, the easiest part of the job.
Didn't I mention to check everything before finalizing the install? Well, the one thing I didn't check was the backup camera.....it seems that pushing the radio into the slot dislodged the video input to the radio....no video!
Oh well, one of these days I'll take it out and fix it.....
I hope this helps anyone trying the same thing.
Tom
Given all of the excellent DIY articles here I decided to do a write up on my experience of installing the Alpine 7" Nav unit. My way of saying thanks! This will be a write up of installing the Alpine INE-W927HD with the Nav-TV Most-HUR for integration with the Bose system in a 997 TT.
First of all I will not go into all of the steps where there are already write ups around the web but I will give my experience of following all those DIY's and add some that do not appear on the web, in particular installing a panel mount USB connected in the center console storage area as well as installing a wireless backup camera.
To start with, I purchased the excellent 997 Double DIN installation kit from Ebay from Euromotorspeed. The kit has all you need to install the radio including the tools as well. A nice touch.
Here is a picture from euromotorspeed of the finished install:
and the kit:
Loi at Euromotorspeed provided excellent support during the install even to the point of calling me to proactively remind me of some things during the install. Highly recommended.
There are other kits available as well. Delray Customs makes one as well. They also have tons of videos about the installation.
Ok, so I started with adding a USB - Auxiliary input in the center console storage compartment. I chose one from amazon.com that had the same diameter as the Power plug in the storage area. I took a chance as to the size....as it turned out it was a perfect fit. I bought 2, one was to be used in outdoor hot tubes and the other just a generic plug. Do not buy the outdoor plug. Too big. Here is a picture of the plug:
Now, the first step is to remove the center console. This is actually quite easy and you can follow these directions on youtube
In my opinion, the trickiest part of this was to remove the shift boot. It was easy enough to put a wedge under the boot and pry up but the forward clips proved to be more difficult. However, removing the trim in the front of the boot made it quite easy. Note, that to remove the center console you do NOT have to remove the boot from the shifter. It will fit through the hole of the console on problem.
Once the console was out (about 45 minutes) next I had to remove the power plug. Piece of cake. Took only 1 hour!!!! Seriously, the service manual said push the tabs on the sides and push out. Ya right, no tabs to be found. So finally in an act of desperation, I just pushed and it slipped right off. Go figure.
This is the end result:
As I mentioned, the USB plug is a perfect fit on the inside of the storage compartment:
Not so around the rear. The surface is curved so it was not possible to use the large nut that came with the device. So i tried, silicone sealant to stick it in place, and hot glue. Both failed immediately. I finally decided to use epoxy putty as show here:
If I ever have a failure in the jack, I guess it's time for the carbon center console!!
Installing the GPS antenna is also pretty easy. Again there are write ups on the web. Here is one:
Making the slit in the grommet is pretty tough. However there is a much better solution. In my case just pushing hard on the grommet pushed it into the passenger compartment along with a small piece of circular carpet that is stuck to the firewall with sticky tape. Once it was pushed, it just fell into the footwell and I had full access to make a slit, route the wire and stick it back. The mounting of the antenna under the cowl seems to be a really good spot. The unit picks up the satellites very quickly.
Ok now on to the radio install. There are many write ups here. It's actually pretty easy to remove the radio. Make sure you disconnect the negative lead from your battery first!
Here's one:
The instructions that come with the Euromotorspeed kit show how the radio is connected. Heat shrink solder connectors are supplied and I used a lighter to melt and shrink the wires. Building the wiring harness is easy if you have electronics experience but if not Loi offers doing the wiring if you send the radio harness to him.
Now the fun starts....there's not a lot of room back there! I mounted the MOST HUR under the steering column. There is a nice ledge free of anything which will take the unit. The first thing to do is hook up everything (and I mean everything) and try the radio to make sure it works. In my case it worked perfectly. Even the reverse wire will switch the radio into rear camera mode, and the steering wheel controls will control volume, source and next track perfectly. It does not control the phone however.
My first try of putting the radio into the opening failed. There was still an inch to go! So I removed the wiring harness and I cut off all wires that were not used such as the second zone audio, various cameras, the speaker outputs and unused audio outputs. This made the harness much smaller. But still no no! In all it took me about 4 hours to get that darn radio in the opening but finally it made it! Did I mention to test everything first before finalizing things? More on that later.
Couple of hints:
If you look into the opening at the top left is a nice opening at the back which allows you to route all of the preamp outputs of the radio. At the bottom left is a smaller opening that the USB, GPS and microphone can be fed through. At the top of the opening is the original harness. This should be pushed up as far as possible and all of the fiber optic cables and others should be fixed to the back of the opening. Make sure that nothing is touching the bottom of the opening! This is what was stopping many attempts to push it in. Also do not put any wires out the side of the opening.
Did I tell you to check everything before finalizing the install?
Finally everything was installed, wires tie wrapped and operational. All panels were re-installed. Well almost...
Installing the rear backup camera:
I bought the following camera fom Ebay: The Pyle license plate backup camera and a wireless video transmitter.
I tested these on the bench before installing everything and it worked really well with the Alpine.
Installing it on the car is a piece of cake.
First thing is to remove your license plate and plastic mounting surface under it. There you will find a nice big hole in the bumper:
Route the wires of the camera through here and cut a narrow slot in the top of the plastic license mounting plate as so:
Now on the inside of the engine, remove the airfilter box and you will notice that on the left of the center of the bumper is a grommet where the wires from the license plate lights come out:
Easy job to fish the two wires through here and through the grommet.
Next take off the drivers side rear light. (Two screws) and route the wire from the transmitter into one of the two holes as shown here:
Finally connect the red wire (+) to the blue wire of the backup light and the black to the brown wire of the backup light:
Voila, the easiest part of the job.
Didn't I mention to check everything before finalizing the install? Well, the one thing I didn't check was the backup camera.....it seems that pushing the radio into the slot dislodged the video input to the radio....no video!
Oh well, one of these days I'll take it out and fix it.....
I hope this helps anyone trying the same thing.
Tom
Registered User
Joined: Mar 2013
Posts: 497
From: Las Vegas,nv
Rep Power: 72

That is incorrect you do have Bluetooth with this unit I use mine everyday
Thread Starter
|
Registered User
Joined: Nov 2012
Posts: 267
From: Montreal
Rep Power: 26
Unfortunately, between all the updates for the Android and the Apple and the fact that none of these idiots can produce bug free software updates I decided to go for the one thing that works right on the Alpine. The IPOD.
USB? forget it. The alpine won't display the album art on a standard file system USB file drive nor will it display it correctly with my Bluetooth streaming from my Android. As much as I do not like Apple products, the IPOD does work well. I put in the storage and it works, no issues.
Pandora? Works ok for the first song you play, then it fails on the second song. Why? don't know yet. It could be that I'm using a VPN to the US (us Canucks are not allowed to use Pandora!) or it could be the Pandora ap. Don't know.
I wish the software industry would get their **** together and make software that works...not only sometimes.

Thread Starter
|
Registered User
Joined: Nov 2012
Posts: 267
From: Montreal
Rep Power: 26

Thread
Thread Starter
Forum
Replies
Last Post
sdg1871
991 Turbo
77
Sep 12, 2015 06:54 AM
vividracing
Boxster / Cayman
0
Aug 20, 2015 12:17 PM