

New Product, Valentine One Mounting Bracket (G Bracket) for Porsche 997 by G Rides


Thread Starter
|
Former Vendor
Joined: Aug 2006
Posts: 233
From: San Luis Obispo, CA
Rep Power: 0


New Product, Valentine One Mounting Bracket (G Bracket) for Porsche 997 by G Rides
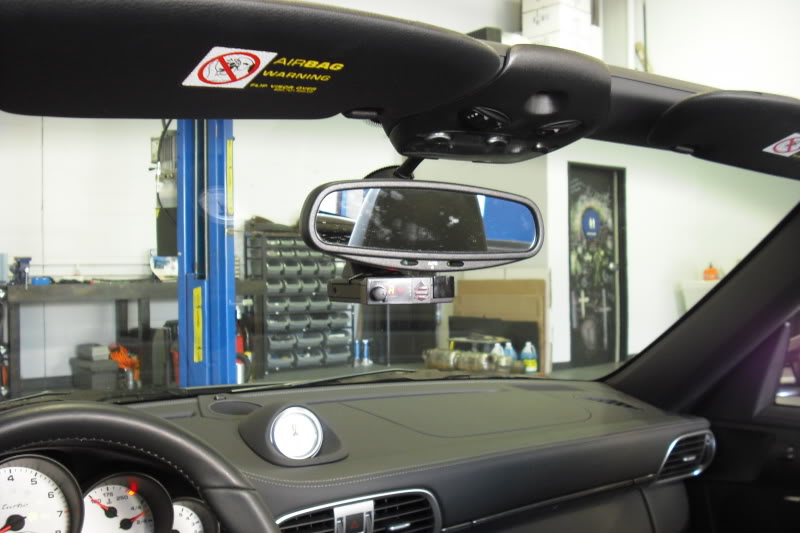
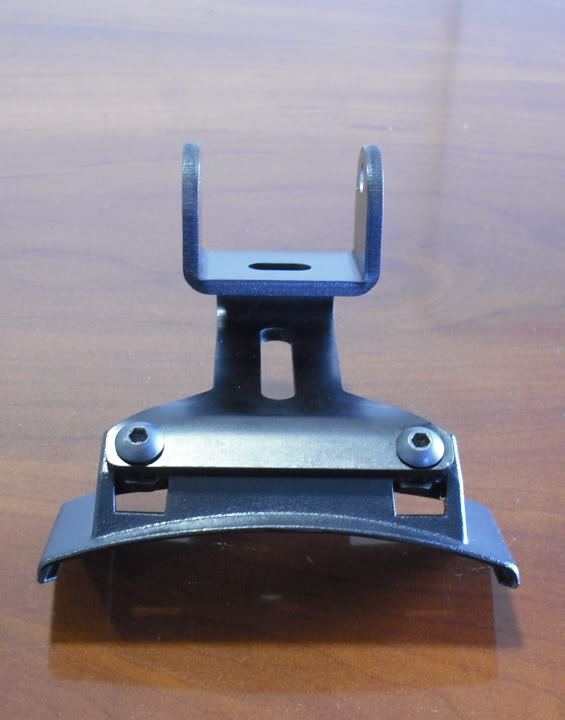
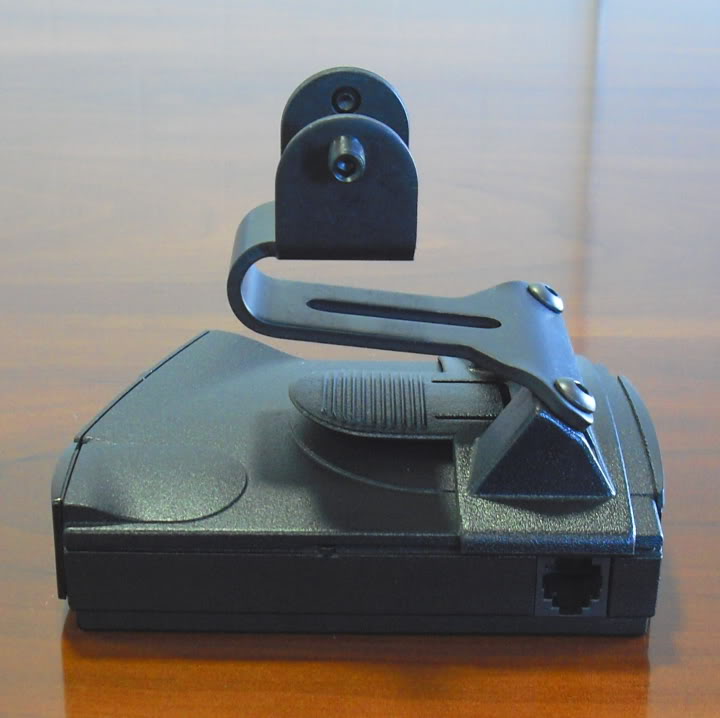
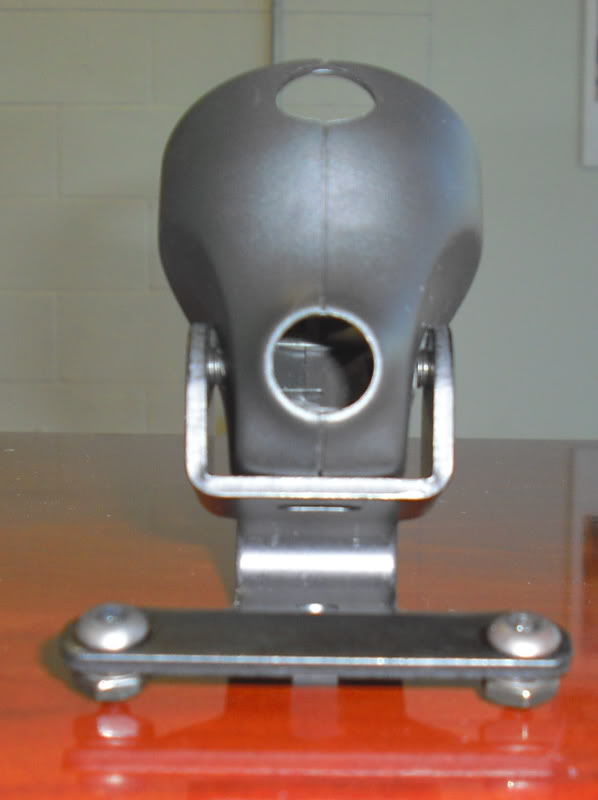
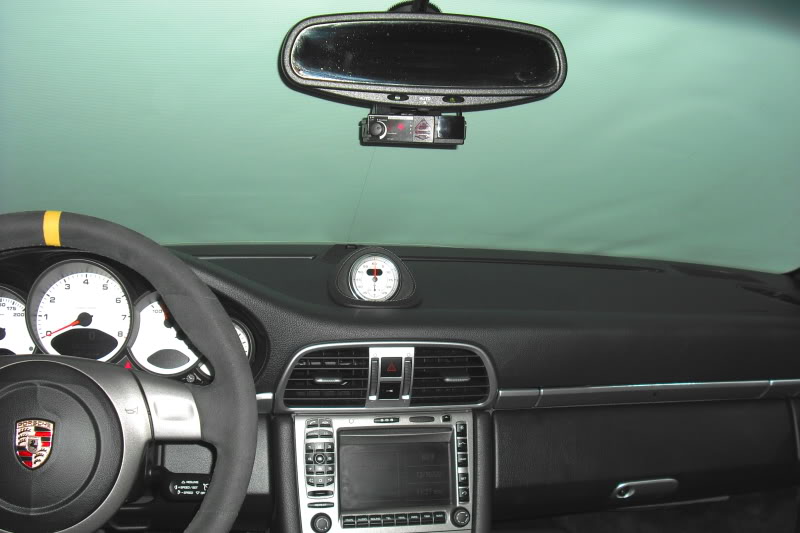
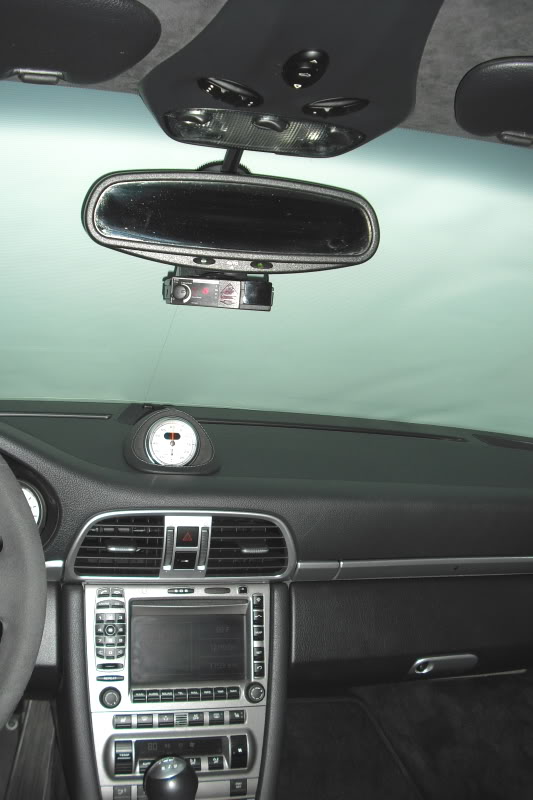
G Rides has finished development, testing and manufacturing of these Valentine One Mounting Brackets for the Porsche 997 with Auto Dimming Mirror (Should fit Cayman with Power Dimming Mirror too). They will be called "G Brackets" and locate the Valentine One below the rear view mirror. They are made in California, USA from Aluminum, Anodized Black and include Mounting Hardware. This G Bracket combined with Hardwiring of your Valentine One makes for a clean and functional installation of your Valentine One. We're finishing details such as putting them on an on-line store, but they are in-stock ready to ship now.
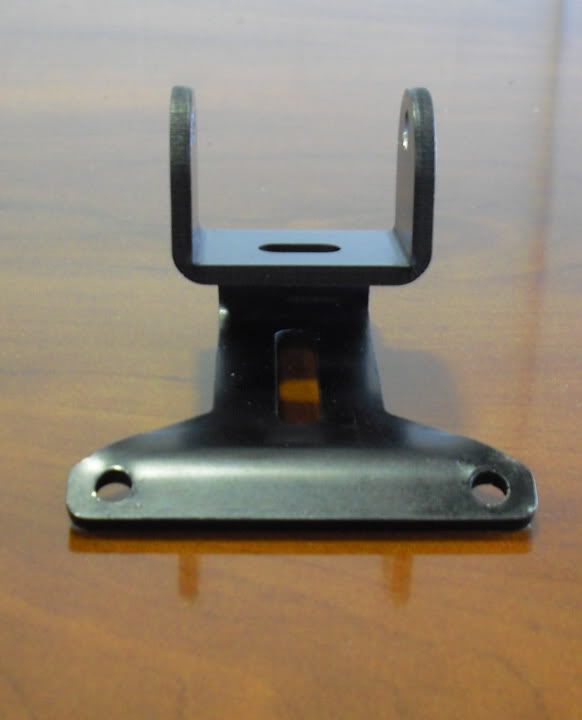
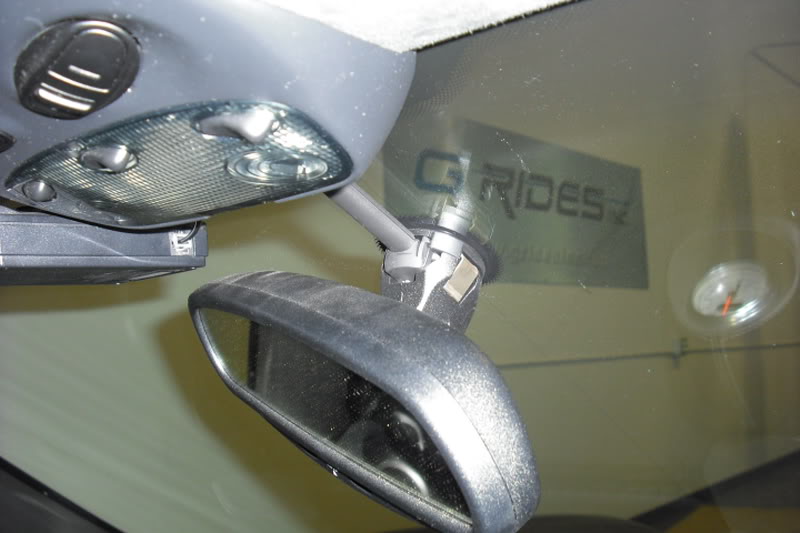
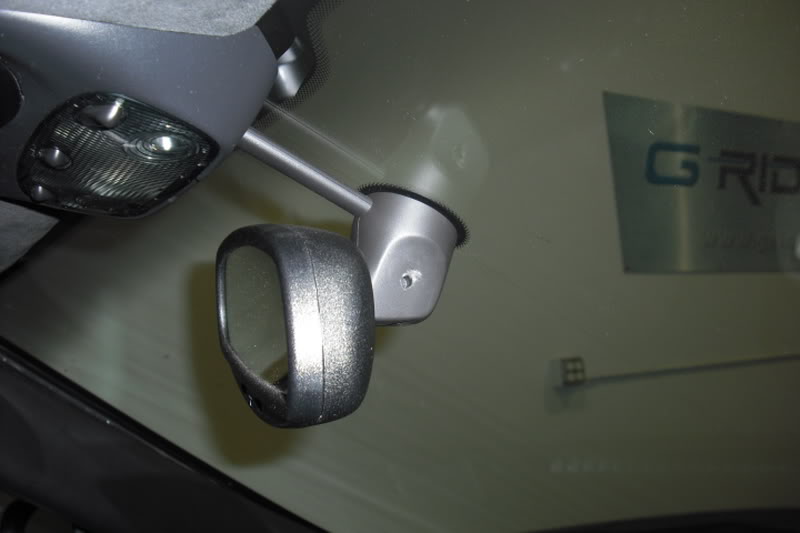
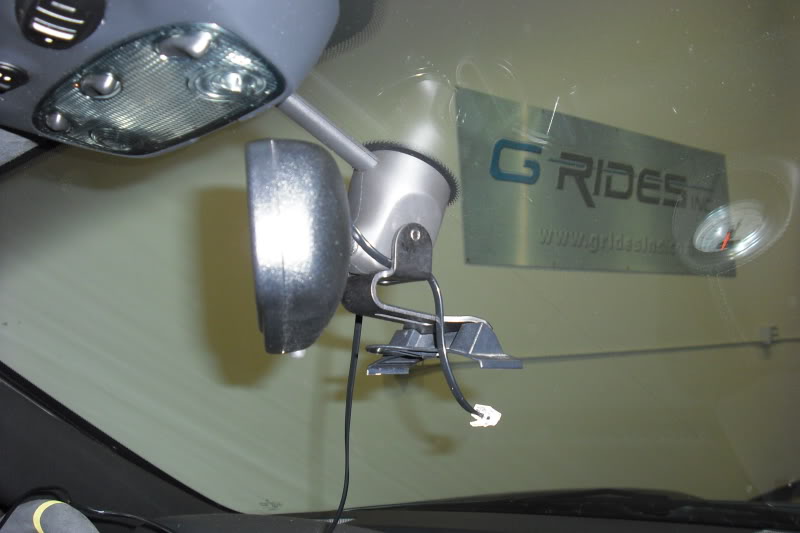
These pictures may help convey how the G Bracket is installed. Full instructions to come.
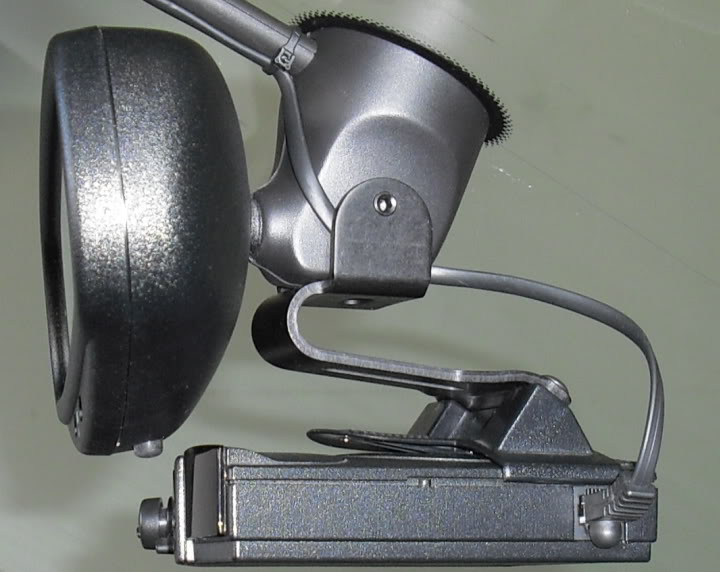
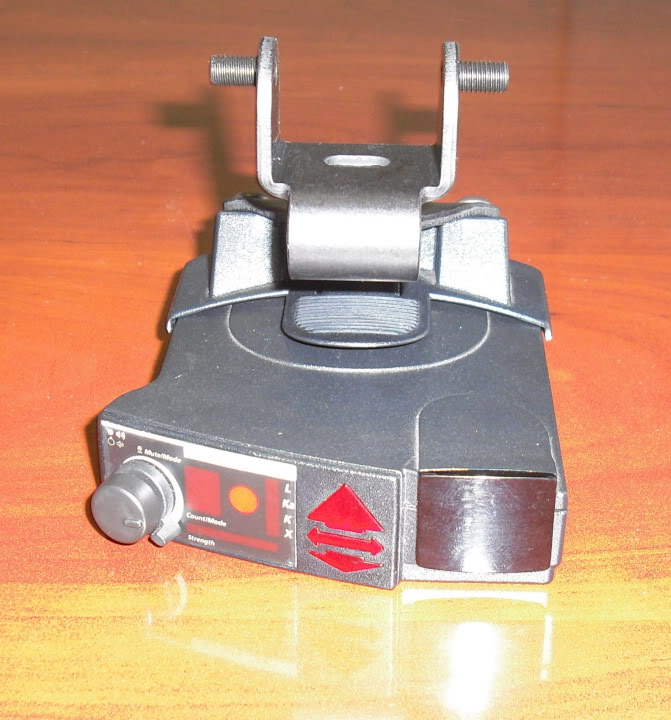
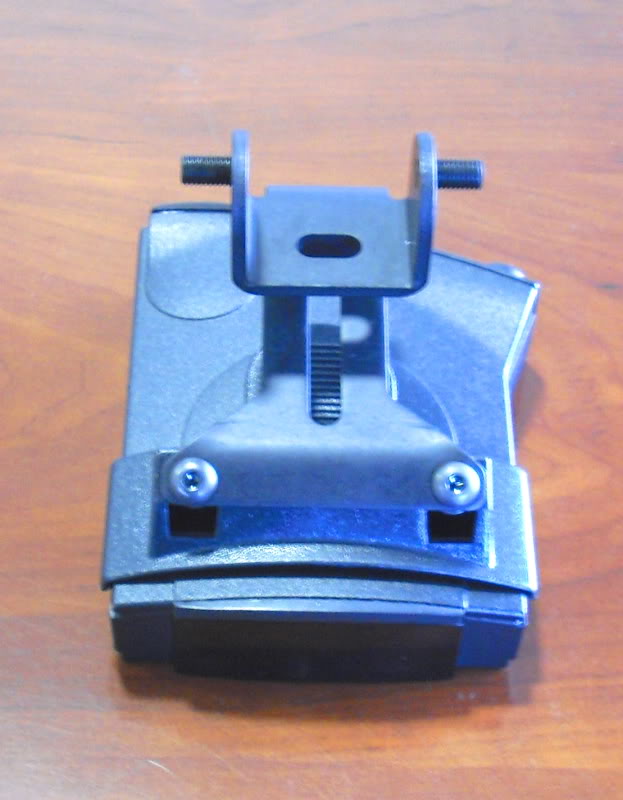
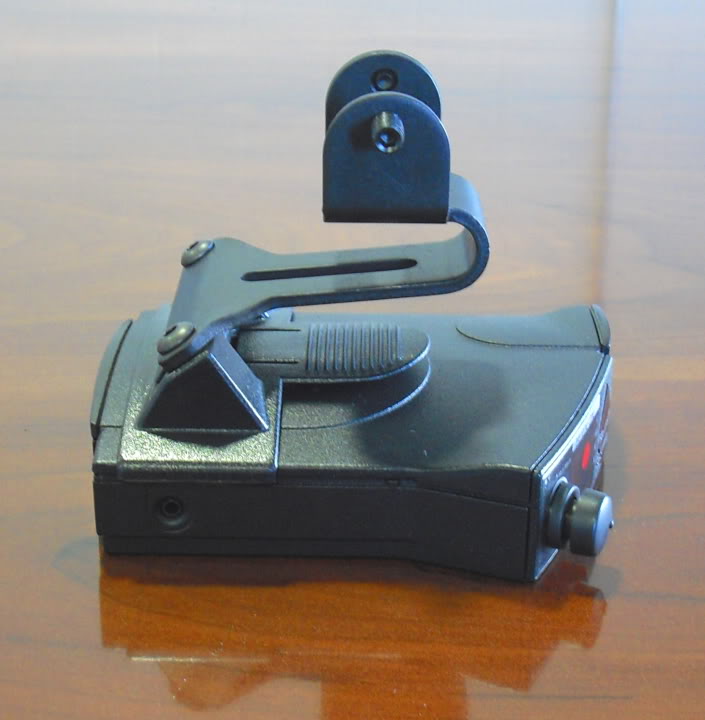
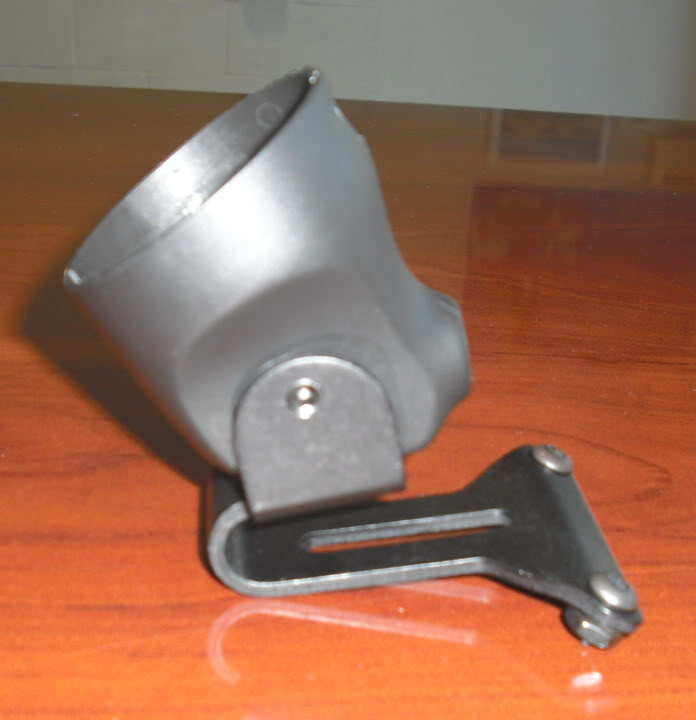
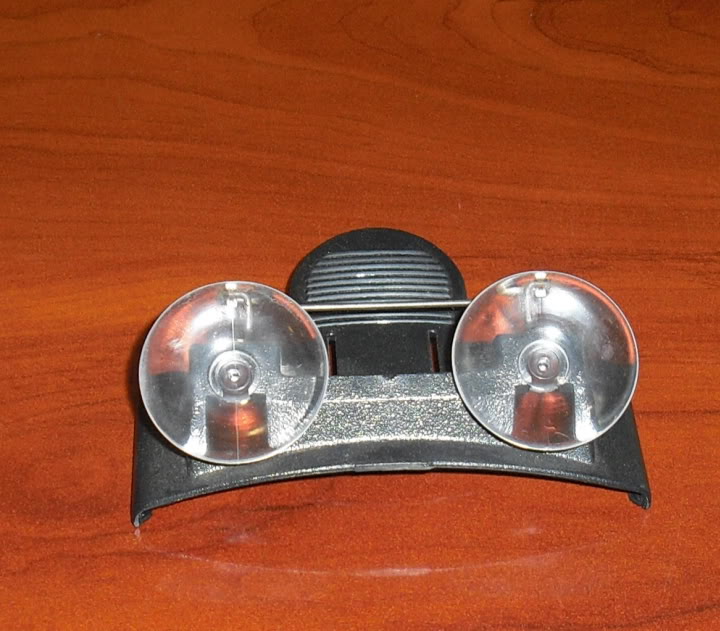
The G Bracket mounts to the V1 by removing the suction cup from the V1 mount. Attach the G Bracket to the V1 mount with supplied fasteners as seen in these pictures.
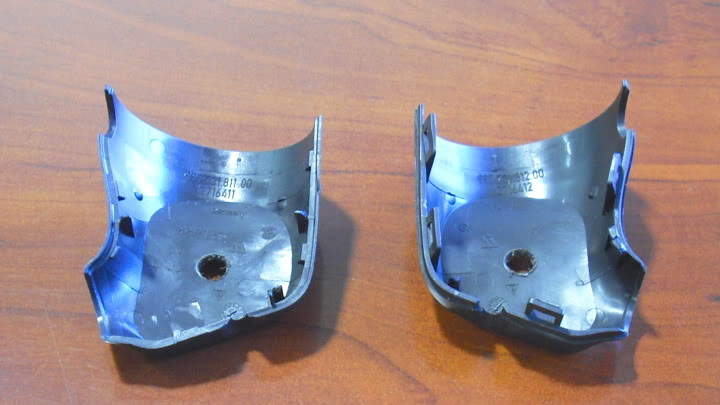
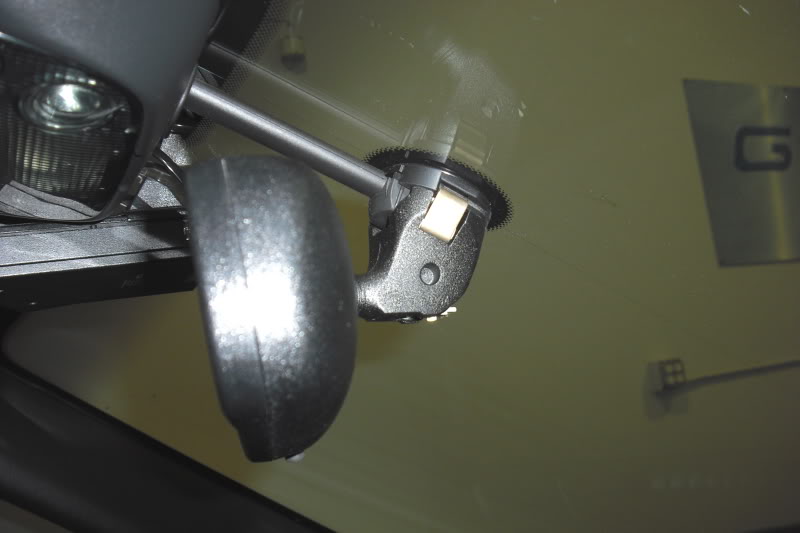
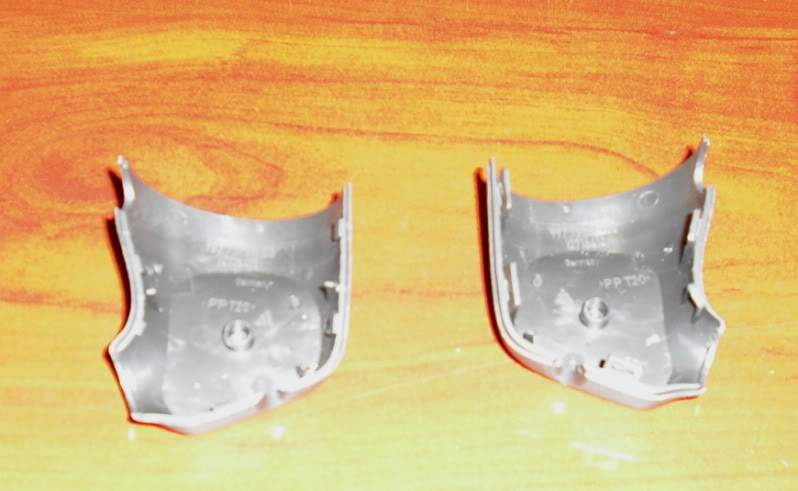
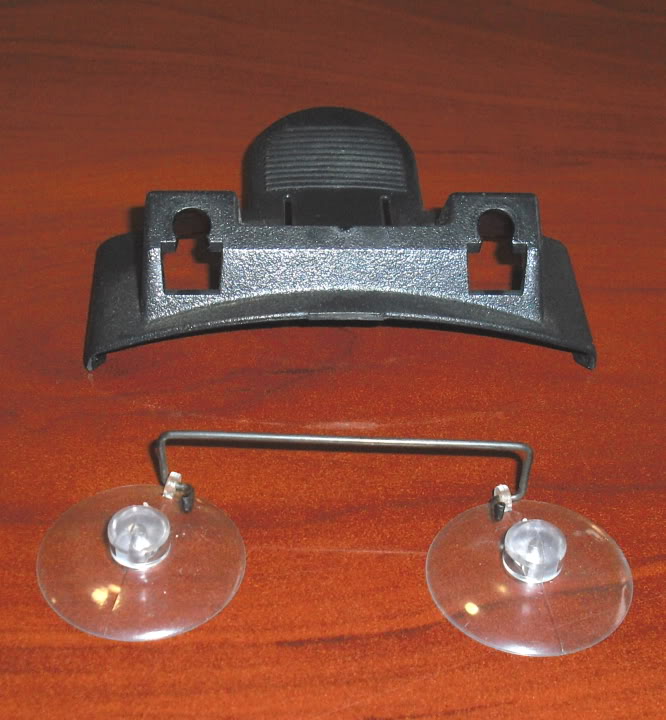
This is the 2-Piece Plastic Housing that covers the Metal Mirror Post, which needs to be removed. This Plastic Housing is snapped in place and needs to be pryed off. We use one of those flat plastic blades and place it towards the top back seem and it will snap apart.
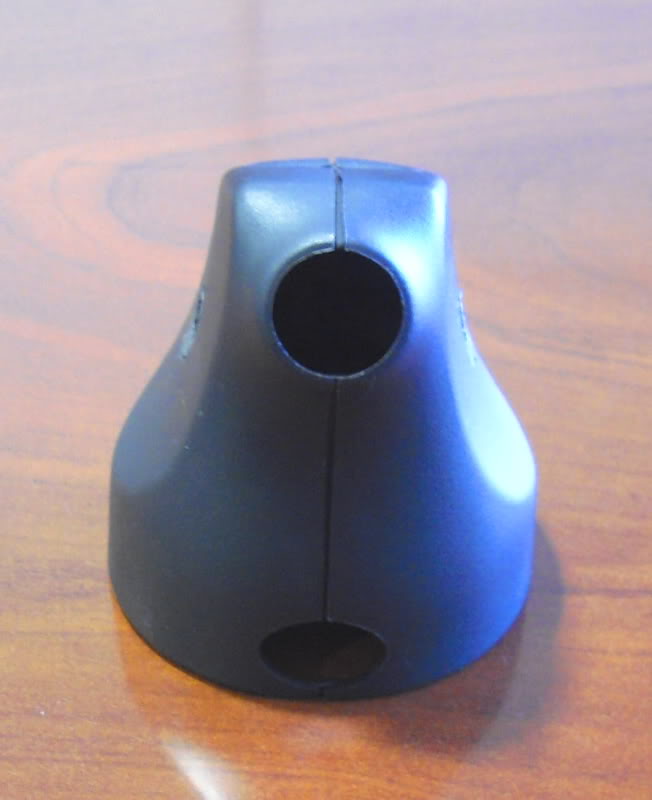
This piece is already drilled but, before drilling there is basically a little plastic nub on each side that indexes where the holes need to be made. Those little plastic nubs went into the pockets of the Metal Mirror Post which the G Bracket Set Screws will go into. Once the holes are drilled, re-install the Plastic Housing by snapping it back together in place.
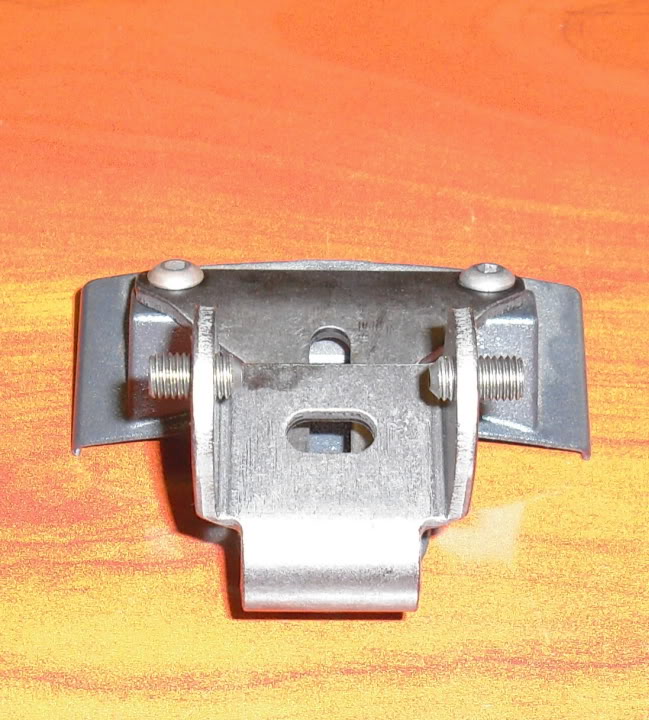
I colored the set screws yellow so you may see where the set screws go.
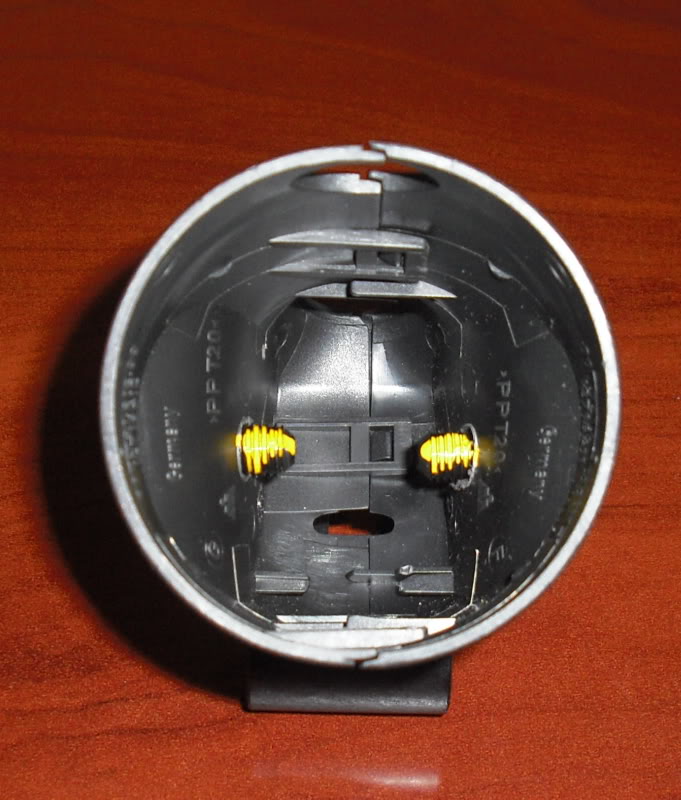
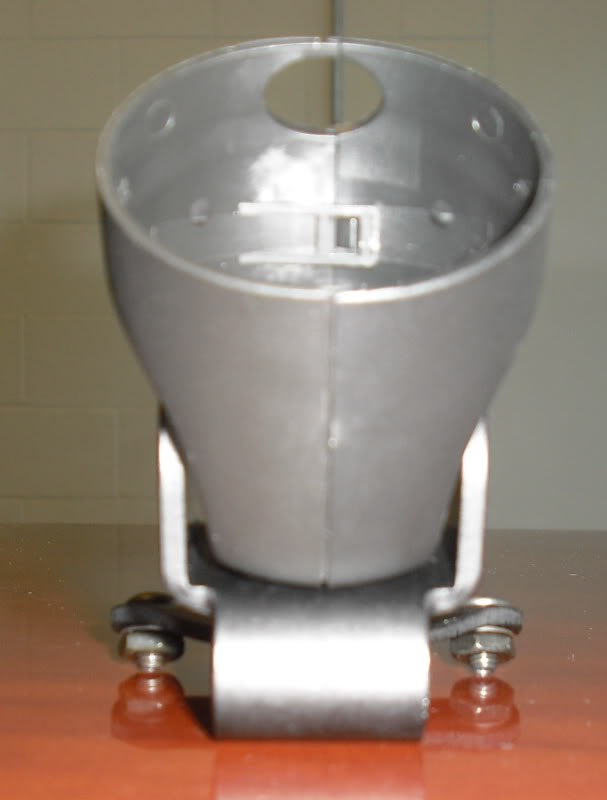
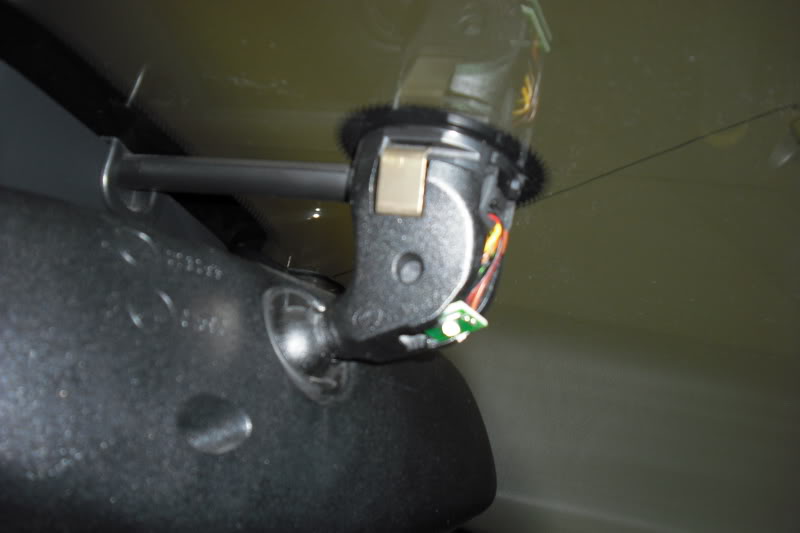
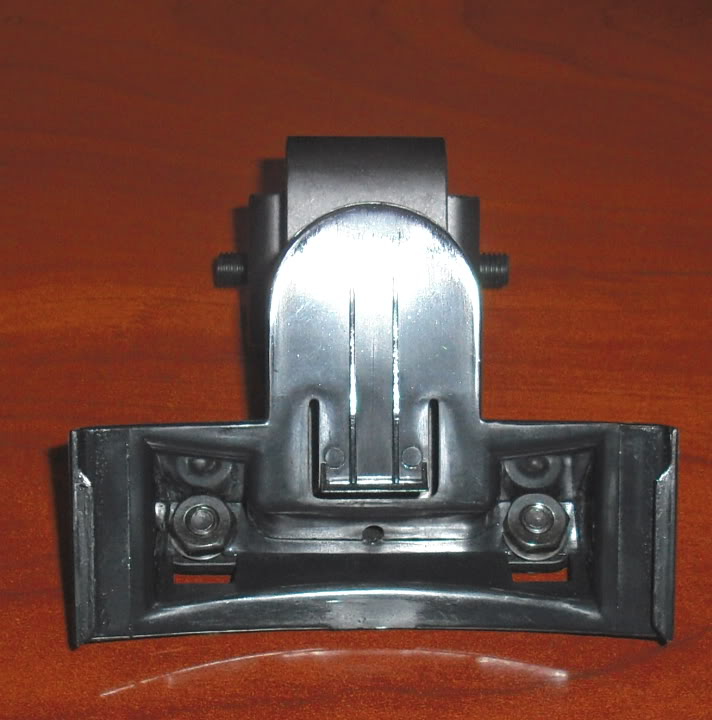
With the plastic housings reinstalled, slide the G Bracket into place. It is a tight fit, but the tight fit helps it mount securely. With the G Bracket in place, thread in the set screws which should just about bottom out making them flush with the G Bracket.
These pictures may help convey how the G Bracket is installed. Full instructions to come.
The G Bracket mounts to the V1 by removing the suction cup from the V1 mount. Attach the G Bracket to the V1 mount with supplied fasteners as seen in these pictures.
This is the 2-Piece Plastic Housing that covers the Metal Mirror Post, which needs to be removed. This Plastic Housing is snapped in place and needs to be pryed off. We use one of those flat plastic blades and place it towards the top back seem and it will snap apart.
This piece is already drilled but, before drilling there is basically a little plastic nub on each side that indexes where the holes need to be made. Those little plastic nubs went into the pockets of the Metal Mirror Post which the G Bracket Set Screws will go into. Once the holes are drilled, re-install the Plastic Housing by snapping it back together in place.
I colored the set screws yellow so you may see where the set screws go.
With the plastic housings reinstalled, slide the G Bracket into place. It is a tight fit, but the tight fit helps it mount securely. With the G Bracket in place, thread in the set screws which should just about bottom out making them flush with the G Bracket.
Registered User
Joined: Jul 2006
Posts: 3,800
From: Tampa
Rep Power: 234
Gary, WOW that is very slick...a neat and tidy install. My 2009 Carrera S does not have auto dimming mirrors so will you have a set up for me? Also will I be able to get power to my V1 like you have done?
Registered User
Joined: Jul 2007
Posts: 3,122
From: Natick, MA
Rep Power: 163
IMHO optimal spot for V1 is right above mirror on its left side. It fits there perfectly using its original big suction clip.
Registered User
Joined: Feb 2007
Posts: 26
From: central california
Rep Power: 21
I have this bracket mounted in my car and there is minimal impact on the view to the right. The V-1 sits just below the mirror in the perfect position for monitoring while driving. Thanks to Gary and G-Rides for developing such a functional and well designed product.
Ken
Ken
Registered User
Joined: Jan 2009
Posts: 458
From: Maryland
Rep Power: 39
Even Valentine agrees with you on your placement above the mirror. ("Detector performance is enhanced by a high mounting position. Two reasons. For radar, a longer sight line to the horizon always helps. For laser, moving away from the hood and its sun reflections helps a lot." (http://www.valentine1.com/moreinfo/p...ng_pg17-18.pdf)). I'm sure this is expecially true on a Porsche as you are very low to the ground already. A few inches higher matters.
Trending Topics
Registered User
Joined: Sep 2009
Posts: 107
From: ATX
Rep Power: 21
FWIW, I use a Passport and get a lot of bounce and rattle from the rough ride of the 997, even in non-sport mode.

What I have done is add a small cushion (ear plug) bridging the gap between the end of the Passport and the upper mirror housing. It really helps the bounce.

Thread Starter
|
Former Vendor
Joined: Aug 2006
Posts: 233
From: San Luis Obispo, CA
Rep Power: 0
Installed another G Bracket today and took a few pictures.
Pry apart the 2-piece plastic mirror housing cover. It's best to pry from the front as seen here because there are no wires in this area. Pry with a tool, just enough to get some separation, then carefully pull apart by hand.
You can see the metal mirror post now with the plastic removed.
In these pictures please notice the pocket on the side of the mirror post (It's the same on both sides, the post comes like this from Porsche and you do not need to drill on the mirror post), this is where the G Bracket Set Screws inserts and creates a very sturdy mount.
Here is the plastic housing before drilling. Please notice the little nubs, they are where you need to drill.
After holes have been drilled.

Take your bracket from your V1 and remove the suction cups.
Bolt the G Bracket to the V1 Bracket with supplied hardware.

Reinstall the drilled plastic housings.
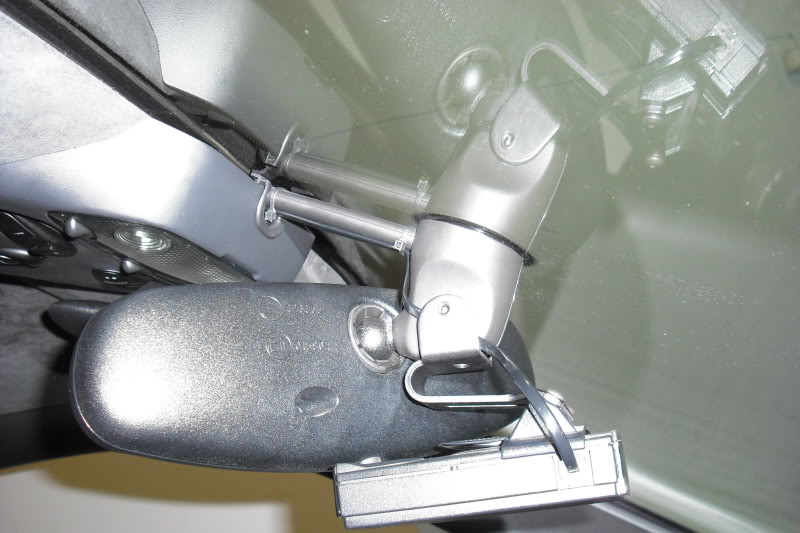
If installing with a hardwire, place your wire in between the G Bracket and the plastic housing, there is space for this and the wire will not get pinched. Screw in the set screws through the holes of the plastic housing and into the pockets of the metal mirror post. Do not torque real hard, the set screws should bottom out into the pockets of the mirror post and sit pretty flush with the G Bracket.
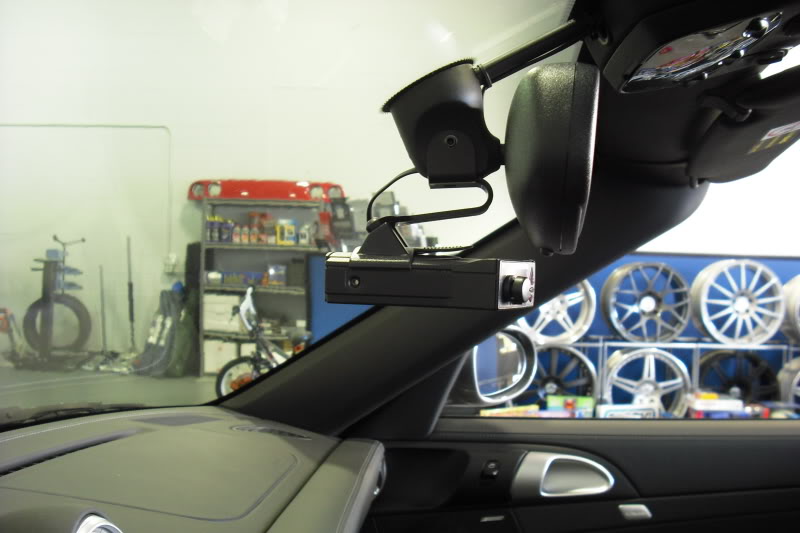
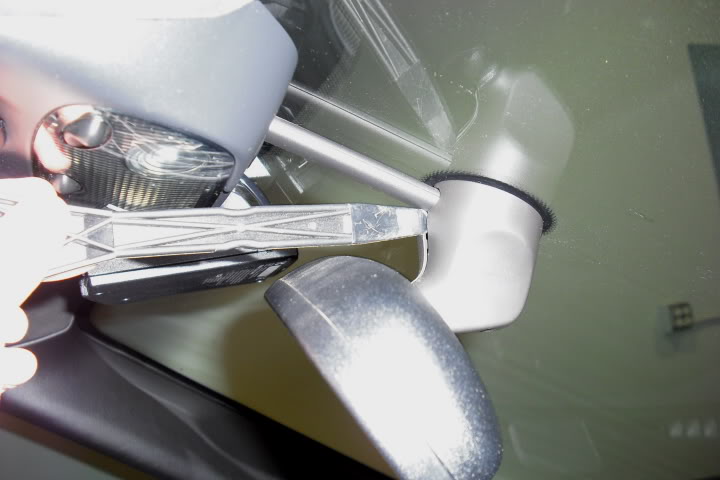
Slide your V1 onto the V1 Bracket all the way towards the windshield and take the slack out of the hardwire cord.
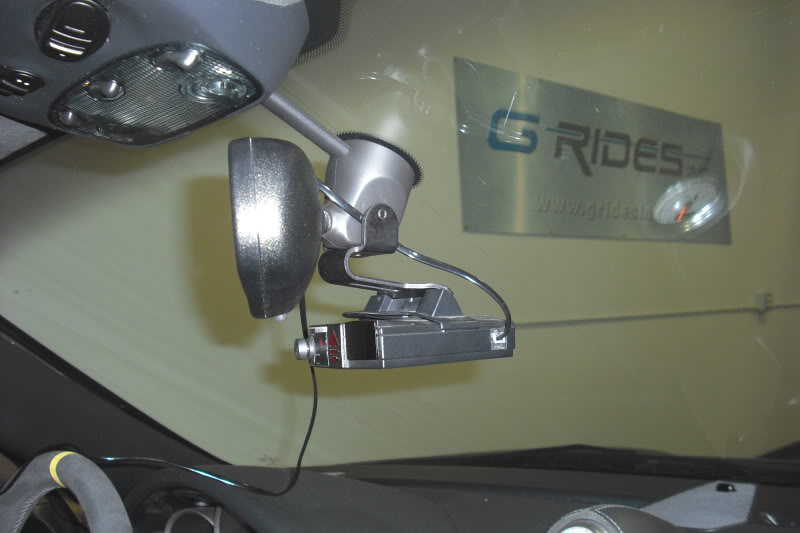
Route the hardwire as seen and 2-small black zip ties tiddy the hardwire cord well as seen and are fairly descreet.

Here are a couple finished shots, the V1 sits just below the rearview mirror.
We realized going into this that this location would not be for everyone. We know there are people that prefer their radar detector elsewhere. We just set out to make a great solution for folks who would like their Radar Detector located below their rear view mirror, those folks seem to really appreciate that we have developed a quality, well designed product and brought it to market.
Pry apart the 2-piece plastic mirror housing cover. It's best to pry from the front as seen here because there are no wires in this area. Pry with a tool, just enough to get some separation, then carefully pull apart by hand.
You can see the metal mirror post now with the plastic removed.
In these pictures please notice the pocket on the side of the mirror post (It's the same on both sides, the post comes like this from Porsche and you do not need to drill on the mirror post), this is where the G Bracket Set Screws inserts and creates a very sturdy mount.
Here is the plastic housing before drilling. Please notice the little nubs, they are where you need to drill.
After holes have been drilled.
Take your bracket from your V1 and remove the suction cups.
Bolt the G Bracket to the V1 Bracket with supplied hardware.
Reinstall the drilled plastic housings.
If installing with a hardwire, place your wire in between the G Bracket and the plastic housing, there is space for this and the wire will not get pinched. Screw in the set screws through the holes of the plastic housing and into the pockets of the metal mirror post. Do not torque real hard, the set screws should bottom out into the pockets of the mirror post and sit pretty flush with the G Bracket.
Slide your V1 onto the V1 Bracket all the way towards the windshield and take the slack out of the hardwire cord.
Route the hardwire as seen and 2-small black zip ties tiddy the hardwire cord well as seen and are fairly descreet.
Here are a couple finished shots, the V1 sits just below the rearview mirror.
We realized going into this that this location would not be for everyone. We know there are people that prefer their radar detector elsewhere. We just set out to make a great solution for folks who would like their Radar Detector located below their rear view mirror, those folks seem to really appreciate that we have developed a quality, well designed product and brought it to market.
Thread Starter
|
Former Vendor
Joined: Aug 2006
Posts: 233
From: San Luis Obispo, CA
Rep Power: 0
Here's a hardwire write-up I've done that worked on both 997 Turbo Cab. and 997 C2S. Please note that these Fuse Taps are great and we are putting together some hardwire kits so everything is all put together and you just route the wire and install it, no cutting or splicing.:
We've done this on a couple of 997's. What's great about this is you're able to have the Radar Detector be switched on and off with the ignition and you don't have a cord hanging down from the Radar Detector and plugged into a cigarette lighter.
Using one of these Add-A-Fuse deals is a great way to grab an ignition on 12-Volt source with out having to cut/splice on factory wiring.
The Add-A-Fuse goes right into a fuse block. For this install there was an unused fuse location that was a switched on 12-Volt source so we used that. With the Add-A-Fuse you may also use it with a pre-existing fuse, replace that fuse with the Add-A-Fuse, put the removed fuse into the Add-A-Fuse then place a second fuse into the Add-A-Fuse so the Radar Detector has a inline fuse (we used a 5 Amp fuse going to the Radar Detector).
We used basically a phone cable as a wire to the Radar Detector. Find out which wire needs to be Hot (12-Volt Source), then Solder and shrink wrap the Add-A-Fuse to that.
Find out which wire needs to be Ground, then solder and shrink wrap a connector that suits your install to complete a good ground.
Here we used a pre-existing nut on a stud for our ground close to the fuse block, we put a stainless steel washer behind that nut so the ground connector gets sandwiched between to pieces of steel to make a good ground.
Remove the A-Pillar Cover so you can route the wire and secure it with some zip ties. Route the wire to where you want the Radar Detector and your about done already and the wire is hidden.
Here's how this Fuse Block looked when done with the cover off. The Add-A-Fuse is easily accessible and removed for any maintenance and nothing from the factory has been cut up. Having fun and keeping it clean. Any question please ask.
Registered User
Joined: Apr 2009
Posts: 192
From: South Florida
Rep Power: 31

I'd order one, but I think I'm leaning toward an installed radar for my Porsche (since it's a cab) and leave the Valentine in the daily driver. Still on the fence.
Great job!

