
Chrysler 300c w/ JDM & DTM roots


Thread Starter
|
Registered User
Joined: Jun 2005
Posts: 116
From: OC, CA
Rep Power: 25

I apologize for the delay guys. We were busy tinkering away for Spring Fest 9 and had a lot of varying issues arise.
Here is a photo showing a stock 300c headlamp vs. 1 Single Q45 Retrofit vs. A Dual q45 retrofit setup:
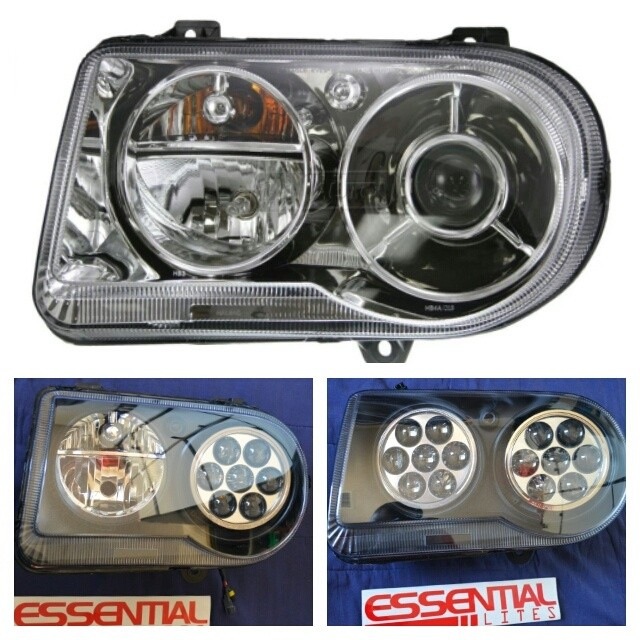
The Quad q45 setup from Essential Lites. All metal brackets and most importantly looks stock from the back with rubber seals and all.
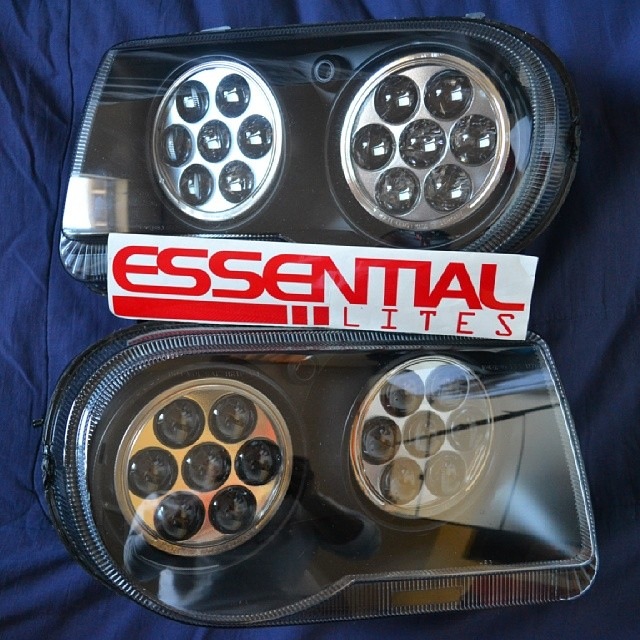
Parking lights on. These are not HiD's on at this point. These are reverse mounted XBLED's (aka Halos) from The Retrofit Source. Yes, we wanted to do something different and didn't want to do the "typical halos."

HID's vs. signals on! A hole was drilled out to fit an amber LED blinker bulb and the "rings" are actually strategically placed LED strips from The Retrofit Source. You have to look really, really close to see them.

Thread Starter
|
Registered User
Joined: Jun 2005
Posts: 116
From: OC, CA
Rep Power: 25
All engine panels etc were removed to make it easy to work with the supercharger install. Here's the initial bracket etc mounted up.

Here it is with FMIC and piping run. The piping on the driver said was a head scratcher, but we soon figured out that it needed to be modified lol

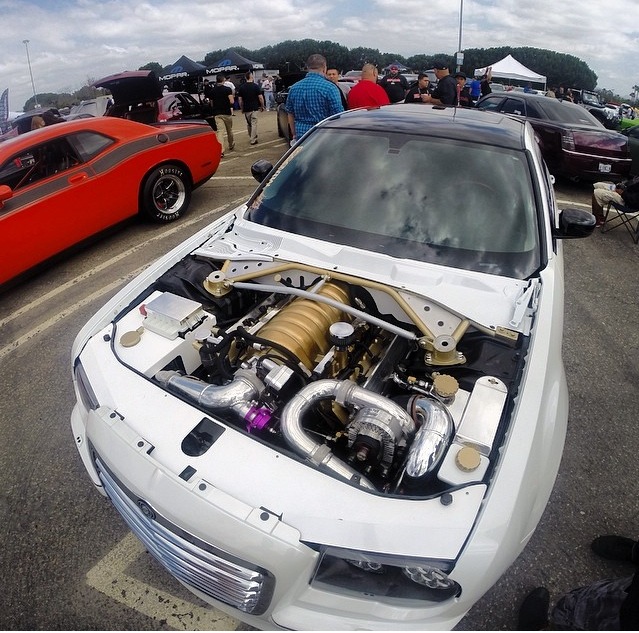
After battling with the Supercharger install with hiccup after hiccup it is on and ready to go:

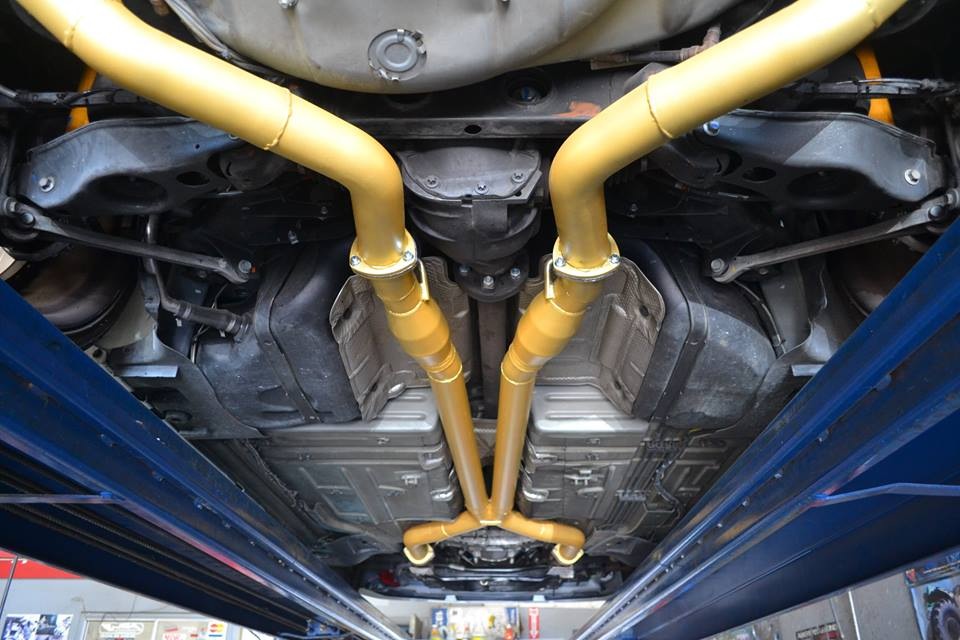
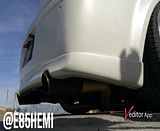
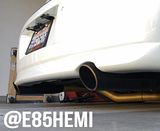
We then headed over to the @OCMufflerman to get the exhaust installed. Yeah, the welds could have been cleaner but the last minute decision to make a splash at Spring Fest really put us in a bind.


The race mufflers sit just before the rear flanges:


Here it is with FMIC and piping run. The piping on the driver said was a head scratcher, but we soon figured out that it needed to be modified lol

After battling with the Supercharger install with hiccup after hiccup it is on and ready to go:

We then headed over to the @OCMufflerman to get the exhaust installed. Yeah, the welds could have been cleaner but the last minute decision to make a splash at Spring Fest really put us in a bind.


The race mufflers sit just before the rear flanges:


Thread Starter
|
Registered User
Joined: Jun 2005
Posts: 116
From: OC, CA
Rep Power: 25
The final push is Real!!! The car was finally buttoned up at 3am the day of the show. With all of the hard work put in and all of the support received from Diablosport, AMP, BFNY, Inertia, etc. It was truly rewarding to record this video of the car running.

Side view then moving to the front:

Side view then moving to the front:
Thread Starter
|
Registered User
Joined: Jun 2005
Posts: 116
From: OC, CA
Rep Power: 25
Prepping for the show all week really put me out of commission. I'm usually more social, but I literally was just drained. I apologize for those that I missed at the show, but hopefully I can catch some of you guys at future events.
Luckily, there were a few awesome folks that were able to snap pics:


Luckily, there were a few awesome folks that were able to snap pics:


Thread Starter
|
Registered User
Joined: Jun 2005
Posts: 116
From: OC, CA
Rep Power: 25
Vossen Wheels was kind enough to place the 300 at the opening scene of their video coverage of the Spring Festival 9 event:
http://youtu.be/vkRR2UT3SCk
R1 Concepts was also nice enough to place the 300 at a prime location of their video coverage of Spring Fest 9 when the music drops at the 46 Second mark. Awesome rotating shot!
http://youtu.be/KariCPUT1fo
http://youtu.be/vkRR2UT3SCk
R1 Concepts was also nice enough to place the 300 at a prime location of their video coverage of Spring Fest 9 when the music drops at the 46 Second mark. Awesome rotating shot!
http://youtu.be/KariCPUT1fo
Thread Starter
|
Registered User
Joined: Jun 2005
Posts: 116
From: OC, CA
Rep Power: 25
Cameron, not much to report after the supercharger was put on. The car is finally ready to see the dyno soon though just to see where it's at.
Finally installed the gauges and overhead gauge pod


Had a little fun in front of Chino state prison


Some updated sound clips:
We will Be upgrading the q45 projector hardware to 55w for 2015

Some new shots:


Thread Starter
|
Registered User
Joined: Jun 2005
Posts: 116
From: OC, CA
Rep Power: 25
Found one of the Power Steering single pass units for a steal, so I test fitted it to see if I wanted to mount it on the bumper support or higher up. I think higher up is the winner to make room for the oil and tranny coolers in the future.


The factory horns have to be relocated or the mounting brackets will have to be modified for a tight fit. I'll just opt to relocate them to make room for a larger radiator down the road.


The chosen mounting location:


The factory horns have to be relocated or the mounting brackets will have to be modified for a tight fit. I'll just opt to relocate them to make room for a larger radiator down the road.


The chosen mounting location:


Thread Starter
|
Registered User
Joined: Jun 2005
Posts: 116
From: OC, CA
Rep Power: 25
So it looks like I will be adding the Razors edge Motorsports front bumper support to shave a few pounds that I probably put back in Dynamat lol. Going to have it powdercoater by Baid Polish.


Thread Starter
|
Registered User
Joined: Jun 2005
Posts: 116
From: OC, CA
Rep Power: 25
After looking at the boring factory interior for a while, I decided to try to learn something new and skin the interior pieces for a different look. I opted for black and silver (actually texalium) in place of where the factory silver bezels are to somewhat retain a factory look, but with some bling!
Since it was my first time trying i pulled some random test pieces to experiment with.


I swear that rear pillar on the back window is a pita to work with. I don't look forward to reinstalling it.

Some initial prep:


Since it was my first time trying i pulled some random test pieces to experiment with.


I swear that rear pillar on the back window is a pita to work with. I don't look forward to reinstalling it.

Some initial prep:


Thread Starter
|
Registered User
Joined: Jun 2005
Posts: 116
From: OC, CA
Rep Power: 25
Decided to yank the backings on the 2010 challenger seats as well

Diboblo and I are thinking of swapping the led's in the seat backings out to something custom


The "horseshoes" or u-shaped pieces on the backing were all siliconed in so had to remove them to allow the cf process


Diboblo and I are thinking of swapping the led's in the seat backings out to something custom


The "horseshoes" or u-shaped pieces on the backing were all siliconed in so had to remove them to allow the cf process


Thread Starter
|
Registered User
Joined: Jun 2005
Posts: 116
From: OC, CA
Rep Power: 25
Some chemicals and my miscellaneous starter kit with Betty Crocker of course


Never had use for the bottom floor bathroom, but made my "a beautiful mind" setup for this experiment.

The fabric has arrived!


Never had use for the bottom floor bathroom, but made my "a beautiful mind" setup for this experiment.

The fabric has arrived!


