

My Custom DCT Wheel install thread

Thread Starter
|
Registered User
Joined: May 2009
Posts: 3,335
From: Rye, NY
Rep Power: 202


My Custom DCT Wheel install thread
Wanted to finally document some tips on a steering wheel install for those that are concerned or intimidated by the thought of an install. Just as a disclaimer, do so at your own risk and I am not responsible for any issues you may have with your installation or damage you may cause yourself or your vehicle.
The installation of a wheel is very straightforward and should take about 20 minutes (not including waiting after disconnecting the battery). I've done several Porsche wheel installs and it is really a snap and a very rewarding mod. After all, what are you most in contact with on your car?
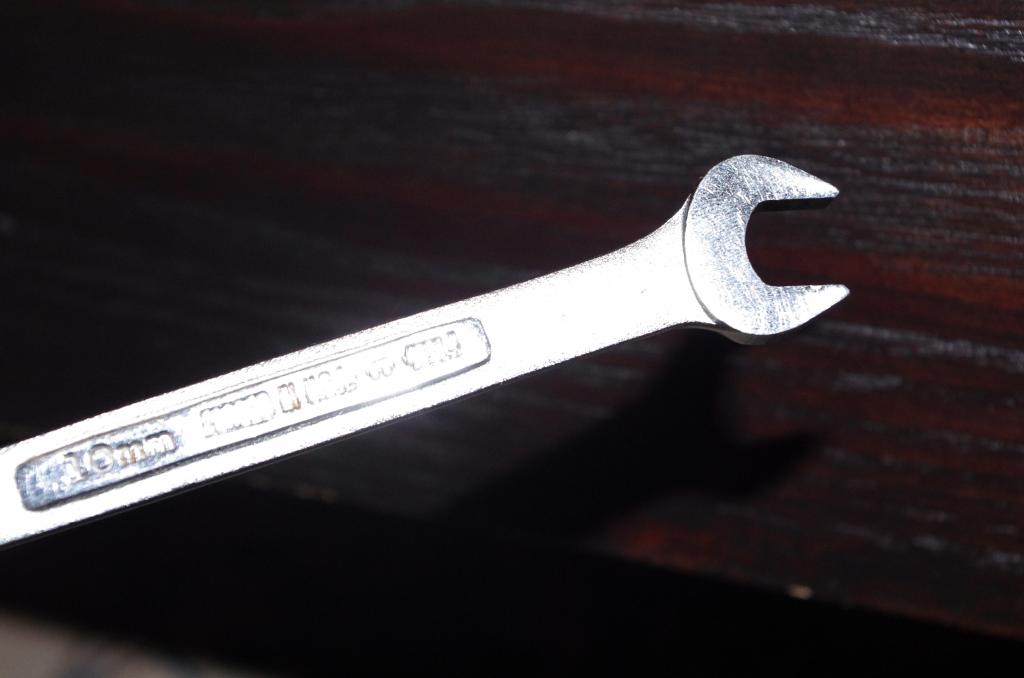
First, disconnect your battery. After you open the frunk, be sure to leave your door open as the window drop mechanism will not be working. The battery connection uses a 10 mm wrench.

After disconnecting the battery, wait 20 minutes to be sure the airbag has gone to sleep.

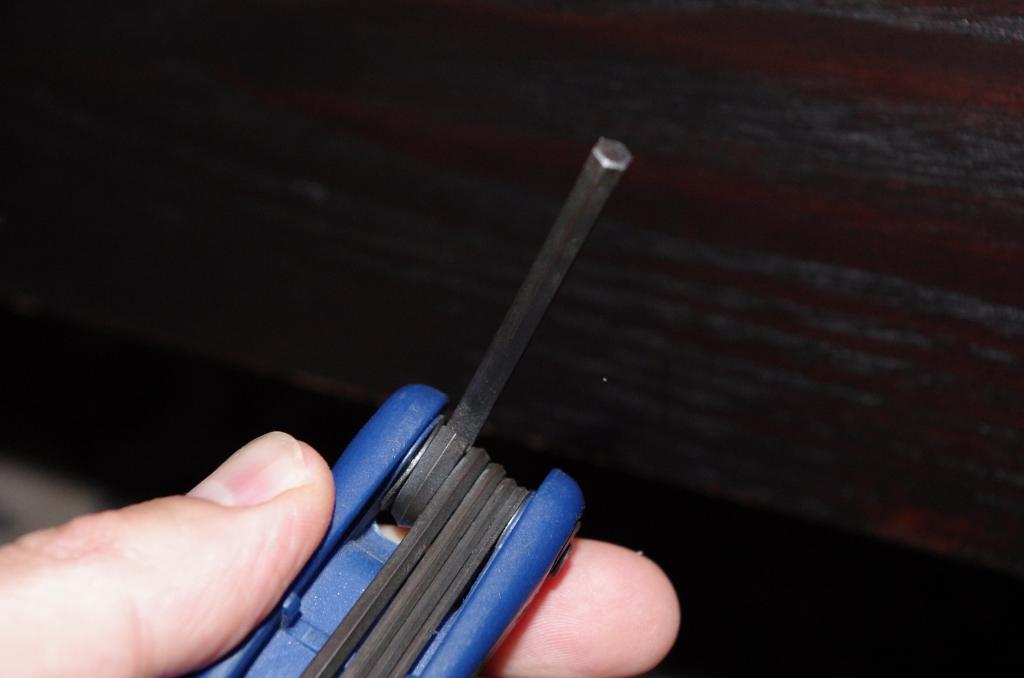
Now comes the challenging part, releasing the airbag. This is really the hardest part of the install. The real key to it is understanding how the mechanism works. The biggest benefit you have is if you are installing another wheel, check out the mechanism on the new wheel so you can see what actually happens inside. A tiny hole in the bottom of the wheel is used to insert something to actuate the airbag spring release. I've always used a 4 mm hex wrench as it is very solid, wide enough not to slip off the spring bar and narrow enough to fit into the hole.
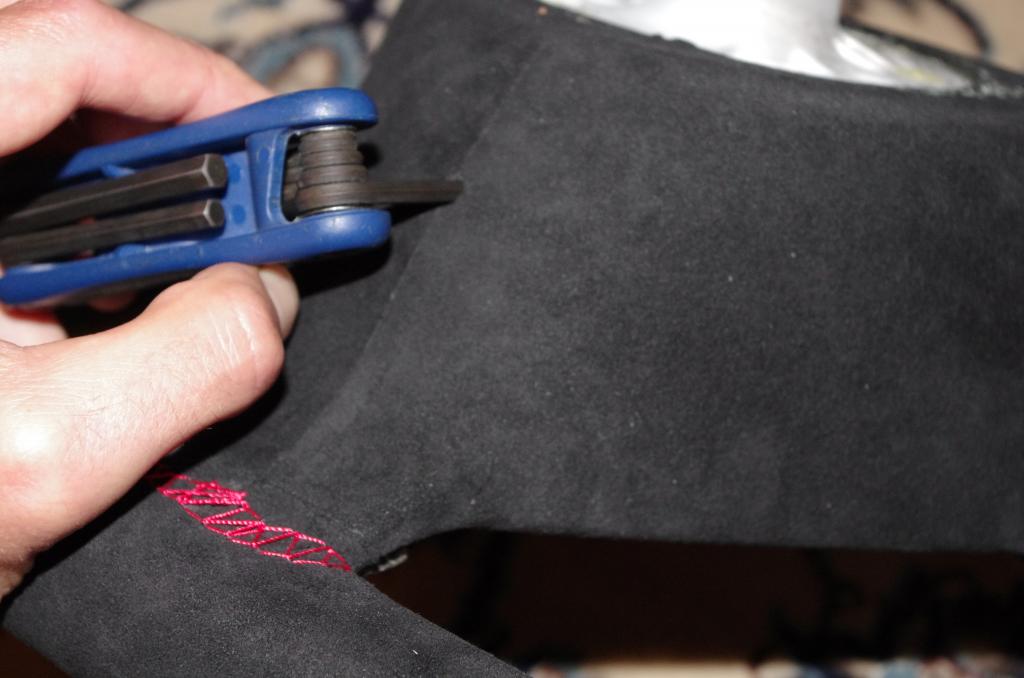
This shows the location of the hole.
Now pull lightly from the bottom and the sides and the airbag will come out. It will not take any force, however you need to press on the release quite hard to actuate the mechanism. Practice on the wheel you are going to install to get a feel for the pressure.
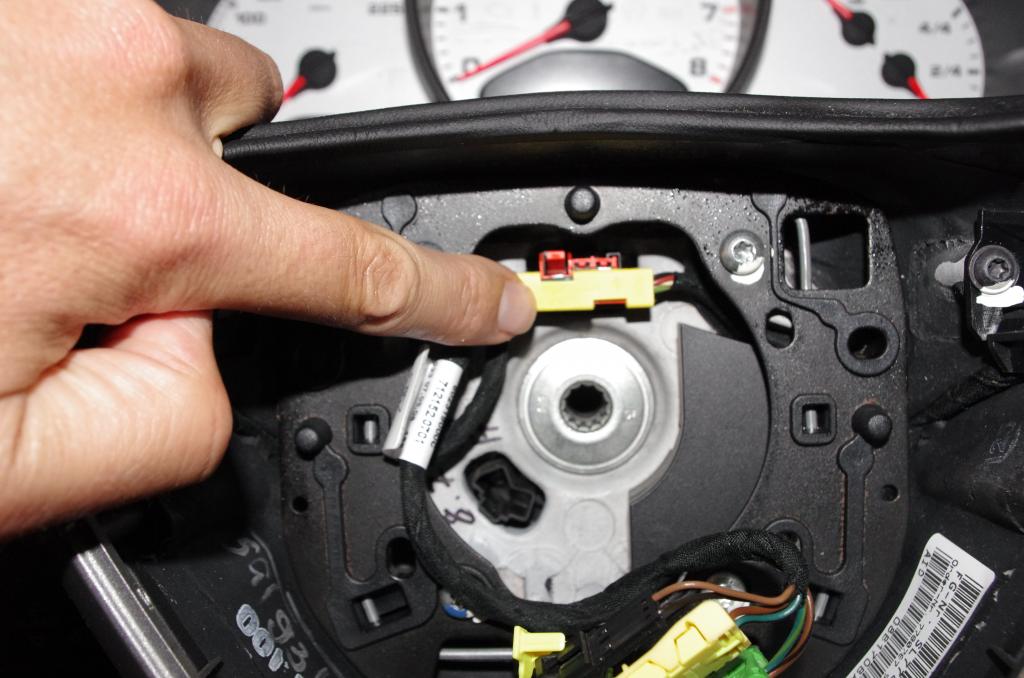
Once the airbag is released, disconnect the horn and airbag connectors. The airbag connectors have little locking tabs that you carefully pry out. A small screwdriver could help. I've diconnected them many times and have never broken one, although YMMV!
Once you have the airbag out and set aside, now is time to remove the wheel. FIRST, you need to disconnect the cable harness on the wheel from the column. Press the tab on the connector and pull the connector out. It is attached to the wheel.
After disconnecting the harness, you need to release the main bolt. I've always used a T 55 torx, although, you officially should use a specific 12 point socket. The torx is a perfect fit though and I've never had any issues.

Be sure to keep the wheel straight when you undo the bolt. If it locks not straight, it will be more difficult to be sure you have the new wheel on straight.
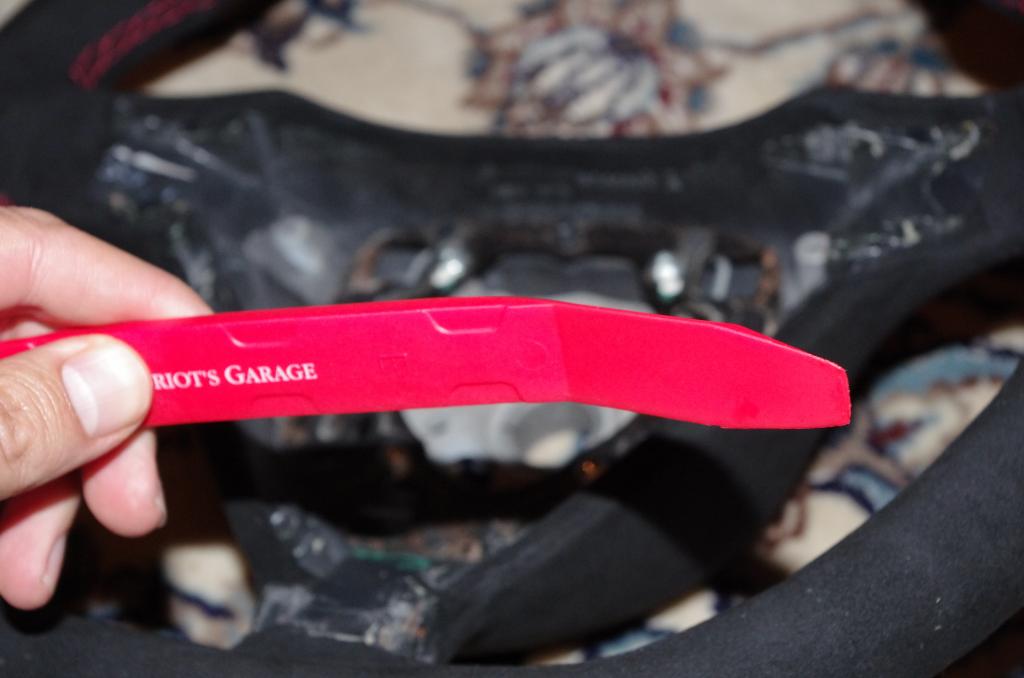
That is really it. If you need to remove the trim pieces from the wheel, you will need a torx screwdriver and a trim tool. The Y piece is a bit tricky, the attachments are deep into the wheel. Be careful and buy yourself some trim tools, they are only about $20.

Installation is reverse of the process. Line up the splines of the wheel and be sure it is straight. Slide it on. Attach the bolt and torque it down with the T55. Modest torque is required and the existing loctite on the wheel should be adequate. Attach the wheel harness to the column. Attach the three plugs to the airbag and push it in. It will click when seated properly. Reconnect your battery. Initially, you will get a PASM failure. Pretty bizarre, but it goes away very quickly.
The installation of a wheel is very straightforward and should take about 20 minutes (not including waiting after disconnecting the battery). I've done several Porsche wheel installs and it is really a snap and a very rewarding mod. After all, what are you most in contact with on your car?
First, disconnect your battery. After you open the frunk, be sure to leave your door open as the window drop mechanism will not be working. The battery connection uses a 10 mm wrench.


After disconnecting the battery, wait 20 minutes to be sure the airbag has gone to sleep.

Now comes the challenging part, releasing the airbag. This is really the hardest part of the install. The real key to it is understanding how the mechanism works. The biggest benefit you have is if you are installing another wheel, check out the mechanism on the new wheel so you can see what actually happens inside. A tiny hole in the bottom of the wheel is used to insert something to actuate the airbag spring release. I've always used a 4 mm hex wrench as it is very solid, wide enough not to slip off the spring bar and narrow enough to fit into the hole.

This shows the location of the hole.

Now pull lightly from the bottom and the sides and the airbag will come out. It will not take any force, however you need to press on the release quite hard to actuate the mechanism. Practice on the wheel you are going to install to get a feel for the pressure.
Once the airbag is released, disconnect the horn and airbag connectors. The airbag connectors have little locking tabs that you carefully pry out. A small screwdriver could help. I've diconnected them many times and have never broken one, although YMMV!
Once you have the airbag out and set aside, now is time to remove the wheel. FIRST, you need to disconnect the cable harness on the wheel from the column. Press the tab on the connector and pull the connector out. It is attached to the wheel.

After disconnecting the harness, you need to release the main bolt. I've always used a T 55 torx, although, you officially should use a specific 12 point socket. The torx is a perfect fit though and I've never had any issues.

Be sure to keep the wheel straight when you undo the bolt. If it locks not straight, it will be more difficult to be sure you have the new wheel on straight.
That is really it. If you need to remove the trim pieces from the wheel, you will need a torx screwdriver and a trim tool. The Y piece is a bit tricky, the attachments are deep into the wheel. Be careful and buy yourself some trim tools, they are only about $20.


Installation is reverse of the process. Line up the splines of the wheel and be sure it is straight. Slide it on. Attach the bolt and torque it down with the T55. Modest torque is required and the existing loctite on the wheel should be adequate. Attach the wheel harness to the column. Attach the three plugs to the airbag and push it in. It will click when seated properly. Reconnect your battery. Initially, you will get a PASM failure. Pretty bizarre, but it goes away very quickly.
Last edited by ryem3; Jul 3, 2013 at 07:32 PM.
Thread Starter
|
Registered User
Joined: May 2009
Posts: 3,335
From: Rye, NY
Rep Power: 202
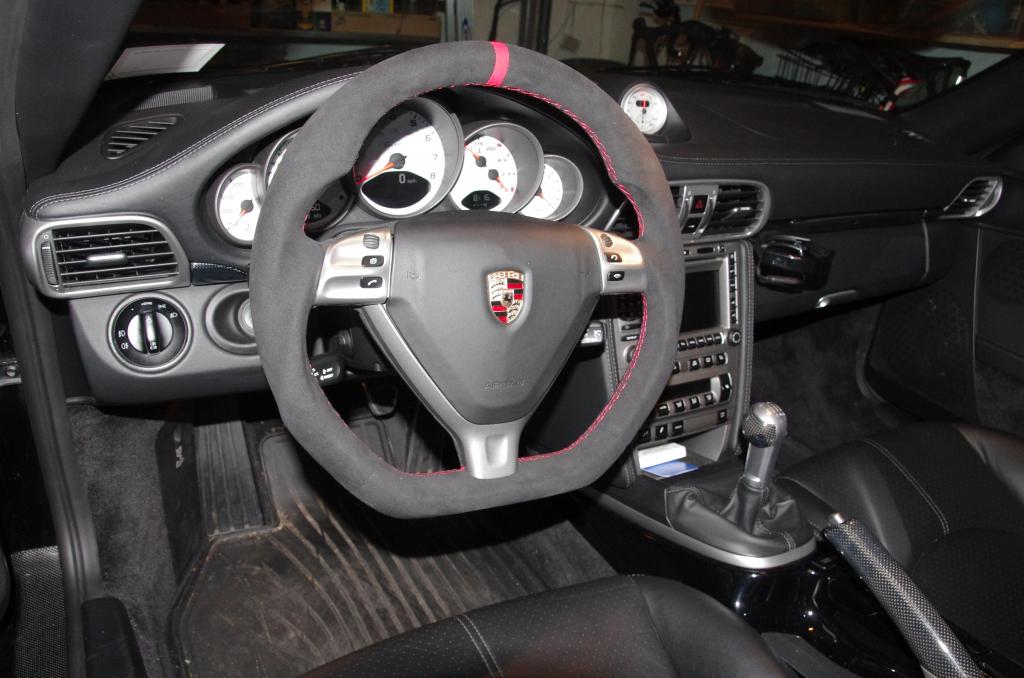
The results
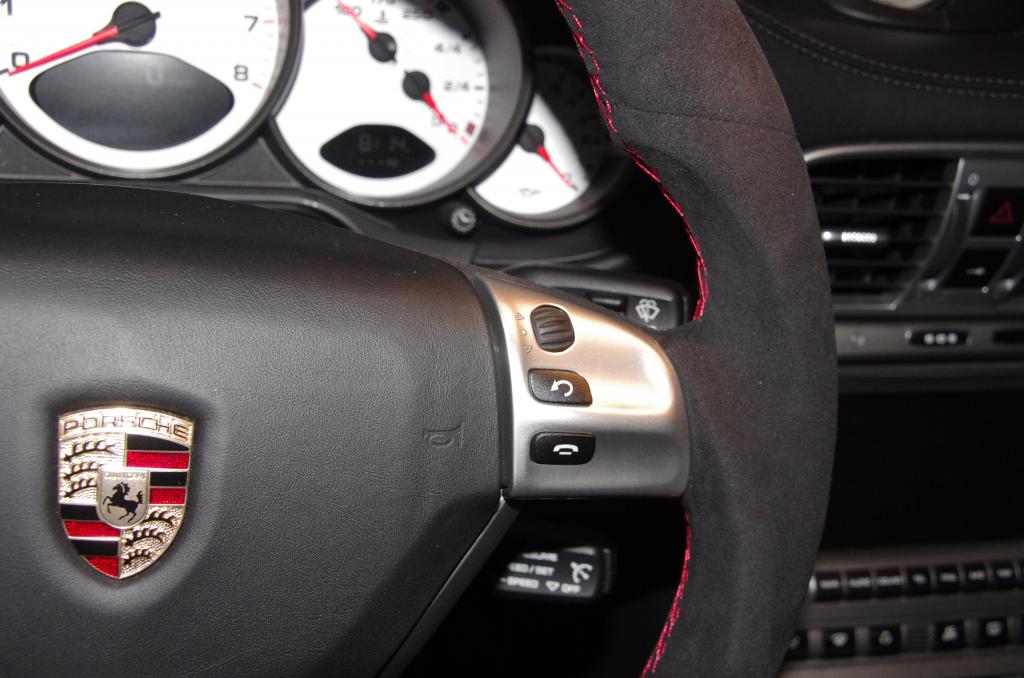
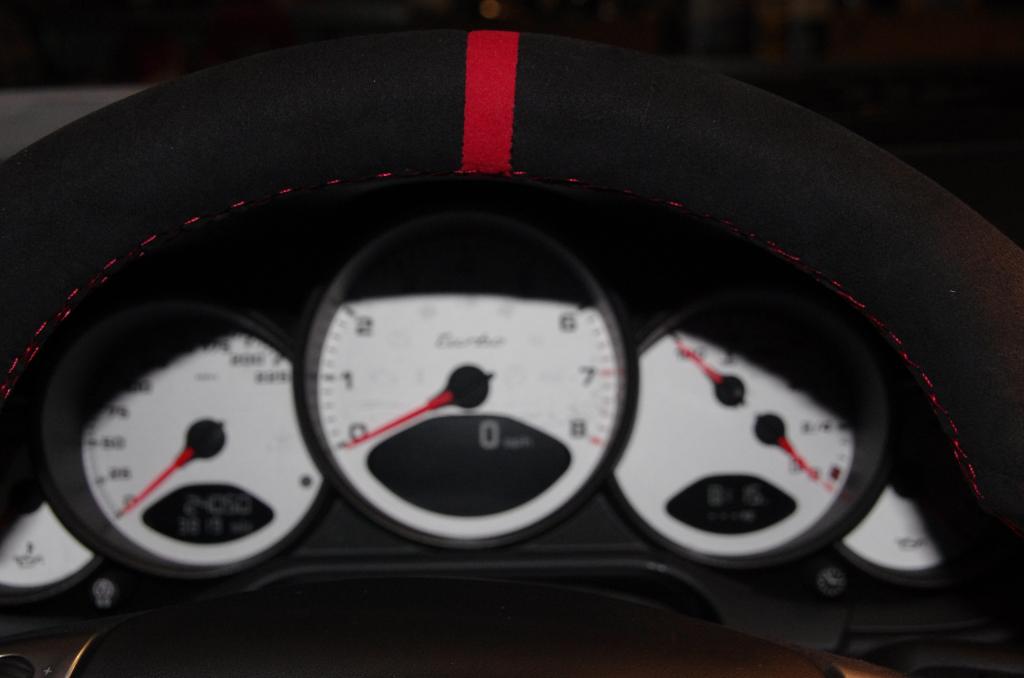
The results are very rewarding! I had this wheel custom made with a flat bottom, full Alacantara and a red ring. The contours are very well made, as you can see from the detail and the red ring is very precisely round. The red ring and stitching are great accents for my red belts and even the red needles of the instruments. DCT construction and craftsmanship are excellent and very good value if you compare to some of the higher end offerings.


Last edited by ryem3; Jul 3, 2013 at 07:39 PM.
Registered User
Joined: Mar 2010
Posts: 2,273
From: San Jose, CA
Rep Power: 193
Nice start! ^^^Yes, more detailed pictures and more instructions after you insert the hex key, and then what comes next after you undo the wiring harness? How do you actually take the wheel of the steering column
Thanks,
VID
Thanks,
VID
Thread Starter
|
Registered User
Joined: May 2009
Posts: 3,335
From: Rye, NY
Rep Power: 202
After you insert the T55 and remove the bolt, you simply pull the wheel straight off. It will slide off easily. Just be sure you remove the clip with the wire harness first! Pulled one out and almost snapped it off once! It comes out with very little effort.

Registered User

Joined: Jul 2008
Posts: 109
From: greatwhitenorth
Rep Power: 22
this is excellent!
Wish I had this before I did mine. It is fairly simple. Did not know to let the airbag go to sleep! I guess that I was slow after getting the battery disconnected
On the advice of my stepson who is a master mechanic in the Caymans I got the triple-square bit --- it was about 12 bucks up here for 4 different sizes, I suspect that I won't use the other three.
On the advice of my stepson who is a master mechanic in the Caymans I got the triple-square bit --- it was about 12 bucks up here for 4 different sizes, I suspect that I won't use the other three.
Registered User
Joined: Mar 2009
Posts: 109
From: Dallas
Rep Power: 26

Trending Topics


Registered User
Joined: Mar 2010
Posts: 2,273
From: San Jose, CA
Rep Power: 193
ryem3:??? I'm confused? Did you add more content after my posting? Yesterday when I replied, pictures and instructions ended with your finger pointing at the airbag disconnect and instructing us to remove the wiring harness.
Nice additional content.
Thanks
Nice additional content.
Thanks
Thread Starter
|
Registered User
Joined: May 2009
Posts: 3,335
From: Rye, NY
Rep Power: 202
Indeed I did. Instead of posting the whole thing, I added in pieces to the same post. If my computer melted down, I didn't want to lose all the content. You just started reading before I was finished! Let me know if you have more questions!

