
DIY DB9 Halo Lights

Thread Starter
|
Registered User
Joined: Dec 2013
Posts: 48
From: Alabama
Rep Power: 16

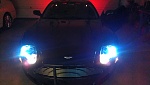
DIY DB9 Halo Lights
DIY Halo Lights for DB9
Tools:
� Drill
� Torx Sockets T27, T30, T40
� 5mm Socket
� Socket Extensions
� Jack Stands
� 2 Sided Tape - High Grade
� Silicone Sealant
� Wire Crimps
� Tie Wraps
� Flat Head Screwdrivers
� Wire cutters and crimps
� Dremel Tool with ceramic cutting disk
� Electrical Tape
� Oracle Halo kit available from: http://www.automotivelightstore.com/...B9HaloKit.aspx * The one I used is the Plasma Kit.
Instructions:
1. Set brake, Jack up car and set on stands.
2. Remove front tires
3. Remove bottom front aluminum panel. This will be T30 and a couple of T40 bolts. A drill socket adapter will speed in this entire process.
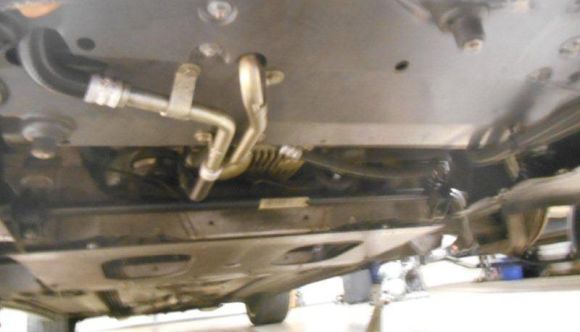
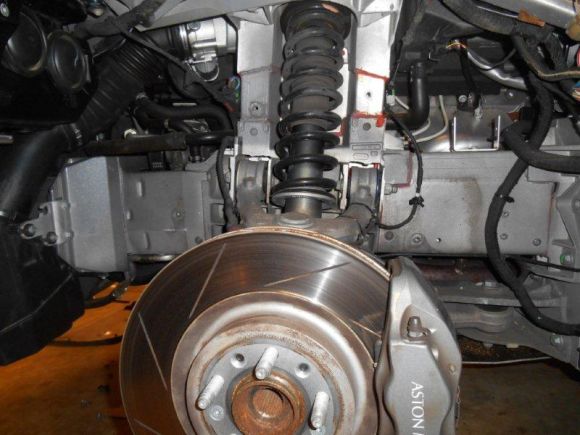
4. Remove Fender well skirts
*This is a great opportunity to inspect your brakes and linkage.
5. Disconnect electrical connector from air box
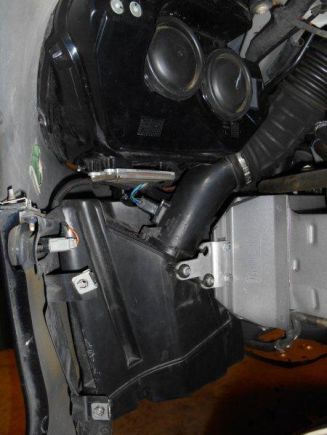
6. Unscrew bolt on air box feed tube. The tube will then rotate counter clockwise to remove.
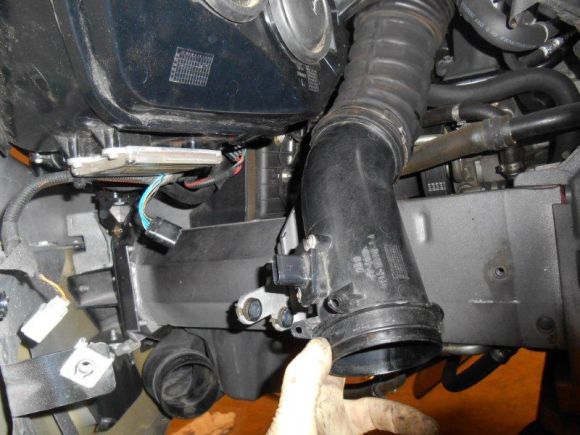
7. Remove Air Box. This will be 4 bolts and you need a long socket extension. The feed tube is tough to get out, but it will pop on out.
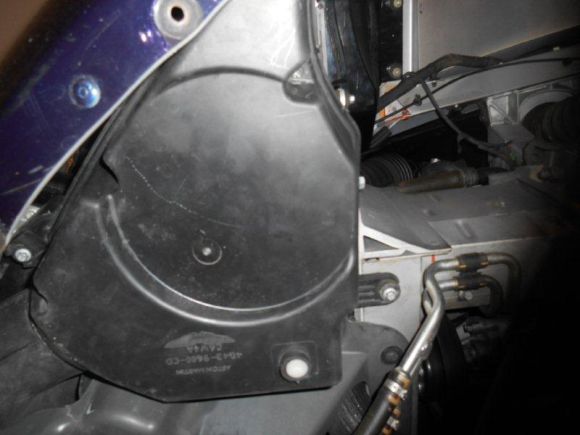
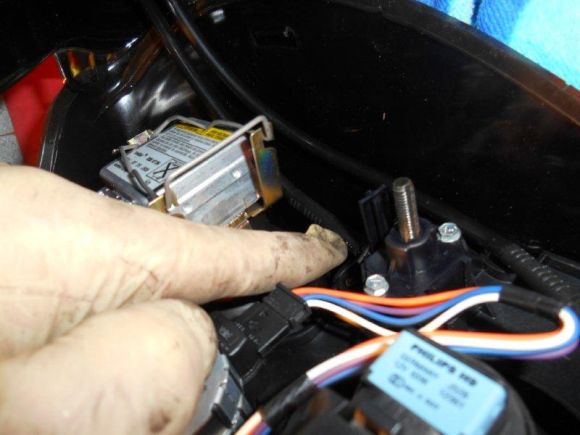
8. Disconnect wiring harnesses from light. Use a small flathead screwdriver to aide in this. You can also do this step as you are pulling the light out if it is easier.
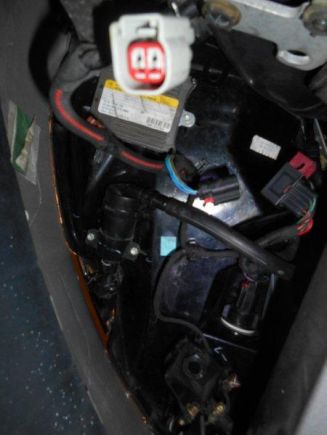
9. Disconnect water hose from light washer. There is a small black clip, similar to a strut clip. It pulls off. There will be fluid that comes out. You can set the hose up against the inside of the wheel well and it will stop leaking.

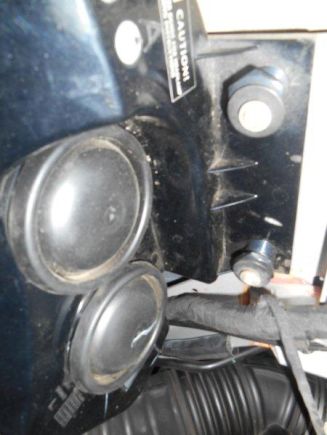
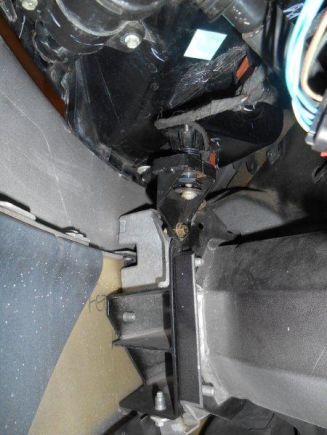
10. Remove the 3 bolts holding the light housing. (Pic show 2 back. There is one in the front.)
11. Place tape or a towel around the housing to avoid scratching the light or fender.
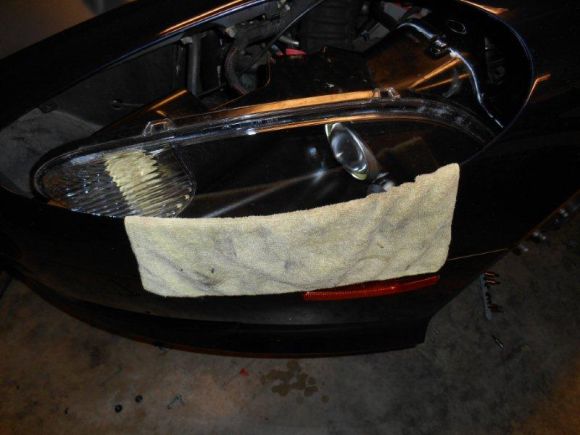
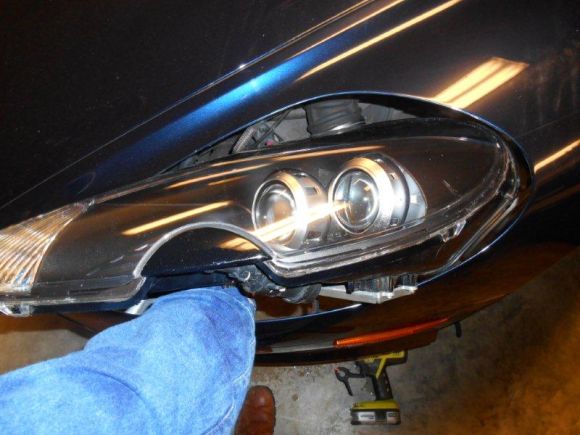
12. Move the light down and backwards, then angle outwards and come forward.
13. Pre-heat your oven to 225 degrees F. (Yes we are gonna bake!) Put your expensive lights in the oven on the middle shelf for 10 minutes. This allows the sealant to loosen and ease removal.
14. Using glove and a towel. Slowly remove the back housing. I used razor blades to lift tabs. This can be dangerous if done carelessly, but any thin sheet will also do. You can use a screw driver, but I was able to pull using just my hands. Take your time and put a firm pull on the edge. Use a friend to help if necessary. If it takes you more than 10 mins, put the light back in the oven for another 10 mins.
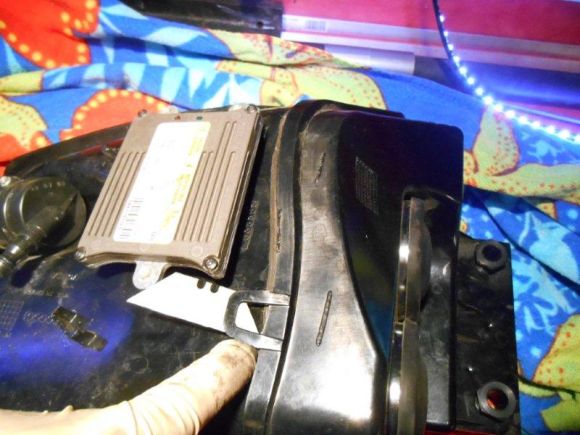
15. Remove excess silicone, re-heating if necessary.
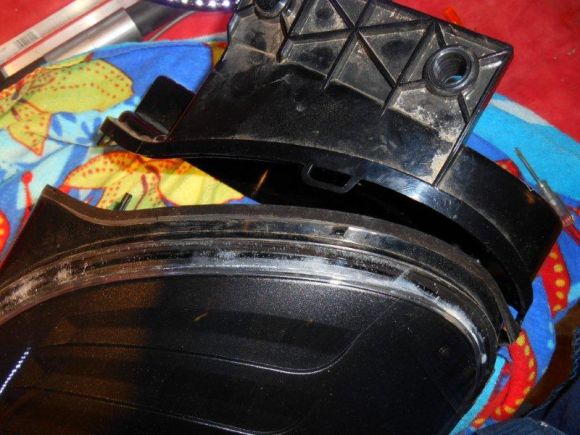
16. Remove the HID adjustment cables. Pry them off with a flathead screw driver.
17. Remove the electrical connectors.
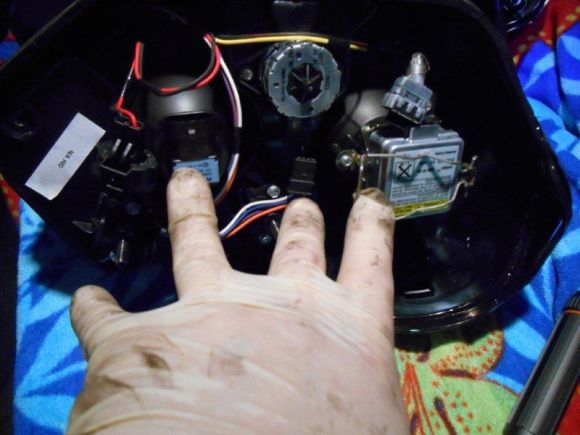
18. Remove 4 � 5mm bolts
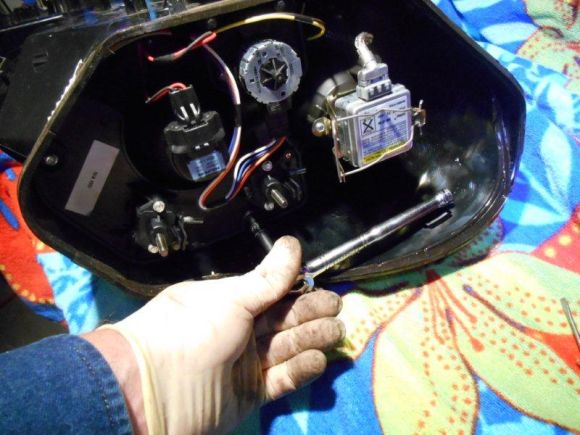
19. Remove the lens module.
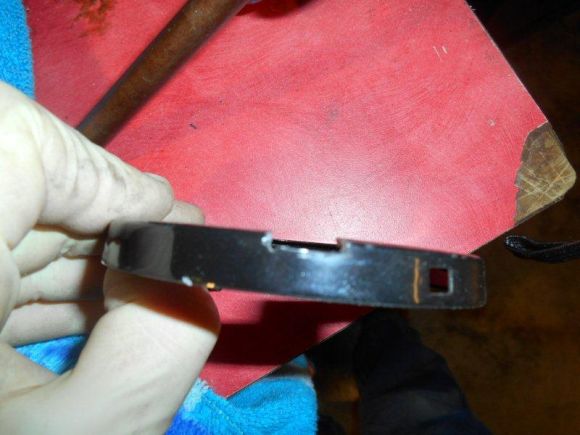
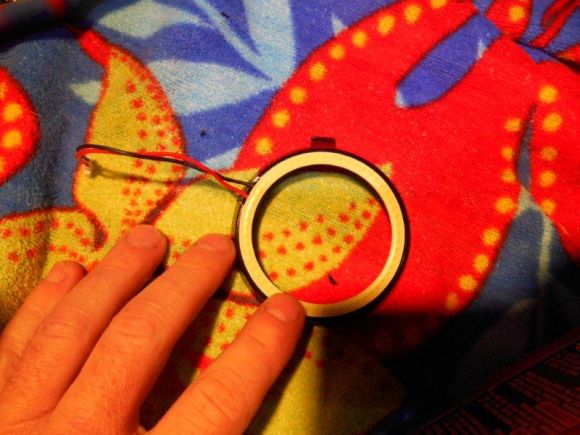
20. Remove the lens ring by simply lifting tab.
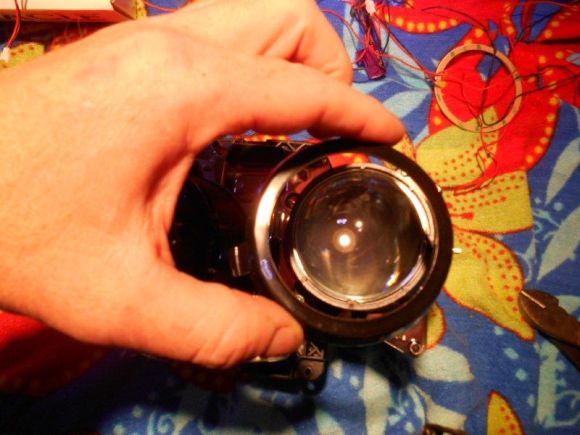
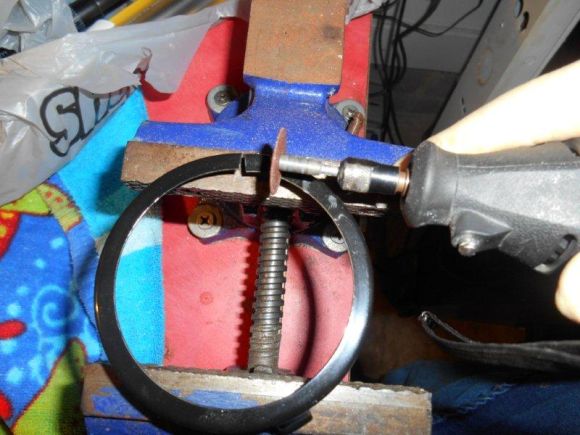
21. Take a Dremel tool with a ceramic cutting blade and cut @ �� notch in the ring, noting where you are going to route the wires.
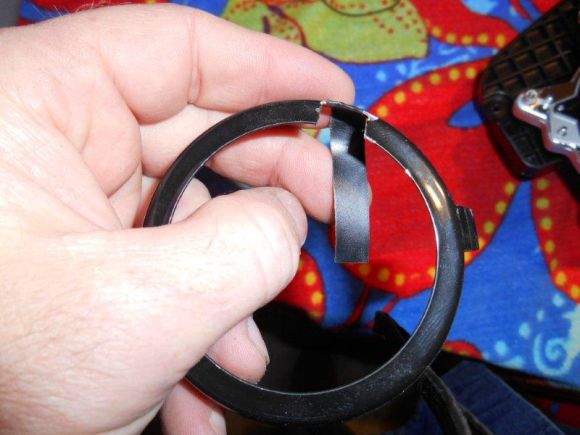
22. Put electrical tape over the ring edge to ensure there is no chaffing.
23. Put high grade 3M 2-sided tape on the outside of the ring.
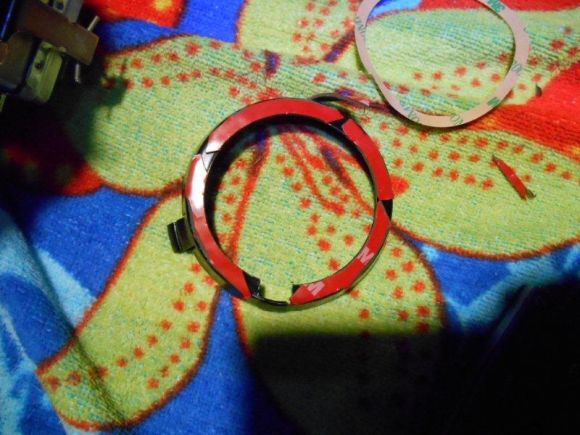
24. Stick on the ring, making sure to center well. (Test Halos using 9-12v battery)
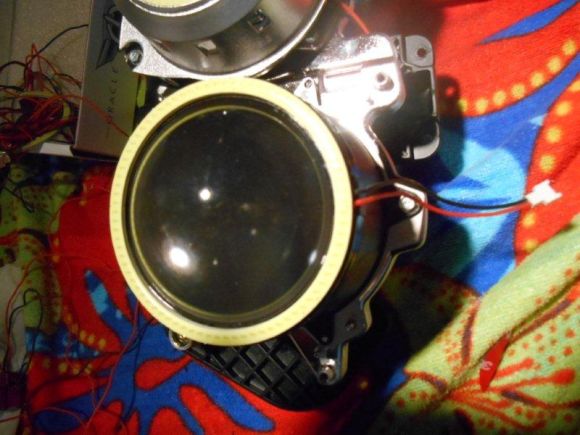
25. Place the ring back on over the lens.
26. Re-install lens module. The clearance is tight, but it will fit. Careful not to over tighten. (Test Halos)
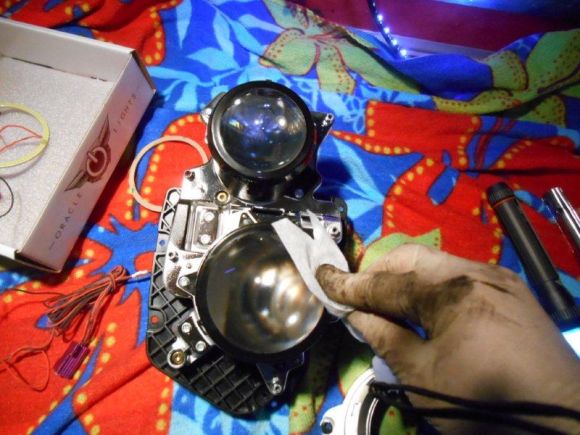
27. Clean lens with alcohol.
28. Drill small hole in bottom of housing to route wires.

29. Mount ballast inside of housing using screws if possible or high grade 2 � sided tape.
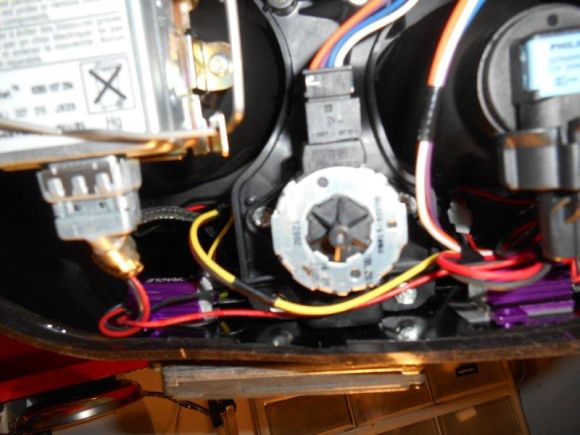
30. Re-Install electrical connectors and adjustment cables.
31. Put down new silicone around housing and wire hole.
32. Replace back of housing. Use long clamps or any suitable method to apply pressure. (Test Halos)
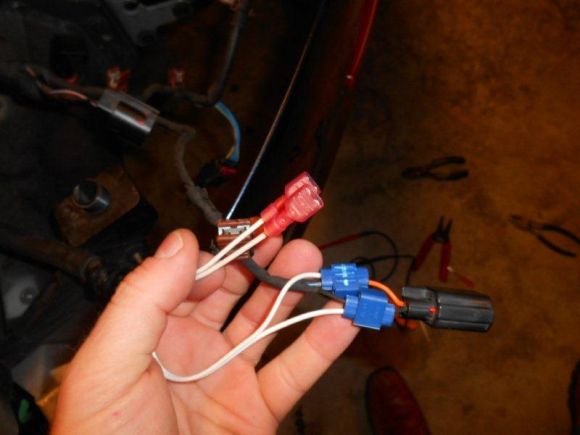
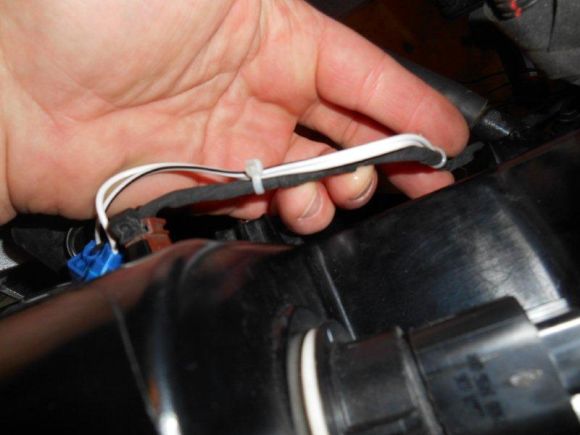
33. Using electrical splices, connect red wire to orange running light wire and the back to black. Use tie wraps to tidy it up. (TEST)
34. Re-install everything using the reverse process.
Tools:
� Drill
� Torx Sockets T27, T30, T40
� 5mm Socket
� Socket Extensions
� Jack Stands
� 2 Sided Tape - High Grade
� Silicone Sealant
� Wire Crimps
� Tie Wraps
� Flat Head Screwdrivers
� Wire cutters and crimps
� Dremel Tool with ceramic cutting disk
� Electrical Tape
� Oracle Halo kit available from: http://www.automotivelightstore.com/...B9HaloKit.aspx * The one I used is the Plasma Kit.
Instructions:
1. Set brake, Jack up car and set on stands.
2. Remove front tires
3. Remove bottom front aluminum panel. This will be T30 and a couple of T40 bolts. A drill socket adapter will speed in this entire process.
4. Remove Fender well skirts
*This is a great opportunity to inspect your brakes and linkage.
5. Disconnect electrical connector from air box
6. Unscrew bolt on air box feed tube. The tube will then rotate counter clockwise to remove.
7. Remove Air Box. This will be 4 bolts and you need a long socket extension. The feed tube is tough to get out, but it will pop on out.
8. Disconnect wiring harnesses from light. Use a small flathead screwdriver to aide in this. You can also do this step as you are pulling the light out if it is easier.
9. Disconnect water hose from light washer. There is a small black clip, similar to a strut clip. It pulls off. There will be fluid that comes out. You can set the hose up against the inside of the wheel well and it will stop leaking.
10. Remove the 3 bolts holding the light housing. (Pic show 2 back. There is one in the front.)
11. Place tape or a towel around the housing to avoid scratching the light or fender.
12. Move the light down and backwards, then angle outwards and come forward.
13. Pre-heat your oven to 225 degrees F. (Yes we are gonna bake!) Put your expensive lights in the oven on the middle shelf for 10 minutes. This allows the sealant to loosen and ease removal.
14. Using glove and a towel. Slowly remove the back housing. I used razor blades to lift tabs. This can be dangerous if done carelessly, but any thin sheet will also do. You can use a screw driver, but I was able to pull using just my hands. Take your time and put a firm pull on the edge. Use a friend to help if necessary. If it takes you more than 10 mins, put the light back in the oven for another 10 mins.
15. Remove excess silicone, re-heating if necessary.
16. Remove the HID adjustment cables. Pry them off with a flathead screw driver.
17. Remove the electrical connectors.
18. Remove 4 � 5mm bolts
19. Remove the lens module.
20. Remove the lens ring by simply lifting tab.
21. Take a Dremel tool with a ceramic cutting blade and cut @ �� notch in the ring, noting where you are going to route the wires.
22. Put electrical tape over the ring edge to ensure there is no chaffing.
23. Put high grade 3M 2-sided tape on the outside of the ring.
24. Stick on the ring, making sure to center well. (Test Halos using 9-12v battery)
25. Place the ring back on over the lens.
26. Re-install lens module. The clearance is tight, but it will fit. Careful not to over tighten. (Test Halos)
27. Clean lens with alcohol.
28. Drill small hole in bottom of housing to route wires.
29. Mount ballast inside of housing using screws if possible or high grade 2 � sided tape.
30. Re-Install electrical connectors and adjustment cables.
31. Put down new silicone around housing and wire hole.
32. Replace back of housing. Use long clamps or any suitable method to apply pressure. (Test Halos)
33. Using electrical splices, connect red wire to orange running light wire and the back to black. Use tie wraps to tidy it up. (TEST)
34. Re-install everything using the reverse process.
Registered User

Joined: Jun 2010
Posts: 800
From: Lake Geneva, WI
Rep Power: 52
You're a brave soul.. I thought of tackling this myself once then chickened out and just installed a little bit "hotter" bulb to give a slight bluish tint. Great write up.. Thanks for sharing.
Registered User
Joined: Mar 2010
Posts: 348
From: West Palm Beach FL
Rep Power: 32
Great look! I used to do time consuming mods like this on past cars and had no problem telling people what it took.
You knew you'd be among .1% of the car guys to actually spend the time to do it!
You knew you'd be among .1% of the car guys to actually spend the time to do it!


Thread
Thread Starter
Forum
Replies
Last Post
GSR Autosport
Automotive Parts & Accessories For Sale/Wanted
0
Aug 26, 2015 05:20 PM