
Some random maintenance things


Thread Starter
|
Registered User

Joined: Apr 2009
Posts: 4,366
From: NoVa
Rep Power: 295


Some random maintenance things
I finally got around to doing a bunch of maintenance-type stuff I've been putting off. I posted some of this in another thread or two but I'll put it here to consolidate everything. Hopefully this will give some insight into general expectations for maintenance for owners and prospective owners that want to DIY as much as they can.
First up was draining my oil catch can. I'm sure everyone is aware of the kit by now, but just in case here's the info:
https://www.6speedonline.com/forums/...tallation.html
Pulling the catch can, draining it, reinstalling it, and topping off the oil takes 10 mins all in.
Here's the vid I shot of what it collects:
http://vid65.photobucket.com/albums/...42601677_n.mp4
Next came my brake pads. I posted this in my "Tracking your Aston" thread as well:
https://www.6speedonline.com/forums/...our-aston.html
Here's the pic of what my front pads looked like, even though they still have material left:
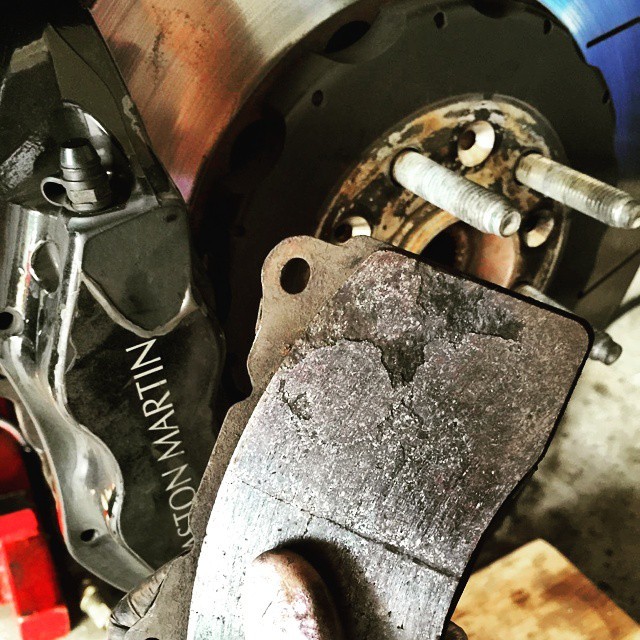
Brake pads are super easy to do on our cars and no special tools are needed if you're even a little careful.
Intake filters were nice and easy because I already had the front wheels off for the brakes and the undertray off for the thermostat.
The hardest job by far was the FEAD belt and updated pulley. There's a thread around somewhere about the squeaky pulley on startup. Aston changed two things at some point. The main thing is the change in pulley design (they added walls to the sides of the pulley to keep the belt in place, which you can see in this thread:
http://www.pistonheads.com/GASSING/t...or+belt+squeak
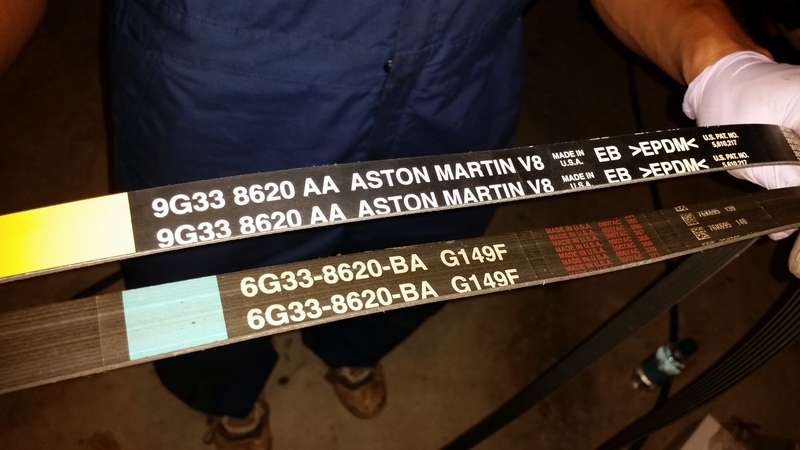
The other thing is the change in the belt. I didn't do an exact measurement, but putting them side-by-side I couldn't tell a difference in the belt width or length. Here's old and new so you can see the change in part numbers:
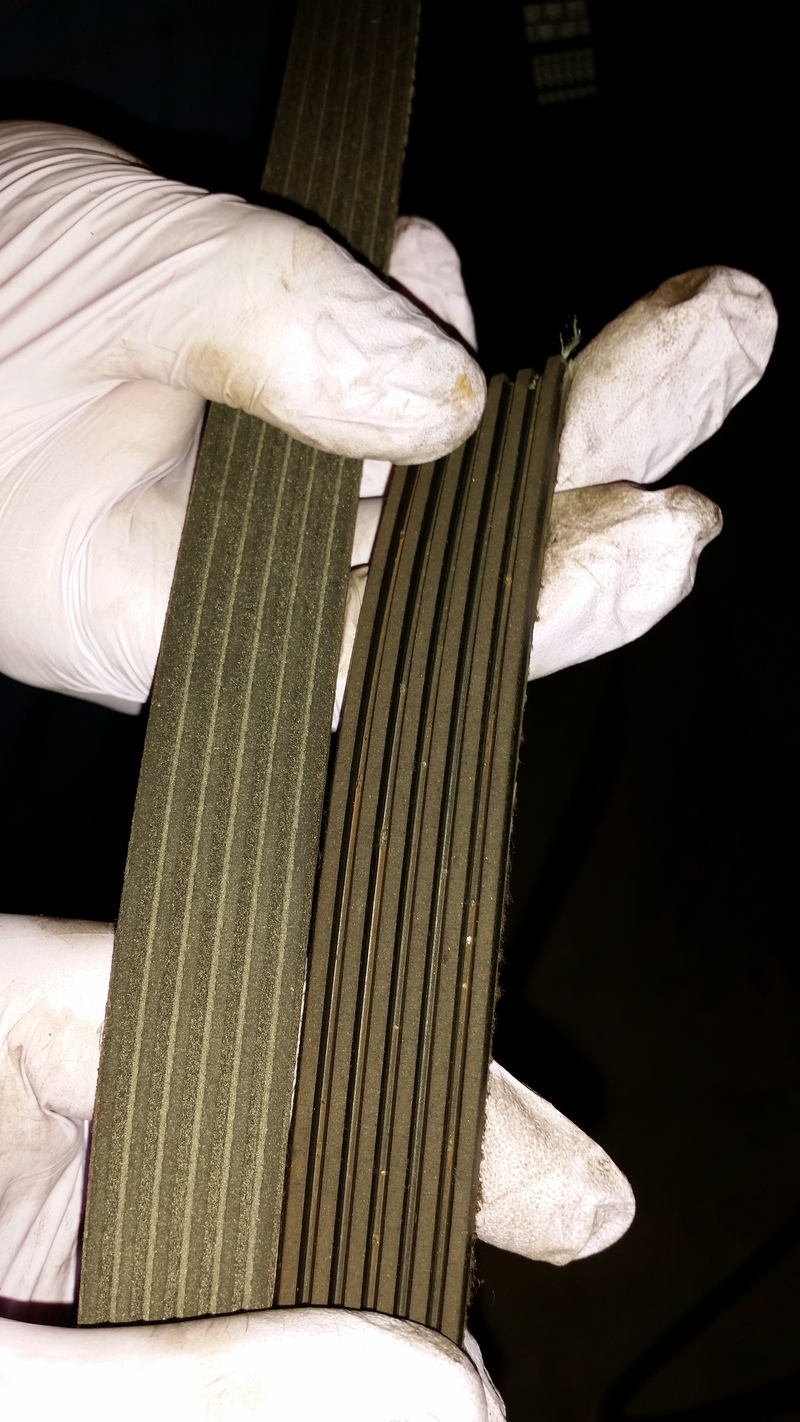
The main difference is the belt material itself. Granted, this is comparing an old belt to new, but the old belt actually looks newer (smoother). The new belt looks like it's made of a more textured material. New is on the left, old is on the right:
Since I was getting rid of the old pulley and belt, I cut the old belt to save a lot of time and effort removing it "nicely". This job is MUCH easier with a second set of hands, but still a pain because you're working in such a tight space. I can do a write-up for this later, but won't have pics. There's a good video on Youtube that I used as a guide, but there are lots of lessons learned that are worth sharing.
Last was the thermostat. I used this thread as a guide:
https://www.6speedonline.com/forums/...rmostat-2.html
This was actually really easy to do, I just made it way too hard because I tried draining coolant from the radiator to bring the coolant level down so none would dump out of the thermostat housing. Did not work. Coolant dumped out of the housing despite draining a gallon out of the radiator. The stud-cutting trick made this very easy, and cutting the stud wasn't too hard (just be extremely careful). I used a cutting wheel on a Dremel and it went through easily.
http://s65.photobucket.com/user/telu...o.mp4.html?o=1
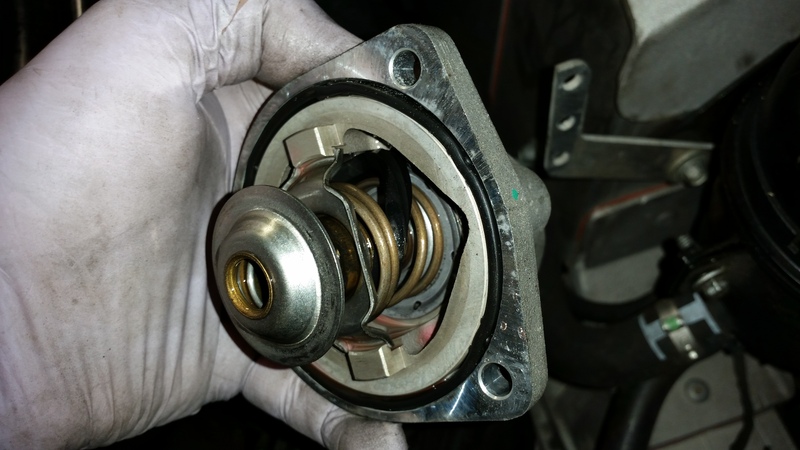
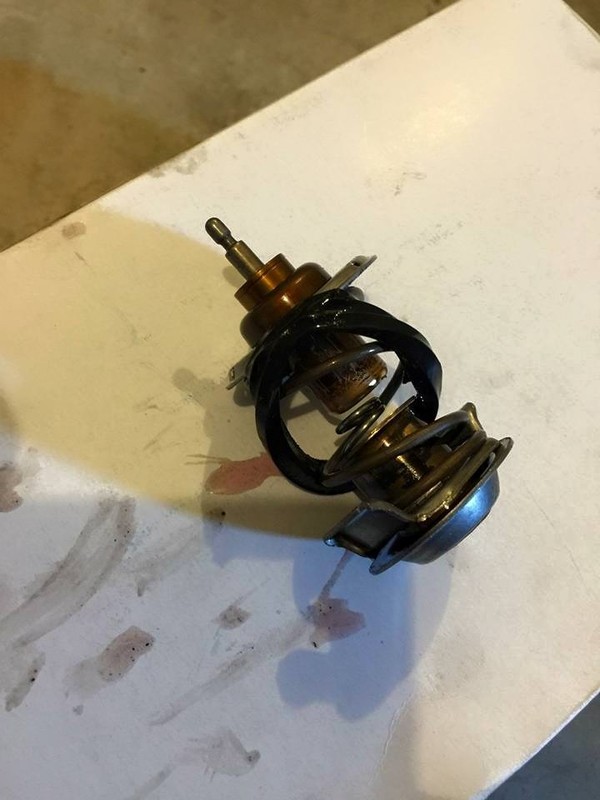
The housing gasket was in good condition so I reused it. But you can see the failure-prone thermostat gasket did its failuring as expected:
Anyway, there are some great write-ups floating around, many of which are in the FAQ sticky. But there are some little things that make these jobs a bit easier, and the lessons learned can be worthwhile.
Next up are some carbon fiber trim pieces for my interior and a shiny new set of headers.....
First up was draining my oil catch can. I'm sure everyone is aware of the kit by now, but just in case here's the info:
https://www.6speedonline.com/forums/...tallation.html
Pulling the catch can, draining it, reinstalling it, and topping off the oil takes 10 mins all in.
Here's the vid I shot of what it collects:
http://vid65.photobucket.com/albums/...42601677_n.mp4
Next came my brake pads. I posted this in my "Tracking your Aston" thread as well:
https://www.6speedonline.com/forums/...our-aston.html
Here's the pic of what my front pads looked like, even though they still have material left:
Brake pads are super easy to do on our cars and no special tools are needed if you're even a little careful.
Intake filters were nice and easy because I already had the front wheels off for the brakes and the undertray off for the thermostat.
The hardest job by far was the FEAD belt and updated pulley. There's a thread around somewhere about the squeaky pulley on startup. Aston changed two things at some point. The main thing is the change in pulley design (they added walls to the sides of the pulley to keep the belt in place, which you can see in this thread:
http://www.pistonheads.com/GASSING/t...or+belt+squeak
The other thing is the change in the belt. I didn't do an exact measurement, but putting them side-by-side I couldn't tell a difference in the belt width or length. Here's old and new so you can see the change in part numbers:
The main difference is the belt material itself. Granted, this is comparing an old belt to new, but the old belt actually looks newer (smoother). The new belt looks like it's made of a more textured material. New is on the left, old is on the right:
Since I was getting rid of the old pulley and belt, I cut the old belt to save a lot of time and effort removing it "nicely". This job is MUCH easier with a second set of hands, but still a pain because you're working in such a tight space. I can do a write-up for this later, but won't have pics. There's a good video on Youtube that I used as a guide, but there are lots of lessons learned that are worth sharing.
Last was the thermostat. I used this thread as a guide:
https://www.6speedonline.com/forums/...rmostat-2.html
This was actually really easy to do, I just made it way too hard because I tried draining coolant from the radiator to bring the coolant level down so none would dump out of the thermostat housing. Did not work. Coolant dumped out of the housing despite draining a gallon out of the radiator. The stud-cutting trick made this very easy, and cutting the stud wasn't too hard (just be extremely careful). I used a cutting wheel on a Dremel and it went through easily.
http://s65.photobucket.com/user/telu...o.mp4.html?o=1
The housing gasket was in good condition so I reused it. But you can see the failure-prone thermostat gasket did its failuring as expected:
Anyway, there are some great write-ups floating around, many of which are in the FAQ sticky. But there are some little things that make these jobs a bit easier, and the lessons learned can be worthwhile.
Next up are some carbon fiber trim pieces for my interior and a shiny new set of headers.....
Last edited by telum01; Jul 20, 2015 at 12:17 PM.


Thread
Thread Starter
Forum
Replies
Last Post
ECS Tuning - VW
VW Vendor Classifieds
0
Sep 2, 2015 01:47 PM