When you click on links to various merchants on this site and make a purchase, this can result in this site earning a commission. Affiliate programs and affiliations include, but are not limited to, the eBay Partner Network.
I've been a bit of a pain on this site and on PistonHeads over the past couple of weeks looking for information as I worked my way through a self-install of front and rear parking cameras. But I'm done...and they work! The following chronicles my project, but please do not regard this as advice as I am clearly not qualified to give such.
I'm very grateful to those who helped out by answering specific questions and also those who had previously taken on similar projects and posted their discoveries. My car is an '06 DB9 Volante, and there are some installation differences between my car and other models, especially in the back (no surprise...).
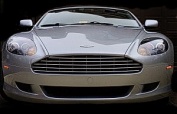
So first...where did I mount the cameras? The front camera is mounted with double-stick tape in the lower grill recess. The wiring is zip-tied at various points along the route to the right-front wheel well (behind the liner) where it passes through a hole I made in a grommet in the firewall/bulkhead. For more information on that painful journey, see here: https://www.6speedonline.com/forums/...-firewall.html '06 DB9 Volante Front Camera Mount
The rear camera is mounted with double-stick tape below the bar with the rear parking sensors, between the exhaust pipes. I ran the wire through a grommet in the bottom of the boot, under the carpeting, near the left taillights and not far from the boot fusebox. '06 DB9 Volante Rear Camera Mount
'06 DB9 Volante Boot Floor Grommet. Back of car to left, boot fusebox at upper right.
Here's what else I learned:
1) I used a Naviks 2005 - 2011 Aston Martin DB9 HDMI Video Interface (NK-200). It cost $295, and it daisy-chains to the rear of the navigation disk player, which lives under the left-rear seat in a Gen 1 DB9 Volante.
2) The images, both front and rear, are absolutely fine for parking. In other words, I didn't need to upgrade to a higher-resolution screen for parking assist purposes.
3) I had to run a camera wire from the interface (under the left-rear seat) to the front of the car, so I decided to run the power wire for the Naviks and the two cameras along the same route, under the center console trim, and tapping into the cabin fusebox in the front passenger's footwell. There's a dedicated fuse for the reversing lights, so I used an Add-A-Circuit fuse tap and the backup camera powers-up and triggers automatically when I shift into reverse.
4) I took the easiest route I could find to get from the Naviks under the seat to the boot. That required removing the left-rear passenger's seatback. To do that, I first removed the backseat headrest by pulling it out (toward the front of the car) and then lifting up. There are then four bolts to remove to release the seatback.
5) After the seatback is out, I then followed the large red power cable to exit the passenger compartment and start heading toward the boot. '06 DB9 Volante with lots of stuff removed in the back. It wasn't necessary to remove the right side (left in picture) seatback like I did. See the big red cable at far right.
6) Next, I opened the roof part-way. This is terrifying! I needed the aluminum roof lid/cover open and I also needed the soft-top partially out of the way to gain access to the boot. You can stop the roof lid/cover when it's open and before the soft-top starts to rise by releasing the roof-open switch at the right time, but if you turn off the key it will start to close again after a few seconds. I stuck a box in there to hold it open and turned the key off while I routed my wires. '06 DB9 Volante with cardboard box holding roof lid open. NOTE THE GIANT HOLE LEADING TO THE BOOT (NORMALLY COVERED BY BOOT CARPET)! The red "wire" is just a fish tape I didn't end up using...
7) I ran my camera wires through the same gap as the big red power cable, then raised the soft-top half way and left the key on while I routed the camera cables along the bottom of the compartment where the folded top rests, taped them in place, then sent them out through that giant hole and into the boot. Then it was just a matter of running the wires to that grommet through the boot floor and covering everything back up with the carpeting.
8) The front camera is activated by a little push-button (supplied with the Naviks) that I installed in the center console cubby (in front of the ashtray). The other things in there are an Aux and USB audio input I installed a few years ago when I added a Grom Bluetooth adapter and my iPhone mount. The button is very easy to reach, and the front camera will stay on until the button is pushed again or until the accessory power is turned off.
Here's a view from the rear parking camera:
And here's a 2x6 I placed in front of the front camera (which is 180 degrees):
...and about 3/4" in front of the forward-most point of the car:
I'm quite pleased with the outcome. The Volante isn't easy to back-up with the roof closed because the rear window is so small, and we all know the horrors of approaching concrete parking bumper blocks. Now I can move forward to within an inch or so of them while keeping them in full view!
Total cost for interface, two cameras, and miscellaneous bits: under $500.
Good job! I installed front and rear cameras in my vantage. I opted to use a video rear view mirror instead of the horrible navigation screen.
it's really helpful, especially the front camera when I park in the garage. It helps me line up the car.
I use a wireless remote to switch, as I wanted my set up to be reversible.
Much needed in our cars with limited c rear views and such a long bonnet.
That sounds like a great idea too. Can you PM me with more details? This is the next mod that I've had on the list but this type of tech I"m not very familiar with. Any help would be very appreciated.