

GMP Performance's 2008 Audi A4 Track Day Project Car


GMP Performance's 2008 Audi A4 Track Day Project Car
One of the perks of being part of GMP Performance is our ability to go play on the track with our cars. We are a group of racing people here, many of us having been around tracks and race cars our entire lives. It�s a passion and one a lot of us share.
Another passion a lot of us share is a love for BIG projects. The more parts that can go into a car, the more excited we are for the final result. It consumes time, energy, money, and requires more than a fair share of sweat and tears but the end is always worth it.
Combine those together and you get this A4: a daily driver track car and our latest project.

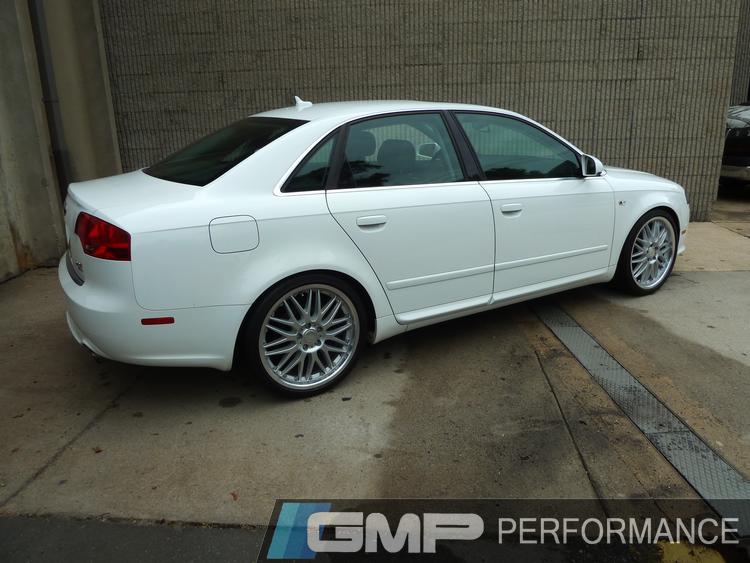
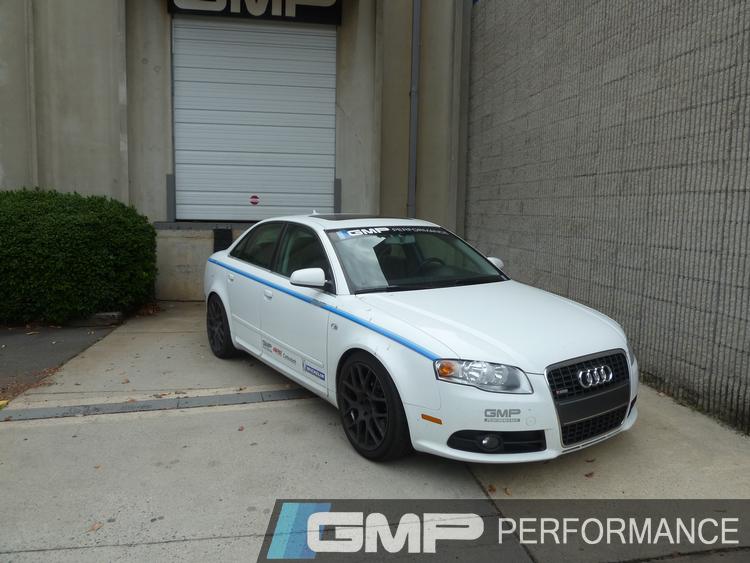
This 2008 A4 2.0T was purchased by us to be a little bit of our everything; it�s a street car for our owner, a track car for our team, a R&D guinea pig for our shop, and a show car for our company when we go to events.
We have this running joke here that no one leaves their car stock for longer than 24 hours. The A4 was no exception. First thing we decided was to get some RH Wheels and a set of H&R Springs to add some extra style.
Parts Installed:
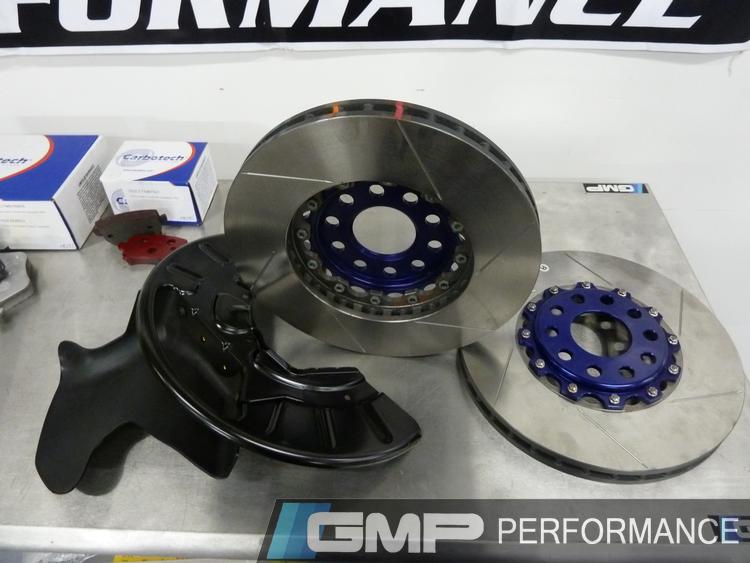
Audi A4 B6 (1.8T) / A4 B7 (2.0T) 2-Piece Brake Rotor
Nurburgring Rotary Forged Wheel - Gunmetal
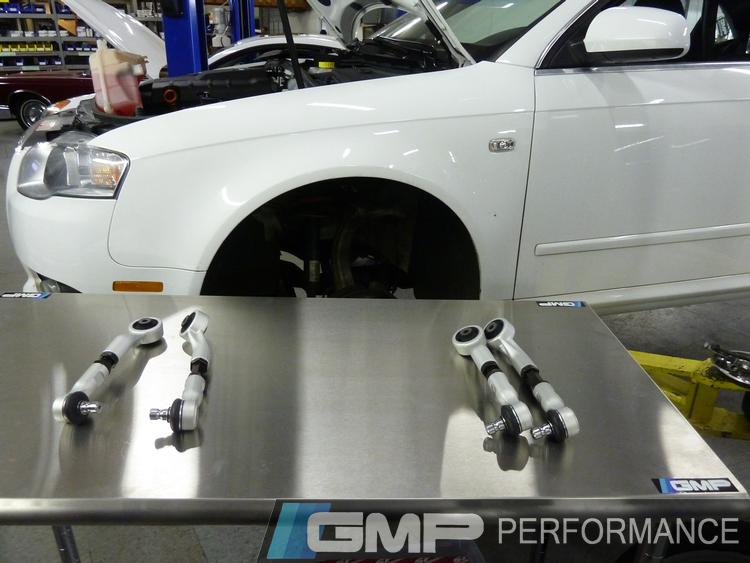
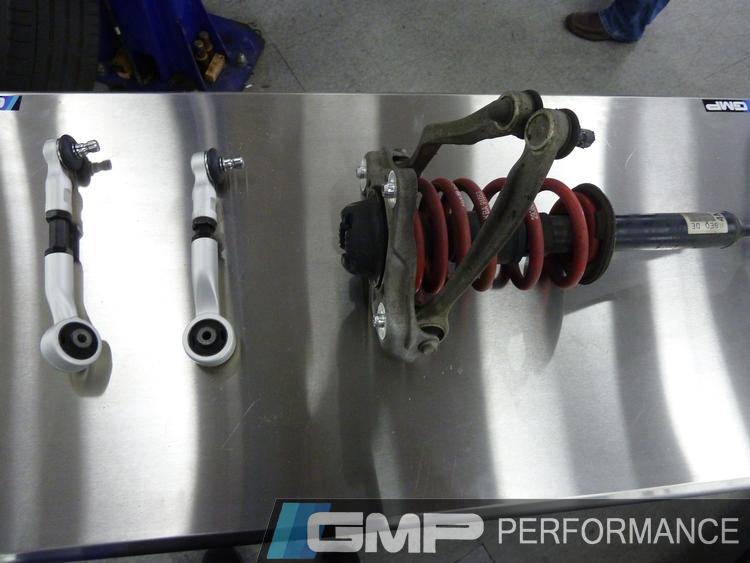
Audi A4/A6/A8/S4(B5/B6/B7 Chassis) Camber Adjustable Upper Control Arms
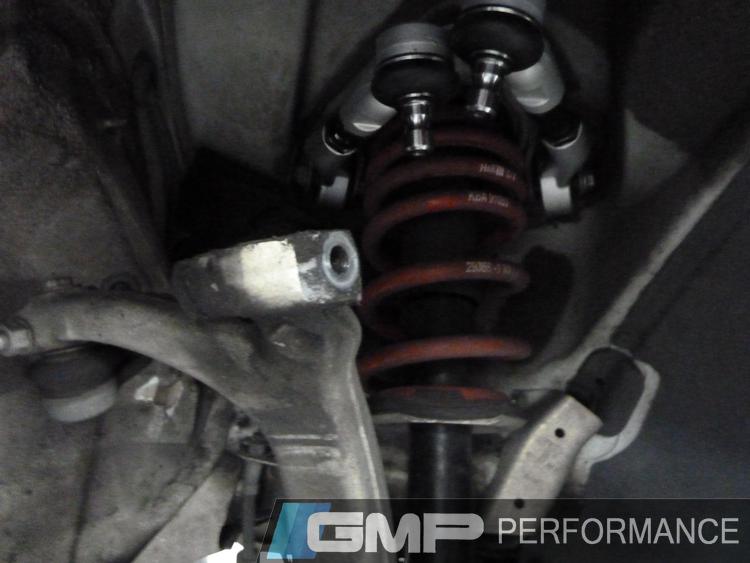
Audi A4 Lowering springs - 2002 - 2008 - H+R Sport Springs 2WD 4cyl. incl. Avant
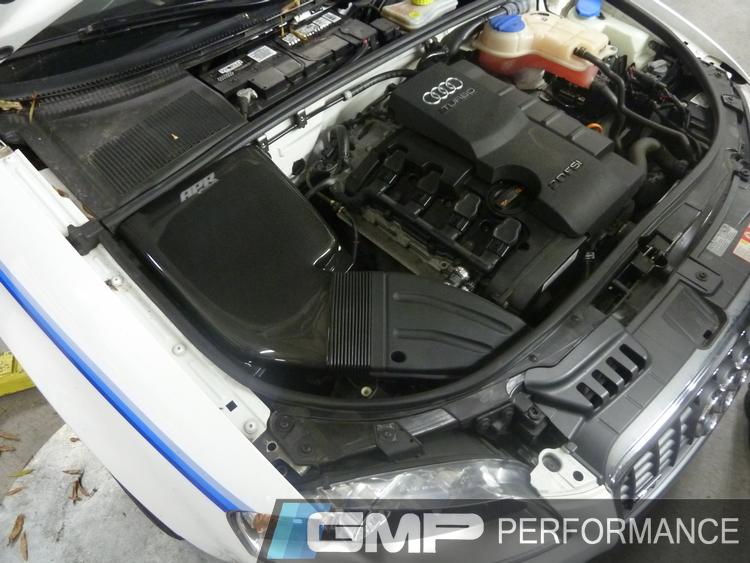
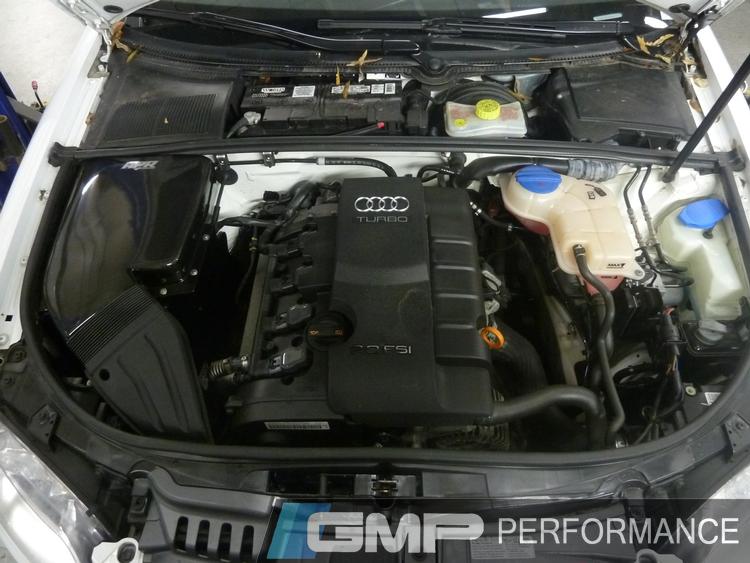
Audi A4 B7 (07-09) 2.0T Carbon Cold Air Intake Airbox
Audi A4/A6/S4/TT Front Brake Pad Sets
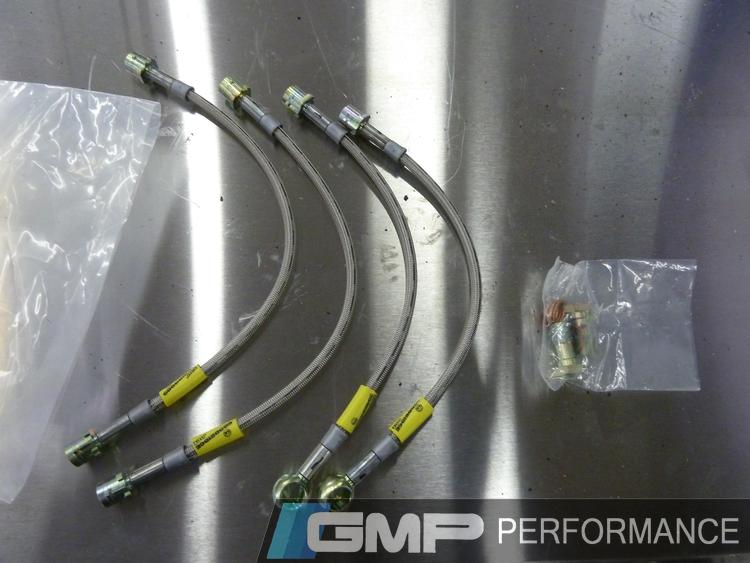
Audi A4/A5 Stainless Steel Brake Lines
Step One: Style and Some Stop
Although the plan included only wheels and springs, it hit us that while we had the wheels and tires off anyway, why not take this time to address two big issues that would quickly come up?
One being camber arms. This set of our camber adjustable upper control arms would help to get the optimal camber setting for a street car that will be driven at the track. We wanted to put a little bit of negative camber so that we don't roll over the front tires and destroy the sidewalls.
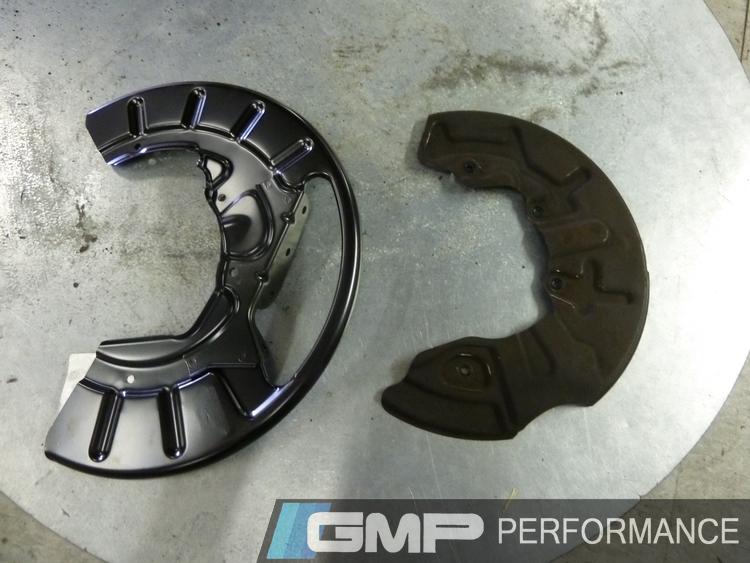
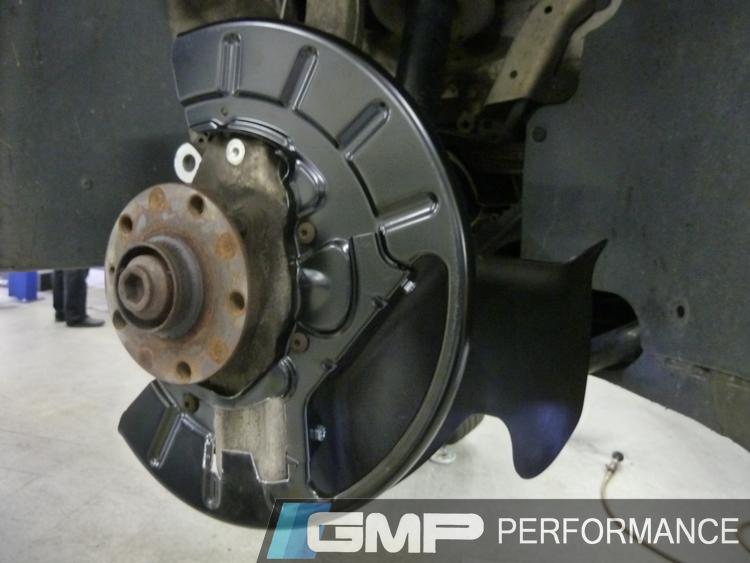
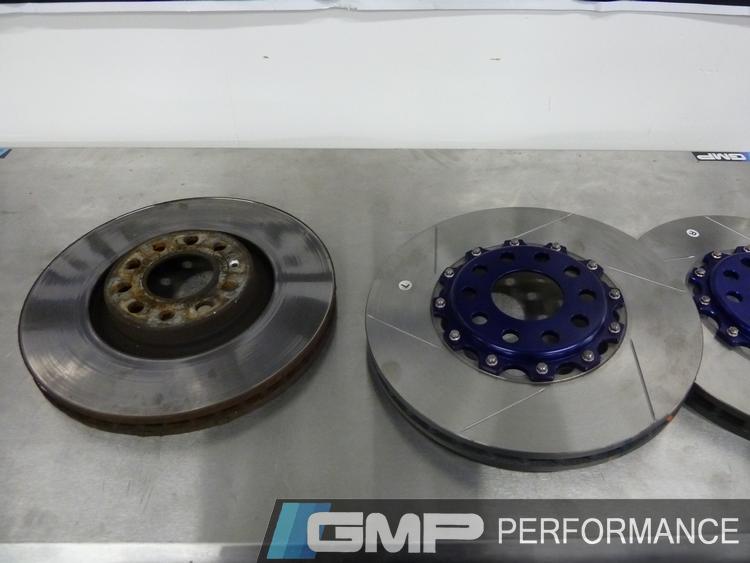
The second issue we knew would arise was our brakes. Our stopping power would need to be amped up a good bit to handle the pressures of the track time we were preparing to throw it into. So we added it all: rotors, pads, a brake cooling system and new brake lines.

We really like manufacturers that control their mixes themselves, from beginning to end. It's one of the worst scenarios when you can get a pad and rotor configuration that works wonders, buy a second set and they're totally different from the first. This is easily avoidable when working with companies that have the resources to decide everything, since the mix will always be the same or better. So we worked closely with two manufacturers to get both a set of rotors and a set of brake pads that would both be unfaltering in the quality.
Since we wouldn't be at big brake kit tracking levels just yet, we went with some direct replacement rotors that would breathe better and hold up to prolonged braking periods while also being great on the street. We added some stainless steel brake lines and bigger ducting system for additional cooling help.

Then it was on to the brake pads. And this is also where we were first introduced to what it truly means to have a "guinea pig" track car.
The first set of brake pads we tried were a dual-purpose street and track application, with a composition meant to maintain a higher temp with good stop and no noise... They failed miserably. Even for moderately skilled drivers, the car was just too heavy for the pads to handle. They were overworked in no time and they crystallized and glazed the rotors. They weren't much better on the street either, as noise was definitely present and annoying. Seems if we wanted multipurpose brake pads, we would have to have multiple brake pads.
Luckily for us, we knew some friends who could help us out. Working closely with their company, we developed a plan that would make the pads interchangeable. Their interchangeability relies on one fact: their mixture. There are 3-4 base ingredients and the % ratio in the mix of each compound determines and friction characteristics and temperature range. The base mixture of the pads is 60% similar across the board. The plus of that simple fact is that the pads are similar enough that you have the ability to swap various compounds on the same rotors without having any compatibility issues or separate set of track rotors. So we picked a pad with a compound suited for track and another with a compound suited for street. Another perk of these was the ease of changing them out. Swapping your pads is as easy as keeping the track set in the trunk, swapping at the track before your day, then swapping when you're done and driving back home on your street pads again.
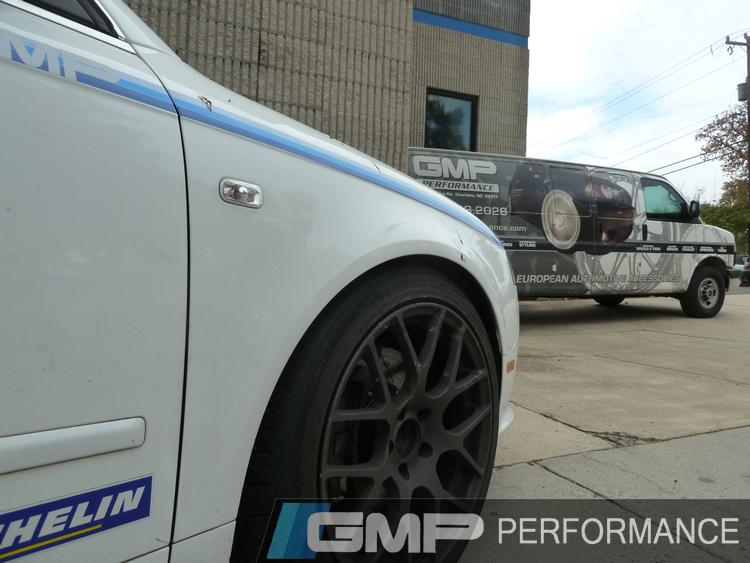
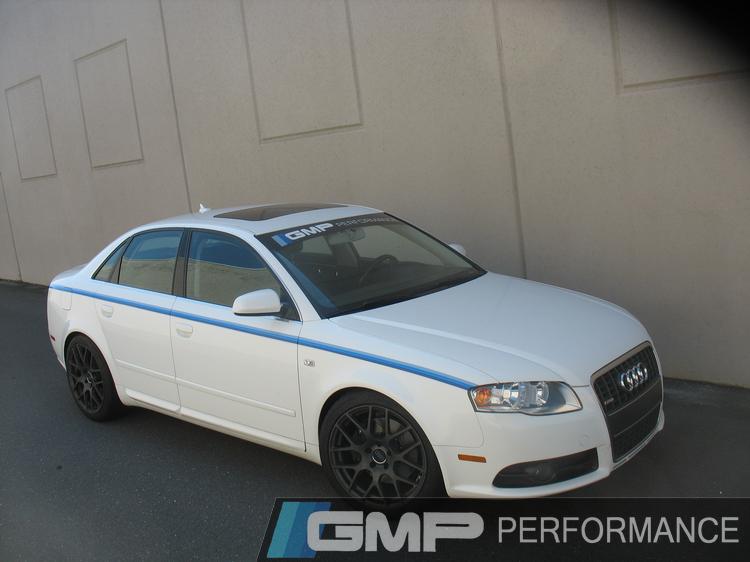
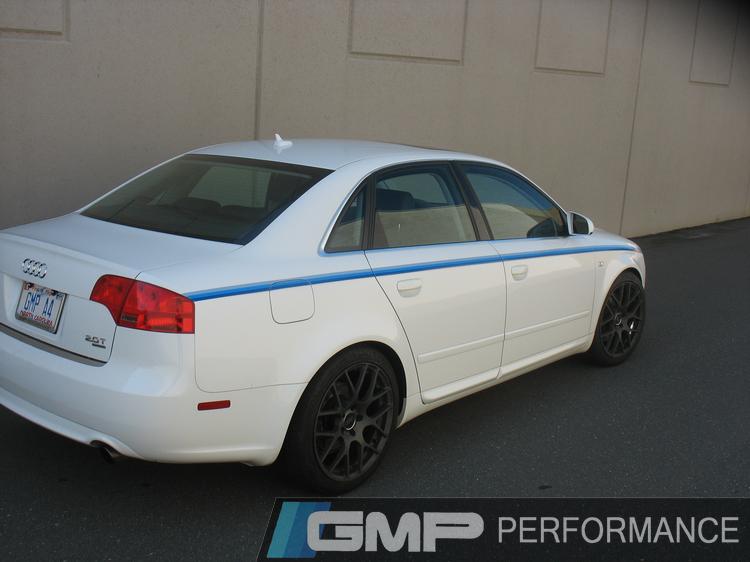
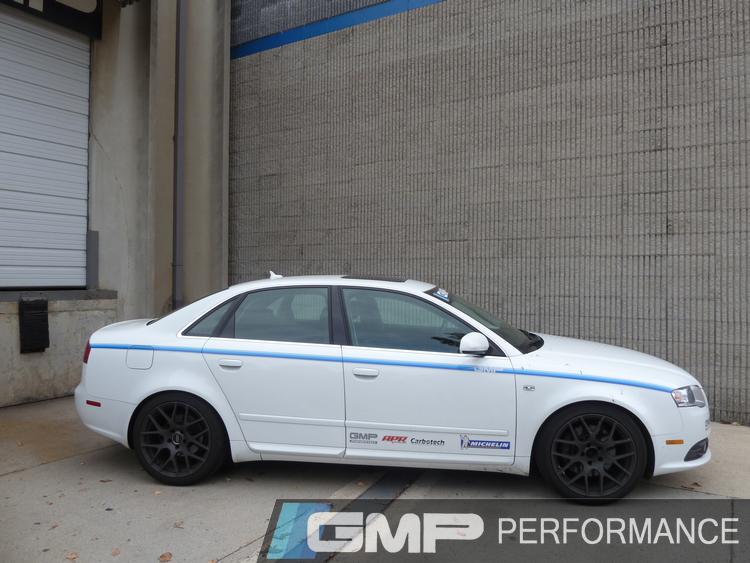
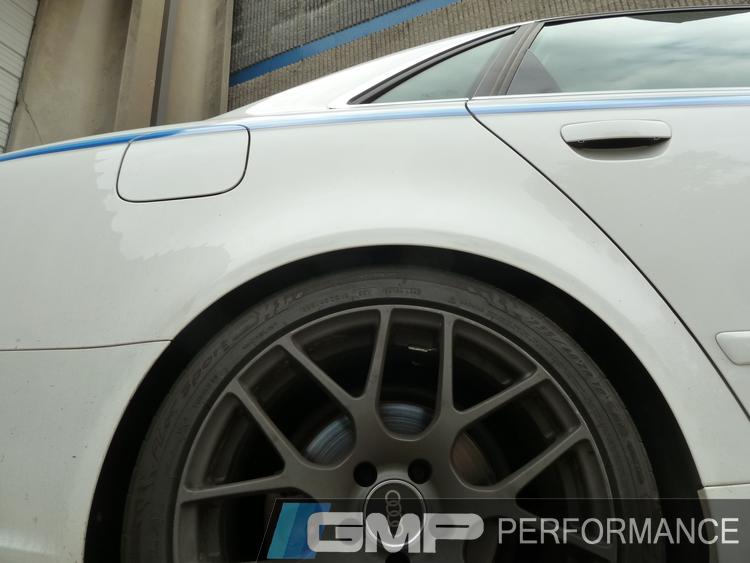
We were getting closer to some serious play time. Now that the time had come for the wheels to be prepared for more than just the street, we bumped up their intensity too. Selecting a wheel designed for track usage (it's even named after a legendary track), the TSW Nurburgring wheel is manufactured using a production technique called rotary forging. The rim of the wheels is forged at high pressure while the wheel is spun at high speed. This strengthens the alloy and makes for a much lighter weight wheel, both major benefits to have on a tracking car. We added our classic GMP Tribute Stripes and, looks wise, it was track ready.
It seemed like the best time to add the APR intake we had planned, because even cars need to breathe. With improved horsepower, torque and throttle response for the track, and improved fuel economy for the street, adding the intake is a bit of a win win for both functions this car serves.
And the big moment was finally here! Tracking it. We did and it worked fantastically. What also was fantastic? The all new list of mods we came up with from it!

To see the gallery on this build, click here! And stay tuned to see the next BIG step in our project!
Another passion a lot of us share is a love for BIG projects. The more parts that can go into a car, the more excited we are for the final result. It consumes time, energy, money, and requires more than a fair share of sweat and tears but the end is always worth it.
Combine those together and you get this A4: a daily driver track car and our latest project.
This 2008 A4 2.0T was purchased by us to be a little bit of our everything; it�s a street car for our owner, a track car for our team, a R&D guinea pig for our shop, and a show car for our company when we go to events.
We have this running joke here that no one leaves their car stock for longer than 24 hours. The A4 was no exception. First thing we decided was to get some RH Wheels and a set of H&R Springs to add some extra style.
Parts Installed:
Audi A4 B6 (1.8T) / A4 B7 (2.0T) 2-Piece Brake Rotor
Nurburgring Rotary Forged Wheel - Gunmetal
Audi A4/A6/A8/S4(B5/B6/B7 Chassis) Camber Adjustable Upper Control Arms
Audi A4 Lowering springs - 2002 - 2008 - H+R Sport Springs 2WD 4cyl. incl. Avant
Audi A4 B7 (07-09) 2.0T Carbon Cold Air Intake Airbox
Audi A4/A6/S4/TT Front Brake Pad Sets
Audi A4/A5 Stainless Steel Brake Lines
Step One: Style and Some Stop
Although the plan included only wheels and springs, it hit us that while we had the wheels and tires off anyway, why not take this time to address two big issues that would quickly come up?
One being camber arms. This set of our camber adjustable upper control arms would help to get the optimal camber setting for a street car that will be driven at the track. We wanted to put a little bit of negative camber so that we don't roll over the front tires and destroy the sidewalls.
The second issue we knew would arise was our brakes. Our stopping power would need to be amped up a good bit to handle the pressures of the track time we were preparing to throw it into. So we added it all: rotors, pads, a brake cooling system and new brake lines.
We really like manufacturers that control their mixes themselves, from beginning to end. It's one of the worst scenarios when you can get a pad and rotor configuration that works wonders, buy a second set and they're totally different from the first. This is easily avoidable when working with companies that have the resources to decide everything, since the mix will always be the same or better. So we worked closely with two manufacturers to get both a set of rotors and a set of brake pads that would both be unfaltering in the quality.
Since we wouldn't be at big brake kit tracking levels just yet, we went with some direct replacement rotors that would breathe better and hold up to prolonged braking periods while also being great on the street. We added some stainless steel brake lines and bigger ducting system for additional cooling help.
Then it was on to the brake pads. And this is also where we were first introduced to what it truly means to have a "guinea pig" track car.
The first set of brake pads we tried were a dual-purpose street and track application, with a composition meant to maintain a higher temp with good stop and no noise... They failed miserably. Even for moderately skilled drivers, the car was just too heavy for the pads to handle. They were overworked in no time and they crystallized and glazed the rotors. They weren't much better on the street either, as noise was definitely present and annoying. Seems if we wanted multipurpose brake pads, we would have to have multiple brake pads.
Luckily for us, we knew some friends who could help us out. Working closely with their company, we developed a plan that would make the pads interchangeable. Their interchangeability relies on one fact: their mixture. There are 3-4 base ingredients and the % ratio in the mix of each compound determines and friction characteristics and temperature range. The base mixture of the pads is 60% similar across the board. The plus of that simple fact is that the pads are similar enough that you have the ability to swap various compounds on the same rotors without having any compatibility issues or separate set of track rotors. So we picked a pad with a compound suited for track and another with a compound suited for street. Another perk of these was the ease of changing them out. Swapping your pads is as easy as keeping the track set in the trunk, swapping at the track before your day, then swapping when you're done and driving back home on your street pads again.
We were getting closer to some serious play time. Now that the time had come for the wheels to be prepared for more than just the street, we bumped up their intensity too. Selecting a wheel designed for track usage (it's even named after a legendary track), the TSW Nurburgring wheel is manufactured using a production technique called rotary forging. The rim of the wheels is forged at high pressure while the wheel is spun at high speed. This strengthens the alloy and makes for a much lighter weight wheel, both major benefits to have on a tracking car. We added our classic GMP Tribute Stripes and, looks wise, it was track ready.
It seemed like the best time to add the APR intake we had planned, because even cars need to breathe. With improved horsepower, torque and throttle response for the track, and improved fuel economy for the street, adding the intake is a bit of a win win for both functions this car serves.
And the big moment was finally here! Tracking it. We did and it worked fantastically. What also was fantastic? The all new list of mods we came up with from it!
To see the gallery on this build, click here! And stay tuned to see the next BIG step in our project!
GMP Performance's 2008 Audi A4 Track Day Project Car- Part 2!
So we had better stopping power, better breathing, and better looks, and took to the track. With lots of long-term big projects, every time you really get to test out your vehicle, you're always overly aware of all the little noises, the feel, the overall experience. You revel in the areas that are clearly improved but there will always be that tiny part that noticed the areas that are still lacking. And that's exactly what our track time did. The biggest area we noticed: suspension.
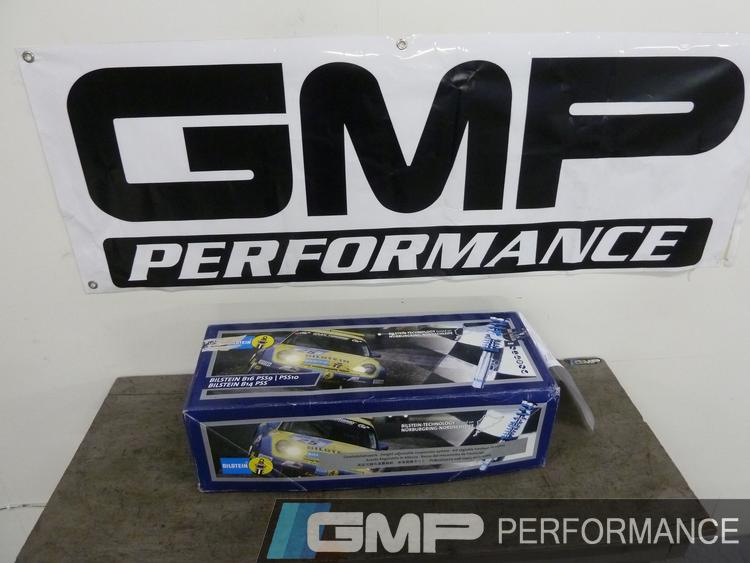
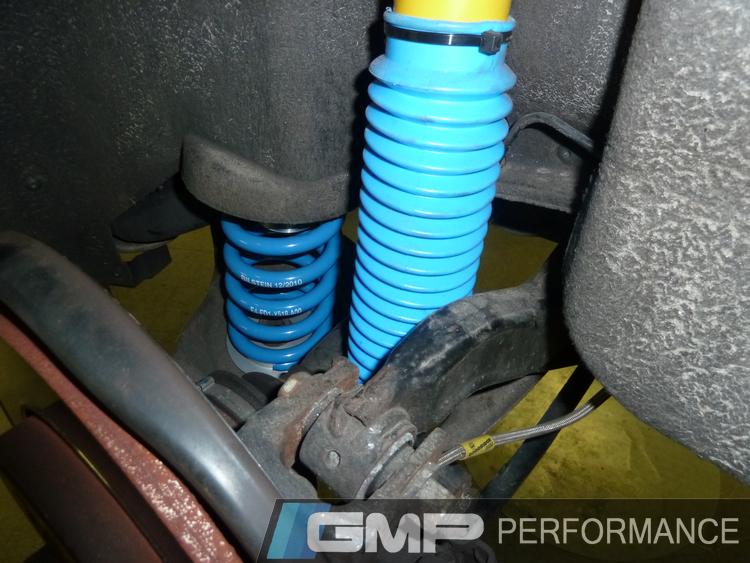
The H&R springs we had outfitted our A4 with were fantastic but for track times, the OE shocks just could not keep up. Like nearly everything else on this car, we spent a fair deal of time making sure that what we got would be multipurpose, like the car itself. That brought us to our good friends at Bilstein who made a kit that would not only help the shocks but also equip us with some progressive springs suited for what we wanted to do with this Audi.
Parts Installed:
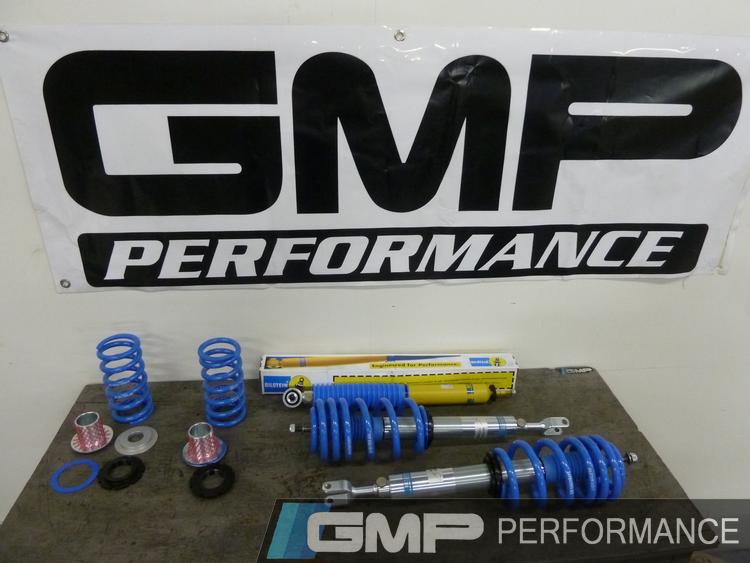
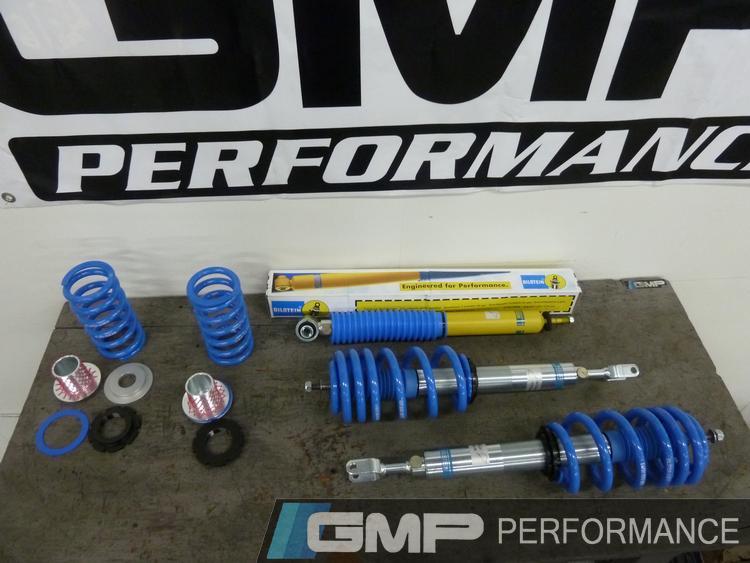
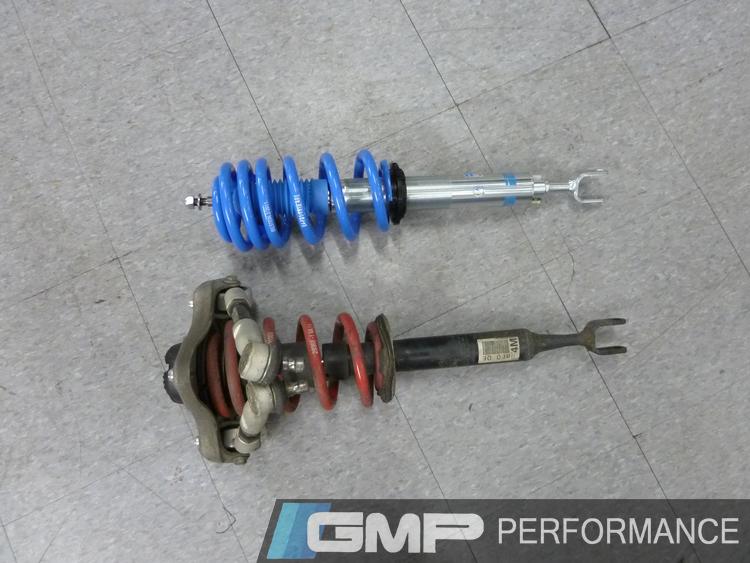
Bilstein PSS9 for Audi A4 Coilover kit
Stern Audi A4 4 Cyl/6Cyl Pro-Mount Engine Mounts
JHM 4:1 Audi Center Diff Upgrade (Manual Trans Only)
Coilovers
Straight, or linear rate, springs are excellent for the track, solid and predictable, but stiff and there is a clear sacrifice in comfort levels. The plus of a progressive spring versus a linear spring is that the car will be responsive to what you're doing and react to match. It keeps the comfort as you drive about, day to day, but shifts to a more aggressive style when thrown into a situation where handling is the superior requirement. The PSS9s also come with the feature of a manually adjustable monotube gas shock absorbers, which features 9-stage precise compressing and rebound settings, from comfort to competition.
The Kit
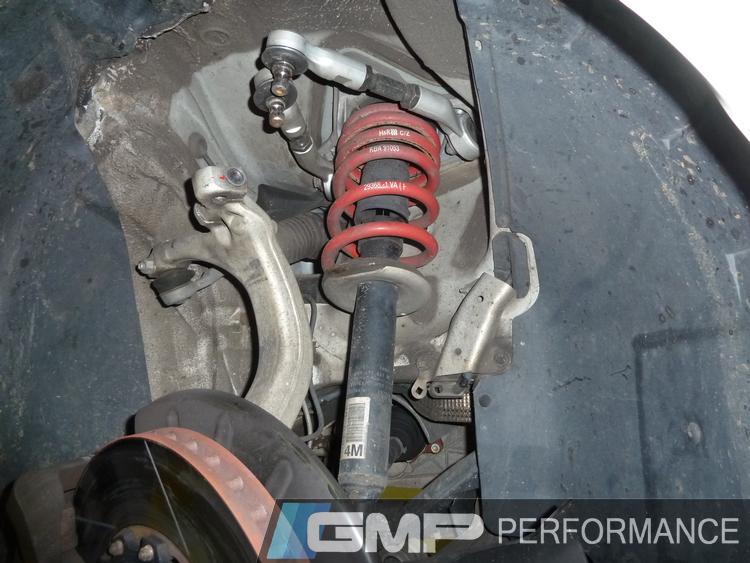
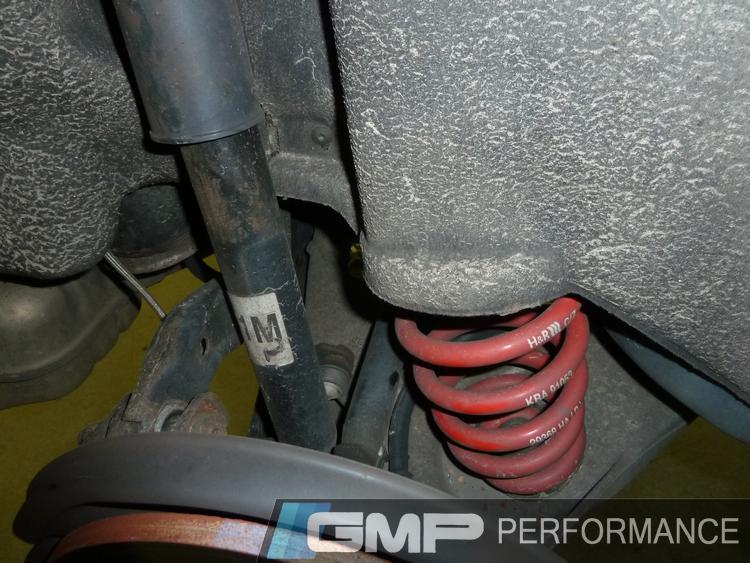
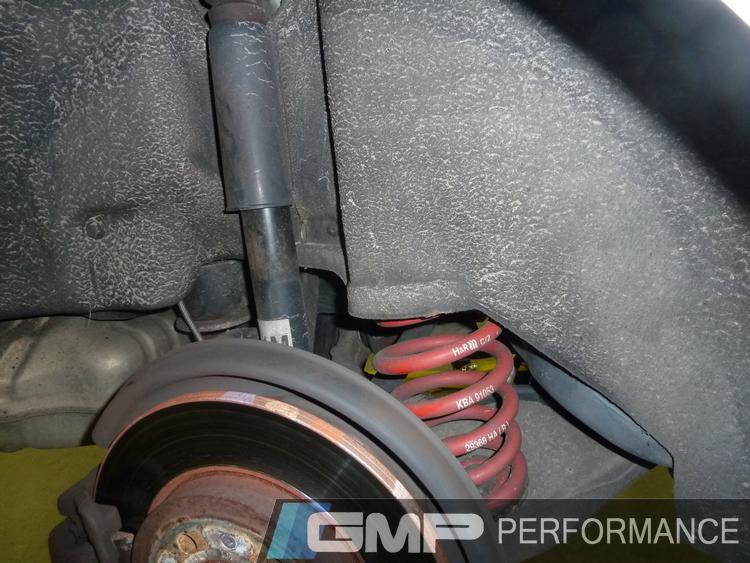
All the H&Rs in place
Time get those out and in with the Bilstein. (Its a fun plus that the blue also matches the tribute stripes a litte! )
)
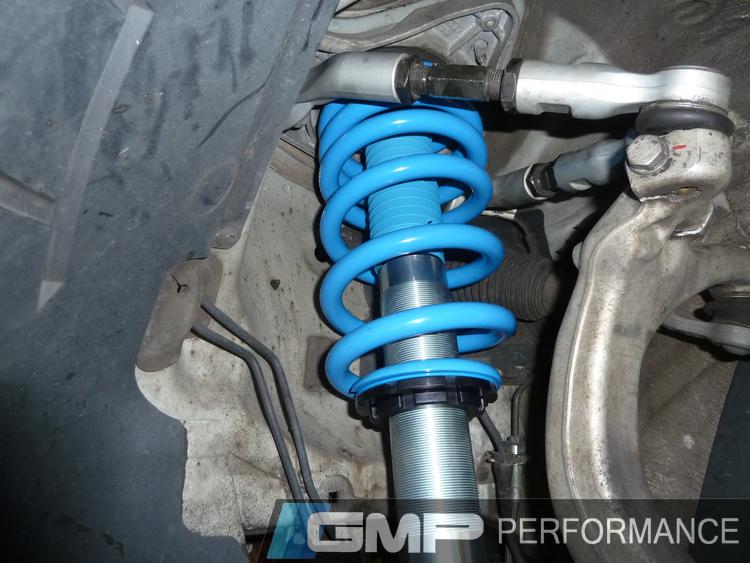
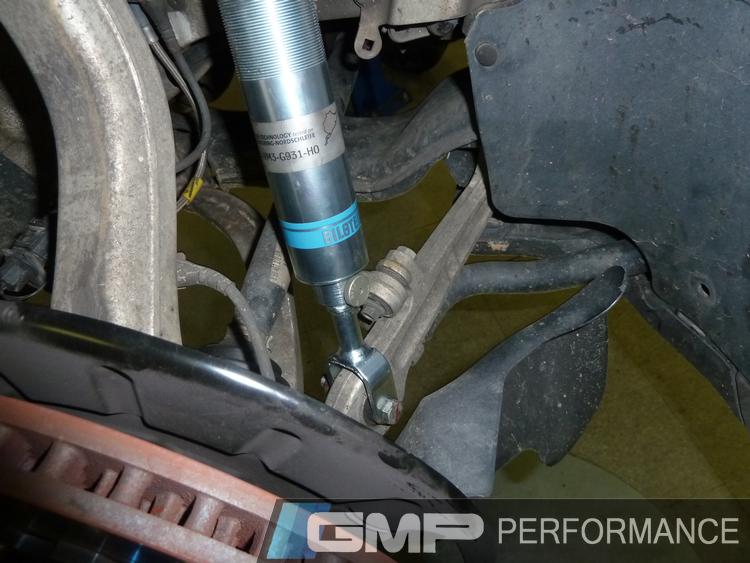
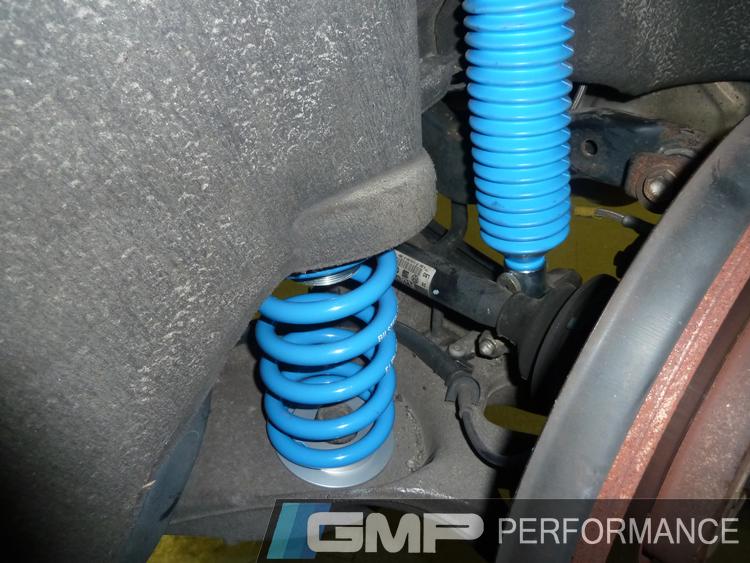
The end result
The Center Diff
During all this, an upgrade to the center differential came into the conversation. The factory differential on the A4 has a 2:1 torque distribution rate between the front and the rear. This enables the end of the car that still has traction (most of the time the rear) to deliver double the torque to the tires with traction. This set up is great for straight shot racing styles like drag racing but for a style that is defined by corners like road course racing, the guys are JHM have found that the ratio that excels is a bias ration of 4:1, similar to the RS4. Considering that road courses are what we do, this was a great upgrade for us to have.
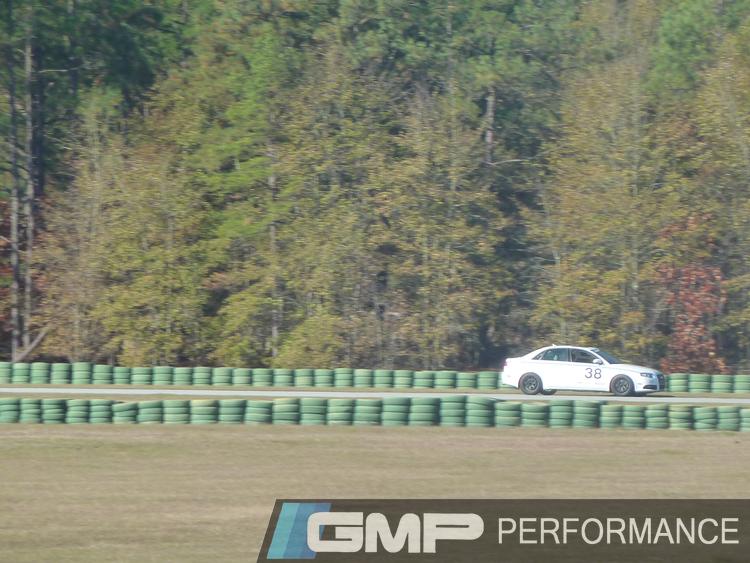
Tracking It, Part 2!
After sending it out for modification and re-installing once received, we took it back out to the track to feel the progress and reassess our direction to be sure we were happy with it. We were. We could feel that the steps we had taken were improving the car big time and liked how it was both handling the track and the street.
There was just one thing...
So far, the modifications we had covered handled a lot of the beginning stages of track-car improvement. Now that we were pleased with its current state, we knew the time had come for bigger leaps. That meant more POWER!
Maintenance Time
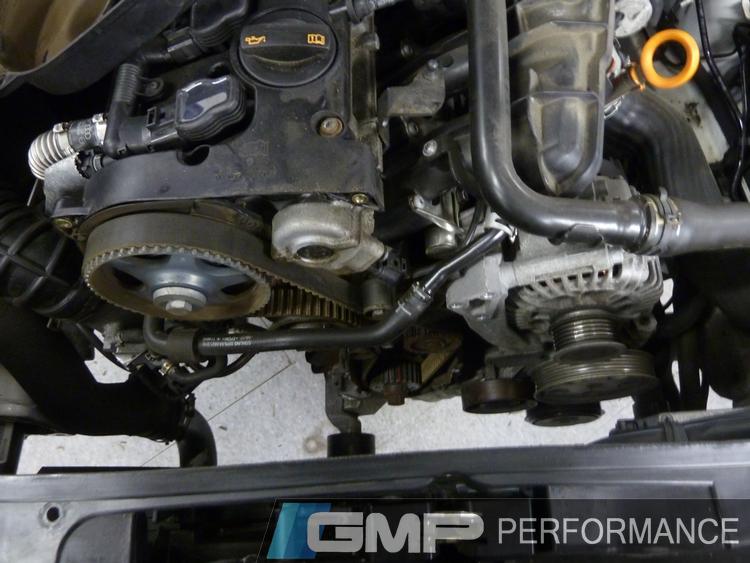
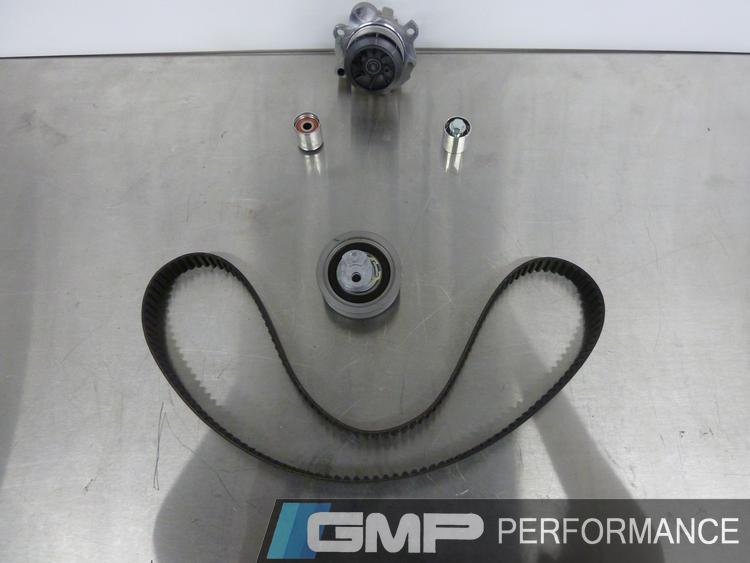
We wanted to be sure that the engine was prepared for our new plans, which meant maintenance and a good once over for the engine. We replaced the timing belt, water pump and valve cover seals, for security. We never like to just replace the belt so it was done as kit, complete with tensioner and rollers.
Taking out the old
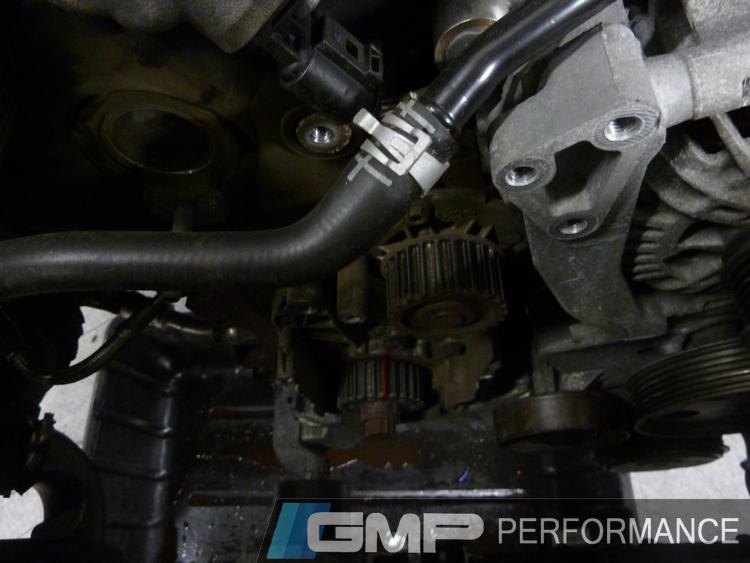
The new kit laid out and getting it in place

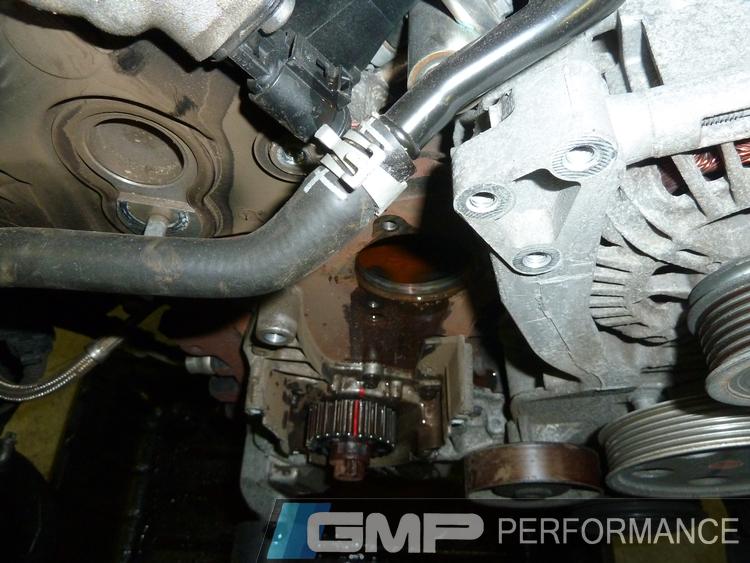
With our minds on maintenance, we began to look over the engine. And it was a good thing we did...
Damage!

Part 3 Coming Soon!
To see the gallery on this build, click here! And stay tuned to see the next BIG step in our project!
The H&R springs we had outfitted our A4 with were fantastic but for track times, the OE shocks just could not keep up. Like nearly everything else on this car, we spent a fair deal of time making sure that what we got would be multipurpose, like the car itself. That brought us to our good friends at Bilstein who made a kit that would not only help the shocks but also equip us with some progressive springs suited for what we wanted to do with this Audi.
Parts Installed:
Bilstein PSS9 for Audi A4 Coilover kit
Stern Audi A4 4 Cyl/6Cyl Pro-Mount Engine Mounts
JHM 4:1 Audi Center Diff Upgrade (Manual Trans Only)
Coilovers
Straight, or linear rate, springs are excellent for the track, solid and predictable, but stiff and there is a clear sacrifice in comfort levels. The plus of a progressive spring versus a linear spring is that the car will be responsive to what you're doing and react to match. It keeps the comfort as you drive about, day to day, but shifts to a more aggressive style when thrown into a situation where handling is the superior requirement. The PSS9s also come with the feature of a manually adjustable monotube gas shock absorbers, which features 9-stage precise compressing and rebound settings, from comfort to competition.
The Kit
All the H&Rs in place
Time get those out and in with the Bilstein. (Its a fun plus that the blue also matches the tribute stripes a litte!
)The end result
The Center Diff
During all this, an upgrade to the center differential came into the conversation. The factory differential on the A4 has a 2:1 torque distribution rate between the front and the rear. This enables the end of the car that still has traction (most of the time the rear) to deliver double the torque to the tires with traction. This set up is great for straight shot racing styles like drag racing but for a style that is defined by corners like road course racing, the guys are JHM have found that the ratio that excels is a bias ration of 4:1, similar to the RS4. Considering that road courses are what we do, this was a great upgrade for us to have.
Tracking It, Part 2!
After sending it out for modification and re-installing once received, we took it back out to the track to feel the progress and reassess our direction to be sure we were happy with it. We were. We could feel that the steps we had taken were improving the car big time and liked how it was both handling the track and the street.
There was just one thing...
So far, the modifications we had covered handled a lot of the beginning stages of track-car improvement. Now that we were pleased with its current state, we knew the time had come for bigger leaps. That meant more POWER!
Maintenance Time
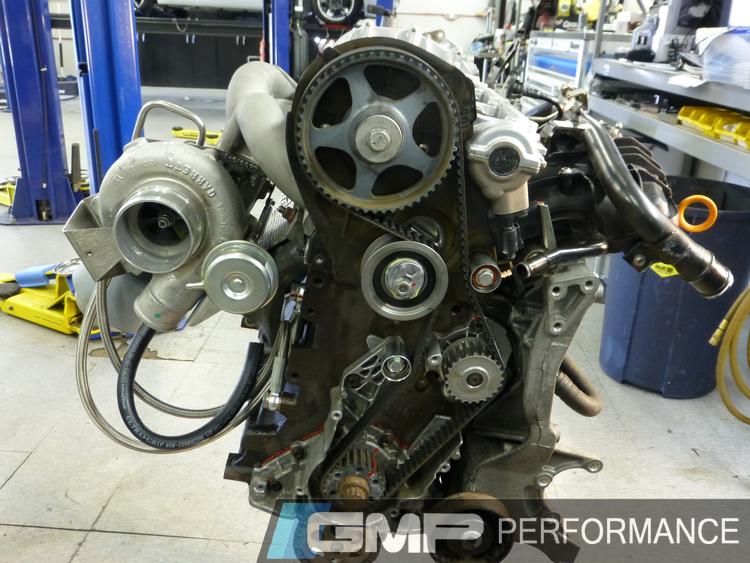
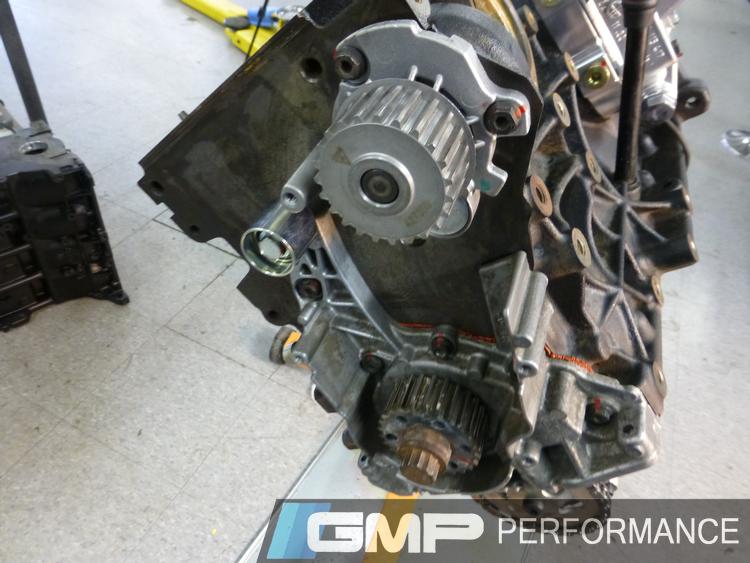
We wanted to be sure that the engine was prepared for our new plans, which meant maintenance and a good once over for the engine. We replaced the timing belt, water pump and valve cover seals, for security. We never like to just replace the belt so it was done as kit, complete with tensioner and rollers.
Taking out the old
The new kit laid out and getting it in place
With our minds on maintenance, we began to look over the engine. And it was a good thing we did...
Damage!
Part 3 Coming Soon!
To see the gallery on this build, click here! And stay tuned to see the next BIG step in our project!
Last edited by GMP Performance; Jun 24, 2013 at 11:03 AM.
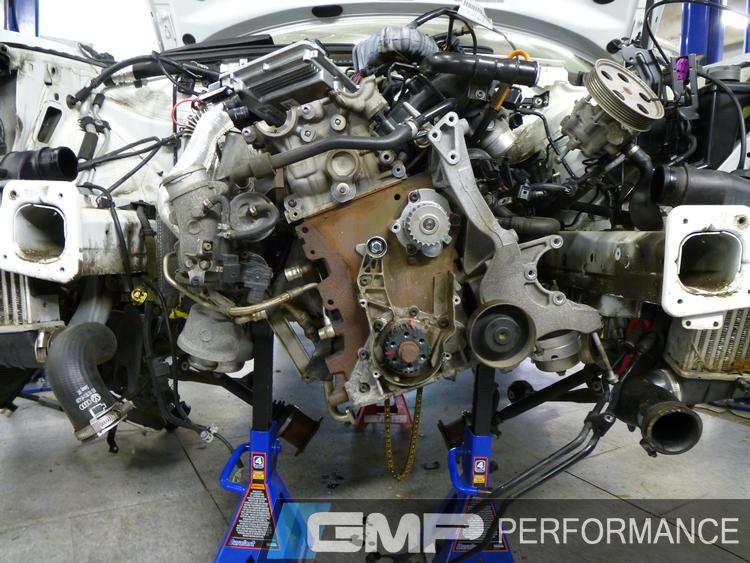
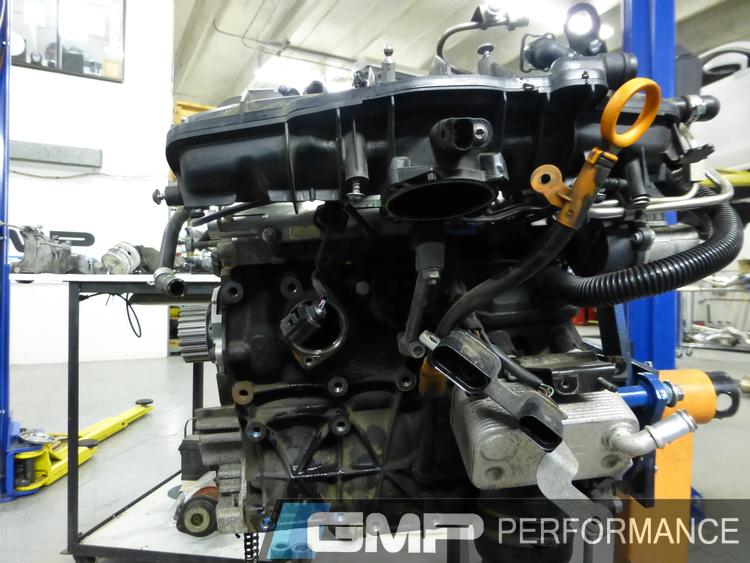
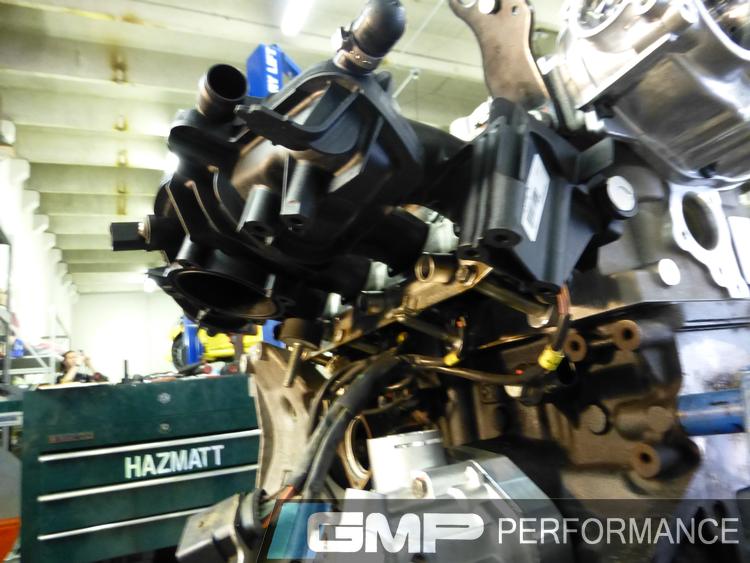
One of the most frustrating things for any car owner is inspecting their car's engine and finding damage that was there before you bought it. A pre-purchase inspection is crucial but sometimes, even for us, a lengthy and thorough one can get overlooked for one reason or another. Sometimes, you get by okay. Other times, this happens.
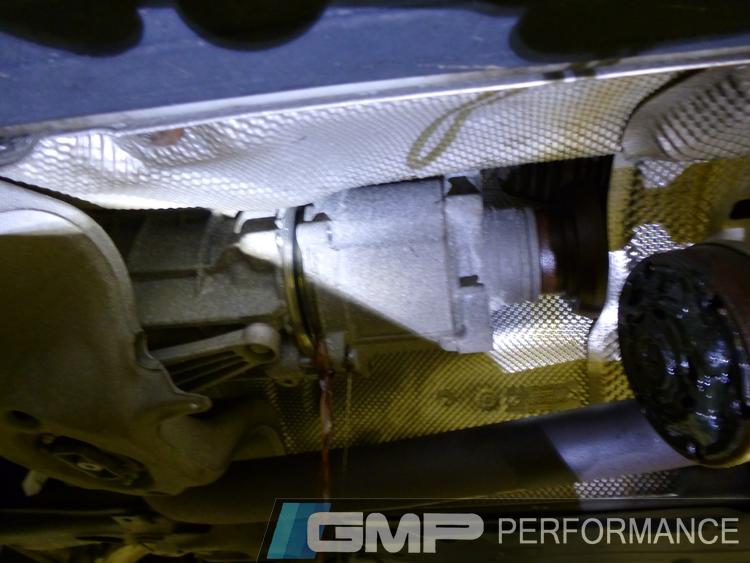
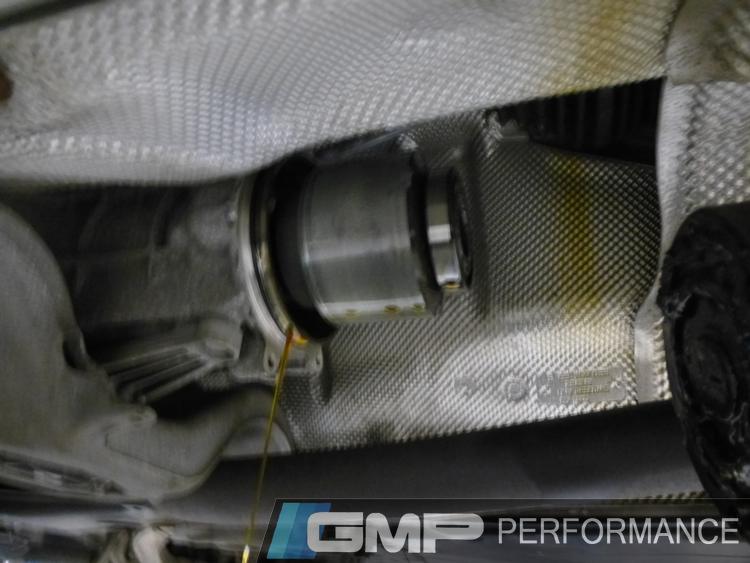
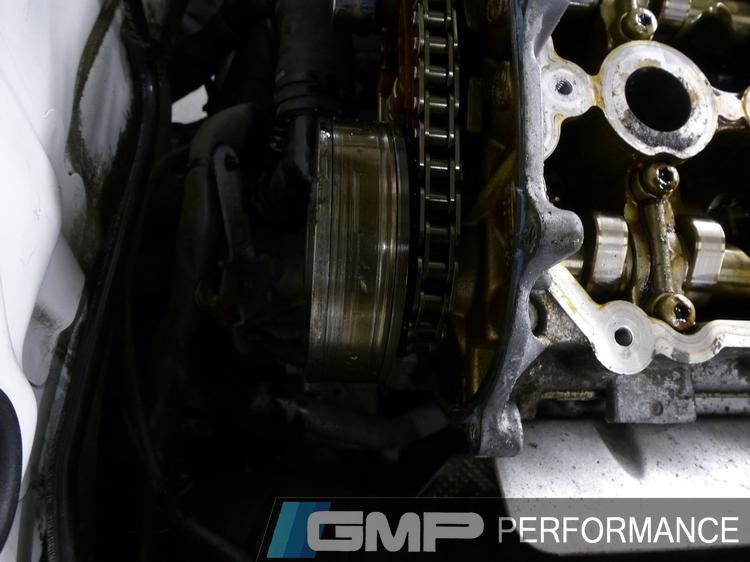
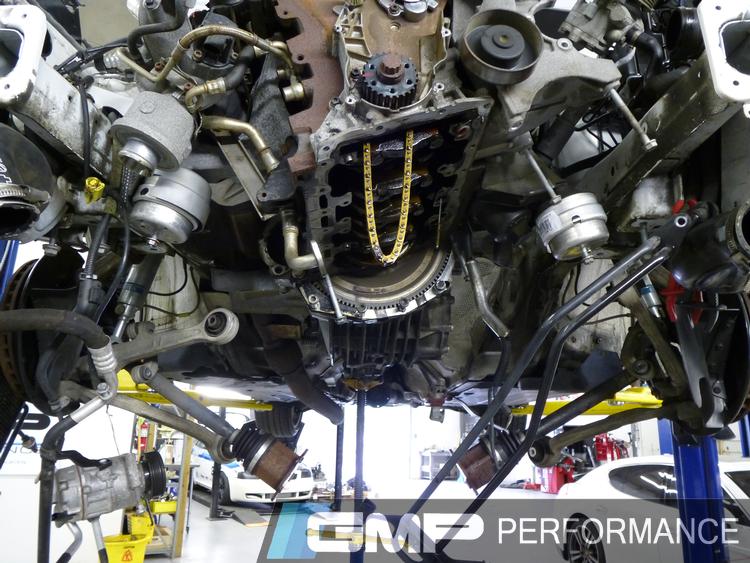
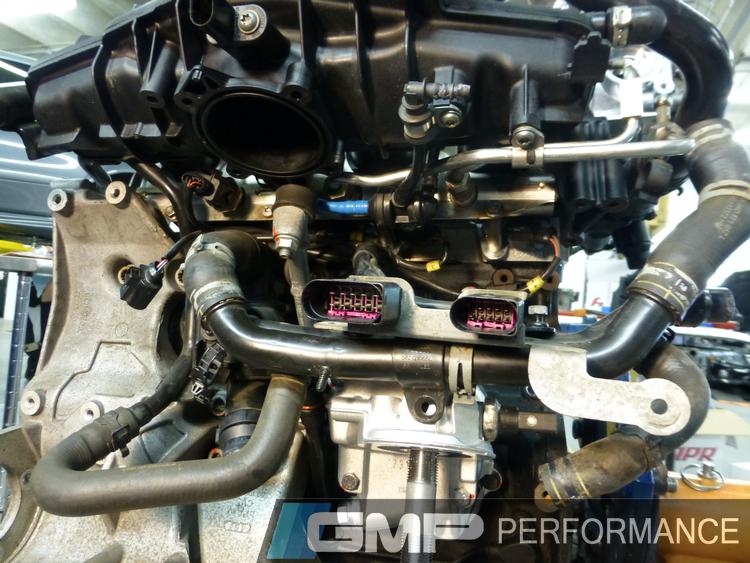
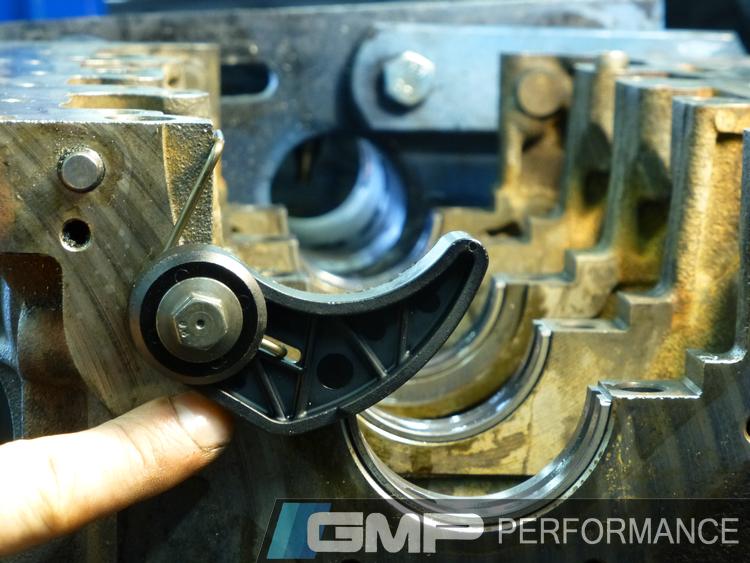
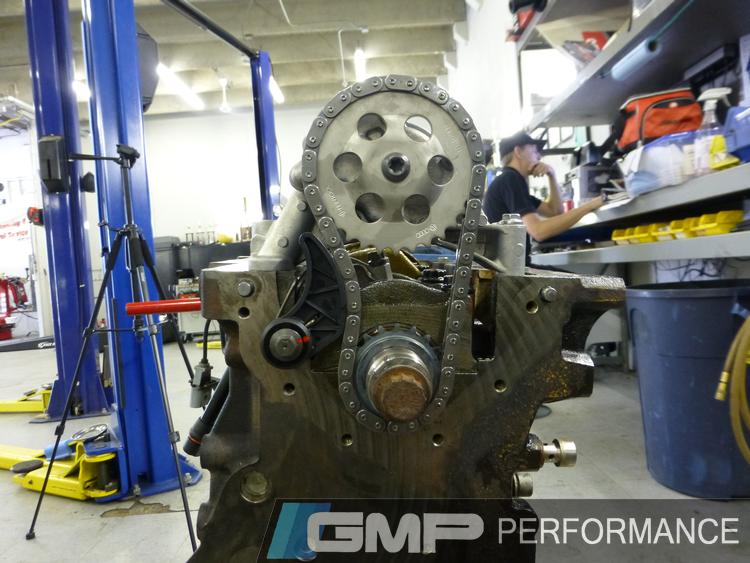
We had tracked the A4 a few times and we noticed a faint rattling in the top end of the engine. The Audi was due for a new timing belt as well so it seemed like a good time to investigate while we were in there anyway. Initially, we thought the rattling was coming from the chain tensioner between the two camshafts and when we pulled off the rear timing chain cover, we found evidence that some sort of metal had passed through the cover, damaging it. Uh oh... Not a good start.
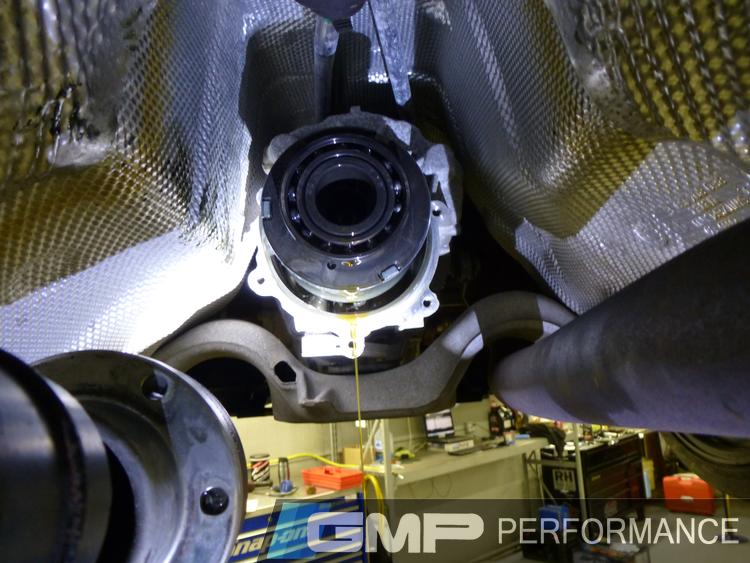
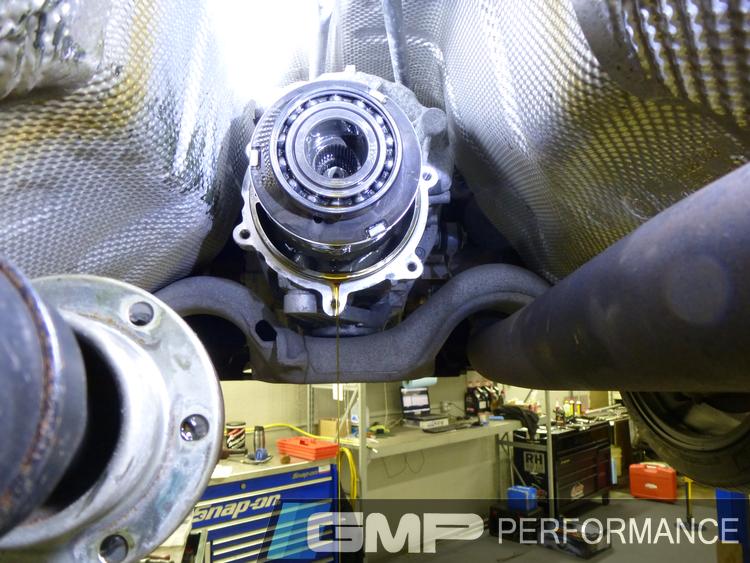
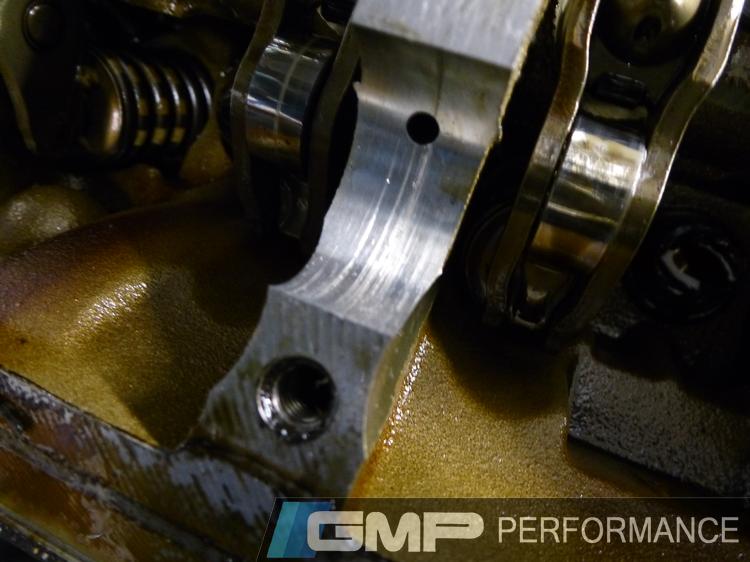
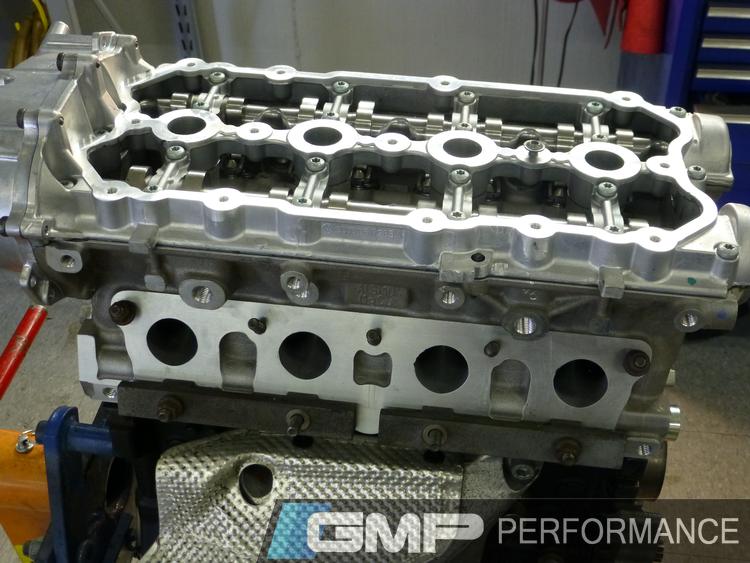
We then removed the camshafts to inspect for other damage and found that the camshaft bearing journals in the cylinder head had been scored pretty badly. We knew at that point that we’d need to replace the head. With this discovery, the decision to just rebuild the engine was made. The more we tore into, the more interesting things we found.
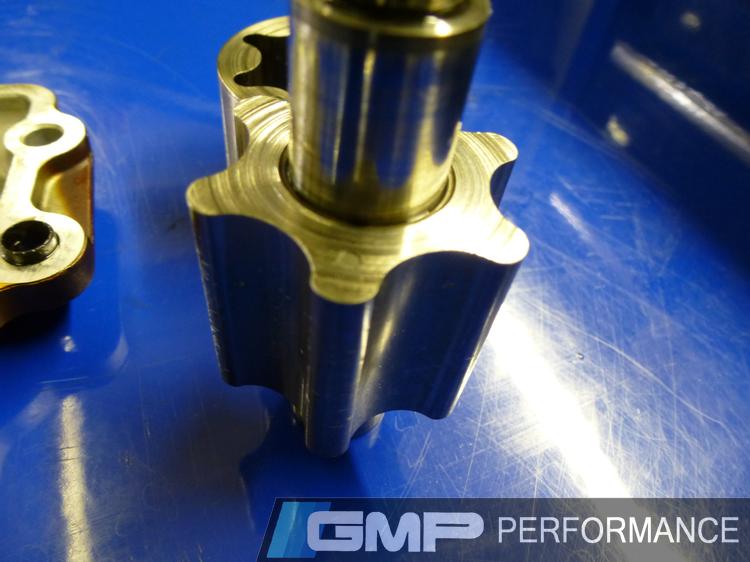
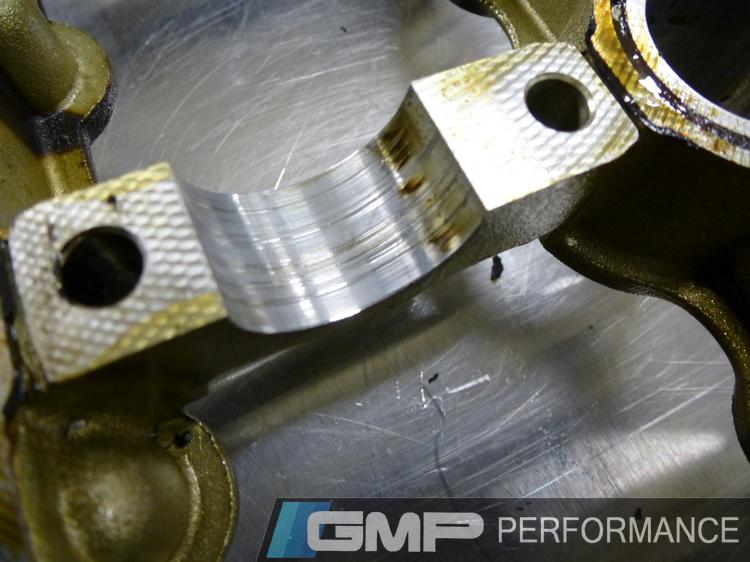
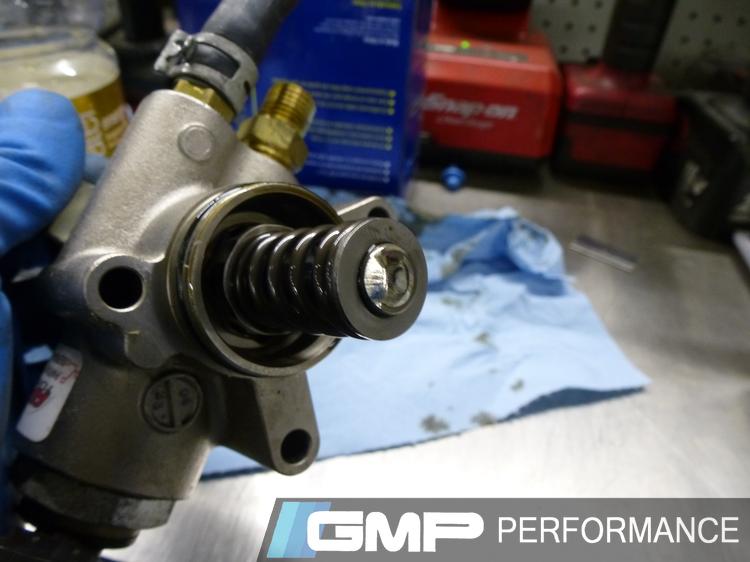
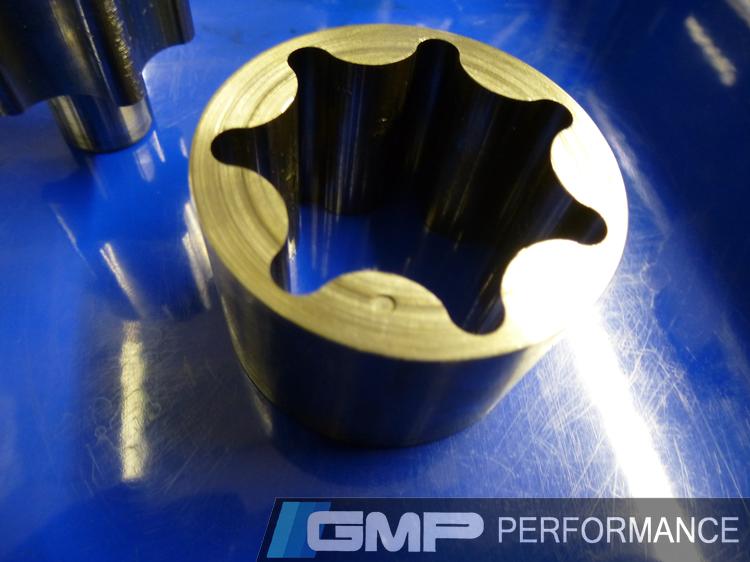
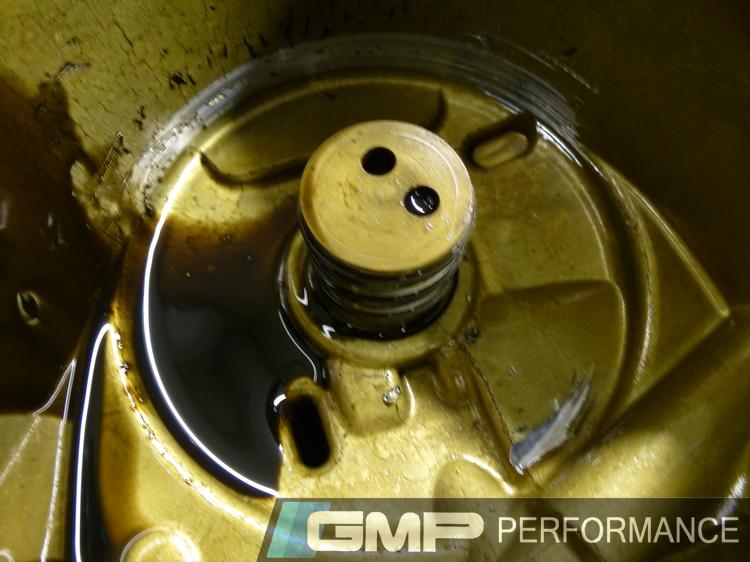
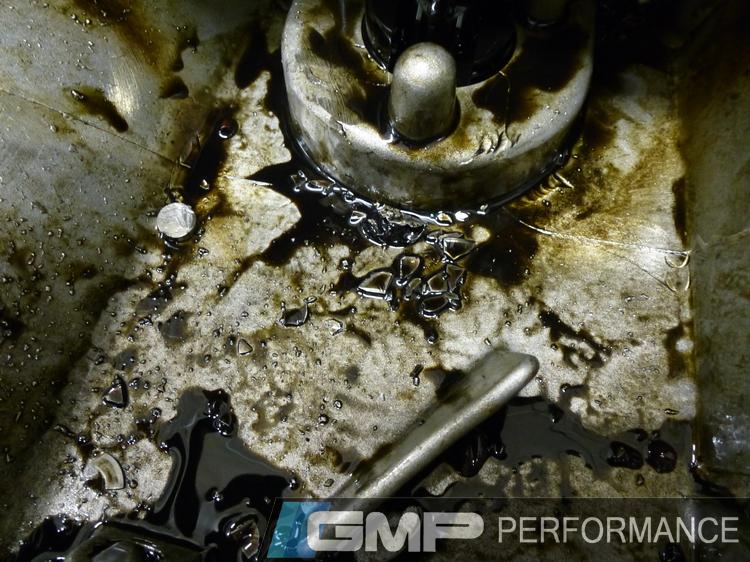
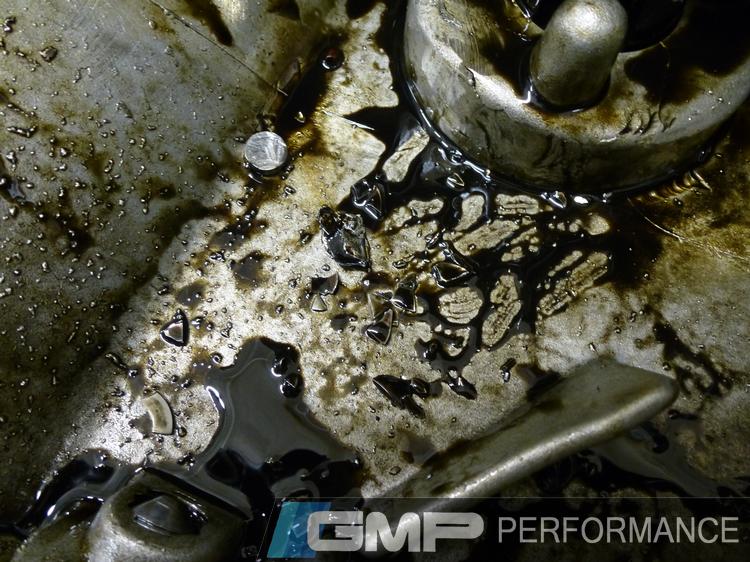
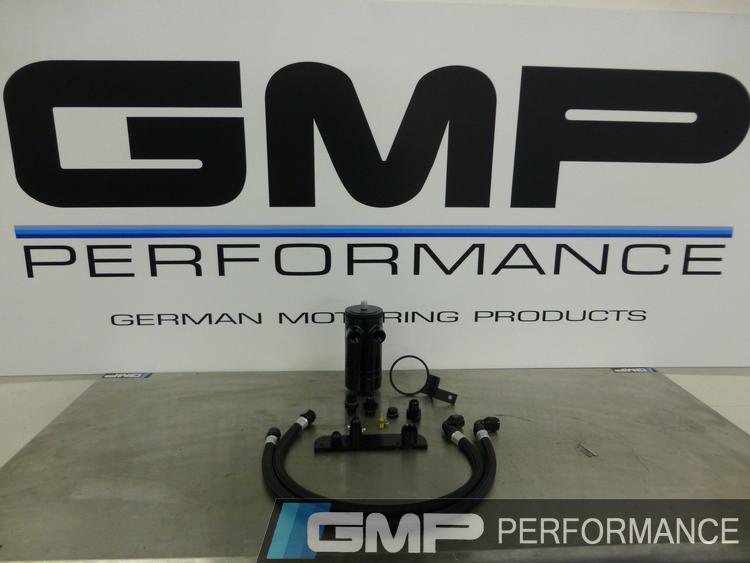
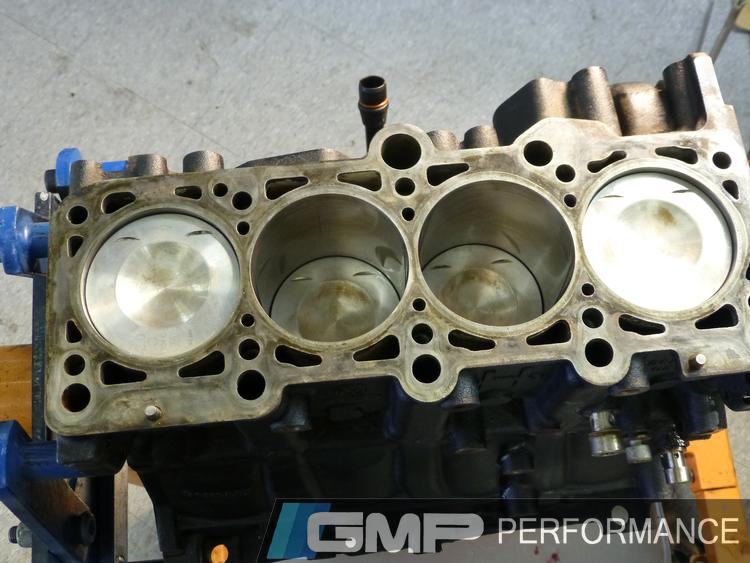
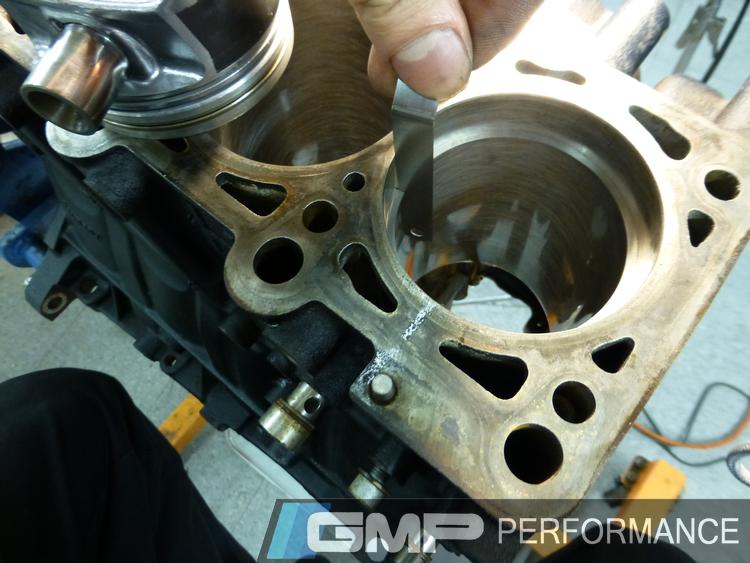
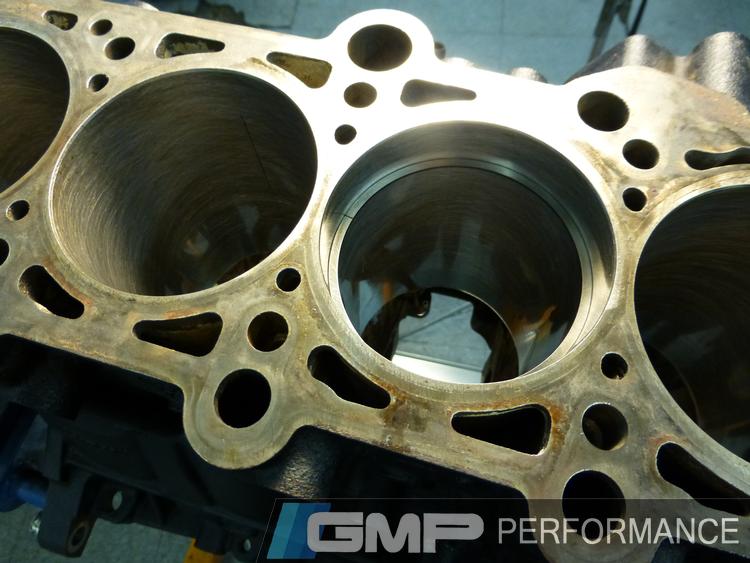
When we removed the oil pan, we found parts of a damaged high pressure fuel pump. What made this even worse in the big picture is that the pump that was in the engine wasn't missing any parts. We had to believe that the car had previously had a catastrophic cam follower/HPFP failure and somebody simply replaced the cam follower and pump without addressing the other damage. During the dis-assembly and inspection, we found the oil pump to had also been damaged by metal passing through.
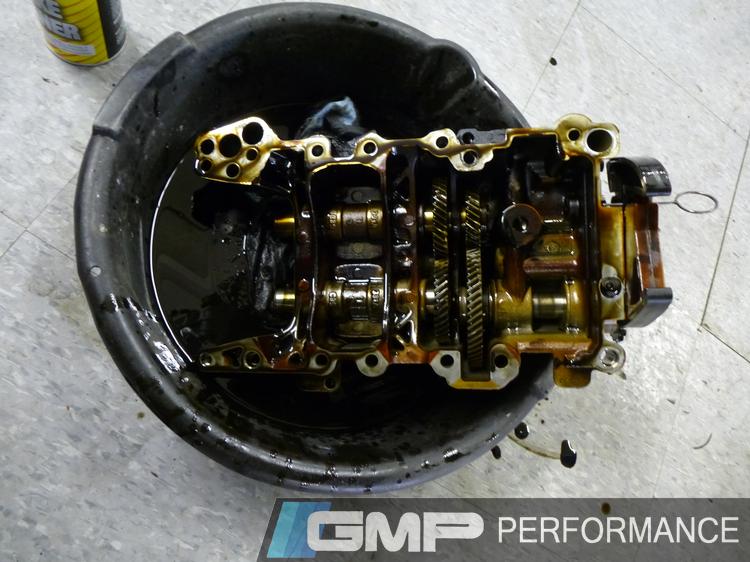
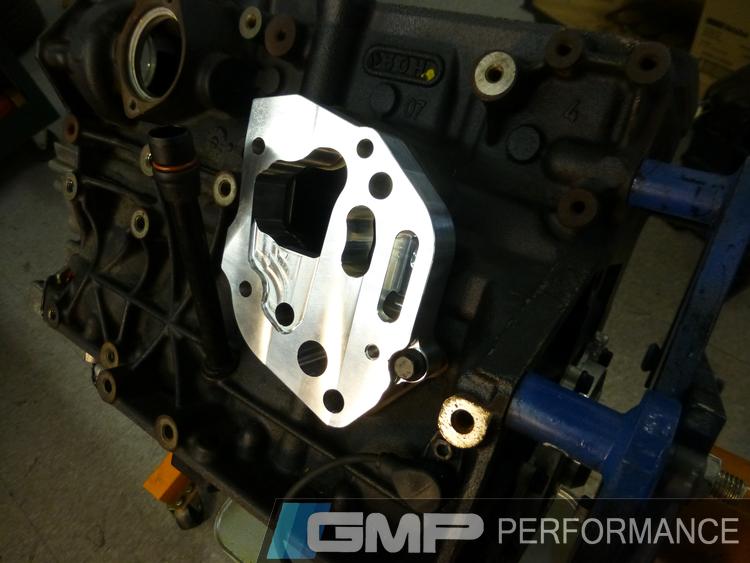
On this engine, the oil pump is integral with the balance shaft assembly. We had heard about people doing a 1.8t oiling system conversion and upon investigating, we found the cost to be similar to replacing the OE pump, but with added benefits of removing the balance shafts and increasing the car’s oil capacity by over two quarts. Balance shafts are essentially big weights that are mounted on one side of a spinning shaft. They are there to counter act the engines natural vibrations and cancel them out. For a performance car, the increase in vibrations is hardly noticeable, but you get the same benefit as using a light weight flywheel by removing this rotating mass.
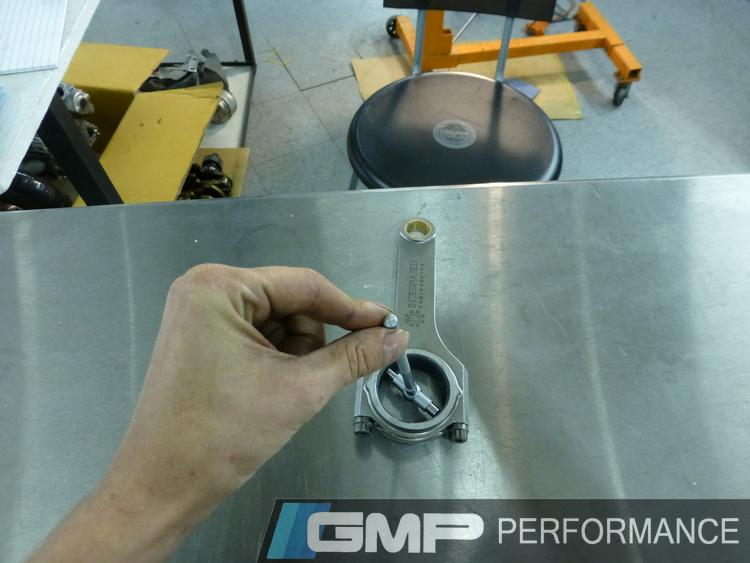
Since we were rebuilding the engine and adding a big power upgrade at the same time, we decided to future-proof the bottom end of the engine by using IE connecting rods and all APR hardware. While the stock bottom end will support up to Stage 3 power levels, anything more requires upgrades. By upgrading the bottom end now, we can later increase the power to Stage 3+ and beyond without needing to remove the engine again. Since we know we like to play and push our cars to the limit, it was a good move for us to make to pre-game for the future.
Parts Installed:
LOTS of hard work!
The inspection and damage
Damaged injector pump
Worn cam from injector pump

Oil pump gear damage

Timing chain cover damage
Damage from fuel pump failure

Parts of the fuel pump found in the oil pan
Cylinder head damage

Inspecting the balance shafts
Rod bearing inspection
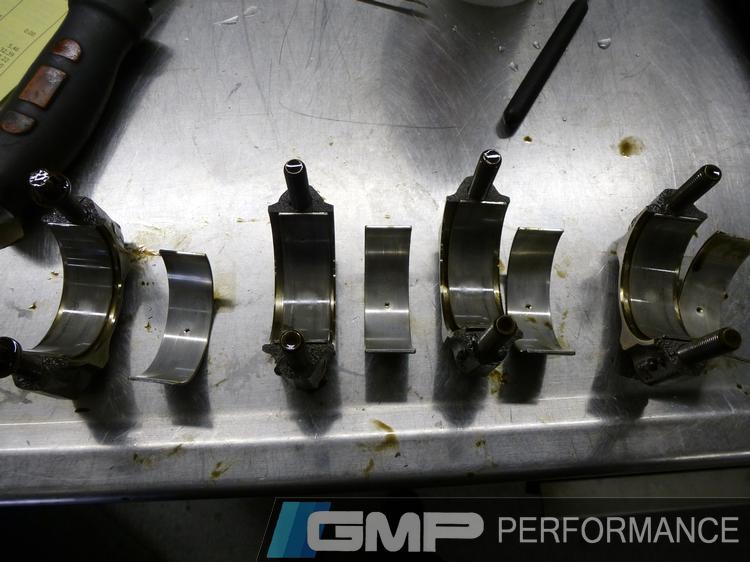
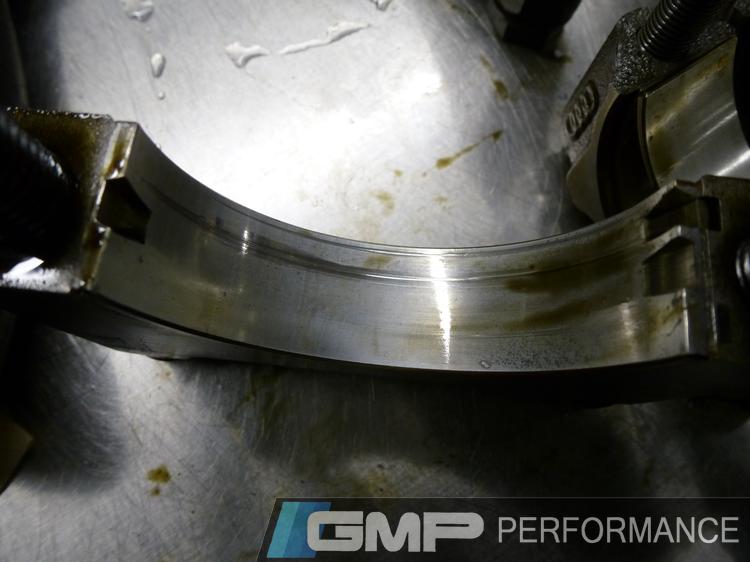
Main bearing damage
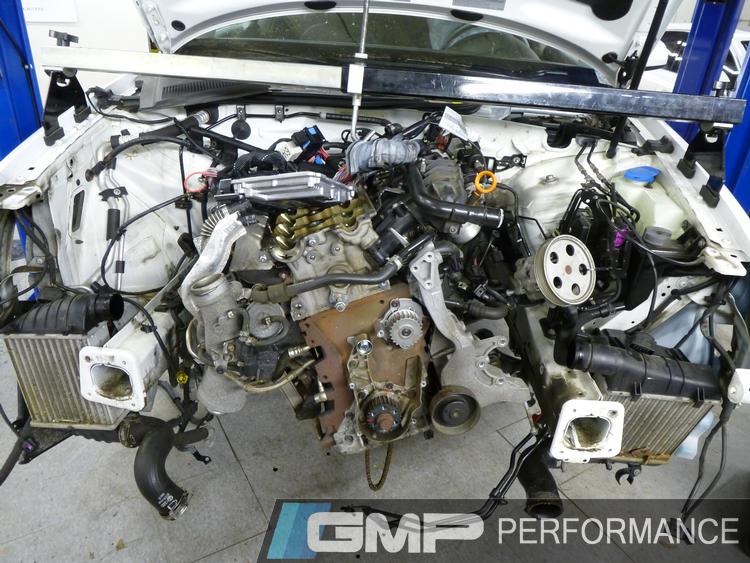
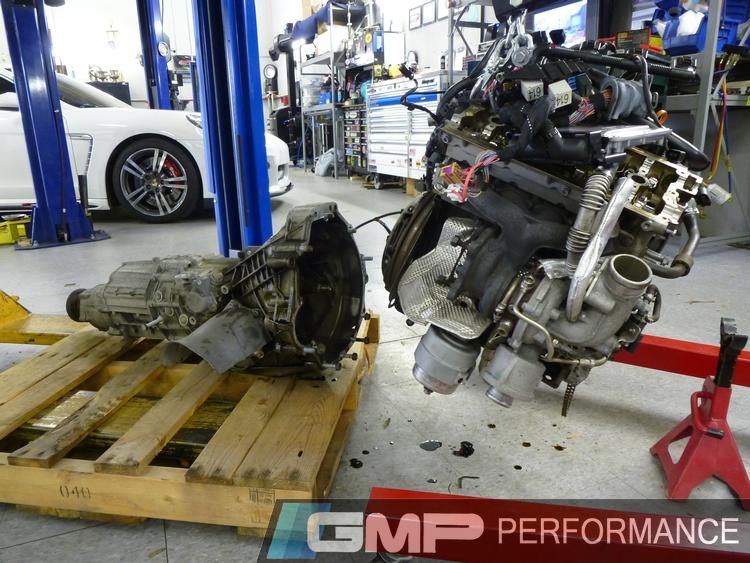
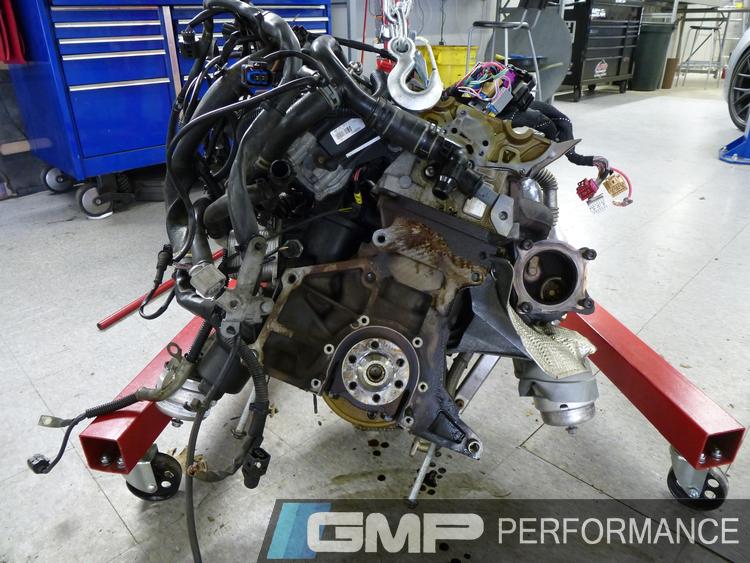
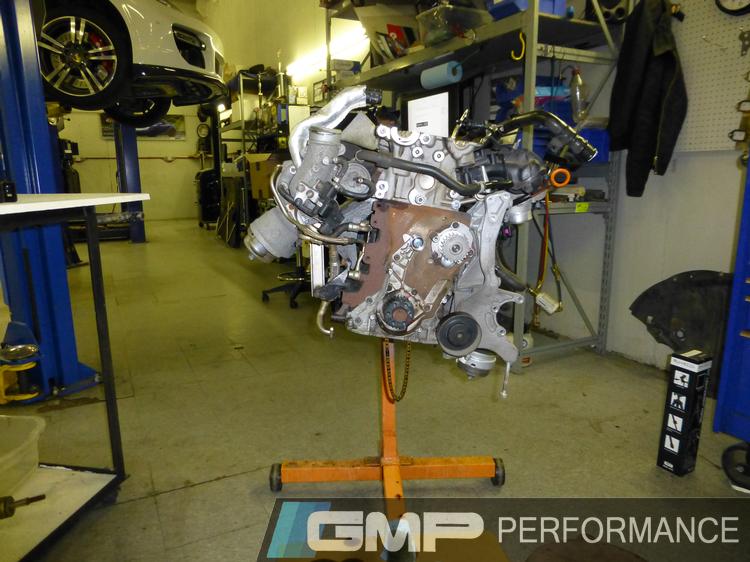
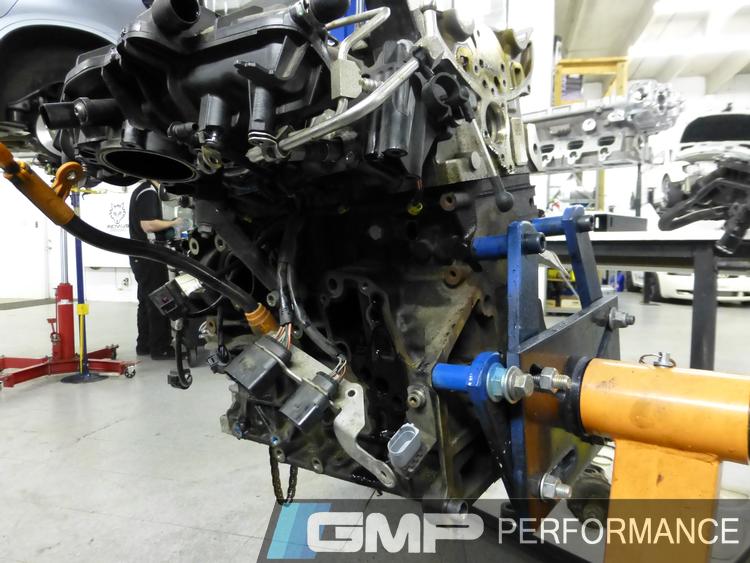
Removing the engine and tearing it down


A bit like the old phrase, what comes up must come down, in our case it was what comes apart, must be put back together. But getting put back together would be the best part, thanks to a special addition.
Part 4 Coming Soon!
To see the gallery on this build, click here! And stay tuned to see the next BIG step in our project!
We had tracked the A4 a few times and we noticed a faint rattling in the top end of the engine. The Audi was due for a new timing belt as well so it seemed like a good time to investigate while we were in there anyway. Initially, we thought the rattling was coming from the chain tensioner between the two camshafts and when we pulled off the rear timing chain cover, we found evidence that some sort of metal had passed through the cover, damaging it. Uh oh... Not a good start.
We then removed the camshafts to inspect for other damage and found that the camshaft bearing journals in the cylinder head had been scored pretty badly. We knew at that point that we’d need to replace the head. With this discovery, the decision to just rebuild the engine was made. The more we tore into, the more interesting things we found.
When we removed the oil pan, we found parts of a damaged high pressure fuel pump. What made this even worse in the big picture is that the pump that was in the engine wasn't missing any parts. We had to believe that the car had previously had a catastrophic cam follower/HPFP failure and somebody simply replaced the cam follower and pump without addressing the other damage. During the dis-assembly and inspection, we found the oil pump to had also been damaged by metal passing through.
On this engine, the oil pump is integral with the balance shaft assembly. We had heard about people doing a 1.8t oiling system conversion and upon investigating, we found the cost to be similar to replacing the OE pump, but with added benefits of removing the balance shafts and increasing the car’s oil capacity by over two quarts. Balance shafts are essentially big weights that are mounted on one side of a spinning shaft. They are there to counter act the engines natural vibrations and cancel them out. For a performance car, the increase in vibrations is hardly noticeable, but you get the same benefit as using a light weight flywheel by removing this rotating mass.
Since we were rebuilding the engine and adding a big power upgrade at the same time, we decided to future-proof the bottom end of the engine by using IE connecting rods and all APR hardware. While the stock bottom end will support up to Stage 3 power levels, anything more requires upgrades. By upgrading the bottom end now, we can later increase the power to Stage 3+ and beyond without needing to remove the engine again. Since we know we like to play and push our cars to the limit, it was a good move for us to make to pre-game for the future.
Parts Installed:
LOTS of hard work!
The inspection and damage
Damaged injector pump
Worn cam from injector pump
Oil pump gear damage
Timing chain cover damage
Damage from fuel pump failure
Parts of the fuel pump found in the oil pan
Cylinder head damage
Inspecting the balance shafts
Rod bearing inspection
Main bearing damage
Removing the engine and tearing it down
A bit like the old phrase, what comes up must come down, in our case it was what comes apart, must be put back together. But getting put back together would be the best part, thanks to a special addition.
Part 4 Coming Soon!
To see the gallery on this build, click here! And stay tuned to see the next BIG step in our project!
Last edited by GMP Performance; Jul 3, 2013 at 08:46 AM.
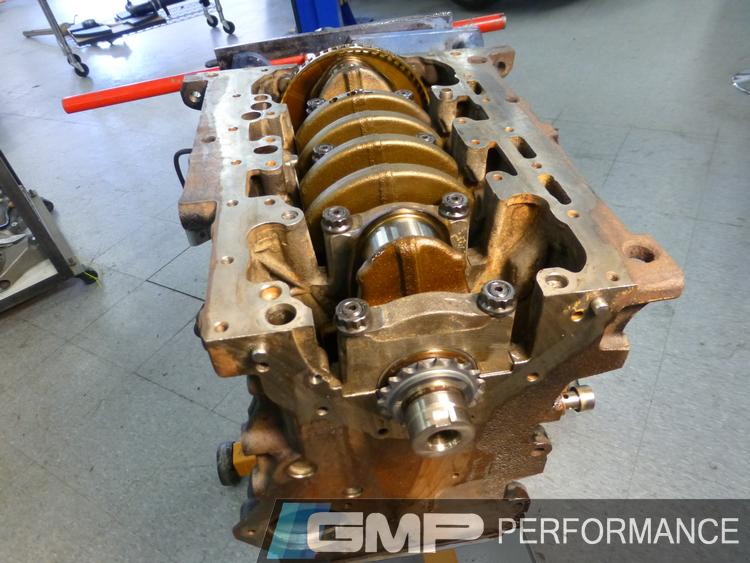
The time had come! We had torn our poor engine down, ordered all the parts we'd need and some extras, and prepped the car. Once the parts got here, we immediately went to work. We have an awesome event coming up, hosted by Grassroots Motorsports Magazine. It's called the Ultimate Track Car Challenge (many of you may already know about it) and we were determined to be there, just like last year. But, different from last year, we didn't plan to bring the S3. We planned to bring this soon-to-be bad boy. So with impatience and a lot of drive, we set to getting it better than ready!
Parts Installed:
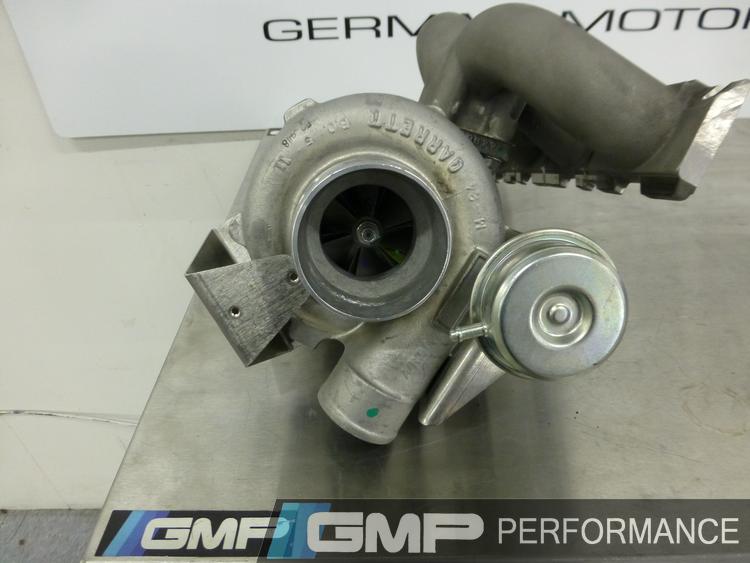
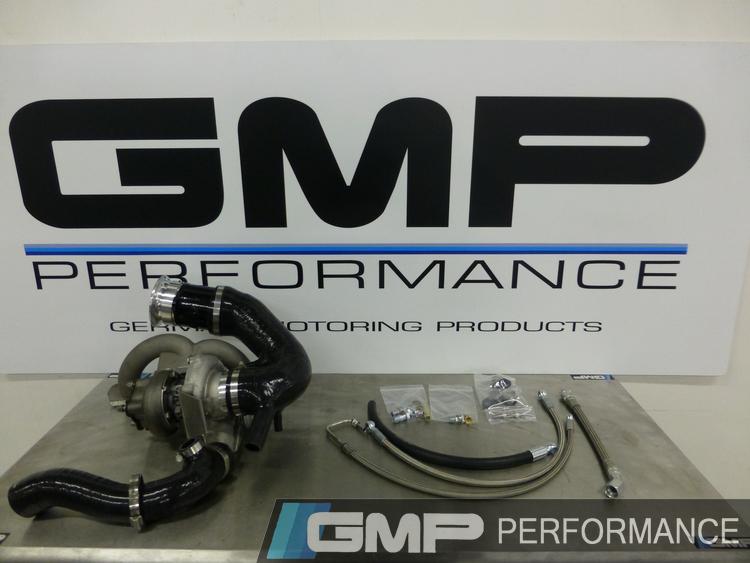
APR Longitudinal 2.0T FSI Stage III Turbo Upgrade Kit
DXD Stage III Daily Clutch
APR 2.0T FSI High Pressure Fuel Pump Upgrade
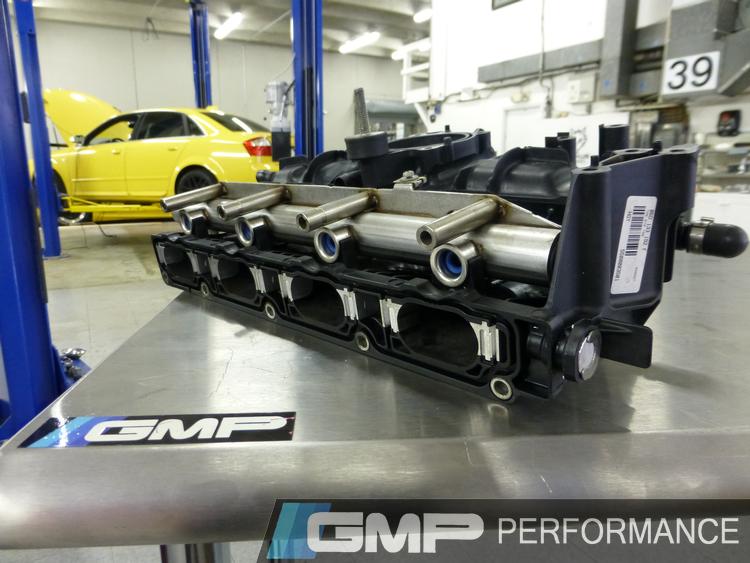
APR Intake Manifold Runner Flap Delete
Just some of the new parts, all laid out before install

And most importantly, the Stage 3!
With all the parts in hand, the build was underway
Fuel lines installed
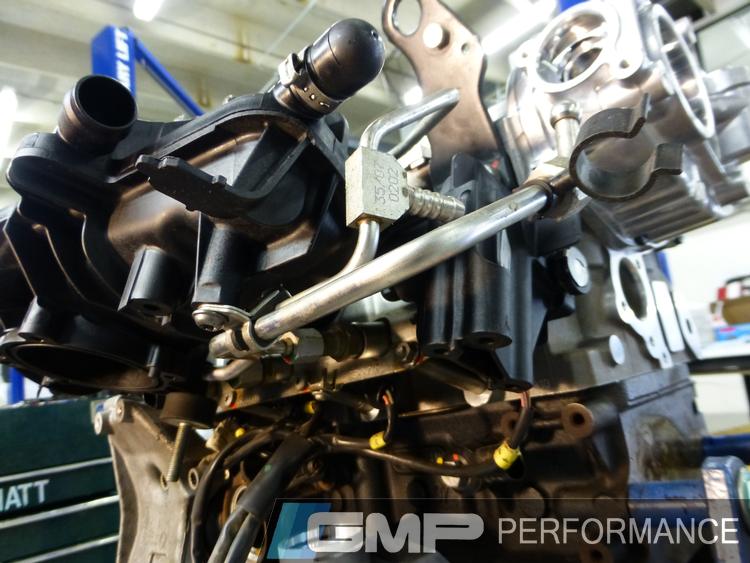
Coolant lines
Timing belt
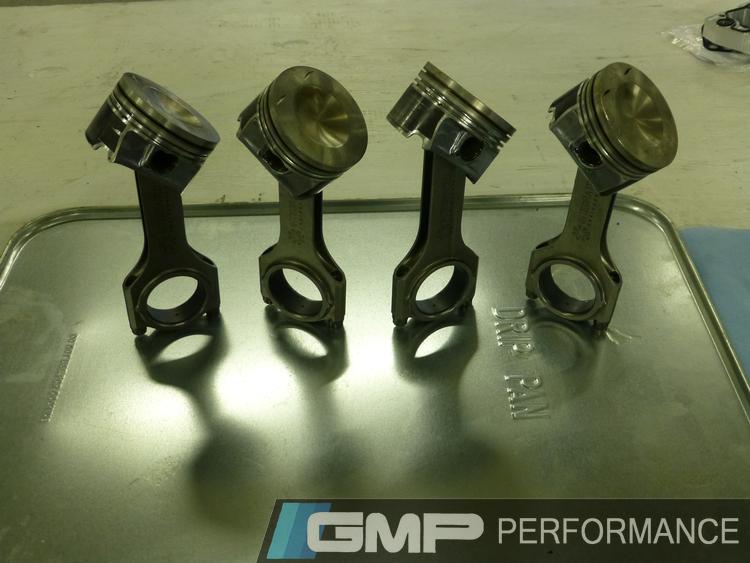
Pistons Installed
New oil pump drive chain tensioner
Crank Shaft
Measuring the main bearing oil clearance
and rod bearing oil clearance
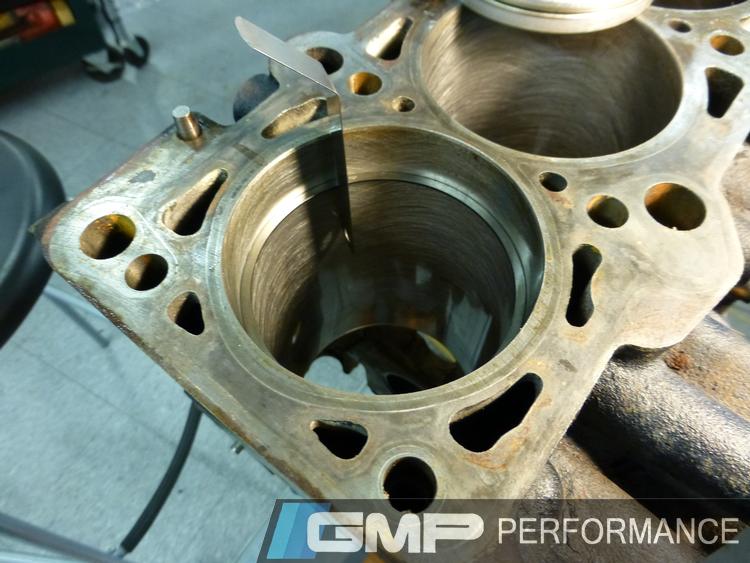
Setting the ring end gaps
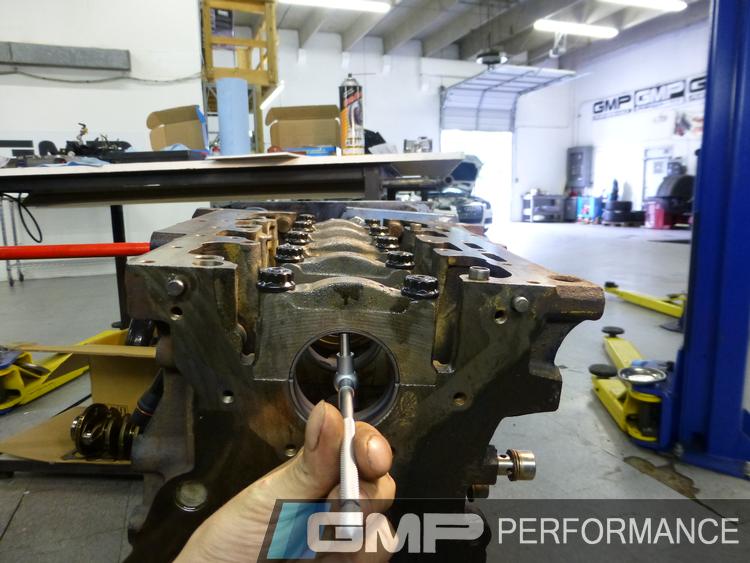
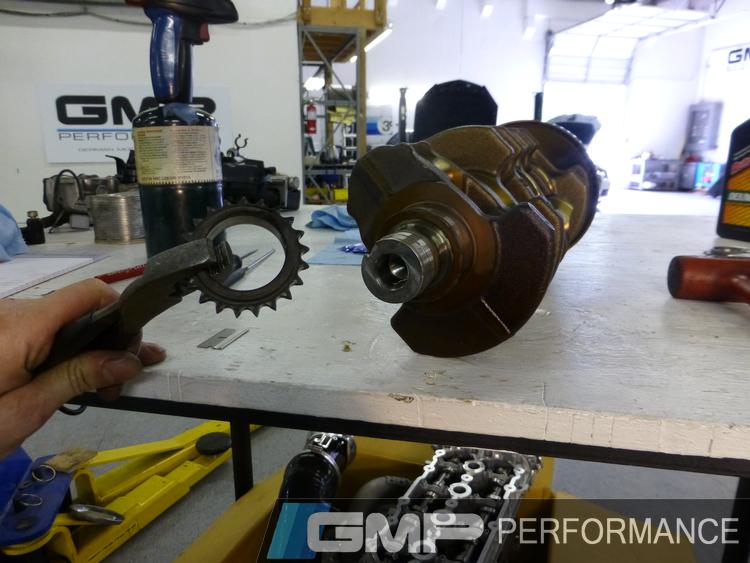
Removing original oil pump drive sprocket
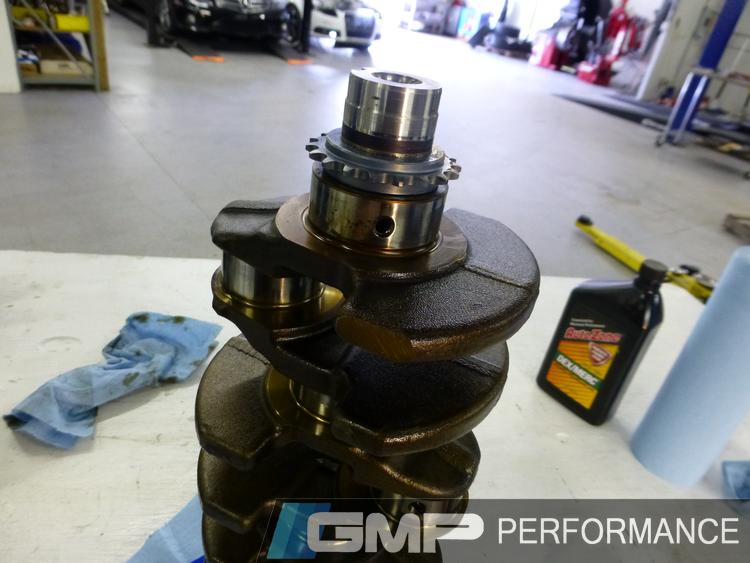
New sprocket installed
Intake runners before removal
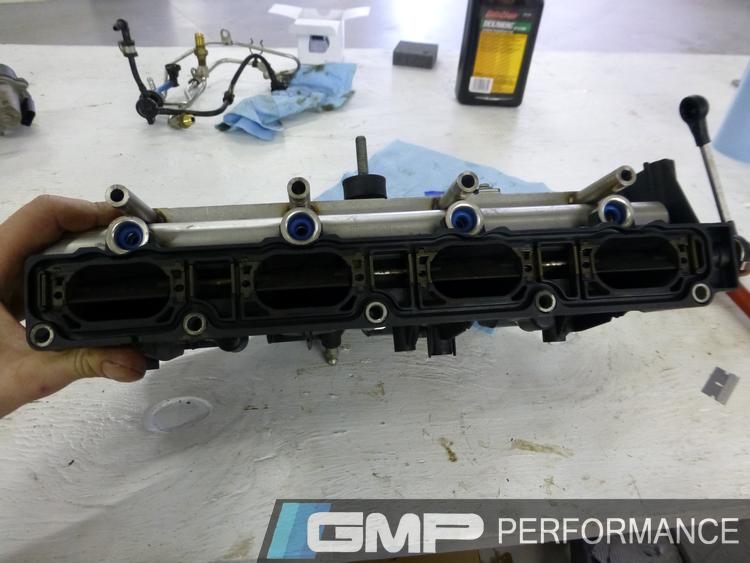
APR Intake Runner Delete Kit
1.8L oil filter adapter and housing installed
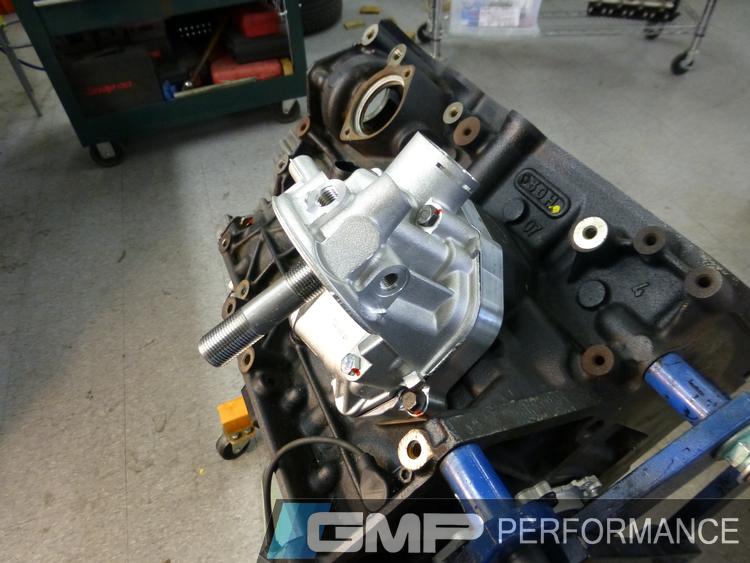
Oil pump and drive chain installed
Water pump installed
New cylinder head
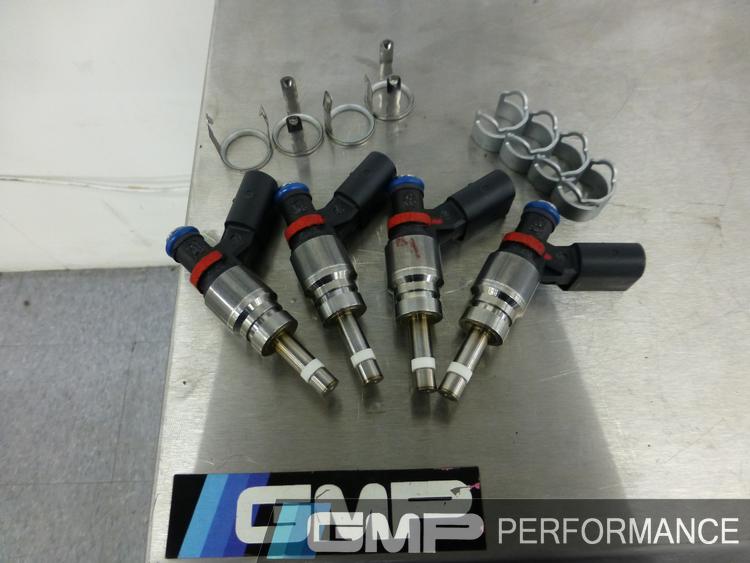
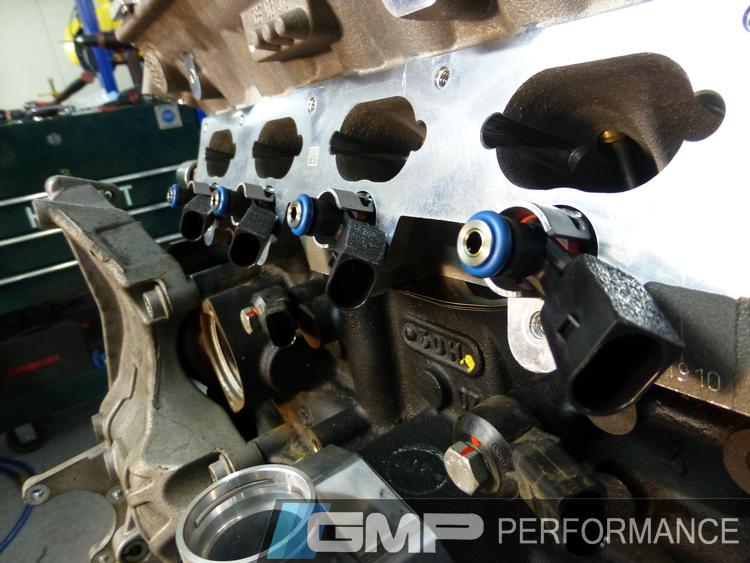
New injectors installed
Intake manifold
APR Stage 3 Turbo charger installed
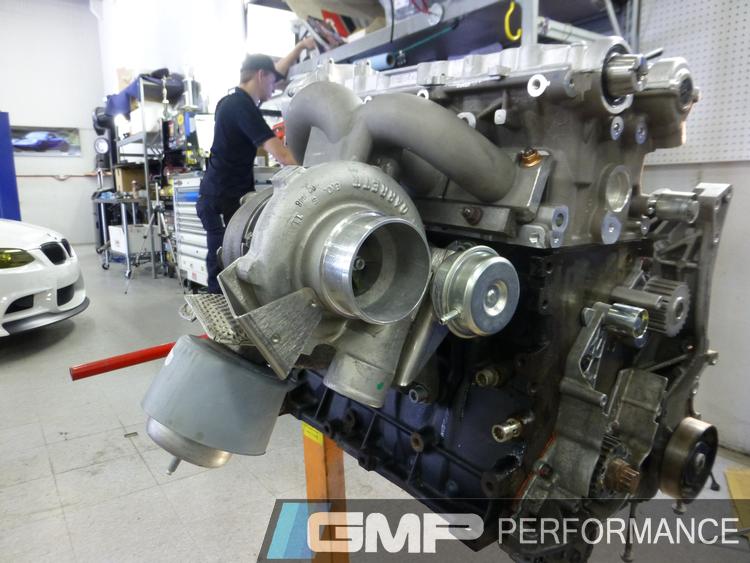
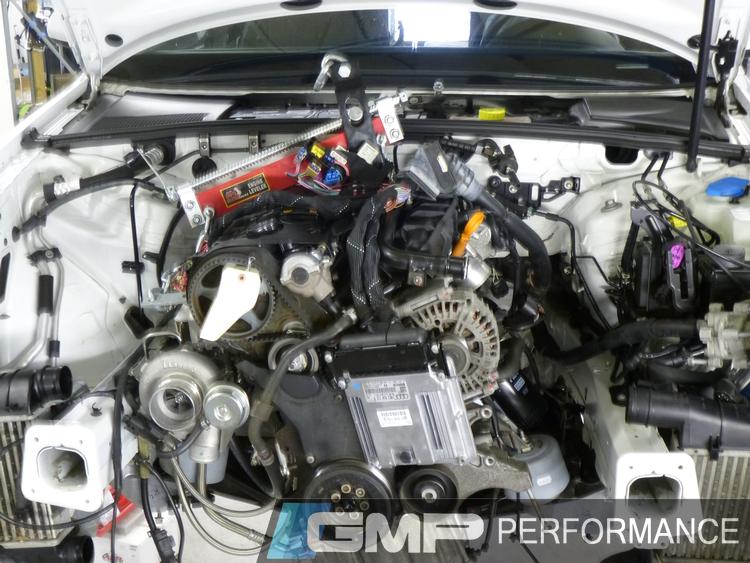
With everything in place, it was time to reinstall the engine and make the A4 whole again

We had tackled power upgrades. We had tackled engine security. We had tackled clutches and suspension kits and wheels. But our brains are always turning and there was still a few upgrades we felt our Audi needed before we took it to go play with the Grassroots Motorsports crowd...
Part 5 Coming Soon!
To see the gallery on this build, click here! And stay tuned to see the next BIG step in our project!
Parts Installed:
APR Longitudinal 2.0T FSI Stage III Turbo Upgrade Kit
DXD Stage III Daily Clutch
APR 2.0T FSI High Pressure Fuel Pump Upgrade
APR Intake Manifold Runner Flap Delete
Just some of the new parts, all laid out before install
And most importantly, the Stage 3!
With all the parts in hand, the build was underway
Fuel lines installed
Coolant lines
Timing belt
Pistons Installed
New oil pump drive chain tensioner
Crank Shaft
Measuring the main bearing oil clearance
and rod bearing oil clearance
Setting the ring end gaps
Removing original oil pump drive sprocket
New sprocket installed
Intake runners before removal
APR Intake Runner Delete Kit
1.8L oil filter adapter and housing installed
Oil pump and drive chain installed
Water pump installed
New cylinder head
New injectors installed
Intake manifold
APR Stage 3 Turbo charger installed
With everything in place, it was time to reinstall the engine and make the A4 whole again
We had tackled power upgrades. We had tackled engine security. We had tackled clutches and suspension kits and wheels. But our brains are always turning and there was still a few upgrades we felt our Audi needed before we took it to go play with the Grassroots Motorsports crowd...
Part 5 Coming Soon!
To see the gallery on this build, click here! And stay tuned to see the next BIG step in our project!


Basic Sponsor

Joined: Apr 2013
Posts: 242
From: Taipe
Rep Power: 25

Great project!
Just wondering, how does the car feel after changing the center diff?
Was understeer reduced dramatically? And is it possible to slide the tail out like a rwd?
Just wondering, how does the car feel after changing the center diff?
Was understeer reduced dramatically? And is it possible to slide the tail out like a rwd?
Trending Topics
Thanks for the kind words! 
Well, we're running ours with slicks on it so it has tons of grip, not much sliding action going on here. 
That being said, the car has noticeably less understeer and handles much better. The unit is basically set up the same as the RS4 is from the factory.
That being said, the car has noticeably less understeer and handles much better. The unit is basically set up the same as the RS4 is from the factory.

With the Grassroots Motorsports Magazine's Ultimate Track Car challenge coming up in our horizons, we knew it was time to finish up on some little details, and get it prepped for its first tracking test in a good while. From the little details like gauges and trim we had started installation of getting finished up, to a bigger upgrade for our braking, we went to work getting our A4 ready to go test its new muscle.
Parts Installed:
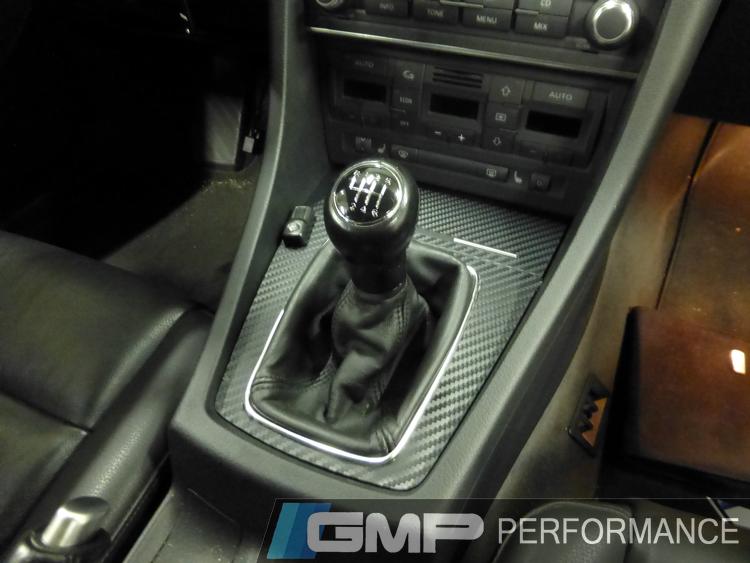
JHM Solid Short Throw Shifter for 2004+ Audi A4
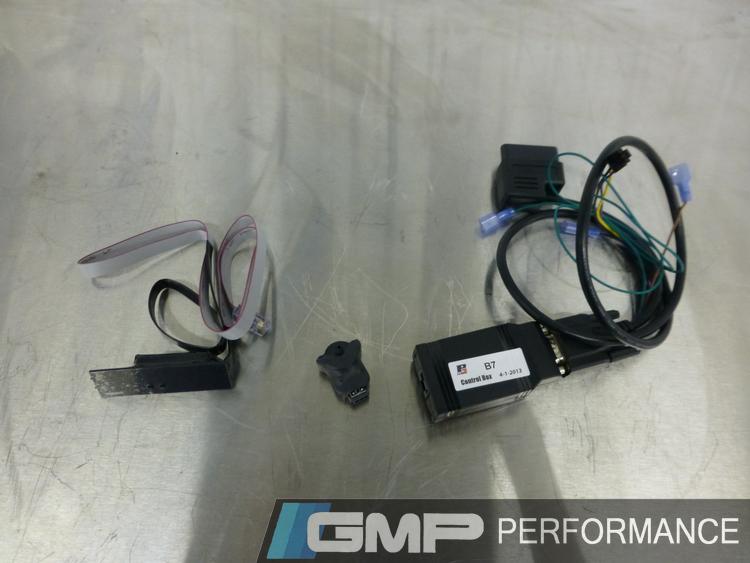
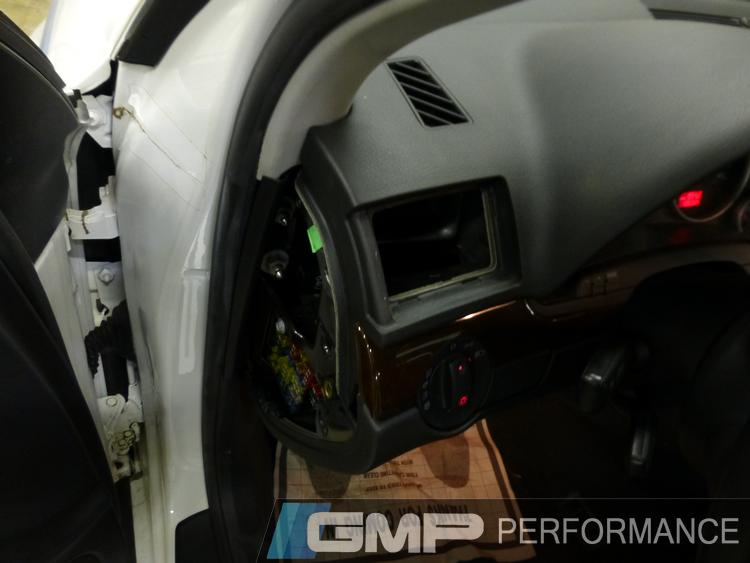
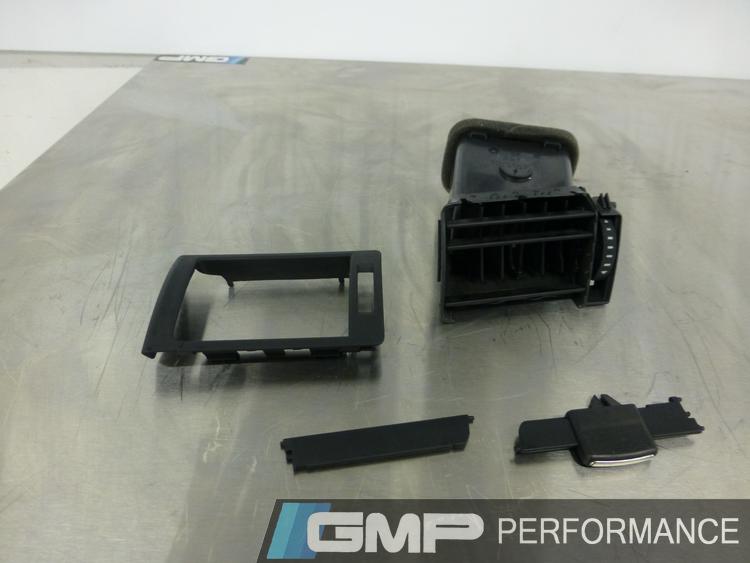
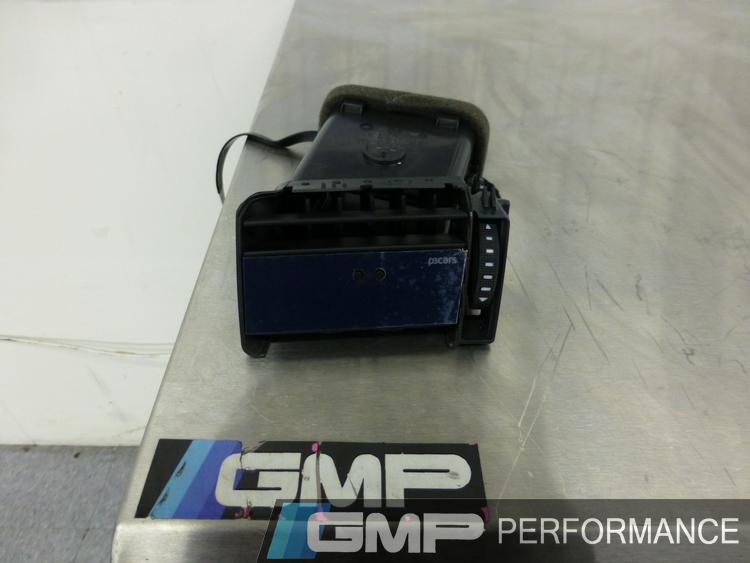
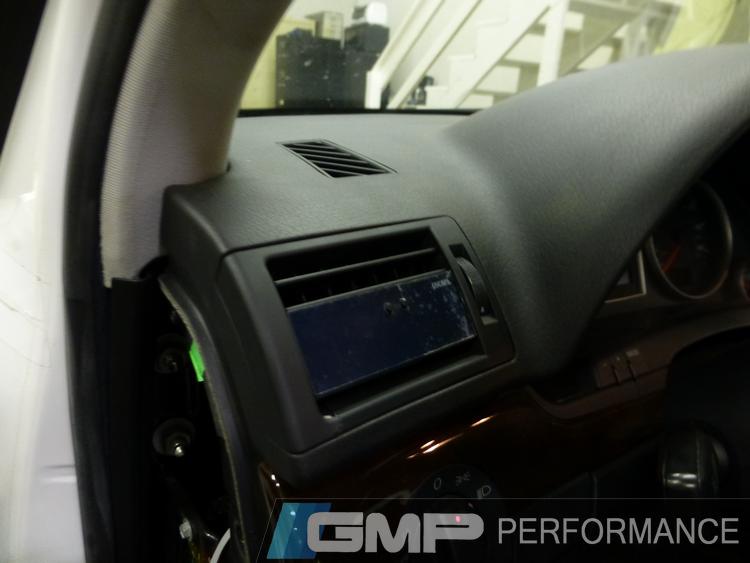
P3Cars Audi B7 A4/S4/RS4 Vent Integrated Digital Interface
Audi A4 (B6, B7)/ S4 (B5) Front 6-piston 355x32 2-Piece Big Brake Gran Turismo Kit by Brembo
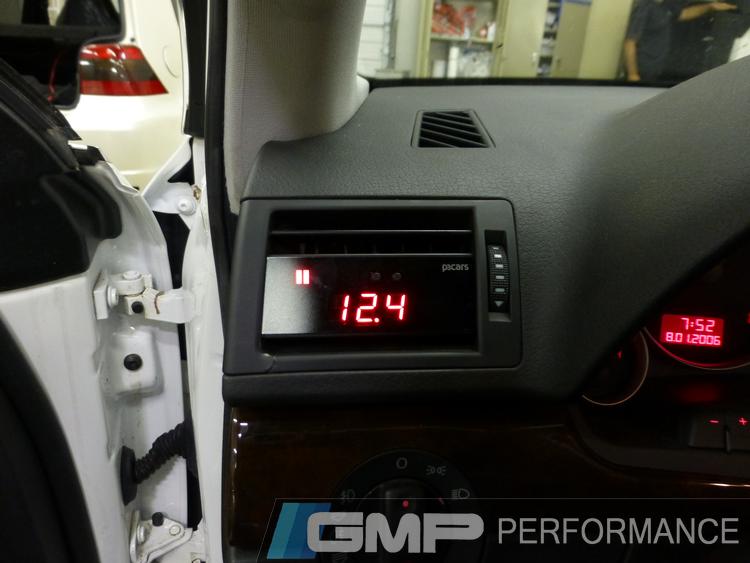
P3Cars Gauge
We recently started carrying P3 Cars brand of gauges and once we saw these cool little things, we immediately knew we wanted one for the Audi. It fits right into the OE vent and become a discreet but very helpful part of your car's dash.
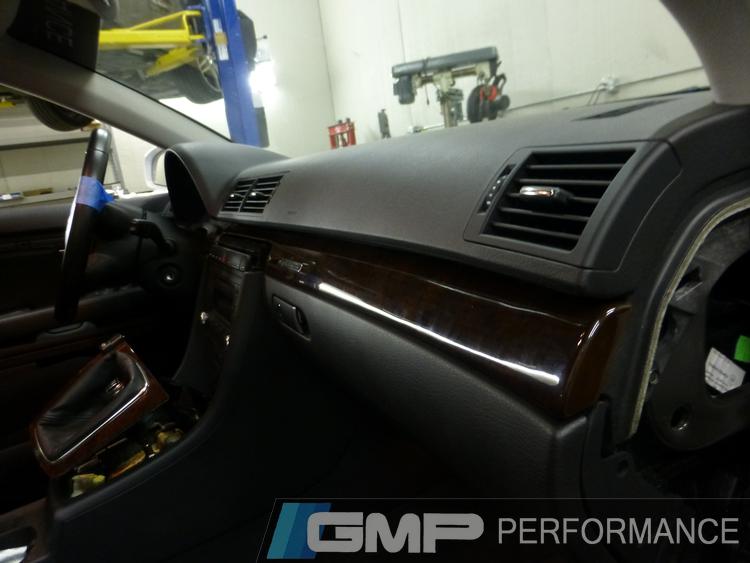
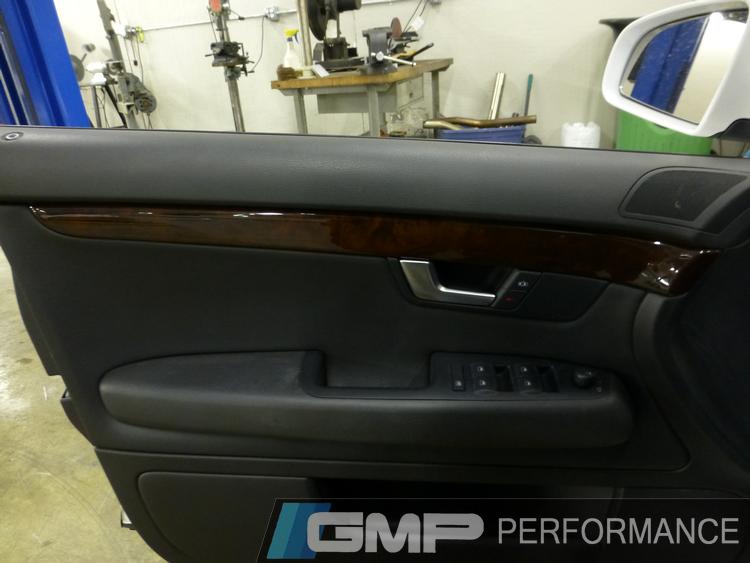
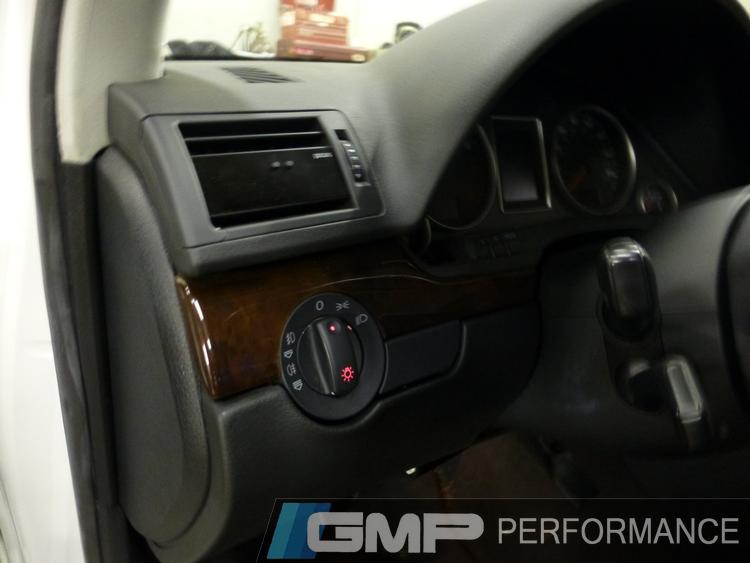
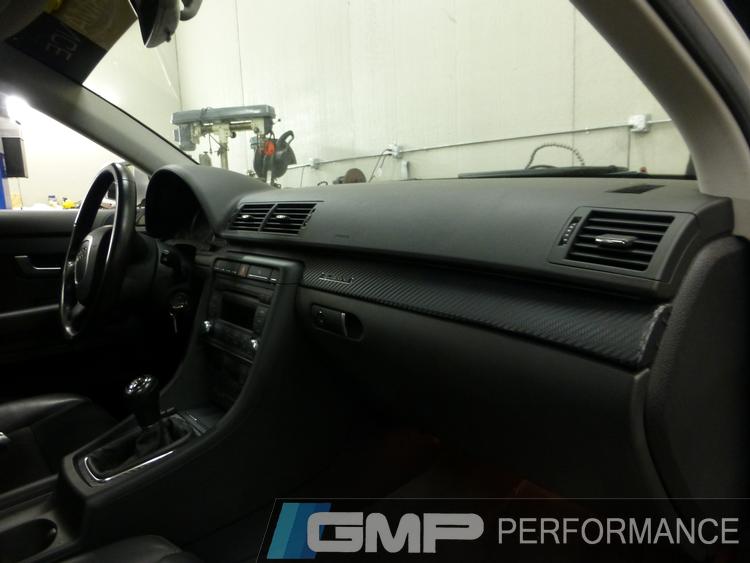
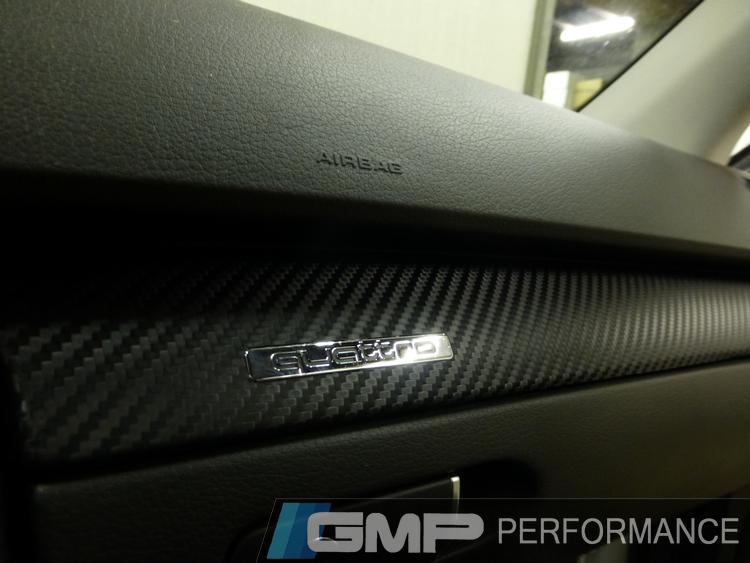
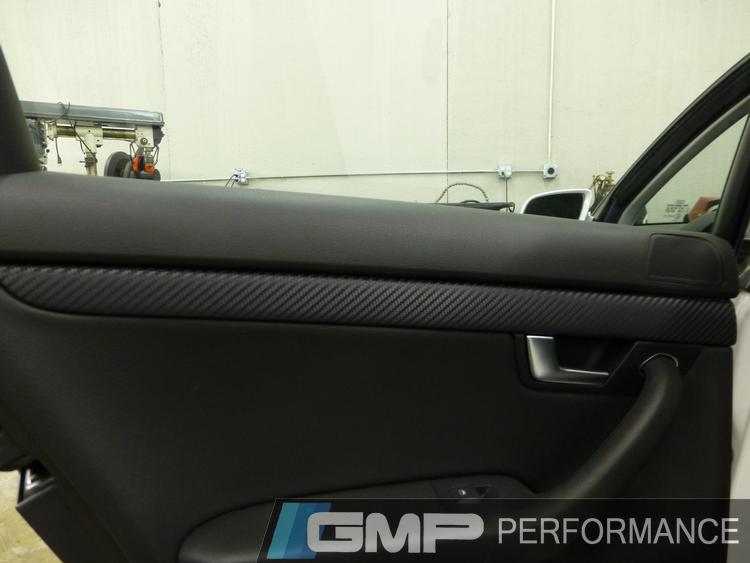
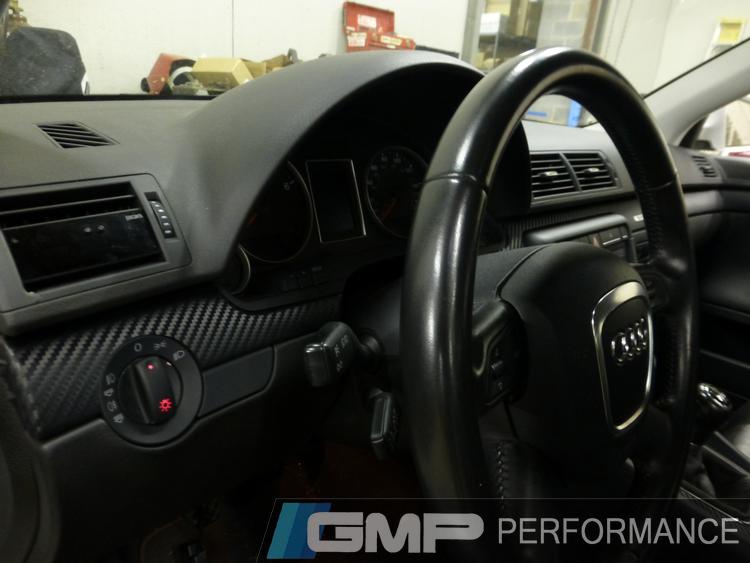
Interior trim wrap
Another thing on the to do list while we were already inside was the trim. Originally a classic wood trim, we wanted something a bit more fitting for such a hardcore car that this Audi was becoming. So we removed it all and wrapped it in carbon fiber vinyl.
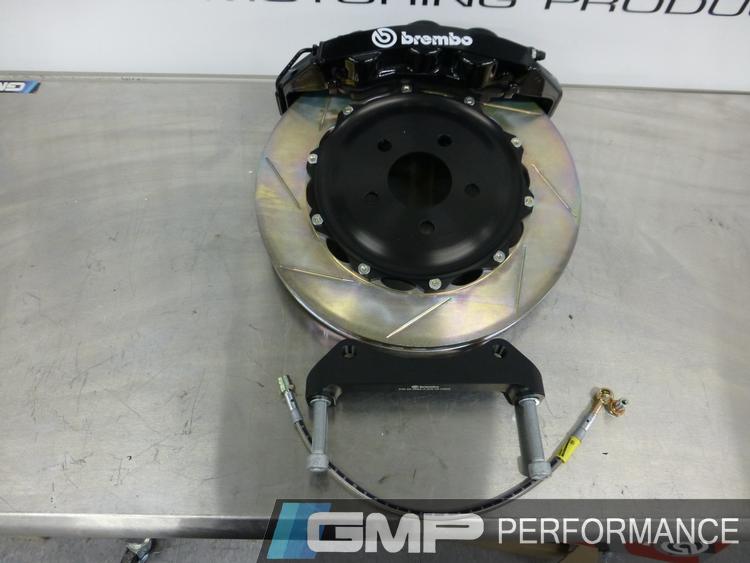
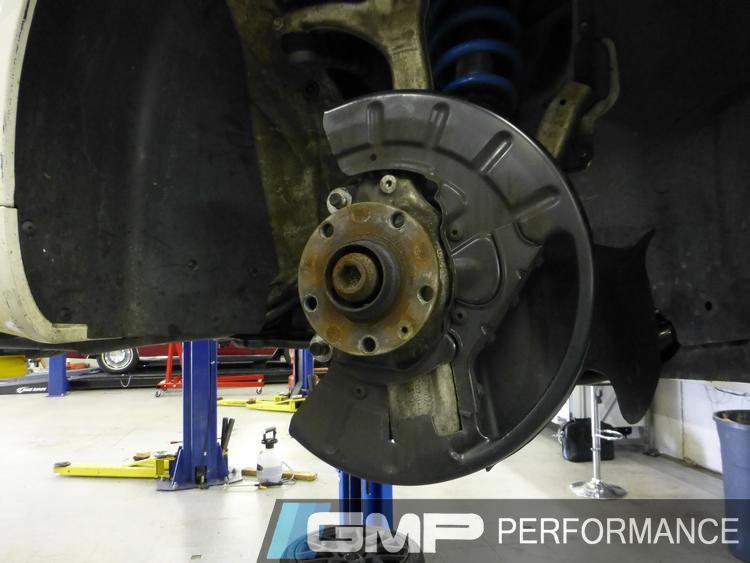
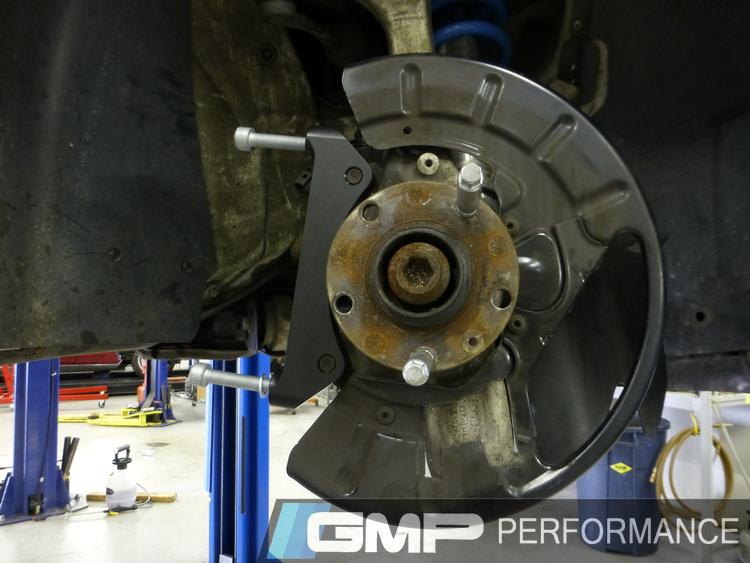
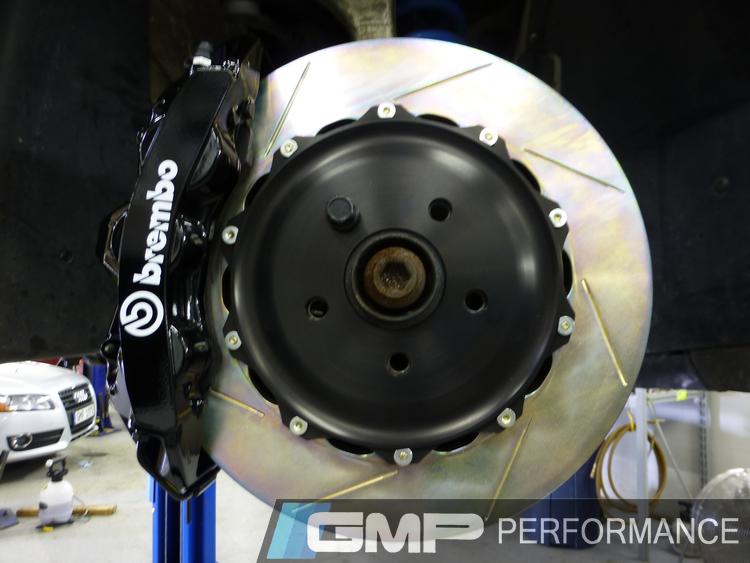
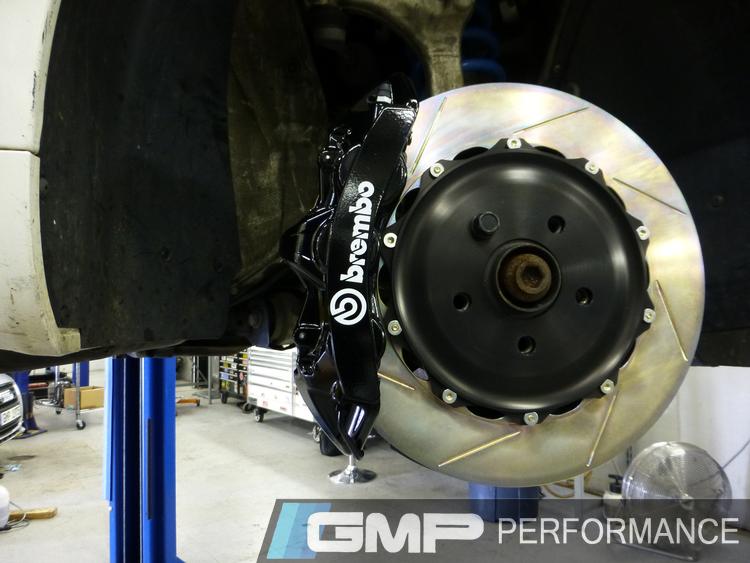
Brembo front brake install
We were preparing to really push our A4 harder than the occasional track fun day and that would mean so heavy duty braking power. We loved our DBAs but since they are a direct replacement for OE, in order to get a bigger rotor, we had to go elsewhere. We went to a company we trust: Brembo's Big Brake Kits!
The Kit!
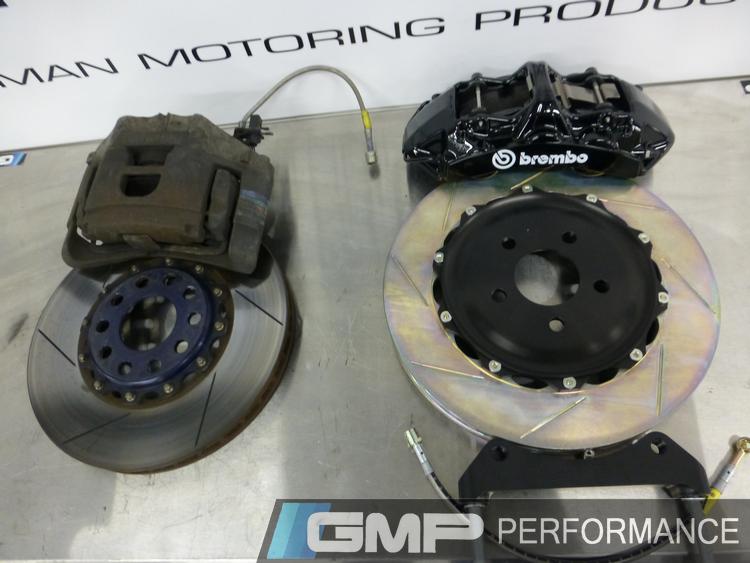
DBAs versus the Brembos
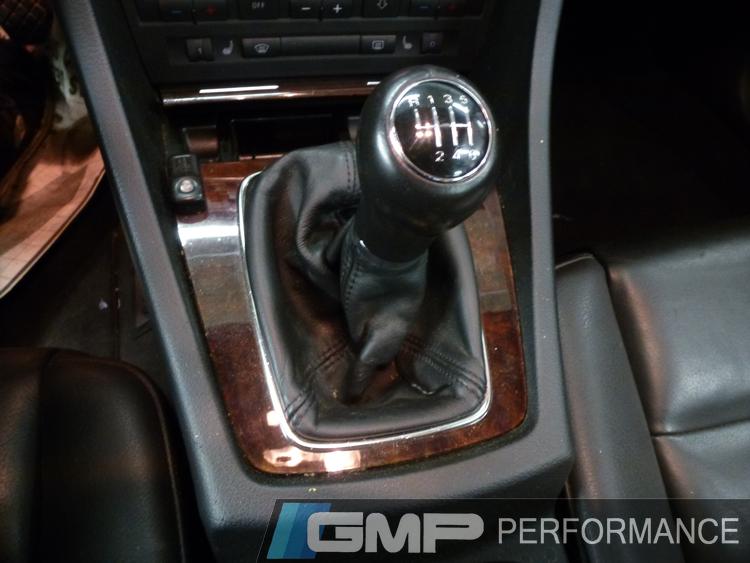
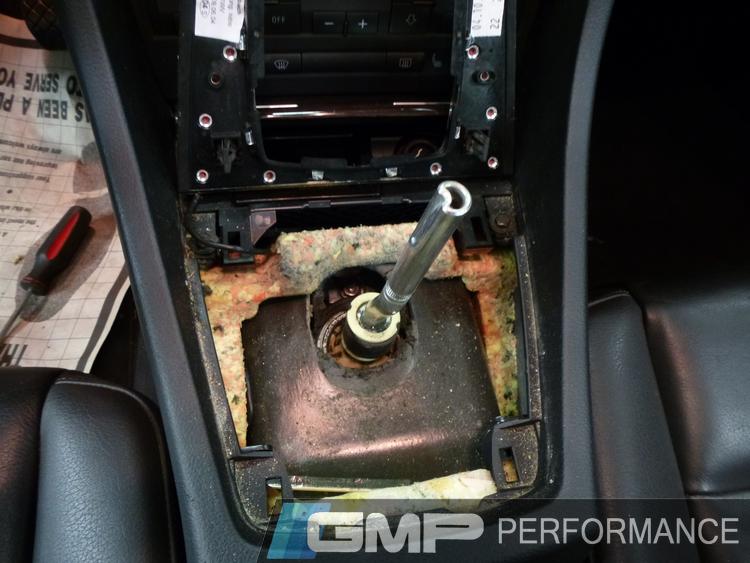
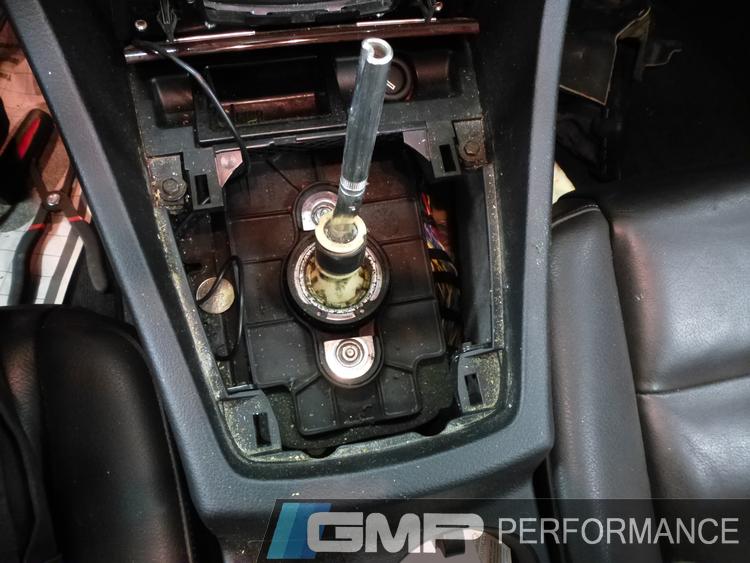
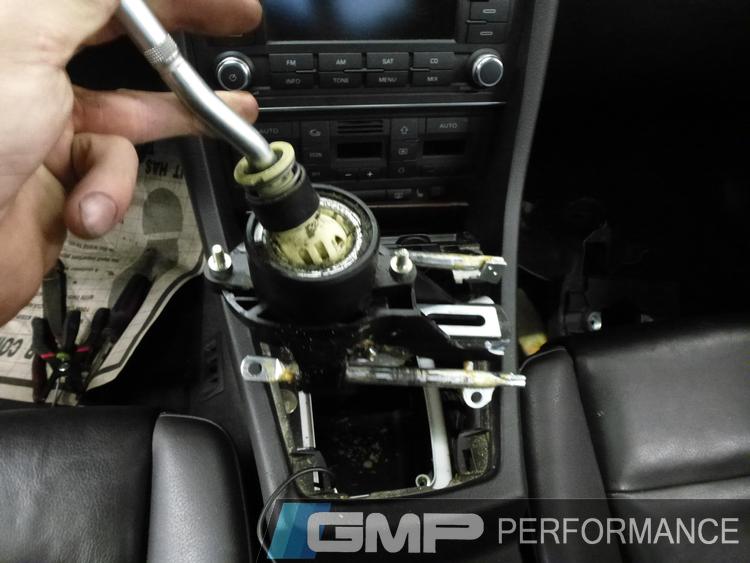
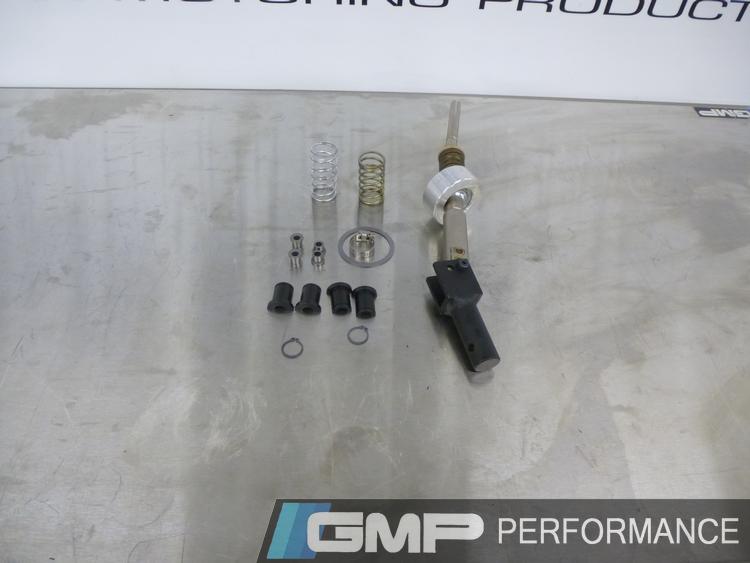
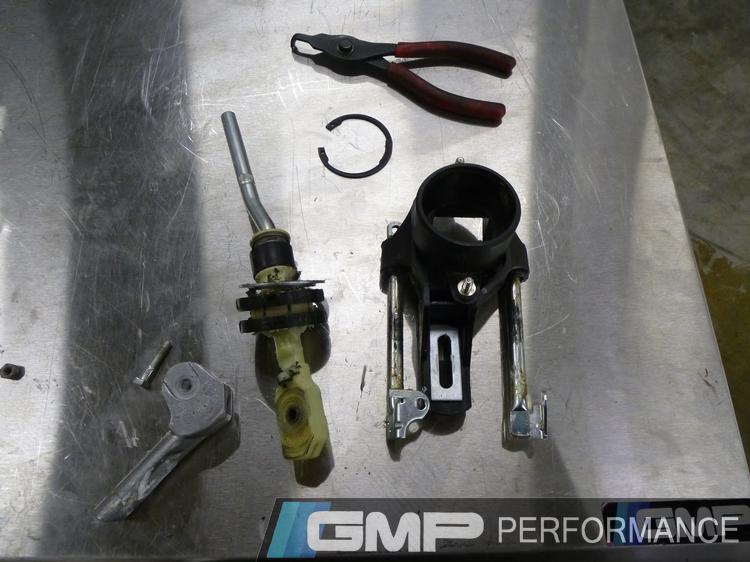
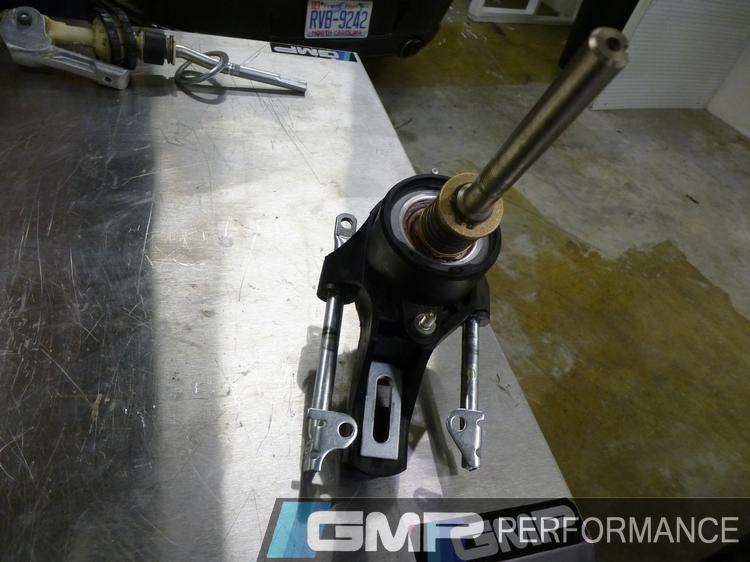
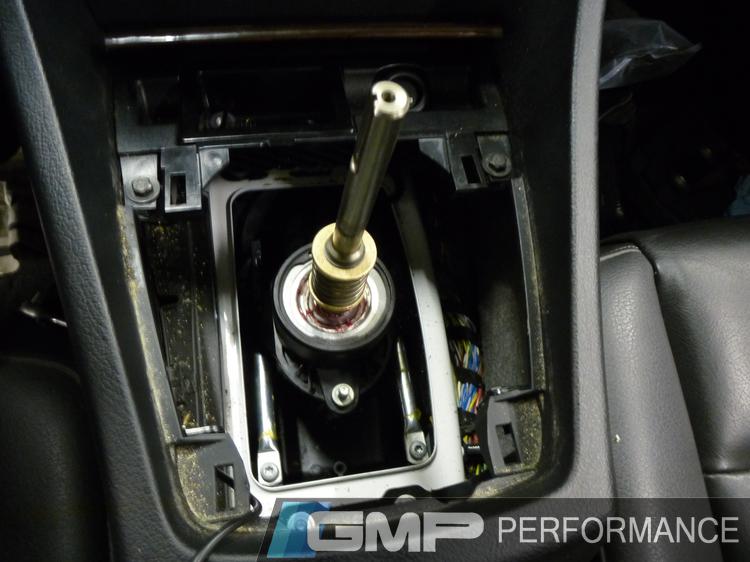
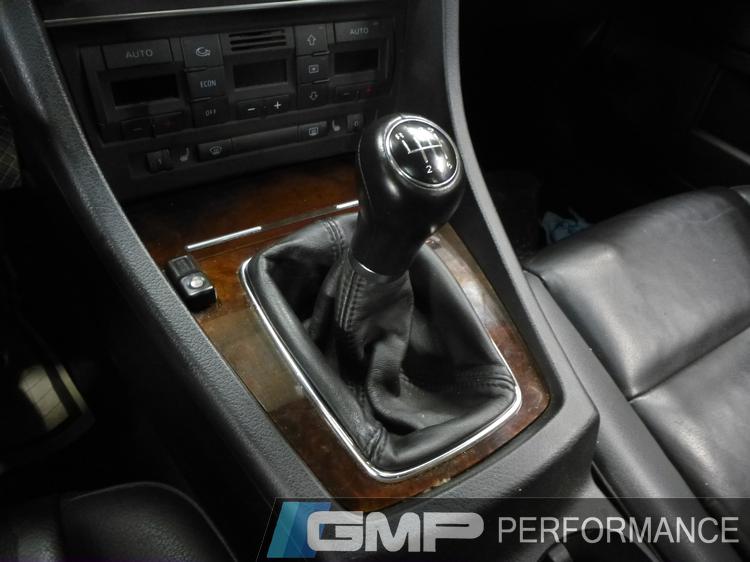
JHM Shifter Install
When it comes to track cars, short shifters are incredibly popular. We were no exception and got a JHM short throw shifter for the A4.
Part 6 Coming Soon!
To see the gallery on this build, click here! And stay tuned to see the next BIG step in our project!
Parts Installed:
JHM Solid Short Throw Shifter for 2004+ Audi A4
P3Cars Audi B7 A4/S4/RS4 Vent Integrated Digital Interface
Audi A4 (B6, B7)/ S4 (B5) Front 6-piston 355x32 2-Piece Big Brake Gran Turismo Kit by Brembo
P3Cars Gauge
We recently started carrying P3 Cars brand of gauges and once we saw these cool little things, we immediately knew we wanted one for the Audi. It fits right into the OE vent and become a discreet but very helpful part of your car's dash.
Interior trim wrap
Another thing on the to do list while we were already inside was the trim. Originally a classic wood trim, we wanted something a bit more fitting for such a hardcore car that this Audi was becoming. So we removed it all and wrapped it in carbon fiber vinyl.
Brembo front brake install
We were preparing to really push our A4 harder than the occasional track fun day and that would mean so heavy duty braking power. We loved our DBAs but since they are a direct replacement for OE, in order to get a bigger rotor, we had to go elsewhere. We went to a company we trust: Brembo's Big Brake Kits!
The Kit!
DBAs versus the Brembos
JHM Shifter Install
When it comes to track cars, short shifters are incredibly popular. We were no exception and got a JHM short throw shifter for the A4.
Part 6 Coming Soon!
To see the gallery on this build, click here! And stay tuned to see the next BIG step in our project!

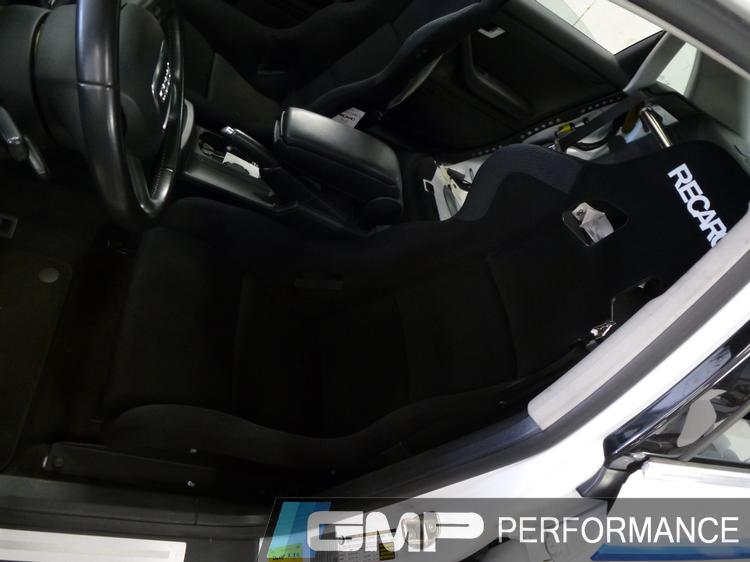
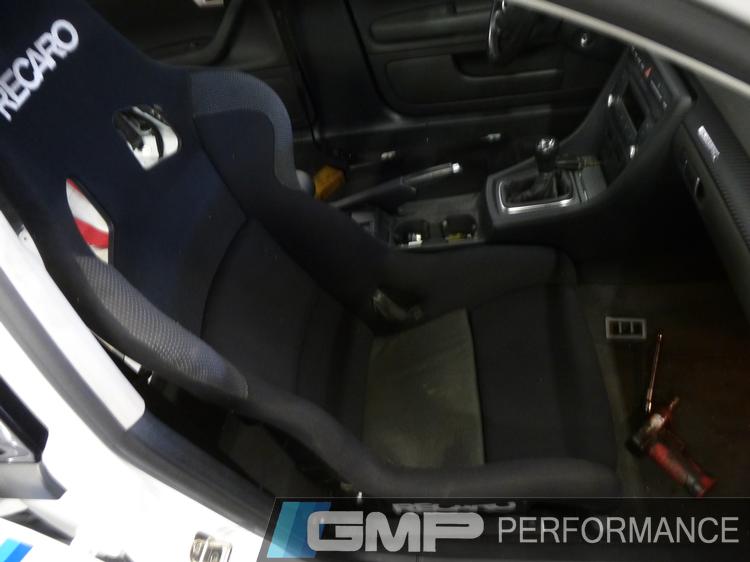
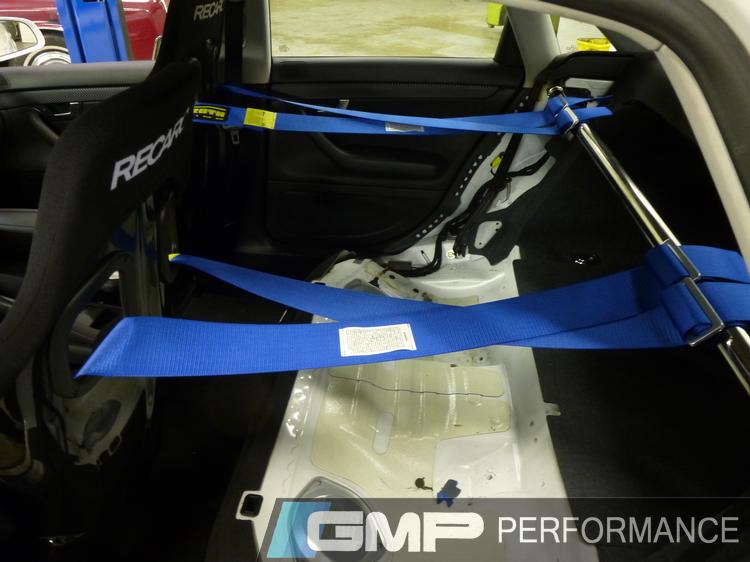
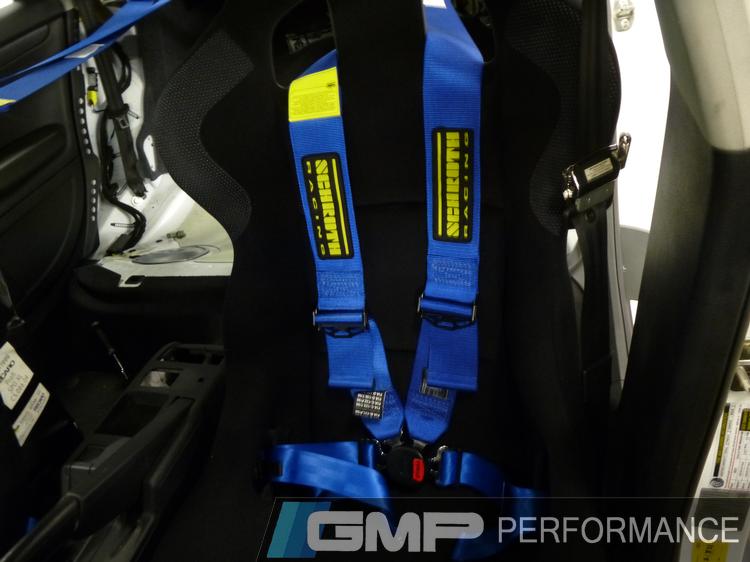
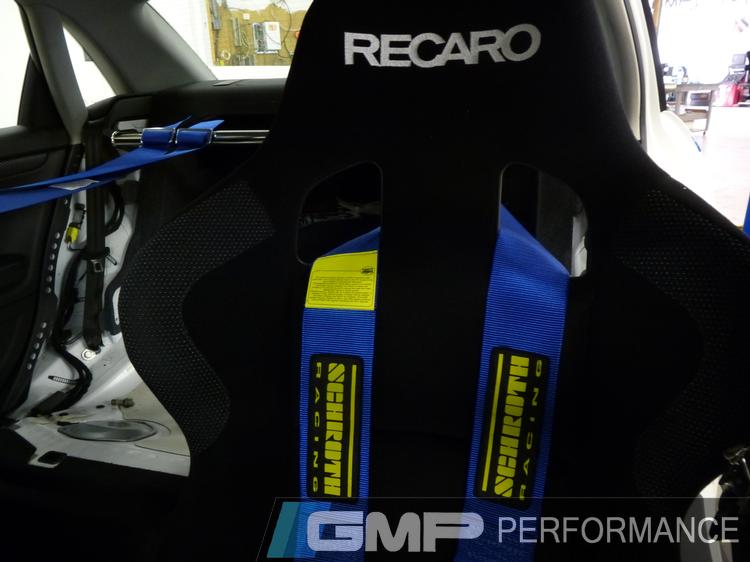
We had two things left before track time: race seats and racing harnesses. With Recaro seats and some Schroth racing harnesses already in hand, all that was left was to install it all and then excitedly wait for the day to arrive.
Parts Installed:
Recaro PROFI XL Race Seat
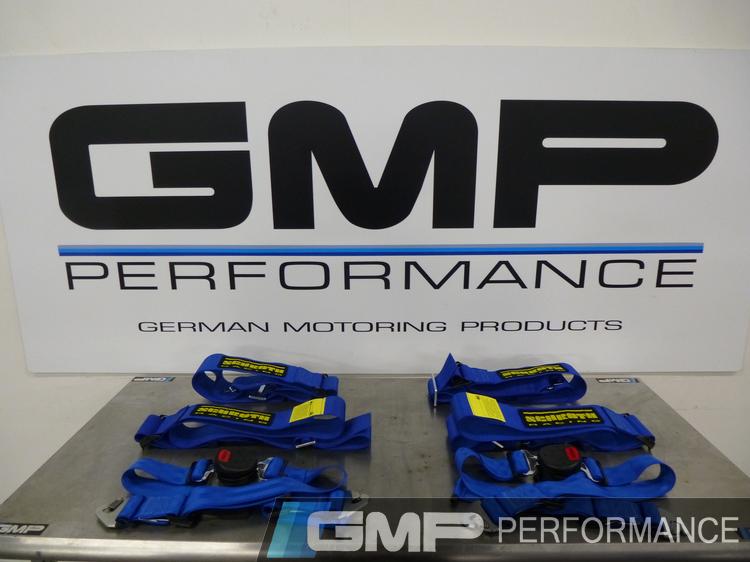
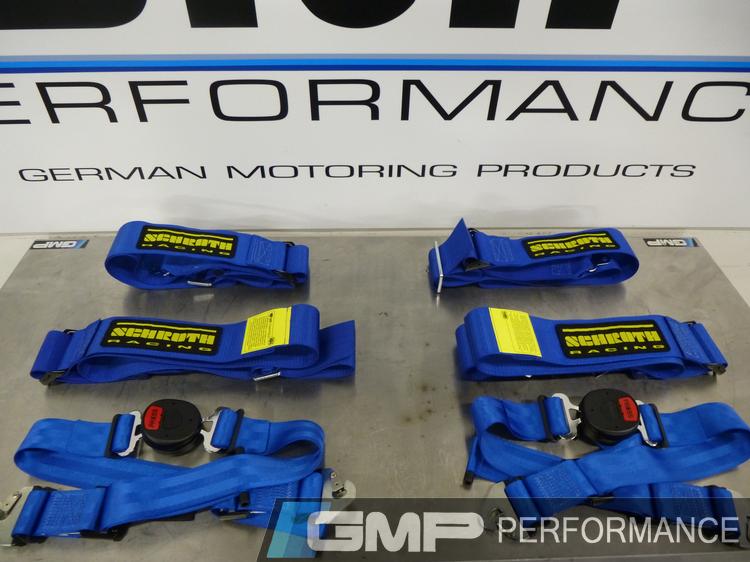
Profi II ASM FE Scroth Harness Belts
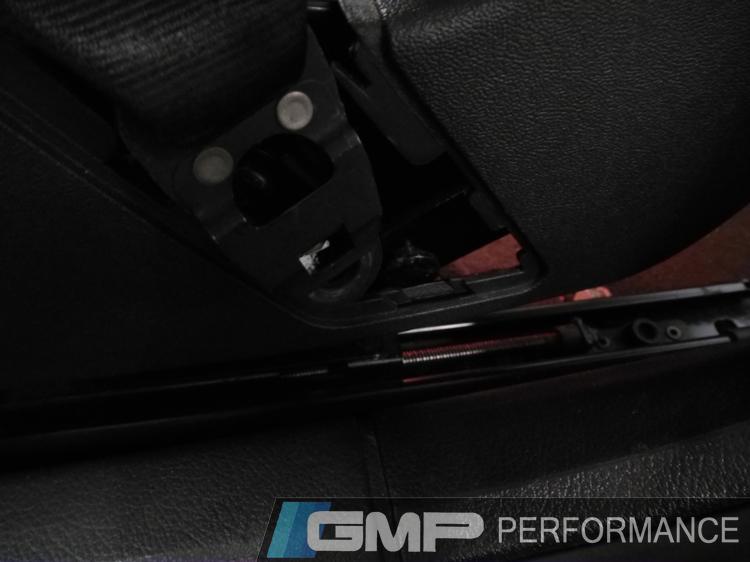
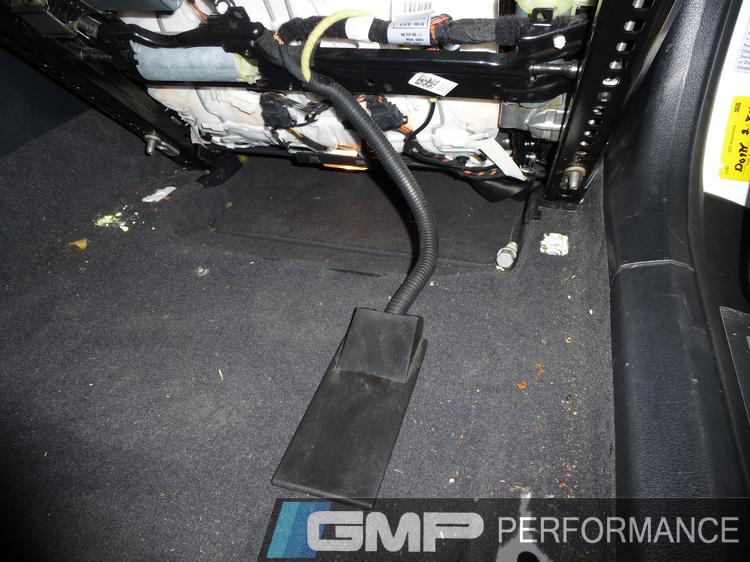
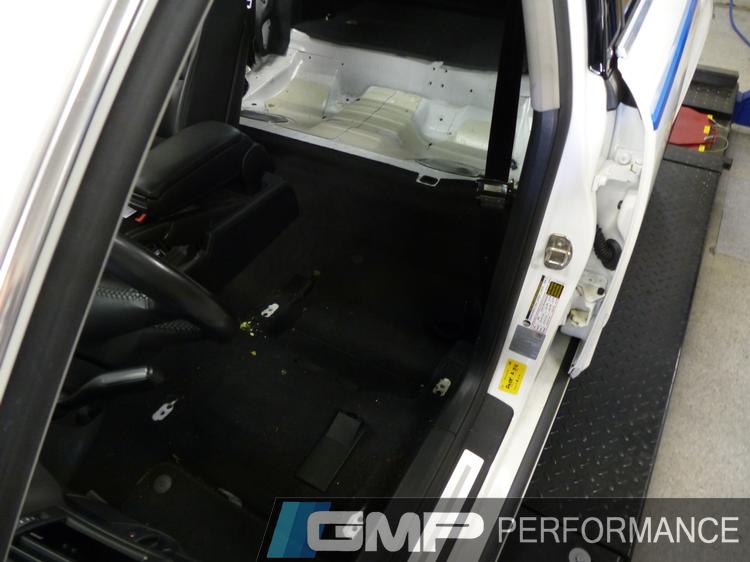
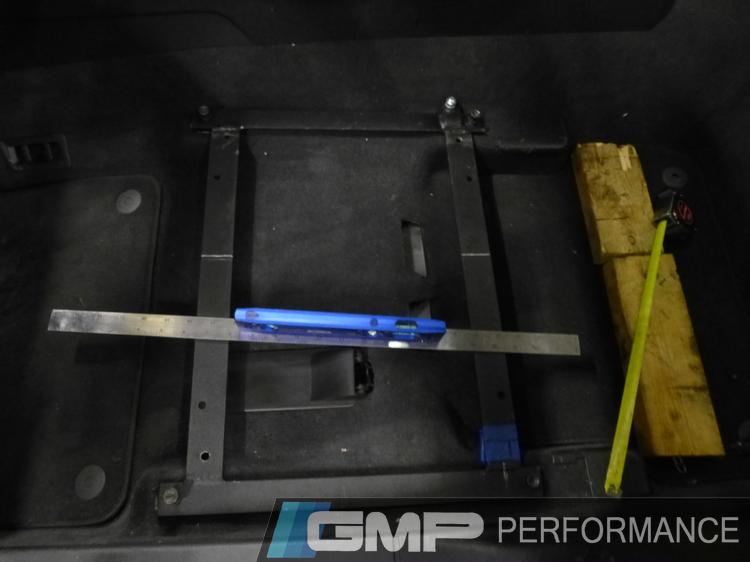
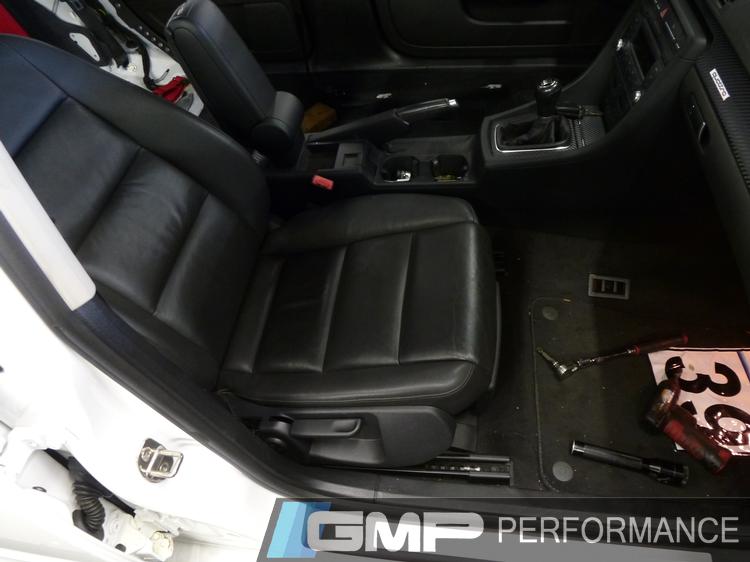
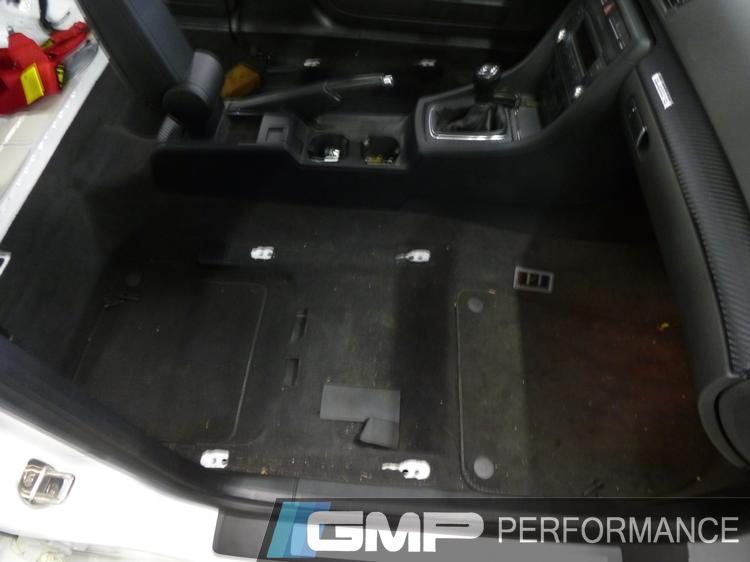
We started by removing the back seats, a quick and super effective way to drop a lot of weight, and fabricated a temporary harness bar for the track event. Then came time to get the new Recaros in!

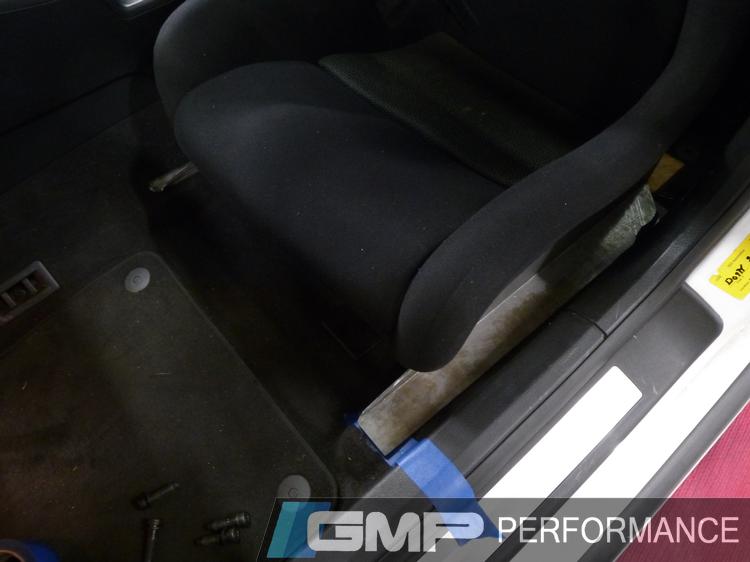
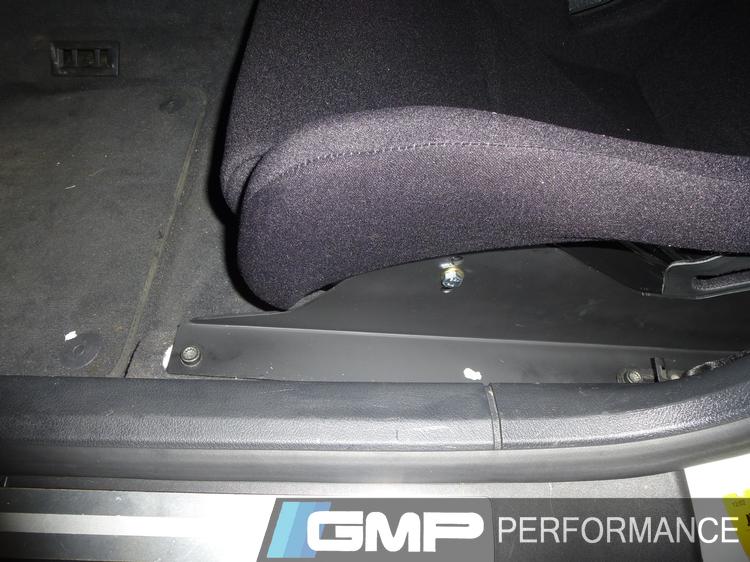
Since we would be be fabricating custom brackets for this job, we had a little bit of extra work ahead of us.
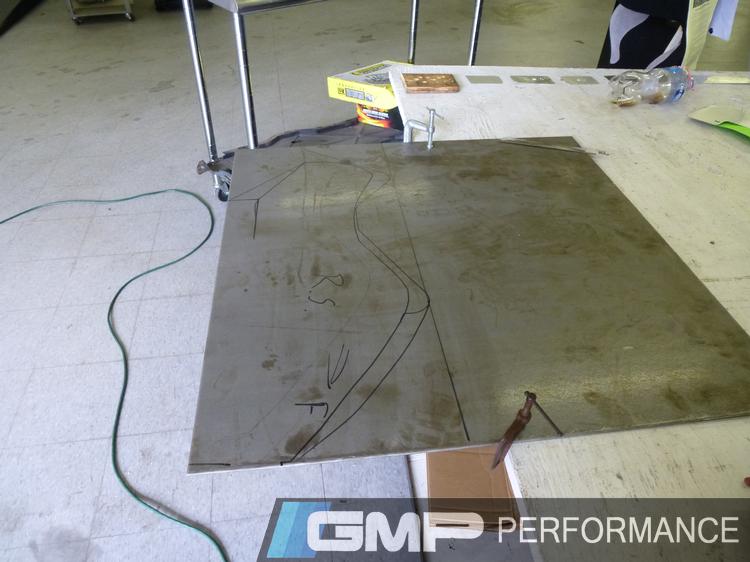
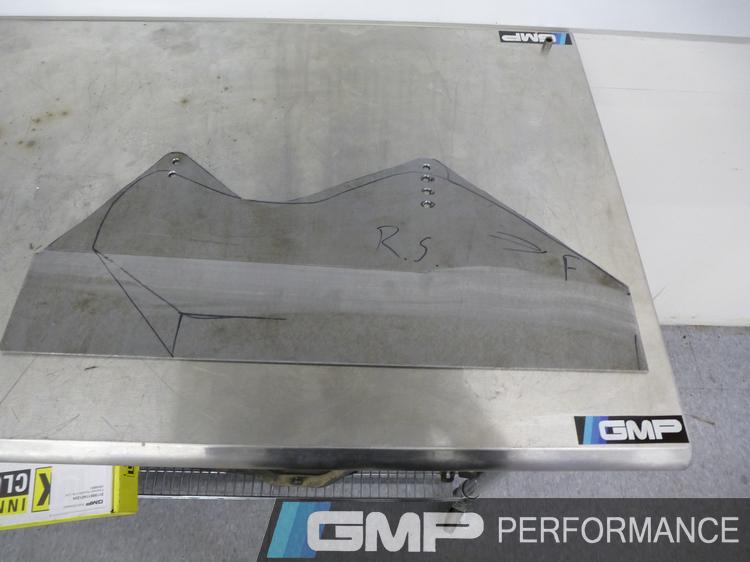
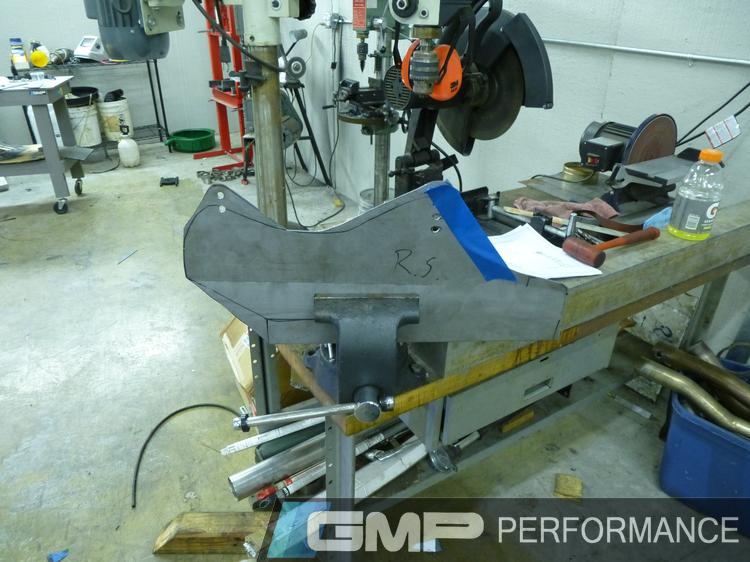
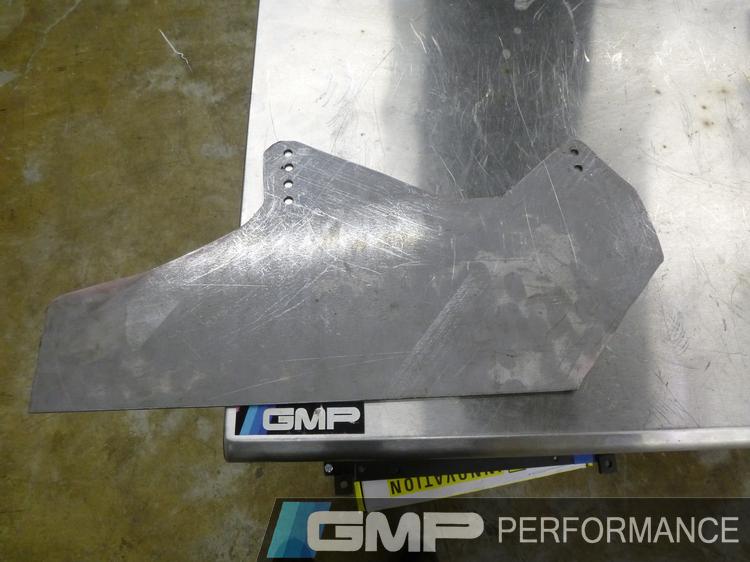

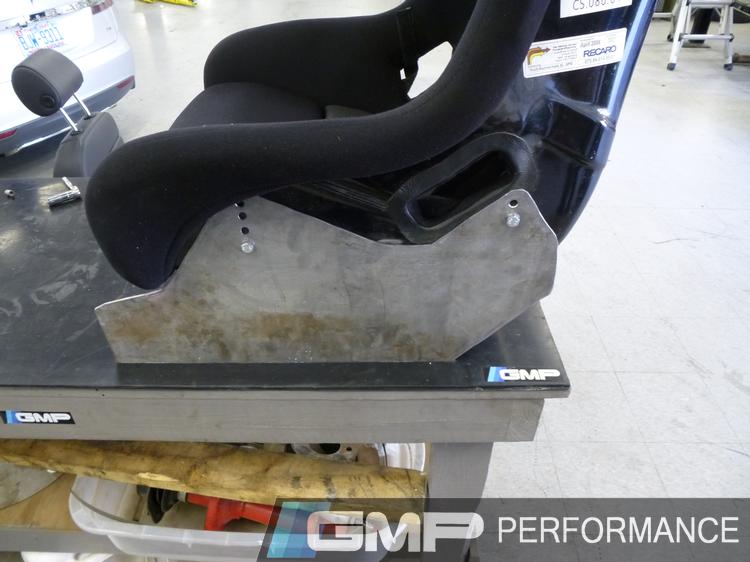

Putting it all together

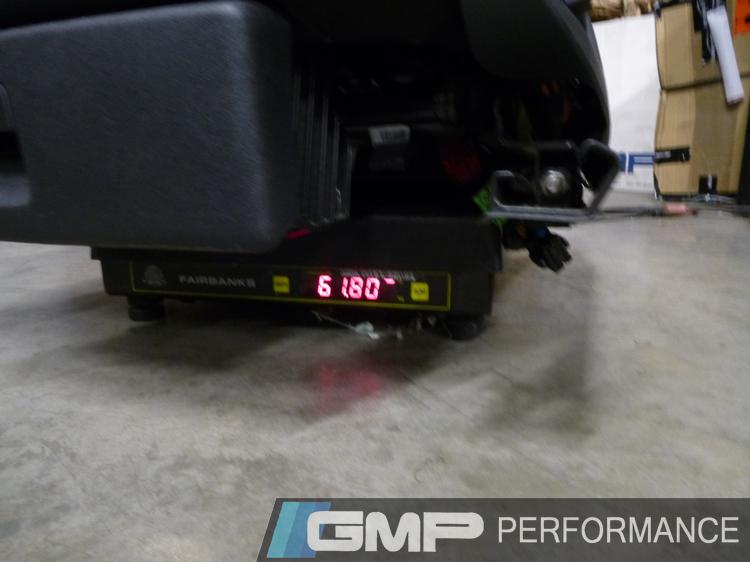
The weight of the stock front seat
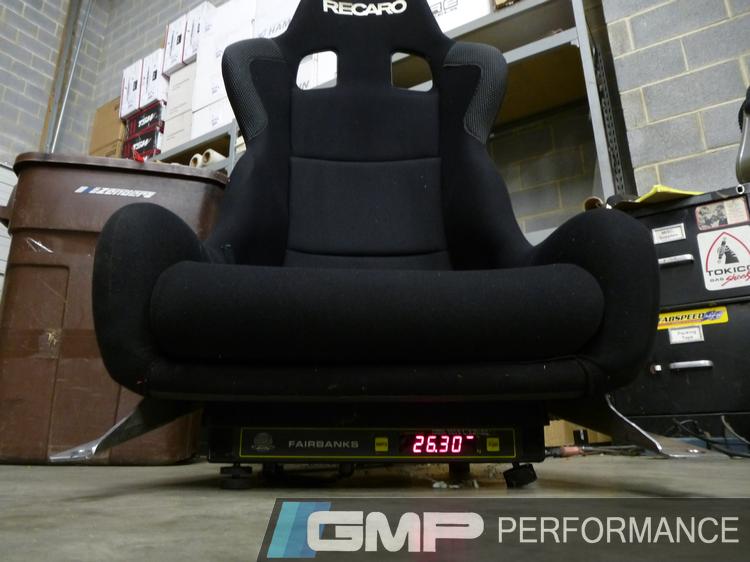
Versus the weight of the Recaros. Can you say savings!
With the passenger side swapped over as well...
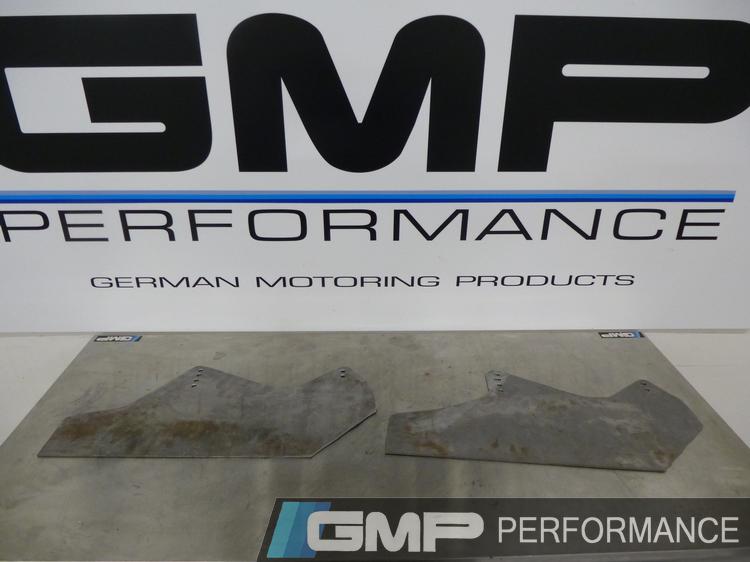
and our custom brackets painted black for a sleek, discreet look...
It was on to the harnesses! (We're a bit partial to blue here at GMP. [ ] )
] )
The time we were waiting for had finally come.

The Ultimate Track Car Challenge!!
The UTCC is always incredible fun and this year was no exception. This year, it was more than just fun for us; it was testing. This was the first time our A4 hit the track with all its new additions so we viewed the event as a critical learning experience. The car performed well and we got a great idea of where we were headed with the project. But mainly, we enjoyed every minute we spent with such awesome car enthusiasts!

Part 7 Coming Soon!
To see the gallery on this build,http://gmpperformance.com/index.cfm?...6#imageSet_725
And stay tuned to see the next step in our project!
Parts Installed:
Recaro PROFI XL Race Seat
Profi II ASM FE Scroth Harness Belts
We started by removing the back seats, a quick and super effective way to drop a lot of weight, and fabricated a temporary harness bar for the track event. Then came time to get the new Recaros in!
Since we would be be fabricating custom brackets for this job, we had a little bit of extra work ahead of us.
Putting it all together
The weight of the stock front seat
Versus the weight of the Recaros. Can you say savings!
With the passenger side swapped over as well...
and our custom brackets painted black for a sleek, discreet look...
It was on to the harnesses! (We're a bit partial to blue here at GMP. [
] )The time we were waiting for had finally come.
The Ultimate Track Car Challenge!!
The UTCC is always incredible fun and this year was no exception. This year, it was more than just fun for us; it was testing. This was the first time our A4 hit the track with all its new additions so we viewed the event as a critical learning experience. The car performed well and we got a great idea of where we were headed with the project. But mainly, we enjoyed every minute we spent with such awesome car enthusiasts!
Part 7 Coming Soon!
To see the gallery on this build,http://gmpperformance.com/index.cfm?...6#imageSet_725
And stay tuned to see the next step in our project!