
HELP WATER!! Preventative Maintenance


Thread Starter
|
Registered User
Joined: Nov 2011
Posts: 328
From: New YAWK
Rep Power: 29

HELP WATER!! Preventative Maintenance
Hi Everyone
I thought I would put together a helpful post for anyone who has wondered how to clean out all drains in your cayenne. It has been covered a few times and there are several post on here about certain drains but why not put one together about all your water issues
DISCLAIMER
This thread is not intended for anyone to copy or imitate. I am not endorsing any products or companies. I am merely showing the steps I went through to get this working for me. If you think you want to do something similar, contact your local Porsche dealer and ask for recommendations and proceed at your own risk. I assume no responsibility for any work performed on your vehicle.
First you want to examine your car and notice that water can enter from different directions, whether it be from the drains or moisture around the seals. Now I have had some talks with Porsche and Porsche service guys and this is deemed a maintenace issue. MEANING ITS ON YOU! They will not cover it under warranty if water enters your vehicle and causes shorts. Just as you would change your oil and conduct the regular service intervals you will want to conduct these steps as well to prevent any water issues.
Now I wanted to keep my opinion to myself with this but...I think there are some design flaws with the drains in these cars. I have owned many cars in my lifetime and have never seen so many issues as others have reported with these cars. Now on to the Maintenance
First: You will want to Lock your suspension if you have air/ride push the level button to top height and hold it till you see the icon on the dash. This will ensure that when jacking up the car on each corner your suspension will not move on you.
Once you have that done and the corner has been jacked up remove your wheel Im starting with the front wheel. Once that has been removed you will need to remove the fender liner using a T20 torx bit for the bolts. I chose to remove it half way since it gave me access to the drain. This is up to you
Second: You will need to lay on the ground and look up you will see a rubber looking drain sticking out it is next to the purple line for clarification There may be or may not be leaves and muck sticking out of it in my situation there was only a few small leaves. You can pull this drain out and leave it out while cleaning the drains.
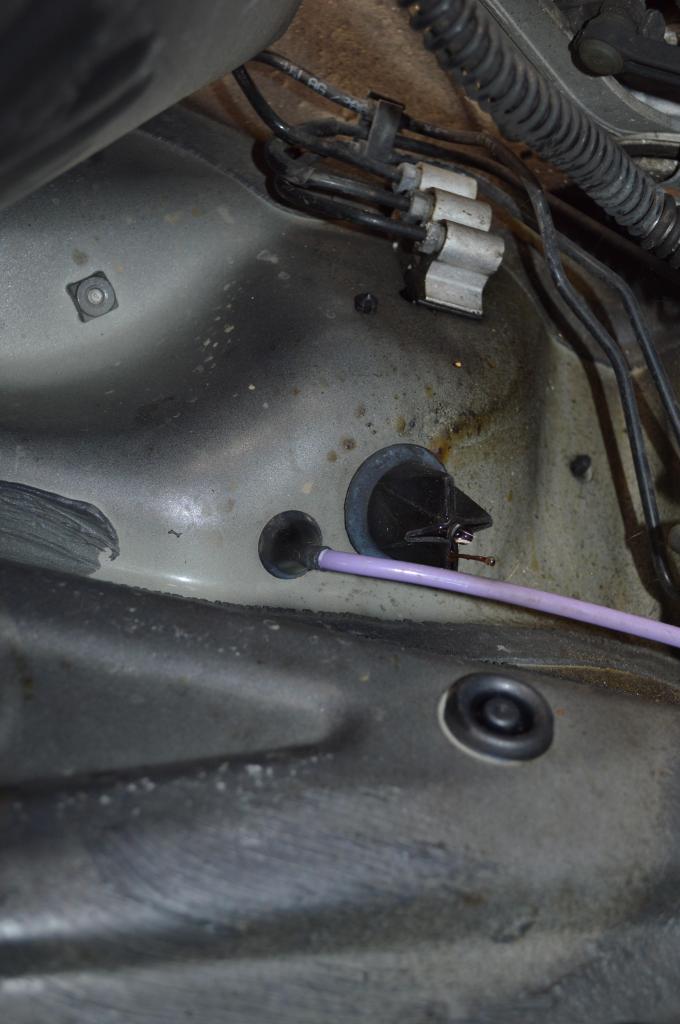
Third: Open your sunroof all the way, both on pano and regular. Take a cup of water and pour it along the drain line its basically on the track between rubber seals you will see it here is a side shot of the rubber seal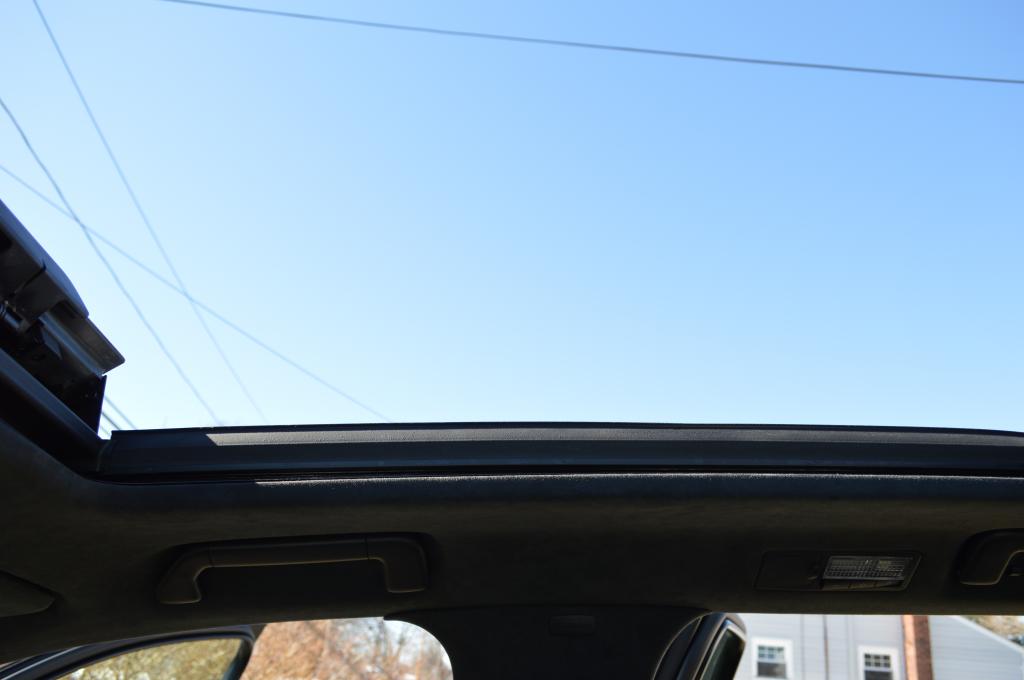
And here is a front shot of the front of the sunroof where the water will drain
Now once you run water through the drain you should see it coming out in a nice steam on the ground if not then you have a blockage and there is a trick I used. If you have a weedwacker aka grass trimmer the orange or green or clear or whatever color you have that you used to trim your grass works wounders, this can be picked up at any hardware store. Bascially in the front of the sunroof you have drains they are located on the corners you will need to run this line down the drain until it stops. The plastic line will not break and it will make turns making it ideal to clean out those lines.
You will need to duplicate this for the drivers side now, it is very time consuming but will pay off big time in the long run. AND NOW FOR THE DESIGN FLAW where most dont realize our vehicles have this and why water is coming into your vehicle.
This next step you will need to take off the winshield cowl.
First: remove your wiper arms I have included a link that I found here on 6speed http://www.inkilino.es/Porsche_Cayen...WIPER%20WASHER
second:
remove the plastic clips holding the cowl down, they basically look like phillip's head screw but juse use a flat head turn it a quater turn and you will see it pop up. Once you see that use a panal tool if you have one to pull the clips up, if not try using the flat head and pry it little by little paying attention as to not break those clips.
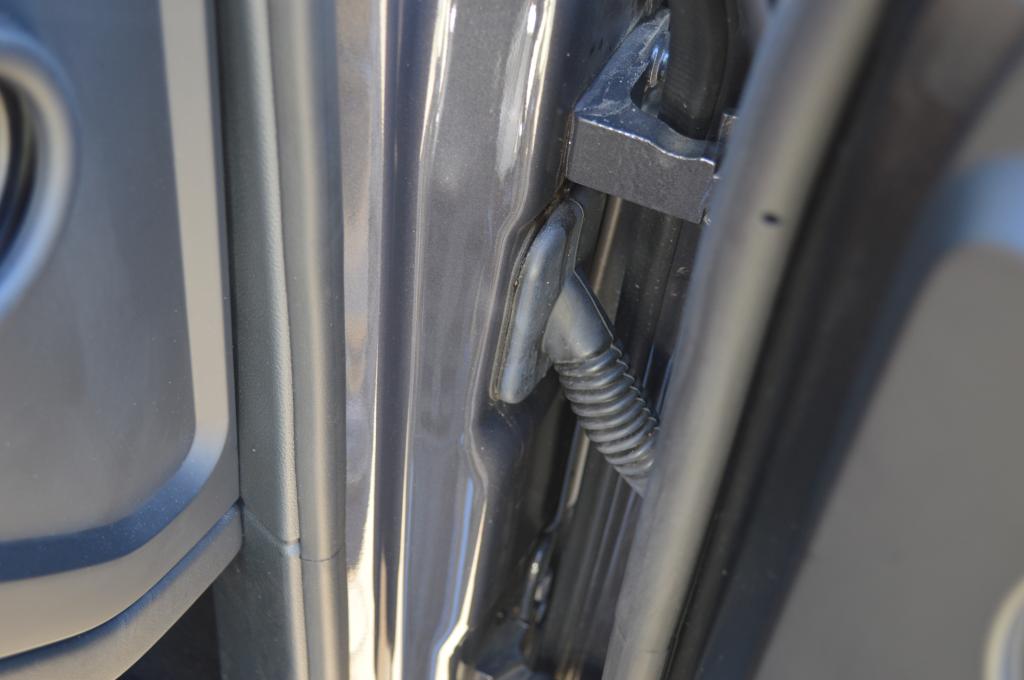
third: remove cowl and on each side of the hood hinge you will notice a black C shape foam that looks like a sponge. Thats exactly what it is here is a picture
Fourth: pull that foam peice off and look what I found!
That is basically the setimant from leaves, dirt and pollen that runs down your winshield and collects through that sponge. Everytime it rains the water will run down your winshield and drain in those corners. If that is not clean then the Sponge! will fill up with water and water will find its way inside the cabin and soak your carpets, give you electrical shorts, mold and mildew that you might not even know is happening until its too late.
Fifth: once you clean that out, you can use an air hose or water hose to clean that out and watch the water drain down below. Once you are satisfied that everything is clean reasemble the cowl and wiper arms. Once your happy that all the drains are good then put everything back together, next we will get into door seals and the AC Drains
I thought I would put together a helpful post for anyone who has wondered how to clean out all drains in your cayenne. It has been covered a few times and there are several post on here about certain drains but why not put one together about all your water issues
DISCLAIMER
This thread is not intended for anyone to copy or imitate. I am not endorsing any products or companies. I am merely showing the steps I went through to get this working for me. If you think you want to do something similar, contact your local Porsche dealer and ask for recommendations and proceed at your own risk. I assume no responsibility for any work performed on your vehicle.
First you want to examine your car and notice that water can enter from different directions, whether it be from the drains or moisture around the seals. Now I have had some talks with Porsche and Porsche service guys and this is deemed a maintenace issue. MEANING ITS ON YOU! They will not cover it under warranty if water enters your vehicle and causes shorts. Just as you would change your oil and conduct the regular service intervals you will want to conduct these steps as well to prevent any water issues.
Now I wanted to keep my opinion to myself with this but...I think there are some design flaws with the drains in these cars. I have owned many cars in my lifetime and have never seen so many issues as others have reported with these cars. Now on to the Maintenance
First: You will want to Lock your suspension if you have air/ride push the level button to top height and hold it till you see the icon on the dash. This will ensure that when jacking up the car on each corner your suspension will not move on you.
Once you have that done and the corner has been jacked up remove your wheel Im starting with the front wheel. Once that has been removed you will need to remove the fender liner using a T20 torx bit for the bolts. I chose to remove it half way since it gave me access to the drain. This is up to you

Second: You will need to lay on the ground and look up you will see a rubber looking drain sticking out it is next to the purple line for clarification There may be or may not be leaves and muck sticking out of it in my situation there was only a few small leaves. You can pull this drain out and leave it out while cleaning the drains.

Third: Open your sunroof all the way, both on pano and regular. Take a cup of water and pour it along the drain line its basically on the track between rubber seals you will see it here is a side shot of the rubber seal

And here is a front shot of the front of the sunroof where the water will drain

Now once you run water through the drain you should see it coming out in a nice steam on the ground if not then you have a blockage and there is a trick I used. If you have a weedwacker aka grass trimmer the orange or green or clear or whatever color you have that you used to trim your grass works wounders, this can be picked up at any hardware store. Bascially in the front of the sunroof you have drains they are located on the corners you will need to run this line down the drain until it stops. The plastic line will not break and it will make turns making it ideal to clean out those lines.
You will need to duplicate this for the drivers side now, it is very time consuming but will pay off big time in the long run. AND NOW FOR THE DESIGN FLAW where most dont realize our vehicles have this and why water is coming into your vehicle.
This next step you will need to take off the winshield cowl.
First: remove your wiper arms I have included a link that I found here on 6speed http://www.inkilino.es/Porsche_Cayen...WIPER%20WASHER
second:
remove the plastic clips holding the cowl down, they basically look like phillip's head screw but juse use a flat head turn it a quater turn and you will see it pop up. Once you see that use a panal tool if you have one to pull the clips up, if not try using the flat head and pry it little by little paying attention as to not break those clips.
third: remove cowl and on each side of the hood hinge you will notice a black C shape foam that looks like a sponge. Thats exactly what it is here is a picture

Fourth: pull that foam peice off and look what I found!

That is basically the setimant from leaves, dirt and pollen that runs down your winshield and collects through that sponge. Everytime it rains the water will run down your winshield and drain in those corners. If that is not clean then the Sponge! will fill up with water and water will find its way inside the cabin and soak your carpets, give you electrical shorts, mold and mildew that you might not even know is happening until its too late.
Fifth: once you clean that out, you can use an air hose or water hose to clean that out and watch the water drain down below. Once you are satisfied that everything is clean reasemble the cowl and wiper arms. Once your happy that all the drains are good then put everything back together, next we will get into door seals and the AC Drains
Last edited by aspenone; Mar 7, 2014 at 01:14 PM.
Thread Starter
|
Registered User
Joined: Nov 2011
Posts: 328
From: New YAWK
Rep Power: 29
Door Seals and AC Drain:
Now I started to notice after washing my car that on the inside I would see some moisture or water meaning that the seals on these cars need to be maintained as well. I beleive it is due to the vehicle having very heavy doors which partly why you purchase these vehicles becuase of the safety and strong design. With that being said a seal around the door can become compressed and dry out and it looses its elasticity causing water to again find its way in. So I did some research on this and dealers recommend replacing the seals etc which as we know is quite costly. I have included some pictures of my seals and where moisture was seen even though it doesnt look like it entered the cabin I still didnt want to see it.

So the research continued (meaning talking to Renaissance man ) lol and he recomended a product from germany for door seals called Einszett found on Amazon. Its very easy to apply with a sponge on the head of the applicator I used it on all the seals the sun roof around every door and door jam and the rear hatch. It brought back the seals to life but only time will tell I will report later.
AC DRAINS: Under Construction
AC drains can cause water to enter the cabin just as the sunroof drains can and this has been covered as well. I will be taking more pictures for others this weekend to give you a better idea of what I did to insure those are clean as well. So thats all for now hope you guys enjoyed it and if you want me to add anything let me know if I forgot anything let me know as well were all here to help each other out
Josh
Now I started to notice after washing my car that on the inside I would see some moisture or water meaning that the seals on these cars need to be maintained as well. I beleive it is due to the vehicle having very heavy doors which partly why you purchase these vehicles becuase of the safety and strong design. With that being said a seal around the door can become compressed and dry out and it looses its elasticity causing water to again find its way in. So I did some research on this and dealers recommend replacing the seals etc which as we know is quite costly. I have included some pictures of my seals and where moisture was seen even though it doesnt look like it entered the cabin I still didnt want to see it.


So the research continued (meaning talking to Renaissance man ) lol and he recomended a product from germany for door seals called Einszett found on Amazon. Its very easy to apply with a sponge on the head of the applicator I used it on all the seals the sun roof around every door and door jam and the rear hatch. It brought back the seals to life but only time will tell I will report later.
AC DRAINS: Under Construction
AC drains can cause water to enter the cabin just as the sunroof drains can and this has been covered as well. I will be taking more pictures for others this weekend to give you a better idea of what I did to insure those are clean as well. So thats all for now hope you guys enjoyed it and if you want me to add anything let me know if I forgot anything let me know as well were all here to help each other out
Josh
Last edited by aspenone; Mar 7, 2014 at 12:41 PM.
Moderator

Joined: Jan 2011
Posts: 1,504
From: (in my garage welding something vicious)
Rep Power: 105

Nice write up with very clear pictures! This is one of the first DIYs that I will run out and perform as soon as I get a chance.
As a side note, I think I put put up a sticky in the Cayenne section for items like this that will come in handy for years to come.
As a side note, I think I put put up a sticky in the Cayenne section for items like this that will come in handy for years to come.
Thread Starter
|
Registered User
Joined: Nov 2011
Posts: 328
From: New YAWK
Rep Power: 29
Feel free to add to my rep points

Moderator
Joined: Jan 2011
Posts: 1,504
From: (in my garage welding something vicious)
Rep Power: 105
Trending Topics
Thread Starter
|
Registered User
Joined: Nov 2011
Posts: 328
From: New YAWK
Rep Power: 29
Update!!
Hi Everyone,
I wanted to update this post a bit to some new findings with water and these vehicles. Last night I took the CTTS out for some dinner and noticed when I came to a stop a loud sloshing sound was heard from the Drivers side. So I drove into a parking lot and drove foward and back and could hear like a wave of water sloshing in my vehicle. At first I said great") must be water in the trunk under the spare tire. Checked that and nothing glad to see no water. So I did what any car enthusiest would do in this situation and ask a freind . My buddy Doug aka CUNNINGHAM on the forum owns a bad *** RHD Subaru and a sweet Cayenne S which is already VR tuned featured on Vivid Racing website alright enough plugging, what im trying to get at is he knows his stuff. He showed me a post of someone with the same issue, they contacted porsche and they said that rain water gets into the rocker panel. They wanted to charge him $500 to clear the drain
must be water in the trunk under the spare tire. Checked that and nothing glad to see no water. So I did what any car enthusiest would do in this situation and ask a freind . My buddy Doug aka CUNNINGHAM on the forum owns a bad *** RHD Subaru and a sweet Cayenne S which is already VR tuned featured on Vivid Racing website alright enough plugging, what im trying to get at is he knows his stuff. He showed me a post of someone with the same issue, they contacted porsche and they said that rain water gets into the rocker panel. They wanted to charge him $500 to clear the drain Well I examined the rocker panel and noticed a rubber drain on the end with a hole that was infact clogged. So what I did was get a pick tool and insert it slowing into the hole and what do yah know! water appeared a lot of water! see for your self


I just wanted to share with anyone who else is having this issue and now you know what to do instead of paying porsche $500 and a shout out to Kent AKA renaissance Man for the late night imput as well thanks bro
I wanted to update this post a bit to some new findings with water and these vehicles. Last night I took the CTTS out for some dinner and noticed when I came to a stop a loud sloshing sound was heard from the Drivers side. So I drove into a parking lot and drove foward and back and could hear like a wave of water sloshing in my vehicle. At first I said great
must be water in the trunk under the spare tire. Checked that and nothing glad to see no water. So I did what any car enthusiest would do in this situation and ask a freind . My buddy Doug aka CUNNINGHAM on the forum owns a bad *** RHD Subaru and a sweet Cayenne S which is already VR tuned featured on Vivid Racing website alright enough plugging, what im trying to get at is he knows his stuff. He showed me a post of someone with the same issue, they contacted porsche and they said that rain water gets into the rocker panel. They wanted to charge him $500 to clear the drain Well I examined the rocker panel and noticed a rubber drain on the end with a hole that was infact clogged. So what I did was get a pick tool and insert it slowing into the hole and what do yah know! water appeared a lot of water! see for your self

I just wanted to share with anyone who else is having this issue and now you know what to do instead of paying porsche $500
and a shout out to Kent AKA renaissance Man for the late night imput as well thanks bro
Registered User
Joined: Jun 2014
Posts: 913
From: Northwest
Rep Power: 56
This is a decent video of the side drains. This guy had the extended rockers so had to take the small panel off. If you don't have that it is in the open and pretty easy to see. I pulled the whole thing out and cleaned it. And this is the stuff to use on the foam seals. I've been using it on other cars like my 308 that has seals all around the roof that are getting about impossible to find replacements.
Last edited by jdubbya; Oct 8, 2014 at 02:13 PM.
Registered User
Joined: Jun 2014
Posts: 913
From: Northwest
Rep Power: 56
One more note to add. Don't forget if you have 4 zone climate, there is an A/C unit in the drivers side of the cargo area too. It's a pain to get to if you need to so don't mess with the "outlet" too much or you risk pulling it loose which will fill your spare tire area (or subwoofer area like me) with water.
Thread Starter
|
Registered User
Joined: Nov 2011
Posts: 328
From: New YAWK
Rep Power: 29
One more note to add. Don't forget if you have 4 zone climate, there is an A/C unit in the drivers side of the cargo area too. It's a pain to get to if you need to so don't mess with the "outlet" too much or you risk pulling it loose which will fill your spare tire area (or subwoofer area like me) with water.
Good stuff man Thanks for adding ....Cant help it but the opening of that video sounds and looks like a horror movie Heavy breathing..Check....Shakey Camera Check
 But great visual for those that are wondering. And thats the same stuff I used on my seals thanks bro
Registered User
Joined: Jun 2014
Posts: 913
From: Northwest
Rep Power: 56
Ha, well perfect timing then. Just in time for Halloween. I don't who he is, just found it on youtube.