
Full Write Up, 1966 Pontiac Lemans Show Car, Fully Sanded and Polished

Thread Starter
|
Registered User
Joined: Mar 2008
Posts: 312
From: Dallas
Rep Power: 31

Full Write Up, 1966 Pontiac Lemans Show Car, Fully Sanded and Polished
The complete write up is now finished, the majority of the process is at the bottom of this page and on the rest on page 2. The final pics are on page 3. If you have questions please read through the whole right up first since I wrote it in order for everyone to understand what it takes to do a process like this.
Also I put text that I felt more important in Bold so it would be easier for you to find....
Thanks
Okay, here's the teaser pics. I will get an early start tomorrow with the lengthy write up.
I spent about 25 hours just polishing the paint.


I will do a very indepth write up covering my exact movements on this entire process so please stay tuned.
Josh
__________________
I rarely ever post up and brag about my own work, but I thought this was worth reading. check it out.
Lots of information for the DIY's as well as the pro's.
This is a very lengthy, thorough and detailed write up of the exact process, steps and techniques I performed on a 66 Pontiac Lemans that was fully color sanded and polished out to perfection.
If anyone is curious what it takes to paint and perfect a car, this is what you want to read.
Please understand why I posted a link and did not rewrite the entire documentation as it took me over 5 hours just to do the write up.
Thanks and enjoy,
Josh
http://www.autopia.org/forum/pro-det...polishing.html
Also I put text that I felt more important in Bold so it would be easier for you to find....
Thanks
Okay, here's the teaser pics. I will get an early start tomorrow with the lengthy write up.
I spent about 25 hours just polishing the paint.
I will do a very indepth write up covering my exact movements on this entire process so please stay tuned.
Josh
__________________
I rarely ever post up and brag about my own work, but I thought this was worth reading. check it out.
Lots of information for the DIY's as well as the pro's.
This is a very lengthy, thorough and detailed write up of the exact process, steps and techniques I performed on a 66 Pontiac Lemans that was fully color sanded and polished out to perfection.
If anyone is curious what it takes to paint and perfect a car, this is what you want to read.
Please understand why I posted a link and did not rewrite the entire documentation as it took me over 5 hours just to do the write up.
Thanks and enjoy,
Josh
http://www.autopia.org/forum/pro-det...polishing.html
Last edited by JoshVette; Aug 1, 2008 at 10:08 AM.

Banned
Joined: Nov 2005
Posts: 178
From: pleasanton ca
Rep Power: 35

Josh,
Great work, ten years ago I had a contract with a company that restored 66 GTO tri power convertibles and most of them were black...... that brought back many memories of late nights sanding and compounding, oh the days of solvent based urethane paints!!.
Great work, ten years ago I had a contract with a company that restored 66 GTO tri power convertibles and most of them were black...... that brought back many memories of late nights sanding and compounding, oh the days of solvent based urethane paints!!.
Thread Starter
|
Registered User
Joined: Mar 2008
Posts: 312
From: Dallas
Rep Power: 31
Cool, well when the owner origional purchased the car it was converted to a GTO but he he reconverted it to a Lemans which is what it was origionally but for his daughter who had an old Lemans back when she graduated school and he wanted to rebuild it for her to be like the origional one she used to drive.
Josh
Josh


Registered User
Joined: Jun 2004
Posts: 576
Rep Power: 58
Very well done and very informative !
One qs if I may, Im not sure I understand this step, " Dobbing it around and then a spritz with water"
thanks for sharing with us
One qs if I may, Im not sure I understand this step, " Dobbing it around and then a spritz with water"
thanks for sharing with us
Trending Topics
Moderator

Joined: May 2004
Posts: 4,962
From: South Bend, IN
Rep Power: 241
Why does this look incredibly relaxing to me?
__________________
damon@tirerack.com
877-522-8473 ext. 4643
574-287-2345 ext. 4643
**Don't forget to add my name to online orders!**
Or use this link:
http://www.tirerack.com/a.jsp?a=BH1&url=index.jsp
damon@tirerack.com
877-522-8473 ext. 4643
574-287-2345 ext. 4643
**Don't forget to add my name to online orders!**
Or use this link:
http://www.tirerack.com/a.jsp?a=BH1&url=index.jsp
Thread Starter
|
Registered User
Joined: Mar 2008
Posts: 312
From: Dallas
Rep Power: 31

Spritzing the surface with water before I start to buff helps the polished to spread easier without jumping and skipping to much.
Thread Starter
|
Registered User
Joined: Mar 2008
Posts: 312
From: Dallas
Rep Power: 31
Sorry I'm not very computer savy but I'll try.

Josh
Thread Starter
|
Registered User
Joined: Mar 2008
Posts: 312
From: Dallas
Rep Power: 31
Thanks, glad it was useful. I don't do to many write ups, especially that long so I'm glad you enjoyed it.
Thread Starter
|
Registered User
Joined: Mar 2008
Posts: 312
From: Dallas
Rep Power: 31
Okay guys, I'm going to take a quick minute to basically describe the process before I go into detail with pics and writing.
The owner called me to "rub out" his home painted 66 Lemans, I thought no way am I going to put my name on a car that was painted in a garage. (his friend has a paint booth set up in his garage where the car was painted, not the garage I did all the work in)
The owner is 70 years old and this sort of thing is just getting a little harder to do on his own.
The car is just over 17 feet long front to back not including the bumpers that are off the car at this point.
So I went to evaluate it and after seeing the condition of the paint before sanding it was to my surprise very clean with little orange peel except for just a few panels were it was worse so I decided to take on this project and gave him a conservative quote of $2500++ as a ballpark which was way on the low side as I was to find out as the total process from sanding to polish took about 49 hours so the bill would have been closer to $3800. Considering that quote was based on sanding the bad areas with 1500 and refining with 2000 and 2500 and on the good areas going with 2000 and then 2500 so the whole car would be without OP and finished with 2500 grit.
Needless to say the owner opted to sand it himself. It took him and a few others a total of about 24 hours to fully color wet sand it with the process I explained.
Meg's Unigrit sandpaper was used at my request for this wet sanding process.
After it was fully sanded and ready to be polished, I started with the trunk as the tester panel and spent about 3 hours with about 8 different combinations before I came up with what I felt to be the deepest cut with the cleanest finish the fastest. It was difficult to find this combo as the sanding marks needed at least two passes with a heavy compund to really get underneath them and remove them 100%. Then I would need to finish it down and remove the holograms.
I'll explain more in the pics about the testing.
The combo that won the trophy was surprisingly Menzerna Power Gloss on a Purple LC foamed wool pad at 1700 rpms which cut deep and removed a most of the sanding marks and then another heavy hitter to cut deep again to clean up any marks the PG missed and with a beautiful finish using Meg's M105 on a LC white pad at 1500 rpms with much jeweling.
Believe it or not I knocked out all the sanding marks and swirls with a two step heavy compound/polish combo knowing how well M105 finishes down required very little perfecting with Menz Final Polish II.
By the end of it all I would judge this paint to be about a 5 on a hardness scale of 1-10 with 10 being the hardest.
I am not finished with the car, once the owner gets all the trim, lights, bumpers, covertable top all put on and a few panels realigned I will go back to touch up any areas and then seal the heck out of it so there's still just a little more to do but for now the finish is nearly ready for show.
Okay, enough talking, onto the pics which I will also provide write ups with as I post so please be patient.
Thread Starter
|
Registered User
Joined: Mar 2008
Posts: 312
From: Dallas
Rep Power: 31
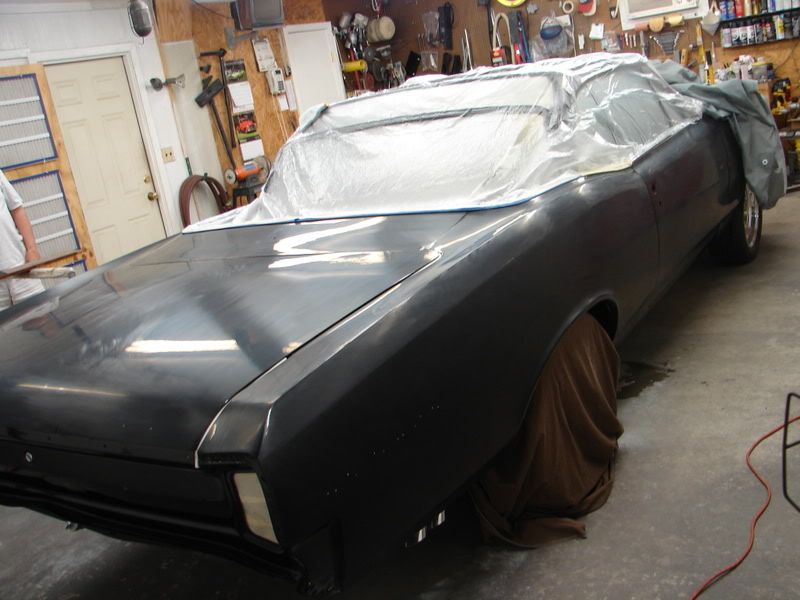
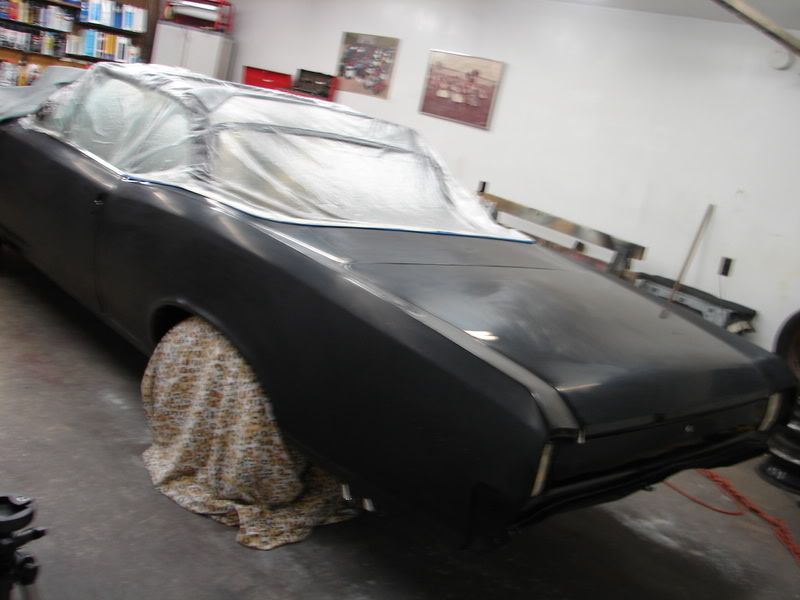
Okay, so here's what I'm dealing with.
A 1966 Pontiac Lemans Convertable that the owner has spent nearly 3 years restoring and perfecting to show quality standards to give to his daughter as a birthday gift two years ago.....

The entire car has been sanding between 2-3 times depending on how bad the OP was per panel and all is finished down with 2500 grit using Meg's Unigrit paper which took nearly 24 hours total just to sand.

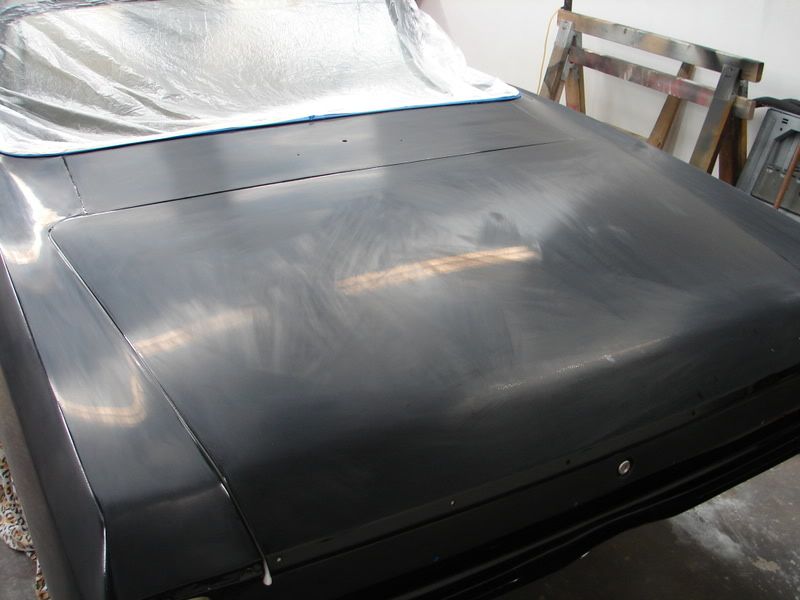
The cover was still on the front of the car so I didn't take pics of the front sanding marks till I got around to polishing it them out.
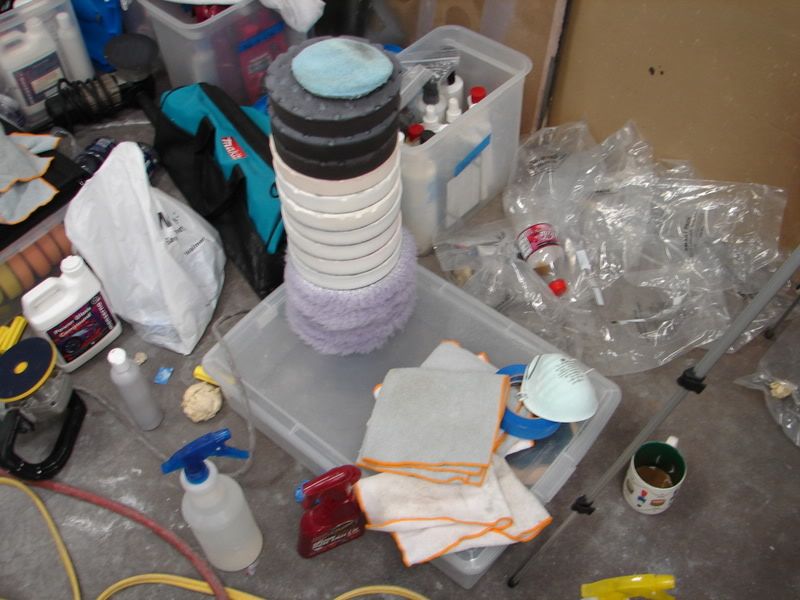
Now for the intial test to find out which pad/polish combo I was going to start off with.
From left to right are 1 Gloss It Extreme Cut (left) 2 Menz SIP (middle) 3 Meg's M105 (right).
I am trying out a new line called Gloss It to see how I like it so please understand this is the first time I've used the polishes and there is a slight learning curve involved with any new product, but to be fair I did use it with the same pad and rpms as all the others were tested with.

__________________
A 1966 Pontiac Lemans Convertable that the owner has spent nearly 3 years restoring and perfecting to show quality standards to give to his daughter as a birthday gift two years ago.....
The entire car has been sanding between 2-3 times depending on how bad the OP was per panel and all is finished down with 2500 grit using Meg's Unigrit paper which took nearly 24 hours total just to sand.
The cover was still on the front of the car so I didn't take pics of the front sanding marks till I got around to polishing it them out.
Now for the intial test to find out which pad/polish combo I was going to start off with.
From left to right are 1 Gloss It Extreme Cut (left) 2 Menz SIP (middle) 3 Meg's M105 (right).
I am trying out a new line called Gloss It to see how I like it so please understand this is the first time I've used the polishes and there is a slight learning curve involved with any new product, but to be fair I did use it with the same pad and rpms as all the others were tested with.
__________________
Thread Starter
|
Registered User
Joined: Mar 2008
Posts: 312
From: Dallas
Rep Power: 31
So onto the test.
First off Meg's M105 on a purple foamed wool pad at 1700rpms for one pass properly worked. I dob it all around then spritz it with a shot of water then quickly spread it at 600rpms and then up to 1700 and once worked in and broken down I turn it back down to 1100 then 700 and am finished. All were wiped down with IPA 90% which can leave a slight hazing behind itself. fyi.
All the polishes were done with this exact same process so that I could really see who has the better cut and finish for this custom black paint job. Also to note all the polishes are supposed to be able to take out 2500 grit sanding marks.
M105 sure it looks good under floresense as they all do for now....
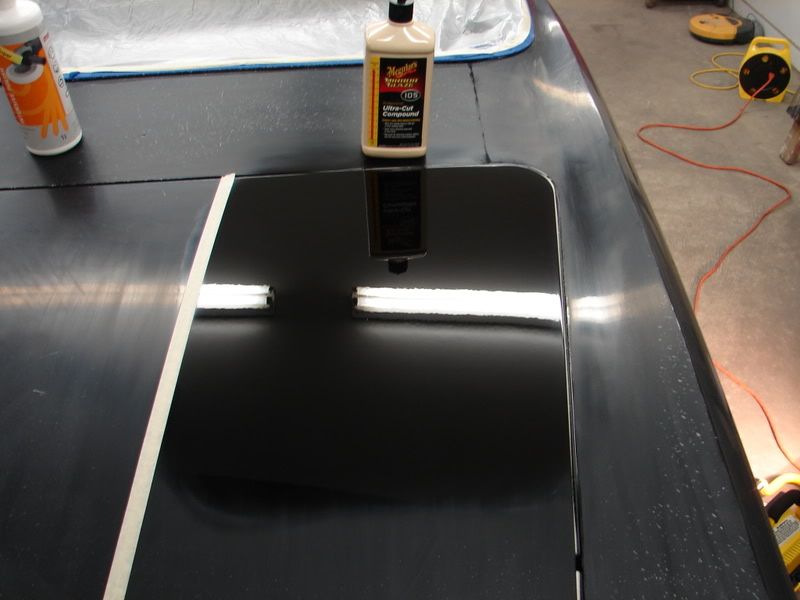
Not bad for one pass but still has significant marks and swirls left behind. (to note holograms/buffer trails and swirls are two different things)

Menz SIP

Notice it did not cut as deep as the M105 or finish down as well either, now I did not expect it to cut as deep, but I did expect it to finish down better then M105 so I was a little surprised.

Now for the new kid on the block, Gloss It Extreme Cut, this is Gloss It's heaviest cut polish and after lengthy talks with the owner and other detailers that use the product I wanted to give it the true test.
Please understand this is my first time to use it so there's always a learning curve involved and I don't believe I got it's full potential out of it as others have and as I did with the other two polishes I was using.
Gloss It Extreme Cut

It looks good as far as cutting power but doesn't finish down near as well as M105.

__________________
First off Meg's M105 on a purple foamed wool pad at 1700rpms for one pass properly worked. I dob it all around then spritz it with a shot of water then quickly spread it at 600rpms and then up to 1700 and once worked in and broken down I turn it back down to 1100 then 700 and am finished. All were wiped down with IPA 90% which can leave a slight hazing behind itself. fyi.
All the polishes were done with this exact same process so that I could really see who has the better cut and finish for this custom black paint job. Also to note all the polishes are supposed to be able to take out 2500 grit sanding marks.
M105 sure it looks good under floresense as they all do for now....
Not bad for one pass but still has significant marks and swirls left behind. (to note holograms/buffer trails and swirls are two different things)
Menz SIP
Notice it did not cut as deep as the M105 or finish down as well either, now I did not expect it to cut as deep, but I did expect it to finish down better then M105 so I was a little surprised.
Now for the new kid on the block, Gloss It Extreme Cut, this is Gloss It's heaviest cut polish and after lengthy talks with the owner and other detailers that use the product I wanted to give it the true test.
Please understand this is my first time to use it so there's always a learning curve involved and I don't believe I got it's full potential out of it as others have and as I did with the other two polishes I was using.
Gloss It Extreme Cut
It looks good as far as cutting power but doesn't finish down near as well as M105.
__________________